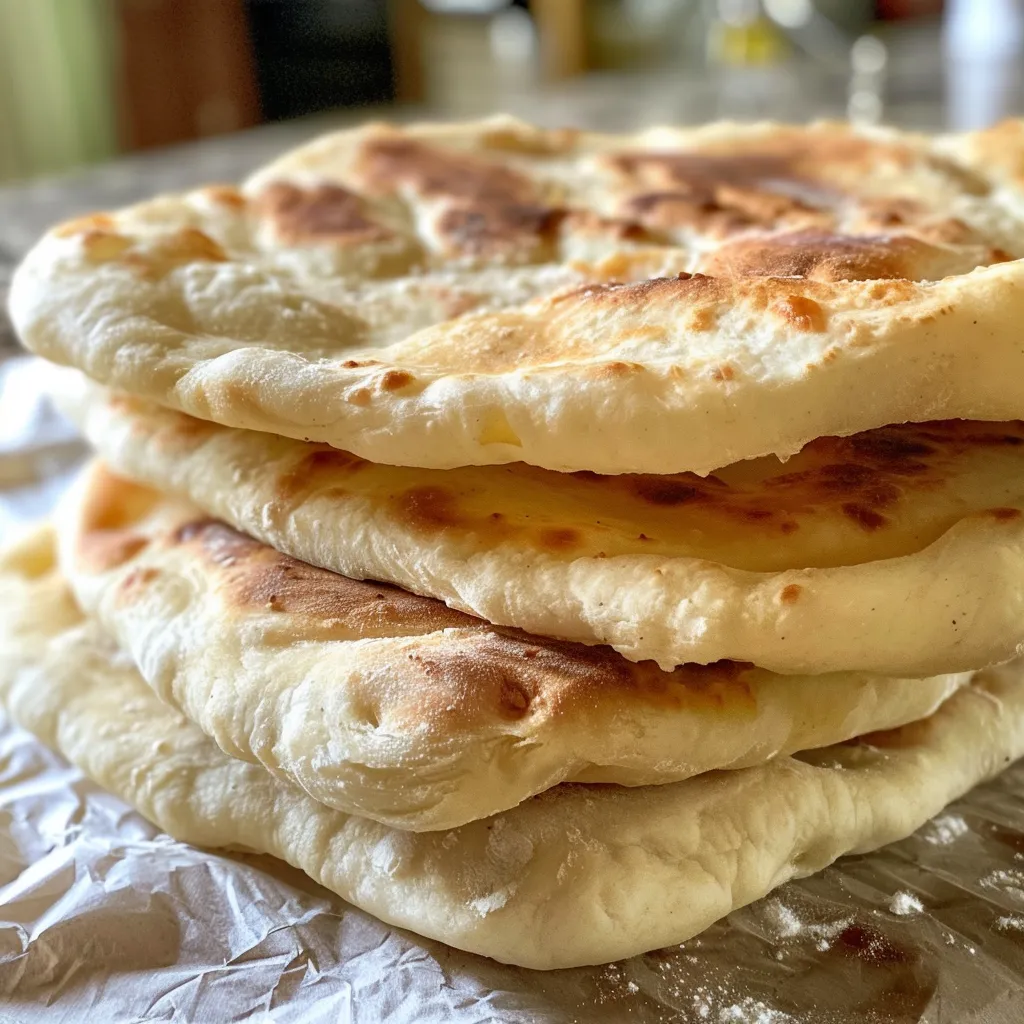
Discover the Joy of Homemade Pita Bread
Welcome to your culinary adventure where we transform simple ingredients into a warm, fluffy delight that’s perfect for sharing, dipping, or stuffing! This pita bread recipe is not just about the final product; it’s a celebration of Mediterranean flavors, a nod to family traditions, and an invitation to gather around the table. Let’s dive into the delightful world of **homemade pita bread**, where each bite brings you closer to the heart of Mediterranean cuisine.
Why You’ll Love This Recipe
This pita bread recipe is a true gem for many reasons. Here are just a few:
- Easy to Make: With just a handful of **simple ingredients**, this recipe is perfect for both novice and seasoned cooks.
- Fluffy Texture: The secret lies in the right rising technique, creating that perfect puff that makes pita bread so beloved.
- Versatile Uses: Whether for **morning breakfast** with eggs, a savory lunch with dips, or a cozy dinner with fillings, homemade pita is endlessly adaptable.
- Budget Friendly: Making your own pita bread saves money, allowing you to enjoy fresh, healthy bread without the premium price tag.
- Family Fun: Involve your loved ones in the cooking process! Making pita is a wonderful way to bond and create lasting memories.
Ingredients You’ll Need
Here’s what you’ll need to whip up this delightful pita bread:
- 2 tablespoons granulated sugar: This helps activate the yeast and adds a touch of sweetness.
- 1 tablespoon active dry yeast: The heart of that fluffy, airy texture.
- 1 cup warm water: Not too hot! Just warm enough to wake the yeast.
- 2 teaspoons salt: A crucial element that enhances flavor.
- 1.5 tablespoons olive oil: Adds richness and moisture to the dough.
- 3 cups all-purpose flour: For the perfect structure of your pita.
How to Make Pita Bread: Step-by-Step
Let’s get our hands doughy! Follow these steps for a perfect homemade pita bread:
- Activate the Yeast: Whisk together the sugar and yeast in a large bowl. Stir in the warm water and let it sit for about 5 minutes until frothy.
- Mix the Dough: Add salt and olive oil to the yeast mixture. Gradually stir in 2.5 cups of flour until the dough pulls away from the bowl.
- Knead Until Smooth: Transfer the dough to a floured surface and knead for about 15 minutes until smooth and stretchy.
- First Rise: Place the dough in an oiled bowl, cover it, and let it rise for 1 hour until it’s doubled in size.
- Portion and Rest: Divide the dough into 10 pieces, shape them into balls, cover, and rest for 20 minutes.
- Roll Out: Roll each ball into a 6-inch, 1/4-inch thick disk.
- Cook and Puff: Cook each pita in a lightly oiled skillet over medium heat, flipping them until puffed and golden brown.
Pro Tips for Perfect Pita
To help you on your journey to pita perfection, here are some expert insights:
- Temperature Matters: Ensure your water is warm but not hot; too hot can kill the yeast.
- Resting Time: Don’t rush the resting period; it’s essential for developing flavor and texture.
- Use a Cast Iron Skillet: For even heat distribution, a cast iron skillet works wonders.
- Watch for Puffing: Once you see the pita puff up, flip it to cook the other side; this creates that airy pocket.
- Experiment with Flour: For a nuttier flavor, try using whole wheat flour in place of some of the all-purpose flour.
- Keep Pitas Warm: Place cooked pitas in a towel-lined basket to keep them warm and soft.
- Make-ahead Dough: You can prepare the dough in advance and refrigerate it for up to 2 days before baking.
- Perfect for Meal Prep: Make a batch and store them for quick meals throughout the week.
Common Mistakes and Troubleshooting
Even the best cooks encounter hurdles. Here are some common mistakes and how to fix them:
- Pita Doesn’t Puff: Ensure the oven or skillet is hot enough and that the dough has risen correctly.
- Dough is Sticky: Add a little more flour during kneading until it’s manageable.
- Pita is Tough: Knead gently and don’t overwork the dough; it should be soft and elastic.
- Flavors Are Bland: Don’t skip the salt, as it enhances all other flavors.
Delicious Variations of Pita Bread
Feel free to get creative! Here are some delightful variations:
- Herbed Pita: Incorporate dried herbs like oregano or thyme into the dough for added flavor.
- Garlic Pita: Brush the freshly cooked pita with garlic-infused olive oil for a fragrant twist.
- Whole Wheat Pita: Substitute half of the all-purpose flour with whole wheat flour for a healthier option.
- Cheese-Stuffed Pita: Before sealing the dough, add a sprinkle of feta or mozzarella for a cheesy surprise.
Storage and Make-Ahead Instructions
To enjoy your homemade pita bread longer:
- Room Temperature: Store in a sealed bag for up to 3 days.
- Refrigeration: For longer storage, keep in the fridge for up to a week.
- Freezing: Freeze pitas flat in a zip-top bag for up to 3 months. Reheat directly from frozen.
Comprehensive FAQ
Here are some frequently asked questions to guide you on your pita-making journey:
- Can I use instant yeast instead of active dry yeast? Yes, you can use instant yeast; just mix it directly with the dry ingredients.
- How can I make gluten-free pita? Substitute the flour with a gluten-free all-purpose blend and add a little xanthan gum for elasticity.
- What if my pita bread is too thick? Roll the dough thinner next time and ensure even cooking temperature.
- Can I bake the pita instead of frying? Absolutely! Bake in a preheated oven at 475°F until puffed.
- What can I serve with pita bread? Serve with hummus, tzatziki, or stuffed with falafel or grilled vegetables.
- How do I know when the dough is ready to rise? It should double in size and feel light and airy.
- Can I flavor the water? Infusing the water with herbs can add a subtle flavor to your pita.
- What’s the best way to reheat pita? Warm them in a skillet or wrap them in foil and place in the oven for a few minutes.
Nutritional Tips and Dietary Adaptations
This pita bread can be adapted for various dietary needs:
- Vegan Option: This recipe is naturally vegan, making it perfect for plant-based diets.
- Low-Carb Alternative: Try using almond or coconut flour for a keto-friendly version.
- High-Protein Additions: Mix in protein powder to the dough for a protein boost.
Recommended Equipment
Here’s what you’ll need to get started:
- Large Mixing Bowl: For combining and rising the dough.
- Rolling Pin: Essential for rolling out your pita dough.
- Skillet or Baking Stone: For cooking the pitas evenly.
- Flour Sifter: To ensure your flour is lump-free.
Serving Suggestions
Now that your homemade pita bread is ready, here are some delightful ways to serve it:
- Dipping Delight: Serve with a variety of dips such as hummus, baba ganoush, or tzatziki.
- Stuffed Pitas: Fill with grilled meats, fresh vegetables, or falafel for a hearty meal.
- Breakfast Pita: Stuff with scrambled eggs, spinach, and feta for a nutritious morning boost.
- Salad Wrap: Use as a wrap to hold your favorite salad ingredients for a fresh lunch option.
In conclusion, making homemade pita bread is not just about the food; it’s about the experience, the flavors, and the memories we create around the table. So gather your loved ones, roll up your sleeves, and let’s celebrate the joy of cooking together. Enjoy your culinary journey, and may every bite be filled with warmth and happiness!
Pita Bread Recipe
Ingredients
Dough
- 2 tablespoons granulated sugar
- 1 tablespoon active dry yeast
- 1 cup warm water
- 2 teaspoons salt
- 1.5 tablespoons olive oil
- 3 cups all-purpose flour, divided
Instructions
- Mix sugar and yeast in a bowl, add warm water, and let sit until frothy.
- Add salt, olive oil, and 2.5 cups flour; knead until smooth, then rest for 1 hour.
- Divide dough into 10 balls, rest for 20 minutes.
- Roll each into 6-inch disks and cook in a skillet until puffed and cooked through.