Author

rafael

Browsing

As the cool autumn breeze sweeps in, there’s nothing quite like the comforting aroma of pumpkin pie wafting through your home. Enter Healthy Pumpkin Pie Bars: a delightful twist on the classic dessert that not only captures the essence of fall but also offers a wholesome treat to enjoy with family and friends. Made with pure pumpkin, coconut flour, and a hint of maple sweetness, these bars are not just a dessert; they’re a celebration of the season. Whether you’re hosting a gathering or enjoying a cozy night in, this recipe will elevate your autumn experience. Let’s dive into the magic of these pumpkin pie bars!

Why You’ll Love This Recipe

These Healthy Pumpkin Pie Bars are a delightful addition to your fall dessert repertoire. Here’s why you’ll fall in love with them:

  • Wholesome Ingredients: Made with nutritious ingredients like pumpkin puree and coconut flour, these bars are guilt-free and packed with flavor.
  • Easy to Make: With just a handful of ingredients and simple steps, you can whip these bars up in no time—perfect for busy fall days!
  • Versatile Treat: Ideal for dessert, breakfast, or an afternoon snack, these pumpkin pie bars fit perfectly into any meal or occasion.
  • Customizable: Feel free to add your personal touch with variations like nuts or different spices to create your unique version.
  • Gluten-Free Option: With coconut flour as a base, these bars cater to gluten-sensitive eaters without sacrificing taste.

Ingredients Breakdown

Let’s take a closer look at the ingredients that make these Healthy Pumpkin Pie Bars so special:


Digital Kitchen Scale

★ Recommended Kitchen Tool

Digital Kitchen Scale

Make this recipe even easier with a quality Digital Kitchen Scale — a must-have kitchen staple!


🛒 Shop This Tool →

As an Amazon Associate, we earn from qualifying purchases.
  • 15-ounce can of pumpkin puree: The star of the show! This keeps our bars moist and packed with flavor. You can substitute with homemade pumpkin puree if you have it on hand.
  • 3/4 cup coconut flour: This gluten-free flour adds a lovely texture and nutty flavor. If you don’t have coconut flour, almond flour is a great stand-in, but you may need to adjust the liquid slightly.
  • 1/2 cup maple syrup: A natural sweetener that brings out the pumpkin’s flavor. You could use honey or agave syrup if you prefer, but the taste will vary slightly.
  • 1/4 cup almond milk: This creamy base adds moisture to the bars. You can substitute with any non-dairy milk you prefer.
  • 1 teaspoon vanilla extract: Adds depth and enhances the overall flavor of the bars.
  • 2 eggs: Essential for binding the ingredients together and giving the bars a fluffy texture.
  • 1 teaspoon pumpkin pie spice: A warm blend of spices that captures the essence of fall.
  • 1 teaspoon ground cinnamon: Offers a lovely aroma and flavor that complements pumpkin beautifully.
  • 1/4 teaspoon kosher salt: Enhances the sweetness and balances the flavors.
  • 1/2 teaspoon baking soda: Helps the bars rise and become light and fluffy.
  • 1/3 cup chocolate chips: Optional, but highly recommended for a touch of sweetness and texture!

Step-by-Step Instructions

Ready to bring these bars to life? Here’s how to make them:

  1. Preheat your oven to 350ºF (175ºC).
  2. Grease an 8×8 inch baking dish with coconut oil, butter, or cooking spray.
  3. In a large bowl, combine the coconut flour, pumpkin puree, maple syrup, vanilla extract, almond milk, eggs, pumpkin pie spice, cinnamon, baking soda, and salt. Mix well until everything is combined smoothly.
  4. Stir in the chocolate chips, if using.
  5. Transfer the batter to the prepared baking dish, spreading it evenly.
  6. Bake for about 45 minutes, or until the bars are set through and lightly golden brown on top.
  7. Allow to cool completely, then refrigerate for a minimum of 2 hours before cutting into nine pieces. Enjoy!

Pro Tips for Perfect Pumpkin Pie Bars

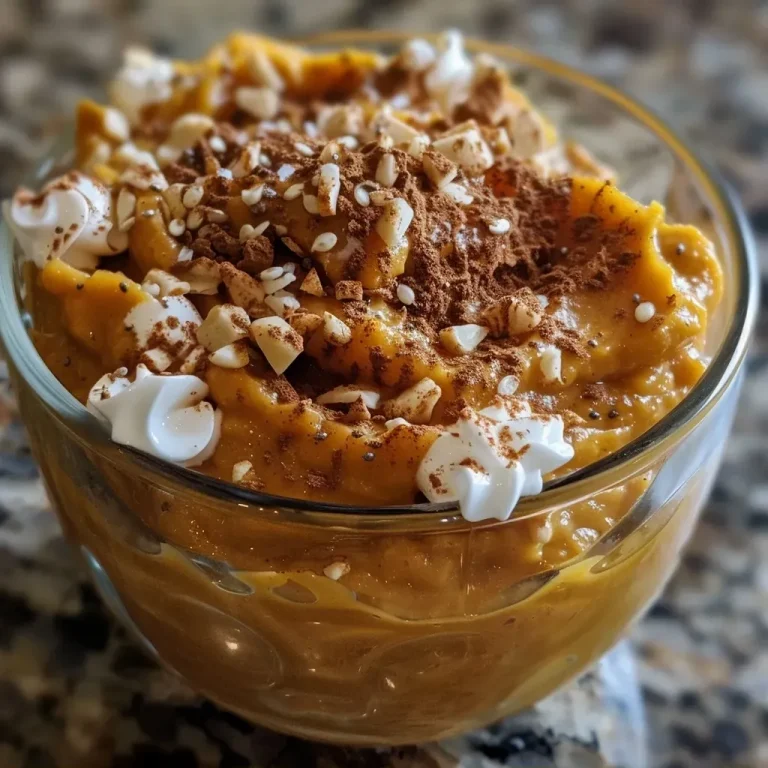
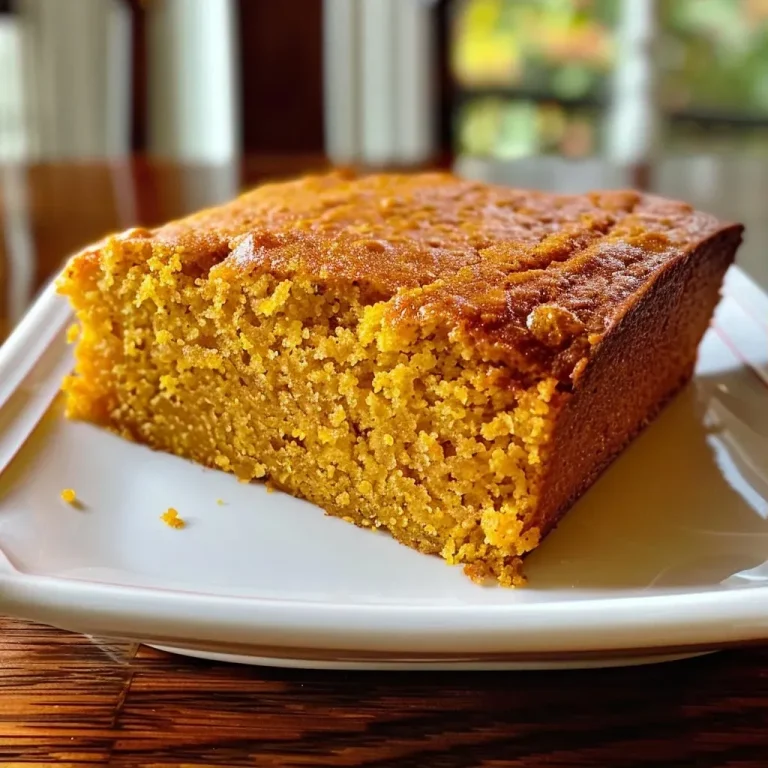
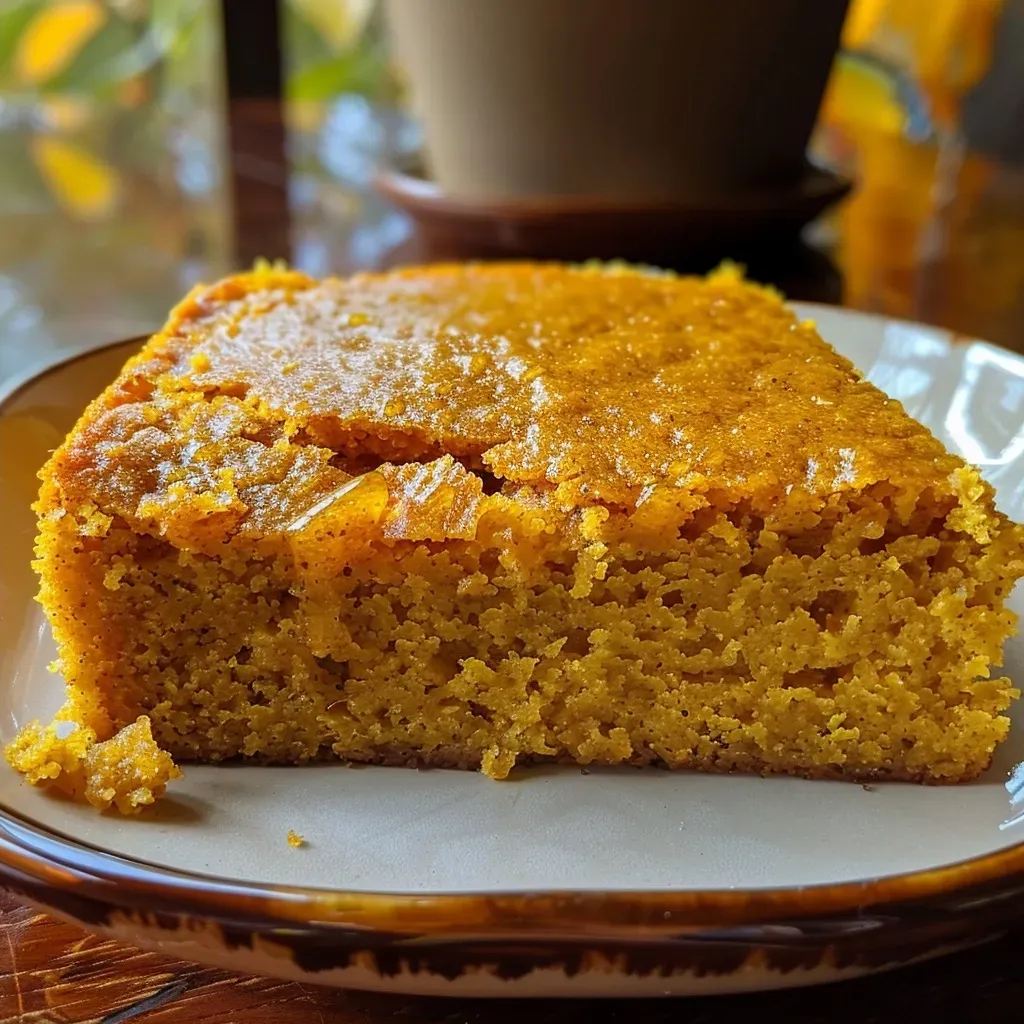
['Close-up view of a slice of healthy pumpkin pie bar topped with chocolate chips.', 'Side view of healthy pumpkin pie bars with a golden crust and chocolate chips.', 'Delicious looking healthy pumpkin pie bars freshly baked, showcasing their texture.', 'Juicy pumpkin pie bars displayed with a warm, inviting appearance, featuring chocolate chips.']

Here are some expert insights to ensure your pumpkin pie bars turn out perfectly:

  • Use Room Temperature Ingredients: This helps in achieving a smooth batter without lumps. If you can, take your eggs and almond milk out in advance.
  • Don’t Overmix: Mix just until combined to keep the texture light and fluffy.
  • Check for Doneness: Insert a toothpick in the center; it should come out clean when the bars are done.
  • Let Them Chill: Cooling the bars helps them set properly and makes cutting easier.
  • Adjust Sweetness: Depending on your taste, you can increase or decrease the maple syrup to make the bars sweeter or less sweet.
  • Top with Whipped Cream: A dollop of whipped coconut cream or regular whipped cream elevates the dessert!
  • Store in an Airtight Container: To keep them fresh, store the bars in an airtight container in the refrigerator.
  • Experiment with Spices: Feel free to tweak the spice blend to suit your preference. A pinch of nutmeg or ginger can add a lovely warmth.

Common Mistakes and Troubleshooting

Even the best of us can make a mistake in the kitchen! Here are some common pitfalls and how to avoid them:

  • Bars Are Too Dense: This can happen if the batter is overmixed. Be gentle when combining your ingredients.
  • Burnt Edges: If you notice the edges browning too quickly, cover the dish with aluminum foil to prevent burning while the center cooks through.
  • Bars Crumble: If the bars fall apart when cutting, they may not have cooled long enough. Refrigerate them longer to help them set.
  • Too Sweet: If you find the bars too sweet, decrease the maple syrup by a couple of tablespoons next time.

Variations to Try

Want to mix things up? Here are some variations you can try:

  • Nutty Delight: Incorporate chopped walnuts or pecans into the batter for added crunch and flavor.
  • Chocolate Swirl: Swirl in some melted chocolate before baking for a decadent twist.
  • Spiced Up: Add a teaspoon of ginger or nutmeg for extra warmth and spice.
  • Fruit Fusion: Mix in some dried cranberries or raisins for a touch of sweetness and chewiness.

Storage and Make-Ahead Instructions

These pumpkin pie bars are perfect for make-ahead meals or snacks. Here’s how to store them:

  • Refrigerate: Keep the bars in an airtight container in the refrigerator for up to a week.
  • Freeze: For longer storage, freeze the bars for up to three months. Just ensure they are wrapped tightly to prevent freezer burn.
  • Thawing: To enjoy frozen bars, simply let them thaw in the fridge overnight before serving.

Nutritional Tips and Dietary Adaptations

Whether you have dietary restrictions or just want to make your dessert a bit healthier, here are some tips:

  • Vegan Option: Substitute eggs with flax eggs (1 tablespoon ground flaxseed mixed with 2.5 tablespoons water per egg).
  • Low-Carb Version: Swap out maple syrup for a low-carb sweetener like erythritol or stevia.
  • Dairy-Free: Ensure any toppings like whipped cream are dairy-free.

Equipment Recommendations

To create these delicious pumpkin pie bars, you’ll need:

  • Mixing Bowls: A large bowl for mixing the batter and a smaller one for combining dry ingredients.
  • Measuring Cups and Spoons: Accurate measurements are key to success in baking!
  • Spatula: For folding in ingredients and spreading the batter evenly in the baking dish.
  • 8×8 Baking Dish: The perfect size for these bars.
  • Oven Thermometer: Ensures your oven is at the correct temperature, crucial for even baking.

Serving Suggestions

These bars are delicious on their own, but here are some serving ideas to enhance the experience:

  • With Whipped Cream: A dollop of whipped cream (dairy or coconut-based) on top adds a creamy contrast to the pumpkin flavor.
  • Pair with Coffee or Tea: Enjoy these bars with a warm cup of coffee or tea for a delightful afternoon treat.
  • As a Breakfast Option: Serve them with yogurt and fresh fruit for a nutritious breakfast idea.

Frequently Asked Questions (FAQs)

If you have questions about these Healthy Pumpkin Pie Bars, you’re not alone! Here are some common inquiries:

  • Can I make these bars ahead of time? Absolutely! They can be made a day or two in advance and stored in the fridge.
  • Is almond flour the same as almond meal? No, almond flour is finer and works better in baking. Almond meal is coarser.
  • Can I substitute the tapioca flour? Yes, you can often use cornstarch or arrowroot flour as a substitute.
  • What’s the best way to press the crust evenly? Use a flat-bottomed measuring cup to press the mixture into the baking dish evenly.
  • Do I need to sweeten the coconut whipped cream? It depends on your preference; some enjoy it as is, while others like a touch of sweetness.
  • Can I use fresh pumpkin? Yes, just ensure it’s cooked and pureed before using in the recipe.
  • What if I don’t have pumpkin pie spice? You can mix cinnamon, nutmeg, and ginger in equal parts as a substitute.
  • How can I make these bars more chocolatey? Add more chocolate chips or drizzle melted chocolate on top before serving!

Conclusion

There you have it! A comprehensive guide to making Healthy Pumpkin Pie Bars that are not only delicious but also filled with the warmth and joy of the autumn season. Whether you’re enjoying them at a family gathering or savoring a quiet evening at home, these bars are sure to be a hit. So grab your ingredients, put on some music, and let the spirit of fall inspire your kitchen adventures. Happy baking!

Healthy Pumpkin Pie Bars

Prep Time 10 minutes
Cook Time 45 minutes
Total Time 55 minutes
Servings 9 pieces
Calories 180
Enjoy these delicious and nutritious pumpkin pie bars, perfect for a healthy dessert or snack.

Ingredients

Pumpkin Filling

  • 15 ounce pumpkin puree
  • 3/4 cup coconut flour
  • 1/2 cup maple syrup
  • 1/4 cup almond milk
  • 1 teaspoon vanilla extract
  • 2 eggs eggs
  • 1 teaspoon pumpkin pie spice
  • 1 teaspoon ground cinnamon
  • 1/4 teaspoon kosher salt
  • 1/2 teaspoon baking soda
  • 1/3 cup chocolate chips (*)

Instructions 

  • Preheat oven to 350ºF (175ºC). Grease an 8x8 baking dish.
  • Mix coconut flour, pumpkin puree, maple syrup, vanilla, almond milk, eggs, spices, salt, and baking soda until well combined.
  • Stir in chocolate chips and transfer batter to prepared dish.
  • Bake for 45 minutes until set and golden. Cool before slicing.

Notes

Chill before cutting for cleaner slices.
Calories: 180kcal
Cost: $15
Course: Dessert
Cuisine: American
Keyword: bars, healthy, pumpkin

A Heartwarming Journey to the Perfect Easy Vintage Gluten-Free Apple Crisp

Welcome to a delightful exploration of flavors and traditions! Today, I invite you to join me in crafting a Easy Vintage Gluten-Free Apple Crisp that encapsulates the warmth of family gatherings and the sweet aroma of freshly baked apples. With the perfect balance of Golden Delicious apples and a crunchy crumble topping, this recipe is not just a dish; it’s a celebration of culture, family, and the joy of simple cooking.

As we dive into this culinary adventure, you’ll discover that making a gluten-free apple crisp is not only easy but also incredibly rewarding. Trust me, once you serve this at your next family gathering, everyone will be asking for seconds!

Why You’ll Love This Recipe

Let’s talk about what makes this gluten-free apple crisp recipe a must-try:


Digital Kitchen Scale

★ Recommended Kitchen Tool

Digital Kitchen Scale

Make this recipe even easier with a quality Digital Kitchen Scale — a must-have kitchen staple!


🛒 Check Price on Amazon →

As an Amazon Associate, we earn from qualifying purchases.
  • Flavorful Layers: Each bite offers a delightful contrast between the sweet apple filling and the crunchy, buttery topping.
  • Simple Ingredients: Made with pantry staples, this recipe is accessible for anyone looking to whip up a quick dessert.
  • Gluten-Free Goodness: Perfect for those with dietary restrictions, ensuring everyone can enjoy a classic.
  • Versatile Variations: Easily adaptable with different fruits or toppings, making it a year-round favorite.
  • Quick Preparation: With just a few steps, you’ll have a warm, comforting dessert ready in no time.

Ingredients You’ll Need

Here’s a detailed breakdown of all the ingredients required for crafting this heartwarming treat, along with some handy substitutions:

  • ⅓ cup granulated sugar: Sweetens the filling without overpowering the apple flavor.
  • 2 tablespoons packed brown sugar: Adds depth and a hint of caramel notes.
  • 1 tablespoon water: Helps blend the ingredients smoothly.
  • 1 tablespoon lemon juice: Brightens the flavor and prevents browning of the apples.
  • 1 ½ tablespoons cornstarch: Thickens the apple filling for a delightful texture.
  • 1 teaspoon vanilla extract: Infuses a warm, comforting aroma.
  • ½ teaspoon ground cinnamon: Adds warmth and classic flavor.
  • ⅛ teaspoon ground nutmeg: A hint of nutmeg enhances the spice profile.
  • ⅛ teaspoon salt: Balances sweetness and elevates flavors.
  • 2 ¾ pounds (about 5 large) Golden Delicious apples: The star of the dish, peeled and cut into ½” cubes.
  • 1 Golden Delicious apple (peeled and grated): Enhances the filling with extra moisture and flavor.
  • 2 tablespoons unsalted butter (melted): Adds richness to the crumble topping.
  • ¾ + ⅓ cup gluten-free old-fashioned rolled oats (divided): Creates the perfect crunchy topping.
  • ⅓ cup all-purpose gluten-free flour (I recommend Cup4Cup): Helps bind the topping while keeping it gluten-free.
  • ⅓ cup packed brown sugar: Another layer of sweetness for the topping.
  • 2 teaspoons vanilla extract: Enhances the overall flavor profile.
  • 2 teaspoons water: Ensures even mixing of the topping ingredients.
  • ¼ teaspoon salt: Elevates the flavor of the topping.
  • 8 tablespoons unsalted butter (softened and cut into 8 pieces): For a rich, crumbly texture.
  • ⅓ cup (optional) chopped nuts (pecans, walnuts, or almonds): Adds a delightful crunch and flavor.
  • (optional) caramel ice cream topping: For serving, because who can resist?

Pro Tips for the Best Apple Crisp

['A close-up view of a delicious, golden-brown gluten-free apple crisp topped with oats.', 'A side view of a vintage-style apple crisp, featuring juicy apples and a crumbly oat topping.', 'Freshly baked gluten-free apple crisp with a crunchy topping, served in a rustic dish.', 'A warm apple crisp with cinnamon and nutmeg aroma, highlighting the golden apples beneath the crust.']

To ensure your gluten-free apple crisp comes out perfectly every time, keep these expert insights in mind:

  • Choose the right apples: Golden Delicious apples are fantastic for their sweetness and texture, but feel free to mix in tart varieties like Granny Smith for a balanced flavor.
  • Don’t skip the lemon juice: It brightens the filling and keeps the apples fresh.
  • Let the filling sit: Allowing the apple mixture to rest with the sugars helps it release its natural juices.
  • Use cold butter for the topping: This helps create a crumbly texture that contrasts beautifully with the soft apples.
  • Experiment with spices: Add ginger or allspice for a unique twist!
  • Protect the topping: If it browns too fast, cover it loosely with foil during baking.
  • Serving warm: This dessert is best served warm, so keep it in the oven until ready to serve.
  • Pair with ice cream: Vanilla or caramel ice cream on top adds a delightful creaminess that complements the crisp.

Common Mistakes & Troubleshooting

Even the best bakers make mistakes! Here are some common pitfalls and how to avoid them:

  • Too watery filling: If your filling is too runny, try adding a bit more cornstarch next time or letting the apples sit longer with the sugar.
  • Topping is soggy: Ensure your butter is cold and well-distributed in the topping ingredients.
  • Burnt edges: Cover with foil if the topping begins to brown too quickly, ensuring the apples cook through.
  • Flavor lacking: Taste the apple filling before baking. Adjust the sugar or spices to your preference.

Variations to Try

Mix things up with these delightful variations that cater to different tastes and seasons:

  • Berry Crisp: Substitute half the apples with fresh or frozen berries for a vibrant twist.
  • Nutty Topping: Add chopped nuts to the topping for extra crunch and flavor.
  • Maple Flavored: Use maple syrup instead of granulated sugar for a rich, unique sweetness.
  • Spiced Pear Crisp: Swap out apples for pears and add cardamom for an elegant dessert.

Storage & Make-Ahead Instructions

This apple crisp can be made ahead of time and stored for later enjoyment:

  • Storing leftovers: Keep any leftovers in an airtight container in the refrigerator for up to 3 days.
  • Freezing: You can freeze the unbaked crisp for up to 3 months. Just bake it straight from the freezer, adding a few extra minutes to the cooking time.
  • Reheating: Warm individual portions in the microwave or reheat the entire crisp in the oven at 350°F (175°C) until heated through.

Frequently Asked Questions

Here are answers to some common questions about this recipe:

  • Can I use other types of apples?: Absolutely! Feel free to experiment with different apple varieties.
  • Is this recipe suitable for vegans?: You can substitute the butter with coconut oil and the sugar with maple syrup for a vegan version.
  • How can I make it less sweet?: Reduce the amount of sugar in both the filling and the topping according to your taste.
  • What if I can’t find gluten-free oats?: Look for certified gluten-free oats, or you can use a gluten-free flour blend instead.
  • Can I add more spices?: Yes! Feel free to get creative with additional spices that you love.
  • How do I know when it’s done baking?: The crisp is done when the apples are soft and the topping is golden brown.
  • Can I serve it cold?: While it’s best served warm, you can enjoy it cold as well!
  • Can I make this in advance?: Yes! Prepare it ahead of time, store it in the fridge, and bake when you’re ready to serve.

Nutritional Tips & Dietary Adaptations

If you’re looking to make this dish even healthier, consider these adaptations:

  • Lower Sugar: Use a sugar substitute like stevia or monk fruit sweetener to cut down on calories.
  • Increase Fiber: Add in some chia seeds or ground flaxseed to the filling for an extra health boost.
  • Use Whole Foods: Try to use whole, unprocessed ingredients whenever possible for maximum nutritional value.

Equipment Recommendations

Having the right tools can make all the difference. Here are my recommendations:

  • Mixing Bowls: A set of various sizes for easy mixing and combining ingredients.
  • Measuring Cups and Spoons: Precision is key in baking, so ensure you have a reliable set.
  • Sharp Knife: For easily peeling and chopping apples.
  • 9×13-inch Baking Dish: Ideal for baking your crisp evenly.
  • Oven Mitts: Protect your hands when handling hot dishes!

Serving Suggestions

Your easy vintage gluten-free apple crisp is ready to shine! Here are some delightful serving ideas:

  • À la mode: Serve warm with a scoop of vanilla ice cream or whipped cream for a decadent treat.
  • Drizzled with caramel: A drizzle of caramel sauce adds an indulgent touch.
  • With fresh cream: Pour a splash of heavy cream over the top for richness.
  • On its own: Enjoy it plain to savor the pure flavors of the apples and spices!

As we wrap up our culinary journey, I hope this recipe not only brings joy to your table but also creates memories that last a lifetime. Cooking is about sharing love and laughter, so gather your loved ones, whip up this gluten-free apple crisp, and celebrate the simple pleasures in life. Bon appétit!

Easy Vintage Gluten-Free Apple Crisp Recipe

Prep Time 15 minutes
Cook Time 40 minutes
Total Time 55 minutes
Servings 8 servings
Calories 350
This delicious gluten-free apple crisp combines tender apples with a crunchy oat topping, perfect for a cozy dessert.

Ingredients

Filling

  • 0.33 cup granulated sugar
  • 2 tablespoons packed brown sugar
  • 1 tablespoon water
  • 1 tablespoon lemon juice
  • 1.5 tablespoons cornstarch
  • 1 teaspoon vanilla extract
  • 0.5 teaspoon ground cinnamon
  • 0.125 teaspoon ground nutmeg
  • 0.125 teaspoon salt
  • 2.75 pounds Golden Delicious apples (peeled and cut into ½" cubes)
  • 1 apple Golden Delicious apple (peeled and grated)
  • 2 tablespoons unsalted butter (melted)
  • 0.75 cup gluten-free old-fashioned rolled oats (divided)
  • 0.33 cup all purpose gluten-free flour (Cup4Cup)
  • 0.33 cup packed brown sugar
  • 2 teaspoons vanilla extract
  • 2 teaspoons water
  • 0.25 teaspoon salt
  • 8 tablespoons unsalted butter (softened and cut in 8 pieces)
  • 0.33 cup chopped nuts (optional, pecans, walnuts, or almonds) (optional)

Optional Topping

  • caramel ice cream topping (for serving) (optional)

Instructions 

  • Preheat oven to 350°F (175°C). Prepare filling by mixing sugar, brown sugar, water, lemon juice, cornstarch, vanilla, cinnamon, nutmeg, and salt. Toss apples in mixture and transfer to baking dish.
  • Combine oats, gluten-free flour, brown sugar, vanilla, water, salt, and melted butter to make the topping. Spread evenly over the apples.
  • Sprinkle chopped nuts on top if desired. Bake for 40 minutes until bubbly and golden.

Notes

Use high-quality gluten-free oats and flour for best results. Serve warm with optional caramel topping.
Calories: 350kcal
Cost: $15
Course: Dessert
Cuisine: American
Keyword: apple, gluten free

Welcome, dear friends! If you’re looking to elevate your gatherings with a dish that’s not only creamy and delicious but also a feast for the eyes, you’ve stumbled upon the right recipe. The Spinach Cob Loaf Dip is more than just an appetizer; it’s a celebration of flavors that brings loved ones together around the table. With rich cream cheese, vibrant spinach, and a hint of French onion goodness, this dip is the life of any party. Let’s dive into the magic of this dish and explore how to make your next gathering unforgettable!

Why You’ll Love This Recipe

  • Crowd-Pleaser: This dip is a guaranteed hit at any gathering, disappearing faster than you can say “more, please!” It’s a delightful blend of creamy and savory flavors that everyone loves.
  • Easy to Make: With just a handful of ingredients, you can whip up this dish in no time, leaving you with more time to enjoy the company of your guests.
  • Customizable: Want to add a twist? You can easily modify this recipe with various herbs, spices, or even proteins for a unique spin that suits your taste.
  • Perfect for Sharing: Served in a hollowed-out cob loaf, this dip invites everyone to dig in and share, making it a social delight at every table.
  • Make-Ahead Friendly: Prep it in advance and bake just before serving, ensuring you can relax and enjoy the moment!

Ingredients You’ll Need

Here’s what you’ll require to create your Spinach Cob Loaf Dip:

  • 1 cob loaf
  • 250g cream cheese, softened
  • 250g frozen spinach, thawed and excess liquid squeezed out
  • 300ml sour cream
  • 40g French onion soup mix

Feel free to substitute the cream cheese with a vegan alternative or Greek yogurt for a lighter version. You can also swap sour cream for a dairy-free option if desired.


Meal Prep Container Set

★ Recommended Kitchen Tool

Meal Prep Container Set

Make this recipe even easier with a quality Meal Prep Container Set — a must-have kitchen staple!


🛒 See Deals on Amazon →

As an Amazon Associate, we earn from qualifying purchases.

How to Make Spinach Cob Loaf Dip Recipe

Let’s get cooking! Follow these simple steps:

  1. Preheat the oven to 160ºC fan forced (or 180ºC for conventional).
  2. In a large bowl, combine the spinach, cream cheese, sour cream, and French onion soup mix. Stir to combine well. Place in the fridge for 30 minutes for flavors to settle.
  3. Cut the top of the cob loaf, and scoop out the bread from the center. Tear into small pieces. Tear the top lid into small pieces too. Place onto a tray.
  4. Pour the dip mixture into the cob loaf and place it into the oven. Bake for 20 minutes. Serve hot.

Pro Tips for Making Spinach Cob Loaf Dip

['Close-up view of Spinach Cob Loaf Dip in a rustic bowl, emphasizing its creamy texture.', 'Side angle of a Spinach Cob Loaf Dip, showing the green filling and crusty bread edges.', 'Detailed capture of Spinach Cob Loaf Dip, highlighting the smooth dip and golden loaf crust.', 'Juicy Spinach Cob Loaf Dip displayed with a focus on its creamy consistency and vibrant color.']
  • Don’t Skip the Squeeze: Make sure to squeeze out excess liquid from the spinach to prevent the dip from becoming watery.
  • Flavor Boost: Add a pinch of garlic powder or freshly minced garlic for an extra flavor kick.
  • Cheesy Goodness: For a cheesier dip, incorporate shredded cheese like mozzarella or cheddar into the mix before baking.
  • Herbal Infusion: Consider adding fresh herbs like dill, parsley, or chives for added freshness and flavor.
  • Keep an Eye on the Oven: Oven times can vary, so keep an eye on the dip to ensure it doesn’t over-bake.
  • Serving Platter: Serve with an assortment of fresh vegetables, crackers, or toasted bread for a delightful dipping experience.
  • Leftover Love: If you have leftovers (which is rare!), it can be stored in the fridge for up to 3 days — just reheat before serving.
  • Make it Ahead: Prepare the dip mixture a day in advance and store it in the fridge. Just hollow out the loaf and bake when ready to serve!

Common Mistakes and Troubleshooting

  • Watery Dip: If your dip turns out watery, it’s usually due to excess liquid in the spinach. Always squeeze out moisture!
  • Overbaking: Keep a close watch as baking times can vary based on your oven. You want it bubbling and golden, not burnt!
  • Too Thick: If the dip seems too thick, add a splash of milk or a little more sour cream to loosen it up.
  • Flavorless: If you find the dip lacking flavor, consider adding more seasoning or a splash of hot sauce.

Delicious Variations

Feeling adventurous? Here are some tasty variations to try:

  • Artichoke Spinach Dip: Add chopped artichokes to the original mixture for a delightful twist.
  • Cheesy Spinach Dip: Mix in a blend of cheeses like feta or Parmesan for an extra cheesy experience.
  • Spicy Spinach Dip: Incorporate diced jalapeños or a dash of cayenne pepper for a spicy kick!
  • Herbed Spinach Dip: Add a blend of fresh herbs like basil and oregano for a Mediterranean flair.

Storage and Make-Ahead Instructions

This dip can be made ahead of time! Just prepare the mixture and store it in the fridge until you’re ready to bake. It’s best enjoyed fresh, but if you have leftovers, keep them in an airtight container for up to 3 days. Reheat in the oven until warmed through. Enjoy this delicious dish anytime!

Comprehensive FAQ

  • Can I use fresh spinach instead of frozen? Yes, fresh spinach can be used; just sauté it and squeeze out the excess moisture.
  • How long can I store the leftovers? Leftovers can be stored in the fridge for up to 3 days.
  • Can I make this dip vegan? Absolutely! Substitute cream cheese and sour cream with plant-based alternatives.
  • What can I serve with this dip? Serve with fresh vegetables, breadsticks, crackers, or tortilla chips for the ultimate dipping experience.
  • Can I freeze the dip? While it’s not recommended to freeze due to texture changes, you can freeze the dip before baking for a quick meal later on.
  • How do I reheat the dip? Reheat in the oven at 180ºC until warmed through, about 10-15 minutes.
  • What is the best way to hollow out the cob loaf? Use a serrated knife to carefully cut around the inside, then scoop out the bread gently.
  • Can I add meat to this dip? Yes! Feel free to mix in cooked bacon or shredded chicken for a heartier dip.

Nutrition Tips and Dietary Adaptations

This dip can be adapted to fit various dietary needs:

  • Low-Fat Option: Use low-fat cream cheese and Greek yogurt instead of sour cream.
  • Gluten-Free: Serve with gluten-free crackers or vegetables for dipping.
  • Vegetarian Friendly: This recipe is vegetarian as-is, making it perfect for meat-free gatherings!

Equipment Recommendations

To make this delicious Spinach Cob Loaf Dip, you’ll need:

  • A large mixing bowl for combining ingredients
  • A serrated knife for hollowing out the cob loaf
  • A baking tray for placing the cob loaf in the oven
  • A spoon or spatula for mixing the dip

Serving Suggestions

Present your Spinach Cob Loaf Dip with flair! Arrange a beautiful platter of:

  • Crispy breadsticks
  • Fresh vegetable sticks (carrots, celery, bell peppers)
  • Assorted crackers
  • Toasted baguette slices

With these delightful accompaniments, your guests will be in for a treat!

Conclusion

And there you have it, my friends! The Spinach Cob Loaf Dip is a delightful way to bring warmth and joy to your gatherings. It’s easy to make, wonderfully versatile, and guaranteed to leave everyone asking for the recipe. So gather your loved ones, prepare this scrumptious dip, and let the feast begin! Cooking is not just about filling bellies; it’s about creating memories. Bon appétit!

Spinach Cob Loaf Dip

Prep Time 10 minutes
Cook Time 20 minutes
Total Time 30 minutes
Servings 8 people
Calories 350
A delicious and creamy spinach dip served inside a crusty cob loaf, perfect for sharing at gatherings.

Ingredients

Bread

  • 1 piece cob loaf
  • 250 g cream cheese (softened)
  • 250 g frozen spinach (thawed and excess liquid squeezed out)
  • 300 ml sour cream
  • 40 g French onion soup mix

Instructions 

  • Preheat oven to 160ºC fan forced (or 180ºC conventional).
  • Mix spinach, cream cheese, sour cream, and soup mix. Chill for 30 minutes.
  • Cut the top of the loaf, scoop out the bread, and tear into small pieces. Place on a tray.
  • Pour dip into the loaf and bake for 20 minutes. Serve hot.

Notes

Serve immediately for best flavor and texture.
Calories: 350kcal
Cost: $15
Course: Appetizer
Keyword: Spinach

Welcome, friends! Today, we’re diving into the heart of autumn with a recipe that captures the essence of the season: Cottage Cheese Pumpkin Cake Bars. These bars are not only a delightful treat but also a celebration of cozy flavors and the joy of baking together. Imagine the warm aroma of cinnamon and pumpkin wafting through your kitchen as you prepare these irresistible bars. With every bite, you’ll experience a symphony of flavors that embody the spirit of family gatherings and festive celebrations. Perfect for snacking, dessert, or even breakfast, these bars are your new go-to recipe for embracing autumn’s bounty!

Why You’ll Love This Recipe

Here are five reasons why these Cottage Cheese Pumpkin Cake Bars are a must-try:

  • Protein-Packed: With cottage cheese and eggs, these bars provide a wholesome boost of protein to fuel your day.
  • Moist and Flavorful: The combination of pumpkin purée and cottage cheese creates a delightfully moist texture that you’ll crave.
  • Versatile Sweetness: You can customize the sweetness with honey or maple syrup, making them suitable for various dietary preferences.
  • Gluten-Free Option: Using almond flour makes these bars a great choice for anyone needing a gluten-free treat.
  • Easily Adaptable: Want to spice things up? This recipe allows for a range of variations to suit your taste!

Ingredient Breakdown: What You’ll Need

Let’s gather our ingredients! Each component plays a crucial role in creating the ultimate flavor profile:


Cake Decorating Set

★ Recommended Kitchen Tool

Cake Decorating Set

Make this recipe even easier with a quality Cake Decorating Set — a must-have kitchen staple!


🛒 View on Amazon →

As an Amazon Associate, we earn from qualifying purchases.
  • 1 cup Cottage cheese: Provides moisture and protein, making your bars rich and satisfying.
  • 2 large Eggs: Helps bind the ingredients together for a perfect texture.
  • 1 cup Pumpkin purée: The star of the show, adding both flavor and moisture to these bars.
  • 1 cup Almond flour: A gluten-free alternative that adds a nutty flavor and helps create the ideal crumb.
  • 1/4 cup Honey or maple syrup: Optional sweetness that enhances the natural flavors of pumpkin and spices.
  • 1 teaspoon Vanilla extract: A must for enhancing the overall flavor of your bars.
  • 1 teaspoon Cinnamon: Adds warmth and a hint of spice.
  • 1 teaspoon Pumpkin spice: This can be substituted with nutmeg and ginger for a different flavor twist.
  • 1 teaspoon Baking powder: Essential for helping your bars rise and achieve the perfect texture.
  • 1 pinch Salt: Balances the sweetness and brings out the flavors.

Step-by-Step Instructions for Perfect Bars

Ready to create some magic in your kitchen? Follow these simple steps:

  • Preheat your oven: Start by preheating your oven to 350°F (175°C) and greasing a baking pan.
  • Mix wet ingredients: In a large bowl, combine the cottage cheese, eggs, pumpkin purée, honey or maple syrup, and vanilla extract. Mix until smooth.
  • Combine dry ingredients: In another bowl, whisk together the almond flour, baking powder, spices, and salt.
  • Mix together: Gradually fold the dry ingredients into the wet mixture until just combined. Avoid overmixing to keep your bars light and fluffy.
  • Pour and spread: Pour the batter into the prepared baking pan and spread it evenly.
  • Bake: Bake for 25-30 minutes, or until a toothpick inserted in the center comes out clean.
  • Cool and slice: Allow the bars to cool in the pan for 10 minutes before transferring to a wire rack. Once cool, slice into squares and serve!

Pro Tips for Irresistible Bars

['Close-up view of moist cottage cheese pumpkin cake bars with a golden-brown crust.', 'Side view of delicious pumpkin cake bars topped with a sprinkle of cinnamon.', 'Freshly baked pumpkin cake bars showcasing a soft texture and rich color.', 'Irresistibly easy cottage cheese pumpkin cake bars arranged on a white plate.']

To ensure you achieve the best results, consider these expert tips:

  • Room temperature ingredients: Use room temperature cottage cheese and eggs for a smoother batter.
  • Texture matters: For a denser bar, add less almond flour; for a lighter bar, increase the flour slightly.
  • Don’t skip the spices: Pumpkin spice is key to that signature autumn flavor profile. Adjust to your liking!
  • Mix-ins: Feel free to add in chocolate chips, nuts, or dried fruit for extra flavor and texture.
  • Test for doneness: Every oven is different—check your bars a few minutes before the suggested baking time.
  • Let them cool: Cooling properly ensures the bars set well and are easier to slice.
  • Storage: Store any leftovers in an airtight container in the fridge for up to a week.
  • Freeze for later: These bars freeze beautifully! Wrap them individually and store them in the freezer for up to three months.

Common Mistakes and Troubleshooting

Even seasoned bakers encounter hiccups. Here are some common mistakes to avoid:

  • Overmixing the batter: This can lead to dense bars. Mix until just combined.
  • Not measuring ingredients accurately: Baking is a science; make sure to measure your ingredients carefully.
  • Skipping the salt: This tiny ingredient makes a big difference in enhancing flavors.
  • Neglecting to preheat: Always preheat your oven for even baking.

Delicious Variations to Try

Want to switch things up? Here are some fun variations to explore:

  • Chocolate Chip Pumpkin Cake Bars: Stir in a cup of dark chocolate chips for a sweet twist!
  • Nutty Almond Crunch: Add chopped almonds or walnuts to the batter for extra crunch.
  • Maple Pecan Delight: Substitute maple syrup for honey and add toasted pecans for a rich flavor.
  • Spiced Cranberry Bars: Fold in dried cranberries for a tart contrast to the sweet pumpkin.

Storage and Make-Ahead Instructions

These bars are perfect for meal prep! Here’s how to store and prepare them:

  • Refrigerate: Store in an airtight container in the fridge for up to a week.
  • Freeze: Wrap individual bars in plastic wrap and place them in a zip-top bag to freeze for up to three months.
  • Make Ahead: Bake the bars a day in advance; they taste even better after the flavors meld overnight!

Frequently Asked Questions

Here are some common questions about making these delightful bars:

  • 1. Can I use regular flour instead of almond flour?
    Yes! If gluten is not a concern, feel free to substitute all-purpose flour.
  • 2. Is this recipe suitable for vegetarians?
    Absolutely! All ingredients are vegetarian-friendly.
  • 3. How do I know when the bars are done?
    Insert a toothpick in the center; if it comes out clean, they’re ready!
  • 4. Can I use fresh pumpkin instead of canned?
    Yes! Just ensure it’s pureed to maintain the right consistency.
  • 5. Are these bars healthy?
    They’re packed with protein and nutrients, making them a wholesome treat!
  • 6. What is the best way to enjoy these bars?
    They’re fantastic on their own, but try them warm with a dollop of yogurt or a drizzle of honey.
  • 7. How can I make them vegan?
    Substitute cottage cheese with silken tofu and use flax eggs instead of regular eggs.
  • 8. Can I add frosting?
    For a sweeter touch, consider a light cream cheese frosting or a dusting of powdered sugar!

Nutritional Information

These bars are not only delicious but also provide a nutritious snack option. Here’s a quick overview of their nutritional benefits:

  • Low in sugar: Naturally sweetened, making them a healthier option for dessert.
  • Rich in protein: Thanks to the cottage cheese and eggs, each bar is a protein boost!
  • High in fiber: Pumpkin adds fiber, aiding digestion and keeping you full longer.

Serving Suggestions

These bars are incredibly versatile! Here are some delightful serving ideas:

  • As a Snack: Perfect for an afternoon pick-me-up or a post-workout treat.
  • With Coffee: Enjoy alongside a steaming cup of coffee or tea for a cozy afternoon.
  • At Brunch: Serve with fresh fruit and yogurt for a delightful brunch spread.
  • As a Dessert: Top with whipped cream or a scoop of vanilla ice cream for an indulgent dessert.

Now that you have all the tools to create your own Cottage Cheese Pumpkin Cake Bars, let’s celebrate the flavors of autumn together! Each bite will remind you that cooking is not just about feeding yourself; it’s about sharing joy, culture, and memories. Gather your loved ones, whip up these delicious bars, and make your kitchen come alive with warmth and laughter. Happy baking, amigos!

Irresistibly Easy Cottage Cheese Pumpkin Cake Bars

Prep Time 10 minutes
Cook Time 25 minutes
Total Time 35 minutes
Servings 12 bars
Calories 180
These moist and flavorful pumpkin cake bars are quick to make and perfect for a healthy snack or dessert.

Ingredients

Dairy

  • 1 cup Cottage cheese (provides moisture and protein)
  • 2 large Eggs (helps bind the ingredients)
  • 1 cup Pumpkin purée (adds flavor and moisture)
  • 1 cup Almond flour (gluten-free option)
  • 0.25 cup Honey or maple syrup (optional sweetness)
  • 1 teaspoon Vanilla extract (enhances flavor)
  • 1 teaspoon Cinnamon
  • 1 teaspoon Pumpkin spice (can substitute with nutmeg and ginger)
  • 1 teaspoon Baking powder (helps bars rise)
  • 1 pinch Salt (balances sweetness)

Instructions 

  • Preheat oven to 350°F (175°C) and line a baking pan with parchment paper.
  • In a mixing bowl, combine cottage cheese, eggs, pumpkin purée, honey, and vanilla until smooth.
  • Stir in almond flour, cinnamon, pumpkin spice, baking powder, and salt until well incorporated.
  • Pour the batter into the prepared pan and smooth the top.
  • Bake for 25 minutes or until a toothpick inserted in the center comes out clean. Let cool before slicing.

Notes

For added flavor, sprinkle with a little cinnamon before serving.
Calories: 180kcal
Cost: $15
Course: Dessert
Cuisine: American
Keyword: pumpkin

Embrace the Warmth of Tradition with Hot Mulled Apple Cider

As the crisp autumn air settles in and the leaves turn golden, there’s nothing quite like a steaming mug of hot mulled apple cider to evoke warmth and comfort. This delightful concoction, with its medley of spices and sweet fruits, transforms any gathering into a cherished celebration. Whether you’re cozying up by the fire or hosting friends for a festive gathering, this recipe is more than just a drink; it’s an invitation to savor the moments that matter most. In this definitive guide, we’ll explore the rich flavors and aromas of mulled apple cider, ensuring you can make it from scratch with ease and joy.

Why You’ll Love This Recipe

  • Comforting Aroma: The enticing scent of cinnamon, cloves, and citrus fills your home, creating an inviting atmosphere perfect for gatherings.
  • Customizable Flavor: Adjust the spice levels and sweetness to cater to your taste, ensuring everyone enjoys their perfect cup.
  • Easy to Make: With simple ingredients and minimal prep time, you can whip this up quickly, leaving you more time to enjoy with your loved ones.
  • A Festive Tradition: This recipe can become a beloved family tradition, making it a staple at autumn and winter celebrations.
  • Health Benefits: Packed with antioxidants from apples and spices, this cider isn’t just delicious; it also offers a comforting boost to your immune system.

Ingredient Breakdown

Understanding the ingredients is crucial to mastering your hot apple cider. Here’s a detailed breakdown of what you need and some substitutions to consider:

  • 12 cups water: The base of your cider; you can also use apple juice for a sweeter flavor.
  • 2 pounds of apples: Any variety works, but a mix of tart and sweet apples like Granny Smith and Honeycrisp creates a balanced flavor.
  • 1 cup raisins: Adds natural sweetness; feel free to substitute with dried cranberries for a tart twist.
  • 6 whole cloves: For a warm spice note; you can use ground cloves in a pinch, but fresh is best.
  • 1 star anise: Its unique flavor enhances the cider; if unavailable, skip it or use a pinch of fennel seeds.
  • 6 cinnamon sticks: Essential for that classic mulled flavor; powdered cinnamon works but won’t have the same visual appeal.
  • 4 cardamom pods: These add a fragrant note; you can use ½ teaspoon of ground cardamom as an alternative.
  • ½ teaspoon allspice: For depth; if you don’t have allspice, a blend of nutmeg and cinnamon can work.
  • ¼ teaspoon ground nutmeg: Just a hint elevates the flavor; use fresh nutmeg for the best taste.
  • 1 orange: The zest and juice bring brightness; don’t skip this for the best flavor.
  • 1 tablespoon apple cider vinegar: Adds a slight tang and depth; optional but recommended.
  • ½ – 1 tablespoon molasses: For sweetness; adjust to your taste. Honey or brown sugar can be substituted.
  • Additional garnishes: Sliced apples, oranges, limes, and lemons add a beautiful touch when serving.

How to Make Hot Mulled Apple Cider

['Close-up view of a warm mug of hot mulled apple cider garnished with spices and fruit slices.', 'Side view of steaming hot mulled apple cider in a clear glass mug, decorated with cinnamon sticks and orange slices.', 'Juicy hot mulled apple cider with vibrant apple slices and spices, captured in a close-up shot.', 'A delicious serving of hot mulled apple cider, showing the rich colors of apples and spices in a glass mug.']

Now that you have your ingredients ready, let’s dive into the process:


Meal Prep Container Set

★ Recommended Kitchen Tool

Meal Prep Container Set

Make this recipe even easier with a quality Meal Prep Container Set — a must-have kitchen staple!


🛒 Shop This Tool →

As an Amazon Associate, we earn from qualifying purchases.
  1. Pour the water into a large pot and place it on the stove. Turn on the heat to medium-high.
  2. Wash, core, and cut the apples into 4 to 6 pieces, then add them to the pot along with the raisins, cloves, anise star, cinnamon sticks, allspice, and nutmeg.
  3. Bring the mixture to a boil, then reduce the heat, cover, and let it simmer for about 1 hour, keeping the liquid at a low boil.
  4. While it simmers, prepare the orange by zesting it and then juicing it.
  5. After an hour, gently mash the apples with a potato masher to release more flavor. Add the orange zest and juice.
  6. Cover and continue cooking for another hour. Once done, turn off the heat and let it cool slightly.
  7. Strain the cider through a fine mesh strainer or cheesecloth to remove solids (for quick straining, refer to our detailed blog post).
  8. Stir in the apple cider vinegar and taste; add molasses if desired for additional sweetness.
  9. Reheat before serving, garnishing with fresh apple and orange slices, an extra cinnamon stick, and a star anise.

Pro Tips for the Best Mulled Cider

To elevate your cider experience, consider these expert insights:

  • Use Fresh Spices: Freshly ground spices enhance the flavor significantly compared to pre-ground versions.
  • Adjust Sweetness: Taste as you go! Every batch of apples varies in sweetness, so adjust molasses or sugar accordingly.
  • Slow Cooker Option: If you prefer a hands-off approach, make this in a slow cooker on low for 6-8 hours.
  • Add Complexity: Consider adding fresh ginger or a splash of bourbon for a more robust flavor.
  • Serve Warm: Always serve your cider warm for the best experience; reheat gently to maintain flavor.
  • Let it Sit: Allowing the cider to sit overnight in the fridge allows the spices to deepen, making it even more flavorful.
  • Garnish Creatively: Use seasonal fruits like pears or pomegranate seeds for a festive touch.
  • Make Ahead: You can make the cider a day in advance and reheat when ready to serve.

Common Mistakes and Troubleshooting

Sometimes things don’t go according to plan. Here’s how to avoid common pitfalls:

  • Too Sweet: If your cider turns out too sweet, add a splash of vinegar or citrus juice to balance the flavors.
  • Weak Flavor: If the flavor is too mild, let it simmer longer to intensify the spices and apple essence.
  • Overcooked Apples: Avoid boiling the apples too long as they can turn mushy; a gentle simmer is best.
  • Straining Issues: If you find straining cumbersome, use a fine mesh sieve or cheesecloth to make it easier.

Delicious Variations

Feel free to get creative with your cider! Here are some fun variations to try:

  • Spiked Mulled Cider: Add a splash of rum, bourbon, or brandy for a spirited version that’s perfect for adult gatherings.
  • Autumn Spice Cider: Incorporate pumpkin spice or chai spices for a seasonal twist.
  • Citrus-Infused Cider: Experiment with different citrus fruits like grapefruit or tangerine for a unique flavor profile.
  • Herbal Mulled Cider: Add fresh herbs like rosemary or thyme for an aromatic experience.

Storage and Make-Ahead Instructions

Want to make your cider ahead of time? Here’s how to store it:

  • Refrigeration: Store leftover cider in an airtight container in the fridge for up to a week.
  • Freezing: You can freeze cider in ice cube trays for quick use in future cocktails or drinks.
  • Reheating: When ready to enjoy again, reheat gently on the stove or in the microwave, ensuring it doesn’t boil.

Frequently Asked Questions

Let’s tackle some common queries about hot mulled apple cider:

  • Can I use store-bought apple cider? Yes, store-bought cider can be used as a base; just enhance it with spices.
  • How long does mulled cider last? When refrigerated, it lasts about a week; always check for freshness.
  • Is there a non-alcoholic version? Absolutely! This recipe is naturally non-alcoholic and perfect for all ages.
  • Can I make it in a slow cooker? Yes! Follow the same recipe, but cook on low for 6-8 hours.
  • What if I don’t have all the spices? Use whatever you have on hand; the cider will still be delightful!
  • Can I add other fruits? Yes, feel free to experiment with seasonal fruits like pears or cranberries.
  • How do I make it less sweet? Reduce the amount of raisins or molasses and add more citrus.
  • What do I serve with mulled cider? It pairs beautifully with pastries, spiced nuts, or a cheese platter.

Nutrition Tips and Dietary Adaptations

For a healthier version of your cider:

  • Reduce Sugar: Use less molasses or opt for a natural sweetener like stevia.
  • Gluten-Free: This recipe is naturally gluten-free, making it suitable for all diets.
  • Vegan: The ingredients used are vegan-friendly; ensure any sweeteners are also plant-based.

Equipment Recommendations

To create your perfect mulled cider, here’s what you’ll need:

  • Large Pot: A heavy-bottomed pot is ideal for even heating.
  • Fine Mesh Strainer: Essential for straining out solids.
  • Potato Masher: For mashing the apples and releasing their juices.
  • Crockpot: If you choose the slow cooker method, a large capacity is recommended.

Serving Suggestions

Make your cider experience even more delightful with these serving ideas:

  • Garnish: Add fresh slices of apples, oranges, or a sprinkle of cinnamon on top.
  • Presentation: Serve in clear mugs to showcase the vibrant color of your cider.
  • Pairing: Offer alongside spiced cookies or a charcuterie board for a complete experience.

With this comprehensive guide, you’re not just making hot mulled apple cider; you’re crafting a warm, inviting experience that celebrates the beauty of togetherness. So gather your ingredients, invite your loved ones, and let the aromas of spice and sweetness fill your home. Cheers to a cozy season!

Hot Mulled Apple Cider Recipe

Prep Time 15 minutes
Cook Time 2 hours
Total Time 2 hours 15 minutes
Servings 8 cups
Calories 150
A warm, spiced apple cider perfect for cozy gatherings, infused with aromatic spices and citrus.

Ingredients

Water and Fruits

  • 12 cups water
  • 2 pounds apples (washed, cored, and cut into 4-6 pieces)
  • 1 cup raisins
  • 6 whole cloves
  • 1 star anise star
  • 6 sticks cinnamon sticks (about 3-4 inches long)
  • 4 pods cardamom pods (or ½ tsp ground cardamom)
  • ½ tsp allspice
  • ¼ tsp ground nutmeg
  • 1 orange orange (zest and juice)
  • 1 Tbsp apple cider vinegar
  • ½ - 1 Tbsp molasses (optional)
  • 1 or 2 apples sliced apples
  • 2 cinnamon sticks additional cinnamon sticks
  • 2 anise stars additional anise stars
  • 4 whole cloves
  • 1 orange sliced orange
  • 1 lime sliced lime
  • ½ lemon sliced lemon

Instructions 

  • Pour water into a large pot, add apples, raisins, spices, and bring to a boil. Reduce heat, cover, and simmer for 1 hour.
  • Scrape orange peel, press out orange juice, and mash apples slightly. Add orange zest and juice to the pot.
  • Continue simmering for another hour, then turn off heat and cool slightly. Strain the cider and add vinegar and molasses if desired.
  • Reheat before serving and garnish with sliced citrus and apple slices.

Notes

Adjust sweetness with molasses and serve hot for best flavor.
Calories: 150kcal
Cost: $15
Course: beverage
Cuisine: American
Keyword: apple, spiced

Welcome to a Slice of Joy!

Ah, the Mediterranean! A place where the sun kisses the earth, and flavors dance in the air like a joyful fiesta. Today, I’m thrilled to share a cherished family recipe that has warmed hearts and bellies for generations: my Carrot Walnut Cake. This cake isn’t just a dessert; it’s a celebration of tradition, love, and the simple joys of life. With its rich spices and delightful textures, this cake is perfect for any occasion, whether it’s a Sunday family gathering or a casual afternoon tea. Let’s dive into all the reasons why this recipe deserves a special spot in your kitchen.

Why You’ll Love This Recipe

  • Moist and Flavorful: This carrot walnut cake is incredibly moist, thanks to the freshly grated carrots and a blend of warm spices like cinnamon that fill every bite with flavor.
  • Simple Ingredients: You’ll find that the ingredients are easy to come by, making this cake a breeze to whip up any day of the week.
  • Versatile Delight: Whether served as a sweet snack cake or a celebratory dessert, it fits perfectly into any meal or occasion.
  • Healthier Indulgence: Packed with carrots and walnuts, this cake is not just a treat; it’s also a source of nutrients that you can feel good about enjoying.
  • Customizable Options: Feel free to make it your own! Add golden raisins, swap nuts, or even try a different frosting—this recipe is as flexible as your imagination!

Ingredient Breakdown

Let’s take a closer look at the star players in our Carrot Walnut Cake recipe. Understanding each ingredient will help you create a cake that’s not only delicious but also personalized to your taste.

  • All-Purpose Flour: Provides structure. For gluten-free options, consider using almond flour or a gluten-free flour blend.
  • Cinnamon: This spice adds warmth and depth. Feel free to experiment with nutmeg or ginger for additional flavor.
  • Baking Soda & Baking Powder: These leavening agents help the cake rise beautifully. Make sure they are fresh for the best results.
  • Salt: Enhances flavor. A pinch goes a long way in balancing sweetness.
  • Vegetable Oil: Keeps the cake moist and tender. You can substitute with melted coconut oil or unsweetened applesauce for a lighter version.
  • Light Brown Sugar & White Sugar: The combination gives a nice caramel flavor. Adjust the ratio to suit your sweetness preference.
  • Vanilla Extract: Adds a lovely aroma. Opt for pure vanilla for the best flavor.
  • Eggs: Bind the ingredients together and add richness. For an egg-free option, use flaxseed meal mixed with water.
  • Grated Carrots: The main attraction! Freshly grated carrots bring moisture and natural sweetness.
  • Walnuts: Provide a delightful crunch. You can swap them with pecans or omit them for a nut-free version.
  • Golden Raisins (optional): Add sweetness and texture. Feel free to leave them out if you prefer a more traditional cake.

Step-by-Step Instructions

['A side view close-up of a slice of Carrot Walnut Cake on a wooden table.', 'Juicy Carrot Walnut Cake slice with chopped walnuts visible, displayed on a plate.', 'Delicate layers of Carrot Walnut Cake, showing grated carrots and walnuts in a close-up shot.', 'A piece of moist Carrot Walnut Cake with icing, captured from the side with a soft background.']

Ready to bake? Follow these simple steps to achieve that perfect Carrot Walnut Cake.


Silicone Baking Cups Set

★ Recommended Kitchen Tool

Silicone Baking Cups Set

Make this recipe even easier with a quality Silicone Baking Cups Set — a must-have kitchen staple!


🛒 View on Amazon →

As an Amazon Associate, we earn from qualifying purchases.
  • Prep: Preheat your oven to 350° F (177°C). Grease an 8-inch square or round baking pan with cooking spray and line the bottom with parchment paper.
  • Mix Dry Ingredients: In a medium bowl, whisk together the flour, cinnamon, baking soda, baking powder, and salt until well combined.
  • Mix Wet Ingredients: In a larger bowl, whisk the vegetable oil, light brown sugar, white sugar, and vanilla extract together for about a minute. Then, add in the eggs and whisk until blended well.
  • Finish the Batter: Switch to a rubber spatula to stir in the dry ingredients, grated carrots, walnuts, and raisins until evenly combined.
  • Bake: Pour the batter into the prepared pan, spreading it evenly. Bake for 30 to 35 minutes or until a toothpick inserted in the center comes out clean.
  • Serve: Let the cake cool in the pan on a wire rack before slicing and enjoying!

Pro Tips for Baking Success

  • Fresh Ingredients: Always use fresh, high-quality ingredients for the best flavor and texture.
  • Grating Carrots: Use the coarse side of your box grater to achieve the perfect size for the carrots that will keep the cake moist.
  • Don’t Overmix: Mix just until combined to prevent a dense cake. Overmixing develops gluten, which can lead to a tougher texture.
  • Cool Before Serving: Allow the cake to cool completely before slicing to ensure clean cuts and optimal flavor release.
  • Experiment with Frosting: While this cake is delightful on its own, consider a cream cheese frosting for an extra layer of indulgence!
  • Use Parchment Paper: Line the bottom of your pan with parchment to easily lift the cake out after baking.
  • Check for Doneness: Ovens vary, so start checking your cake a few minutes before the recommended baking time.
  • Store Properly: Keep the cake in an airtight container at room temperature for up to three days or in the refrigerator for up to a week.

Common Mistakes and Troubleshooting

Even the best bakers can encounter a few hiccups along the way. Here are some common mistakes and how to avoid them:

  • Dry Cake: Ensure you’re measuring your flour correctly by spooning it into the measuring cup rather than scooping directly from the bag.
  • Dense Texture: Overmixing the batter can lead to a dense cake. Remember, less is more!
  • Uneven Baking: Make sure your oven is preheated and use an oven thermometer to check the temperature accuracy.
  • Burnt Edges: If your cake is browning too quickly, cover it loosely with aluminum foil during baking.
  • Falling Center: This can happen from underbaking; ensure the toothpick comes out clean before removing the cake from the oven.

Delicious Variations

If you want to switch things up, consider these delightful variations:

  • Spiced Carrot Cake: Add nutmeg and ginger along with cinnamon for a more aromatic flavor.
  • Pineapple Carrot Cake: Incorporate crushed pineapple for added moisture and sweetness.
  • Coconut Carrot Cake: Stir in shredded coconut for a tropical twist.
  • Vegan Carrot Cake: Replace eggs with flaxseed meal and use plant-based oil and dairy-free sugar.

Storage and Make-Ahead Instructions

This cake can be made ahead of time and stored for later enjoyment. Here’s how:

  • Room Temperature: Store in an airtight container for up to three days.
  • Refrigeration: Keep in the fridge for up to a week. Just remember to bring it back to room temperature before serving for the best flavor.
  • Freezing: Wrap tightly in plastic wrap and then in aluminum foil for up to three months. Thaw overnight in the refrigerator before serving.

Frequently Asked Questions

  • Can I use different nuts? Absolutely! Pecans or even almonds can be wonderful substitutes for walnuts.
  • Is this cake good without frosting? Yes! The cake is flavorful enough to stand on its own, but feel free to add cream cheese frosting if desired.
  • How do I know when the cake is done? A toothpick inserted in the center should come out clean or with a few crumbs attached, but not wet batter.
  • Can I make mini cakes with this recipe? Definitely! Just reduce the baking time and keep an eye on them to avoid overbaking.
  • What’s the best way to serve it? This cake pairs beautifully with a dollop of whipped cream or a scoop of vanilla ice cream.
  • Can I add more vegetables? Yes! Grated zucchini or apples would be delightful additions.
  • Is it possible to make this cake gluten-free? Yes! Substitute all-purpose flour with a gluten-free flour blend.
  • How should I store leftovers? Keep it wrapped in an airtight container to maintain its moisture.

Nutritional Tips and Dietary Adaptations

This Carrot Walnut Cake is not only delicious but can also be adapted to fit various dietary needs:

  • Lower Sugar: Reduce the amount of sugar or use a sugar substitute if you’re watching your intake.
  • Nut-Free: Omit the walnuts and consider adding seeds like sunflower or pumpkin for crunch.
  • Increased Fiber: Substitute half the flour with whole wheat flour for a fiber boost.
  • Dairy-Free: Use almond milk or coconut milk in place of dairy milk in any frosting if desired.

Essential Equipment Recommendations

Having the right tools can make all the difference. Here are my top recommendations:

  • Mixing Bowls: A set of nested mixing bowls will make your prep smoother.
  • Measuring Cups and Spoons: Accurate measurements are key for baking success.
  • Rubber Spatula: Perfect for folding ingredients and scraping down the sides of bowls.
  • 8-inch Cake Pan: A good-quality, non-stick pan ensures easy release and even baking.
  • Wire Rack: Ideal for cooling cakes to prevent sogginess.

Serving Suggestions

How you serve this Carrot Walnut Cake can elevate the experience:

  • With Cream Cheese Frosting: Top the cake with a rich cream cheese frosting for an indulgent treat.
  • Fresh Fruits: Serve with a side of seasonal fruits or a berry compote for brightness.
  • Garnish: A sprinkle of chopped walnuts on top adds an attractive finishing touch.
  • Pair with Tea: Enjoy it with a cup of herbal tea or coffee for a cozy afternoon break.

Conclusion

And there you have it! A Carrot Walnut Cake that brings together the best of Mediterranean flavors and family traditions. I hope you enjoy creating this delightful treat as much as I do. Cooking is not just about the food; it’s about the memories we create and the love we share. So grab your apron, invite your loved ones into the kitchen, and let’s make some magic happen. Remember, every slice is a slice of joy! Happy baking!

Carrot Walnut Cake

Prep Time 15 minutes
Cook Time 35 minutes
Total Time 50 minutes
Servings 8 pieces
Calories 350
A moist and flavorful carrot cake packed with walnuts and a hint of cinnamon, perfect for any occasion.

Ingredients

Dry ingredients

  • 1 cup all purpose flour
  • 1 teaspoon ground cinnamon
  • 1 teaspoon baking soda
  • 1/2 teaspoon baking powder
  • 1/4 teaspoon salt

Wet ingredients

  • 1/2 cup vegetable oil
  • 1/2 cup light brown sugar
  • 1/4 cup white sugar
  • 1 teaspoon vanilla extract
  • 2 large eggs

Main ingredients

  • 2 cups coarsely grated carrots
  • 3/4 cup finely chopped walnuts
  • 1/4 cup golden raisins (optional)

Instructions 

  • Preheat oven to 350°F (177°C). Grease and line an 8-inch pan.
  • Whisk dry ingredients in a bowl. Mix wet ingredients, then add eggs and blend.
  • Combine wet and dry, then fold in carrots, walnuts, and raisins.
  • Pour batter into pan and bake for 30-35 minutes. Cool before serving.

Notes

For extra flavor, add a cream cheese frosting.
Calories: 350kcal
Cost: $15
Course: Dessert
Cuisine: American
Keyword: cake, carrot, walnut

Welcome, my friends, to a delightful journey into the heart of Southern baking! Today, we’re diving into the irresistible world of Cream Cheese Pound Cake—a moist, buttery, and elegant dessert perfect for any occasion. This cake is not just a recipe; it’s a celebration of flavors, memories, and togetherness. With every slice, you’ll experience the warmth of Southern hospitality and the joy that comes from sharing good food with loved ones. Let’s embark on this culinary adventure together and discover why this cream cheese pound cake is destined to become your new favorite!

Why You’ll Love This Recipe

  • Rich and Creamy Texture: The addition of cream cheese creates a cake that is wonderfully moist and decadent, making each bite melt in your mouth.
  • Easy to Make: With simple ingredients and straightforward steps, this recipe is perfect for both novice bakers and seasoned pros.
  • Versatile Delight: This cake serves beautifully at family gatherings, holiday celebrations, or even as an everyday treat with your afternoon coffee.
  • Time-Tested Recipe: Passed down through generations, this cream cheese pound cake embodies the love and tradition of Southern baking.
  • Customizable Flavors: Feel free to add your favorite citrus zest, chocolate chips, or nuts to make this cake uniquely yours!

Ingredient Breakdown

Let’s gather our ingredients and get ready to create something magical. Here’s what you’ll need for your Southern Cream Cheese Pound Cake:

  • 8 oz. cream cheese: Use full-fat cream cheese, preferably Philadelphia, for the best results. Ensure it’s softened to room temperature for easy mixing.
  • 1 1/2 cups unsalted butter: Three sticks of butter, softened, will give your cake that rich, buttery flavor.
  • 3 cups granulated sugar: The sugar not only sweetens the cake but also helps achieve that lovely texture.
  • 6 large eggs: Make sure they are at room temperature; this helps with the mixing process.
  • 2 teaspoons vanilla extract: Pure vanilla extract adds warmth and depth of flavor to the cake.
  • 3 cups all-purpose flour: I recommend using White Lily flour, known for its fine texture, which yields a lighter cake.
  • 1/8 teaspoon salt: This will enhance the flavors in your cake.

How to Make Cream Cheese Pound Cake

Now that we have everything ready, let’s dive into the step-by-step process of making this delightful cake:


Silicone Baking Cups Set

★ Recommended Kitchen Tool

Silicone Baking Cups Set

Make this recipe even easier with a quality Silicone Baking Cups Set — a must-have kitchen staple!


🛒 See Deals on Amazon →

As an Amazon Associate, we earn from qualifying purchases.
  • Prepare the pan: Do not preheat the oven. Butter and flour a large (10-12-cup) Bundt or tube pan. Placing the pan on a foil-covered baking sheet can catch any overflow, although if sized correctly, it shouldn’t be an issue.
  • Sift dry ingredients: Sift together the flour and salt on a piece of parchment paper and set it aside for later.
  • Cream butter and cream cheese: In a large mixing bowl, beat the softened butter and cream cheese on medium-high speed until blended and creamy, about 8 minutes. Gradually add the sugar, beating for another 5-7 minutes until the batter becomes fluffy and pale yellow.
  • Add the eggs: Incorporate the eggs one at a time, mixing on low speed just until the yellow disappears. Scrape the sides of the bowl after the third egg to ensure everything is well combined.
  • Mix in the flour: With the mixer on low, gradually add the sifted flour mixture. Beat just until blended, being careful not to overmix. Add the vanilla and stir until incorporated.
  • Prepare to bake: Pour the batter into the prepared pan. Place it in a cold oven along with a 2-cup oven-proof measuring cup or bowl filled with water to create steam while baking.
  • Bake the cake: Set your oven to 300 degrees F and bake for about 1 hour and 15-30 minutes, or until a cake tester inserted in the center comes out with just a few moist crumbs. Start checking at about 1 hour and 15 minutes.
  • Cool the cake: Once baked, let the cake cool in the pan on a wire rack for 15 minutes before flipping it onto the rack to cool completely.

Pro Tips for Baking Success

['Close-up side view of a moist Southern Cream Cheese Pound Cake topped with a golden crust.', 'Slice of Southern Cream Cheese Pound Cake showing a rich texture and fluffy interior.', 'Delicious Southern Cream Cheese Pound Cake displayed elegantly, emphasizing its creamy layers.', 'An enticing piece of Southern Cream Cheese Pound Cake with a light golden hue and creamy topping.']
  • Room Temperature Ingredients: Ensuring all your ingredients are at room temperature is key for a smooth batter.
  • Don’t Overmix: After adding the flour, mix just until combined to prevent a dense cake.
  • Use a Cold Oven: Starting the cake in a cold oven helps it rise evenly and prevents cracking.
  • Check for Doneness: Every oven is different, so start checking for doneness a little earlier than the recipe suggests.
  • Let It Rest: Allow the cake to cool completely before slicing to ensure clean cuts.
  • Flavor Variations: Consider adding a tablespoon of lemon or orange zest for a citrus twist!
  • Storing Your Cake: Keep it covered at room temperature for up to 3 days or refrigerate for up to a week.
  • Glazes and Frostings: A simple glaze made from powdered sugar and milk pairs beautifully with this cake.

Common Mistakes and Troubleshooting

Every baker has been there! Here are some common mistakes and how to avoid them:

  • Too Dense Cake: This often occurs from overmixing the batter. Mix just until the ingredients are combined.
  • Cake Not Rising: Make sure your baking powder and baking soda are fresh and that you’ve followed the correct baking temperatures.
  • Cracked Top: This can happen if the oven temperature is too high. Baking at a lower temperature helps prevent this.
  • Dry Cake: Ensure you’re measuring the flour correctly and not packing it down. Adding a little bit of oil can also help keep the cake moist.

Delicious Variations to Try

Want to mix it up? Here are some delightful variations you can try:

  • Lemon Cream Cheese Pound Cake: Add 1 tablespoon of lemon zest and replace some vanilla extract with lemon extract for a bright flavor.
  • Chocolate Chip Cream Cheese Pound Cake: Fold in 1 cup of semi-sweet chocolate chips to the batter for a delectable treat.
  • Nuts Galore: Incorporate 1 cup of chopped walnuts or pecans for a nutty crunch.
  • Spiced Pound Cake: Add 1 teaspoon of cinnamon or nutmeg to give your cake a warm, spiced flavor.

Storage and Make-Ahead Instructions

You can prepare your cream cheese pound cake ahead of time. Here’s how to store it:

  • Room Temperature: Keep the cake in an airtight container at room temperature for up to 3 days.
  • Refrigeration: For longer storage, wrap the cake tightly in plastic wrap and refrigerate for up to a week.
  • Freezing: You can freeze the unglazed cake for up to 3 months. Thaw it overnight in the refrigerator before serving.
Frequently Asked Questions

Here are some common questions about making cream cheese pound cake:

  • Can I use salted butter instead of unsalted? Yes, but omit the added salt in the recipe.
  • How do I know when my cake is done? Insert a toothpick in the center; it should come out clean or with a few moist crumbs.
  • Can I add other flavors? Absolutely! Try adding almond extract or other flavorings to customize your cake.
  • Why is my cake falling apart? This may be due to overmixing or not allowing it to cool completely before slicing.
  • What can I serve with this cake? Whipped cream, fresh berries, or a scoop of vanilla ice cream complement this cake beautifully.
  • Is this cake gluten-free? To make it gluten-free, substitute with a gluten-free flour blend.
  • How long does it take to bake? Generally, it takes about 1 hour and 15-30 minutes, but always check for doneness.
  • Can I make this cake in a loaf pan? Yes! Just adjust the baking time, as it may take longer.

Nutritional Tips and Dietary Adaptations

This cream cheese pound cake can be made with some adjustments to fit different dietary needs:

  • Lower Sugar Option: Substitute granulated sugar with a sugar alternative suitable for baking.
  • Gluten-Free: Use a gluten-free flour blend to make this recipe suitable for those with gluten sensitivities.
  • Dairy-Free: Replace cream cheese and butter with plant-based alternatives for a dairy-free version.

Essential Equipment Recommendations

For the best results, here’s what you’ll need in your kitchen:

  • Electric Mixer: A stand mixer or hand mixer makes creaming the butter and cream cheese a breeze.
  • Baking Pan: A 10-12 cup Bundt or tube pan is ideal for this recipe.
  • Measuring Cups and Spoons: Accurate measurements ensure your cake turns out perfectly every time.
  • Cooling Rack: Essential for cooling your cake evenly after baking.

Serving Suggestions

Now that your cake is baked and cooled, let’s talk about how to serve it:

  • Classic Enjoyment: Slice and serve plain for a simple yet indulgent treat.
  • With Fresh Berries: Top slices with fresh strawberries, blueberries, or raspberries for a fruity twist.
  • Glazed Delight: Drizzle with a simple glaze made from powdered sugar and milk or cream for added sweetness.
  • Pair with Ice Cream: Serve alongside a scoop of creamy vanilla ice cream for an extra special dessert.

As you can see, this Cream Cheese Pound Cake is not just a dessert; it’s a slice of Southern tradition that invites you to gather around the table. So, grab your apron, turn on your favorite tunes, and let’s create a masterpiece that will bring joy to your home. Remember, cooking is about celebration, love, and sharing! Enjoy every bite, my friends!

Southern Cream Cheese Pound Cake

Prep Time 20 minutes
Cook Time 1 hour 20 minutes
Total Time 1 hour 40 minutes
Servings 12 slices
Calories 480
A rich and moist pound cake with a creamy texture, perfect for special occasions or everyday indulgence.

Ingredients

Dairy

  • 8 oz cream cheese (Philadelphia), softened (1 block)
  • 1.5 cups unsalted butter, softened (3 sticks)
  • 3 cups granulated sugar
  • 6 large eggs (room temperature)
  • 2 teaspoons vanilla extract

Dry ingredients

  • 3 cups all-purpose flour (White Lily)
  • 1/8 teaspoon salt

Instructions 

  • Butter and flour a large Bundt or tube pan; set aside.
  • Sift flour and salt; set aside.
  • Cream butter and cream cheese until smooth, then add sugar and beat until fluffy. Add eggs one at a time, then vanilla. Mix until combined.
  • Gradually add flour mixture, mixing on low. Pour batter into prepared pan.
  • Place in cold oven with water-filled bowl; bake at 300°F (150°C) for 1 hour 15 minutes to 1 hour 30 minutes, until a tester comes out moist crumbs.
  • Cool in pan 15 minutes, then invert onto wire rack to cool completely.

Notes

Ensure ingredients are at room temperature for best results.
Calories: 480kcal
Cost: $15
Course: Dessert
Cuisine: Southern
Keyword: pound cake

Unveiling the Magic of Caramel Apple Nachos

Welcome to a world where crispy apples meet luscious caramel in a delightful twist on a classic treat! If you’re looking to elevate your gatherings or simply indulge in a sweet snack, Caramel Apple Nachos are the answer. This recipe is not just about combining flavors; it’s about creating a celebration on a plate. Whether you’re hosting a fall gathering or just want a quick dessert, these nachos are quick to prepare and sure to impress. Let’s dive into why this recipe is a must-try!

Why You’ll Love This Recipe

  • Easy to Make: With just a few simple steps, you can whip up a batch of these delicious nachos in no time.
  • Customizable: Choose your favorite toppings to make it uniquely yours — the possibilities are endless!
  • Kid-Friendly: A fun and interactive treat that your kids will love to help assemble.
  • Perfect for Any Occasion: Whether it’s a family gathering, a party, or a cozy night in, these nachos fit right in.
  • Visual Appeal: The vibrant colors and textures make for an eye-catching dessert that’s sure to wow your guests.

Ingredients Breakdown

To create these tasty apple nachos, you’ll need a handful of ingredients that are easy to find:

  • Apples: Choose crisp varieties like Granny Smith or Honeycrisp for the best texture.
  • Lemon Juice: A splash of lemon juice will keep the apples from turning brown.
  • Caramel Sauce: Store-bought or homemade, this is the star of the show!
  • White Chocolate Chips: Adds a sweet, creamy layer that pairs perfectly with the caramel.
  • Mini Chocolate Chips: For those who love a bit of chocolatey goodness.
  • Heath Toffee Bits: These add a delightful crunch and a rich flavor.
  • Salted Peanuts: A great choice for a salty contrast to the sweetness.
  • Mini M&Ms: Fun and colorful, they add a pop of sweetness and color.
  • Sprinkles: Because who doesn’t love a little extra fun on their dessert?

Pro Tips for Caramel Apple Nachos

['Close-up of caramel apple nachos topped with chocolate chips and sprinkles.', 'Side view of a plate of caramel apple nachos with colorful toppings.', 'Juicy apple slices drizzled with caramel and decorated with various toppings.', 'Artistic arrangement of caramel apple nachos featuring mini M&Ms and toffee bits.']

To make your Caramel Apple Nachos even better, consider these expert tips:


Silicone Baking Cups Set

★ Recommended Kitchen Tool

Silicone Baking Cups Set

Make this recipe even easier with a quality Silicone Baking Cups Set — a must-have kitchen staple!


🛒 Shop This Tool →

As an Amazon Associate, we earn from qualifying purchases.
  • Choose the Right Apples: The best apples for nachos are those that won’t turn mushy quickly, like Honeycrisp or Fuji.
  • Keep It Fresh: Squeeze lemon juice over apple slices to prevent browning. This keeps the apples looking fresh and appetizing.
  • Warm the Caramel: If using store-bought caramel, warm it slightly to make drizzling easier.
  • Layer Wisely: For a beautiful presentation, layer the ingredients rather than just tossing them together.
  • Serve Immediately: These nachos are best enjoyed fresh, as the apples will turn brown over time.
  • Mix and Match Toppings: Don’t hesitate to experiment with different toppings! Try crushed cookies, dried fruits, or even a drizzle of peanut butter.
  • Make It a Party: Set up a nacho bar where guests can build their own nachos with various toppings.
  • Store Leftovers Properly: If you have leftovers, store them in an airtight container in the fridge but consume within a day.

Avoiding Common Mistakes

Even the best cooks can make mistakes when preparing Caramel Apple Nachos. Here’s how to avoid them:

  • Not Using Lemon Juice: Skipping lemon juice will result in brown apples that are less appealing.
  • Overloading on Toppings: While toppings are fun, too many can make the nachos difficult to eat. Aim for balance!
  • Using Soft Apples: Avoid apples that are mealy or overly soft; always opt for the crispest ones.
  • Not Serving Fresh: These nachos taste best when served immediately. Prepare them right before serving.
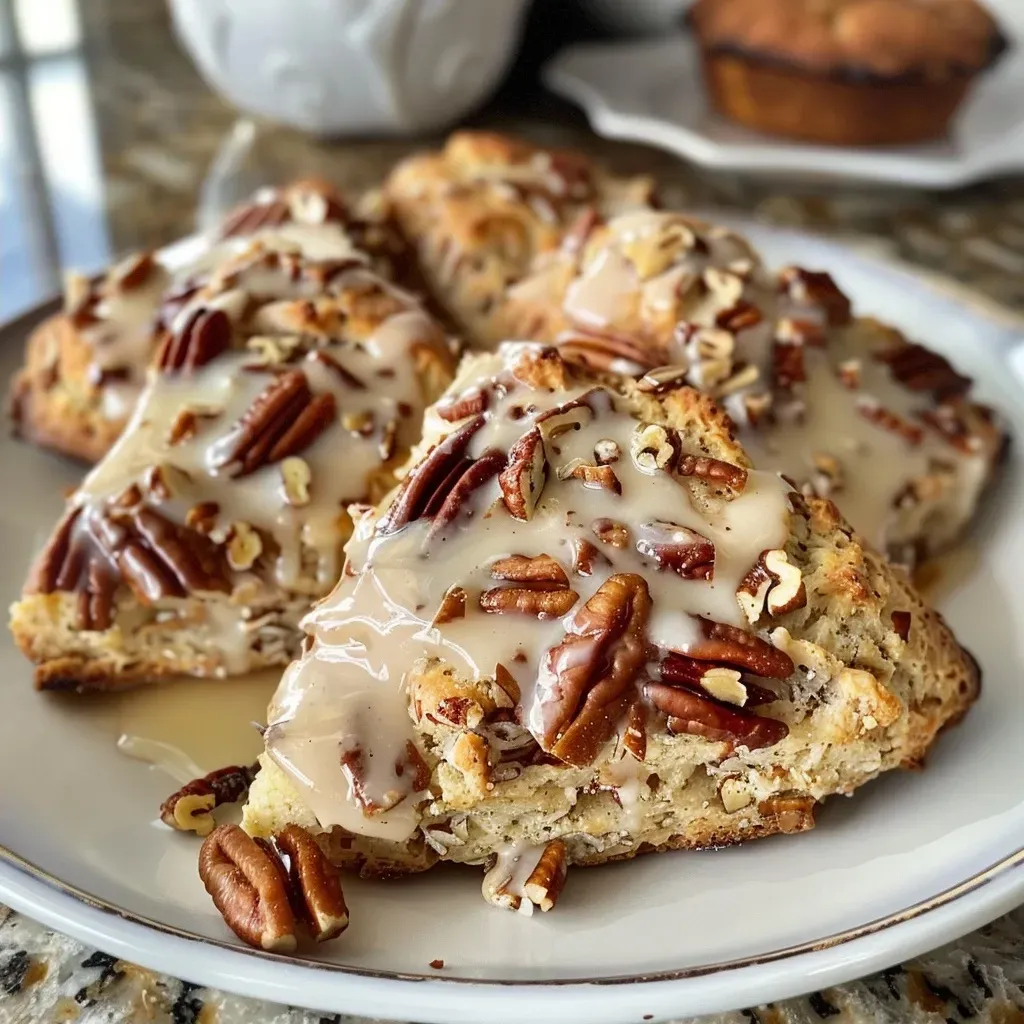
Delicious Variations

Want to switch things up? Here are some creative variations to consider:

  • Chocolate Drizzle: Add a rich chocolate drizzle instead of white chocolate for a more decadent dessert.
  • Nutty Delight: Use almond slices or pecans for a nutty twist, enhancing both flavor and texture.
  • Spiced Apples: Sprinkle cinnamon or nutmeg on the apples before drizzling with caramel for a warm, spiced flavor.
  • Fruit Medley: Mix in other fruits like bananas or strawberries for a fruity take on the classic.

Storage and Make-Ahead Instructions

If you find yourself with extra nachos, here are some storage tips:

  • Refrigeration: Store any leftovers in an airtight container in the fridge but consume within 1-2 days to enjoy their best flavor and texture.
  • Prep Ahead: You can prepare the apples and toppings ahead of time, but wait to assemble until just before serving to prevent browning and sogginess.

Comprehensive FAQ

Here are some frequently asked questions about Caramel Apple Nachos:

  • What kind of apples are best for apple nachos? Crisp varieties like Honeycrisp or Granny Smith work well.
  • How can I prevent my apples from turning brown? Squeeze a bit of lemon juice over the cut apples to keep them fresh.
  • Can I make these nachos ahead of time? You can prep the ingredients but assemble just before serving for the best texture.
  • What are some good toppings for apple nachos? Mini chocolate chips, toffee bits, and crushed nuts are all great choices!
  • How do I store leftovers? Store in an airtight container in the fridge for up to two days.
  • Can I use caramel dip instead of sauce? Yes, caramel dip can work just as well for drizzling.
  • What if I want to make them healthier? Try using dark chocolate chips and adding more fruit toppings.
  • Are these nachos suitable for parties? Absolutely! They’re fun, interactive, and visually appealing.

Nutritional Insights

When it comes to indulgent treats like Caramel Apple Nachos, balance is key. Here are some nutritious pointers:

  • Portion Control: Enjoy in moderation — it’s easy to overindulge with sweets!
  • Fresh Ingredients: Use fresh apples and quality toppings to maximize flavor without excessive sugars.
  • Dietary Adaptations: You can make these nachos gluten-free by using certified gluten-free toppings.
  • Mindful Eating: Savor each bite; it’s a celebration of flavors and textures!

Recommended Equipment

To make your Caramel Apple Nachos, you’ll need:

  • Cutting Board: For slicing your apples easily.
  • Sharp Knife: A good knife will help achieve even apple slices.
  • Mixing Bowl: To toss the apple slices with lemon juice.
  • Serving Platter: Present your nachos beautifully on a large platter for sharing.

Serving Suggestions

Now that you’ve created your masterpiece, here are some serving ideas:

  • Family Style: Serve the nachos on a large platter for everyone to share and enjoy.
  • Individual Portions: For a more refined presentation, serve in small bowls.
  • Pair with Drinks: These nachos go wonderfully with apple cider or a warm cup of tea.
  • Festive Garnish: Add fresh mint leaves or edible flowers for an elegant touch.

In conclusion, Caramel Apple Nachos aren’t just a treat; they’re an experience! The joy of creating this dish comes from the vibrant colors, the delightful crunch of apples, and the sweet, gooey caramel that ties it all together. Whether you’re gathering with family or celebrating with friends, this recipe is sure to bring smiles and satisfaction. So grab your ingredients, invite your loved ones into the kitchen, and make some delicious memories together!

Caramel Apple Nachos

Prep Time 10 minutes
Cook Time 5 minutes
Total Time 15 minutes
Servings 4 servings
Calories 250
A fun and delicious treat featuring fresh apple slices topped with caramel and chocolate, perfect for sharing.

Ingredients

Fruits

  • 2 pieces apple (preferably tart apples)
  • 0.5 lemon lemon (for juice)
  • 0.33 cup caramel sauce
  • 0.33 cup white chocolate chips
  • 2 tablespoons mini chocolate chips
  • 2 tablespoons Heath toffee bits
  • 2 tablespoons salted peanuts
  • 2 tablespoons mini M&Ms
  • 2 teaspoons sprinkles

Instructions 

  • Slice apples, squeeze lemon juice over, and toss to prevent browning.
  • Arrange apple slices on a plate and drizzle with caramel and melted chocolate.
  • Top with desired toppings like mini chocolate chips, toffee bits, peanuts, M&Ms, and sprinkles. Serve immediately.

Notes

Enjoy right away for the best texture and flavor.
Calories: 250kcal
Cost: $10
Course: Dessert
Keyword: apple, caramel, chocolate

Unleashing the Magic of Chai-Spiced Granola: A Comforting Culinary Adventure

Welcome, dear friend! Today, we embark on a delightful culinary journey to create a dish that will not only fill your kitchen with the enchanting aromas of the Mediterranean but also warm your heart. This is not just any granola; this is Chai-Spiced Granola, a symphony of spices that dances on your palate and fills your soul with joy. Imagine waking up to the sweet scent of cinnamon, ginger, and cardamom wafting through the air, beckoning you to indulge in a bowl of crunchy, nutty goodness. Whether you enjoy it as a breakfast option or a snack, this homemade granola is gluten-free, dairy-free, and naturally sweetened to perfection.

In this comprehensive guide, we’ll explore the magic of how to make chai-spiced granola, delve into the ingredients, share some pro tips, and highlight the unique variations you can create. So grab your apron, and let’s get cooking!

Why You’ll Love This Recipe

  • Simple and Quick: This recipe is straightforward, requiring just a few simple steps to create a delicious and satisfying snack.
  • Healthy and Nutritious: Packed with wholesome ingredients like oats and nuts, this granola is a great source of fiber and healthy fats.
  • Customizable: You can easily adapt this recipe to include your favorite nuts, seeds, or dried fruits, making it uniquely yours.
  • Perfect for Meal Prep: This granola stores beautifully, allowing you to make a big batch and enjoy it throughout the week.
  • Versatile Usage: Enjoy it with yogurt, milk, or as a topping on smoothie bowls, or even straight from the jar as a delightful snack.

Let’s Break Down the Ingredients

Before diving into the cooking process, let’s take a closer look at the ingredients that make this chai spice granola so special. Here’s what you’ll need:


Glass Mason Jars for Oats

★ Recommended Kitchen Tool

Glass Mason Jars for Oats

Make this recipe even easier with a quality Glass Mason Jars for Oats — a must-have kitchen staple!


🛒 See Deals on Amazon →

As an Amazon Associate, we earn from qualifying purchases.
  • 2 cups oats (certified gluten-free): Oats are the base of this granola, providing fiber and a satisfying crunch.
  • 1 cup almonds, chopped: Almonds add healthy fats and a delightful nuttiness. Feel free to swap with other nuts like walnuts or pecans!
  • 1 cup pecans or walnuts, chopped: A beautiful contrast in texture, giving your granola extra crunch.
  • 2 tsp cinnamon: The hallmark spice of chai, cinnamon warms the flavor profile.
  • 1 tsp ginger: Fresh and zesty, ginger adds a lovely kick.
  • 1 tsp cardamom: This aromatic spice contributes to the chai flavor, elevating the dish.
  • 1 tsp allspice: Adds depth and complexity to the flavor mix.
  • 1/4 cup coconut oil: For binding and a touch of tropical flavor; you can also use melted butter or ghee.
  • 1/3 cup honey (or maple syrup): The natural sweetener that brings all the flavors together.
  • 1 tsp vanilla: Vanilla enhances the overall taste, making it even more inviting.

Each ingredient plays a vital role in creating the perfect spiced granola. If you have dietary restrictions, substitutions are easy! Use maple syrup for a vegan option or swap nuts for seeds if allergies are a concern.

Pro Tips for Perfect Chai-Spiced Granola

['Close-up of golden-brown chai-spiced granola with visible nuts and oats.', 'Side view of a bowl filled with crunchy, spiced granola and scattered almonds.', 'Detailed shot of freshly baked chai granola, showcasing its texture and ingredients.', 'A vibrant mix of oats and nuts in a bowl, flavored with chai spices.']

As you embark on your granola-making adventure, here are some expert tips to ensure your chai-spiced granola turns out perfectly every time:

  • Use fresh spices: Freshly ground spices deliver the most vibrant flavors. Check the expiration date on your spice jars!
  • Don’t skip the cooling step: Allowing the granola to cool completely will help it clump together into those delightful chunks.
  • Experiment with mixing: Feel free to add other ingredients like dried coconut or cacao nibs for an extra layer of flavor.
  • Keep an eye on it while baking: Ovens vary, so start checking your granola at the 20-minute mark to prevent over-browning.
  • Add dried fruit after baking: To prevent burning, mix in dried fruits like raisins or cranberries once the granola has cooled.
  • Store in an airtight container: This keeps your granola crunchy and fresh for longer.
  • Adjust sweetness to taste: If you prefer a sweeter granola, add more honey or maple syrup.
  • Get creative with toppings: Top your yogurt or smoothie bowls with this granola, or sprinkle it on salads for a delightful crunch.

Avoiding Common Mistakes

Even the most seasoned cooks encounter challenges. Here are some common mistakes and how to troubleshoot them:

  • Granola is too soft: Ensure you bake it long enough and let it cool completely before breaking it apart.
  • Granola is too hard: If it hardens too much, you may have overcooked it. Keep a close watch during baking!
  • Flavors are muted: Fresh spices can significantly enhance flavor, so always opt for the freshest ingredients.
  • Burnt edges: If you notice browning around the edges, stir the granola halfway through baking to ensure even cooking.

Delicious Variations to Try

Now that you’ve mastered the classic chai spice granola, why not switch it up? Here are some delightful variations:

  • Chocolate Chip Chai Granola: Add dark chocolate chips after cooling for a sweet twist.
  • Coconut Chai Granola: Stir in unsweetened shredded coconut for a tropical flair.
  • Fruit and Nut Chai Granola: Incorporate dried fruits like apricots or cranberries along with mixed nuts for extra texture.
  • Spicy Chai Granola: Add a pinch of cayenne pepper or chili powder for a surprising kick!

Storage and Make-Ahead Instructions

This granola is perfect for meal prep! Here’s how to store it:

  • Store in an airtight container: This will keep your granola fresh and crunchy for up to two weeks at room temperature.
  • Freeze for longer storage: You can freeze granola in a freezer-safe bag for up to three months. Just thaw before serving.
  • Make-ahead breakfasts: Portion your granola into jars with yogurt or milk for a quick grab-and-go breakfast option.

Your Questions Answered: Comprehensive FAQ

Let’s address some common questions you may have:

  • Can I make this recipe vegan? Absolutely! Use maple syrup instead of honey, and it will be completely vegan.
  • How can I make it nut-free? Substitute nuts with seeds like sunflower or pumpkin seeds.
  • What’s the best way to serve granola? Enjoy it with yogurt, as a topping on smoothie bowls, or straight from the jar as a delicious snack.
  • Can I add protein powder? Yes, mix in your favorite protein powder with the dry ingredients for an extra boost.
  • What’s the nutritional value of this granola? It provides a good balance of fiber, healthy fats, and protein, making it a nutritious choice for breakfast or snacking.
  • How can I adjust the sweetness? You can increase or decrease the amount of honey or maple syrup based on your preference.
  • Is this granola gluten-free? Yes, as long as you use certified gluten-free oats, this granola is gluten-free.
  • Can I make this with quick oats? It’s best to use rolled oats for the best texture, as quick oats can become mushy.

Nutritional Tips and Dietary Adaptations

This chai-spiced granola is not just delicious; it’s also packed with nutritional benefits:

  • High Fiber: Oats and nuts provide dietary fiber, which supports digestive health.
  • Healthy Fats: Nuts and coconut oil provide healthy fats that are essential for your body.
  • Vitamins and Minerals: The spices used are rich in antioxidants and have anti-inflammatory properties.
  • Customizable to Dietary Needs: Easily adapt this recipe for paleo, vegan, or keto diets with minor adjustments.

Essential Equipment for Your Granola Adventure

To make the best chai-spiced granola, here are some essential tools you’ll need:

  • Baking Sheet: A large baking sheet lined with parchment paper ensures even baking and easy cleanup.
  • Mixing Bowls: Use a large mixing bowl for combining your dry and wet ingredients.
  • Measuring Cups and Spoons: Accurate measurements are key to achieving the perfect balance of flavors.
  • Storage Containers: Airtight containers are essential for keeping your granola fresh.

Serving Suggestions to Elevate Your Experience

Once your granola is ready, here are some delicious ways to serve it:

  • With Yogurt: Layer it with Greek yogurt and fresh fruits for a delightful parfait.
  • On Smoothie Bowls: Sprinkle it on top of your favorite smoothie bowl for a crunchy texture.
  • As a Snack: Keep a jar handy for a quick energy boost throughout the day.
  • In Baking: Use it as a topping for muffins or as a crunchy layer in desserts.

In Conclusion: Join the Celebration!

Dear friend, I hope this guide has inspired you to create your own batch of chai-spiced granola. Cooking is not just about nourishing our bodies; it’s about celebrating culture, family, and the joy of sharing a meal. So gather your loved ones, whip up this delightful recipe, and experience the love that fills the kitchen with every bite. You’re not just making granola; you’re creating memories that will last a lifetime. Enjoy every crunchy bite!

Chai-Spiced Granola (gluten-free, dairy-free, naturally sweetened)

Prep Time 10 minutes
Cook Time 30 minutes
Total Time 40 minutes
Servings 8 servings
Calories 350
A flavorful, crunchy granola infused with chai spices, perfect for a healthy breakfast or snack.

Ingredients

Dry ingredients

  • 2 cups oats (certified gluten-free)
  • 1 cup almonds, chopped
  • 1 cup pecans or walnuts, chopped
  • 2 tsp cinnamon
  • 1 tsp ginger
  • 1 tsp cardamom
  • 1 tsp allspice
  • 0.25 cup coconut oil
  • 0.33 cup honey (or maple syrup)
  • 1 tsp vanilla

Instructions 

  • Preheat oven to 300°F (150°C) and line a pan with parchment paper.
  • Mix dry ingredients in a large bowl.
  • Melt coconut oil, then stir in honey and vanilla. Microwave until bubbly, then whisk.
  • Pour wet mixture over dry ingredients and stir to coat evenly.
  • Spread mixture on pan and bake for 25-30 minutes. Cool before breaking into chunks.

Notes

Store in an airtight container for up to a week.
Calories: 350kcal
Cost: $15
Course: Breakfast
Cuisine: fusion
Keyword: granola

Welcome to the Warmth of Autumn: Discover the Joy of Pumpkin Pie Bars

As the leaves turn golden and the air gets crisp, there’s nothing quite like the comforting aroma of freshly baked pumpkin pie wafting through the kitchen. These pumpkin pie bars are a delightful twist on a classic dessert, combining a buttery shortbread crust with a creamy, spiced pumpkin filling. Perfect for family gatherings, Thanksgiving feasts, or a cozy evening at home, these bars are sure to become a seasonal favorite. In this ultimate guide, we’ll explore everything you need to know about making the best pumpkin pie bars, from the ingredients to the baking tips, and more!

Why You’ll Love This Recipe

These pumpkin pie bars are not just a treat; they’re an experience! Here’s why you’ll adore them:

  • Easy to Make: With simple ingredients and straightforward steps, these bars can be whipped up in no time, making them great for both novice and seasoned bakers.
  • Perfectly Portable: Unlike traditional pies, these bars can easily be cut into squares and transported, making them an ideal choice for gatherings and potlucks.
  • Rich Flavor: The harmonious blend of spices and creamy pumpkin filling creates a rich flavor profile that’s bound to impress your guests.
  • Versatile Serving Options: Whether served warm with a dollop of whipped cream or chilled straight from the refrigerator, these bars are delicious in any form.
  • Make-Ahead Friendly: These bars can be prepared in advance and stored, making them a stress-free option for busy holiday seasons.

Ingredients Breakdown

Let’s dive into the key ingredients that make these pumpkin pie bars so delightful! Here’s what you’ll need:


Meal Prep Container Set

★ Recommended Kitchen Tool

Meal Prep Container Set

Make this recipe even easier with a quality Meal Prep Container Set — a must-have kitchen staple!


🛒 View on Amazon →

As an Amazon Associate, we earn from qualifying purchases.
  • Unsalted Butter: Use room temperature butter for a smooth and creamy texture in the crust.
  • Granulated Sugar & Light Brown Sugar: This combination balances sweetness and gives the crust an inviting flavor.
  • Eggs: Ensure your eggs are at room temperature for better mixing and texture.
  • All-Purpose Flour: Spoon and level your flour for accurate measurements to ensure the right crust consistency.
  • Pumpkin Puree: Opt for canned pumpkin puree (not pumpkin pie filling) for consistent results.
  • Heavy Cream: This adds richness to the filling, making it creamy and decadent.
  • Spices: Ground cinnamon, pumpkin pie spice, and a hint of salt elevate the flavors beautifully.

Pro Tips for Perfect Pumpkin Pie Bars

['Close-up of golden-brown pumpkin pie bars topped with whipped cream.', 'A slice of pumpkin pie bar with a creamy filling and crispy crust, viewed from the side.', 'Juicy pumpkin pie bars displayed on a rustic wooden table, featuring a smooth topping.', 'Delicious pumpkin pie bars with a rich golden color and light whipped cream dollop.']

To ensure your bars turn out perfectly every time, consider these expert tips:

  • Chill the Dough: Letting the shortbread crust chill for at least 30 minutes before baking helps prevent it from shrinking.
  • Don’t Overbake: Keep an eye on the bars as they bake. They should be set around the edges but still slightly jiggly in the center.
  • Cool Completely: Allow the bars to cool completely at room temperature and then chill in the refrigerator before slicing for cleaner cuts.
  • Use Fresh Spices: Freshly ground spices can enhance the flavor profile immensely compared to pre-ground versions.
  • Try a Blind Bake: For an extra crispy crust, consider blind baking the shortbread for 15 minutes before adding the filling.
  • Serve with Whipped Cream: A dollop of homemade whipped cream or a drizzle of caramel sauce takes these bars to the next level.
  • Experiment with Toppings: Add a sprinkle of chopped nuts or a sprinkle of cinnamon sugar on top for added texture and flavor.

Avoiding Common Mistakes

Even the most seasoned bakers can run into a few hiccups. Here are some common mistakes to avoid:

  • Too Much Flour: Using too much flour can lead to a dry crust. Always spoon and level flour for accuracy.
  • Cold Ingredients: Using cold eggs or butter can affect the final texture of the crust and filling. Let them warm up to room temperature.
  • Skipping the Chilling Step: Chilling the crust helps it maintain its shape during baking. Don’t skip this important step!
  • Not Allowing to Cool: Cutting into the bars too soon can result in a messy presentation. Patience is key!

Delicious Variations to Try

Looking to switch things up? Here are some fun variations to consider:

  • Chocolate Chip Pumpkin Pie Bars: Add semi-sweet chocolate chips to the pumpkin filling for a decadent twist.
  • Pumpkin Cheesecake Bars: Swirl in a cheesecake mixture made from cream cheese for a creamy contrast.
  • Nutty Crust: Incorporate ground nuts like pecans or almonds into the shortbread crust for added flavor and crunch.
  • Spiced Whipped Cream: Flavor your whipped cream with cinnamon or nutmeg for an extra festive touch.

How to Store and Make Ahead

These pumpkin pie bars store beautifully, making them perfect for prepping ahead of time:

  • Refrigerator Storage: Keep the bars tightly covered in the refrigerator for up to 4 days.
  • Freezing: You can freeze the bars for up to 3 months. Just wrap them tightly in plastic wrap and aluminum foil.
  • Thawing: To enjoy, simply thaw in the refrigerator overnight before serving.

Frequently Asked Questions

Here’s a roundup of common questions and answers about pumpkin pie bars:

  • Can I use pumpkin pie filling instead of puree? No, pumpkin pie filling contains added spices and sweeteners that will alter the recipe.
  • Can I make these bars gluten-free? Yes! Substitute all-purpose flour with a 1:1 gluten-free blend.
  • How can I make these bars dairy-free? Use vegan butter and coconut cream in place of heavy cream.
  • What’s the best way to cut the bars? Use a sharp, non-serrated knife and clean it between cuts for neat squares.
  • Can I use fresh pumpkin? Yes, but ensure it’s properly cooked and pureed for the best results.
  • How long do they last? When stored properly, they can last in the refrigerator for up to 4 days.
  • Can I add nuts? Absolutely! Chopped walnuts or pecans can be sprinkled on top before baking.
  • What’s the best way to serve them? Serve chilled with a dollop of whipped cream or a scoop of ice cream!

Nutritional Tips and Dietary Adaptations

These pumpkin pie bars can be adapted to fit various dietary needs:

  • Lower Sugar: Reduce the sugar content by using a sugar substitute suitable for baking.
  • Whole Grain Option: Substitute half of the all-purpose flour with whole wheat flour for added nutrition.
  • Vegan Option: Use flax eggs in place of regular eggs and substitute dairy with plant-based alternatives.

Essential Equipment for Success

To make your pumpkin pie bars, you’ll need a few essential tools:

  • 9×13-inch Baking Pan: A standard size for baking these bars evenly.
  • Mixing Bowls: Various sizes for mixing the crust and filling.
  • Whisk: For combining ingredients smoothly.
  • Spatula: Perfect for spreading the filling over the crust.
  • Measuring Cups and Spoons: Accurate measurements are key to baking success.

Serving Suggestions

To elevate your pumpkin pie bars, try these serving suggestions:

  • Garnish with Whipped Cream: A dollop of freshly whipped cream adds a lovely touch.
  • Drizzle with Caramel Sauce: A sweet caramel drizzle enhances the flavors beautifully.
  • Serve with Ice Cream: Vanilla or cinnamon ice cream pairs perfectly with the warm bars.
  • Top with a Sprinkle of Nuts: Chopped pecans or walnuts add a lovely crunch.

Conclusion: Celebrate the Season with Pumpkin Pie Bars

As you gather around the table this autumn, let these pumpkin pie bars be a centerpiece of joy and warmth. With their rich flavors and delightful texture, they are more than just a dessert; they are a celebration of the season. So grab your ingredients, invite some friends, and let’s create a moment to remember over these delicious pumpkin pie bars. Happy baking!

Pumpkin Pie Bars Recipe

Prep Time 20 minutes
Cook Time 40 minutes
Total Time 1 hour
Servings 12 pieces
Calories 350
Delight in these creamy pumpkin pie bars with a buttery crust and spiced filling, perfect for fall gatherings.

Ingredients

Crust

  • 113 g unsalted butter, room temperature
  • 50 g granulated sugar
  • 50 g light brown sugar, packed
  • 1 pcs egg, room temperature
  • 1 tsp vanilla extract
  • 205 g all-purpose flour, spooned and leveled
  • 0.5 tsp baking powder
  • 0.5 tsp ground cinnamon
  • 0.125 tsp kosher salt

Filling

  • 425 g pumpkin puree (not pumpkin pie filling)
  • 300 ml heavy cream
  • 3 pcs large eggs
  • 100 g light brown sugar, packed
  • 66 g granulated sugar
  • 2 tsp vanilla
  • 1 tbsp cornstarch
  • 1 tsp pumpkin pie spice
  • 1 tsp cinnamon
  • 1 tsp salt

Whipped Cream

  • 240 ml heavy whipping cream
  • 2 tbsp powdered sugar

Instructions 

  • Preheat oven to 350°F (175°C). Prepare crust by mixing butter, sugars, egg, vanilla, flour, baking powder, cinnamon, and salt; press into a baking pan.
  • Mix pumpkin puree, heavy cream, eggs, sugars, vanilla, cornstarch, pumpkin pie spice, cinnamon, and salt; pour over crust.
  • Bake for 40 minutes until set. Cool before slicing.
  • Whip heavy cream with powdered sugar until soft peaks form; serve with bars.

Notes

Chill the bars before serving for best flavor.
Calories: 350kcal
Cost: $15
Course: Dessert
Cuisine: American
Keyword: pumpkin