Author

rafael

Browsing

Why Garlic Mashed Potatoes Are the Heart of Every Family Gathering

Garlic mashed potatoes are more than just a side dish; they are a *central part of family gatherings*, a warm embrace of flavor that transforms every meal into a celebration. With their creamy texture and aromatic garlic infusion, these potatoes are sure to please the palate and create lasting memories around the dinner table. In this comprehensive guide, you will discover everything you need to know about making the *perfect garlic mashed potatoes*, from essential ingredients to serving suggestions that will have everyone reaching for seconds.

Why You’ll Love This Recipe

There are countless reasons to adore garlic mashed potatoes, but here are just a few that stand out:

  • Unmatched Creaminess: The blend of Yukon Gold potatoes and butter creates a luxurious texture that melts in your mouth.
  • Elevated Flavor: The addition of garlic not only enhances the taste but also gives a fragrant aroma that fills your kitchen.
  • Simple Ingredients: You need just a handful of ingredients, making it easy to whip up even on busy weeknights.
  • Versatile Side Dish: These mashed potatoes complement a variety of main dishes, from roasted meats to vegetarian entrees.
  • Family Favorite: This recipe is a guaranteed hit at any gathering, sparking joy and conversation around the table.

Essential Ingredients Breakdown

Before you start cooking, let’s take a closer look at the ingredients you’ll need to create these delicious garlic mashed potatoes:


Professional Chef Knife Set

★ Recommended Kitchen Tool

Professional Chef Knife Set

Make this recipe even easier with a quality Professional Chef Knife Set — a must-have kitchen staple!


🛒 Shop This Tool →

As an Amazon Associate, we earn from qualifying purchases.
  • 3 lbs. Yukon Golds or Russet potatoes: These starchy potatoes are perfect for achieving a creamy consistency. Yukon Golds have a buttery flavor, while Russets offer a fluffier texture.
  • 1/2 cup unsalted butter: Opt for unsalted to control the seasoning. This adds richness and a velvety mouthfeel.
  • 4 garlic cloves, minced: Fresh garlic infuses an aromatic punch; feel free to adjust the amount based on your taste.
  • 1 cup whole milk: Warm milk helps in achieving the desired smoothness. You can substitute with *vegan milk* for a dairy-free option.
  • 1 Tbsp. seasoned salt: This enhances the flavor without overpowering the garlic.
  • Kosher salt and black pepper, to taste: Adjust these to your personal preference for seasoning.
  • Chopped fresh parsley or chives, for garnish (optional): A sprinkle of fresh herbs adds color and brightness to the dish.

How to Make Garlic Mashed Potatoes
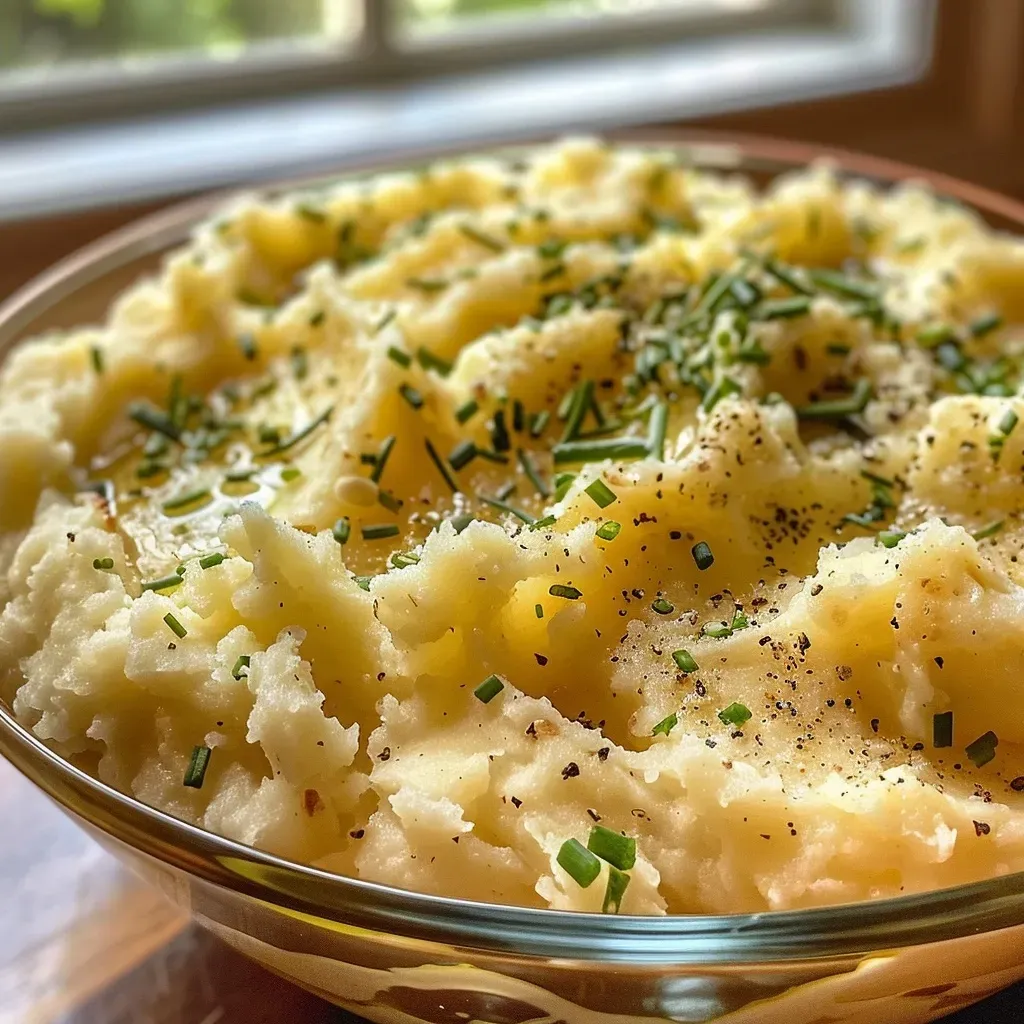
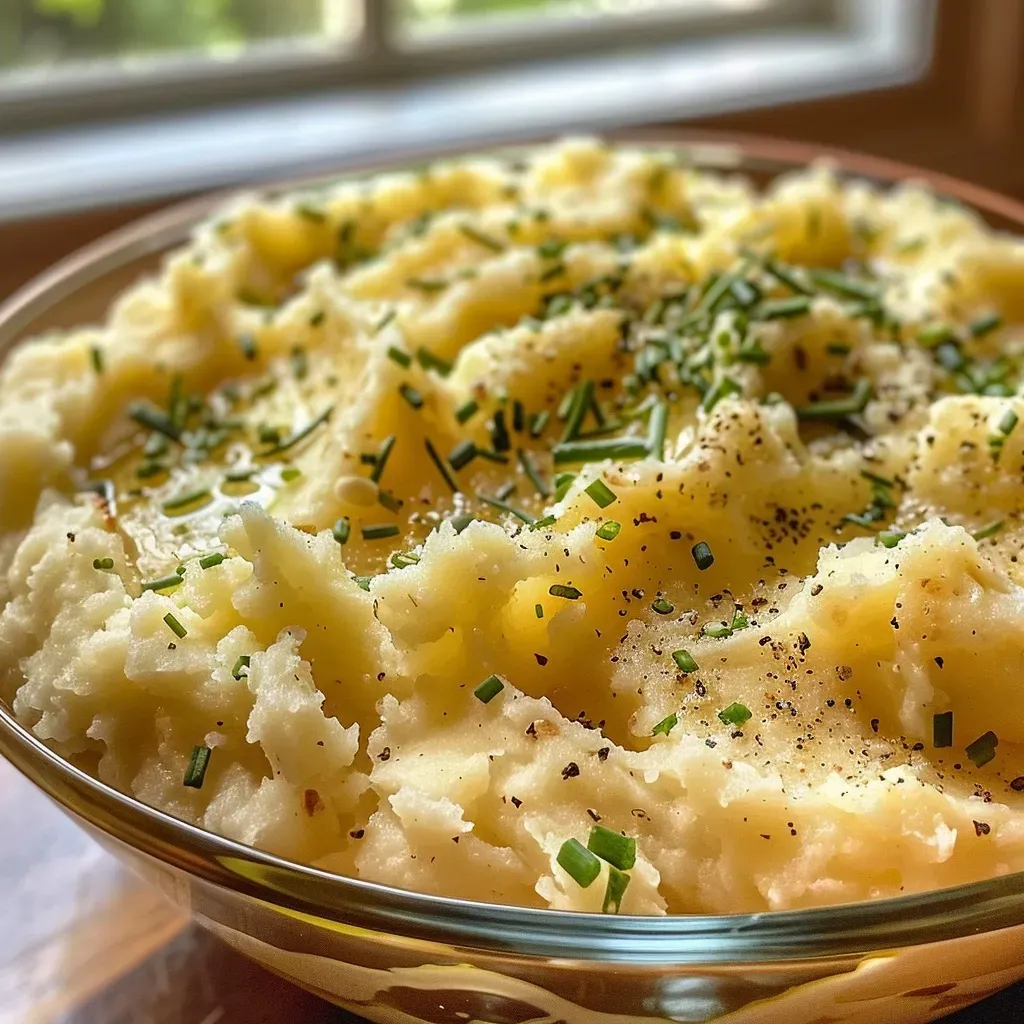
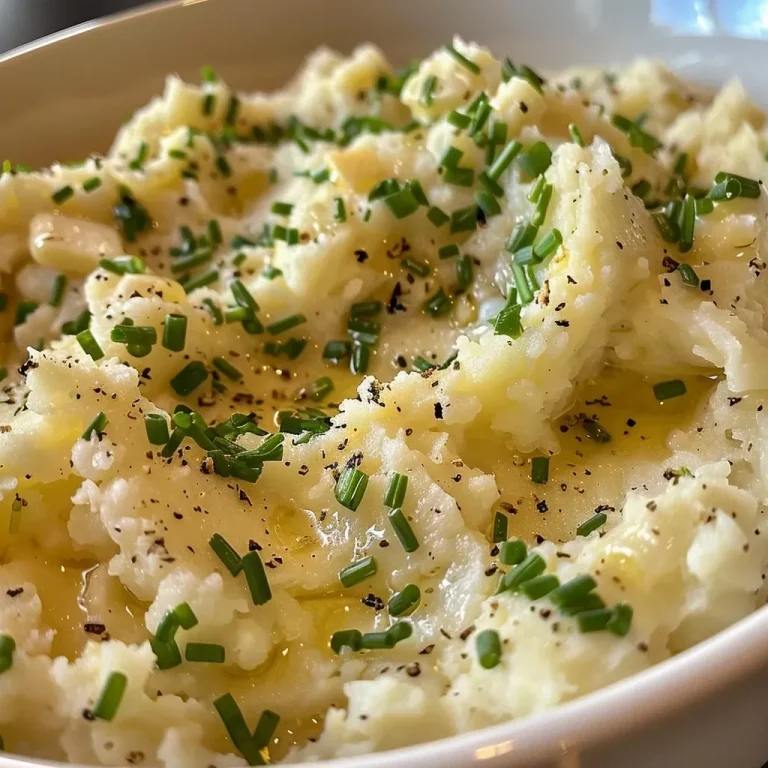
Side view of garlic mashed potatoes in a bowl, showing texture and color.

Follow these simple steps to create the *best garlic mashed potatoes* that will impress your family and friends:

  1. Place the potato chunks in a large pot and cover with cold water. Add a generous pinch of salt to the water. Bring to a boil over medium-high heat, then reduce the heat to medium and let the potatoes simmer until they are fork-tender, about 15-20 minutes.
  2. While the potatoes cook, melt butter in a small saucepan over medium heat. Add the minced garlic and cook until fragrant, about 30 seconds. Be careful not to let the garlic burn. Add the milk and cook just until warmed through, avoiding boiling.
  3. Once the potatoes are cooked, drain them well using a colander. Using a potato masher, mash the potatoes until you reach your desired consistency.
  4. Pour about half of the milk mixture over the potatoes and sprinkle seasoned salt. Fold it in with a wooden spoon or spatula until the potatoes have soaked up the liquid. Repeat with the remaining milk mixture.
  5. Taste the potatoes and season with salt and pepper as needed. If desired, serve garnished with parsley or chives for a pop of color.

Pro Tips for Perfect Garlic Mashed Potatoes

Here are some expert insights to elevate your mashed potatoes:

  • Use warm milk: Adding warm milk helps the potatoes absorb the liquid better, creating a smoother texture.
  • Don’t over-mash: Overworking the potatoes can make them gummy. Mash just until combined and creamy.
  • Flavor variations: Experiment with roasted garlic or add cream cheese for an extra rich flavor.
  • Make ahead: Prepare your mashed potatoes a few hours in advance and keep them warm in the oven.
  • Check seasoning: Always taste and adjust seasonings before serving to ensure optimal flavor.
  • Use a ricer: For ultra-smooth mashed potatoes, consider using a potato ricer instead of a masher.
  • Storage tips: Store leftovers in an airtight container in the fridge for up to 3 days.
  • Reheat gently: When reheating, add a splash of milk to restore creaminess.

Common Mistakes and Troubleshooting

Even the best cooks can run into hiccups. Here’s how to avoid common pitfalls:

  • Gummy potatoes: This typically happens when potatoes are over-mashed. Mash just until combined.
  • Too dry: If your mashed potatoes are too thick, add more warm milk gradually until you reach your desired consistency.
  • Undersalted: If the flavor is lacking, it’s often due to insufficient seasoning. Always taste and adjust before serving.
  • Burnt garlic: Ensure you cook the garlic over medium heat and watch it closely to avoid burning.

Delicious Variations of Garlic Mashed Potatoes

Why not try a twist on the classic? Here are some variations to consider:

  • Roasted Garlic Mashed Potatoes: Roast garlic in the oven until caramelized before adding it to the potatoes for a sweeter flavor.
  • Cheesy Mashed Potatoes: Stir in shredded cheese like cheddar or Parmesan for a rich, cheesy experience.
  • Herbed Mashed Potatoes: Incorporate fresh herbs such as thyme or rosemary for a fragrant twist.
  • Vegan Garlic Mashed Potatoes: Substitute butter with olive oil and use plant-based milk for a dairy-free option.

Storage and Make-Ahead Instructions

Garlic mashed potatoes can be made ahead of time and stored properly:

  • Refrigeration: Store in an airtight container in the refrigerator for up to three days.
  • Freezing: For longer storage, freeze in a freezer-safe container for up to two months. Thaw in the fridge before reheating.
  • Reheating: Reheat gently on the stovetop over low heat, adding a splash of milk or cream to restore texture.

Frequently Asked Questions

Here are some common questions and answers about garlic mashed potatoes:

  • Can I use other types of potatoes? Yes, while Yukon Gold and Russets are recommended for their starchiness, you can experiment with other varieties like red potatoes.
  • Can I make this recipe vegan? Absolutely! Use plant-based milk and substitute butter with olive oil or vegan margarine.
  • How do I prevent the potatoes from turning brown? Keep the peeled potatoes submerged in cold water until you are ready to cook them.
  • What can I serve with garlic mashed potatoes? These mashed potatoes pair well with roasted meats, grilled vegetables, or as a hearty side for a vegetarian meal.
  • How can I make my mashed potatoes fluffier? Avoid over-mashing and use a potato ricer for a light, airy texture.
  • Can I add other flavors? Yes! Feel free to customize with ingredients like cream cheese, sour cream, or even bacon bits for added flavor.
  • How long can I keep leftovers? Leftovers can be stored in the fridge for up to three days. Reheat gently before enjoying.
  • Is it necessary to peel the potatoes? While peeling is traditional for a smooth texture, you can leave the skins on for a rustic feel and added nutrition.

Nutrition Tips and Dietary Adaptations

Here are some nutritional considerations when making garlic mashed potatoes:

  • Caloric content: These mashed potatoes are rich and creamy, so enjoy them in moderation if you’re watching your calorie intake.
  • Gluten-free: This recipe is naturally gluten-free, making it suitable for those with gluten sensitivities.
  • Low-carb options: For a low-carb alternative, try using cauliflower instead of potatoes for a similar texture.

Recommended Equipment

To make your cooking experience easier, consider using the following tools:

  • Large pot: For boiling the potatoes.
  • Colander: For draining the cooked potatoes.
  • Potato masher or ricer: For achieving the perfect texture.
  • Small saucepan: For melting the butter and warming the milk.

Serving Suggestions

To create a truly memorable meal, consider pairing your garlic mashed potatoes with:

  • Herb-roasted chicken: The savory flavors complement the creamy potatoes beautifully.
  • Steak or beef stew: A classic combination that is sure to satisfy.
  • Grilled vegetables: Add a fresh and colorful touch to your plate.
  • Salads: A crisp salad can provide a refreshing contrast to the richness of the potatoes.

In conclusion, garlic mashed potatoes are not just a side dish—they are a comforting experience, a flavorful addition to any meal, and a beautiful way to gather with loved ones. So gather your ingredients, roll up your sleeves, and let’s celebrate the joy of cooking together. Bon appétit!

The Best Garlic Mashed Potatoes Recipe

Prep Time 10 minutes
Cook Time 20 minutes
Total Time 30 minutes
Servings 4 servings
Calories 250
Creamy, flavorful garlic mashed potatoes perfect for any meal. Easy to prepare with simple ingredients for a comforting side dish.

Ingredients

Potatoes

  • 3 lbs Yukon Golds or russet potatoes, peeled and cut into 1 to 2 inch pieces
  • 1/2 cup unsalted butter
  • 4 cloves garlic, minced
  • 1 cup whole milk
  • 1 Tbsp seasoned salt
  • to taste Kosher salt and black pepper
  • for garnish Chopped fresh parsley or chives (optional)

Instructions 

  • Boil potatoes in salted water until fork-tender, about 15-20 minutes.
  • Meanwhile, melt butter and cook garlic until fragrant; warm milk without boiling.
  • Drain potatoes and mash until smooth.
  • Mix in half of the milk mixture and seasoned salt; repeat with remaining milk until desired consistency.
  • Season with salt and pepper to taste; garnish with herbs if desired.
Notes

For extra flavor, roast garlic before adding.
Calories: 250kcal
Cost: $15
Course: Side Dish
Cuisine: American
Keyword: Potatoes

Welcome to the cozy world of my kitchen, where every bowl of soup tells a story and every ingredient dances with flavor! Today, we embark on a culinary journey with my beloved Sausage Potato and Kale Soup. This delightful dish is not just about nourishment; it’s a celebration of warmth, family, and the vibrant Mediterranean lifestyle that I adore. With smoky sausage, tender potatoes, and vibrant kale, this soup is perfect for family feasts or a cozy night in. Let’s dive into this heartwarming recipe that transforms simple ingredients into a comforting bowl of goodness!

Why You’ll Love This Recipe

There are countless reasons to fall in love with this Sausage Potato and Kale Soup. Here are just a few:

  • Comforting warmth: Each spoonful envelops you in a cozy embrace, making it ideal for chilly evenings.
  • Nutritious ingredients: Packed with vitamins and minerals from kale and potatoes, this soup is as healthy as it is delicious.
  • Versatile and adaptable: Feel free to tweak the ingredients based on what you have on hand—this recipe welcomes creativity!
  • Quick and easy: With minimal prep and cooking time, you can whip up this delightful dish in no time!
  • Family-friendly: Kids and adults alike will love the rich flavors and textures, making it a hit at the dinner table.

Ingredients Breakdown

Let’s gather our ingredients for this delightful soup! Here’s what you’ll need to create your masterpiece:


Meal Prep Container Set

★ Recommended Kitchen Tool

Meal Prep Container Set

Make this recipe even easier with a quality Meal Prep Container Set — a must-have kitchen staple!


🛒 See Deals on Amazon →

As an Amazon Associate, we earn from qualifying purchases.
  • 1 lb smoked beef sausage: Options include kielbasa or andouille sausage for a smoky flavor.
  • 1 medium yellow onion: Finely chopped for a sweet and savory base.
  • 4-6 cloves of fresh garlic: Minced to elevate the flavor profile.
  • 1 to 2 heaped teaspoons smoked paprika: This adds a rich, smoky depth to the soup.
  • 4 medium potatoes: Cubed for heartiness; you can also use cauliflower florets for a low-carb option.
  • 32 ounces no sodium chicken bone broth: A flavorful base that enhances the soup.
  • 2 tablespoons heavy whipping cream or half & half: Optional, for a creamy touch.
  • 4 cups roughly chopped kale: Choose Tuscan or curly kale for vibrant color and nutrition.
  • Fresh ground black pepper: To taste, for that perfect kick.

Pro Tips for Perfecting Your Soup

Here are my expert tips to ensure your Sausage Potato and Kale Soup turns out perfectly every time:

  • Brown the sausage well: Allow the sausage to develop a rich, golden crust before adding other ingredients.
  • Don’t rush the onion and garlic: Sauté until translucent to build a deep flavor.
  • Adjust the broth consistency: If you prefer a thinner soup, have extra broth on hand to add as needed.
  • Experiment with spices: Feel free to add a pinch of cayenne or red pepper flakes for extra heat.
  • Fresh herbs at the end: Adding herbs like parsley or thyme just before serving brightens the dish.
  • Let it simmer: Allowing the soup to simmer longer melds the flavors beautifully.
  • Save leftovers for lunch: This soup tastes even better the next day, so make extra!
  • Instant Pot alternative: If you’re short on time, use an Instant Pot for quick cooking.

Common Mistakes and Troubleshooting

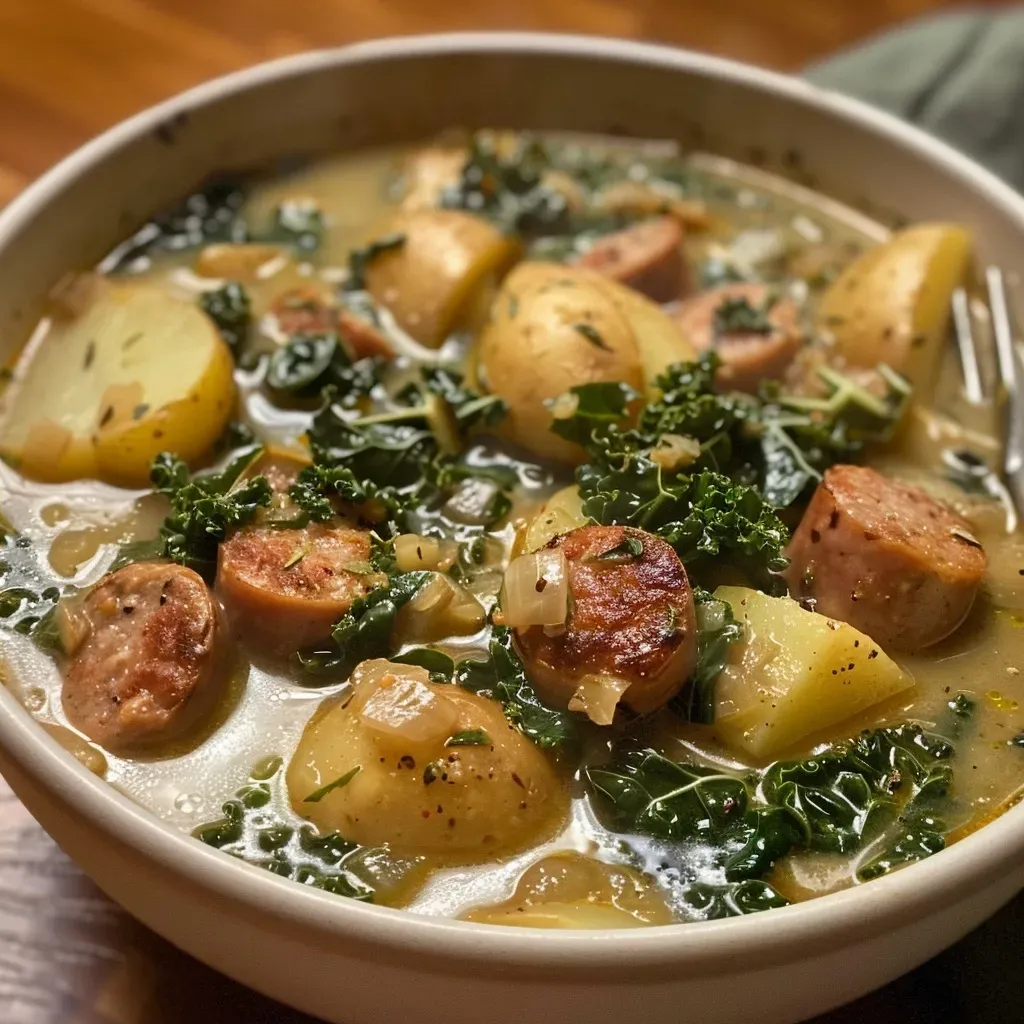
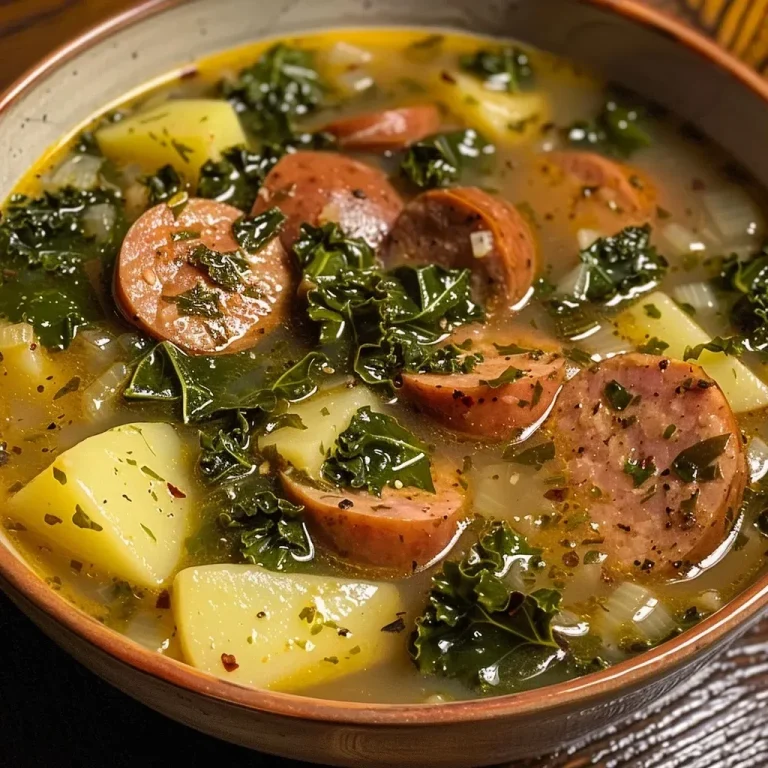
Side view of Sausage Potato and Kale Soup with visible chunks of sausage and fresh kale.

Even the best of us can have a hiccup in the kitchen! Here are some common pitfalls and how to avoid them:

  • Overcooking the kale: Add the kale at the end of cooking to keep it vibrant and tender.
  • Too much grease: If the sausage releases too much fat, drain some before adding other ingredients to avoid a greasy soup.
  • Undercooking the potatoes: Make sure the potatoes are fork-tender to enhance the soup’s texture.
  • Not seasoning properly: Taste as you go and adjust seasoning to your liking for a flavorful finish.

Variations to Try

Want to switch things up? Here are some delicious variations you can try:

  • Vegetarian version: Replace sausage with a plant-based sausage and use vegetable broth.
  • Spicy twist: Add diced jalapeños or use spicy sausage for an extra kick.
  • Herbed delight: Stir in fresh herbs like dill or basil for a garden-fresh flavor.
  • Cheesy goodness: Mix in shredded cheese like cheddar or Parmesan before serving for a creamy finish.

Storage and Make-Ahead Instructions

This soup is perfect for meal prep! Here’s how to store and reheat it:

  • Refrigeration: Store in an airtight container in the fridge for up to 4 days.
  • Freezing: Freeze in individual portions for up to 3 months; just make sure to leave out the cream until reheating.
  • Reheating: Gently reheat on the stove over low heat, adding extra broth if necessary to thin it out.

Frequently Asked Questions

Got questions? I’ve got answers! Here are some FAQs about this beloved soup:

  • Can I make this soup in advance? Absolutely! It tastes even better the next day.
  • Can I use different greens? Yes! Spinach or Swiss chard can be great substitutes for kale.
  • Is this soup gluten-free? Yes, as long as you use gluten-free sausage and broth.
  • Can I add beans for more protein? Definitely! White beans or chickpeas can add a hearty touch.
  • How spicy is this soup? It’s mild, but you can easily adjust the spice level to your preference.
  • What do I serve with this soup? A crusty bread or a simple green salad pairs beautifully with it.
  • How can I make it creamier? Add more cream or use a splash of milk at the end for a richer texture.
  • Can I use fresh herbs instead of dried? Yes! Fresh herbs add a lovely brightness to the soup.

Nutrition Tips and Dietary Adaptations

For those watching their diet, here are some modifications to consider:

  • Low-carb option: Substitute potatoes with cauliflower florets.
  • Low-fat version: Use turkey sausage and reduce or omit the cream.
  • High-protein variant: Incorporate lentils or beans for added protein and fiber.

Essential Equipment Recommendations

Having the right tools makes cooking easier! Here’s what I recommend:

  • Heavy-bottomed saucepan: Ideal for even cooking and preventing burning.
  • Instant Pot: For a quick and easy alternative cooking method.
  • Sharp knife: A good knife makes chopping onions and veggies a breeze.
  • Wooden spoon: Perfect for stirring and scraping the bottom of the pot.

Serving Suggestions

Now that your soup is ready, let’s talk about how to serve it:

  • Garnish with fresh herbs: A sprinkle of parsley or chives adds a pop of color.
  • Serve with crusty bread: Perfect for dipping and soaking up the delicious broth.
  • Pair with a light salad: A simple green salad complements the richness of the soup.

As we wrap up this culinary journey, I hope you feel inspired to create this Sausage Potato and Kale Soup in your own kitchen. Remember, cooking is not just about the food; it’s about the love and memories we share with each meal. So grab your ingredients, invite your loved ones, and let’s celebrate the joyous flavors of life together. Bon appétit!

Sausage Potato and Kale Soup

Prep Time 10 minutes
Cook Time 30 minutes
Total Time 40 minutes
Servings 4 servings
Calories 350
A hearty and flavorful soup combining smoked sausage, potatoes, and kale for a comforting meal.

Ingredients

Meat

  • 1 lb smoked beef sausage, kielbasa, or andouille sausage, sliced into coins

Vegetables

  • 1 medium yellow onion, finely chopped
  • 4-6 cloves minced fresh garlic
  • 1 to 2 heaped teaspoons teaspoons smoked paprika
  • 4 medium potatoes, cubed
  • 32 ounces no sodium chicken bone broth
  • 2 tablespoons heavy whipping cream or half & half
  • 4 cups roughly chopped tuscan or curly kale

Fresh Ground Black Pepper

  • to taste lots of fresh ground black pepper

Instructions 

  • Sauté sausage in a heavy-bottomed pan until golden, then add onion and garlic, cooking until translucent.
  • Add smoked paprika, potatoes, and broth. Simmer until potatoes are soft, then adjust paprika seasoning.
  • Stir in kale and cream, simmer briefly until kale wilts. Serve with black pepper.
  • For Instant Pot: Sauté sausage, add ingredients, cook on high pressure for 6 minutes, then stir in kale and simmer briefly.

Notes

This soup is perfect for a cozy night and can be customized with different greens or sausages.
Calories: 350kcal
Cost: $15
Course: Soup
Cuisine: American
Keyword: Kale, Potato, Sausage

Embrace the Flavors of Fall with Caramel Apple Cinnamon Rolls

As the leaves begin to turn and the air grows crisp, there’s nothing quite like the scent of freshly baked caramel apple cinnamon rolls wafting through your home. This delightful recipe merges the warm, comforting flavors of cinnamon and sweet apples with a luscious caramel drizzle, making it the perfect treat for cozy autumn mornings or festive gatherings. In this post, we’ll explore how to make these rolls from scratch, ensuring you capture the essence of fall in every bite.

Not only are these rolls a feast for the senses, but they also invite you to celebrate traditions and create new memories with friends and family. So, grab your apron, and let’s dive into the delightful world of caramel apple cinnamon rolls!

Why You’ll Love This Recipe

  • Sweet and Savory Delight: The combination of tart Granny Smith apples and sweet caramel creates a flavor profile that dances on your palate.
  • Easy to Make: With simple ingredients and straightforward steps, even beginners can whip these up with confidence.
  • Perfect for Any Occasion: Whether it’s a Sunday brunch, holiday celebration, or just a treat for yourself, these rolls fit the bill.
  • Customizable: This recipe allows for creative variations, so you can adjust it to suit your taste preferences.
  • Warm Comfort: There’s nothing like the warmth of freshly baked rolls to make your home feel inviting and cozy.

Ingredients Breakdown

Here’s what you’ll need to make these delicious caramel apple cinnamon rolls:


Digital Kitchen Scale

★ Recommended Kitchen Tool

Digital Kitchen Scale

Make this recipe even easier with a quality Digital Kitchen Scale — a must-have kitchen staple!


🛒 See Deals on Amazon →

As an Amazon Associate, we earn from qualifying purchases.
  • 2 tablespoons (28g) unsalted butter: For a rich, flavorful base.
  • 2 cups diced Granny Smith apples (about 2 medium apples or 200g): These apples add tartness that balances the sweetness.
  • 2 tablespoons (25g) granulated sugar: To enhance the natural sweetness of the apples.
  • 1 teaspoon cinnamon: A warm spice that complements the apples beautifully.
  • 1 can crescent rolls (8 rolls): The easy base for your rolls, saving you time on dough.
  • 2 tablespoons (28g) unsalted butter: For the caramel sauce.
  • ¼ cup (50g) packed brown sugar: Adds depth and richness to the caramel.
  • 2-3 tablespoons heavy whipping cream: To achieve that creamy, decadent frosting consistency.
  • ½ cup (57g) powdered sugar: For sweetness in the frosting.
  • 1 teaspoon vanilla: Enhances the overall flavor profile.

**Substitutions**: If you don’t have Granny Smith apples, feel free to use Honeycrisp or Fuji for a sweeter option. For a dairy-free version, substitute the butter and cream with plant-based alternatives.

Step-by-Step Cooking Instructions

A side view of freshly baked cinnamon rolls topped with caramel and apple pieces.

Let’s roll up our sleeves and get started on these delicious caramel apple cinnamon rolls!

  • Step 1: Preheat and Prepare
  • Preheat your oven to 350°F (175°C). Line a cookie sheet with parchment paper or a silpat liner to prevent sticking.

  • Step 2: Cook the Apples
  • In a small skillet, melt the butter over low-medium heat. Add the diced apples, cinnamon, and granulated sugar. Cook, stirring occasionally, until the apples become tender and start to turn translucent, about 15 minutes. Let cool for at least 10 minutes.

  • Step 3: Assemble the Rolls
  • Unroll the crescent rolls on a clean cutting board, pressing the seams together to form one large rectangle. Evenly spread the cooked apple mixture over the dough. Roll it up tightly from one end to the other, and slice into 8 equal portions. A serrated knife works best for this!

  • Step 4: Bake
  • Place the sliced rolls on the baking sheet, either spaced apart or close together for a doughy center. Bake for 15-25 minutes, or until golden brown on top and cooked through.

  • Step 5: Drizzle with Caramel and Icing
  • While the rolls bake, prepare the frosting. In a saucepan, melt the butter and brown sugar together over medium heat, stirring constantly for 2 minutes. Remove from heat and whisk in the powdered sugar, vanilla, and 2 tablespoons of cream. Adjust the consistency by adding more cream if needed.

  • Tip: If you’re pressed for time, you can skip making the frosting and use store-bought caramel ice cream topping instead!

Pro Tips for Perfect Rolls

  • Use Fresh Apples: Opt for firm, fresh apples for the best texture and flavor.
  • Don’t Overmix the Dough: When preparing the crescent rolls, be gentle to maintain a tender texture.
  • Watch the Baking Time: Keep an eye on the rolls to prevent overbaking; every oven is different.
  • Experiment with Spices: Add nutmeg or allspice for a unique twist on the flavor.
  • Let Cool Before Serving: Allow the rolls to cool slightly before drizzling with frosting to achieve the perfect consistency.
  • Make Ahead: Prepare the apple filling the night before and assemble the rolls in the morning for a quicker bake.
  • Consider Different Frostings: Try cream cheese frosting for a tangy contrast to the sweetness.
  • Pair with Coffee: These rolls are excellent with a cup of warm coffee or tea for a cozy treat.

Common Mistakes and Troubleshooting

Even the best bakers encounter hiccups. Here are some common issues and how to solve them:

  • Rolls Not Rising: Ensure your crescent rolls are fresh and not expired; old dough can lead to flat rolls.
  • Filling Leaking Out: Roll the dough tightly and seal the edges well to prevent filling from escaping.
  • Burnt Caramel Sauce: Keep an eye on the heat while making the frosting; stir continuously to prevent sticking.
  • Too Much Cinnamon: If the cinnamon flavor is overpowering, balance it with more apple or cream in the frosting.

Delicious Variations

Feeling adventurous? Here are some fun twists to try with your caramel apple cinnamon rolls:

  • Pecan Caramel Apple Rolls: Add chopped pecans to the apple filling for an extra crunch.
  • Chocolate Drizzle: Drizzle melted chocolate on top of the caramel for a decadent treat.
  • Maple Syrup Glaze: Replace the caramel sauce with a maple syrup glaze for a different flavor profile.
  • Berry Apple Fusion: Mix in some fresh berries with the apples for a burst of color and flavor.

Storage and Make-Ahead Instructions

These caramel apple cinnamon rolls are best enjoyed fresh, but you can store leftovers for later:

  • Room Temperature: Keep in an airtight container for up to 2 days.
  • Refrigerator: Store in the fridge for up to a week if you need to keep them longer.
  • Freezer: Freeze unbaked rolls for up to 2 months. Thaw and bake when ready to enjoy!

Comprehensive FAQ

  • Can I use different types of apples? Yes! Feel free to experiment with your favorite apples.
  • What can I use instead of crescent rolls? You can use puff pastry or homemade dough if you prefer.
  • Can I make this gluten-free? Yes, use gluten-free crescent rolls and ensure your other ingredients are gluten-free.
  • How do I reheat them? Reheat in the microwave or oven until warm.
  • Can I make the filling ahead of time? Absolutely! Prepare the apple filling a day ahead and store it in the refrigerator.
  • What’s the best way to serve these rolls? Serve warm with a drizzle of caramel sauce and a sprinkle of powdered sugar.
  • How can I adjust the sweetness? Feel free to reduce the sugar in the filling or frosting to suit your taste.
  • Can I add nuts to the filling? Yes! Chopped walnuts or pecans can add a wonderful texture.

Nutrition Tips and Dietary Adaptations

For those watching their diet, consider these adjustments:

  • Lower Sugar: Reduce the sugar in the filling and frosting to cut calories.
  • Substitute Ingredients: Use unsweetened applesauce instead of butter for a lower-fat option.
  • Portion Control: Enjoy smaller portions to satisfy your sweet tooth without overindulging.

Equipment Recommendations

Here are some handy tools to have on hand for making these rolls:

  • Sharp Knife: A serrated knife works best for slicing the rolls.
  • Skillet: A non-stick skillet is ideal for cooking the apple filling.
  • Baking Sheet: Use a rimmed baking sheet for easy transfer and clean-up.
  • Parchment Paper: This helps prevent sticking and makes for easier clean-up.

Serving Suggestions

Pair your caramel apple cinnamon rolls with:

  • Fresh Fruit: Serve with slices of fresh apples or pears for a balanced plate.
  • Coffee or Tea: A warm beverage complements the sweetness beautifully.
  • Ice Cream: A scoop of vanilla ice cream on the side creates a delightful contrast.

Conclusion

There you have it — a comprehensive guide to making the most delightful caramel apple cinnamon rolls! This recipe not only captures the essence of fall but also brings warmth and joy to your table. So, gather your loved ones, whip up a batch, and celebrate the flavors of the season together. Happy baking!

Easy Caramel Apple Cinnamon Rolls

Prep Time 15 minutes
Cook Time 20 minutes
Total Time 35 minutes
Servings 8 pieces
Calories 250
Delight in these warm, gooey cinnamon rolls filled with caramelized apples and topped with a luscious frosting. Perfect for a cozy breakfast or dessert.

Ingredients

Dough and Filling

  • 28 g unsalted butter
  • 200 g diced Granny Smith Apples (about 2 medium apples)
  • 25 g granulated sugar
  • 1 tsp cinnamon
  • 8 rolls crescent rolls
  • 50 g packed brown sugar
  • 45 ml heavy whipping cream (2-3 tablespoons)
  • 57 g powdered sugar
  • 1 tsp vanilla

Instructions 

  • Preheat oven to 350°F (175°C). Line a baking sheet with parchment.
  • Melt butter, cook apples with cinnamon and sugar until translucent, then cool.
  • Unroll crescent dough, press seams, spread apple filling, roll up, and slice into 8 pieces. Place on baking sheet.
  • Bake for 15-25 minutes until golden.
  • Make frosting by melting butter and brown sugar, then whisk in powdered sugar, vanilla, and cream. Drizzle over warm rolls.

Notes

You can skip the frosting and serve with caramel ice cream topping for extra indulgence.
Calories: 250kcal
Cost: $12
Course: Breakfast
Cuisine: American
Keyword: apple, caramel, cinnamon

Warm Your Soul with Creamy Mushroom Ramen

Ah, the cozy embrace of a hot bowl of ramen! If you’re seeking comfort on a chilly evening, look no further than this creamy mushroom ramen. This delightful dish marries the rich flavors of earthy shiitake mushrooms with silky noodles, all enveloped in a luscious cream sauce. Perfect for both intimate dinners and gatherings with loved ones, this recipe is sure to become a staple in your kitchen. Let’s dive into why you’ll love this creamy delight!

Why You’ll Love This Recipe

  • Quick and Easy: With just a few simple steps and under 30 minutes, you can whip up a hearty meal that feels gourmet.
  • Rich and Creamy: The heavy cream creates a velvety sauce that clings to the ramen noodles, elevating the dish to pure comfort food bliss.
  • Versatile Ingredients: You can easily substitute ingredients based on what you have on hand, making this recipe adaptable for any pantry.
  • Nutritious and Satisfying: Packed with shiitake mushrooms, this dish is not only delicious but also offers health benefits like boosting your immune system.
  • Perfect for Meal Prep: This creamy mushroom ramen keeps well in the fridge, making it an excellent option for meal prepping lunches or dinners.

Ingredient Breakdown

Let’s explore the ingredients that make this dish a star:

  • 2 cups water: Essential for boiling the ramen, ensuring the noodles reach the desired tenderness.
  • 1 pack instant ramen noodles: Discard the seasoning packet to control sodium levels and enhance the dish with homemade flavors.
  • 200 grams shiitake mushrooms (sliced): Rich in umami, these mushrooms add depth and texture to the broth.
  • 2 cloves garlic (minced): Fresh garlic infuses the dish with aromatic flavors, elevating the overall experience.
  • 2 tablespoons soy sauce: This adds a savory kick, balancing the creaminess with a touch of saltiness.
  • 1 cup heavy cream: The star of the show, this ingredient transforms the broth into a luxurious, creamy sauce.

Pro Tips for Perfect Creamy Mushroom Ramen

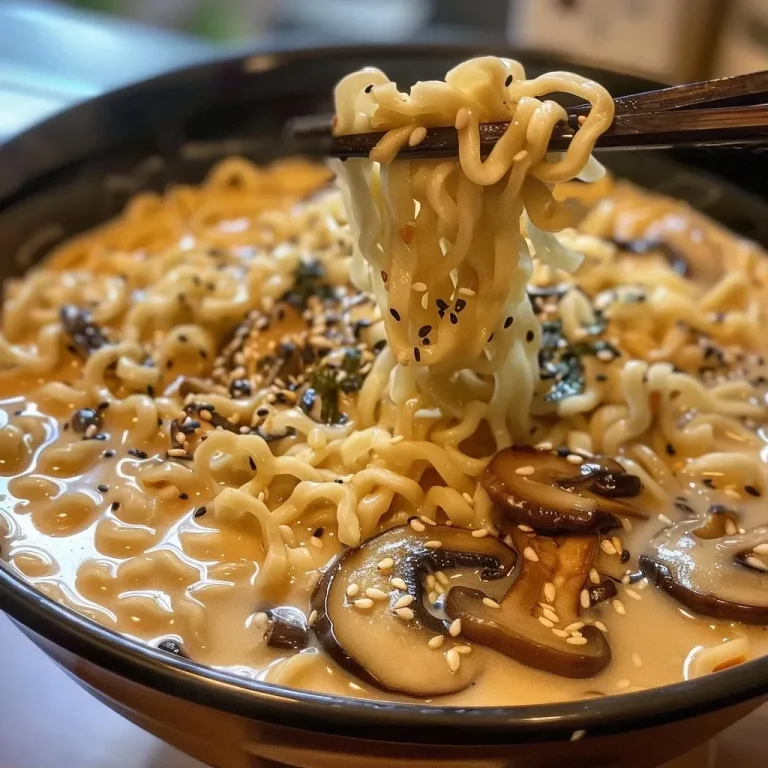
Side view of a bowl of creamy mushroom ramen garnished with mushrooms and garlic.
  • Fresh Ingredients: Always use fresh shiitake mushrooms for the best flavor and texture.
  • Adjust the Creaminess: Feel free to substitute heavy cream with coconut milk for a lighter, dairy-free version.
  • Flavor Boosters: Consider adding chili garlic sauce for a spicy twist, or drizzle with a bit of garlic sauce or sriracha for extra zing.
  • Don’t Rush the Sauté: Take your time to sauté the mushrooms until they’re golden-brown for maximum flavor.
  • Garnish Generously: Top with sliced green onions or additional sautéed mushrooms to enhance presentation and taste.
  • Experiment with Broth: For a deeper flavor, use homemade vegetable broth instead of water.
  • Storing Leftovers: Store any leftover ramen in an airtight container in the fridge for up to 3 days, and reheat on the stovetop.
  • Make It a Meal: Serve with a side of steamed vegetables or a light salad to round out your meal.

Common Mistakes and Troubleshooting

Even the best chefs encounter hiccups! Here are common mistakes and how to avoid them:


Professional Chef Knife Set

★ Recommended Kitchen Tool

Professional Chef Knife Set

Make this recipe even easier with a quality Professional Chef Knife Set — a must-have kitchen staple!


🛒 See Deals on Amazon →

As an Amazon Associate, we earn from qualifying purchases.
  • Overcooking Noodles: Keep an eye on the ramen noodles; they should be tender but not mushy. Aim for about 3 minutes of boiling time.
  • Too Thick or Thin Sauce: If your sauce is too thick, add a splash of water or broth to loosen it. If it’s too thin, let it simmer for a few extra minutes.
  • Skipping the Garlic: Don’t skip the garlic! It’s essential for building flavor; sautéing it with the mushrooms enhances its fragrance.
  • Not Deglazing: Be sure to stir the soy sauce into the mushroom mixture to deglaze the pot, ensuring you capture all those flavorful bits stuck to the bottom.

Creative Variations

Want to switch things up? Here are some fun variations to try:

  • Spicy Mushroom Ramen: Add sliced jalapeños or a teaspoon of red pepper flakes to the sauté for a kick.
  • Asian-Inspired: Mix in bok choy or baby spinach for an Asian twist, adding a pop of color and nutrition.
  • Protein Boost: Incorporate cooked chicken, shrimp, or tofu for a heartier meal.
  • Herbaceous Twist: Fresh herbs like cilantro or basil can be added just before serving for a refreshing touch.

Storage and Make-Ahead Instructions

This creamy mushroom ramen is not only a joy to eat but also perfect for meal prep!

  • Storing Leftovers: Keep any remaining ramen in an airtight container in the fridge for up to 3 days. Reheat gently on the stovetop.
  • Make Ahead: You can prepare the creamy sauce ahead of time and store it separately. When ready to serve, quickly cook the ramen and mix it in.
  • Freezing: While the noodles don’t freeze well, you can freeze the mushroom sauce in individual portions for a quick meal later on.

Frequently Asked Questions

Here are some common questions to help you on your cooking journey:

  • Can I use other types of mushrooms? Absolutely! Feel free to experiment with baby bella or even portobello mushrooms for different flavors and textures.
  • Is there a substitute for heavy cream? Yes! You can use coconut milk for a dairy-free alternative that still gives you creaminess.
  • How can I make this dish gluten-free? Use gluten-free ramen noodles and tamari instead of soy sauce.
  • What can I add for extra protein? Consider adding cooked chicken, shrimp, or tofu for a satisfying boost.
  • Can I store this dish? Yes! Store in an airtight container in the fridge for up to 3 days.
  • How do I reheat leftovers? Gently reheat on the stovetop, adding a splash of water if needed to loosen the sauce.
  • What’s the best way to serve this ramen? Top with fresh herbs, green onions, or sesame seeds for added flavor and crunch.
  • Can I make this vegetarian? Yes! Use vegetable broth and skip any meat additions.

Nutritional Tips and Dietary Adaptations

This creamy mushroom ramen can fit into various dietary lifestyles:

  • Low-Carb Option: Substitute the ramen noodles with spiralized zucchini or shirataki noodles for a low-carb alternative.
  • Dairy-Free Version: As mentioned, coconut milk is a fantastic substitute for heavy cream.
  • Vegetarian and Vegan: By using vegetable broth and omitting any meat, you can easily make this dish suitable for vegetarians and vegans.
  • Low-Sodium Adaptation: Opt for low-sodium soy sauce and broth to keep sodium levels in check.

Essential Equipment for Making Creamy Mushroom Ramen

Here’s what you’ll need to create this delicious dish:

  • Large Pot: For boiling the ramen noodles and cooking the sauce.
  • Sharp Knife: For slicing the shiitake mushrooms and mincing garlic.
  • Cutting Board: To provide a safe and clean workspace for your ingredients.
  • Wooden Spoon: Perfect for stirring the sauce and sautéing the mushrooms without scratching your pot.

Serving Suggestions

To make your meal even more delightful, consider serving this creamy mushroom ramen with:

  • Steamed Vegetables: Broccoli, snap peas, or bok choy make excellent sides!
  • Fresh Salad: A light cucumber salad with sesame dressing complements the rich ramen beautifully.
  • Crusty Bread: Serve with a slice of crusty bread to soak up the creamy goodness.

This creamy mushroom ramen is more than just a meal; it’s a celebration of flavors, textures, and memories. So grab your ingredients, gather your loved ones, and indulge in a bowl that warms the soul. Happy cooking!

Creamy Mushroom Ramen

Prep Time 5 minutes
Cook Time 10 minutes
Total Time 15 minutes
Servings 2 servings
Calories 450
A comforting and creamy ramen dish featuring sautéed shiitake mushrooms and rich heavy cream, perfect for a quick and satisfying meal.

Ingredients

Broth and Noodles

  • 2 cups water (for boiling the ramen)
  • 1 pack instant ramen noodles (discard seasoning packet)

Mushrooms and Aromatics

  • 200 grams shiitake mushrooms (sliced)
  • 2 cloves garlic (minced)

Sauces and Cream

  • 2 tablespoons soy sauce (for flavor)
  • 1 cup heavy cream (for creaminess)

Instructions 

  • Boil water in a large pot over medium-high heat.
  • Add noodles to boiling water and cook for 3 minutes. Drain and set aside.
  • Sauté mushrooms and garlic in the same pot for 2-3 minutes.
  • Stir in soy sauce and heavy cream, cook until thickened.
  • Combine noodles with sauce, stir well, and serve hot.

Notes

You can garnish with green onions or additional mushrooms for extra flavor.
Calories: 450kcal
Cost: $12
Course: Main Course
Cuisine: Asian
Keyword: Creamy, Mushrooms, ramen

Introducing the Ultimate Chai Hot Chocolate Experience

Ah, the cozy embrace of a warm drink on a chilly day! If you’re searching for that perfect comfort in a cup, look no further than this delightful Honey Sweetened Chai Hot Chocolate. Infused with aromatic spices and sweetened naturally, this recipe transforms every sip into a celebration of warmth and flavor. Imagine curling up by the fire, the aroma of spices swirling in the air, making each moment feel special. This recipe combines the classic essence of chai with the rich, creamy taste of hot chocolate. Are you ready to dive into a world where every cup feels like a hug? Let’s get started!

Why You’ll Love This Recipe

This isn’t just any hot chocolate; it’s a culinary adventure! Here are five reasons you’ll adore this chai hot chocolate:

  • Invigorating Spice Blend: The combination of ginger, cinnamon, and cardamom offers a warm, comforting flavor profile that dances on your palate.
  • Health Benefits: Each ingredient is selected not just for flavor but also for its immune-boosting properties. Enjoy a treat that loves you back!
  • Natural Sweetness: Using honey or maple syrup means you control the sweetness without refined sugars, making it a healthier indulgence.
  • Perfect for Sharing: This recipe makes enough for you and your loved ones, making it ideal for cozy gatherings or quiet nights in.
  • Easy to Customize: With simple variations, you can adapt the recipe to suit your taste, dietary needs, and preferences.

Ingredient Breakdown and Substitutions

Let’s take a closer look at what goes into this delicious chai hot chocolate and how you can customize it:


Silicone Baking Cups Set

★ Recommended Kitchen Tool

Silicone Baking Cups Set

Make this recipe even easier with a quality Silicone Baking Cups Set — a must-have kitchen staple!


🛒 Check Price on Amazon →

As an Amazon Associate, we earn from qualifying purchases.
  • Milk: Use 3 cups of grass-fed/organic milk for a rich taste, or substitute with full-fat coconut milk for a dairy-free option.
  • Fresh Ginger: A ½ inch chunk, peeled and finely grated, adds a zesty kick. If fresh isn’t available, 1 teaspoon of ground ginger can serve in a pinch.
  • Cinnamon Stick: One stick infuses deep flavor. Ground cinnamon can replace it, but use sparingly (about ½ teaspoon).
  • Fennel Seed, Cloves, Cardamom Pods: These spices are essential for that chai flavor; however, you can adjust the quantities based on your taste preferences.
  • Astragalus Root: This is optional but offers immune support. If unavailable, simply omit it without losing the essence of the recipe.
  • Cacao Powder: Use 2 tablespoons for a rich chocolate flavor. Feel free to switch with fair-trade cocoa powder if needed.
  • Honey or Maple Syrup: Depending on your sweetness preference, use 2-4 tablespoons to taste. Maple syrup works wonderfully for a vegan option!
  • Vanilla Extract: A pinch (about 2 teaspoons) adds depth, enhancing the overall flavor profile.
  • Sea Salt: A pinch of mineral-rich sea salt elevates the sweetness and balances flavors.
  • Grass-Fed Gelatin: For a creamy texture, add 2 tablespoons. This recipe features the only grass-fed gelatin I recommend.

Pro Tips for the Perfect Chai Hot Chocolate

A side view of a rich hot chocolate cup filled with chai flavors, garnished with spices.

Ready to master your chai hot chocolate? Here are some expert insights:

  • Infuse Gradually: Heat the milk over low heat to allow the spices to steep without boiling. This enhances flavor extraction.
  • Blend for Frothiness: After straining, blending the hot mixture incorporates air, creating a delightful frothy top.
  • Experiment with Sweetness: Start with less sweetener and adjust according to your taste. You can always add more!
  • Garnish Creatively: Top with whipped cream, a sprinkle of cinnamon, or even a drizzle of honey for added flair.
  • Perfect for Batch Making: Double up the recipe for gatherings. It keeps warm in a slow cooker, making serving a breeze!
  • Use Quality Ingredients: Opt for organic or high-quality spices and sweeteners for the best flavor and health benefits.
  • Mind the Heat: If using a stovetop, keep an eye on the temperature to avoid scalding the milk.
  • Store Leftovers Wisely: Refrigerate any leftovers and reheat gently on the stovetop for the next cozy moment.

Common Mistakes and Troubleshooting

Cooking can be an adventure, and sometimes things don’t go as planned. Here’s how to troubleshoot:

  • Too Watery? If your chai hot chocolate is too thin, try adding more cacao or gelatin to thicken.
  • Flavor Not Strong Enough? Allow the milk to infuse longer with the spices. You can also add more spices to taste.
  • Too Sweet? Balance out sweetness with a pinch of salt or a splash of milk to dilute.
  • Not Frothy? Ensure you blend the mixture for long enough to incorporate air and create that velvety foam.

Delicious Variations to Try

Feeling adventurous? Here are some creative twists on the classic chai hot chocolate:

  • Minty Chai: Add a few fresh mint leaves during infusion for a refreshing twist.
  • Spicy Orange: Incorporate orange zest for a citrusy brightness that complements the spices beautifully.
  • Nutty Delight: Stir in a tablespoon of almond or hazelnut butter for a creamy, nutty flavor.
  • Vegan Version: Use almond or oat milk and maple syrup to make it completely plant-based.

Storage and Make-Ahead Instructions

Planning ahead? Here’s how to store your chai hot chocolate:

  • Refrigeration: Store leftover hot chocolate in an airtight container in the fridge for up to 3 days.
  • Reheating: Gently reheat on the stovetop over low heat, stirring frequently to avoid scorching.
  • Make Ahead: Prepare the spice-infused milk in advance, strain, and refrigerate. Just blend with cacao and sweetener when ready to serve.

Frequently Asked Questions

Got questions? No worries! Here are some common queries about this chai hot chocolate:

  • Can I use dairy-free milk? Yes! Full-fat coconut milk or almond milk works beautifully in this recipe.
  • How spicy is this recipe? It’s customizable! Adjust the spices based on your personal preference for heat and flavor.
  • Can I make this in a slow cooker? Absolutely! Combine all ingredients in a slow cooker and heat on low for a few hours.
  • Is it kid-friendly? Yes! It’s a delicious treat for all ages. Just adjust the sweetness to your liking.
  • How can I make it more chocolatey? Simply add an extra tablespoon of cacao powder for deeper chocolate flavor.
  • Are there any health benefits? Yes! The spices used have anti-inflammatory and immune-boosting properties.
  • Can I freeze leftovers? It’s best to enjoy it fresh, but you can freeze it for up to a month. Thaw and reheat gently.
  • What’s the best way to garnish it? Whipped cream, cocoa powder, or a sprinkle of cinnamon add a lovely finishing touch!

Nutritional Tips and Dietary Adaptations

This chai hot chocolate can be adapted for various dietary needs:

  • Low Sugar: Use less honey or opt for a sugar substitute like stevia or erythritol.
  • High Protein: Consider adding protein powder to the hot chocolate mix for a post-workout treat.
  • Dairy-Free: As mentioned, use plant-based milk and sweeteners to make it vegan-friendly.
  • Gluten-Free: All ingredients in this recipe are naturally gluten-free, ensuring everyone can enjoy!

Essential Equipment for the Perfect Chai Hot Chocolate

To make your cooking experience smooth and enjoyable, here’s what you’ll need:

  • Medium Saucepan: For infusing the spices and heating the milk.
  • Fine Mesh Strainer: To strain out the spices for a smooth drink.
  • Blender: To create that frothy, creamy texture.
  • Measuring Cups and Spoons: Accurate measurements are key to perfecting your recipe!
  • Whisk: Useful for mixing in the cacao and sweetener evenly.

Serving Suggestions

Now that you have your chai hot chocolate ready, let’s talk about how to serve it:

  • With Treats: Pair it with ginger cookies or spiced biscotti for a delightful snack.
  • Festive Touch: Add a cinnamon stick as a stirrer for a beautiful presentation.
  • Share the Warmth: Serve in large mugs for cozy gatherings, and don’t forget to pass around the marshmallows!

Conclusion: Sip, Savor, and Celebrate

Your journey to creating the perfect Honey Sweetened Chai Hot Chocolate has just begun! Each sip is not just about the flavors but about embracing the warmth of togetherness, culture, and joy. So gather your loved ones, share this delightful drink, and transform an ordinary day into a cherished celebration. I hope you get to try this recipe soon! Until then, happy sipping!

Honey Sweetened Chai Hot Chocolate

Prep Time 10 minutes
Cook Time 10 minutes
Total Time 20 minutes
Servings 2 cups
Calories 250
A cozy, spiced hot chocolate infused with chai flavors and sweetened naturally with honey, perfect for warming up any day.

Ingredients

Dried spices and flavorings

  • 3 cups grass-fed/organic milk or full-fat coconut milk
  • ½ inch fresh ginger, peeled and grated
  • 1 stick cinnamon stick
  • 1.5 teaspoon fennel seed
  • ½ teaspoon whole cloves
  • 5 pods cardamom pods, gently smashed
  • 2 black peppercorns black peppercorns (optional) (optional)
  • ½ star anise pod star anise (optional) (optional)
  • 1 strip astragalus root
  • 2 tablespoons cacao powder or fair-trade cocoa powder
  • 2-4 tablespoons raw honey or organic maple syrup
  • 2 teaspoons vanilla extract
  • Pinch sea salt mineral-rich sea salt
  • 2 tablespoons grass-fed gelatin (recommended brand)

Instructions 

  • Peel and grate the fresh ginger, then add it to a saucepan with the smashed cardamom pods.
  • Add milk, cinnamon stick, fennel seeds, cloves, peppercorns (if using), star anise (if using), and astragalus root. Heat over low for 10 minutes until fragrant.
  • Strain the infused milk into a blender, then add cacao powder, honey, vanilla, sea salt, and gelatin. Blend until frothy and well combined.
  • Carefully pour into mugs and enjoy hot.

Notes

Adjust sweetness to taste and enjoy the warming spices.
Calories: 250kcal
Cost: $15
Course: beverage
Cuisine: fusion
Keyword: chai, Honey, hot chocolate

Welcome to a Cozy Culinary Adventure

As the crisp autumn air sweeps through our neighborhoods, it brings with it the delightful aroma of spiced treats wafting from kitchens everywhere. Today, I invite you to embark on a joyful journey of baking with these delicious Pumpkin White Chocolate Chip Cookies. Imagine biting into a soft, chewy cookie that combines the warm flavors of pumpkin and spices with the rich sweetness of white chocolate. This recipe is not just about baking; it’s about creating a moment of togetherness, sharing, and joy. The perfect treat for cozy evenings at home, festive gatherings, or simply indulging in a sweet moment with loved ones, these cookies are sure to embrace the essence of the season.

Why You’ll Love This Recipe

  • Delicious Flavor: The combination of pumpkin puree and white chocolate creates a taste sensation that’s both comforting and unique. Each bite is a celebration of autumn.
  • Easy to Make: With straightforward steps, even novice bakers can effortlessly whip up these tasty treats without any hassle.
  • Perfect for Any Occasion: These cookies are ideal for fall parties, holiday cookie exchanges, or cozy evenings at home with a warm drink.
  • Customizable: Whether you prefer different types of chocolate chips or want to add nuts, this recipe can adapt to your personal taste.
  • Great for Sharing: Bake a batch and share them with friends and family, spreading the warmth and joy of the season.

Essential Ingredients for Your Pumpkin White Chocolate Chip Cookies

Before we dive into the baking process, let’s take a closer look at the ingredients that will make these cookies truly special. Here’s what you’ll need:

  • ½ cup unsalted butter: Softened to room temperature for easy mixing.
  • ½ cup packed light brown sugar: Adds a rich, caramel-like flavor that balances the pumpkin.
  • ½ cup granulated sugar: For sweetness and texture.
  • 6 tbsp pumpkin puree: (¼ cup plus 2 tbsp) This is the star ingredient that brings moisture and flavor.
  • 1 egg yolk: For richness and binding.
  • 1.5 cups all-purpose flour: Spoon and leveled for accuracy in measurement.
  • ½ tsp cinnamon: Or pumpkin pie spice, to add warmth and depth.
  • 1 tsp vanilla extract: For a lovely aromatic flavor.
  • ½ tsp baking soda: A leavening agent to help the cookies rise.
  • ½ tsp baking powder: Works in tandem with baking soda for a perfect texture.
  • ½ tsp salt: Enhances flavors (decrease to ¼ tsp if using salted butter).
  • 1 cup white chocolate chips: Melts beautifully and complements the pumpkin perfectly.

Steps to Create Your Delicious Cookies

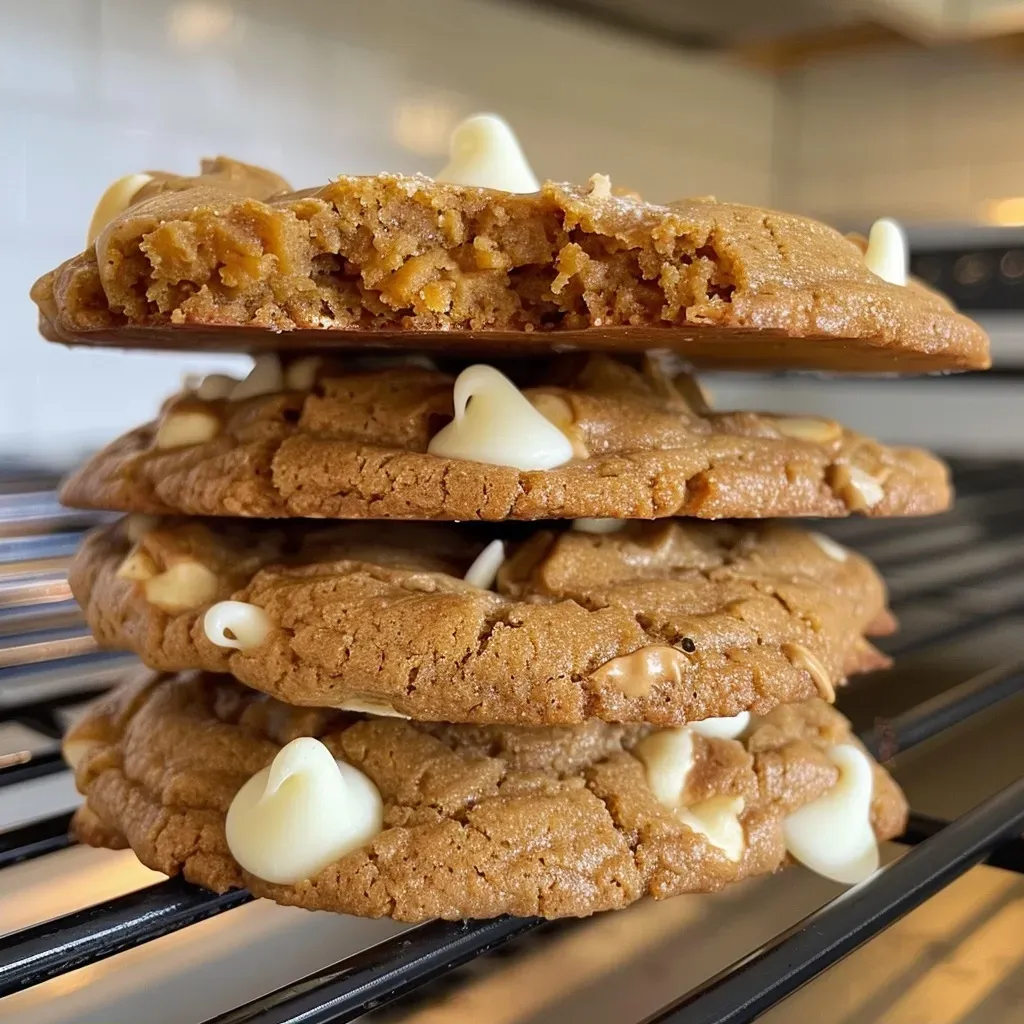
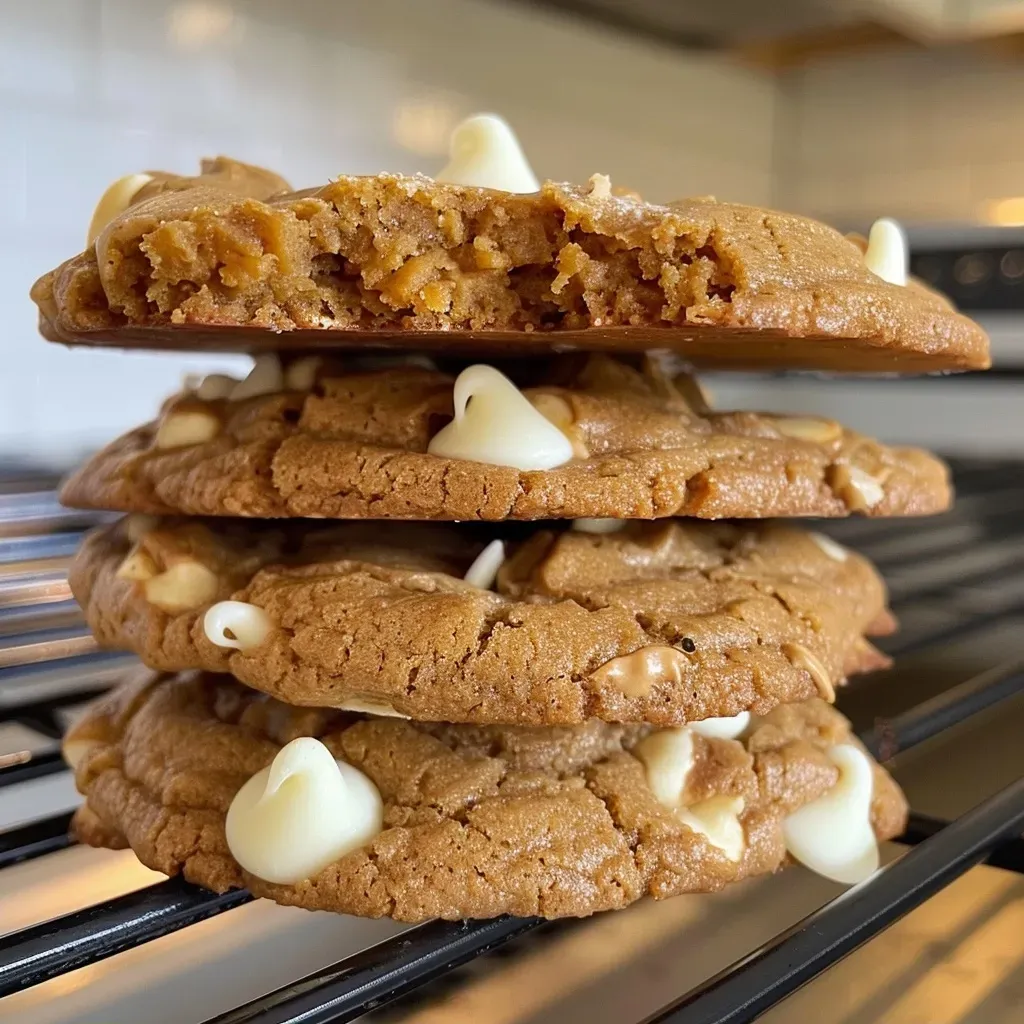
Close-up of moist pumpkin cookies studded with white chocolate chips, highlighting their delicious appeal.

Now that you have your ingredients ready, let’s get started on making these mouthwatering cookies.


Cake Decorating Set

★ Recommended Kitchen Tool

Cake Decorating Set

Make this recipe even easier with a quality Cake Decorating Set — a must-have kitchen staple!


🛒 See Deals on Amazon →

As an Amazon Associate, we earn from qualifying purchases.
  1. Prepare the Pumpkin: Using paper towels or a clean tea towel, wrap up the pumpkin puree in a few layers and squeeze out excess liquid. This step is crucial for achieving the right texture.
  2. Cream the Butters and Sugars: In a mixing bowl, cream the softened butter, granulated sugar, and light brown sugar for 2-3 minutes until fully combined, scraping down the sides of the bowl as necessary. The mixture should be light and fluffy.
  3. Add Wet Ingredients: Mix in the vanilla extract, pumpkin puree, and egg yolk until well combined.
  4. Combine Dry Ingredients: Add the flour, baking soda, baking powder, salt, and cinnamon. Mix until just combined—do not overmix!
  5. Fold in Chocolate Chips: Gently fold in the white chocolate chips, ensuring they are evenly distributed throughout the dough.
  6. Chill the Dough: Chill the cookie dough for 30 minutes. For convenience, you can pre-scoop the dough into 2-tablespoon balls before chilling.
  7. Preheat the Oven: While the dough is chilling, preheat your oven to 350°F (175°C).
  8. Bake the Cookies: Place the chilled dough balls onto a baking sheet lined with parchment paper, keeping them 2-3 inches apart as they will spread.
  9. Bake: Bake in the preheated oven for 9-12 minutes until the edges start to brown. Remove from the oven and immediately tap the pan against the counter to help the cookies settle.
  10. Cool: Let the cookies cool on the baking tray for 5-10 minutes, then transfer them to a cooling rack to finish cooling. Enjoy your delightful creations!

Pro Tips for Perfect Cookies

  • Use Fresh Ingredients: Ensure your pumpkin puree is fresh, as this significantly impacts the flavor and moisture of your cookies.
  • Don’t Overmix: Overmixing can lead to tough cookies; mix until just combined.
  • Chill the Dough: Chilling the dough helps prevent spreading and enhances flavor.
  • Experiment with Spices: Feel free to add a pinch of nutmeg or ginger for an extra flavor kick.
  • Monitor Baking Time: Keep an eye on your cookies, as oven temperatures can vary. Remove them when the edges are golden.
  • Tap the Pan: Tapping the baking pan helps the cookies settle, creating a beautiful shape.
  • Use Quality Chocolate: Opt for high-quality white chocolate chips for the best flavor.
  • Store Properly: Store cookies in an airtight container to keep them fresh for a longer time.
  • Make-ahead Option: The dough can be made in advance and stored in the refrigerator for up to 3 days or frozen for up to a month.
  • Pair with Beverages: Enjoy these cookies with a cozy cup of tea, coffee, or even a glass of milk!

Common Mistakes and Troubleshooting

Even seasoned bakers can face challenges. Here are some common mistakes and how to avoid them:

  • Too Dry or Crumbly Cookies: If your cookies turn out dry, it might be due to too much flour. Always spoon and level your flour when measuring.
  • Overly Sweet Cookies: If you find your cookies too sweet, reduce the amount of sugar slightly next time or add a pinch of salt to balance flavors.
  • Underbaked Cookies: Ensure you bake them long enough, as removing them too soon can lead to gooey centers. They should be slightly firm at the edges.
  • Flat Cookies: If your cookies spread too much, make sure to chill the dough adequately before baking.

Delicious Variations to Try

Want to mix things up? Here are some fun variations to enhance your pumpkin white chocolate chip cookies:

  • Nutty Addition: Add ½ cup of chopped walnuts or pecans for a crunchy texture.
  • Chocolate Chip Combo: Substitute half of the white chocolate chips with semi-sweet or dark chocolate chips for a richer flavor.
  • Spiced Delight: Incorporate additional spices like nutmeg or allspice for a more complex flavor profile.
  • Frosted Treats: Once cooled, drizzle a simple glaze made of powdered sugar and milk over the cookies for an extra sweet touch.

Storage and Make-Ahead Instructions

These cookies are best enjoyed fresh, but they can be stored for later enjoyment!

  • Room Temperature: Store cookies in an airtight container at room temperature for up to a week.
  • Refrigerator: For longer freshness, keep them in the fridge for up to two weeks.
  • Freezing: Cookies can be frozen for up to a month. Place them in a single layer on a baking sheet to freeze, then transfer to a freezer-safe bag.
  • Make-Ahead Dough: You can prepare the cookie dough ahead of time and refrigerate it for up to 3 days or freeze for up to a month. Just thaw in the fridge before baking.

Frequently Asked Questions

  • Can I use pumpkin pie mix instead of pumpkin puree? Yes, but reduce the spices in the recipe as pumpkin pie mix contains added spices and sugar.
  • What should I do if my dough is too sticky? If the dough feels overly sticky, chill it in the refrigerator for 15-20 minutes to firm it up.
  • Can I substitute white chocolate chips? Absolutely! You can use dark chocolate chips or even a mix of both for a delightful twist.
  • How do I know when my cookies are done? The edges should be golden brown while the center remains soft but set.
  • Can these cookies be made gluten-free? Yes, you can substitute all-purpose flour with a 1:1 gluten-free flour blend.
  • What’s the best way to store leftover cookies? Keep them in an airtight container at room temperature or in the refrigerator for longer freshness.
  • Can I add other flavors to this recipe? Definitely! Feel free to experiment with flavors such as almond extract or even a hint of citrus zest.
  • How do I prevent my cookies from spreading too much? Ensure your butter is softened but not melted, chill the dough adequately, and bake on a preheated baking sheet.

Nutritional Tips and Dietary Adaptations

For those minding their dietary intake, here are a few tips:

  • Lower Sugar: Consider using a sugar substitute or reducing the amount of granulated sugar for a lighter version.
  • Healthier Fats: Substitute half of the butter with unsweetened applesauce for a lower-fat option.
  • Vegan Adaptation: Use a plant-based butter and replace the egg yolk with a flaxseed egg (1 tbsp flaxseed meal + 2.5 tbsp water).
  • Whole Grain Option: Swap out all-purpose flour for whole wheat flour for added fiber.

Kitchen Equipment Recommendations

To make your baking experience seamless, here are some essential tools:

  • Mixing Bowls: A set of mixing bowls in various sizes for all your mixing needs.
  • Silicone Spatula: Perfect for folding ingredients and scraping down bowls.
  • Baking Sheet: Use a sturdy baking sheet for even baking.
  • Parchement Paper: Line your baking sheet for easy cleanup and to prevent sticking.
  • Cooling Rack: Essential for cooling your cookies evenly after baking.

Serving Suggestions

These cookies are delightful on their own, but you can elevate your serving experience with a few ideas:

  • Pair with Beverages: Serve them alongside a warm cup of chai, spiced cider, or a classic latte for a comforting treat.
  • Cookie Platter: Create a cookie platter with these cookies, alongside other fall favorites like pecan pie bars or apple crisp.
  • Gift Packaging: Package them in a festive tin as a thoughtful homemade gift for friends and family during the holiday season.

Conclusion: Embrace the Joy of Baking

As you step into your kitchen to create these Pumpkin White Chocolate Chip Cookies, remember that baking is more than just a task; it’s an opportunity to create memories, share love, and celebrate the flavors of the season. So grab your ingredients, put on your favorite music, and let the warmth of the oven fill your home with the sweet scent of autumn. I hope you enjoy every bite of these delightful cookies as much as I do. Happy baking!

Pumpkin White Chocolate Chip Cookies

Prep Time 15 minutes
Cook Time 10 minutes
Total Time 25 minutes
Servings 24 cookies
Calories 150
Delight in these soft, spiced pumpkin cookies loaded with creamy white chocolate chips, perfect for fall treats.

Ingredients

Butter

  • 0.5 cup unsalted butter (1 stick, softened)

Sugar

  • 0.5 cup packed light brown sugar
  • 0.5 cup granulated sugar

Pumpkin Puree

  • 6 tbsp pumpkin puree (¼ cup plus 2 tbsp) (squeezed out excess liquid)

Egg Yolk

  • 1 egg yolk egg yolk

Flour

  • 1.5 cups all-purpose flour (spooned and leveled) (180 g)

Spices

  • 0.5 tsp cinnamon (or pumpkin pie spice)

Vanilla Extract

  • 1 tsp vanilla extract

Baking Soda

  • 0.5 tsp baking soda

Baking Powder

  • 0.5 tsp baking powder

Salt

  • 0.5 tsp salt (decrease to ¼ tsp if using salted butter)

White Chocolate Chips

  • 1 cup white chocolate chips

Instructions 

  • Wrap pumpkin puree in paper towels and squeeze out excess liquid.
  • Cream butter, sugars, and vanilla for 2-3 minutes until smooth.
  • Mix in pumpkin puree and egg yolk.
  • Add dry ingredients and mix until just combined, then fold in chocolate chips.
  • Chill dough for 30 minutes, preheat oven to 350°F, then scoop onto baking sheet and bake for 9-12 minutes.
  • Cool cookies on tray for 5-10 minutes, then transfer to a rack to cool completely. Enjoy!

Notes

Chilling the dough helps prevent spreading and improves texture.
Calories: 150kcal
Cost: $15
Course: Dessert
Cuisine: American
Keyword: pumpkin

Welcome to the Spooktacular World of Mummy Hot Dogs!

As the leaves turn and the air gets crisp, it’s time to embrace the festive spirit with delightful treats that spark joy and laughter. Enter Mummy Hot Dogs—a whimsical addition to any Halloween gathering or cozy family dinner that’s not only fun to make but also a feast for the senses. Imagine flaky, golden crescent dough cradling juicy mini hot dogs, all wrapped up like little mummies, ready to be devoured with laughter and love. Let’s dive into the magic of this recipe and discover why it’s a must-try this season!

Why You’ll Love This Recipe

These Mummy Hot Dogs are more than just a playful dish; they bring a host of benefits that make them perfect for any occasion. Here are five reasons to whip up this crowd-pleaser:

  • Family-Friendly Fun: Kids will love helping to wrap the hot dogs, turning cooking into a delightful family bonding experience.
  • Quick and Easy: With minimal prep time and just a handful of ingredients, these tasty mummies can be on your table in under 30 minutes!
  • Customizable Flavors: Use your favorite hot dogs and dip them in your choice of sauces—ketchup, mustard, or even a spicy aioli for a twist!
  • Perfect for Any Gathering: Whether it’s a Halloween party, game night, or just a cozy family dinner, these bites are sure to impress guests of all ages.
  • Visually Appealing: These adorable mummies are not just delicious; they also make for a stunning centerpiece that adds a festive touch to your table.

Ingredients Breakdown and Substitutions

Gathering the right ingredients is essential for a successful culinary adventure. Here’s what you’ll need along with some creative substitutions:


Digital Kitchen Scale

★ Recommended Kitchen Tool

Digital Kitchen Scale

Make this recipe even easier with a quality Digital Kitchen Scale — a must-have kitchen staple!


🛒 Shop This Tool →

As an Amazon Associate, we earn from qualifying purchases.
  • Mini Hot Dogs: 1 (14–16 oz) package of mini hot dogs (cocktail franks) can be substituted with vegetarian or turkey hot dogs for a healthier option.
  • Crescent Roll Dough: 1 (8 oz) can of refrigerated crescent roll dough is perfect, but you can use puff pastry if you prefer a flakier texture.
  • Mustard: Yellow mustard adds a classic touch. For a gourmet experience, try Dijon or whole-grain mustard.
  • Mayonnaise: This is optional but adds creaminess. You can replace it with sour cream or Greek yogurt for a tangy twist.
  • Candy Eyes: Black sesame seeds or candy eyes make the mummies come to life. If unavailable, use small pieces of olives or dots of mustard.

How to Make Mummy Hot Dogs: Step-by-Step Instructions

Juicy Mummy Hot Dogs displayed with black sesame seeds and candy eyes.

Ready to bring these delightful mummies to life? Follow these simple steps:

  1. Preheat the Oven: Preheat your oven to 375°F (190°C) and line a baking sheet with parchment paper for easy cleanup.
  2. Prepare the Dough: Open the can of crescent roll dough and unroll it onto a cutting board. Pinch any perforations together to create a solid sheet, and then slice thin strips (about ¼ inch wide).
  3. Wrap the Hot Dogs: Pat the mini hot dogs dry with a paper towel. Take 2–3 strips of dough and wrap them around each hot dog, crisscrossing to mimic bandages and leaving a small gap at the top for the eyes. Place them on the prepared baking sheet.
  4. Bake to Perfection: Bake in the preheated oven for 12–14 minutes, or until the dough is puffed and golden brown.
  5. Add the Eyes: Once baked, carefully remove them from the oven. Use a tiny dab of yellow mustard or mayonnaise in the eye gap, then gently press on two black sesame seeds or small candy eyes.
  6. Serve with Dips: Arrange the Mummy Hot Dogs on a platter and serve with bowls of “bloody” ketchup and extra mustard for dipping.

Pro Tips for the Best Mummy Hot Dogs

To elevate your Mummy Hot Dogs game, consider these expert insights:

  • Don’t Rush the Dough: Allow the dough to rest a few minutes after unrolling; this makes it easier to work with.
  • Make Them Ahead: Assemble the mummies ahead of time and refrigerate until ready to bake. You can bake them right before serving for fresh, hot treats.
  • Experiment with Shapes: Try different wrapping techniques to create various mummy styles—some can be more tightly wrapped, while others can be loosely bandaged.
  • Spice Things Up: Add a pinch of garlic powder or paprika to the dough for an extra flavor boost.
  • Perfect Pairings: Serve these with a side of roasted vegetables or a fresh salad to balance the meal.
  • Leftover Dough?: Use any leftover dough to make cheesy breadsticks by sprinkling cheese and herbs before baking.
  • Check for Doneness: Ensure the dough is golden brown, as underbaked dough can be gummy.
  • Fun Presentation: Use a Halloween-themed platter to enhance the spooky vibe!

Common Mistakes and Troubleshooting

Even seasoned cooks can encounter hiccups along the way. Here are common mistakes to avoid and how to troubleshoot them:

  • Too Thick Dough: If the dough strips are too thick, they may not cook through properly. Ensure they are about ¼ inch wide for even baking.
  • Hot Dogs Not Wrapped Properly: If the hot dogs are not wrapped tightly, they may expose too much of the filling. Crisscross the strips well to keep the hot dogs cozy!
  • Burnt Edges: Keep an eye on the mummies during the last few minutes of baking. If they brown too quickly, cover them with foil.
  • Dry Dough: If your dough appears dry, it may have been exposed to air too long. Ensure you keep it sealed until you’re ready to use it.

Variations on Mummy Hot Dogs

Feeling adventurous? Here are some fun variations to try:

  • Cheesy Mummy Hot Dogs: Add a slice of cheese inside the dough before wrapping for a melty surprise.
  • Vegan Mummy Hot Dogs: Use plant-based hot dogs and vegan crescent roll dough for a guilt-free treat.
  • Spicy Mummy Hot Dogs: Wrap jalapeño slices around the hot dogs before adding the dough for a spicy kick!
  • Breakfast Mummies: Swap out hot dogs for breakfast sausages and serve with maple syrup for a unique brunch item.

Storage and Make-Ahead Instructions

Want to prepare these adorable treats in advance? Here’s how to store and reheat them:

  • Refrigerator: Store leftovers in an airtight container in the fridge for up to 3 days. Reheat in the oven at 350°F (175°C) for 10 minutes.
  • Freezer: Assemble the Mummy Hot Dogs, place them on a baking sheet to freeze individually, then transfer to a freezer bag for up to 2 months. Bake directly from frozen, adding a few extra minutes to the baking time.

Frequently Asked Questions

Here are some common questions about making Mummy Hot Dogs:

  • Can I use regular hot dogs? Yes, regular hot dogs work perfectly! Feel free to use any kind you like.
  • How do I store leftovers? Store leftovers in an airtight container in the fridge for up to 3 days.
  • Can I make these in advance? Absolutely! You can assemble them ahead of time and refrigerate until ready to bake.
  • What dips go well with Mummy Hot Dogs? Ketchup and mustard are classics, but you could also serve with ranch dressing or spicy aioli.
  • Can I freeze them? Yes, you can freeze them! Assemble and freeze before baking for later enjoyment.
  • Is this recipe gluten-free? To make it gluten-free, use gluten-free crescent roll dough and hot dogs.
  • How spicy can I make them? Add jalapeños or hot sauce for those who enjoy a kick!
  • What’s the best way to reheat leftovers? Reheat in the oven at 350°F (175°C) to maintain the dough’s crispiness.

Nutritional Tips and Dietary Adaptations

To ensure everyone can enjoy these Mummy Hot Dogs, consider the following adaptations:

  • Low-Carb Version: Use zucchini or eggplant slices wrapped in a low-carb dough for a keto-friendly option.
  • Gluten-Free Option: Use gluten-free dough and hot dogs to accommodate gluten sensitivities.
  • Healthier Hot Dogs: Opt for turkey or chicken hot dogs for a leaner choice.
  • Fiber Boost: Serve with a side of roasted vegetables or a fresh salad to add nutritional value to your meal.

Equipment Recommendations

Here’s what you’ll need to create your Mummy Hot Dogs:

  • Baking Sheet: A sturdy baking sheet lined with parchment paper for optimal baking.
  • Pizza Cutter or Knife: For cutting the dough strips with precision.
  • Parchment Paper: Helps with easy cleanup and prevents sticking.
  • Measuring Cups and Spoons: For accurate ingredient measurement, if you decide to add spices or variations.

Serving Suggestions for Mummy Hot Dogs

Now that your Mummy Hot Dogs are ready, here are some ideas to elevate your presentation:

  • Themed Platter: Serve on a Halloween-themed platter adorned with faux spider webs and plastic spiders.
  • Colorful Sides: Pair with a vibrant Halloween veggie tray featuring bell peppers, carrots, and dip.
  • Creative Drinks: Offer spooky drinks, like “witches’ brew” punch, to complement the festive atmosphere.

Conclusion

There you have it—Mummy Hot Dogs that are not only a treat for the taste buds but also a canvas for creativity and fun! Whether you’re hosting a Halloween bash or simply enjoying a cozy night in, these delicious bites will surely bring smiles and laughter to your table. So gather your loved ones, roll up your sleeves, and let’s make some memories in the kitchen. Bon appétit!

Mummy Hot Dogs

Prep Time 10 minutes
Cook Time 15 minutes
Total Time 25 minutes
Servings 8 pieces
Calories 150
A fun and spooky snack perfect for Halloween parties or kids' gatherings. These mummy hot dogs are easy to make and delightfully creepy.

Ingredients

Meat

  • 1 package mini hot dogs (cocktail franks) (14–16 oz)

Dough

  • 1 can refrigerated crescent roll dough (8 oz)

Condiments & Toppings

  • Yellow mustard
  • Mayonnaise
  • Black sesame seeds or candy eyes
  • Ketchup
  • Extra mustard Extra mustard

Instructions 

  • Preheat oven to 375°F (190°C). Line a baking sheet with parchment.
  • Unroll crescent dough, pinch perforations, and cut into ¼ inch strips.
  • Pat hot dogs dry, wrap with 2–3 dough strips, leaving space for eyes, and place on baking sheet.
  • Bake for 12–14 minutes until golden and puffy.
  • Dot eyes with mustard or mayonnaise, add candy eyes or sesame seeds.
  • Serve with ketchup and extra mustard for dipping.

Notes

Use candy eyes for a more realistic mummy look.
Calories: 150kcal
Cost: $10
Course: Appetizer
Cuisine: American
Keyword: hot dogs

Embrace Autumn with Pumpkin Cinnamon Roll Pancakes

As the leaves turn golden and the air fills with the scent of spices, there’s nothing quite like starting your day with warm, fluffy pumpkin cinnamon roll pancakes. This recipe is a delightful fusion of classic pancake goodness and the rich flavors of pumpkin and cinnamon, making it the perfect breakfast for cozy mornings with family and friends. In this guide, we will walk you through everything you need to know to create these heavenly pancakes that will brighten your day!

Why You’ll Love This Recipe

  • Flavor Explosion: The combination of pumpkin puree, cinnamon, and warm spices creates an irresistible flavor that captures the essence of fall.
  • Quick and Easy: This recipe simplifies pancake-making; even novice cooks can whip up a batch in no time.
  • Customizable: Whether you prefer extra cinnamon, nuts, or chocolate chips, these pancakes can easily be tailored to your taste.
  • Perfect for Meal Prep: Make a double batch and freeze for a quick breakfast option during busy weekdays.
  • Family Delight: Kids and adults alike will adore the sweet cinnamon swirl, making breakfast a fun family affair.

Ingredient Breakdown

Let’s dive into what you’ll need to make these delightful pancakes:

  • Pancake Batter: Start with your preferred pancake mix, replacing half of the oil or butter with pumpkin puree to infuse moisture and flavor.
  • Flour: All-purpose flour provides structure and fluffiness. You can substitute whole wheat flour for a healthier option.
  • Baking Powder: This leavening agent ensures your pancakes rise perfectly, creating a light texture.
  • Pumpkin Pie Spice: A blend of cinnamon, nutmeg, and ginger that enhances the warm flavors of the pancakes.
  • Milk: Whole milk or any plant-based milk works well to achieve the right batter consistency.
  • Egg: Adds richness and helps bind the ingredients together.
  • Brown Sugar: For a hint of sweetness and to deepen the flavor profile.
  • Cinnamon and Butter: Essential for creating the delicious cinnamon swirl that makes these pancakes special.
  • Cream Cheese Icing: A rich, sweet glaze that takes these pancakes to the next level.

Here’s a quick list of the ingredients you’ll need:


5-Speed Electric Hand Mixer

★ Recommended Kitchen Tool

5-Speed Electric Hand Mixer

Make this recipe even easier with a quality 5-Speed Electric Hand Mixer — a must-have kitchen staple!


🛒 See Deals on Amazon →

As an Amazon Associate, we earn from qualifying purchases.
  • 2 cups preferred pancake batter (with half of the oil/butter replaced with pumpkin puree)
  • 1 ½ tsp pumpkin pie spice
  • 1 ½ cups all-purpose flour
  • 3 ½ teaspoons baking powder
  • 1 teaspoon salt
  • 1 tablespoon white sugar
  • 1 ¼ cups whole milk
  • 1 egg
  • 3 tablespoons butter (melted – substitute 1/2 with pumpkin puree)
  • 3 tablespoons unsalted butter (for the swirl)
  • ¼ cup brown sugar
  • ½ teaspoon cinnamon
  • 2 tablespoons cream cheese (room temperature)
  • ½ cup powdered sugar
  • ½ teaspoon vanilla extract
  • Milk (optional, to thin out icing)

Pro Tips for Perfect Pancakes

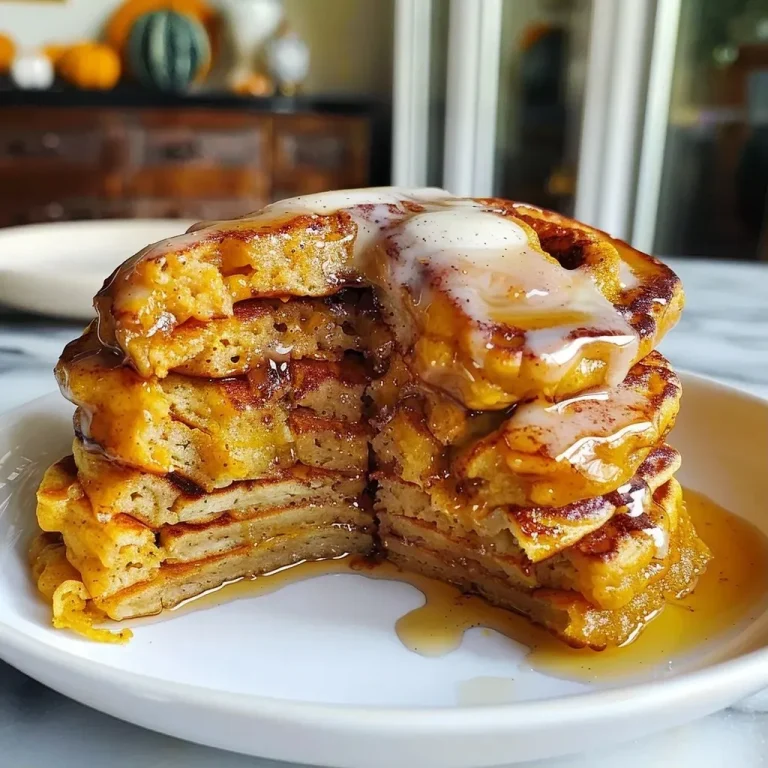
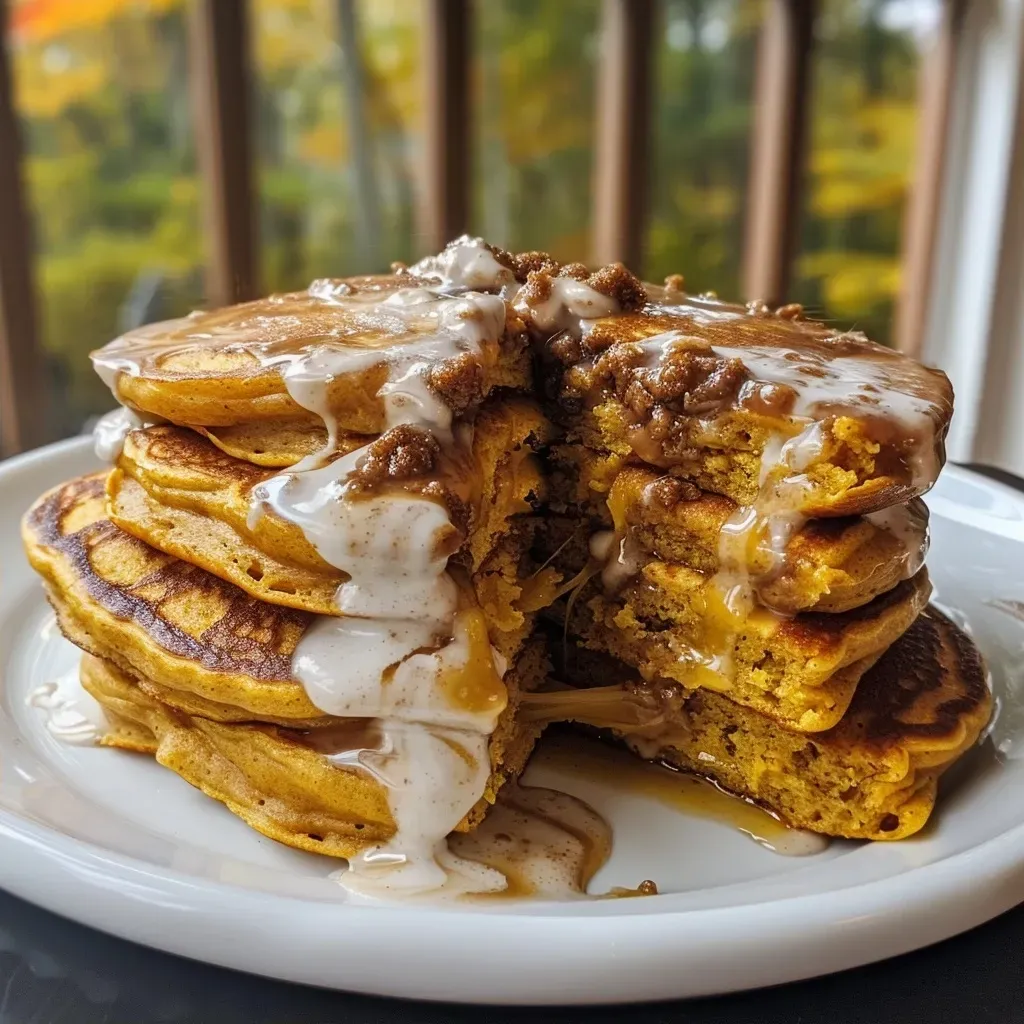
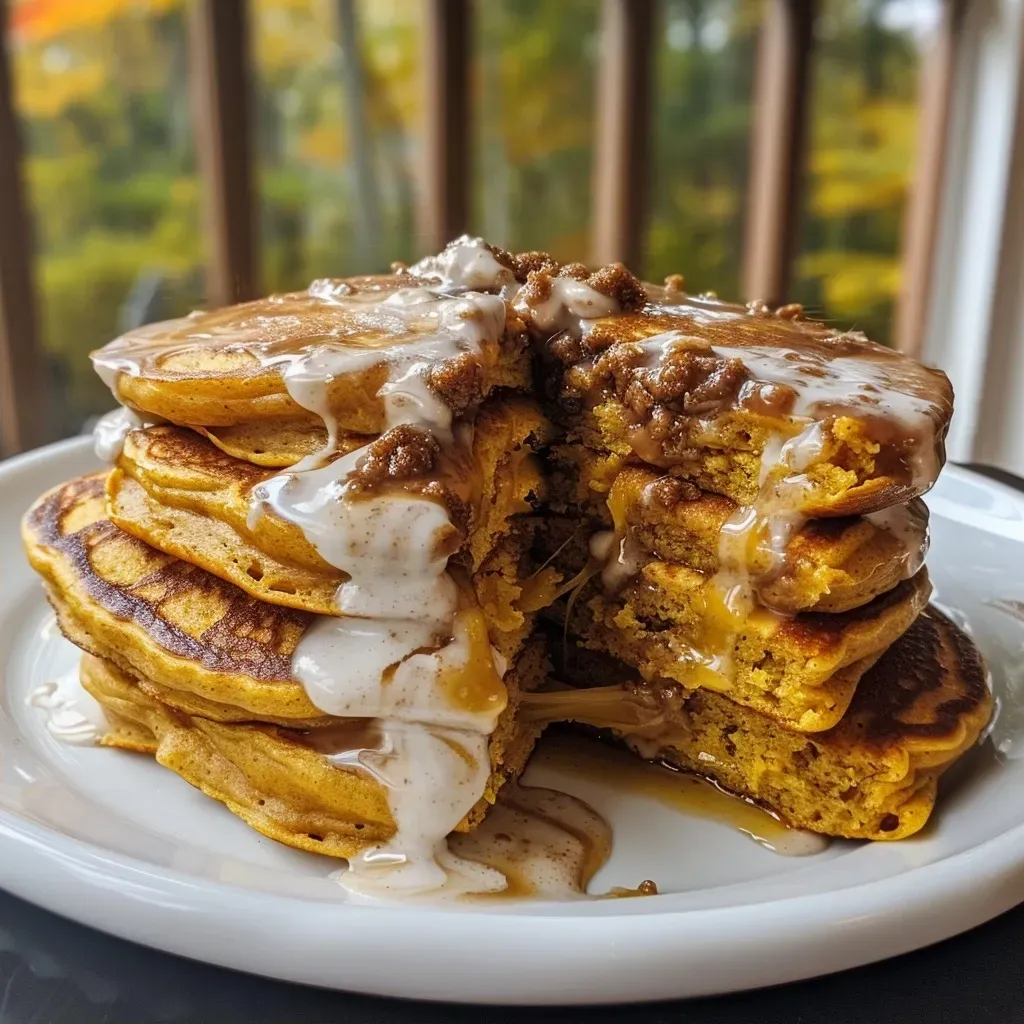
Mouthwatering pumpkin cinnamon roll pancakes drizzled with icing and topped with spices.
  • Let the Batter Rest: Allowing the batter to sit for 10-15 minutes can improve texture and fluffiness.
  • Optimal Pancake Size: Use a 1/3 to 1/2 cup of batter for each pancake; this ensures even cooking.
  • Perfect Heat: Cook on medium heat; too high and your pancakes will burn on the outside before cooking through.
  • Swirl Technique: Use a piping bag for the cinnamon swirl to create beautiful designs.
  • Don’t Crowd the Pan: Give your pancakes room to spread and flip easily.
  • Use Fresh Ingredients: Ensure your baking powder is fresh for maximum fluffiness.
  • Experiment with Add-Ins: Consider adding nuts, chocolate chips, or dried fruits to enhance flavor.
  • Keep Warm: Place cooked pancakes in a warm oven (200°F) while finishing the batch.
  • Make Ahead: Prepare the pancake batter the night before and store it in the fridge, ready for a quick morning cook.

Avoiding Common Mistakes

To ensure your pancakes turn out perfectly, watch out for these common pitfalls:

  • Overmixing the Batter: This can lead to tough pancakes. Mix until just combined.
  • Skipping the Cinnamon Swirl: Don’t miss out on this crucial step; it’s what makes these pancakes unique!
  • Ignoring Cooking Time: Flip your pancakes too early, and they may fall apart. Wait until bubbles form on the surface.

Variations to Try

Feel free to get creative with these pancake variations:

  • Chocolate Chip Pumpkin Pancakes: Add semi-sweet chocolate chips to the batter for a sweet twist.
  • Nutty Crunch: Mix in chopped pecans or walnuts for a delightful crunch.
  • Spiced Apple Topping: Top with warm sautéed apples and a sprinkle of cinnamon for a seasonal touch.
  • Vegan Option: Replace egg with flaxseed meal and use plant-based milk and butter.

Storage and Make-Ahead Instructions

These pancakes are perfect for meal prepping:

  • Refrigerate: Store leftover pancakes in an airtight container in the fridge for up to 3 days.
  • Freeze: Place cooled pancakes in a single layer on a baking sheet, freeze until solid, then transfer to a freezer bag for up to 2 months.
  • Reheat: Use a toaster or microwave to reheat pancakes; add a little butter for extra flavor.

Frequently Asked Questions

Here are some common questions about pumpkin cinnamon roll pancakes:

  • Can I make the batter ahead of time? Yes, you can prepare the batter the night before and store it in the fridge.
  • What can I substitute for pumpkin puree? You can use applesauce or mashed bananas, but the flavor will change slightly.
  • Can I use gluten-free flour? Absolutely! Just ensure your pancake mix is gluten-free.
  • How do I know when to flip the pancakes? Wait for bubbles to form on the surface; this indicates they are ready to flip.
  • What if my pancakes are too thick? Add a splash of milk to reach your desired consistency.
  • Can I add chocolate chips? Yes! Fold them into the batter for a sweet surprise.
  • How do I make the cream cheese icing? Whip together cream cheese, powdered sugar, vanilla, and milk until smooth.
  • Are these pancakes suitable for freezing? Yes, they freeze well and can be reheated easily.

Nutritional Tips and Dietary Adaptations

For those watching their diet, here are some tips:

  • Lower Sugar: Reduce the brown sugar or use a sugar substitute to lower the calorie count.
  • Whole Grains: Opt for whole wheat flour for added fiber.
  • Healthy Fats: Use avocado oil instead of butter for a healthier fat option.
  • Dairy-Free: Use almond or coconut milk and non-dairy butter for a dairy-free version.

Equipment Recommendations

For the best results, consider the following kitchen tools:

  • Non-stick Skillet: Essential for perfectly cooked pancakes without sticking.
  • Piping Bag: For creating beautiful cinnamon swirls in your pancakes.
  • Whisk: A good quality whisk helps combine ingredients smoothly.
  • Measuring Cups and Spoons: Accurate measurements are crucial for consistent results.

Serving Suggestions

Serve your pumpkin cinnamon roll pancakes hot with:

  • Maple Syrup: A classic topping that complements the flavors beautifully.
  • Fresh Fruits: Add sliced bananas, berries, or apples for a refreshing touch.
  • Whipped Cream: A dollop of whipped cream adds indulgence to your breakfast.
  • Chopped Nuts: Sprinkle toasted pecans or walnuts for added crunch.

These pancakes are not just a meal; they are an experience that brings warmth and joy to your mornings. So gather around the table, pour some syrup, and enjoy the delightful taste of pumpkin cinnamon roll pancakes with your loved ones!

Pumpkin Cinnamon Roll Pancakes Recipe

Prep Time 10 minutes
Cook Time 15 minutes
Total Time 25 minutes
Servings 4 servings
Calories 350
Delight in fluffy pumpkin pancakes swirled with cinnamon and topped with a creamy glaze for a cozy breakfast treat.

Ingredients

Pancake Batter

  • 2 cups preferred pancake batter with half of oil/butter replaced with pumpkin puree
  • 1.5 tsp pumpkin pie spice
  • 1.5 cups all-purpose flour
  • 3.5 teaspoons baking powder
  • 1 tsp salt
  • 1 tablespoon white sugar
  • 1.5 tsp pumpkin pie spice
  • 1.25 cups whole milk
  • 1 egg egg
  • 3 tablespoons butter (melted - substitute 1/2 of the butter with 2 Tablespoons pumpkin puree)
  • 3 tablespoons unsalted butter
  • 0.25 cup brown sugar
  • 0.5 tsp cinnamon
  • 4 tablespoons butter (room temperature)
  • 2 tablespoons cream cheese (room temperature)
  • 0.5 cup powdered sugar
  • 0.5 tsp vanilla extract

Optional

  • to taste milk (optionally, to thin out)

Instructions 

  • Make the cinnamon swirl by heating butter, then stirring in brown sugar and cinnamon; set aside to cool.
  • Preheat griddle; prepare pancake batter by mixing all pancake ingredients.
  • Scoop batter onto skillet; pipe cinnamon swirl onto each pancake and cook until golden, flipping after set.
  • Repeat for remaining pancakes; prepare cream cheese glaze and drizzle over pancakes.

Notes

For best results, use fresh pumpkin puree and ensure the glaze is smooth before drizzling.
Calories: 350kcal
Cost: $15
Course: Breakfast
Cuisine: American
Keyword: pumpkin

Discover the Irresistible Flaky Mushroom Galette

Welcome to a culinary adventure where flavor meets tradition! This mushroom galette is not just a dish; it’s an invitation to gather around the table and share in the joy of cooking. Originating from the heart of Mediterranean kitchens, this flaky delight combines earthy mushrooms, creamy ricotta, and a hint of garlic, presenting a perfect balance of textures and flavors. Let’s dive into the details of this recipe that guarantees to impress your guests and become a staple in your home!

Why You’ll Love This Mushroom Galette

Here are just a few reasons why this dish will win a special place in your heart:

  • Easy to Prepare: With simple ingredients and straightforward steps, even novice cooks can master this recipe with ease.
  • Versatile Filling: Adapt the galette’s filling to your taste—whether you prefer wild mushrooms, seasonal vegetables, or a mix of cheeses, the options are endless!
  • Perfect for Any Occasion: Ideal for dinner parties, family gatherings, or a cozy night in, this dish brings warmth and comfort to any table.
  • Make-Ahead Friendly: Prepare the dough and filling in advance, making it a great option for busy days.
  • Savor the Flavors: Each slice is packed with Mediterranean flair, making it a delightful experience for your taste buds.

Essential Ingredients Breakdown

Let’s talk ingredients! Here’s what you’ll need to create your own flaky mushroom galette:


Digital Kitchen Scale

★ Recommended Kitchen Tool

Digital Kitchen Scale

Make this recipe even easier with a quality Digital Kitchen Scale — a must-have kitchen staple!


🛒 See Deals on Amazon →

As an Amazon Associate, we earn from qualifying purchases.
  • 125 g flour: All-purpose flour works best for the crust, giving it the right texture. You can also experiment with whole wheat for a nuttier flavor.
  • 110 g cold butter: Use unsalted butter for the perfect flaky crust. Make sure it’s really cold for the best results.
  • 1 tsp apple cider vinegar: This enhances the flavor and helps create a tender crust.
  • ½ tsp salt: Essential for flavoring the dough.
  • A pinch of pepper: Just a hint to elevate the taste.
  • 30-40 ml very cold water: This helps bind the dough together without warming it up.
  • ½ tsp baking powder: To achieve a flaky texture.
  • 2.5 tbsp ricotta: Creamy ricotta adds richness to the filling.
  • 1 leek or green onion: Offers a mild onion flavor that complements the mushrooms.
  • 2 tbsp feta cheese: A tangy addition that pairs beautifully with mushrooms.
  • ½ tsp Italian herbs: Brings a delicious Mediterranean aroma and flavor.
  • 1 clove garlic: Fresh garlic lifts the dish with its aromatic essence.
  • 1 egg: For binding the filling and achieving a beautiful glaze on the crust.
  • 10-12 medium mushrooms: Feel free to use a mix of your favorites, like cremini, shiitake, or portobello.
  • Egg + milk for brushing: This gives the crust a golden finish.

Step-by-Step Instructions

Side view of a delicious mushroom galette showcasing its savory filling.

Now, let’s get to cooking! Follow these simple steps to create your mouthwatering mushroom galette:

  1. Before you start making the dough, place the water in the freezer for about 10 minutes.
  2. In a large bowl, combine the dry ingredients: flour, salt, and baking powder. Then, cut in the cold butter with your fingers until the mixture resembles coarse crumbs.
  3. Add the apple cider vinegar, followed by a little cold water at a time, mixing until the dough just comes together.
  4. Wrap the dough in plastic wrap and refrigerate for at least 30 minutes. For extra layers, roll it out into a rectangle and fold it like a letter two or three times, then chill overnight.
  5. The next day, prepare the filling: sauté the leek until soft, then mix it with ricotta, feta, egg, and Italian herbs. In a separate pan, sauté the cleaned and sliced mushrooms until golden brown.
  6. Remove the dough from the fridge and roll it out on a lightly floured surface. Aim for a round shape, about 12 inches in diameter.
  7. Leave a 3 cm border around the edge, and spread the mushroom filling in the center. Gently fold the edges over the filling, creating a rustic look.
  8. Brush the edges with the egg and milk mixture for that golden crust.
  9. Bake in a preheated oven at 220°C (428°F) for 30-35 minutes, or until the crust is golden and flaky.
  10. Serve warm, perhaps with a dollop of sour cream or as a standalone appetizer. Enjoy!

Expert Tips for the Best Mushroom Galette

To ensure your galette turns out perfectly every time, keep these expert tips in mind:

  • Chill Your Ingredients: Keeping your butter and water cold helps create a flaky crust.
  • Don’t Overwork the Dough: Mix just until combined to prevent a tough crust.
  • Use Seasonal Mushrooms: Fresh, seasonal mushrooms will enhance the flavor and texture of your filling.
  • Experiment with Cheese: Try different cheeses like goat cheese or mozzarella for a unique twist.
  • Add Fresh Herbs: Fresh thyme or parsley can elevate the flavors even more.
  • Monitor Baking Time: Ovens can vary, so check your galette a few minutes before the suggested baking time.
  • Let It Cool: Allow the galette to rest for a few minutes before slicing; this will help it hold its shape.
  • Pair with Sides: It goes wonderfully with a fresh salad or roasted vegetables.
  • Store Properly: Keep leftovers in the fridge for up to 3 days; reheat gently in the oven.

Common Mistakes and Troubleshooting

Every cook makes mistakes; here are some common pitfalls and how to avoid them:

  • Dry Dough: If the dough is crumbly, add a little more cold water, one tablespoon at a time.
  • Soggy Filling: Make sure to sauté mushrooms properly to remove excess moisture before adding to the filling.
  • Burnt Edges: If the edges brown too quickly, cover them with foil during baking.
  • Uneven Baking: Rotate the galette halfway through baking for even cooking.

Delicious Variations to Try

Feeling adventurous? Here are some delightful variations to make your galette even more exciting:

  • Vegetable Twist: Substitute mushrooms with other vegetables like zucchini or bell peppers for a colorful filling.
  • Cheesy Delight: Mix in a variety of cheeses like Gruyère, or even a touch of blue cheese for an intense flavor.
  • Herb-Infused: Add fresh basil or rosemary to the filling for an aromatic twist.
  • Meat Lovers: Incorporate cooked sausage or bacon for a heartier galette.

Storage and Make-Ahead Instructions

This mushroom galette is perfect for prepping in advance:

  • Make-Ahead: Prepare the dough and filling the night before and store separately in the fridge. Assemble and bake when ready to serve.
  • Storing Leftovers: Keep any leftover galette in an airtight container in the fridge for up to 3 days. Reheat in the oven for best results.
  • Freezing Options: You can also freeze the unbaked galette for up to 2 months. Just wrap it tightly in plastic wrap and foil. Bake straight from the freezer, adding a few extra minutes to the baking time.

Frequently Asked Questions

Got questions? Here are some common queries about making a mushroom galette:

  • Can I use frozen mushrooms? Yes, but fresh mushrooms will yield better flavor and texture.
  • What if I don’t have ricotta? Cottage cheese can be a suitable substitute, providing a similar creaminess.
  • Can I make the dough ahead of time? Absolutely! The dough can be made a day in advance and stored in the fridge.
  • How do I know when the galette is done? Look for a golden brown crust; a skewer inserted into the filling should come out clean.
  • What can I serve with this galette? A fresh side salad or roasted vegetables pair beautifully with this dish.
  • Is this recipe vegetarian? Yes, it’s entirely vegetarian-friendly!
  • Can I add nuts? Yes! Chopped walnuts or pine nuts can add an exciting crunch to the filling.
  • What’s the best way to reheat leftovers? Reheat in the oven to retain crispiness, rather than the microwave.

Nutritional Tips and Dietary Adaptations

Here are some tips to make this recipe fit various dietary needs:

  • Gluten-Free Option: Use a gluten-free flour blend for the crust.
  • Vegan Adaptation: Substitute the egg with a flax egg and use plant-based cheese.
  • Lower-Calorie Version: Use less cheese or substitute with low-fat options.
  • Protein Boost: Add cooked lentils or beans to the filling for extra protein.

Essential Equipment Recommendations

To make your cooking experience smoother, here’s a list of equipment that will help:

  • Mixing Bowls: A set of different sizes for combining ingredients.
  • Rolling Pin: For rolling out the dough to the desired thickness.
  • Sharp Knife: For cleanly slicing mushrooms and leeks.
  • Baking Sheet: A heavy-duty baking sheet ensures even heat distribution.
  • Parchment Paper: Prevents sticking and makes clean-up a breeze.

Serving Suggestions

When it’s time to serve your masterpiece, consider these delightful ideas:

  • Pair with a Fresh Salad: A simple arugula or mixed green salad with lemon vinaigrette complements the richness of the galette.
  • Accompany with Dips: Serve with tzatziki or a herbed yogurt for a refreshing contrast.
  • Finish with a Drizzle: A light drizzle of balsamic reduction adds a gourmet touch.
  • Wine Pairing: A glass of chilled white wine, like Sauvignon Blanc or a light red, enhances the meal beautifully.

Conclusion

This flaky mushroom galette is not just a recipe; it’s a celebration of flavors, a gathering of loved ones, and an expression of Mediterranean joy. Whether you’re enjoying it as a main dish or a hearty appetizer, each bite is a reminder of the warmth and richness of home-cooked meals. So roll up your sleeves, gather your ingredients, and let the aroma of this galette fill your kitchen. Happy cooking!

Best mushroom galette with flaky dough

Prep Time 30 minutes
Cook Time 35 minutes
Total Time 1 hour 5 minutes
Servings 4 pieces
Calories 350
A delicious mushroom galette with flaky, layered dough and savory filling, perfect for a cozy meal or appetizer.

Ingredients

Dough

  • 125 g муки
  • 110 g холодного масла
  • 5 ml яблочного уксуса
  • 2.5 g соли
  • 30 ml Очень холодной воды
  • 2.5 g разрыхлителя

Filling

  • 37.5 g рикотты
  • 1 pcs лук-порей или зелёный лук
  • 5 g Феты
  • 1/2 tsp итальянских приправ
  • 1 clove чеснок
  • 1 pcs яйцо
  • 10-12 pcs Шампиньоны
  • 1 pcs Яйцо+молоко для смазывания корочки

Instructions 

  • Поставьте воду в морозилку перед замешиванием.
  • Соедините сухие ингредиенты, добавьте масло и растирайте до крошки. Влейте уксус и немного воды, замесите тесто.
  • Заверните тесто в пленку, охладите 30 минут, затем многократно раскатывайте и складывайте для слоистости. Охладите на ночь.
  • Обжарьте лук, смешайте с рикоттой, Фетой, яйцом и приправами. Обжарьте шампиньоны.
  • Раскатайте тесто, вырежьте круг, выложите начинку, заверните края. Смазать смесью яйца и молока.
  • Выпекайте 30-35 минут при 220°C. Подавайте со сметаной или как закуску.

Notes

Для более слоистого теста повторите складывание и раскатывание несколько раз.
Calories: 350kcal
Cost: $12
Course: Main Course
Cuisine: French
Keyword: Mushrooms

As the leaves begin to change and the air turns crisp, there’s nothing quite like the aroma of baking that fills your home, signaling the arrival of fall. This Pumpkin Crème Brûlée Tart is a celebration of the season, combining the rich flavors of pumpkin with a creamy custard and a delightful caramelized topping. This recipe is not just about indulging in dessert; it’s about creating memories with loved ones, sharing laughter, and savoring the moment. So, grab your apron and let’s dive into the art of making this exquisite tart!

Why You’ll Love This Recipe

  • Perfect Harmony of Flavors: The creamy custard blends beautifully with the pumpkin and spices, creating a flavor profile that dances on your palate.
  • Impressive Presentation: With its glossy caramel top and vibrant filling, this tart is sure to wow your guests at any gathering.
  • Customization Options: Feel free to play with spices and toppings to make this dessert your own.
  • Make Ahead Friendly: Prepare the tart in advance, making it an ideal choice for busy holiday schedules.
  • Versatile Dessert: Perfect for Thanksgiving, family dinners, or simply a cozy evening at home!

Ingredients for Your Pumpkin Crème Brûlée Tart Recipe

Let’s gather our ingredients! Here’s what you’ll need:

  • 120 g (4oz) All Purpose Flour (about 1 cup measured volumetrically): Essential for the tart crust.
  • 2 tbsp Almond Flour: Adds a nutty flavor and nice texture to the crust.
  • Pinch of Salt: Balances sweetness and enhances flavor.
  • 1/2 cup Unsalted Butter (at room temperature): Creates a rich, flaky crust.
  • 1/3 cup White Sugar: Sweetens the crust perfectly.
  • 1/2 tsp Vanilla: Enhances the flavor depth of the crust.
  • 4 Large Egg Yolks: Key for the custard filling’s richness.
  • 1/4 cup White Sugar: Sweetens the custard filling to perfection.
  • 1 ¼ cups Heavy Cream: Provides that luscious creaminess.
  • 1/4 cup Pumpkin Puree: The star ingredient for that classic pumpkin flavor.
  • 1 tsp Vanilla: Adds warmth to the filling.
  • 3/4 tsp Cinnamon: A must-have spice for fall desserts.
  • 1/4 tsp Allspice: Adds a hint of warmth and complexity.
  • 6 tbsp White Sugar: For caramelizing the topping.
  • 1 tbsp Water: Helps in making the caramel.
  • 1 tsp Corn Syrup: Helps prevent crystallization during caramelization.

Step-by-Step Preparation of Your Pumpkin Crème Brûlée Tart

Step 1: Preparing the Tart Crust

Start by preheating your oven to 175°C (350°F). In a mixing bowl, combine the all-purpose flour, almond flour, salt, and sugar. Cut in the butter until the mixture resembles coarse crumbs. Stir in the vanilla, then form the dough into a disk. Wrap it in plastic wrap and refrigerate for about 30 minutes. Once chilled, roll out the dough on a floured surface and press it into a tart pan. Prick the bottom with a fork to prevent bubbling.


5-Speed Electric Hand Mixer

★ Recommended Kitchen Tool

5-Speed Electric Hand Mixer

Make this recipe even easier with a quality 5-Speed Electric Hand Mixer — a must-have kitchen staple!


🛒 Check Price on Amazon →

As an Amazon Associate, we earn from qualifying purchases.

Step 2: Making the Pumpkin Filling

In a separate bowl, whisk together the egg yolks and sugar until smooth. Add the heavy cream, pumpkin puree, vanilla, and spices. Mix until fully combined and creamy.

Step 3: Assembling the Pumpkin Crème Brûlée Tart

Pour the pumpkin filling into the prepared tart crust, smoothing the top with a spatula. Bake in your preheated oven for 40-45 minutes, or until the filling is set but still slightly jiggly in the center.

Step 4: Creating the Caramelized Topping

Once cooled, sprinkle the white sugar evenly over the surface of the tart. Using a kitchen torch, caramelize the sugar until it’s golden and crispy. If you don’t have a torch, broil it in the oven for a few minutes, watching closely to prevent burning.

Pro Tips for Perfecting Your Pumpkin Crème Brûlée Tart

Side view of a delicious Pumpkin Crème Brûlée Tart with a glossy caramel layer and pumpkin filling.
  • Chill the Custard: Giving the filling time to cool before baking helps in forming a smoother texture.
  • Use Fresh Pumpkin: If possible, use fresh pumpkin puree for a richer flavor.
  • Caramelization Technique: Keep the torch moving to achieve an even caramel layer without burning.
  • Temperature Check: Use an instant-read thermometer; the filling should reach about 70°C (160°F).
  • Experiment with Flavors: Add a splash of bourbon or rum for a unique twist!

Common Mistakes to Avoid

Here are some common pitfalls and how to avoid them:

  • Overbaking: Watch the tart closely; a perfectly baked tart should still have a slight jiggle in the center.
  • Too Much Sugar: Excessive sugar on the topping can lead to a burnt taste; keep it light and even.
  • Not Chilling Enough: If your custard isn’t cooled properly, it can lead to a grainy texture.

Variations on the Classic Recipe

Feel free to get creative! Here are some delicious variations:

  • Chocolate Pumpkin Tart: Add 1/2 cup of melted dark chocolate into the custard mixture for a decadent twist.
  • Spiced Rum Pumpkin Tart: Incorporate 1-2 tablespoons of spiced rum into the filling for a festive touch.
  • Maple Pumpkin Tart: Replace white sugar with maple syrup for a caramel-like sweetness.
  • Nutty Crust: Substitute half of the all-purpose flour with ground pecans or walnuts for a nutty flavor.

Storage Instructions and Make-Ahead Tips

This tart can be made ahead of time! Store it in the refrigerator for up to 3 days. For best results, add the caramelized sugar right before serving to maintain its crispness. If you have leftovers, cover and refrigerate them, and enjoy within 2 days for the best texture.

Nutrition Tips and Dietary Adaptations

This Pumpkin Crème Brûlée Tart is not only a treat for the senses but can also be adapted for various dietary needs:

  • Gluten-Free: Substitute all-purpose flour with a gluten-free blend to accommodate gluten sensitivities.
  • Dairy-Free: Use coconut cream and dairy-free butter for a delicious alternative.
  • Lower Sugar Options: Replace sugar with a natural sweetener like stevia or erythritol to reduce calories.

Equipment Recommendations

To achieve the best results, consider the following tools:

  • Tart Pan: A removable bottom tart pan makes serving easier.
  • Kitchen Torch: Essential for achieving that perfect caramelized topping.
  • Whisk: For a smooth filling, use a whisk to combine ingredients thoroughly.

Serving Suggestions

Serve your Pumpkin Crème Brûlée Tart with a dollop of freshly whipped cream or a scoop of vanilla ice cream. A sprinkle of cinnamon on top adds a lovely finishing touch. Pair it with a warm cup of chai or spiced coffee for a delightful autumn experience.

Frequently Asked Questions (FAQs)

  • Can I use store-bought pumpkin puree? Yes, canned pumpkin puree works perfectly!
  • How do I know when the tart is done baking? The filling should be set but still slightly jiggly in the center.
  • Can I freeze the tart? Yes, but it’s best enjoyed fresh. If freezing, leave off the caramel topping until serving.
  • What’s the best way to store leftovers? Cover and refrigerate for up to 2 days.
  • Can I make this tart vegan? Yes, use vegan butter and a plant-based cream alternative.
  • What spices can I add? Feel free to experiment with nutmeg, ginger, or cardamom for added warmth.
  • How long does it take to make this tart? Including preparation and baking, plan for about 2 hours.
  • Is it possible to make a mini version? Absolutely! Use a muffin tin for individual tarts.

Conclusion

This Pumpkin Crème Brûlée Tart is more than just a dessert; it’s a journey into the heart of autumn, bringing warmth and joy to your table. With its rich flavors and delightful textures, it’s bound to become a family favorite. So, gather your loved ones, share the experience of baking together, and enjoy every delicious bite of this seasonal treat. Happy baking!

Pumpkin Crème Brûlée Tart

Prep Time 20 minutes
Cook Time 40 minutes
Total Time 1 hour
Servings 8 pieces
Calories 350
A delicious fall-inspired tart combining creamy pumpkin filling with a crisp brûlée topping.

Ingredients

Dough

  • 120 g All Purpose Flour (about 1 cup measured volumetrically)
  • 2 tbsp Almond Flour (†⅕)
  • Pinch Salt
  • 1/2 cup Unsalted Butter (at room temperature)
  • 1/3 cup White Sugar
  • 1/2 tsp Vanilla
  • 4 Large Egg Yolks
  • 1/4 cup White Sugar
  • 1 ¼ cups Heavy Cream
  • 1/4 cup Pumpkin Puree
  • 1 tsp Vanilla
  • 3/4 tsp Cinnamon
  • 1/4 tsp Allspice
  • Pinch Salt
  • 6 tbsp White Sugar
  • 1 tbsp Water
  • 1 tsp Corn Syrup

Instructions 

  • Prepare the tart crust by mixing flour, almond flour, salt, and butter, then press into a tart pan and bake at 350°F (175°C) for 15 minutes.
  • Whisk egg yolks, sugar, vanilla, cinnamon, and allspice in a bowl. Add pumpkin puree and heavy cream, mix well.
  • Pour the pumpkin filling into the baked crust and bake at 350°F (175°C) for 25 minutes until set.
  • Chill the tart for at least 2 hours. Before serving, sprinkle sugar on top and caramelize with a torch to create a brûlée crust.

Notes

Ensure the tart is fully chilled before caramelizing the sugar topping for best results.
Calories: 350kcal
Cost: $15
Course: Dessert
Cuisine: American
Keyword: pumpkin