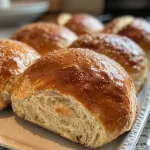
A Warm Welcome to Homemade Pita Bread
Ah, the tantalizing allure of warm, fluffy homemade pita bread! This delightful bread, a staple of Mediterranean cuisine, is not just food—it’s an invitation to gather around the table, share stories, and create lasting memories. Join me, Rafael, in this culinary journey as we craft the perfect pita bread that puffs up in the oven and fills your home with irresistible aromas.
In this article, we’ll explore not only how to make this beloved bread but also why you’ll fall in love with it. From the ingredients to expert tips and delicious variations, you’ll be equipped to bring a piece of the Mediterranean into your kitchen.
Why You’ll Love This Recipe
- Quick and Easy: With just a few simple steps, you can whip up fresh pita bread in no time, perfect for any weeknight dinner.
- Perfect for Sharing: Pita is great for wraps, dips, or simply enjoyed warm with a drizzle of olive oil—ideal for gatherings.
- Customizable: Feel free to experiment with different flours or add herbs and spices to suit your palate.
- Healthier Option: Homemade pita bread allows you to control the ingredients, making it a healthier alternative to store-bought versions.
- Delicious Aroma: The smell of freshly baked pita will instantly transport you to a sun-drenched Mediterranean market.
Ingredients Breakdown
Let’s dive into what makes this pita bread a triumph! Here’s what you’ll need:
- 1 Cup Warm Water (110F): The perfect temperature to activate the yeast without killing it.
- 2 Teaspoons Sugar: A little sweetness to help the yeast bloom, giving your pita that beautiful rise.
- 2 Teaspoons Active Dry Yeast: Essential for leavening; make sure it’s fresh for the best results.
- 1 Teaspoon Salt: Balances the flavors and enhances the overall taste of your pita.
- 2 Tablespoons Olive Oil: Adds richness and helps keep the pita soft.
- 3/4 Cup Whole Wheat Flour: Provides a nutty flavor and adds nutrition.
- 2 Cups All-Purpose Flour: The base flour that gives your pita the right texture.
You can also make substitutions if necessary:
- Whole Wheat Flour: Substitute with spelt flour for a different flavor profile.
- Olive Oil: Can be replaced with melted butter for a richer taste.
- All-Purpose Flour: Use bread flour for a chewier texture.
Pro Tips for Perfect Pita
Mastering pita bread is all about technique! Here are some expert tips:
- Check Your Yeast: Always make sure your yeast is active. If it doesn’t foam up in warm water, it’s time to buy a new package.
- Don’t Overwork the Dough: Mix just until combined to achieve a soft and airy bread.
- Let it Rise: Be patient! Allow the dough to double in size for the best puffing action in the oven.
- Use a Pizza Stone: Preheat your pizza stone to ensure even baking and that lovely puff.
- Keep it Covered: Cover the dough and baked pitas with a kitchen towel to keep them warm and prevent drying out.
- Try Cast Iron: If you don’t have a pizza stone, a cast iron skillet works wonders!
- Experiment with Thickness: Roll the dough thicker for pita that is fluffier and softer, or thinner for a crispier result.
- Use Fresh Ingredients: Fresh flour and yeast make a world of difference in flavor and texture.
Common Mistakes and Troubleshooting
Even seasoned bakers run into hiccups! Here’s how to avoid common pitfalls:
- Pita Doesn’t Puff: Make sure your oven is hot enough and the dough is allowed to rise properly.
- Dough is Too Sticky: If it sticks to your hands, add a little more flour gradually until it’s manageable.
- Flat Pitas: This could mean the dough wasn’t rolled out evenly, or it didn’t rise enough—trust the process!
Variations to Try
Once you’ve mastered the classic pita recipe, why not play around with some exciting variations?
- Herbed Pita: Mix in dried herbs like oregano or rosemary into the dough for an aromatic twist.
- Whole Wheat Pita: Use 100% whole wheat flour for a heartier, more nutritious option.
- Spiced Pita: Add spices such as cumin or paprika to the dough for a flavor boost.
- Sweet Pita: Incorporate a tablespoon of honey into the dough for a subtly sweet version perfect for breakfast.
Storage and Make-Ahead Instructions
Want to prep ahead? Here’s how to store and enjoy your pita bread:
- Room Temperature: Store cooled pita in an airtight container for up to 3 days.
- Freezing: Freeze baked pita bread. Just separate each piece with parchment paper and store in a zip-lock bag—thaw and reheat in the oven!
- Make Ahead: You can prepare the dough a day in advance; just refrigerate it after the first rise and bring it back to room temperature before shaping.
Comprehensive FAQ
Here are some frequently asked questions about making homemade pita bread:
- Can I make pita bread without a mixer? Yes! You can mix by hand, but be prepared for a little elbow grease.
- Can I use whole wheat flour instead of all-purpose flour? Absolutely! Just keep in mind that the texture will be denser.
- What do I do if my dough doesn’t rise? Make sure your yeast is fresh and that the water isn’t too hot or too cold.
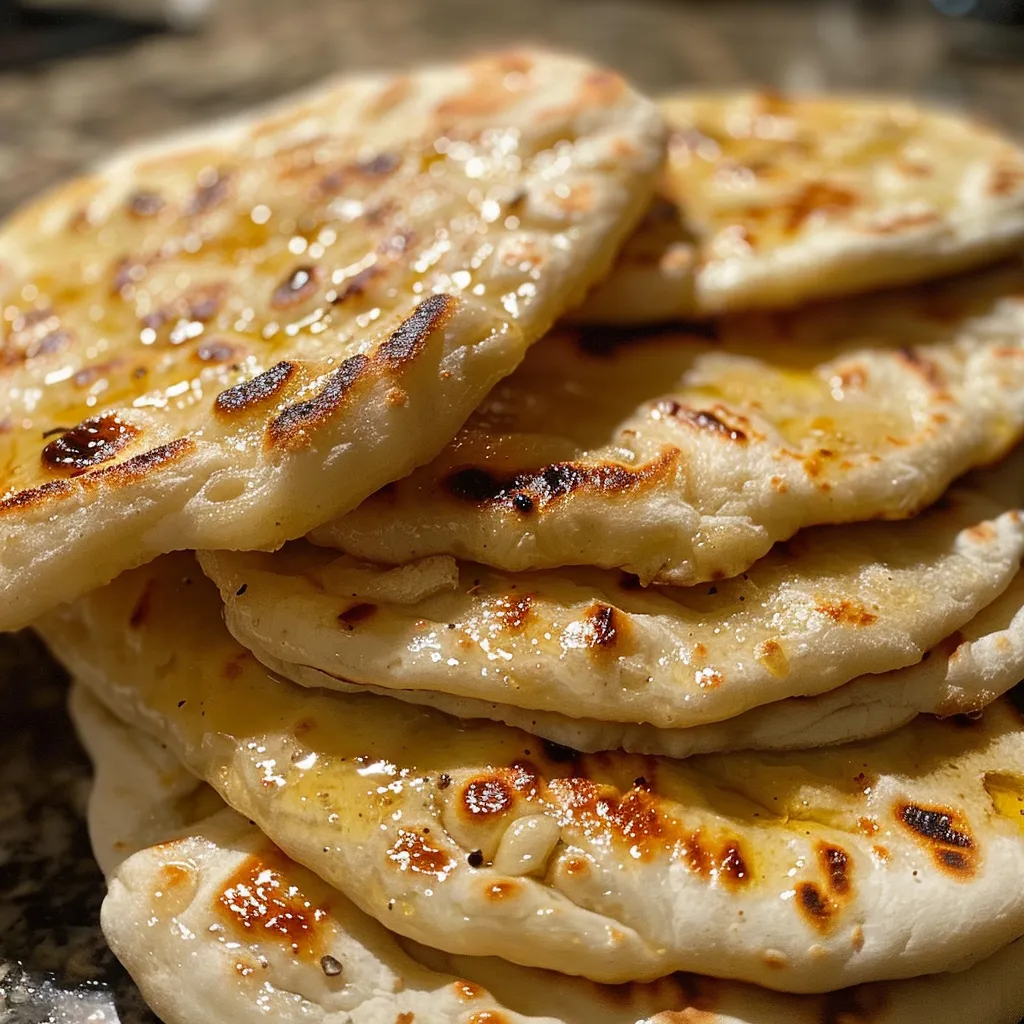
- How do I know when my pita bread is done baking? It should be puffed and lightly browned, typically after 3-4 minutes in a hot oven.
- Can I add toppings to my pita bread? Yes! Before baking, sprinkle on sesame seeds or za’atar for added flavor.
- What should I serve with pita bread? Try it with dips like baba ganoush, hummus, or as a wrap filled with grilled veggies and meats.
- How can I make my pita bread softer? Adding a bit more olive oil to the dough can help keep the pita soft and pliable.
- Is pita bread healthy? When made with whole grains and natural ingredients, it can be a nutritious choice!
Nutritional Tips and Dietary Adaptations
Want to keep it healthy? Here’s how:
- Whole Grains: Opt for whole wheat flour for added fiber and nutrients.
- Low-Calorie Option: Reduce the olive oil to one tablespoon for a lighter version.
- Gluten-Free: Use a gluten-free flour blend, adjusting the liquid as needed for the right consistency.
- Vegan-Friendly: This recipe is naturally vegan—simply skip any animal-based toppings or fillings!
Equipment Recommendations
A few handy tools will make your pita bread journey smoother:
- Stand Mixer: For quick and efficient dough mixing.
- Pizza Stone: Essential for achieving that perfect puff and even baking.
- Rolling Pin: To roll out the dough evenly for perfectly shaped pitas.
- Kitchen Towel: To keep the pitas warm and soft post-baking.
Serving Suggestions
Now that your homemade pita is ready, here are some delightful ways to enjoy it:
- As a Wrap: Fill with grilled chicken, fresh veggies, and tzatziki for a satisfying meal.
- Dip It: Serve warm pita with hummus, baba ganoush, or tzatziki for a delicious appetizer.
- As a Pizza Base: Top with sauce, cheese, and your favorite toppings for a fun mini pizza night.
- With Salads: Tear pieces to complement salads, adding texture and flavor.
Now, my dear culinary companions, it’s time to roll up your sleeves and bring this pita bread to life in your kitchen! Let’s create some magic and fill the air with the delightful aromas of the Mediterranean. Cooking is not just about feeding the body—it’s about nourishing the soul and celebrating life. So, grab your ingredients, let your creativity flow, and enjoy this journey together. Happy cooking!
Homemade Pita Bread
Ingredients
Dough
- 1 cup Warm Water (110F)
- 2 teaspoons Sugar
- 2 teaspoons Active Dry Yeast
- 1 teaspoon Salt
- 2 tablespoons Olive Oil
- 3/4 cup Whole Wheat Flour
- 2 cups All-Purpose Flour
Instructions
- Combine warm water, yeast, and sugar; let activate for 10 minutes until foamy.
- Add remaining ingredients and knead until smooth, adding water if dry.
- Let dough rise in a oiled bowl, covered, until doubled (~1 hour).
- Preheat oven with pizza stone to 475F (245C) for 30-45 minutes.
- Divide dough into 8 balls, roll into 6-inch rounds, and bake 2 at a time for 3-4 minutes.