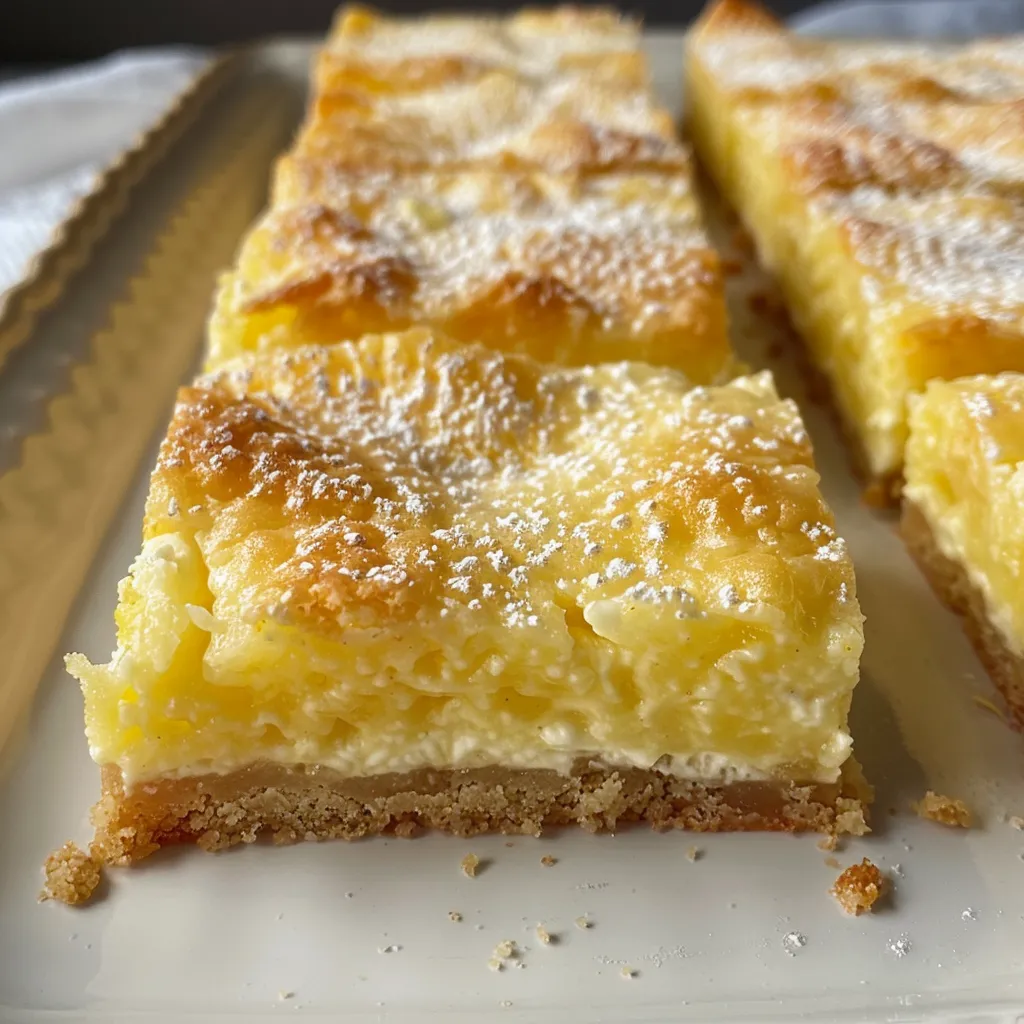
Experience the Joy of Baking with Sun-Kissed Greek Yogurt Lemon Bars
Welcome to a sunny celebration of flavor! Today, we’re diving into the delightful world of Sun-Kissed Greek Yogurt Lemon Bars. With their buttery shortbread crust and tangy lemon filling, these bars are a perfect reflection of Mediterranean sunshine. Whether you’re hosting a gathering or simply indulging in a sweet afternoon treat, these lemon bars will transport you straight to a warm, sunlit terrace in Seville. Let’s explore why you’ll love this recipe and how to create these zesty delights!
Why You’ll Love This Recipe
- Refreshing flavor: The combination of fresh lemon juice and Greek yogurt creates a bright, tangy filling that bursts with flavor in every bite.
- Simple and quick: With just a few straightforward steps, you can whip up these bars in no time, making them an ideal treat for any occasion.
- Healthier twist: Using Greek yogurt adds creaminess while reducing the need for heavy cream or excessive sugar, resulting in a lighter dessert.
- Perfect for sharing: These lemon bars are great for gatherings, picnics, or potlucks — everyone will be asking for the recipe!
- Versatile masterpiece: You can easily adapt this recipe to cater to dietary preferences or seasonal ingredients, ensuring it’s always a hit!
Ingredients Breakdown
Let’s gather our ingredients for these delectable yogurt lemon bars. Below is a detailed list along with possible substitutions to cater to your taste and dietary needs:
- For the Shortbread Crust:
- 1 cup all-purpose flour: You can substitute with whole wheat flour for a nuttier flavor.
- ¼ cup granulated sugar: Coconut sugar can work here for a lower glycemic index.
- ¼ tsp salt: Essential for balancing flavors.
- ½ cup unsalted butter: Melted or softened; for a dairy-free option, use coconut oil.
- For the Lemon Yogurt Filling:
- 2 large eggs: Make sure they’re at room temperature for better mixing.
- ¾ cup granulated sugar: Adjust according to your sweetness preference.
- ½ cup plain Greek yogurt: Full-fat or low-fat works well; you could also use non-dairy yogurt as an alternative.
- ⅓ cup fresh lemon juice: Freshly squeezed is best for that zesty flavor.
- Zest of 1–2 lemons: Adds a fragrant aroma and deeper lemon flavor.
- 1 tsp vanilla extract: Essential for enhancing overall flavor.
- 2 tbsp all-purpose flour: Helps to thicken the filling.
- ½ tsp baking powder: Ensures a light and fluffy texture.
- For Topping:
- Powdered sugar: For dusting before serving, adding a touch of sweetness.
Step-by-Step Cooking Instructions
Now that you have your ingredients ready, let’s get cooking! Follow these simple steps to create your own batch of Greek yogurt lemon bars:
- Preheat oven: Start by preheating your oven to 350°F (175°C). Line an 8×8-inch baking pan with parchment paper, allowing some overhang for easy removal.
- Make the crust: In a mixing bowl, combine the flour, sugar, salt, and melted butter until crumbly. Press this mixture firmly into the bottom of the prepared pan.
- Bake the crust: Place the crust in the oven and bake for 15–18 minutes, until it’s lightly golden. This step ensures a firm base for your filling.
- Prepare the filling: While the crust is baking, whisk together the eggs and sugar in a bowl until smooth. Gradually add the Greek yogurt, lemon juice, lemon zest, vanilla, flour, and baking powder, mixing until well combined.
- Bake the bars: Pour the filling over the warm crust and return to the oven. Bake for 22–26 minutes, until the center is just set — a little jiggle is okay!
- Cool and chill: Allow the bars to cool completely at room temperature, then refrigerate for at least 1 hour to achieve the perfect texture.
- Serve: Dust with powdered sugar just before slicing into squares, and enjoy the burst of flavors!
Pro Tips for Perfect Results
To elevate your lemon bars to the next level, here are some expert insights:
- Use room temperature ingredients: This helps with even mixing and a smoother filling.
- Don’t skip the zest: It adds a depth of flavor that really enhances the lemon taste.
- Check for doneness: The center should be just set — overbaking can lead to a dry texture.
- Cool properly: Allowing the bars to cool completely prevents them from being too soft when sliced.
- Experiment with flavors: Add a hint of lavender or rosemary to the filling for a unique twist.
- Presentation matters: Use a sharp knife for clean slices, and serve with fresh fruit for a gorgeous display.
- Store wisely: Keep leftovers in an airtight container in the fridge, where they stay fresh for up to a week.
- Pair with tea: These bars are a perfect match for a refreshing herbal tea or a crisp white wine!
Common Mistakes and Troubleshooting
Even the best bakers can face challenges. Here are some common mistakes and how to avoid them:
- Overbaking: Keep an eye on the bars during the last few minutes of baking to prevent a dry filling.
- Insufficient chilling: If the bars are too soft, they may fall apart when sliced. Allow adequate cooling time in the fridge.
- Using bottled lemon juice: Fresh lemon juice is vital for the vibrant flavor that defines these bars.
- Not measuring accurately: Baking is a science! Be precise with your ingredient measurements for best results.
Delicious Variations
Feeling adventurous? Here are some fun variations to try:
- Berry Bliss: Fold in fresh blueberries or raspberries into the filling for a fruity twist.
- Chocolate Delight: Drizzle melted dark chocolate over the top for a rich contrast to the tart lemon.
- Nutty Crunch: Add chopped almonds or walnuts to the crust for an extra layer of texture.
- Herbal Infusion: Incorporate fresh mint or basil into the filling for an aromatic surprise.
Storage and Make-Ahead Instructions
These bars store beautifully, making them perfect for meal prep or future gatherings:
- Refrigerate: Store in an airtight container in the fridge for up to 1 week.
- Freeze: Wrap in plastic wrap and aluminum foil to freeze for up to 3 months. Thaw in the fridge before serving.
- Make-ahead: You can prepare the crust and filling a day ahead. Just bake and chill before serving!
Comprehensive FAQ
As you embark on your baking journey, here are some frequently asked questions:
- Can I use other types of yogurt? Absolutely! Feel free to experiment with flavored or non-dairy yogurts.
- What if I don’t have parchment paper? Grease the baking pan with butter or cooking spray to prevent sticking.
- How can I make these bars gluten-free? Substitute with a gluten-free flour blend and ensure all other ingredients are gluten-free.
- Can I adjust the sweetness? Yes, you can reduce the sugar in the filling or use a sugar substitute if desired.
- What’s the best way to cut the bars? Use a sharp knife dipped in hot water for clean, neat cuts.
- Can I add more lemon flavor? Definitely! Increase the lemon juice or zest for a more intense citrus punch.
- How do I know when they are done baking? The edges should be set, and the center should have a slight jiggle when gently shaken.
- What should I serve with these bars? They pair wonderfully with whipped cream, a scoop of vanilla ice cream, or fresh berries!
Nutritional Tips and Dietary Adaptations
For those mindful of their dietary choices, here are some adaptations:
- Lowering sugar: Use less sugar in the filling or opt for a sugar substitute suitable for baking.
- Increasing protein: Swap out some of the yogurt for Greek cottage cheese for an added protein boost.
- Making it dairy-free: Use coconut yogurt and dairy-free butter for a completely dairy-free version.
- Boosting fiber: Incorporate oat flour or almond flour into the crust for added health benefits.
Essential Equipment Recommendations
To achieve the best results, consider these kitchen essentials:
- 8×8-inch baking pan: Perfect for even baking and easy slicing.
- Mixing bowls: A set of various sizes for mixing crust and filling.
- Whisk: For blending ingredients smoothly, especially the filling.
- Sharp knife: For cutting the bars into clean squares.
- Parchment paper: For easy removal and cleanup.
Serving Suggestions
Finally, let’s talk about how to present your delicious lemon bars:
- Garnish with zest: Add a sprinkle of lemon zest on top for a pop of color.
- Serve with berries: Fresh raspberries or strawberries add a delightful contrast in flavor and color.
- Pair with beverages: These bars are excellent with iced tea, lemonade, or a glass of Prosecco!
So there you have it! A comprehensive and delicious guide to crafting the perfect Greek yogurt lemon bars. May your cooking journey be filled with joy, laughter, and lots of shared meals. Gather your ingredients and let’s celebrate the flavors of life together!
Greek Yogurt Lemon Bars
Ingredients
Shortbread Crust
- 1 cup all-purpose flour
- ¼ cup granulated sugar
- ¼ tsp salt
- ½ cup unsalted butter (melted or softened)
Lemon Yogurt Filling
- 2 large eggs (room temperature)
- ¾ cup granulated sugar
- ½ cup plain Greek yogurt (full-fat or low-fat)
- ⅓ cup fresh lemon juice
- Zest of 1–2 lemons lemon zest
- 1 tsp vanilla extract
- 2 tbsp all-purpose flour
- ½ tsp baking powder
For Topping
- Powdered sugar (for dusting) powdered sugar
Instructions
- Preheat oven to 350°F (175°C). Line an 8x8-inch pan with parchment.
- Mix flour, sugar, salt, and butter; press into pan bottom. Bake 15–18 mins until golden.
- Whisk eggs and sugar; add yogurt, lemon juice, zest, vanilla, flour, and baking powder.
- Pour filling over crust; bake 22–26 mins until just set. Cool and refrigerate 1 hour.
- Dust with powdered sugar before slicing and serving.