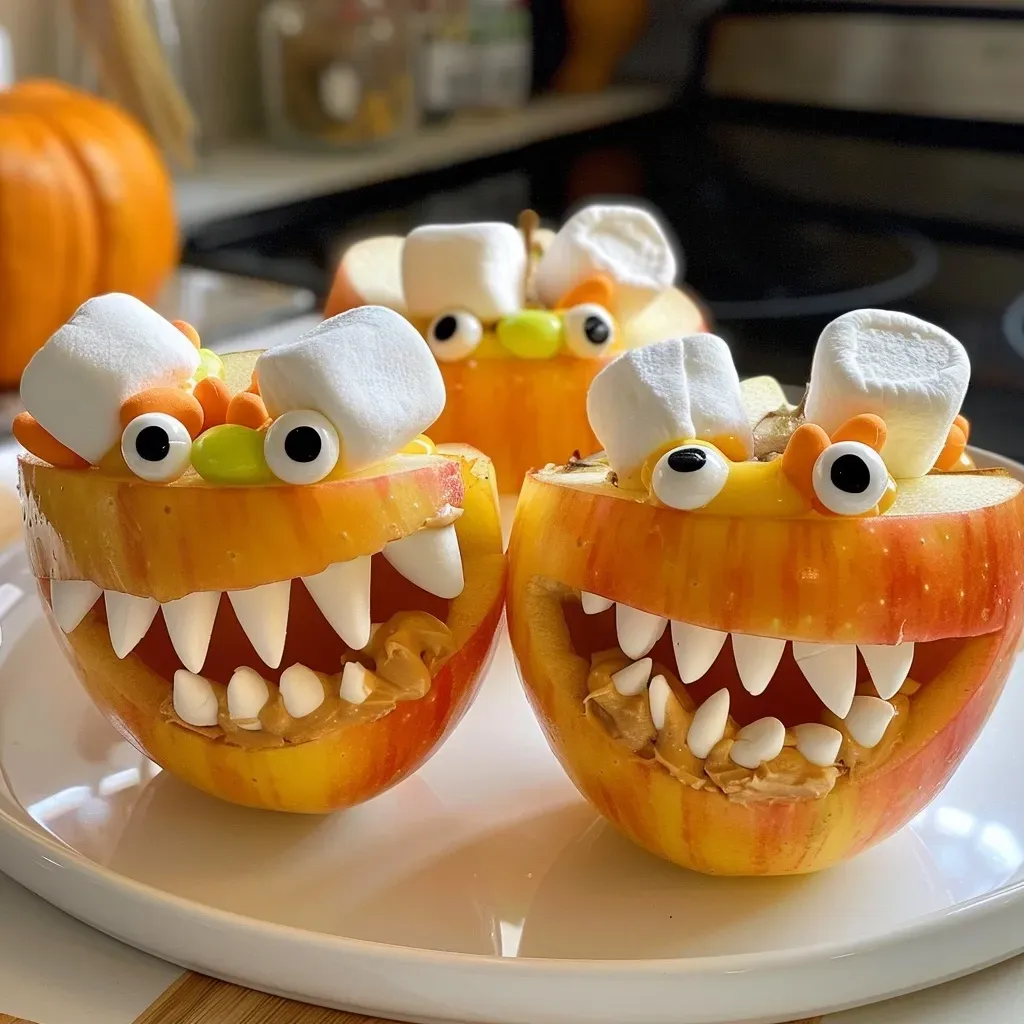
Unleash the Fun: Crafting Apple Monster Mouths for Your Halloween Celebration
As the leaves turn golden and the nights grow crisp, it’s time to embrace the joy of Halloween! What better way to celebrate than with a fun, interactive treat that kids and adults alike will adore? Enter the delightful world of Apple Monster Mouths! These spooky snacks are not only easy to prepare but also bursting with flavor and creativity. Imagine bite-sized apple slices paired with creamy peanut butter, adorned with candy eyes and monster teeth made from mini marshmallows or candy corn. Gather around the kitchen, let your imagination run wild, and let’s dive into this hands-on culinary adventure!
So, if you’re ready to make a treat that will steal the show at your Halloween party, keep reading. In this guide, you’ll discover everything you need to know about crafting these Halloween apple monster delights!
Why You’ll Love This Recipe
- Quick & Easy: These monster mouths can be whipped up in just 15 minutes, making them perfect for last-minute gatherings.
- Healthy and Fun: Packed with fresh apples and protein-rich peanut butter, they strike a balance between indulgence and nutrition.
- Interactive Activity: Kids love helping to assemble these spooky snacks, turning the kitchen into a lively workshop of creativity.
- Customizable: With endless variations on toppings and presentations, you can make each batch unique and suited to your tastes.
- Impress Your Guests: These visually striking treats will surely be a hit at any Halloween celebration, becoming the talk of the table!
Ingredients You’ll Need
To create your spooky Apple Monster Mouths, gather the following ingredients:

★ Recommended Kitchen Tool
Digital Kitchen Scale
Make this recipe even easier with a quality Digital Kitchen Scale — a must-have kitchen staple!
- 3 large apples: Choose crisp varieties like Fuji or Honeycrisp for the best texture and flavor.
- 3/4 cup creamy peanut butter: This will act as both a delicious spread and an adhesive for your monster mouths.
- Mini marshmallows, candy corn, or almond slivers: These will be used to create the “teeth” of your monster mouths.
- Sprite or lemon juice: A quick dip in either will help keep your apple slices from browning.
- Candy eyes: These fun decorations will give your monster mouths a lively expression!
How to Make Halloween Apple Monster Mouths
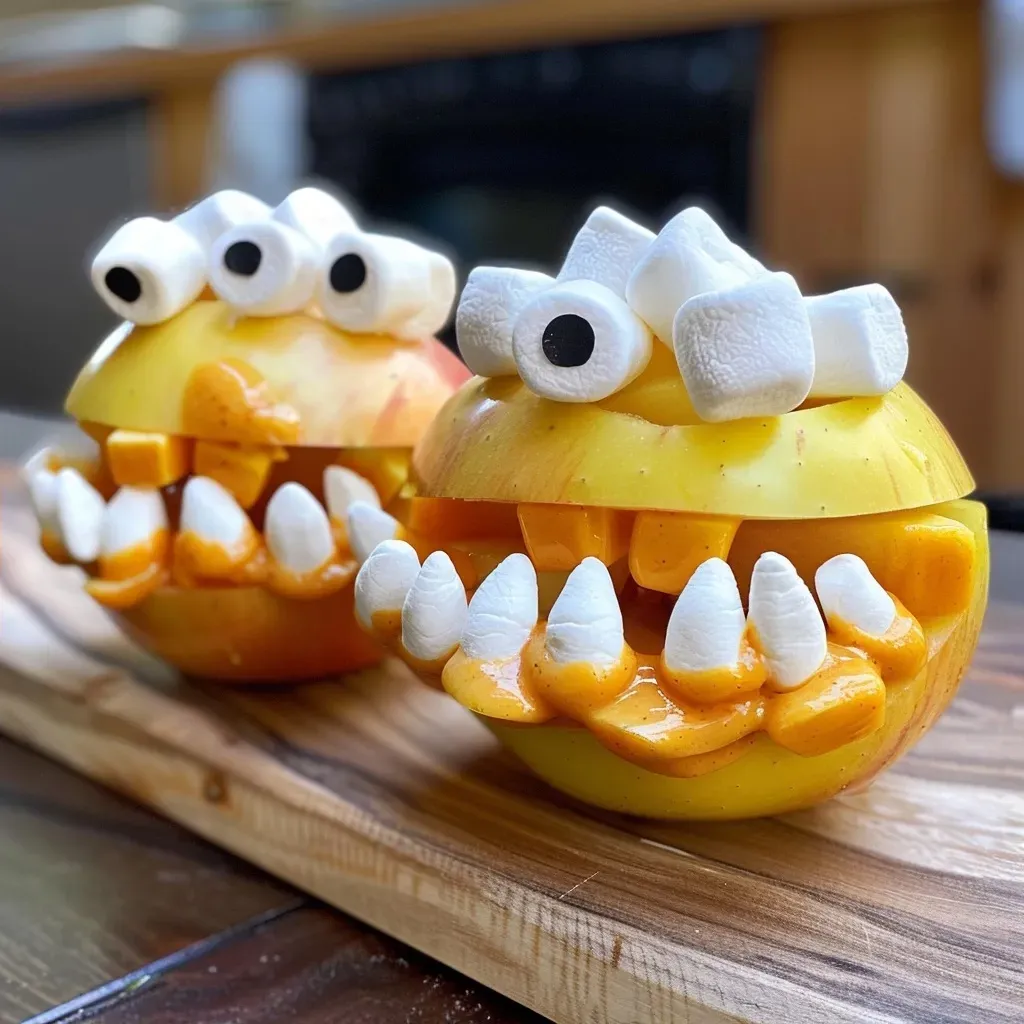
Creating these delightful treats is as easy as 1, 2, 3! Follow these simple steps for a spooktacular experience:
- Step 1: Prepare Your Apples
Remove the core of each apple and slice them into wedges. An apple slicer can be a handy tool for this task! - Step 2: Prevent Browning
Dip your apple slices in lemon juice or Sprite to keep them looking fresh and appetizing. - Step 3: Assemble Your Monster Mouths
Take two apple slices, spread peanut butter on one side, and press them together to form a mouth. If the peanut butter isn’t holding, use toothpicks for added support! - Step 4: Create the Teeth
Stick candy corn, mini marshmallows, or almond slivers into the peanut butter to create the monster’s teeth. Let your imagination run wild! - Step 5: Add the Eyes
Finish off your monster mouths by placing candy eyes on top, giving them a fun and quirky look!
Pro Tips for Making Halloween Apple Monster Mouths
To ensure your Apple Monster Mouths turn out perfectly every time, check out these expert tips:
- Choose the Right Apples: Sweet and crisp apples will enhance the flavor and texture of your monster mouths. Fuji and Honeycrisp are great choices!
- Keep Apples Fresh: Always dip your apple slices in lemon juice or Sprite immediately after slicing to prevent browning.
- Peanut Butter Alternatives: If you need a nut-free option, try using sun butter or a cream cheese spread instead.
- Creative Tooth Options: Mix it up! Use pretzel sticks or chocolate chips for different “teeth” effects.
- Go for Extra Flavor: Drizzle some honey or sprinkle cinnamon on your apples for added sweetness and warmth.
- Make it a Family Activity: Encourage everyone to assemble their own monster mouths, making it a fun family tradition!
- Experiment with Toppings: Get creative with other edible decorations like gummy worms or fruit roll-ups for a unique touch.
- Serve Immediately: These treats are best enjoyed fresh, so prepare them just before serving for the best flavor and appearance.
Common Mistakes and Troubleshooting
Even the best of us can run into hiccups while cooking! Here are some common mistakes and solutions to keep in mind:
- Problem: Apples are browning too quickly.
Solution: Make sure to dip them in lemon juice or Sprite right after slicing! - Problem: Peanut butter isn’t sticking.
Solution: Use toothpicks to hold the apple slices together until the peanut butter sets a bit. - Problem: The teeth keep falling off.
Solution: Ensure you’re using enough peanut butter to adhere the teeth, or try a different type of candy that may stick better.
Variations & Substitutions for Your Apple Monster Mouths
Want to switch things up? Here are some fun variations to try:
- Nut-Free Delight: Substitute peanut butter with sun butter or cream cheese for a nut-free version that everyone can enjoy.
- Fruit Fest: Incorporate other fruits, like bananas or strawberries, to create a fruit salad monster mouth.
- Candy Overload: Use a variety of candies, such as gummy worms or chocolate-covered raisins, for a more colorful and exciting treat.
- Spooky Decorations: Add edible glitter or spooky sprinkles for a touch of Halloween flair!
Storage and Make-Ahead Instructions
Want to prepare these treats in advance? Here’s how to store them effectively:
- Make-Ahead: You can slice the apples and prepare all toppings a few hours before serving. Just keep the apple slices in a bowl of lemon water to prevent browning.
- Storage: If you have leftovers, store the assembled monster mouths in an airtight container in the refrigerator for up to 24 hours. Enjoy them chilled for a refreshing snack!
Nutrition Tips and Dietary Adaptations
These Apple Monster Mouths are not just fun, but they can also be a nutritious snack! Here’s how to make them work for various dietary needs:
- Low-Sugar Option: Use less candy and more fresh fruits to keep sugar levels down while still enjoying the treat.
- Vegan Variation: Substitute honey with agave syrup and use plant-based peanut butter to make this a vegan-friendly option.
- Gluten-Free: All ingredients used are gluten-free, making these monster mouths suitable for those with gluten sensitivities.
Equipment Recommendations
To make your Apple Monster Mouths, here are some handy tools that will simplify the process:
- Apple Slicer: A great tool for cutting apples evenly and efficiently.
- Sharp Knife: Essential for slicing apples and spreading peanut butter smoothly.
- Cutting Board: A sturdy surface will make your prep work easier and cleaner.
Serving Suggestions
These delightful treats can be served in various fun ways:
- On a Platter: Arrange your monster mouths on a colorful platter for a visual feast.
- As Party Favors: Package individual monster mouths in clear bags tied with a festive ribbon for guests to take home.
- With Dipping Sauces: Serve alongside a small bowl of yogurt or caramel sauce for an extra layer of flavor.
FAQ: Your Apple Monster Mouth Questions Answered
- Can I use different types of apples?
Absolutely! Choose any variety you prefer, but sweeter apples like Fuji or Honeycrisp work best. - How can I prevent the peanut butter from sticking to my knife?
Try dipping your knife in warm water before spreading the peanut butter to make it glide smoothly. - What’s the best way to store leftover monster mouths?
Keep them in an airtight container in the refrigerator for up to 24 hours. - Can these be made ahead of time?
Yes! Slice the apples and prepare toppings in advance, but assemble them just before serving for the best results. - Is there a nut-free alternative to peanut butter?
Yes, use sun butter or a creamy cheese spread for a nut-free version. - What if I can’t find candy eyes?
You can use chocolate chips or even small pieces of fruit as a substitute! - How do I make these more flavorful?
Incorporate spices like cinnamon on the apples or add a drizzle of honey on top. - Can I use other candies for the teeth?
Definitely! Pretzel sticks, chocolate-covered raisins, or even licorice can make great teeth!
In conclusion, crafting these playful Apple Monster Mouths is not just a culinary task; it’s an invitation to gather around the table, laugh, and enjoy the spirit of Halloween together. With their vibrant colors, fun textures, and a burst of flavors, these treats are destined to be the centerpiece of your Halloween festivities. So grab your ingredients, roll up your sleeves, and let the monster-making begin! Happy Halloween!
Halloween: Apple Monster Mouths
Ingredients
Fruits and Fillings
- 3 large apples (Choose firm, crisp apples)
- 3/4 cup creamy peanut butter (Smooth peanut butter)
- Mini marshmallows (candy corn, or almond slivers) mini marshmallows, candy corn, or almond slivers (For teeth)
- Sprite or lemon juice Sprite or lemon juice (To prevent browning)
- Candy Eyes candy eyes (Optional for added effect)
Instructions
- Remove cores and slice apples; dip slices in lemon juice or Sprite.
- Spread peanut butter on one apple slice and press another slice on top.
- Insert mini marshmallows, candy corn, or almond slivers into peanut butter to form teeth.

![['Close-up view of gluten-free chocolate chip muffins with a golden-brown crust and visible chocolate chunks.', 'Delicious gluten-free chocolate chip muffins presented side-view showing a fluffy texture and rich chocolate chips.', 'A soft, golden gluten-free chocolate chip muffin, highlighting its moist interior and melted chocolate.', 'A side profile of gluten-free chocolate chip muffins showcasing their inviting golden color and chocolatey goodness.']](https://yumswift.com/wp-content/uploads/2026/07/gluten-free-chocolate-chip-muffins_1_U1-150x150.webp)