Discover the Joy of Making No Bake Reese’s Chocolate Peanut Butter Truffle Cups
Welcome, fellow dessert lovers! Today, we’re diving into a delightful treat that brings together the rich flavors of chocolate and creamy peanut butter in a way that will make your taste buds dance. These No Bake Reese’s Chocolate Peanut Butter Truffle Cups are not just a simple dessert; they’re an experience, a celebration of flavors, and a perfect way to indulge any day of the week. With a combination of textures from the smooth chocolate and crunchy Reese’s Pieces, this dessert is bound to be a hit at any gathering!
Let’s embark on this culinary adventure together, where tradition meets modern flair. Grab your apron, and let’s get started!
Why You’ll Love This Recipe
- No baking required: Enjoy the process without the oven! This recipe is perfect for those hot summer days or when you’re short on time.
- Easy to follow steps: With a simple method and minimal ingredients, you can whip up these truffle cups in no time.
- Customizable flavors: Swap ingredients to create your own twist on these decadent treats. Go wild with toppings or different nut butters!
- Perfect for any occasion: Whether it’s a birthday party, holiday gathering, or just because, these truffles bring joy to every celebration.
- Kid-friendly fun: Involve the little ones in the kitchen! They’ll love helping to mix and decorate these delightful truffle cups.
Ingredient Breakdown
Before we roll up our sleeves, let’s look at what we need for these creamy, dreamy truffles.
- 2 cups semi-sweet chocolate chips: Melt these down for a luscious chocolate shell. You can also use milk chocolate or white chocolate for a sweeter alternative.
- 1 cup creamy peanut butter: The heart of our recipe! Creamy peanut butter provides that signature flavor. For a nut-free option, almond or sunflower butter work beautifully.
- 1/2 cup powdered sugar: This sweetens the mixture and adds to the creamy texture.
- 1/2 teaspoon vanilla extract: A dash of vanilla enhances the overall flavor.
- 1 cup mini Reese’s Pieces: These little gems add crunch and bursts of peanut butter flavor.
- 1/2 cup dark chocolate chunks: For an extra chocolatey touch, sprinkle these inside or on top of your truffles!
- Optional substitutions: Swap semi-sweet chocolate chips for milk chocolate or white chocolate for a sweeter twist. Use almond or sunflower butter for a peanut-free version. Replace Reese’s Pieces with mini M&M’s for added variety.
How to Make Your Reese’s Chocolate Peanut Butter Truffle Cups
Now that we have our ingredients ready, let’s dive into the step-by-step process of creating these truffle cups.
Step 1: Melt the Chocolate
In a microwave-safe bowl, melt your chocolate chips. Heat in 30-second intervals, stirring in between until smooth and fully melted. This will create a luscious chocolate coating for your truffles.
Step 2: Prepare the Base
In a mixing bowl, combine the creamy peanut butter, powdered sugar, and vanilla extract. Stir until you achieve a smooth consistency. This mixture is what will give each truffle its rich flavor.
Step 3: Mix in the Reese’s Pieces
Gently fold in the mini Reese’s Pieces and dark chocolate chunks into your peanut butter mixture. This adds delightful texture and flavor, ensuring every bite is a surprise!
Step 4: Assemble the Truffle Cups
Using a mini muffin tin lined with paper liners, spoon a layer of melted chocolate into the bottom of each cup. Then, add a generous scoop of the peanut butter mixture on top. Finish by drizzling more melted chocolate over the top. Make sure each cup is fully covered.
Step 5: Chill and Serve
Place the muffin tin in the refrigerator for at least 30 minutes to allow the chocolate to set. Once firm, carefully peel away the paper liners and serve your truffle cups!
Pro Tips for Perfect Truffles
- Room temperature ingredients: Make sure your peanut butter is at room temperature for easy mixing.
- Use parchment paper: Line your muffin tin with parchment paper for easy removal of the truffles.
- Freeze for a firmer texture: If you prefer a firmer truffle, freeze them for an hour before serving.
- Decorate with toppings: Get creative! Add crushed nuts, sprinkles, or a drizzle of caramel for an elevated touch.
- Don’t rush the chilling: Allow enough time for the chocolate to set properly; this ensures a beautiful presentation.
- Experiment with flavors: Try adding a pinch of sea salt or a splash of flavored extract for a unique twist.
- Store properly: Keep your truffles in an airtight container in the fridge to maintain freshness.
- Use a cookie scoop: For consistent sizing, use a cookie scoop to portion the peanut butter mixture.
Common Mistakes and Troubleshooting
Let’s address a few common hurdles you might face while making these truffles.
- Chocolate not melting smoothly: Ensure you’re using a microwave-safe bowl and melting in short intervals to prevent overheating.
- Truffles falling apart: If your mixture is too crumbly, try adding a touch more peanut butter or a bit of cream to bind it together.
- Chocolate coating too thick: If the chocolate is too thick, add a teaspoon of vegetable oil to thin it out.
- Peanut butter filling too sticky: Chill the mixture briefly before rolling to make it easier to handle.
Delicious Variations to Try
Feeling adventurous? Here are some fun variations to inspire your next batch of truffle cups:
- Chocolate Lover’s Delight: Use a mix of dark, milk, and white chocolate chips for a colorful and flavorful twist.
- Nutty Bliss: Fold in chopped nuts like almonds, pecans, or hazelnuts for added crunch.
- Minty Fresh: Add a few drops of mint extract to the peanut butter mixture for a refreshing mint chocolate flavor.
- Fruity Fusion: Incorporate dried fruits like cranberries or cherries for a tart contrast to the sweetness.
Storage and Make-Ahead Instructions
These truffles can be made ahead of time, making them a perfect choice for party planning!
- Refrigerate: Store your truffles in an airtight container in the refrigerator for up to 2 weeks.
- Freeze for later: You can also freeze them for up to 3 months. Just ensure they’re well-wrapped to prevent freezer burn.
- Thawing: When ready to enjoy, simply move them to the fridge a few hours before serving to allow them to thaw gradually.
Frequently Asked Questions
Here are some common questions that may arise as you embark on this truffle-making journey:
- Can I use crunchy peanut butter? Absolutely! Crunchy peanut butter will add a delightful texture to your truffles.
- What if I don’t have a mini muffin tin? No problem! You can shape the truffles by hand and place them on a parchment-lined baking sheet.
- Can I use a different type of chocolate? Yes! Feel free to experiment with any chocolate you love, such as dark chocolate or white chocolate.
- Do I have to use Reese’s Pieces? Not at all! You can replace them with other candies or toppings like mini M&M’s or crushed pretzels.
- How can I make these dairy-free? Use dairy-free chocolate and nut butter to create a delicious dairy-free treat.
- What is the best way to serve these truffles? Serve them chilled for the best flavor, and try garnishing with additional Reese’s Pieces or drizzled chocolate.
- Can I add more sugar? Yes, if you prefer a sweeter truffle, adjust the powdered sugar to your taste preference.
- How long do they take to set? Allow at least 30 minutes in the refrigerator for the truffles to set properly.
Nutritional Tips and Dietary Adaptations
While these truffles are a delightful treat, here are some tips for making them a bit healthier:
- Reduce sugar: Use less powdered sugar or a sugar substitute to lower the sweetness.
- Opt for dark chocolate: Dark chocolate contains less sugar and more antioxidants than milk chocolate.
- Use natural nut butter: Choose natural peanut butter with no added sugar or oils for a healthier option.
Equipment Recommendations
To make your truffle-making experience as seamless as possible, here are some essential tools:
- Microwave-safe bowl: For melting chocolate easily.
- Mixing bowls: Have a few on hand for combining ingredients.
- Mini muffin tin: Ideal for creating the perfect shape of your truffles.
- Cookie scoop: For consistent sizing of your truffle filling.
- Parchment paper: Essential for easy removal of the truffles from the muffin tin.
Serving Suggestions
Finally, let’s talk about how to serve these delectable truffles!
- On a dessert platter: Arrange your truffles on a beautiful serving platter for an eye-catching presentation.
- With coffee or tea: These truffles pair wonderfully with a warm beverage, enhancing the overall flavor experience.
- As party favors: Package them in clear bags tied with a ribbon for a sweet gift at gatherings.
In conclusion, making No Bake Reese’s Chocolate Peanut Butter Truffle Cups is not just a recipe; it’s an invitation to indulge in joy, creativity, and togetherness. So gather your loved ones, roll up your sleeves, and let’s celebrate the magic of cooking and sharing delicious treats with one another. Happy cooking, amigos! 🎉
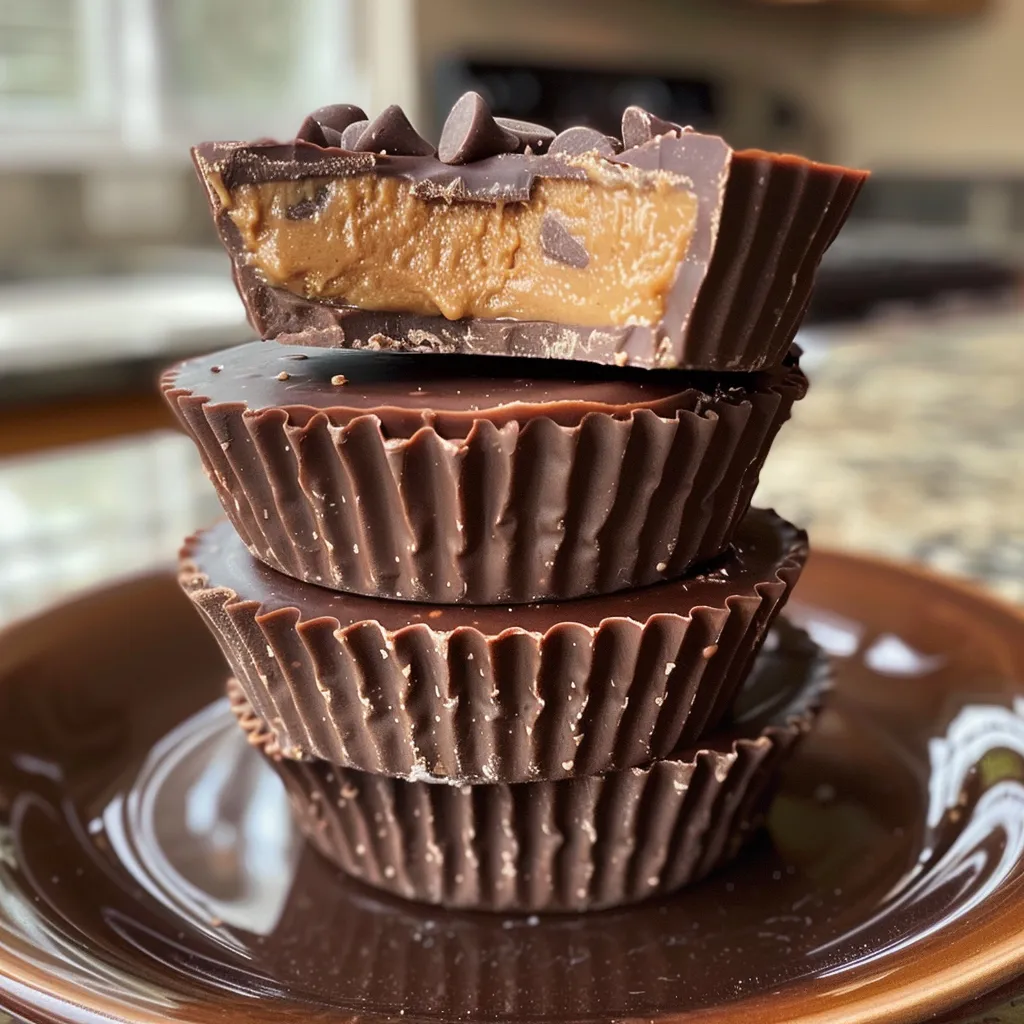
Reese's Chocolate Peanut Butter Truffle Cups – No Bake Dessert
Ingredients
Chocolate
- 2 cups semi-sweet chocolate chips (melted)
Peanut Butter
- 1 cup creamy peanut butter
Dry Ingredients
- 1/2 cup powdered sugar
- 1/2 teaspoon vanilla extract
Add-ins
- 1 cup mini Reese’s Pieces
- 1/2 cup dark chocolate chunks
Notes
- Swap semi-sweet chocolate chips for milk chocolate or white chocolate for a sweeter twist.
- Use almond or sunflower butter for a peanut-free version.
- Replace Reese’s Pieces with mini M&M’s for added variety.
Instructions
- Line a muffin tin with paper liners.
- Mix peanut butter with powdered sugar and vanilla until smooth.
- Spoon a layer of melted chocolate into each liner, then add a spoonful of peanut butter mixture, and top with remaining chocolate.
- Sprinkle mini Reese’s Pieces and dark chocolate chunks on top.
- Refrigerate for at least 30 minutes until set.