Welcome, dear friends! Today, I invite you to embark on a delightful culinary journey as we create a sensational Ice Cream Sandwich Oreo Cake. This dessert is not just a treat; it’s an experience that transforms every gathering into a joyous celebration. With layers of creamy goodness, crunchy Oreo surprises, and a dash of love, this cake is perfect for any occasion. Whether you’re hosting a summer barbecue or celebrating a special milestone, this cake will surely steal the spotlight!
Before we dive into the recipe, let’s explore why you’ll absolutely adore this Ice Cream Sandwich Oreo Cake.
Why You’ll Love This Recipe
- Effortlessly Simple: With just a handful of ingredients, you can whip this cake up in no time. Perfect for busy days when you crave something sweet!
- Customizable Delight: Whether you prefer chocolate, vanilla, or a mix of both, this dessert allows you to tailor it to your taste. Feel free to experiment with flavors!
- Perfect for Any Occasion: Birthdays, picnics, or just a cozy night in—this cake is versatile enough to fit any gathering.
- Make-Ahead Friendly: Prepare it a day in advance and store it in the freezer. It’s the ultimate stress reliever for party hosts!
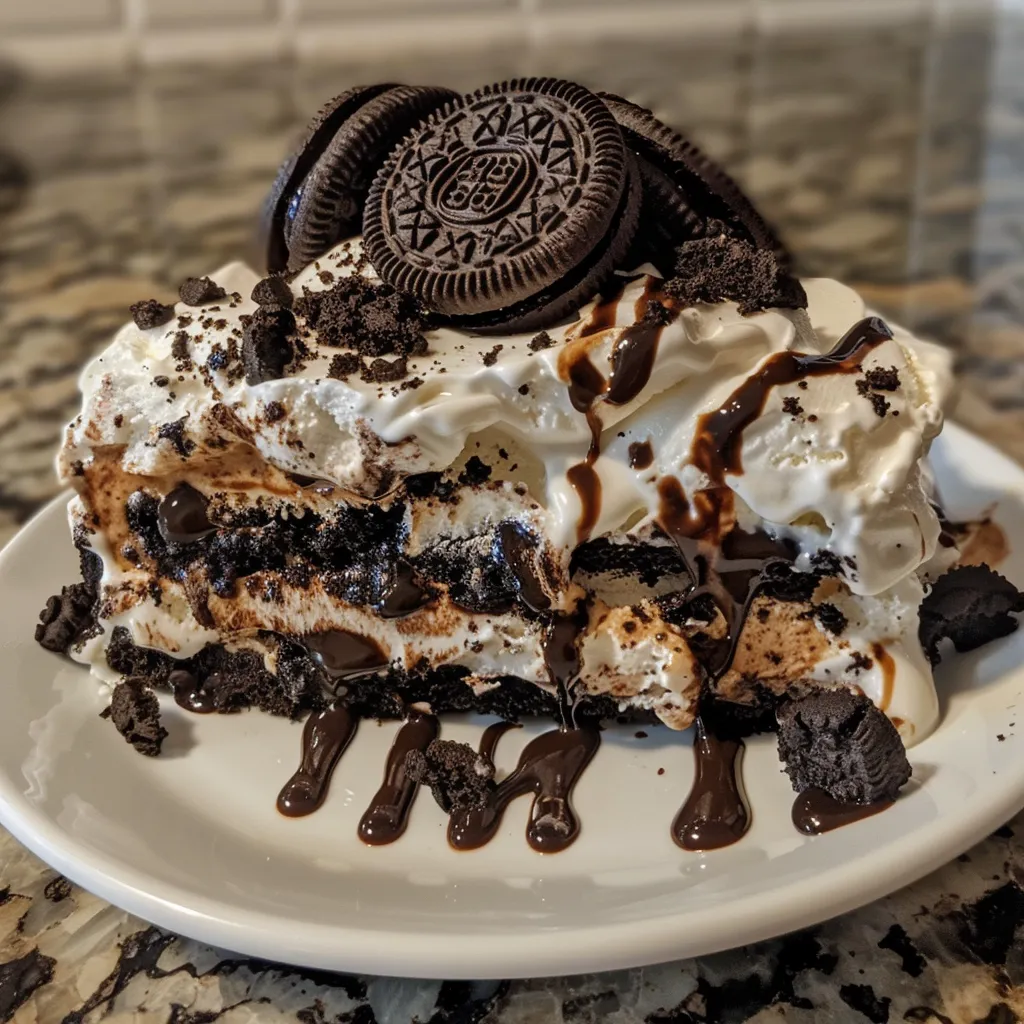
- Rich and Indulgent: The combination of Oreo cookies, ice cream, and whipped topping creates a luscious dessert that your guests won’t forget.
Ingredients Breakdown
Let’s gather our ingredients for this fantastic Ice Cream Sandwich Oreo Cake:
- 24 Ice Cream Sandwiches: These form the base of our cake. Feel free to choose your favorite flavors for a personal touch.
- 16 Crushed Oreos: Adds a delicious crunch and intense chocolate flavor that complements the creaminess of the ice cream.
- 8 oz Whipped Topping: This light and fluffy layer brings everything together, making each slice a dream.
- Hot Fudge Sauce: A drizzle of warm fudge takes this dessert over the top! You can use store-bought or make your own.
Pro Tips for a Perfect Cake
Before we start assembling our cake, here are some essential tips to ensure success:
- Soften Your Ice Cream: Allow your ice cream sandwiches to sit out for a few minutes before assembling. This makes layering easier and prevents cracks.
- Layer Strategically: Alternate between layers of ice cream sandwiches and crushed Oreos for the best texture and flavor balance.
- Chill Between Layers: After adding each layer, pop the cake in the freezer for about 30 minutes. This helps to set the layers beautifully.
- Use a Springform Pan: For easy removal, consider using a springform pan. It makes serving a breeze!
- Garnish Generously: Don’t hold back on toppings! Whipped cream, chocolate shavings, or fresh fruit can elevate your cake to gourmet status.
Common Mistakes and Troubleshooting
Even the best chefs can encounter hiccups in the kitchen! Here are some common pitfalls and how to avoid them:
- Ice Cream Too Hard: If your ice cream sandwiches are too hard to cut, let them sit at room temperature for a few minutes.
- Cracks in Layers: If you notice cracks when layering, your ice cream might be too cold. Let it soften a bit more.
- Overfilling: Be careful not to overfill your cake with layers; it can lead to spilling when you cut it. Keep it balanced!
- Uneven Freezing: Make sure your freezer is at the right temperature. If it’s too warm, the cake won’t freeze properly.
Delicious Variations
Now, let’s get creative! Here are a few variations to put your own spin on this Ice Cream Sandwich Oreo Cake:
- Fruit Fusion: Add layers of fresh berries or banana slices for a fruity twist.
- Nutty Crunch: Incorporate crushed nuts like almonds or walnuts for added texture and flavor.
- Mint Chocolate: Use mint-flavored ice cream sandwiches and add crushed peppermint candies for a refreshing take.
- Caramel Delight: Drizzle caramel sauce between layers for a sweet, buttery flavor contrast.
Storage and Make-Ahead Instructions
This cake is incredibly convenient for meal prep and hosting:
- Freezing: Once assembled, cover the cake with plastic wrap and freeze for up to a week. Simply thaw in the fridge for a few hours before serving.
- Storing Leftovers: Keep any leftover cake in the freezer. It’s perfect for late-night cravings and will stay fresh for up to two weeks!
Frequently Asked Questions
Let’s address some common questions about this delightful dessert:
- Can I use gluten-free Oreos for this recipe? Absolutely! Gluten-free Oreos work perfectly in this cake.
- How long should I freeze the cake before serving? Aim for at least 4 hours, but overnight is best for optimal firmness.
- Can I use different flavors of ice cream? Yes! Feel free to mix and match flavors based on your preferences.
- What can I use instead of whipped topping? You can substitute with homemade whipped cream for a fresher taste.
- How do I cut the cake without it falling apart? Use a sharp knife dipped in warm water, and wipe between cuts for clean slices.
- Is this cake suitable for kids? Definitely! Kids love the flavors, and it’s a fun treat for them.
- Can I make this cake dairy-free? Yes, use dairy-free ice cream sandwiches and whipped topping to cater to dietary restrictions.
- What’s the best way to serve it? Garnish with extra crushed Oreos and a drizzle of hot fudge for a stunning presentation.
Nutritional Tips and Dietary Adaptations
For those mindful of nutrition, here are some tips to enjoy this dessert without the guilt:
- Portion Control: Cut smaller slices to satisfy your sweet tooth without overindulging.
- Healthier Ice Cream Options: Look for lower-calorie ice creams or frozen yogurt for a lighter version.
- Use Natural Sweeteners: Consider using honey or maple syrup in your whipped topping to reduce refined sugars.
Essential Equipment Recommendations
Before you start, here’s a list of equipment that will make your baking experience seamless:
- Springform Pan: Ideal for easy removal and serving.
- Mixing Bowls: A set of various sizes for mixing and layering.
- Spatula: For spreading layers evenly and a smooth finish.
- Sharp Knife: To cut your cake into perfect slices with ease.
Serving Suggestions
Finally, let’s talk about how to serve this stunning cake:
- On a Festive Platter: Transfer your cake to a colorful platter to make it pop on the table.
- With Fresh Berries: Serve with a side of fresh berries for a touch of freshness and color.
- Accompanied by Coffee or Tea: A warm beverage pairs beautifully with the cold, creamy layers of the cake.
There you have it! A comprehensive guide to creating the ultimate Ice Cream Sandwich Oreo Cake that’s sure to impress. Remember, cooking is a celebration, so gather your loved ones, share stories, and enjoy every bite together. Happy baking, my friends!
Tasty Ice Cream Sandwich Oreo Cake
Ingredients
Main
- 24 pieces ice cream sandwiches
- 16 pieces crushed Oreos
- 8 oz whipped topping
- for drizzling hot fudge sauce (as needed)
Instructions
- Layer 12 ice cream sandwiches in a pan.
- Spread half of the crushed Oreos over the sandwiches.
- Add another layer of 12 ice cream sandwiches.
- Spread whipped topping over the top layer.
- Sprinkle remaining crushed Oreos on top and drizzle with hot fudge sauce.
- Freeze for at least 2 hours before serving.