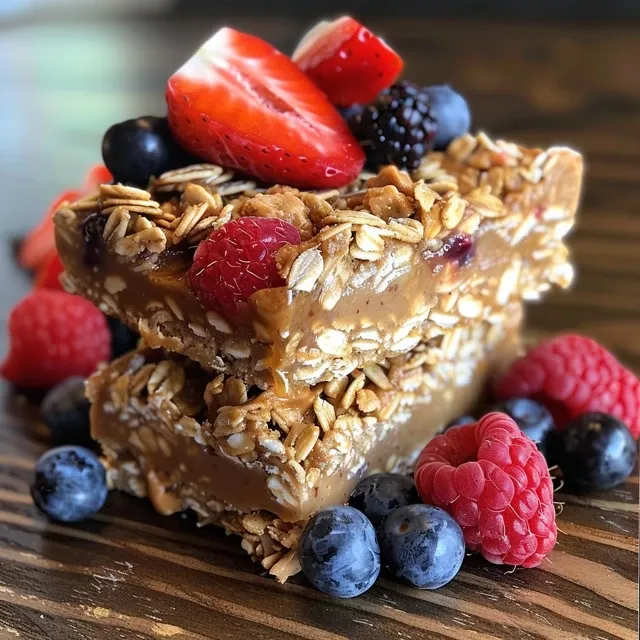
Discover the Joy of Frozen Yogurt Granola Bars
Welcome to a delightful culinary adventure where we create Frozen Yogurt Granola Bars that not only tantalize your taste buds but also celebrate the vibrant flavors of summer! This recipe is all about crafting a treat that’s perfect for family gatherings, sunny afternoons, or simply to satisfy your sweet tooth without the guilt. Packed with wholesome ingredients, these bars are a joyful fusion of creamy yogurt, crunchy granola, and fresh berries, making them a wonderful snack option for both kids and adults alike.
Why You’ll Love This Recipe
There are countless reasons to fall in love with these yogurt granola bars. Here are just a few:
- Quick and Easy Preparation: In just a few simple steps, you can whip up these delicious bars without any baking involved.
- Healthy Ingredients: Made with wholesome oats, nut butter, and fresh fruits, these bars are a nutritious choice for any time of the day.
- Customizable Flavors: Feel free to swap in your favorite nuts or fruits to create a unique flavor profile that suits your taste!
- Perfect for Meal Prep: Make a batch in advance, store them in the freezer, and enjoy a quick snack anytime.
- Family-Friendly Treat: Kids will love these bars, and they make a great addition to lunchboxes or after-school snacks.
Ingredients for Your Frozen Yogurt Granola Bars
Let’s gather what you need to create these delightful bars. Here’s a detailed breakdown of the ingredients along with some substitutions:
- 1 ½ cups old-fashioned rolled oats: Use gluten-free oats if you need a gluten-free option.
- ⅓ cup nut butter: Almond butter or peanut butter work beautifully; feel free to try sunflower seed butter for a nut-free version.
- 3 tbsp maple syrup or honey: Both sweeteners add a lovely flavor; adjust according to your sweetness preference.
- 1 tsp pure vanilla extract: This adds a warm, aromatic touch that enhances the flavor of the yogurt.
- 1 tsp cinnamon: For a hint of spice, cinnamon complements the sweetness perfectly.
- ½ tsp salt: Balances the sweetness and enhances overall flavor.
- 2 cups vanilla yogurt or skyr: I recommend using Siggi’s Vanilla Skyr for its thick texture and rich taste.
- ⅓ cup fresh strawberries (sliced)
- ¼ cup fresh blueberries
- ¼ cup raspberries and/or blackberries: Feel free to mix and match your favorite berries!
Step-by-Step Instructions
Now that we have everything ready, let’s dive into making these delicious Frozen Yogurt Granola Bars!
- Prepare the Baking Dish: Line an 8×8” or 9×9” baking dish with parchment paper and set it aside.
- Make the Granola Base: In a large mixing bowl, combine all the granola ingredients. Mix with a spatula until well combined. Transfer the oat mixture to the lined baking dish, using the spatula to firmly press it into an even layer across the bottom. This packing is crucial for a sturdy base.
- Assemble the Layers: Spread the vanilla yogurt or skyr evenly over the granola base. Top with sliced strawberries, blueberries, and any other berries you choose.
- Freeze the Bars: Place the dish in the freezer for at least 2 hours to allow the yogurt to set. Once solid, remove from the freezer and cut into squares or bars.
- Enjoy!: These bars are best enjoyed cold. Store any leftovers in the freezer for a refreshing snack anytime!
Pro Tips for Perfect Frozen Yogurt Granola Bars
To ensure your bars turn out perfectly every time, consider these expert insights:
- Pack it tight: Ensure your granola base is packed tightly to prevent crumbling when sliced.
- Layer wisely: Distributing the toppings evenly will ensure each bite is bursting with flavor.
- Experiment with textures: Add crunchy nuts or seeds for an extra layer of texture.
- Don’t skip the freeze: Allow ample time for the bars to freeze solid to hold their shape.
- Storage matters: Wrap bars individually in parchment paper for easy grabbing and to prevent freezer burn.
- Flavor variations: Try adding different spices like nutmeg or cardamom for a unique twist.
- Use quality ingredients: The better your ingredients, the more flavorful your bars will be.
- Adjust sweetness: Taste the yogurt before adding it to the granola base to ensure it meets your sweetness preference.
Common Mistakes and Troubleshooting
Even the best chefs make mistakes! Here’s how to avoid some common pitfalls:
- Granola base too crumbly: Make sure you’ve packed the granola mixture tightly in the baking dish.
- Yogurt layer too runny: If using a yogurt that’s too watery, consider straining it slightly before spreading.
- Berries sinking: If your berries tend to sink, try lightly tossing them in flour before adding them to the yogurt layer.
- Bars not freezing properly: Ensure your freezer is set to a proper temperature and avoid opening it frequently while the bars are setting.
Variations to Try
Let’s get creative! Here are some fun variations to make these bars your own:
- Chocolate Delight: Add cocoa powder to the granola base and top with chocolate chips.
- Nutty Banana: Substitute some of the yogurt with mashed ripe banana and top with chopped walnuts.
- Tropical Twist: Use coconut yogurt and top with diced mango and shredded coconut.
- Autumn Spice: Add pumpkin puree and pumpkin spice to the yogurt for a seasonal treat.
Storage and Make-Ahead Instructions
These bars are perfect for meal prep! Here’s how to store them:
- Freezer Storage: Store bars in an airtight container in the freezer for up to 3 months.
- Fridge Option: If you plan to eat them within a week, they can be kept in the refrigerator, but they are best enjoyed frozen.
- Grab-and-Go Snacks: Individually wrap them in parchment paper for easy access on busy days.
Frequently Asked Questions
Let’s address some common questions about these delicious frozen treats:
- Can I make these bars vegan? Yes! Use a plant-based yogurt and maple syrup instead of honey.
- Can I use flavored yogurt? Absolutely! Flavored yogurts can add a fun twist to your bars.
- How do I prevent freezer burn? Wrap bars individually in plastic wrap or parchment paper before freezing.
- Can I add protein powder? Yes! Mixing in a scoop of protein powder into the granola base can enhance the nutritional profile.
- What if I don’t have a baking dish? You can use a silicone mold or even an ice cube tray for smaller portions!
- How long do these bars last? They can be stored in the freezer for up to 3 months, but are best enjoyed within a month for optimal freshness.
- Can I substitute the oats? For a grain-free option, try using crushed nuts or seeds instead of oats.
- Can I add dried fruits? Yes! Dried cranberries or apricots can be a delightful addition to your bars.
Nutritional Tips and Dietary Adaptations
Here are some tips to keep in mind for a healthier version:
- Lower sugar options: Use unsweetened yogurt and reduce the amount of syrup for a lower sugar option.
- Boost fiber: Add chia seeds or flaxseeds to the granola base for an extra fiber boost.
- Healthy fats: Include seeds like pumpkin or sunflower seeds for a dose of healthy fats.
Essential Equipment Recommendations
Before we wrap up, let’s ensure you have all the right tools:
- Mixing bowls: A large bowl for combining the granola ingredients is essential.
- Spatula: A sturdy spatula will help you pack the granola tightly.
- Baking dish: Choose an 8×8” or 9×9” dish for the perfect size.
- Freezer-safe storage container: Keep your bars fresh and ready to enjoy!
Serving Suggestions
These bars are incredibly versatile and can be served in various delightful ways:
- As a breakfast on-the-go: Enjoy a bar with your morning coffee or tea.
- Post-workout snack: The combination of protein and carbs makes these bars ideal for recovery.
- With yogurt parfaits: Layer sliced bars with yogurt and more fresh fruits for a delicious parfait.
- As a dessert: Drizzle with melted dark chocolate for a decadent treat.
In conclusion, these Frozen Yogurt Granola Bars are not just a snack; they are a celebration of flavor and nutrition that can bring joy to any occasion. So gather your ingredients, roll up your sleeves, and let’s create something wonderful together! Enjoy each bite and remember that cooking is all about love, creativity, and sharing with others. Happy cooking!
Frozen Yogurt Granola Bars
Ingredients
Base
- 1 ½ cups old fashion rolled oats (gluten-free if needed)
- ⅓ cup nut butter (almond or peanut)
- 3 tbsp maple syrup or honey
- 1 tsp pure vanilla extract
- 1 tsp cinnamon
- ½ tsp salt
Yogurt & Berries
- 2 cups vanilla yogurt or skyr (e.g., Siggi's Vanilla Skyr)
- ⅓ cup fresh strawberries (sliced)
- ¼ cup fresh blueberries
- ¼ cup raspberries and/or blackberries (cut in half, optional)
Instructions
- Line an 8x8” or 9x9” baking dish with parchment paper.
- Mix oats, nut butter, maple syrup, vanilla, cinnamon, and salt. Press the mixture into the dish firmly.
- Spread yogurt evenly over the pressed granola base. Top with berries.
- Freeze for at least 2 hours until solid. Cut into bars and serve.