

Unlocking the Joy of Homemade No-Bake Granola Bars
Welcome to a culinary adventure where convenience meets delight! Today, we’re diving into the world of no-bake granola bars. These delightful snacks are not only easy to make but also customizable to fit your taste buds and dietary needs. Whether you’re looking for a quick breakfast, a midday pick-me-up, or a sweet treat to share with friends, this recipe is your golden ticket. The beauty of these bars lies in their simplicity and versatility—perfect for anyone who loves to enjoy wholesome snacks without the fuss of baking!
In this article, we’ll explore everything you need to know to create your own delicious granola bars, including ingredient breakdowns, expert tips, and a variety of ways to personalize your creation. So grab your apron and let’s get started on this flavorful journey!
Why You’ll Love This Recipe
Making your own granola bars at home is a rewarding experience, and here are just a few reasons why you’ll fall in love with this recipe:
- Customizable Ingredients: You have complete control over what goes into your bars. Choose healthy options that fit your lifestyle, dietary preferences, or even just what you have on hand.
- Quick and Easy: With no baking required, these bars can be whipped up in just a few minutes. Perfect for those busy mornings or last-minute snack cravings!
- Cost-Effective: Homemade granola bars are often much cheaper than store-bought options, especially if you enjoy using organic or specialty ingredients.
- Nutritious Choices: Load your granola bars with whole grains, nuts, and seeds for a power-packed snack that keeps you satisfied and energized.
- Perfect for Meal Prep: Make a batch ahead of time and keep them in the fridge for easy grab-and-go snacks throughout the week. Your future self will thank you!
Essential Ingredients for Your Granola Bars
Let’s dive into the ingredients that make these bars so special. Here’s what you’ll need:
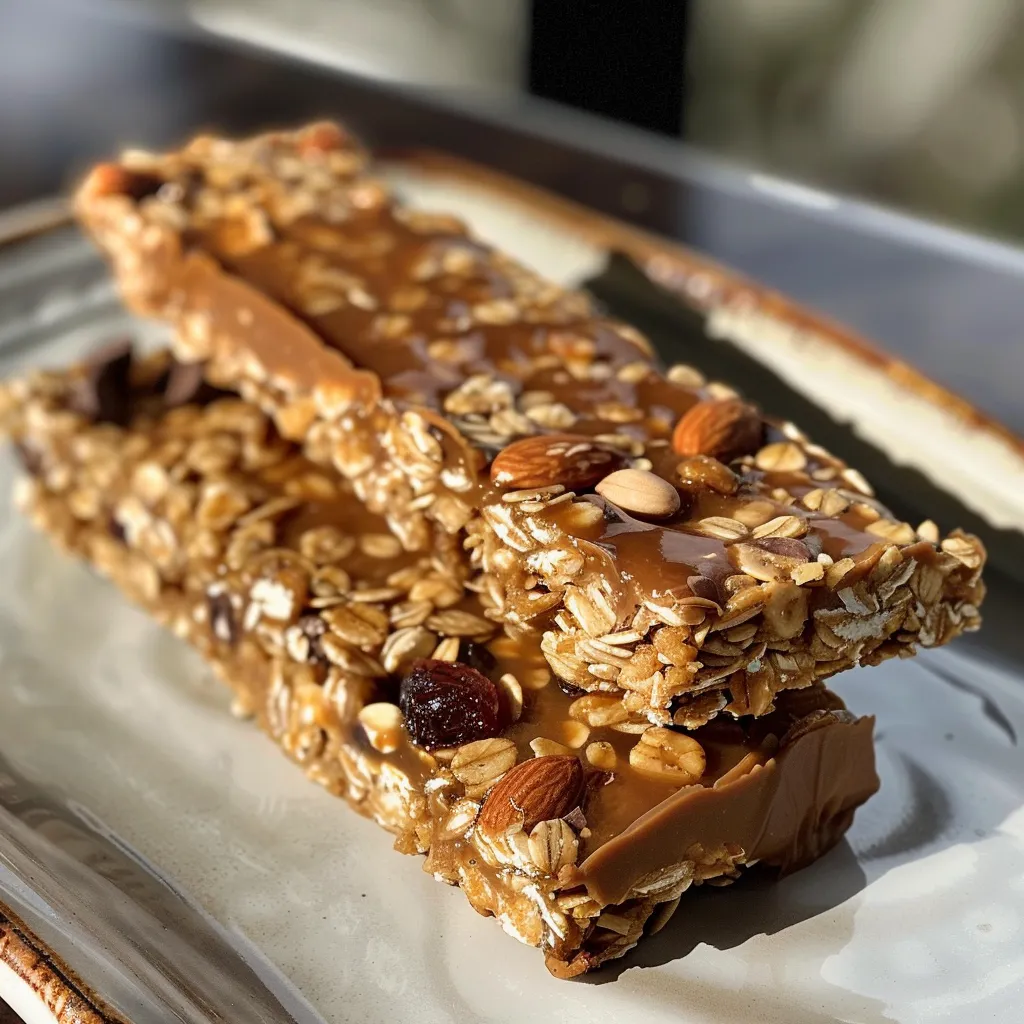
- Old-Fashioned Rolled Oats: The base of our granola bars. These oats provide a chewy texture and are a great source of fiber.
- Nut Butter: Choose from peanut butter, almond butter, or cashew butter. Nut butter binds everything together and adds a creamy richness.
- Sweetener: Use honey, maple syrup, or agave nectar to sweeten your bars naturally and help them hold together.
- Mix-Ins: This is where the fun begins! Add chocolate chips, dried fruits, nuts, or seeds—whatever your heart desires!
- Vanilla Extract (optional): A splash of vanilla enhances the overall flavor and adds a lovely aromatic quality.
- Salt: Just a pinch to balance the sweetness and enhance flavors.
Ingredient Breakdown and Substitutions
Understanding your ingredients can help you make the best choices for your granola bars. Here’s a deeper look:
- Oats: For a gluten-free version, opt for certified gluten-free oats. Quick oats can also work but will yield a softer texture.
- Nut Butter: If you’re nut-free, sunflower seed butter or tahini make excellent substitutes. Each brings its own unique flavor.
- Sweeteners: Maple syrup works well for a vegan option, while agave is another great alternative if you’re looking for a lower glycemic index sweetener.
- Mix-Ins: Get creative! Try adding spices like cinnamon or nutmeg for warmth, or superfoods like chia seeds and hemp seeds for an extra nutritional boost.
- Vanilla: For a different twist, almond extract can be used instead of vanilla for a subtly different flavor profile.
Pro Tips for Perfect Granola Bars
To ensure your granola bars turn out perfectly every time, here are some expert tips to keep in mind:
- Use Fresh Ingredients: Ensure that your oats, nuts, and dried fruits are fresh for the best flavor and texture.
- Press Firmly: When transferring your mixture to the pan, press it down firmly. This helps the bars hold their shape once set.
- Chill for Best Results: Allow your bars to chill in the fridge for at least 2 hours. This step is crucial for achieving the right texture.
- Experiment with Flavor Combinations: Don’t be afraid to try different nut butters, sweeteners, and mix-ins to find your perfect flavor combination!
- Slice with a Warm Knife: For clean cuts, warm your knife under hot water before slicing the bars. This prevents them from crumbling.
- Store Properly: Keep your granola bars in an airtight container in the fridge to maintain freshness.
- Make a Big Batch: Double the recipe and store half in the freezer for future snacks!
- Try Adding Protein: For a protein boost, mix in protein powder or use chickpea flour in your bars.
Common Mistakes and Troubleshooting
Even the best of us make mistakes in the kitchen! Here are some common pitfalls and how to avoid them:
- Bars Falling Apart: This usually happens if there’s not enough binding agent. Make sure you’re using enough nut butter and sweetener.
- Too Dry: If your mixture seems crumbly, add a bit more nut butter or sweetener to moisten it.
- Overmixing: Once you combine wet and dry ingredients, mix just until combined. Overmixing can lead to tough bars.
- Not Packing Firmly Enough: Always press the mixture down firmly in the pan to create a compact bar.
- Storing Incorrectly: Avoid storing in a warm place; always keep them in the fridge to maintain their texture and freshness.
Granola Bar Variations: Spice It Up!
Now that you have the basic recipe down, let’s explore some fun variations:
- Chocolate Chip Delight: Add mini chocolate chips and a sprinkle of sea salt on top before chilling for a sweet and salty treat.
- Fruit and Nut Fusion: Mix in dried cranberries, cherries, or apricots along with chopped walnuts or pecans for a chewy and crunchy combination.
- Coconut Paradise: Add shredded coconut and a few dark chocolate chunks for a tropical twist.
- Peanut Butter Banana: Mix in mashed ripe bananas and chopped peanuts for a banana bread-inspired flavor.
How to Store and Make Ahead
Your homemade granola bars can be stored for maximum freshness. Here’s how:
- Refrigerator Storage: Keep your bars in an airtight container in the fridge for up to one week.
- Freezing: For longer storage, wrap individual bars in parchment paper or plastic wrap and place them in a freezer-safe bag. They can last up to 3 months!
- Make-Ahead: Prepare a batch on the weekend and enjoy them throughout the week as a quick breakfast or snack.
- Thawing: If you freeze your bars, let them thaw in the fridge overnight before enjoying.
Frequently Asked Questions (FAQ)
Below are some common questions and answers that might help you in your granola bar-making journey:
- Can I store them at room temperature? It’s best to store them in the fridge to prevent them from becoming too soft or losing their shape.
- How do I prevent the bars from falling apart? Ensure there’s enough binding agent like nut butter and sweetener in your mixture.
- What are some great add-ins for these bars? Consider adding seeds, dried fruits, or even spices to enhance flavor.
- Can I make these bars vegan? Absolutely! Use maple syrup and any nut or seed butter, avoiding honey.
- How do I know when they are ready to cut? They should be firm to the touch after chilling in the refrigerator for at least 2 hours.
- Can I use quick oats instead of rolled oats? Yes, but keep in mind that the texture will be softer.
- Can I double the recipe? Yes! Just use a larger pan and adjust the chilling time if needed.
- What if I don’t have nut butter? You can substitute with sunflower seed butter or even make a batch without it, although it may affect the texture.
Nutritional Tips and Dietary Adaptations
These granola bars can easily be adapted to fit various dietary needs:
- Gluten-Free: Use certified gluten-free oats and ensure all other ingredients are gluten-free.
- Nut-Free: Substitute nut butter with sunflower seed butter or tahini.
- Low-Sugar: Reduce the amount of sweetener or replace it with stevia or monk fruit for a lower-calorie option.
- Protein-Packed: Add protein powder or use chickpea flour in your recipe to increase the protein content.
Essential Equipment Recommendations
While making your granola bars, having the right tools can make the process smoother:
- Mixing Bowl: A large bowl is essential for mixing all your dry and wet ingredients.
- Baking Dish: An 8×8-inch dish works perfectly for this recipe, providing the right thickness for your bars.
- Parchment Paper: Using parchment paper makes it easy to lift the bars out of the dish after chilling.
- Spatula: A sturdy spatula helps to press the granola mixture evenly.
- Sharp Knife: For cutting your bars into even pieces after they’ve set.
Serving Suggestions: Enjoying Your Creation
Now that your granola bars are ready, here are some delightful serving suggestions:
- Pair with Yogurt: Enjoy your bars alongside a bowl of Greek yogurt topped with fresh fruit for a satisfying breakfast.
- Nut Butter Dip: Dip your bars in a little extra nut butter or dark chocolate for an indulgent snack.
- On-the-Go Snack: Wrap them individually for a convenient snack while you’re out and about.
- Perfect for Lunchboxes: Slice them into smaller pieces and pack them for a healthy lunchbox treat.
With these tips, tricks, and variations, you’re now equipped to create the ultimate homemade no-bake granola bars that will delight your taste buds and nourish your body. Enjoy the process, celebrate your culinary creativity, and share your delicious creations with friends and family. Happy snacking!
Homemade No Bake Granola Bars
Ingredients
Dry Ingredients
- 2 cups old-fashioned rolled oats
- 0.5 cup nut butter (peanut, almond, or cashew)
- 0.33 cup honey or maple syrup
- 0.5 cup mix-ins (chocolate chips, dried fruit, seeds, or nuts)
- 1 teaspoon vanilla extract (optional)
Pinch of salt
- 0.25 teaspoon salt
Instructions
- Line an 8x8-inch baking dish with parchment paper.
- Mix oats and mix-ins in a large bowl.
- Heat nut butter and honey in a saucepan until smooth, then stir in vanilla and salt.
- Pour wet mixture over dry ingredients and stir to coat evenly.
- Press mixture into the prepared pan and chill for at least 2 hours.
- Cut into 10-12 bars and enjoy or store for later.