Delight in the Spooky Season with Whimsical Spider Cupcakes
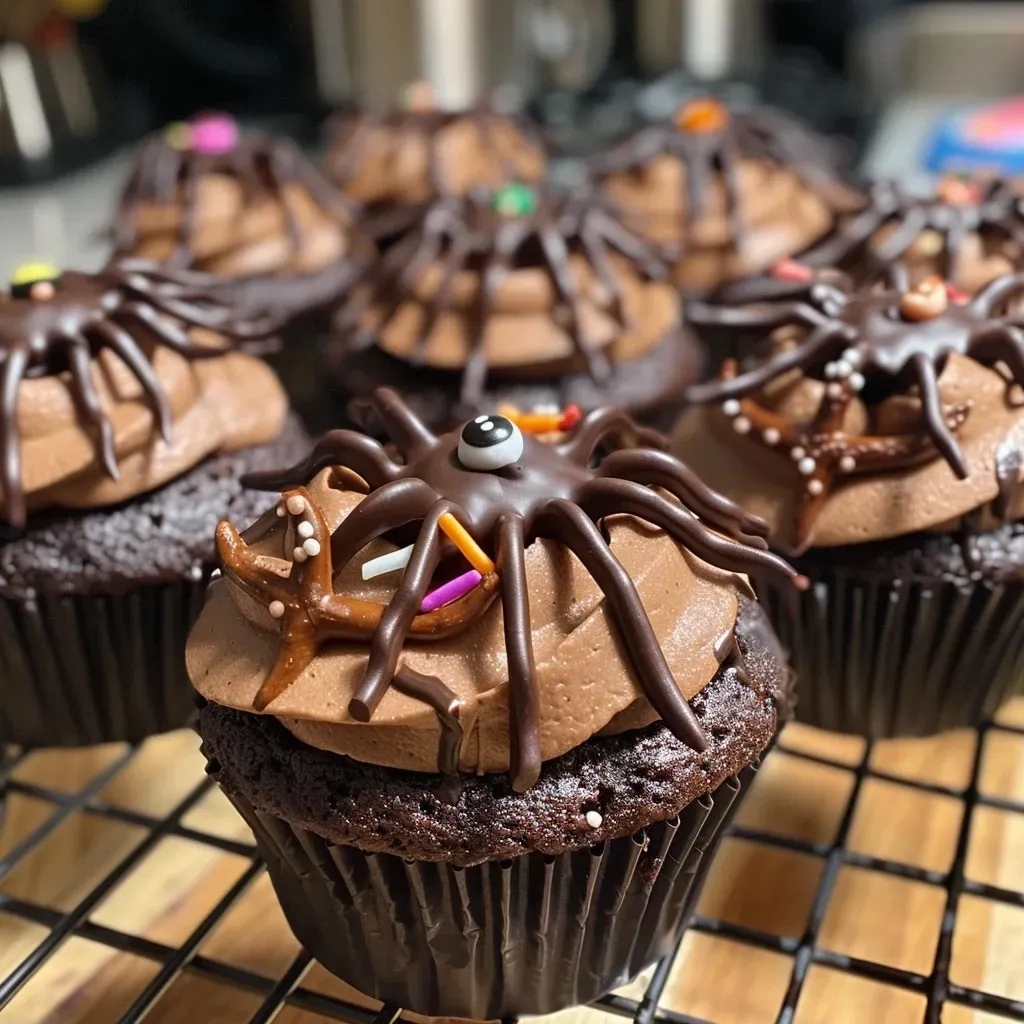
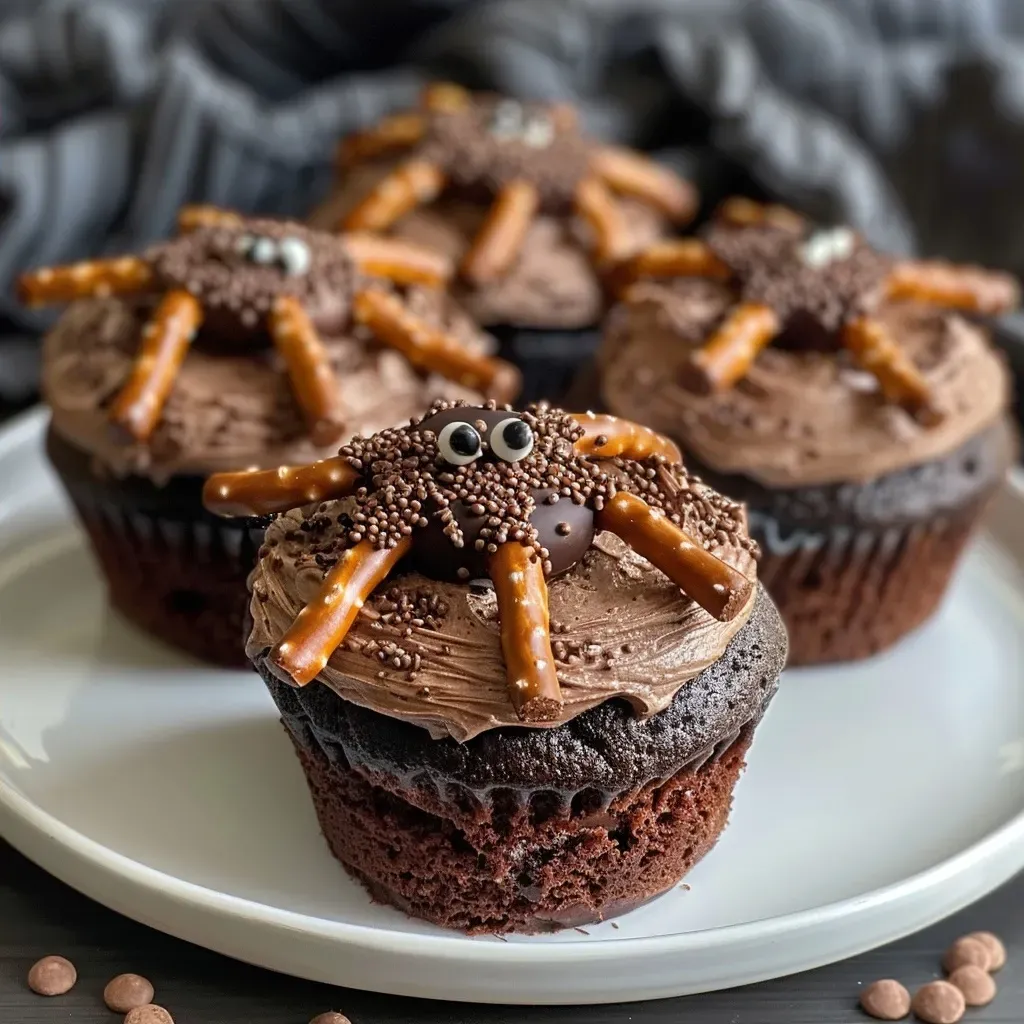
As the leaves turn golden and the air carries a hint of chill, it’s time to embrace the spirit of Halloween! What better way to celebrate than with these whimsical Spider Cupcakes? Crafted from rich chocolate cake and adorned with playful pretzel legs and candy eyes, these cupcakes are perfect for gatherings and celebrations. Whether you’re hosting a spooky soirée or just want to sweeten your day, these delightful treats promise to bring joy to every bite!
Why You’ll Love This Recipe
- Kid-Friendly Fun: These spider cupcakes are not only delicious but also a hit with kids! The fun decorations make them perfect for Halloween parties and school events.
- Simple to Make: With a straightforward recipe, these cupcakes come together easily, making them a perfect choice for novice bakers and experienced ones alike.
- Decadent Chocolate Flavor: The combination of cocoa powder and bittersweet chocolate ensures a rich, moist chocolate cupcake that will have everyone coming back for more.
- Customizable Themes: While they’re themed for Halloween, you can easily adapt the decorations for other occasions—think ghosts or monsters!
- Perfect for Sharing: Whether it’s a gathering with friends or a treat for family, these cupcakes are made to be shared and enjoyed together, just like good food should be.
Ingredients You’ll Need
Here’s what you’ll need to whip up these delightful spider cupcakes:
- 2 ½ cups (300g) all-purpose flour
- ⅓ cup (28g) natural unsweetened cocoa powder
- ½ tsp baking soda
- 1 tsp baking powder
- 1 tsp salt
- 1 stick (½ cup) unsalted butter (room temperature)
- 1 ½ cups (297g) granulated sugar
- 3 oz bittersweet chocolate baking bar (melted & cooled)
- 2 large eggs
- 1 cup (236ml) buttermilk
- ½ cup (118ml) hot tap water
- 2 cups (452g) sticks unsalted butter (4 sticks, room temperature)
- 1 cup (84g) natural unsweetened cocoa powder for frosting
- 4-5 cups (454-567g) powdered sugar
- 3-4 Tbsp heavy whipping cream
- 1 tsp vanilla extract
- ½ tsp salt
- Brown jimmie sprinkles for decoration
- Pretzels (Thin Twists work best)
- Candy eyeballs for the spider decoration
Step-by-Step: How to Make Spider Cupcakes
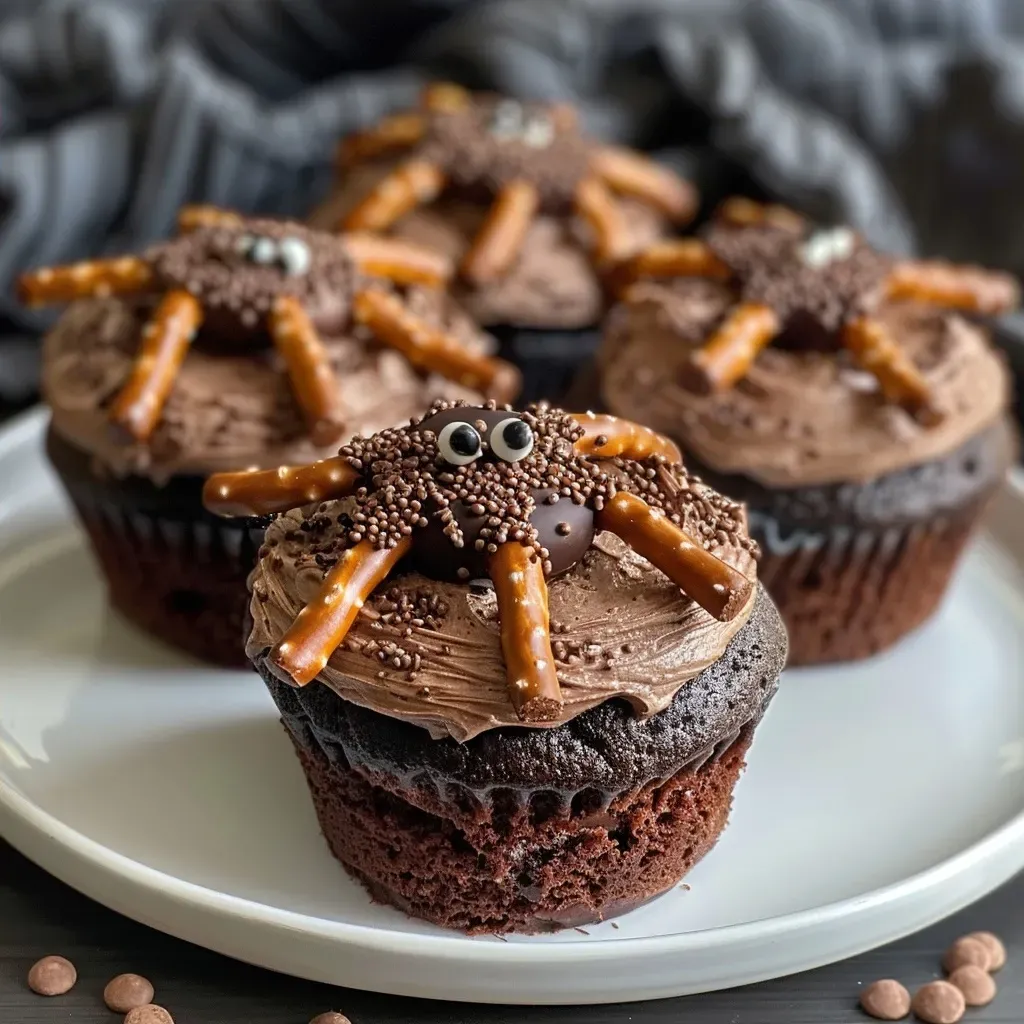
Let’s dive into the fun of baking! Here’s how to create these adorable spider cupcakes:

★ Recommended Kitchen Tool
5-Speed Electric Hand Mixer
Make this recipe even easier with a quality 5-Speed Electric Hand Mixer — a must-have kitchen staple!
1. Preheat & Prep
Start by preheating your oven to 350°F (175°C). Line a cupcake tin with paper liners to keep things tidy and festive.
2. Mix the Cupcake Batter
In a large bowl, combine the flour, cocoa powder, baking soda, baking powder, and salt. In another bowl, beat the butter and sugar together until light and fluffy. Add the melted chocolate and mix well. Incorporate the eggs one at a time, followed by buttermilk and hot water. Finally, add the dry ingredients and mix until smooth.
3. Bake the Cupcakes
Divide the batter evenly among the lined cupcake tins, filling each about two-thirds full. Bake for 18-20 minutes or until a toothpick inserted in the center comes out clean. Let them cool completely on a wire rack.
4. Make the Buttercream Frosting
In a large mixing bowl, beat the room temperature butter until creamy. Gradually add in the cocoa powder and powdered sugar, alternating with the heavy cream until you achieve a smooth, spreadable consistency. Add vanilla extract and salt to taste.
5. Create the Chocolate Spiders
Take your pretzels and break them into 8 legs for each spider. You can dip them in melted chocolate for an extra treat if desired!
6. Assemble the Cupcakes
Once the cupcakes are cool, generously frost each with your chocolate buttercream. Place two candy eyeballs on top and arrange the pretzel legs to form a spider. Be creative and have fun with the placement!
Pro Tips for the Best Spider Cupcakes
- Use Room Temperature Ingredients: Let your butter and eggs sit out for about 30 minutes before baking to ensure a smooth batter.
- Don’t Overmix: Once you combine the wet and dry ingredients, mix just until incorporated to keep your cupcakes light and fluffy.
- Cool Completely: Ensure your cupcakes are completely cool before frosting; otherwise, the frosting will melt!
- Customize the Decorations: Feel free to use colored candy melts or different sprinkles to customize the theme for any occasion.
- Double the Recipe: If you’re expecting a crowd, consider doubling the recipe—these cupcakes will disappear fast!
- Store Properly: Keep leftover cupcakes in an airtight container at room temperature for up to three days.
- Make Ahead: You can bake the cupcakes and the frosting a day in advance; just assemble them on the day of serving.
- Frosting Consistency: If the frosting is too thick, add a splash of milk to reach your desired consistency.
Common Mistakes and Troubleshooting
Even the best bakers make mistakes! Here are some common issues and how to solve them:
- Dry Cupcakes: This can happen if you overbake. Always check for doneness a couple of minutes before the suggested time.
- Frosting Too Runny: If your frosting is too runny, add more powdered sugar until it thickens up.
- Uneven Baking: Make sure your oven is preheated and consider rotating the tins halfway through baking for even results.
- Frosting Sliding Off: Allow cupcakes to cool completely before frosting to prevent melting.
Delicious Variations to Try
- Coconut Spiders: Use coconut flakes on top of the frosting for a spooky effect and a tropical twist.
- Red Velvet Base: Swap out chocolate for red velvet cake for a festive twist.
- Peanut Butter Cream: Substitute half of the butter in the frosting with peanut butter for a rich flavor.
- Gluten-Free Option: Use a gluten-free flour blend to make these cupcakes suitable for guests with dietary restrictions.
Storage and Make-Ahead Instructions
These delightful cupcakes are perfect for making ahead of time:
- Room Temperature: Keep them in an airtight container for up to three days at room temperature.
- Refrigeration: For longer storage, you can refrigerate them but bring them back to room temperature before serving.
- Freezing: Freeze un-frosted cupcakes for up to three months. Thaw and frost them when ready to serve.
Frequently Asked Questions
- Can I use box cake mix? Absolutely! For a quicker option, substitute with your favorite chocolate box mix and follow the frosting instructions.
- What can I use instead of buttermilk? You can make a quick substitute by mixing 1 cup of milk with 1 tbsp of vinegar or lemon juice and letting it sit for 5 minutes.
- Can I make these ahead of time? Yes! You can bake the cupcakes and make the frosting a day in advance; just assemble them on the serving day.
- How do I store leftover cupcakes? Keep them in an airtight container at room temperature for up to three days or refrigerate for longer freshness.
- What if I don’t have cocoa powder? You can substitute with carob powder, but the flavor will be different.
- Can I make these cupcakes vegan? You can substitute eggs with flax eggs and use non-dairy butter and milk for a vegan version.
- Why are my cupcakes sinking? This can happen if the batter is overmixed or if they’re underbaked, so keep an eye on them while baking!
- How do I get my frosting to hold its shape? Ensure your butter is at room temperature and use enough powdered sugar to achieve the desired consistency.
Nutritional Information and Dietary Adaptations
Each cupcake is a wonderful treat, but moderation is key! Here’s a breakdown for those keeping an eye on their nutrition:
- Calories: Approximately 300 calories per cupcake.
- Gluten-Free: Use certified gluten-free flour.
- Dairy-Free: Substitute butter with margarine and use dairy-free milk.
- Lower Sugar: Reduce sugar in the batter and use a sugar substitute in the frosting.
Equipment Recommendations
Here’s what you’ll need to make these cupcakes:
- Mixing Bowls: A large mixing bowl and a medium bowl for easy mixing.
- Cupcake Tin: A standard cupcake tin with liners for easy serving.
- Electric Mixer: A hand or stand mixer will make whipping the batter and frosting a breeze.
- Cooling Rack: Essential for cooling the cupcakes evenly.
Serving Suggestions
Serve these whimsical spider cupcakes on a festive platter, perhaps alongside some spooky treats like witch’s brew punch or ghostly meringues. They’re perfect for Halloween gatherings, birthday parties, or an afternoon treat with friends. Encourage everyone to join in on the decorating fun, making it a lively activity that pairs perfectly with food and laughter!
Conclusion
These whimsical spider cupcakes are not just a treat; they’re an experience filled with joy, creativity, and celebration. As you bake, let the aromas fill your home, reminding you that food is meant to be shared and enjoyed. So grab your loved ones, roll up your sleeves, and dive into the world of baking! Let’s make this Halloween memorable, one delightful cupcake at a time!
Spider Cupcakes
Ingredients
Dry Ingredients
- 2 ½ cups all purpose flour
- ⅓ cup natural unsweetened cocoa powder
- ½ tsp baking soda
- 1 tsp baking powder
- 1 tsp salt
Wet Ingredients
- 1 stick unsalted butter (room temperature)
- 1 ½ cups granulated sugar
- 3 oz bittersweet chocolate baking bar (melted & cooled)
- 2 large eggs
- 1 cup buttermilk
- ½ cup hot tap water
Frosting & Decorations
- 2 cups unsalted butter (room temperature)
- 1 cup natural unsweetened cocoa powder
- 4-5 cups powdered sugar
- 3-4 Tbsp heavy whipping cream
- 1 tsp vanilla extract
- ½ tsp salt
Decorations
- as needed Brown jimmie sprinkles
- as needed Pretzels (e.g., Thin Twists)
- as needed Candy eye balls
Instructions
- Preheat oven to 350°F (175°C) and line a cupcake pan with paper liners.
- Mix dry ingredients in a bowl; in a separate bowl, beat butter and sugar until fluffy, then add eggs, melted chocolate, and buttermilk. Combine wet and dry ingredients, then fold in hot water.
- Divide batter among cupcake liners and bake for 20 minutes. Let cool completely.
- Prepare frosting by beating butter, cocoa, powdered sugar, cream, vanilla, and salt until smooth and fluffy.
- Frost cooled cupcakes, then decorate with sprinkles, pretzels, and candy eyes to create spider designs.