Welcome to a Mediterranean Delight: Your Ultimate Guide to Homemade Pita Bread
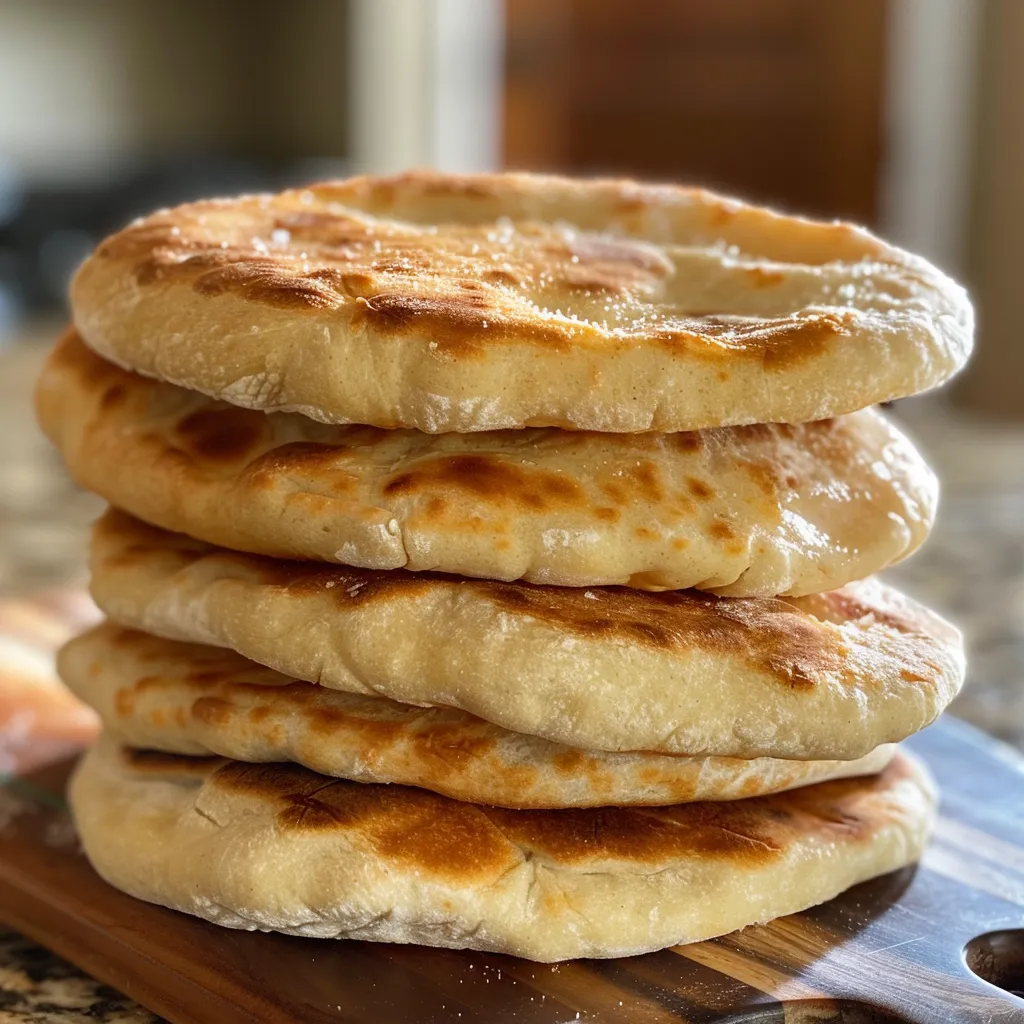
Ah, the aroma of freshly baked pita bread wafting through the kitchen! This easy recipe is not just a method; it’s an experience that brings the warmth of the Mediterranean right to your table. With a few simple ingredients and a bit of love, you can create soft, fluffy pita that’s perfect for dipping, stuffing, or simply enjoying warm with olive oil. Whether you’re a seasoned cook or a kitchen novice, this step-by-step guide will have you mastering homemade Greek flatbreads in no time.
Why You’ll Love This Recipe
This isn’t just any pita bread recipe; it’s a celebration of flavor and tradition! Here are five reasons why you’ll adore making your own:
- Freshness Guaranteed: Nothing compares to the taste of warm, homemade pita bread straight from the skillet.
- Customizable: Adjust the thickness and size of your pita to suit your preferences, making it ideal for every meal.
- Healthier Choice: Control the ingredients for a healthier, preservative-free option that’s perfect for your dietary needs.
- Perfect for Sharing: Pita is not just food; it’s a way to bring people together. Serve it with dips and fillings for a communal feast!
- Simple Techniques: Even if you’re new to baking, the straightforward steps ensure success every time.
The Essentials: Ingredients Breakdown
Let’s dive into the ingredients you’ll need for this delightful pita bread. Each one plays a crucial role in achieving that perfect puff!
- 1 cup warm water (100–110°F): The magic ingredient to activate the yeast. Too hot, and it will kill the yeast; too cold, and it won’t rise.
- 2 1/4 tsp active dry yeast: This is the leavening agent that gives the pita its airy texture.
- 1 tsp sugar: A little sweetness to feed the yeast and aid in activation.
- 2 1/2 cups all-purpose flour: The base of your dough, providing structure and chewiness.
- 1 tsp salt: Enhances flavor and strengthens the dough.
- 1 tbsp olive oil: Adds richness and helps keep the pita soft.
Pro Tips for Perfect Pita Bread
Before you get started, here are some expert insights to ensure your pita bread turns out fantastic every time:
- Yeast Activation: Always use water that’s warm, not hot. If you can comfortably hold your finger in it, it’s perfect!
- Kneading Matters: Make sure to knead the dough until it’s smooth and elastic; this is crucial for achieving that lovely puff.
- Rest Time: Don’t rush the rising process. Allow the dough to double in size for the best results.
- Heat Control: Preheat your skillet adequately to ensure that the pitas puff up properly. A medium-high setting is usually best.
- Keep Them Warm: Wrap cooked pitas in a clean towel to retain warmth and moisture.
- Experiment with Flavors: Feel free to add herbs or spices to the dough for a twist on the traditional flavor.
- Storage Tips: Let pitas cool completely before storing them in an airtight container to keep them soft.
- Perfect Pita Size: Aim for a thickness of about 1/4 inch for optimal puffing.
Common Mistakes and Troubleshooting
Even seasoned bakers can encounter hiccups along the way. Here’s how to avoid some common pitfalls:
- Flat Pitas: If your pitas don’t puff, check your yeast. It should be fresh and active. Also, ensure the skillet is hot enough.
- Dry Texture: This can happen if you knead too much or don’t measure flour correctly. Always spoon flour into your measuring cup and level it off.
- Not Enough Rise: If your dough isn’t rising, the water may have been too hot, killing the yeast. Make sure to use warm water!
Variations to Elevate Your Pita Game
Once you’ve mastered the basic pita bread recipe, try these fun variations:
- Whole Wheat Pita: Substitute half of the all-purpose flour with whole wheat flour for a nuttier flavor and added nutrition.
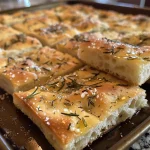
- Herbed Pita: Add dried herbs like oregano, thyme, or rosemary to the dough for an aromatic twist.
- Spicy Pita: Incorporate a pinch of cayenne or paprika into the dough for a subtle kick.
- Garlic Pita: Mix minced garlic into the dough for a delightful savory flavor.
Storage and Make-Ahead Instructions
Want to enjoy your homemade pita bread later? Here’s how to store and prepare it in advance:
- Storing: Place cooled pitas in an airtight container in the fridge for up to a week or freeze for up to three months.
- Freezing: Wrap pitas in plastic wrap and then place them in a zip-top bag before freezing. To reheat, simply thaw and warm on a skillet.
- Make-Ahead Option: You can prepare the dough up to the first rise, then refrigerate it. Just allow it to come to room temperature before proceeding.
Comprehensive FAQs
Here’s a collection of questions to help you navigate your pita bread journey:
- Can I use gluten-free flour? Yes, you can! Look for a gluten-free all-purpose blend that contains xanthan gum for better structure.
- What if my dough is too sticky? If the dough is sticky, sprinkle in a little more flour during kneading until it comes together smoothly.
- How do I know when the pitas are done cooking? They should be puffed and lightly golden. Adjust your cooking time if necessary.
- Can I make pita bread without yeast? While traditional recipes rely on yeast for puffiness, you can try using baking powder instead, though results may vary.
- What dishes pair well with pita bread? Pita is fantastic with dips like hummus, tzatziki, or baba ganoush, and it’s perfect for stuffed meals like gyros or falafel.
- Can I reheat pita bread? Yes! Just warm them in a skillet or wrap them in foil and place them in the oven for a few minutes.
- How can I make my pita bread even softer? Adding a bit more olive oil to the dough can enhance the softness of the final product.
- Is it possible to make pita bread in the oven? Absolutely! You can bake them in a preheated oven at 475°F for about 5-7 minutes.
Nutritional Tips and Dietary Adaptations
Cooking is all about enjoying good food while considering health. Here are some tips:
- Low-Calorie Version: Use less olive oil or substitute with a non-fat yogurt for added moisture without the calories.
- High-Fiber Option: Incorporate seeds like flax or chia into the dough for added fiber and nutrients.
- Vegan-Friendly: This recipe is already vegan, but pair it with plant-based dips to enhance your meal.
Essential Equipment for Your Pita Journey
To make your pita bread experience even more enjoyable, here’s a list of must-have tools:
- Mixing Bowls: A set of large and medium bowls for mixing and rising dough.
- Rolling Pin: Essential for rolling out your dough to the perfect thickness.
- Skillet or Griddle: A non-stick skillet is ideal for cooking your pitas evenly.
- Kitchen Towel: To keep your cooked pitas warm and soft.
Delightful Serving Suggestions
Your homemade pita bread is incredibly versatile. Here are some ideas to inspire your meal:
- Dip Delight: Serve with a trio of dips such as classic hummus, roasted red pepper hummus, and tzatziki.
- Stuffed Goodness: Fill with grilled chicken, veggies, and a drizzle of tahini for a satisfying wrap.
- Breakfast Pita: Scramble eggs with spinach and feta, then stuff into warm pita for a nutritious start to your day.
- Salad Side: Use pita as a side to a refreshing Mediterranean salad, perfect for soaking up the dressing!
Conclusion: Your Mediterranean Adventure Awaits!
There you have it, my friends! A comprehensive guide to creating your own homemade pita bread that will not only delight your taste buds but also bring a little Mediterranean magic into your kitchen. So, roll up your sleeves, gather your ingredients, and let’s make some memories around the table. Remember, cooking is about sharing joy and flavors, so invite loved ones to join you in this delicious adventure. Happy cooking!
Easy Pita Bread Recipe: Homemade Greek Flatbread Step-by-Step
Ingredients
Dough
- 1 cup warm water (100–110°F)
- 2 1/4 tsp active dry yeast
- 1 tsp sugar
- 2 1/2 cups all-purpose flour
- 1 tsp salt
- 1 tbsp olive oil
Instructions
- Mix warm water, sugar, and yeast; let sit 5–10 minutes until frothy.
- Combine flour and salt; add yeast mixture and olive oil, then stir into a shaggy dough.
- Knead on a floured surface for 8–10 minutes until smooth.
- Let dough rise in an oiled bowl, covered, for 1–1.5 hours until doubled.
- Punch down, divide into 6–8 balls, roll into 1/4-inch discs, and rest 5 minutes.
- Cook each pita in a hot skillet 1–2 minutes per side until puffed and golden.