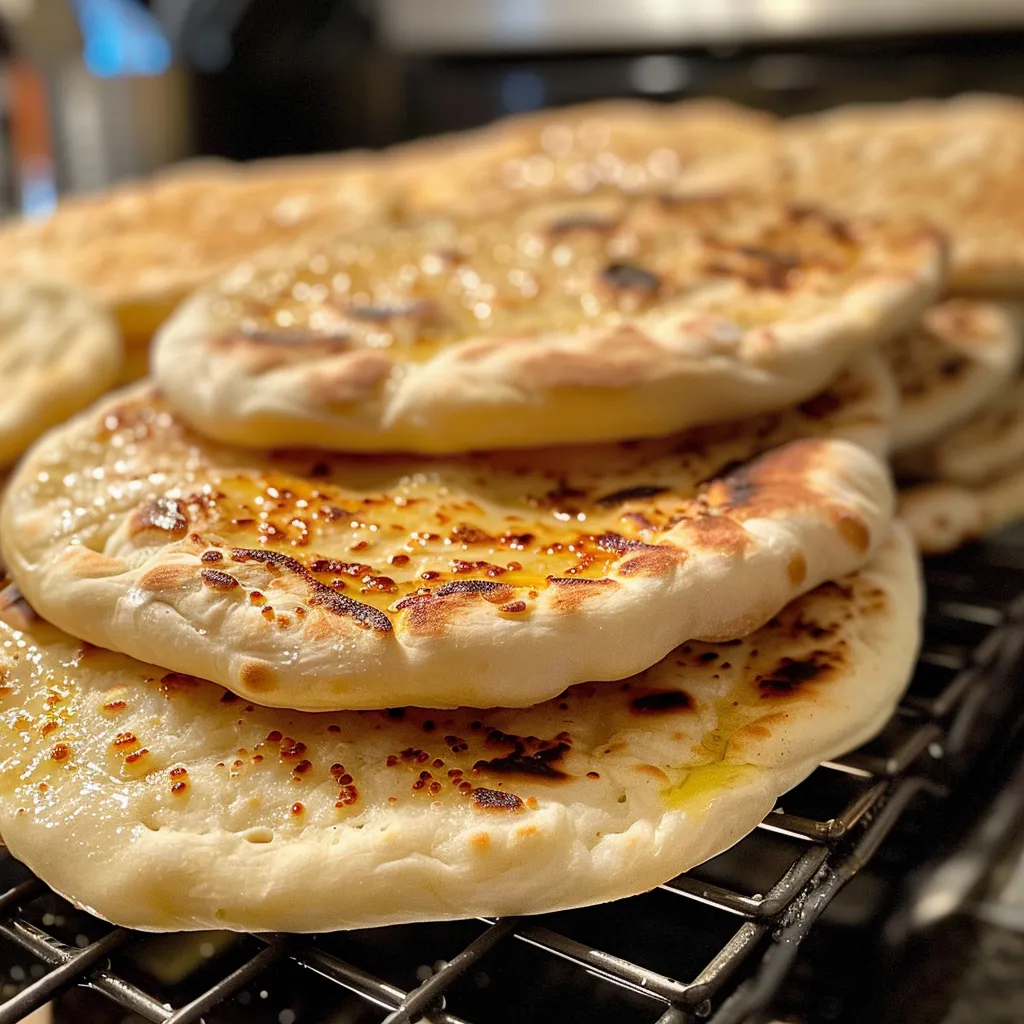
Crafting the Perfect Pita Bread: A Mediterranean Journey
Welcome to a culinary adventure where we explore the art of making homemade pita bread, a staple that embodies the spirit of Mediterranean hospitality! In just a few simple steps, you can create soft, fluffy pita that captures the essence of gatherings filled with laughter, love, and delicious food. This recipe not only brings the flavors of the Mediterranean into your kitchen but also invites you to share in the joy of cooking and eating together. Let’s get started on this delightful journey!
Why You’ll Love This Recipe
- Simple and Quick: This homemade pita bread recipe requires minimal ingredients and can be made in under two hours, perfect for a spontaneous gathering or a cozy family dinner.
- Fluffy Texture: The combination of active dry yeast and lukewarm water creates a light and airy bread that puffs beautifully in the oven.
- Versatile Base: Pita bread is incredibly adaptable; you can use it for wraps, dips, or even as a base for mini pizzas!
- Healthier Option: By making it at home, you control the ingredients, ensuring no preservatives or artificial additives.
- Celebrate Tradition: Each bite connects you to Mediterranean culture, where food is a symbol of community and celebration.
Ingredients & Substitutions for Homemade Pita Bread
To make the best pita bread, gather the following ingredients:
- 3⅓ cups all-purpose flour: You can swap this with whole wheat flour for a healthier option or a gluten-free blend if needed.
- 1¼ cups lukewarm water: Ensure the water is not too hot, as it will kill the yeast.
- 2 teaspoons active dry yeast: Instant dry yeast can be used instead; just mix it directly with the flour.
- 2 teaspoons sugar: This helps activate the yeast; you can use honey for a natural alternative.
- 2 teaspoons salt: Adds flavor; feel free to adjust based on your taste preferences.
- 2 tablespoons olive oil: Extra virgin olive oil adds richness; avocado oil is a great substitute.
How to Make Pita Bread: Step-by-Step
Let’s dive into the process of making this delightful bread. Follow these steps, and soon, your home will be filled with the warm, inviting aroma of freshly baked pita!
1. Measure the Ingredients
Start by measuring all your ingredients accurately. This step is crucial for the perfect dough consistency.
2. Activate the Yeast
In a small bowl, combine the lukewarm water with sugar and yeast. Let it sit for about 5-10 minutes until frothy. This indicates that the yeast is active and ready to work its magic!
3. Mix the Dough
In a large bowl, combine the flour and salt. Create a well in the center and pour in the yeast mixture along with the olive oil. Mix until a shaggy dough forms.
4. Knead the Dough
Transfer the dough to a floured surface and knead for about 8-10 minutes until smooth and elastic. If the dough is sticky, add a little more flour as needed.
5. Let It Rise
Place the dough in a lightly oiled bowl, cover it with a damp cloth, and let it rise in a warm place for about 1 hour or until it has doubled in size.
6. Shape the Pitas
Once risen, punch down the dough and divide it into 8 equal pieces. Roll each piece into a ball, then flatten it into a round disc about ¼ inch thick.
7. Preheat the Oven
Preheat your oven to 475°F (245°C) and place a baking stone or an inverted baking sheet inside to heat up.
8. Bake the Pitas
Carefully place the discs on the hot stone or baking sheet and bake for 5-7 minutes until they puff up and turn golden brown. Keep an eye on them to prevent burning!
9. Cool and Serve
Remove the pita bread from the oven and cover them with a kitchen towel to keep them warm and soft. Serve immediately or let them cool before storing.
Expert Tips for Perfect Pita Bread
- Use Fresh Yeast: Always check the expiration date on your yeast for the best results.
- Don’t Overknead: While kneading is important, overworking the dough can lead to tough pita.
- Steam in the Oven: To create a steamy environment, place a pan of water at the bottom of the oven while baking; this helps the pita puff up.
- Keep Your Dough Warm: If your kitchen is cool, place the dough in a slightly warm oven to encourage rising.
- Experiment with Shapes: Feel free to create larger or smaller pitas, depending on your serving needs.
- Try Different Flours: Mix in whole wheat or spelt flour for unique flavors and textures.
- Let It Rest: If your dough is resistant to rolling out, let it rest for a few minutes before shaping.
- Storage Techniques: Store leftover pita in a sealed bag at room temperature for up to 3 days or freeze them for longer storage.
Common Mistakes & Troubleshooting
Even the best chefs make mistakes! Here are some common pitfalls and how to avoid them:
- Pita Doesn’t Puff: This can happen if the oven isn’t hot enough or if the dough didn’t rise properly. Make sure to use a very hot surface.
- Dense Texture: Over-kneading or using old yeast can lead to a dense pita. Always check your yeast and knead just until smooth.
- Dry Pita: If your pita bread comes out dry, try adding a bit more water next time or adjusting the baking time.
- Sticking to Surfaces: Dust your work surface and rolling pin with flour to prevent sticking.
Delicious Variations of Pita Bread
Why not try something different? Here are some fun variations to spice up your pita bread experience:
- Herb-Infused Pita: Add dried herbs like oregano or thyme to the dough for a fragrant twist.
- Spicy Pita: Incorporate crushed red pepper flakes into the dough for a hint of heat.
- Garlic Pita: Brush the pita with garlic-infused olive oil before baking for a rich flavor.
- Whole Wheat Pita: Substitute half of the all-purpose flour with whole wheat flour for a heartier bread.
Storage & Make-Ahead Instructions
Homemade pita bread is best enjoyed fresh, but it can be stored for later use:
- Room Temperature: Place any leftover pita in a plastic bag and store at room temperature for up to 3 days.
- Freezing: For longer storage, freeze the pitas in a single layer, then transfer them to a freezer bag. They can last up to 3 months!
- Reheating: To revive your pita, wrap it in a damp paper towel and microwave it for 10-15 seconds or warm it in the oven.
Frequently Asked Questions
- Can I use whole wheat flour? Yes! Whole wheat flour can be used, but you may need to adjust the water slightly.
- What can I serve with pita bread? Pita is perfect for dipping into hummus, tzatziki, or for stuffing with grilled meats, veggies, or salads.
- How can I make gluten-free pita bread? Use a gluten-free flour blend specifically designed for bread baking.
- Can I make pita bread without yeast? Yes, although it won’t have the same puffiness. You can use baking powder for a quick version.
- Why did my pita bread turn out hard? This can happen if it’s overbaked or if the dough was too dry. Ensure proper measurements and baking time.
- How do I know when the pita is done baking? The pita should be puffed and lightly golden. You can also tap the bottom; it should sound hollow.
- Can I add flavors to the dough? Absolutely! Herbs, spices, or even cheese can be added to the dough for different flavor profiles.
- How long does it take to make pita bread? The entire process takes about 2 hours, including rising time.
Nutritional Tips and Dietary Adaptations
Pita bread can be a healthy addition to your diet. Here are some tips:
- Whole Grains: For added fiber, use whole wheat flour or incorporate seeds into your dough.
- Low Sugar: Reduce sugar or use natural sweeteners to lower calories.
- Keep It Light: Use less oil for a lighter bread or substitute with unsweetened applesauce.
Tools & Equipment Recommendations
Having the right tools can make your bread-making experience smoother:
- Baking Stone: A pizza stone or baking stone retains heat and creates the perfect surface for puffing pitas.
- Mixing Bowls: Use a large mixing bowl for combining ingredients and a smaller one for yeast activation.
- Rolling Pin: A sturdy rolling pin helps in achieving even thickness for the pita.
- Kitchen Towel: Keep your pitas warm and soft after baking by covering them with a towel.
Serving Suggestions
Now that you’ve made your pita bread, here are some delightful ways to serve it:
- Pita Sandwiches: Fill with grilled chicken, lettuce, tomatoes, and your favorite sauce.
- Dips Galore: Serve warm pita with a variety of dips like hummus, baba ganoush, or tzatziki.
- Mini Pizzas: Top with tomato sauce, cheese, and your favorite toppings for a quick and easy meal.
- Salad Wraps: Use pita as a wrap for Mediterranean-style salads, filled with fresh veggies and feta cheese.
Conclusion
Congratulations! You’ve successfully crafted the perfect pita bread that’s not only delicious but also a celebration of Mediterranean culture. Each bite reflects the warmth of family gatherings and the joy of sharing meals. So grab a plate, fill it with your favorite flavors, and invite your loved ones to join the feast. Cooking is not just about feeding our bodies, but about nourishing our connections and savoring every moment. Thank you for joining me on this delightful culinary adventure. Happy baking!
Pita Bread
Ingredients
Dough
- 3⅓ cups all-purpose flour
- 1¼ cups lukewarm water
- 2 teaspoons active dry yeast
- 2 teaspoons sugar
- 2 teaspoons salt
- 2 tablespoons olive oil
Instructions
- Mix flour, yeast, sugar, and salt in a bowl.
- Add water and olive oil; knead until smooth.
- Let the dough rise for 1 hour until doubled in size.
- Divide dough into 8 balls and roll into circles.
- Bake at 475°F (245°C) for 8-10 minutes until puffed and golden.