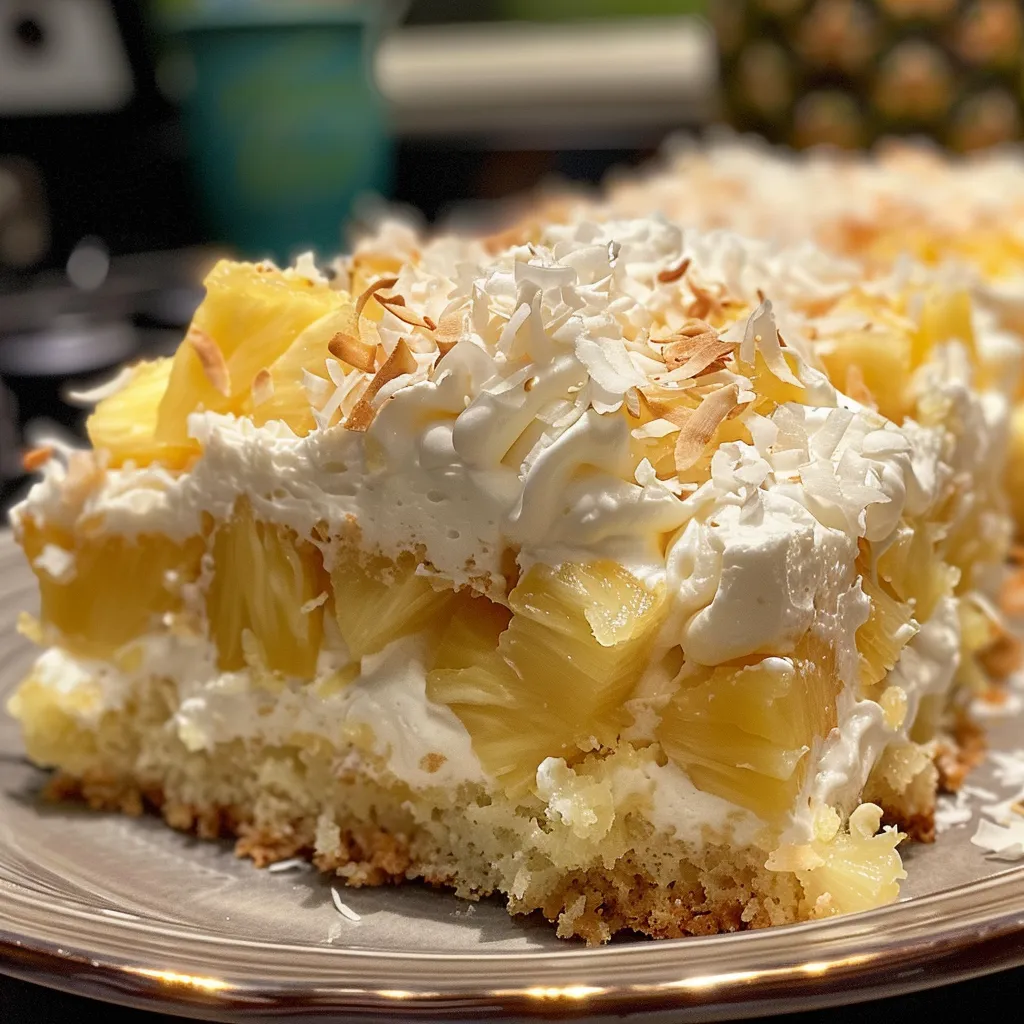
Embark on a Flavorful Journey: Discover the Pineapple Coconut Dream Cake
Welcome to a vibrant culinary adventure! Today, we’re diving into the world of tropical flavors with a delightful treat that will whisk you away to sun-kissed beaches and warm ocean breezes: the Pineapple Coconut Dream Cake. This enchanting dessert masterfully combines the sweet tang of pineapple and the creamy richness of coconut, creating a light, fluffy cake that’s perfect for any celebration. With every bite, you’ll experience a burst of sunshine that not only pleases the palate but also brings joy to your heart. Ready to bake? Let’s get started!
Why You’ll Love This Recipe
- Tropical Bliss: This cake is a perfect balance of sweet and tangy, making it a refreshing dessert that transports you to a tropical paradise with each bite.
- Easy to Make: With simple ingredients and straightforward steps, this recipe is perfect for both novice bakers and seasoned pros.
- Perfect for Celebrations: Whether it’s a birthday, holiday, or just a sunny day, this cake is a showstopper that will wow your guests.
- Make-Ahead Friendly: This cake can be prepared in advance, giving you more time to enjoy with family and friends.
- Flexible Variations: Customize this recipe to suit your taste or dietary preferences. The possibilities are endless!
Ingredient Breakdown
Before we dive into the baking, let’s explore the ingredients that create this tropical masterpiece.
- 1 box yellow cake mix: This forms the base of our cake. You can also use a homemade cake recipe if preferred.
- Water, oil, and eggs: Follow the instructions on the cake mix box for the exact amounts. These ingredients keep the cake moist and fluffy.
- 1 (20 oz) can crushed pineapple with juice: Adds natural sweetness and moisture. For a more intense flavor, consider using fresh pineapple.
- 1 (3.4 oz) box instant vanilla pudding: This ingredient enhances the creaminess of the cake and contributes to its delightful texture.
- 2 cups cold milk: Essential for mixing with the pudding and cream cheese, providing a rich consistency.
- 1 (8 oz) package cream cheese, room temperature: Cream cheese gives the cake a rich and tangy flavor, making it a true dream.
- 1 (8 oz) container whipped topping, thawed: This lightens the cake’s frosting and adds a fluffy finish.
- 1.5 cups shredded coconut: Whether sweetened or unsweetened, coconut brings a chewy texture and enhances the tropical vibe.
Step-by-Step Instructions
Now that we have our ingredients ready, let’s walk through the steps to create our Pineapple Coconut Dream Cake.
- 1. Prepare the Cake: Follow the directions on the yellow cake mix box to prepare the cake in a 13×9 baking pan. Make sure to allow it to cool completely before moving on to the next steps.
- 2. Mix the Creamy Layer: In a large mixing bowl, combine the instant vanilla pudding, cold milk, and softened cream cheese. Beat until smooth and creamy.
- 3. Poke Holes: Using the back of a wooden spoon, poke holes evenly all over the cooled cake. This will allow the pudding mixture to soak into the cake.
- 4. Add the Pudding Mixture: Pour half of the creamy pudding mixture over the cake, spreading it evenly across the surface.
- 5. Layer the Pineapple: Spread the crushed pineapple (with juice) evenly over the pudding layer, ensuring a generous coverage.
- 6. Finish with Pudding: Pour the remaining pudding mixture over the pineapple layer and spread evenly.
- 7. Top with Whipped Topping: Spread the thawed whipped topping over the entire cake, creating a luscious layer.
- 8. Toast the Coconut: In a sauté pan over medium heat, toast the shredded coconut, stirring constantly until golden brown. Allow it to cool.
- 9. Garnish: Sprinkle the toasted coconut over the top of the cake for that extra crunch and flavor.
- 10. Refrigerate: Cover the cake and refrigerate for at least 2 hours, or ideally overnight, allowing the flavors to meld beautifully.
Pro Tips for the Perfect Cake
- Room Temperature Ingredients: Ensure your cream cheese is at room temperature for a smooth blending with the pudding.
- Don’t Rush the Cooling: Allow your cake to cool completely; this prevents sogginess when adding the pudding layers.
- Toast with Care: Watch the coconut closely while toasting to avoid burning, as it can darken quickly.
- Chill Time Matters: Letting the cake set in the fridge enhances the flavor and texture, making each bite even more delightful.
- Try Fresh Pineapple: For a bolder flavor, consider using fresh pineapple instead of canned.
- Experiment with Flavors: Infuse the whipped topping with a splash of coconut extract for an extra tropical kick.
- Layering Technique: Ensure even layering for a beautiful presentation when served.
- Serve Chilled: This cake is best enjoyed cold, making it a refreshing dessert on warm days.
Common Mistakes and Troubleshooting
Even the best bakers can run into a few bumps along the way. Here are some common pitfalls and how to avoid them:
- Too Dense: If your cake is dense, it may not have been mixed enough or the ingredients weren’t at room temperature. Ensure proper mixing and ingredient temperatures.
- Dry Cake: Overbaking can lead to dryness. Keep an eye on the baking time and perform a toothpick test to check for doneness.
- Soggy Base: Avoid making the holes too deep when poking the cake; they should be just enough to allow the pudding to seep in without over-soaking.
- Not Setting: If your cake doesn’t set, ensure you refrigerated it long enough for the pudding and whipped topping to firm up.
Delicious Variations
Don’t hesitate to make this cake your own! Here are some fun variations to try:
- Chocolate Coconut Dream: Add cocoa powder to the cake mix for a chocolatey twist.
- Key Lime Coconut Dream: Replace pineapple with fresh key lime juice for a zesty flavor.
- Berry Coconut Fusion: Incorporate fresh berries like strawberries or blueberries into the layers for a pop of color.
- Nutty Coconut Delight: Add chopped nuts like pecans or macadamias to the topping for added crunch.
Storage and Make-Ahead Instructions
This cake is perfect for preparing ahead of time. Simply follow these tips:
- Make-Ahead: Prepare and assemble the cake a day in advance. Just cover it tightly and refrigerate.
- Storage: Keep leftovers in the fridge, covered, for up to 5 days. The flavors only get better over time!
- Freezing: For longer storage, you can freeze the cake without the topping for up to 3 months. Thaw in the fridge before serving.
Comprehensive FAQ
Got questions? We’ve got answers! Here are some common queries about our Pineapple Coconut Dream Cake.
- Can I use a different cake mix? Yes! Feel free to experiment with any flavor of cake mix you love.
- Is there a dairy-free option? Absolutely! Use dairy-free milk and cream cheese substitutes.
- How can I make it gluten-free? Swap the yellow cake mix for a gluten-free version, and ensure all other ingredients are gluten-free.
- What other fruits can I add? Consider adding mango or banana for an exciting twist!
- Can I adjust the sweetness? Yes! You can reduce the sugar in the pudding mix if you prefer a less sweet cake.
- What should I serve with it? A scoop of vanilla ice cream or a dollop of whipped cream pairs wonderfully!
- How do I know when the cake is done baking? Insert a toothpick in the center; if it comes out clean, your cake is ready!
- Can I make it in a different pan? Yes! Use round pans or even a cupcake tray for individual servings.
Nutritional Tips and Dietary Adaptations
For those mindful of their diet, here are some tips:
- Reduce Sugar: Opt for sugar-free pudding and cake mix to lower the overall sugar content.
- Low-Fat Options: Use low-fat cream cheese and whipped topping for a lighter version.
- Protein Boost: Add a scoop of protein powder to the pudding mix for an extra nutrient kick.
Equipment Recommendations
Here’s a handy list of tools you’ll need to create your dream cake:
- Mixing Bowls: A set of mixing bowls for combining ingredients.
- Electric Mixer: For a smooth and creamy pudding mixture.
- Baking Pan: A 13×9 inch baking pan for the cake.
- Wooden Spoon: Perfect for poking holes in the cake and mixing.
- Sauté Pan: For toasting the coconut.
Serving Suggestions
When it’s time to serve this delightful cake, consider these suggestions:
- Garnish: Decorate with fresh pineapple slices or mint leaves for a vibrant presentation.
- Pair with Beverages: Serve with a refreshing iced tea or tropical fruit punch.
- Individual Portions: Cut into squares and serve on colorful plates for a festive look.
Conclusion: A Slice of Paradise Awaits
There you have it! The Pineapple Coconut Dream Cake is not just a dessert; it’s an experience, a celebration of flavors, and a perfect companion for any occasion. Each slice brings a taste of paradise, reminding us of the joy found in sharing food with loved ones. So gather your ingredients, put on some lively music, and let’s bake a cake that will create memories for years to come. Enjoy every moment, and don’t forget to share your delightful creations with us!
Pineapple Coconut Dream Cake
Ingredients
Cake
- 1 box yellow cake mix
- Water, oil, and eggs as directed on cake mix box as directed on cake mix box
- 1 can (20 oz) crushed pineapple with juice
- 1 box (3.4 oz) instant vanilla pudding
- 2 cups cold milk
Cream Cheese Mixture
- 1 8 oz package cream cheese (room temperature)
- 1 8 oz container whipped topping (thawed)
- 1.5 cups shredded coconut (sweetened or unsweetened)
Instructions
- Prepare and bake the yellow cake in a 13×9 pan; cool completely.
- Mix vanilla pudding, milk, and cream cheese until smooth.
- Poke holes in cooled cake; spread half of pudding mixture over it.
- Spread pineapple evenly over pudding layer; add remaining pudding on top.
- Top with whipped topping, toast coconut, then refrigerate for at least 2 hours.