Author

rafael

Browsing

Welcome to a Culinary Journey of Flavor and Comfort

Have you ever tasted a dish that feels like a warm hug on a chilly evening? If you’re looking to elevate your weeknight meals to a celebration of flavor and togetherness, you’ve come to the right place! Today, we’re diving into the heart of Mediterranean cuisine with a classic that brings families together — a rich, aromatic beef stew. This slow cooker beef stew is not just a meal; it’s an experience filled with the tantalizing aromas of olive oil, garlic, and fresh herbs. Whether you’re a seasoned chef or a beginner in the kitchen, this recipe is designed to be your gateway to culinary bliss.

Imagine the scene: after a long day, you walk into your home and the smell of slow-cooked beef fills the air, inviting you to gather around the table and share stories over a hearty meal. This recipe is about more than just cooking; it’s about creating memories and celebrating culture through food. Let’s explore how you can master this dish and make it your own!

Why You’ll Love This Recipe

  • Effortless Preparation: With the magic of the crockpot, you can set it and forget it. Add your ingredients, turn it on, and let the slow cooker work its magic.
  • Deep Flavor Profile: The combination of herbs, spices, and slow cooking transforms simple ingredients into a rich, flavorful stew that dances on your taste buds.
  • Nutritious and Hearty: Packed with tender beef, vibrant vegetables, and aromatic herbs, this stew is not only delicious but also nourishing — perfect for the whole family.
  • Versatile Ingredients: Customize the stew with your favorite veggies or herbs; it’s a canvas for your culinary creativity.
  • Perfect for Leftovers: This stew tastes even better the next day, making it a fantastic option for meal prep!

Gather Your Ingredients

Before we plunge into cooking, let’s gather what we need for this delightful dish. Below is a detailed list of ingredients, along with some helpful substitutions and tips to make this recipe uniquely yours.

  • Beef: Use stewing beef or chuck roast cut into bite-sized pieces. If you prefer leaner meat, opt for sirloin, but remember it may not be as tender.
  • Olive Oil: Essential for sautéing the beef; it adds a rich flavor. You can also use vegetable oil or coconut oil if needed.
  • Onions: Sweet onions like Vidalia are fantastic, but yellow or white onions work well too.
  • Carrots: Fresh, diced carrots provide sweetness and texture. You can substitute with parsnips or sweet potatoes for a twist.
  • Celery: Adds a lovely crunch and depth of flavor. Leeks can be an interesting alternative.
  • Garlic: Use fresh garlic cloves for the best flavor. If you’re short on time, garlic powder can suffice.
  • Beef Broth: Homemade is best, but store-bought works too. Low-sodium versions allow for better control over the saltiness.
  • Herbs: Fresh thyme and bay leaves are traditional, but feel free to experiment with rosemary or Italian seasoning.
  • Salt and Pepper: Essential for seasoning; adjust to your taste.

Steps to Culinary Perfection

Now that we have our ingredients ready, let’s dive into the steps to create this comforting slow cooker beef stew.

  • Step 1: Sear the Beef: In a hot skillet, add olive oil and sear the beef cubes until browned on all sides. This step enhances the flavor and creates a beautiful crust.
  • Step 2: Prepare the Vegetables: Chop your onions, carrots, and celery into even pieces for uniform cooking. Mince the garlic.
  • Step 3: Combine Ingredients: In the crockpot, layer the seared beef and vegetables. Add the minced garlic, herbs, broth, salt, and pepper.
  • Step 4: Slow Cook: Set your slow cooker to low for 6-8 hours or high for 3-4 hours. The longer it cooks, the more tender the beef becomes.
  • Step 5: Thicken the Stew: If you prefer a thicker stew, mix a tablespoon of cornstarch with cold water and stir it into the stew about 30 minutes before serving.
  • Step 6: Serve and Enjoy: Ladle the stew into bowls, garnish with fresh herbs, and serve with crusty bread for dipping.

Pro Tips for Success

To ensure your beef stew turns out perfectly, here are some expert tips:

  • Don’t Rush the Sear: Taking the time to sear your beef adds a depth of flavor that is essential for a rich stew.
  • Season Gradually: Start with less salt and add more as needed. You can always adjust seasoning later.
  • Use Fresh Herbs: Fresh herbs make a noticeable difference in flavor. Add dried herbs early in cooking, and fresh herbs just before serving.
  • Adjust for Thickness: If the stew is too thin, let it simmer uncovered; if too thick, add a splash of broth or water.
  • Experiment with Spice: A splash of red wine or a teaspoon of smoked paprika can enhance the flavor profile.
  • Consider Leftovers: Store leftovers in an airtight container in the fridge for up to 3 days, or freeze for later enjoyment.
  • Make it a Meal: Serve with a side of crusty bread, a fresh salad, or over creamy mashed potatoes.
  • Save the Bones: If using bone-in cuts, save the bones for making a rich broth!

Common Mistakes and Troubleshooting

Even seasoned cooks can run into issues. Here’s how to troubleshoot:

  • Stew Lacks Flavor: Ensure you’ve adequately seasoned the meat and vegetables. Adding a splash of vinegar or Worcestershire sauce can enhance depth.
  • Meat is Tough: This usually happens if it’s cooked too quickly. Always slow cook for the best tenderness.
  • Too Greasy: If your stew is oily, skim off excess grease before serving.
  • Overcooked Vegetables: Add denser vegetables like carrots early and softer ones like peas towards the end of cooking.

Delightful Variations

Feeling adventurous? Here are some delicious variations to try:

  • Moroccan-Inspired: Add cumin, cinnamon, and dried apricots for a sweet and savory twist.
  • Italian Style: Incorporate diced tomatoes, basil, and a splash of red wine for a Mediterranean flair.
  • Spicy Beef Stew: Add diced jalapeños or a dash of hot sauce for a kick of heat.
  • Vegetarian Twist: Substitute the beef with hearty mushrooms and add more root vegetables for a satisfying stew.

Storage and Make-Ahead Instructions

This stew is perfect for meal prep! Here’s how to store and reheat:

  • Refrigeration: Store in an airtight container in the fridge for up to 3 days.
  • Freezing: Freeze in portions for up to 3 months. Thaw in the fridge overnight before reheating.
  • Reheating: Gently reheat on the stove over low heat, adding a splash of broth if needed.

Comprehensive FAQ

Here are some frequently asked questions to guide you:

  • Can I use frozen beef? Yes, just make sure to thaw before cooking for even results.
  • What if I don’t have a slow cooker? You can use a Dutch oven and cook on low heat on the stovetop.
  • How do I know when the beef is done? The beef should be fork-tender when it’s ready.
  • Can I add other vegetables? Absolutely! Feel free to add potatoes, green beans, or any veggies you love.
  • Is this stew gluten-free? Yes, as long as you use gluten-free broth and thickeners.
  • How can I enhance the flavor? A splash of wine or vinegar can brighten the flavors significantly.
  • What type of beef is best? Chuck roast is ideal due to its marbling and flavor.
  • Can I make this in advance? Yes, it’s a great make-ahead meal, and the flavors deepen over time!

Nutritional Tips and Dietary Adaptations

For those mindful of dietary needs, here are some tips:

  • Low-Carb Version: Skip the potatoes and add more leafy greens or zucchini.
  • Dairy-Free: This recipe is naturally dairy-free, but ensure any sides align with your dietary needs.
  • High-Protein: Serve with a side of quinoa or lentils for an extra protein boost.

Equipment Recommendations

To make your cooking experience seamless, here are some kitchen essentials:

  • Slow Cooker: A reliable slow cooker is key for this recipe. Look for one with programmable settings.
  • Chef’s Knife: A good knife for chopping ingredients efficiently.
  • Cutting Board: A sturdy cutting board makes prep easier.
  • Measuring Cups and Spoons: Accurate measurements ensure the best flavor balance.

Serving Suggestions

To truly elevate your meal experience, consider these serving ideas:

  • Crusty Bread: Serve with warm, crusty bread for dipping in the savory broth.
  • Fresh Salad: A simple green salad with a light vinaigrette complements the richness of the stew.
  • Cheesy Garlic Bread: For a more indulgent pairing, garlic butter and cheese-topped bread is always a hit.
  • Wine Pairing: A glass of red wine, such as a medium-bodied Merlot, enhances the dining experience.

Conclusion: Celebrate with Every Bite

As we wrap up this culinary adventure, remember that cooking is a celebration of life, culture, and community. This slow cooker beef stew is more than just a meal; it’s an invitation to gather around the table, share stories, and enjoy the flavors that connect us. So, roll up your sleeves, gather your loved ones, and embark on this delicious journey. Happy cooking, and may your table always be filled with joy and laughter!

Everyday Essentials

Prep Time 15 minutes
Cook Time 30 minutes
Total Time 45 minutes
Servings 4 people
Calories 600
A collection of quick, comforting, and versatile recipes perfect for busy days, offering a mix of hearty and light options.

Ingredients

Main Ingredients

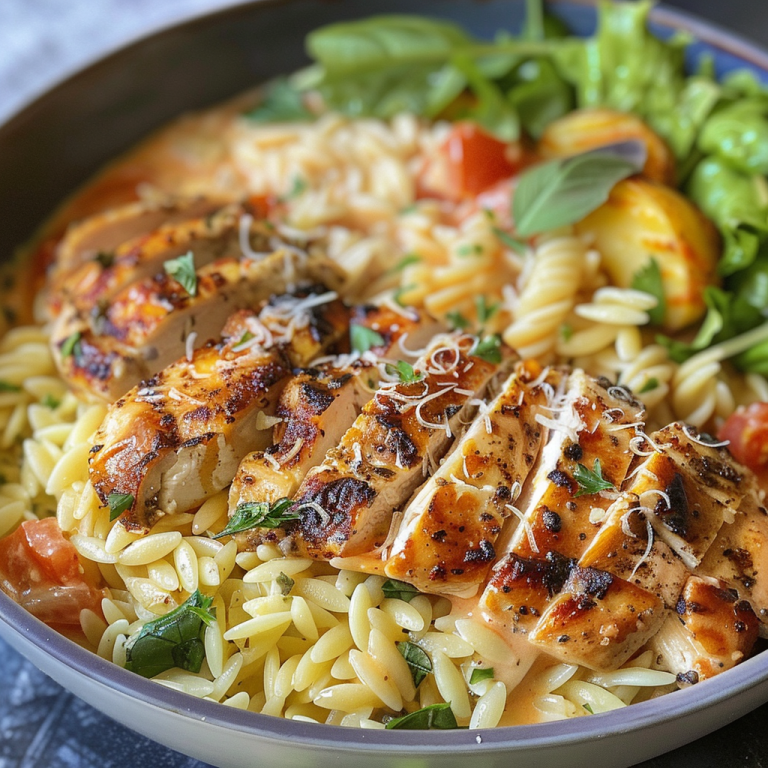
  • 1 lb lemon chicken orzo soup
  • 12 oz creamy tomato pasta
  • 1.5 lb creamy garlic chicken
  • 4 medium scalloped potatoes
  • 1 bottle easy Caesar salad dressing

Instructions 

  • Prepare each dish following your preferred quick recipes, focusing on simplicity and speed.
  • Combine ingredients for each dish, ensuring proper seasoning and cooking times.
  • Serve the dishes hot, garnished as desired, and enjoy a variety of comforting meals.

Notes

Use fresh ingredients for best flavor and quick cooking.
Calories: 600kcal
Cost: $15
Course: Dinner, Main Course
Cuisine: Various
Keyword: Comfort Food

Embrace the Flavors of Summer with Zesty Lemon Pizza

Welcome to a culinary journey where the sun-soaked essence of the Mediterranean comes alive! Today, we’re diving into the delightful world of zesty lemon pizza, a dish that embodies the joy of summer gatherings. With creamy mozzarella, a punch of zesty lemon juice, and a hint of garlic, this recipe is not just a meal; it’s a celebration of flavor and togetherness. Whether you’re hosting friends or enjoying a cozy night in, this pizza is perfect for any occasion!

Why You’ll Love This Recipe

  • Quick and Easy: This zesty lemon pizza can be made in under 30 minutes, making it a fantastic option for those busy weeknights or spontaneous gatherings.
  • Fresh Ingredients: Using seasonal produce and simple pantry staples, this recipe ensures you’re always working with the freshest flavors.
  • Bright and Flavorful: The combination of lemon and garlic elevates the classic pizza experience, giving it a vibrant twist that will tantalize your taste buds.
  • Versatile: Customize this pizza with your favorite toppings or experiment with variations, making it a versatile dish that suits all preferences.
  • Perfect for Sharing: Zesty lemon pizza is designed for gatherings, encouraging everyone to come together and enjoy a slice (or two) while creating lasting memories.

Ingredients You’ll Need

To craft this aromatic masterpiece, gather these essential ingredients:

  • Pizza Crust: Fresh or store-bought, choose a crust that crisps beautifully while remaining tender.
  • Creamy Mozzarella: Use high-quality mozzarella for that deliciously stretchy cheese pull.
  • Zesty Lemon Juice: Freshly squeezed lemon juice brings bright acidity and flavor.
  • Garlic: Minced garlic adds a savory kick, harmonizing beautifully with the lemon.

Expert Pro Tips for Perfect Pizza

  • Preheat Your Oven: Ensure your oven is thoroughly preheated to achieve a crispy crust.
  • Use a Pizza Stone: If available, a pizza stone will help absorb moisture and create a beautifully crisp base.
  • Don’t Overload Toppings: Keep toppings light to ensure the crust cooks evenly and remains crispy.
  • Experiment with Flavors: Don’t hesitate to add herbs like fresh basil or oregano for an aromatic touch.
  • Garnish with Zest: Adding lemon zest before serving enhances aroma and flavor.
  • Let It Rest: Allow the pizza to cool slightly before slicing; this helps the cheese set and prevents it from sliding off.
  • Pair with Fresh Greens: A light salad on the side complements the pizza perfectly, balancing richness with freshness.
  • Perfect for Leftovers: Reheat slices in a skillet for a crispy crust that tastes almost as good as fresh!

Common Mistakes and Troubleshooting

Even the best chefs face challenges! Here are some common mistakes and how to avoid them:

  • Too Soggy Crust: If your crust turns out soggy, ensure your oven is hot enough and avoid overloading with sauce and toppings.
  • Underwhelming Flavor: Always opt for fresh ingredients and season well with salt and herbs to enhance the overall taste.
  • Burning Cheese: If the cheese is burning before the crust is done, consider covering it with foil during the last few minutes of baking.

Variations of Zesty Lemon Pizza

Feel free to experiment with these variations to suit your taste:

  • Herbed Lemon Chicken Pizza: Add grilled chicken and a sprinkle of fresh herbs like thyme or rosemary for a heartier dish.
  • Vegetarian Delight: Top with seasonal veggies like bell peppers, artichokes, and arugula for a fresh twist.
  • Spicy Kick: Include red pepper flakes or a drizzle of chili oil for those who enjoy a bit of heat.
  • Seafood Sensation: Incorporate shrimp or anchovies for a seafood-inspired version that sings of the Mediterranean.

Storage and Make-Ahead Instructions

Planning ahead? Here’s how to store and prepare your zesty lemon pizza:

  • Make Ahead: Prepare the dough and toppings in advance. Store in airtight containers in the fridge for up to 24 hours.
  • Storing Leftovers: Place leftover pizza in an airtight container and refrigerate for up to 3 days.
  • Reheating: For optimal results, reheat slices in a skillet over medium heat to restore crispiness.

Frequently Asked Questions (FAQs)

  • Can I use gluten-free crust? Absolutely! Use a gluten-free pizza crust to suit dietary needs.
  • What can I substitute for mozzarella? Try goat cheese or feta for a different flavor profile.
  • How can I add more protein? Grilled chicken, bacon, or even chickpeas can enhance protein content.
  • Is this pizza keto-friendly? Yes, with a low-carb crust and minimal toppings, it can fit into a keto diet.
  • How do I keep the crust from burning? Bake at a moderate temperature and keep an eye on it during cooking.
  • Can I freeze this pizza? Yes, freeze unbaked pizza; just assemble it, wrap tightly, and store for up to 2 months.
  • What’s the best way to slice pizza? Use a pizza cutter or a sharp knife for clean slices.
  • Can I use dried herbs instead of fresh? Yes, but use about a third of the amount, as dried herbs are more concentrated.

Nutritional Tips and Dietary Adaptations

For a healthier take on your zesty lemon pizza, consider these adaptations:

  • Lower Fat: Opt for part-skim mozzarella or use a smaller amount of cheese.
  • Increase Veggies: Load up on vegetables to boost fiber and nutrients without adding many calories.
  • Whole Wheat Crust: Use a whole wheat pizza crust for added fiber and nutrients.

Essential Kitchen Equipment

To make your pizza-making experience seamless, consider having these tools on hand:

  • Pizza Stone: For that perfect crust.
  • Pizza Cutter: For clean, even slices.
  • Mixing Bowl: To combine and prepare your dough.
  • Spatula: For transferring your pizza to the oven.

Serving Suggestions

To elevate your dining experience, serve this zesty lemon pizza with:

  • Fresh Salad: A simple arugula salad dressed with olive oil and lemon enhances the meal.
  • Wine Pairing: A crisp white wine like Sauvignon Blanc complements the flavors beautifully.
  • Appetizers: Pair with olives and antipasto for a Mediterranean-inspired spread.

In Conclusion: Celebrate with Zesty Lemon Pizza

This zesty lemon pizza isn’t just a dish; it’s a celebration of flavors, memories, and togetherness. With its vibrant taste and inviting aroma, it’s sure to become a favorite in your household. So gather your loved ones, preheat that oven, and get ready to enjoy a slice of summer bliss! Bon appétit!

Zesty Lemon Pizza: The Easy Summer Delight You’ll Crave

Prep Time 15 minutes
Cook Time 10 minutes
Total Time 25 minutes
Servings 4 pieces
Calories 350
Enjoy a refreshing summer pizza with a tangy lemon twist and creamy mozzarella for a light, flavorful treat.

Ingredients

Dough

  • 1 pie crust (Pre-made or homemade)

Cheese

  • 1 cup creamy mozzarella (Shredded)

Toppings

  • 2 tablespoons lemon juice (Freshly squeezed)
  • 2 cloves garlic (Minced)

Instructions 

  • Preheat oven to 450°F (230°C).
  • Spread the crust on a baking sheet.
  • Spread mozzarella evenly over the crust.
  • Mix lemon juice and garlic, then drizzle over the cheese.
  • Bake for 10 minutes until cheese is bubbly and crust is golden.

Notes

For extra flavor, add fresh herbs like basil after baking.
Calories: 350kcal
Cost: $12
Course: Main Course
Cuisine: Italian
Keyword: lemon

Ah, the humble hamburger helper—a dish that holds a special place in my heart. As Rafael, a cook who cherishes Mediterranean flavors and traditions, I find joy in dishes that bring people together, much like our Sunday paellas back in Seville. This homemade hamburger helper is my nod to those cherished moments, filled with warmth, laughter, and the rich aroma of a meal made with love. It reminds me of bustling family dinners, where every bite was a celebration of togetherness. Let’s dive into this recipe that brings comfort and joy to my family and, I hope, to yours as well.

Why You’ll Absolutely Love This Recipe

  • It’s so easy, it feels like a little kitchen victory!
  • Perfect for those busy weeknights when you crave something hearty yet quick.
  • The flavors are rich and comforting, like a warm hug on a plate.
  • A delightful way to bring everyone to the table for a shared meal.
  • It satisfies those cheese cravings with its creamy, cheesy goodness!

Simple Ingredients for a Delicious Treat

Let’s talk about these ingredients like old friends. Ground beef, or turkey if you prefer, provides a hearty base. The yellow onion and garlic? They’re the aromatic duo that fills your kitchen with a welcoming scent. Flour and broth transform into a velvety sauce, while tomato sauce and Italian seasoning add a touch of Mediterranean flair. Smoked paprika and garlic powder? They’re the secret ingredients that bring depth to the dish. And of course, pasta shells—cooked to al dente—are the perfect vehicle for that creamy, cheesy sauce. You’ll find the full ingredient list with exact measurements in the recipe card below!

Let’s Make Some Magic: Step-by-Step

Picture me in the kitchen, music playing softly, and a smile on my face as we start this culinary adventure together. First, brown the ground beef in a large sauté pan over medium-high heat. Once cooked, set it aside but keep a bit of that flavorful grease in the pan. Lower the heat, add the onion, and let it soften, releasing its sweet fragrance. Just before the onion is perfect, toss in the garlic for a quick sauté.

Next, sprinkle in the flour, stirring it for a minute to cook away the raw taste. Slowly pour in the beef broth, turning up the heat until it bubbles into a boil. Add the tomato sauce, Italian seasoning, seasoned salt, smoked paprika, garlic powder, and pasta. Stir everything together and let it simmer under a lid, checking and stirring occasionally. If the pasta needs more liquid, add a splash of broth as needed.

Finally, the moment of magic: stir in the cream and cheese until they melt into a luscious sauce. Return the beef to the pan, warming it through for a couple more minutes. Let it rest briefly to thicken, then serve immediately and enjoy!

A Few of My Favorite Tips

Here’s a little secret from my kitchen to yours: if you want to elevate this dish even more, try adding a pinch of red pepper flakes for a hint of spice. And don’t shy away from experimenting with different cheeses. A bit of mozzarella can add a wonderful stretchiness to the sauce.

How I Like to Serve This

I love serving this dish with a fresh side salad, perhaps with some olives and feta for a Mediterranean twist. A crusty loaf of bread is perfect for mopping up any leftover sauce. And for a touch of color, sprinkle some fresh parsley on top before serving.

Storing & Reheating (If There’s Any Left!)

Should you find yourself with leftovers (a rare occurrence in my home!), store them in an airtight container in the fridge for up to three days. To reheat, add a splash of broth or cream to bring back its creamy nature, and warm it gently on the stove. This dish is like a fine wine—it gets better with time!

For more comforting recipes that feel like home, check out my article on Why My Creamy Smothered Chicken and Rice Feels Like Home. If you’re looking for more ideas to bring joy to your dinner table, explore some Delicious Simple Dinner Ideas That Will Bring You Joy or enjoy a cozy meal for two with Savoring Together: Quick Dinners for Two That Delight.

Homemade Hamburger Helper

Prep Time 10 minutes
Cook Time 20 minutes
Total Time 30 minutes
Servings 4 servings
Calories 600
A comforting and easy one-pan meal that brings the flavors of homemade hamburger helper to your table in no time.

Ingredients

Meat

  • 1 pound lean ground beef (or ground turkey)

Vegetables

  • 1 large yellow onion (diced)
  • 1 clove garlic (minced)

Dairy

  • ½ cup heavy cream (or half and half)
  • 2 cups shredded cheddar cheese

Pasta

  • 8 oz small pasta shells (or small elbow pasta)

Liquids

  • 2 cups low-sodium beef broth (or chicken broth)
  • 1 can tomato sauce ((8 oz))

Spices

  • 1 teaspoon italian seasoning
  • 1 teaspoon seasoned salt
  • ½ teaspoon smoked paprika
  • ½ teaspoon garlic powder

Seasoning

  • to taste salt and pepper

Instructions 

  • Brown the ground beef in a large sauté pan, then set aside.
  • Cook the onion until soft, then add garlic for the last 30 seconds.
  • Add flour, stir, then slowly add beef broth and bring to a boil.
  • Stir in tomato sauce, seasonings, and pasta; simmer until pasta is tender.
  • Add cream and cheese, stir until melted, then return beef to pan.
  • Let rest for a minute before serving.

Notes

For extra creaminess, use half and half instead of heavy cream.
Calories: 600kcal
Cost: $10.00
Course: Main Course
Cuisine: American
Keyword: Ground Beef

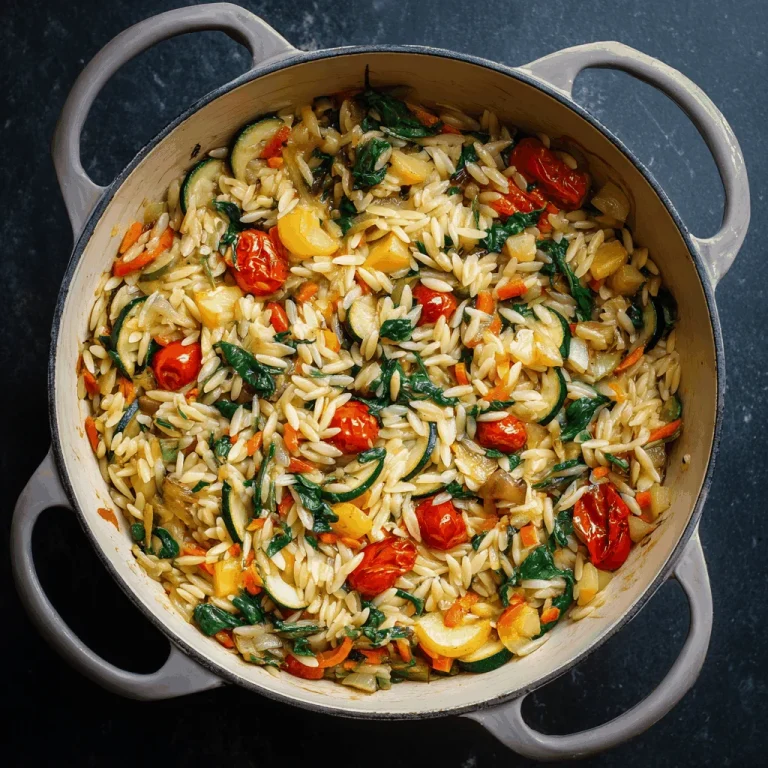
Hola, food lovers! It’s Rafael here, welcoming you back to my bustling Barcelona kitchen. Today, I’m sharing a dish that is close to my heart and a staple in my home — Veggie Orzo. This recipe is a celebration of vibrant Mediterranean flavors and the joy of cooking with fresh, local ingredients. Every time I prepare this dish, I’m reminded of the colorful markets of Seville, where I first fell in love with the art of cooking. It’s a dish that brings people together, much like those Sunday paellas with my family.

Why You’ll Absolutely Love This Recipe

  • It’s quick and easy, perfect for a busy weeknight or a leisurely weekend lunch.
  • Full of vibrant, fresh veggies — a great way to sneak in some nutrition for picky eaters.
  • The creamy, cheesy finish makes it irresistible for both kids and adults.
  • It’s a versatile dish that can be paired with your favorite proteins or enjoyed on its own.
  • Perfect for a Dinner Ideas For Family With Toddler or as a satisfying side dish.

Simple Ingredients for a Delicious Treat

Let’s talk about these beautiful ingredients. Olive oil, the liquid gold of the Mediterranean, is the heart of this dish. It brings out the natural sweetness of the broccoli and carrots, which are not only delicious but also perfect Easy Veggies For Kids. The garlic adds a warm, aromatic depth, and the orzo — oh, the orzo! — it’s like a little pasta hug in every bite. Cream cheese and parmesan create a luscious, creamy sauce that ties everything together. It’s a symphony of flavors that sing of the Mediterranean sun.

You’ll find the full ingredient list with exact measurements in the recipe card below!

Let’s Make Some Magic: Step-by-Step

Ready to create some magic in the kitchen? Let’s dive in together!

Step 1: Start by chopping your broccoli into small, bite-sized pieces and shredding your carrots finely. The smaller the pieces, the quicker they cook and the easier they are to enjoy!

Step 2: In a medium pot, heat your olive oil over medium heat. Add the broccoli, carrots, and garlic. Sauté them for about 5 minutes until they soften slightly and fill your kitchen with a tantalizing aroma.

Step 3: Pour in the orzo and chicken broth. Bring this to a boil, then reduce the heat to medium-high. Let it cook for 10-15 minutes, stirring occasionally to prevent sticking. By the end, the orzo should have absorbed most of the broth.

Step 4: Stir in the cream cheese and parmesan. Mix until everything is beautifully creamy and the cheeses have melted into a delicious sauce.

And there you have it! A dish that’s as delightful to make as it is to eat.

A Few of My Favorite Tips

Here are a few secrets from my kitchen to yours:

  • If you’re cooking for picky eaters, dice the veggies even smaller or blend them into the sauce for a silky texture.
  • Try adding a pinch of saffron to the broth for a hint of that classic Spanish flavor.
  • For a vegetarian version, simply swap the chicken broth for vegetable broth.

How I Like to Serve This

This Veggie Orzo is a star on its own, but I love pairing it with grilled chicken or fish for a complete meal. It’s also perfect as a Toddler Dinner Sides or a main dish for lunch with a crisp, green salad. And don’t forget a glass of chilled white wine!

Storing & Reheating (If There’s Any Left!)

If you happen to have leftovers, store them in an airtight container in the fridge for up to three days. To reheat, simply add a splash of broth or water to bring back the creaminess, and warm it gently on the stove. It’s just as delicious the next day!

There you have it, friends! A dish that’s not just food, but a celebration of life and togetherness. For more cozy inspiration, check out my other creations like Discover My 24 Simple Dinner Ideas for Cozy Family Nights and Delicious Simple Dinner Ideas That Will Bring You Joy. Until next time, happy cooking!

Veggie Orzo

Prep Time 10 minutes
Cook Time 15 minutes
Total Time 25 minutes
Servings 4 servings
Calories 450
A creamy and delicious Veggie Orzo packed with nutritious vegetables, perfect for toddlers and families alike.

Ingredients

Vegetables

  • 2 tbsp olive oil
  • 1 cup broccoli (chopped)
  • 1 cup carrots (finely shredded)
  • 2 tsp garlic (minced)
  • 1 cup orzo
  • 2 cups chicken broth
  • 1 oz cream cheese
  • 1/2 cup parmesan cheese

Instructions 

  • Chop broccoli and shred carrots.
  • Heat olive oil in a pot, add broccoli, carrots, and garlic. Sauté for 5 minutes.
  • Add orzo and chicken broth, bring to a boil, then cook for 10-15 minutes.
  • Stir in cream cheese and parmesan until melted and creamy.
  • Cool slightly before serving. Enjoy as is or with grilled chicken or fish.

Notes

Pair with grilled chicken or fish for added protein.
Calories: 450kcal
Cost: $10.00
Course: Main Dish
Cuisine: Italian
Keyword: Orzo

There’s something magical about cooking that transports us back in time, isn’t there? Just like the saffron in my father’s paella that used to fill our home with the most inviting aroma, this Cheesy Chicken Broccoli Orzo brings me back to cozy family gatherings. It’s a dish that feels like a warm hug — comforting, familiar, and oh-so-delicious. Every bite is a celebration of the Mediterranean flavors I grew up with, mixed with a modern twist that makes it perfect for today’s table. Let’s dive into this recipe that I’m sure will become a staple in your kitchen, just like it has in mine.

Why You’ll Absolutely Love This Recipe

  • **Effortless Cooking**: It’s so easy, it feels like a little kitchen victory!
  • **Family-Approved**: A hit for all ages, even the most picky toddler meals become a delight.
  • **Flavorful Fusion**: Combines the best of Mediterranean warmth and modern comfort.
  • **Versatile**: Perfect as a hearty meal or a side dish to complement any feast.
  • **Toddler Friendly Meals**: Even the fussiest eaters will find it irresistible.

Simple Ingredients for a Delicious Treat

This dish is a testament to the beauty of simple, fresh ingredients. Imagine the sizzle of olive oil and butter in a pot, mingling with the sweet aroma of onions and the earthy scent of garlic. The broccoli, vibrant and green, adds not just color but a crunch that perfectly balances the creamy texture of the orzo. Let’s not forget the sharp cheddar — it’s like the grand finale, bringing everything together with its rich, cheesy goodness. You’ll find the full ingredient list with exact measurements in the recipe card below!

Let’s Make Some Magic: Step-by-Step

Join me in the kitchen, and let’s create something special. Start by heating the oil and butter in a pot over medium-high heat. As the aromas fill the air, add the chopped onion and sauté for 3-4 minutes until they’re soft and translucent. Now, toss in the broccoli and stir for another 2 minutes.

Next, the garlic and Italian seasoning join the party. Stir them in along with the orzo, letting them cook for about 30 seconds. The fragrance is already irresistible!

Pour in the chicken broth, cream, and Worcestershire sauce. Once it starts to boil, reduce the heat so it bubbles gently. Give it about 10 minutes, stirring often. We want the orzo to soak up all those wonderful flavors.

Add the shredded chicken — this is where it gets hearty and comforting. Finally, take the pot off the heat and stir in the cheddar until it’s beautifully melted. Season generously with salt and pepper. If the sauce needs thickening, let it sit covered for a few minutes. Voilà! You’ve done it!

A Few of My Favorite Tips

Here are some secrets that make this dish even more delightful:

  • **Broccoli Alternatives**: Feel free to swap broccoli with peas or spinach for a change.
  • **Cheese Choices**: Experiment with different cheeses like Gruyère or Parmesan for a unique twist.
  • **Make it Spicy**: Add a pinch of red pepper flakes if you like a bit of heat.

How I Like to Serve This

This dish shines as the star of the meal, but I love serving it with a simple side salad or crusty bread to mop up every bit of that creamy sauce. It’s also a fantastic addition to a Mediterranean-inspired dinner spread alongside dishes like Why My Creamy Smothered Chicken and Rice Feels Like Home and Why This Creamy Garlic Parmesan Chicken Pasta Steals My Heart.

Storing & Reheating (If There’s Any Left!)

If you’re lucky enough to have leftovers, store them in an airtight container in the fridge for up to 3 days. To reheat, simply add a splash of cream or broth to bring back the creaminess and warm it gently on the stove or in the microwave. It’s a dish that tastes just as good the next day, making it perfect for easy toddler meals or quick lunches.

Cheesy Chicken Broccoli Orzo

Prep Time 10 minutes
Cook Time 20 minutes
Total Time 30 minutes
Servings 4 servings
Calories 650
A creamy and cheesy dish that combines tender orzo pasta, chicken, and broccoli for a comforting meal.

Ingredients

Base Ingredients

  • 1 tablespoon olive oil
  • 1 tablespoon butter
  • 1/2 medium onion (chopped)
  • 2 cups broccoli (cut into bite-size florets)
  • 3 cloves garlic (minced)
  • 1/2 teaspoon italian seasoning
  • 1 cup uncooked orzo pasta
  • 2 cups chicken broth
  • 1 cup heavy/whipping cream
  • 1 teaspoon worcestershire sauce
  • 2 cups cooked shredded/rotisserie chicken
  • 2 cups shredded sharp cheddar
  • salt & pepper (to taste)

Instructions 

  • Sauté oil, butter, and onion for 3-4 minutes.
  • Add broccoli and cook for 2 minutes.
  • Stir in garlic, Italian seasoning, and orzo; cook for 30 seconds.
  • Add broth, cream, and Worcestershire; boil, then simmer for 10 minutes.
  • Stir in chicken.
  • Remove from heat, stir in cheddar, and season with salt & pepper.

Notes

Let the dish sit for a few minutes to thicken the sauce if needed.
Calories: 650kcal
Cost: $15.00
Course: Main Course
Cuisine: American
Keyword: Chicken

Every time I prepare this Creamy Lemon and Herb Pot Roasted Chicken, I am transported back to my childhood in Seville, sitting at a sun-drenched table surrounded by family, laughter, and the irresistible aroma of my father’s Sunday paella. This dish, with its rich, comforting flavors, feels like a warm hug from home. Though I’ve added my modern twist, it’s still a celebration of the togetherness and tradition that define Mediterranean cooking. The combination of lemon, fresh herbs, and creamy sauce in this Roast Chicken In Dutch Oven recipe is simply magical, and I can’t wait to share it with you.

Why You’ll Absolutely Love This Recipe

  • It’s so easy, it feels like a little kitchen victory!
  • The aroma of roasting chicken and herbs will fill your home with warmth.
  • The creamy sauce is perfect for dipping fresh bread or drizzling over potatoes.
  • It’s versatile enough for a casual family dinner or an elegant gathering.

Simple Ingredients for a Delicious Treat

Let me tell you, the beauty of this dish lies in its simplicity. A whole chicken is the star, bringing back memories of family meals where everyone gathered around to share. The lemon adds freshness, while the rosemary, oregano, and tarragon bring an earthy depth that dances with the creamy sauce. The baby potatoes soak up all the flavors, making them a delightful sidekick. And of course, the garlic — a Mediterranean staple that I can’t imagine cooking without.

You’ll find the full ingredient list with exact measurements in the recipe card below!

Let’s Make Some Magic: Step-by-Step

Ready to dive in? Preheat your oven to 425F. Place the chicken in a Dutch oven, a trusty companion in any kitchen. Prick the lemon with a knife in several places and tuck it into the chicken’s cavity — this will infuse the meat with citrusy goodness. Season the chicken generously with salt, pepper, smoked paprika, and garlic powder. Scatter the rosemary sprigs and garlic cloves around, and nestle slices of butter beside them. Pour in the chicken broth, cover, and let it roast for 45 minutes.

While the chicken is cooking, chop the oregano and tarragon and halve the potatoes. After 45 minutes, add the cream, white wine, herbs, and potatoes to the pot. Uncover and roast for another 45 minutes, letting the flavors meld into a creamy, herby symphony.

Before serving, remove the rosemary sprigs and sprinkle freshly chopped parsley for a burst of color and flavor. And there you have it, your own slice of Mediterranean heaven!

A Few of My Favorite Tips

Here’s a little secret from my kitchen to yours: if you can, let the chicken rest for a few minutes before carving. This allows the juices to redistribute, making each bite succulent and flavorful. Also, if you’re feeling adventurous, try adding a pinch of saffron to the cream for an extra layer of aromatic richness — a nod to those Sunday paellas that still linger in my heart.

How I Like to Serve This

I love serving this dish family-style, with everyone helping themselves and sharing stories over the clinking of glasses. Pair it with a crisp green salad or some freshly baked bread to soak up that luscious sauce. And if you’re in the mood for a culinary journey, explore more comforting dishes like Why My Creamy Smothered Chicken and Rice Feels Like Home or the indulgent Creamy Garlic Parmesan Chicken Pasta.

Storing & Reheating (If There’s Any Left!)

If you’re lucky enough to have leftovers, store them in an airtight container in the fridge for up to 3 days. To reheat, simply pop it back in the oven or warm it gently on the stovetop. The flavors will have deepened, making it even more delicious the next day.

Creamy Lemon and Herb Pot Roasted Chicken

Prep Time 15 minutes
Cook Time 1 hour 30 minutes
Total Time 1 hour 45 minutes
Servings 6 servings
Calories 800
A deliciously creamy and herb-infused roasted chicken dish, perfect for family gatherings.

Ingredients

Poultry

  • 1 whole chicken (about 4 pounds)
  • 1 whole lemon
  • to taste salt & pepper
  • 0.5 teaspoon garlic powder
  • 0.25 teaspoon smoked paprika
  • 5-6 sprigs fresh rosemary
  • 6 cloves garlic (peeled)
  • 3 tablespoons butter
  • 1 cup chicken broth or stock
  • 2 cups heavy/whipping cream (see note)
  • 0.5 cup dry white wine
  • 2 tablespoons fresh oregano
  • 1 tablespoon fresh tarragon
  • 1.5 pounds baby potatoes
  • 1 tablespoon chopped fresh parsley

Instructions 

  • Pre-heat your oven to 425F.
  • Add the chicken to a Dutch oven, insert the pricked lemon in the cavity, and season with salt, pepper, smoked paprika, and garlic powder. Add rosemary and garlic around the chicken, place butter slices, and pour in chicken broth. Cover and roast for 45 minutes.
  • Chop the oregano and tarragon, and cut the potatoes in halves.
  • Add cream, white wine, oregano, tarragon, and potatoes to the pot. Cook uncovered for another 45 minutes.
  • Remove rosemary sprigs, chop parsley, and sprinkle on before serving.

Notes

For a richer flavor, use homemade chicken broth.
Calories: 800kcal
Cost: $25.00
Course: Main Course
Cuisine: American
Keyword: Chicken

Ah, the charm of a Sunday afternoon in Barcelona, where the air is filled with the warmth of laughter and the scent of something delicious baking in the oven. Today, I invite you to gather around and savor the comfort of my Sunday Pioneer Woman Chicken Pot Pie. This recipe is a heartfelt nod to the cherished Sundays of my childhood in Seville, where my father would whip up a feast that brought the whole family together. The pot pie’s golden crust and creamy filling remind me of those joyous meals, where each bite was a celebration of tradition and togetherness.

Why You’ll Absolutely Love This Recipe

  • It’s so easy, it feels like a little kitchen victory!
  • The flavors are a beautiful blend of nostalgia and comfort, perfect for Easy Sunday Meal Ideas.
  • With its inviting aroma, it’s the kind of dish that makes everyone gather around the table.
  • This pot pie is a versatile delight, ideal for Recipes For Hosting Dinner or even as a Fancy Dinner Casserole.

Simple Ingredients for a Delicious Treat

Let’s talk about these wonderful ingredients that make this dish shine. The shredded chicken, tender and juicy, adds a hearty element to the pie. Carrots and peas bring a touch of sweetness and color, while the celery and onion provide a savory backbone. The magic comes together with a luscious blend of chicken broth and heavy cream, creating a filling that’s irresistibly creamy and comforting. And of course, what would a pie be without its golden crust? Whether you choose store-bought or homemade, it’s the perfect vessel for all this goodness.

You’ll find the full ingredient list with exact measurements in the recipe card below!

Let’s Make Some Magic: Step-by-Step

Alright, my friends, let’s dive into the creation of this delightful pot pie. First, preheat your oven to 375°F (190°C). In a large skillet, melt some butter over medium heat. Add the onions, carrots, celery, and a touch of garlic powder, cooking until the vegetables are soft — about 5 minutes should do the trick. Now, stir in the flour and let it mingle with the veggies for another 2 minutes.

Slowly whisk in the chicken broth and heavy cream, bringing the mixture to a simmer. Allow it to thicken, which should take around 5-7 minutes. Add the shredded chicken and peas, stirring everything together. Season with salt and pepper to your taste.

Now, roll out one pie crust and fit it into a 9-inch pie dish. Pour the chicken mixture into this cozy crust. Place the second pie crust on top, crimping the edges to seal in all that deliciousness. Don’t forget to cut a few slits in the top for steam to escape. Brush the top with a beaten egg for that golden finish, then bake for 35-40 minutes until the crust is golden brown and the filling is bubbly. Let it cool for a few minutes before serving. And there you have it — a little piece of culinary joy!

A Few of My Favorite Tips

Here are some tips to make your pot pie even more delightful. For a richer flavor, try adding a pinch of thyme or rosemary to the filling. If you’re feeling adventurous, sprinkle a bit of grated cheese on top of the crust before baking. Trust me, it’s like a warm hug in pie form!

How I Like to Serve This

I love serving this pot pie with a simple green salad drizzled with olive oil and lemon juice. It adds a fresh contrast to the creamy filling. And if you’re hosting, pair it with a crisp white wine for an elegant touch that enhances the flavors beautifully.

Storing & Reheating (If There’s Any Left!)

Should you find yourself with leftovers, store the pot pie in an airtight container in the refrigerator for up to three days. To reheat, simply pop it in the oven at 350°F (175°C) until warmed through. This dish is just as comforting the next day, making it perfect for those Easy Potluck Dinner Ideas or a cozy midweek meal.

If you loved this recipe, you might also enjoy my other comforting dishes like Why My Creamy Smothered Chicken and Rice Feels Like Home or Why My Grandma’s Black Pepper Chicken Is a Family Favorite. And for more inspiration on cozy family dinners, check out Discover My 24 Simple Dinner Ideas for Cozy Family Nights.

Sunday Pioneer Woman Chicken Pot Pie

Prep Time 20 minutes
Cook Time 40 minutes
Total Time 1 hour
Servings 6 servings
Calories 450
A comforting and hearty chicken pot pie filled with tender chicken and vegetables, all encased in a flaky crust.

Ingredients

Filling

  • 2 cups cooked chicken, shredded
  • 1 cup carrots, diced
  • 1 cup frozen peas
  • 1 cup celery, chopped
  • 1 onion chopped
  • 3 cups chicken broth
  • 1 cup heavy cream
  • 3 tbsp butter
  • 1/4 cup flour
  • 1 tsp garlic powder
  • salt and pepper to taste
  • 1 package refrigerated pie crusts (or homemade)
  • 1 egg for egg wash

Instructions 

  • Preheat the oven to 375°F (190°C).
  • Melt butter in a skillet, add onions, carrots, celery, and garlic powder; cook until soft.
  • Stir in flour, then gradually whisk in chicken broth and cream; simmer until thickened.
  • Add chicken and peas, season with salt and pepper, then pour into pie crust.
  • Cover with second crust, seal edges, cut slits for steam, and brush with egg.
  • Bake for 35-40 minutes until golden brown; cool before serving.

Notes

Let the pie cool for a few minutes before slicing for easier serving.
Calories: 450kcal
Cost: $15.00
Course: Main Dish
Cuisine: American
Keyword: Chicken

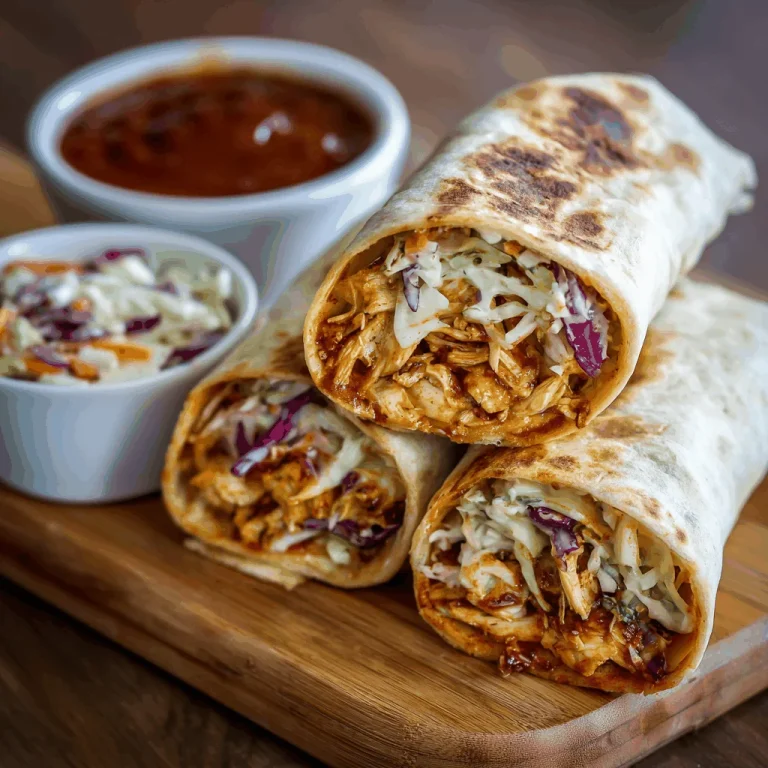
Hola, my dear friends! Today, I’m inviting you on a culinary adventure that wraps up all the sunny, vibrant flavors of the Mediterranean with a modern twist — BBQ Chicken Coleslaw Wraps! This dish is like a warm embrace of flavor, reminiscent of the lively family gatherings from my childhood in Seville, where every meal was a celebration. Imagine succulent chicken, smoky barbecue sauce, and the fresh crunch of coleslaw, all tucked into a soft tortilla. It’s a perfect blend of tradition and modernity, much like the way I love to cook.

Why You’ll Absolutely Love This Recipe

  • It’s so easy, it feels like a little kitchen victory!
  • The wraps are perfect for **Cold Dinners On The Go**, making them ideal for picnics or busy days.
  • A delightful way to enjoy **Healthy Bbq Dinner Recipes** without compromising on flavor.
  • Great for **Summertime Dinners Easy**, offering a refreshing meal that doesn’t require a lot of cooking.

Simple Ingredients for a Delicious Treat

Let’s talk about these lovely ingredients that will bring our wraps to life. The shredded chicken, tender and juicy, is coated in a rich BBQ sauce, which is a nod to the smoky flavors I fell in love with during my travels. The coleslaw, made from crisp green cabbage and sweet carrots, adds a refreshing crunch that dances on your palate. And don’t forget the zesty twist from apple cider vinegar — it’s like a little splash of sunshine! The fresh cilantro and diced bell peppers add a burst of color and aroma, making each bite a celebration of **Coleslaw Meal Ideas**.

You’ll find the full ingredient list with exact measurements in the recipe card below!

Let’s Make Some Magic: Step-by-Step

Now, amigos, let’s roll up our sleeves and dive into the magic of creating these wraps. First, prepare the BBQ chicken. If you have leftover rotisserie chicken, perfect! Otherwise, cook fresh chicken in a skillet until it’s no longer pink, then coat it with BBQ sauce and let it simmer until it’s infused with flavor.

Next, for our coleslaw, combine shredded cabbage and grated carrots in a bowl. Whisk together mayonnaise, apple cider vinegar, salt, and pepper in another bowl. Pour this creamy dressing over the veggies and toss until they’re well-coated. It’s like crafting a little garden of flavors!

Finally, it’s time to assemble. Lay a tortilla flat, spoon BBQ chicken onto the center, add a generous helping of coleslaw, fold in the sides, and roll it up tightly. Voilà! You’ve created a wrap that’s as joyful and lively as a summer fiesta.

A Few of My Favorite Tips

Let me share a couple of secrets to make these wraps even more delightful. For a touch of creaminess, add some avocado slices before rolling up the tortilla. And if you’re a cheese lover like me, sprinkle some cheese on top of the chicken for an extra layer of indulgence. Also, a dash of hot sauce can give it a fiery kick that’s simply irresistible!

How I Like to Serve This

I love serving these wraps with a side of spicy patatas bravas or a simple green salad. They’re also fantastic as part of a **Coleslaw Dinner Ideas** spread for a family gathering, where everyone can pick and choose their favorite fillings. These wraps are a celebration of togetherness, much like the joyous meals I remember from my childhood.

Storing & Reheating (If There’s Any Left!)

If you have any wraps left over, wrap them tightly in foil or plastic wrap and store them in the refrigerator. They’ll keep well for a couple of days. To reheat, simply pop them in a preheated oven at 180°C (350°F) for about 10 minutes, or until warmed through. They’ll be just as delicious as when they were freshly made.

For more delightful dinner ideas, check out my article on **[Why My Pesto Chicken Flatbread is Perfect for Dinner Gatherings](https://yumswift.com//why-my-pesto-chicken-flatbread-is-perfect-for-dinner-gatherings)** or explore **[Savoring Together: Quick Dinners for Two That Delight](https://yumswift.com//savoring-together-quick-dinners-for-two-that-delight)**. And if you’re planning a cozy family night, don’t miss **[Discover My 24 Simple Dinner Ideas for Cozy Family Nights](https://yumswift.com//discover-my-24-simple-dinner-ideas-for-cozy-family-nights)**.

BBQ Chicken Coleslaw Wraps

Prep Time 15 minutes
Cook Time 10 minutes
Total Time 25 minutes
Servings 4 servings
Calories 600
Delicious BBQ Chicken Coleslaw Wraps are a perfect blend of flavors, combining tender chicken with crunchy coleslaw wrapped in a soft tortilla.

Ingredients

Main Ingredients

  • 2 cups cooked chicken, shredded
  • 1 cup bbq sauce
  • 4 large tortillas
  • 2 cups green cabbage, finely shredded
  • 1 cup carrots, grated
  • ½ cup mayonnaise
  • 1 tablespoon apple cider vinegar
  • salt and pepper to taste
  • 1 cup diced bell peppers
  • ¼ cup chopped fresh cilantro
  • 1 teaspoon hot sauce
  • avocado slices
  • cheese

Instructions 

  • Shred chicken and coat with BBQ sauce, then simmer.
  • Mix cabbage and carrots; whisk mayonnaise, vinegar, salt, and pepper, then combine.
  • Lay a tortilla flat, add BBQ chicken and coleslaw, fold sides, and roll tightly.

Notes

For extra flavor, add your favorite spices to the chicken or coleslaw.
Calories: 600kcal
Cost: $15.00
Course: Main Course
Cuisine: American
Keyword: Chicken

Imagine the sun setting over the vibrant streets of Seville, the air filled with the laughter of family and the irresistible aroma of dinner on the grill. This is where my love for cooking began, and right here in my Barcelona kitchen, I recreate that magic with my **Fiesta Lime Chicken with Avocado**. This dish is more than just a meal; it’s a celebration of flavors, a sensory journey through the Mediterranean and beyond. The zesty lime, the creamy avocado — it reminds me of the warmth of Spanish summers and the joy of sharing a table with loved ones. Join me, as we bring a little fiesta to your table tonight!

Why You’ll Absolutely Love This Recipe

  • It’s a **Summer Dinner** delight that brings the sunshine straight to your plate.
  • So vibrant and zesty, it’s like a culinary dance party!
  • Quick to prepare — it’s like a mini-vacation in your kitchen.
  • Perfect for a **Grilled Dinner**, making it ideal for gatherings or a cozy night in.
  • A beautiful blend of Mediterranean and Mexican flavors, celebrating diversity on your plate.

Simple Ingredients for a Delicious Treat

Let’s talk about these fantastic ingredients! Each one plays its part in creating a dish that’s both comforting and exciting. The chicken, tender and juicy, is the star, while fresh limes add a zesty twist that wakes up your taste buds. Avocado brings a creamy balance, and together, they create a symphony of flavors that sing of summer. Don’t forget the garlic — it’s a nod to my love for Mediterranean Recipes and a staple in my kitchen.

You’ll find the full ingredient list with exact measurements in the recipe card below!

Let’s Make Some Magic: Step-by-Step

Ready to dive in? Imagine us cooking together, music playing softly in the background, and the anticipation of a delicious meal to come.

1. **Marinate the Chicken:** Start by mixing lime juice, olive oil, garlic, and spices in a bowl. Let your chicken soak up these flavors for at least 30 minutes. This is where the magic begins!

2. **Grill to Perfection:** Preheat your grill and cook the chicken until it’s golden and succulent. The aroma will transport you to a sunny terrace in Spain.

3. **Avocado Magic:** Meanwhile, mash up some ripe avocados with a hint of lime and salt. This creamy topping is the perfect partner for our zesty chicken.

4. **Assemble & Enjoy:** Place your grilled chicken on a plate, top with the avocado magic, and garnish with fresh cilantro. Voilà! Your Fiesta Lime Chicken is ready to be devoured.

A Few of My Favorite Tips

Here are some secrets to make this dish even more delightful:

– **Use Fresh Ingredients:** Fresh limes and avocados make all the difference, trust me!

– **Let It Marinate:** If you have time, let the chicken marinate overnight for an even deeper flavor.

– **Grill with Love:** Keep your grill at a medium-high heat to ensure your chicken stays juicy.

For more delicious ideas, check out my **Dive into Cheesy Garlic Chicken Wraps**.

How I Like to Serve This

I love serving this dish with a side of Spanish rice or a fresh green salad. A glass of chilled white wine or a tangy margarita complements the flavors beautifully. It’s all about balance and enjoyment!

Storing & Reheating (If There’s Any Left!)

If you happen to have leftovers, store them in an airtight container in the fridge for up to two days. Reheat gently in the oven to maintain that juicy texture. But let’s be honest, it’s so delicious there might not be any left to store!

For more cozy dinner ideas, don’t miss my **24 Simple Dinner Ideas for Cozy Family Nights**.

Fiesta Lime Chicken with Avocado - Mexican Food Recipe

Prep Time 15 minutes
Cook Time 30 minutes
Total Time 45 minutes
Servings 4 servings
Calories 350
A zesty and flavorful chicken dish topped with creamy avocado, perfect for a fiesta!

Ingredients

Chicken

  • 4 pieces Chicken breasts (boneless and skinless)

Seasoning

  • 1 tablespoon Lime juice (freshly squeezed)
  • 1 teaspoon Cumin
  • 1 teaspoon Chili powder

Toppings

  • 1 piece Avocado (sliced)

Instructions 

  • Marinate chicken breasts in lime juice, cumin, and chili powder for 30 minutes.
  • Grill chicken over medium heat for 6-7 minutes on each side until cooked through.
  • Let chicken rest for 5 minutes before slicing.
  • Top with sliced avocado before serving.

Notes

Serve with rice or tortillas for a complete meal!
Calories: 350kcal
Cost: $15.00
Course: Main Course
Cuisine: Mexican
Keyword: Chicken

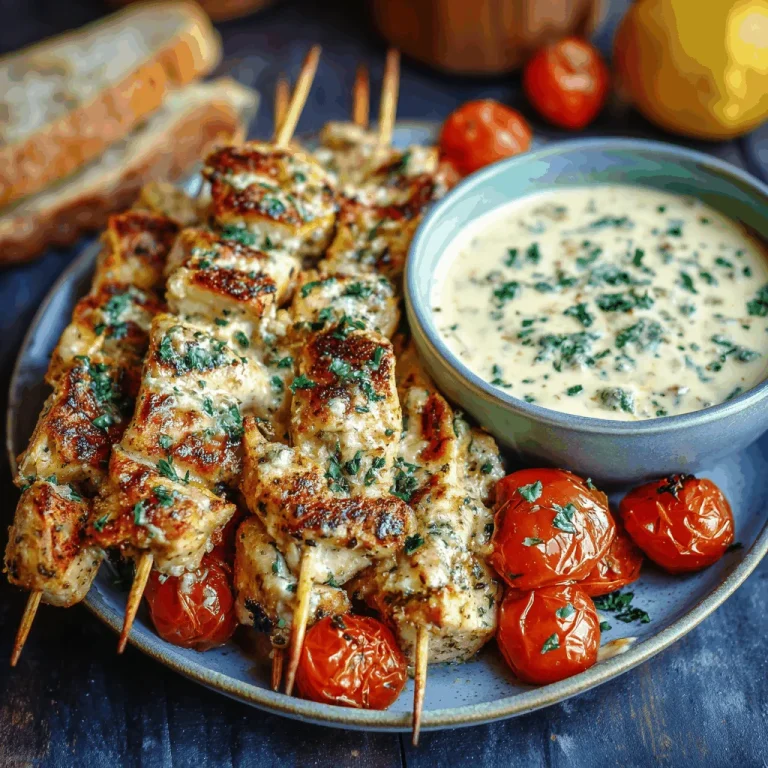
There’s something magical about skewers, don’t you think? The way they bring together flavors and create a delightful dance of taste and aroma is simply enchanting. Growing up in Seville, Sunday was the day for family gatherings, with my father at the helm, crafting the most exquisite paella. Today, I bring a little of that joy and a touch of my Mediterranean roots to your table with my Ranch Garlic Parmesan Chicken Skewers. This recipe takes me back to those vibrant days, now infused with a modern twist inspired by my travels across Europe. Let’s dive into a culinary journey that’s as much about savoring the moment as it is about the food.

Why You’ll Absolutely Love This Recipe

  • It’s so easy, it feels like a little kitchen victory!
  • The combination of ranch, garlic, and parmesan is like a symphony of flavors.
  • Perfect for any gathering, from summer barbecues to cozy winter dinners.
  • It’s versatile and pairs beautifully with a variety of sides and sauces.
  • A delightful addition to your Grilled Dinner repertoire.

Simple Ingredients for a Delicious Treat

Let’s talk about these ingredients that make my heart sing. The olive oil, a staple in my kitchen, brings a luscious richness, while garlic adds that unmistakable Mediterranean fragrance. The parmesan cheese offers a savory depth that complements the creaminess of the ranch dressing. And oh, the parsley, whether dried or freshly chopped, adds a burst of color and freshness. These ingredients together create a harmony that’s simply irresistible.

You’ll find the full ingredient list with exact measurements in the recipe card below!

Let’s Make Some Magic: Step-by-Step

Ready to embark on this culinary adventure? Let’s do this together!

Combine the Marinade Ingredients: In a bowl, mix together the ranch dressing, parmesan cheese, olive oil, garlic, parsley, black pepper, garlic powder, and lemon juice (if using). Stir until everything is well combined.

Marinate the Chicken: Place the cubed chicken into a resealable plastic bag or shallow dish. Pour the marinade over the chicken, ensuring that all pieces are well-coated. Seal the bag or cover the dish and refrigerate for at least 30 minutes, or up to 2 hours for more flavor.

Prepare the Skewers: Thread the marinated chicken cubes onto the skewers, leaving a little space between each piece for even cooking. If using wooden skewers, soak them in water for 15 minutes before threading the chicken to prevent them from burning on the grill.

Preheat the Grill: Preheat your grill to medium-high heat.

Grill the Chicken: Place the skewers on the grill and cook for 10-15 minutes, turning occasionally, until the chicken is fully cooked through and has reached an internal temperature of 165°F (75°C). The chicken should have a nice char on the outside.

Serve the Skewers: Remove the skewers from the grill and let them rest for a few minutes before serving.

Garnish and Serve: Garnish with additional chopped parsley or extra parmesan cheese, if desired. Serve the skewers with your favorite side dishes or a dipping sauce like ranch dressing, BBQ sauce, or a tangy yogurt dip.

A Few of My Favorite Tips

Here’s a little secret from my kitchen to yours: soaking your wooden skewers isn’t just a step, it’s an art! It prevents them from burning and adds a subtle hint of flavor. And if you’re looking for extra zest, a squeeze of lemon juice in the marinade can elevate your skewers to new heights!

How I Like to Serve This

For me, these skewers are a celebration on a plate. I love serving them with a fresh Mediterranean salad, a side of grilled vegetables, or even some fluffy couscous spiced with a hint of cinnamon and cumin. And if you’re feeling indulgent, pairing them with a crisp white wine can make the meal feel like a festive occasion.

Storing & Reheating (If There’s Any Left!)

If you’re lucky enough to have leftovers, store them in an airtight container in the refrigerator for up to three days. Reheat them gently in a skillet over medium heat or in the oven at 350°F (175°C) until warmed through. But trust me, these skewers are so delightful, they rarely make it past the first serving!

For more culinary adventures, check out my stories on why my creamy smothered chicken and rice feels like home or how this creamy garlic parmesan chicken pasta steals my heart. And if you’re in the mood for something savory, these savory garlic butter steak bites are perfect to savor with friends!

Ranch Garlic Parmesan Chicken Skewers

Prep Time 30 minutes
Cook Time 15 minutes
Total Time 45 minutes
Servings 4 servings
Calories 350
Deliciously marinated chicken skewers infused with ranch, garlic, and parmesan flavors, perfect for grilling.

Ingredients

Marinade

  • 120 ml ranch dressing (store-bought or homemade)
  • 30 g grated parmesan cheese
  • 30 ml olive oil
  • 3 cloves garlic, minced
  • 1 tsp dried parsley (or fresh parsley, chopped)
  • 1 tsp black pepper
  • ½ tsp garlic powder
  • 5 ml lemon juice (optional for extra tang)
  • 680 g chicken fillets or pieces (cut into 1-inch cubes)
  • wooden or metal skewers

Instructions 

  • Mix marinade ingredients in a bowl until well combined.
  • Marinate chicken in a resealable bag or dish for 30 minutes to 2 hours.
  • Thread marinated chicken onto skewers, soaking wooden skewers if used.
  • Preheat grill to medium-high heat.
  • Grill skewers for 10-15 minutes until chicken is cooked through.
  • Let skewers rest before serving; garnish as desired.

Notes

For extra flavor, let the chicken marinate longer.
Calories: 350kcal
Cost: $12.00
Course: Main Dish
Cuisine: American
Keyword: Chicken