Author

rafael

Browsing

Indulge in the Ultimate Fudgy Brownies: A Chocolate Lover’s Dream

Welcome, fellow food enthusiasts! Today, we’re diving into the rich, gooey world of fudgy brownies. You might be wondering, what makes this brownie recipe stand out from the rest? Well, my friends, it’s all about the balance of flavors and textures—each bite is a heavenly experience that transports you straight to chocolate paradise. These brownies are not just a treat; they are a celebration of everything delicious and decadent.

In this guide, you’ll discover the secrets to making the best fudgy brownies, detailed ingredient breakdowns, expert tips, and even some delightful variations to keep your taste buds dancing. Grab your apron, because we’re about to embark on a chocolatey adventure!

Why You’ll Love This Recipe

Let’s explore five compelling reasons why this brownie recipe will become your go-to:

  • Decadent Texture: These brownies are perfectly fudgy, with a rich, moist interior that melts in your mouth.
  • Intense Chocolate Flavor: Using high-quality chocolate and cocoa powder elevates the chocolate experience to new heights.
  • Quick and Easy: With straightforward steps, you’ll have these brownies ready in no time, perfect for unexpected guests or a late-night craving.
  • Customizable: Feel free to add your favorite nuts, chocolate chunks, or even a swirl of peanut butter for a unique twist!
  • Perfect for Any Occasion: Whether it’s a cozy family gathering or a festive celebration, these brownies fit right in.

Ingredient Breakdown: What You’ll Need

Let’s get into the heart of the recipe—the ingredients! Each component plays a crucial role in achieving that ultimate fudgy brownie.

  • Semi-sweet chocolate (1 oz / 28g): This is your base chocolate, providing sweetness and depth of flavor.
  • High-quality dark chocolate (3 oz / 85g): Opt for chocolate with 60-70% cocoa for a rich taste. Brands like Lindt or Valrhona work wonderfully.
  • Unsalted butter (10 tbsp / 140g): The fat that makes these brownies moist and luscious.
  • Sugar (3/4 cup / about 165g): Balances the bitterness of the chocolate and adds sweetness.
  • Eggs (2, at room temperature): They lend structure and moisture, essential for that perfect fudgy texture.
  • Instant coffee (1 tsp mixed with 1 tbsp hot water): Enhances the chocolate flavor without adding any coffee taste.
  • All-purpose flour (1/2 cup / about 65g): Provides the necessary structure to hold the brownies together.
  • Cocoa powder (1/3 cup / about 35g): For an extra chocolate punch; Dutch-processed cocoa works best here.
  • Salt (3/4 tsp): Balances sweetness and enhances flavors.
  • Chocolate chips or chopped chocolate (2 oz / 55g): Optional but highly recommended for those melty chocolate pockets in every bite.

How to Make These Fudgy Brownies
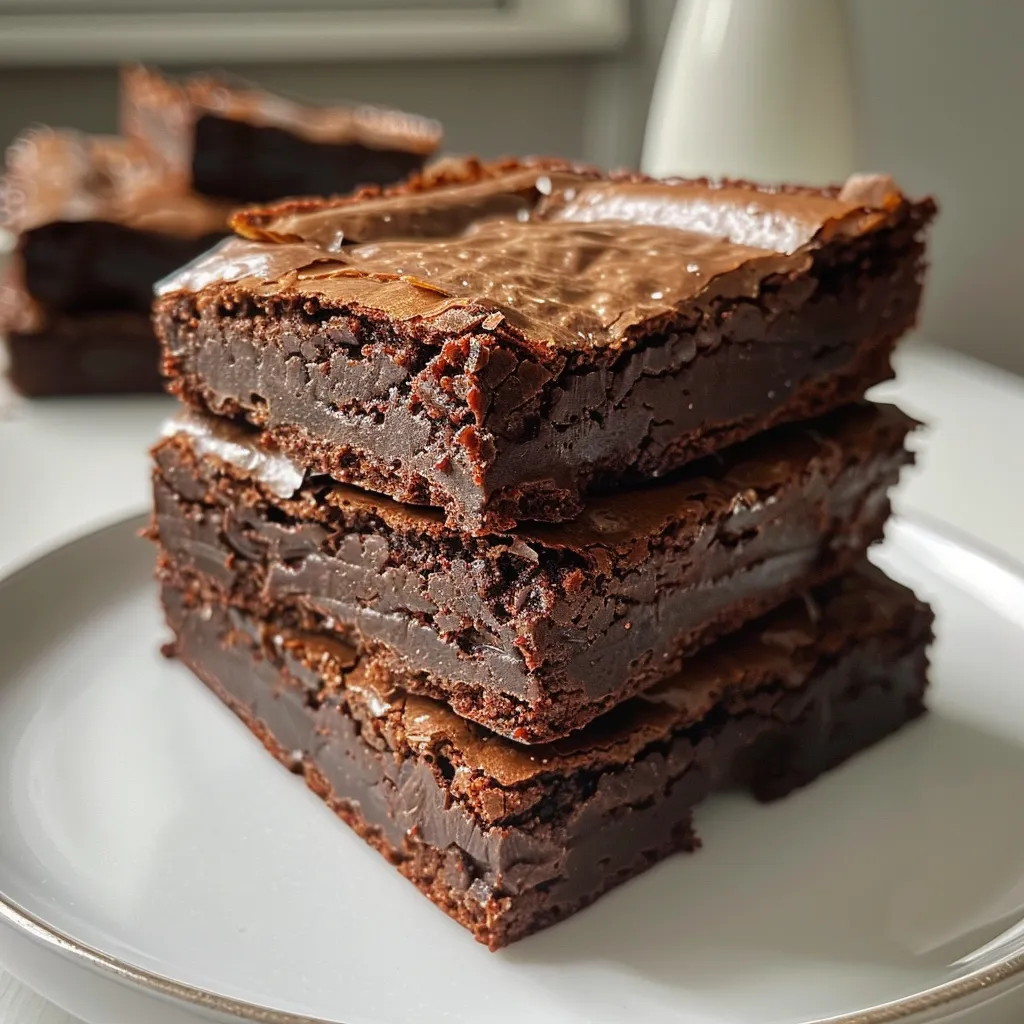
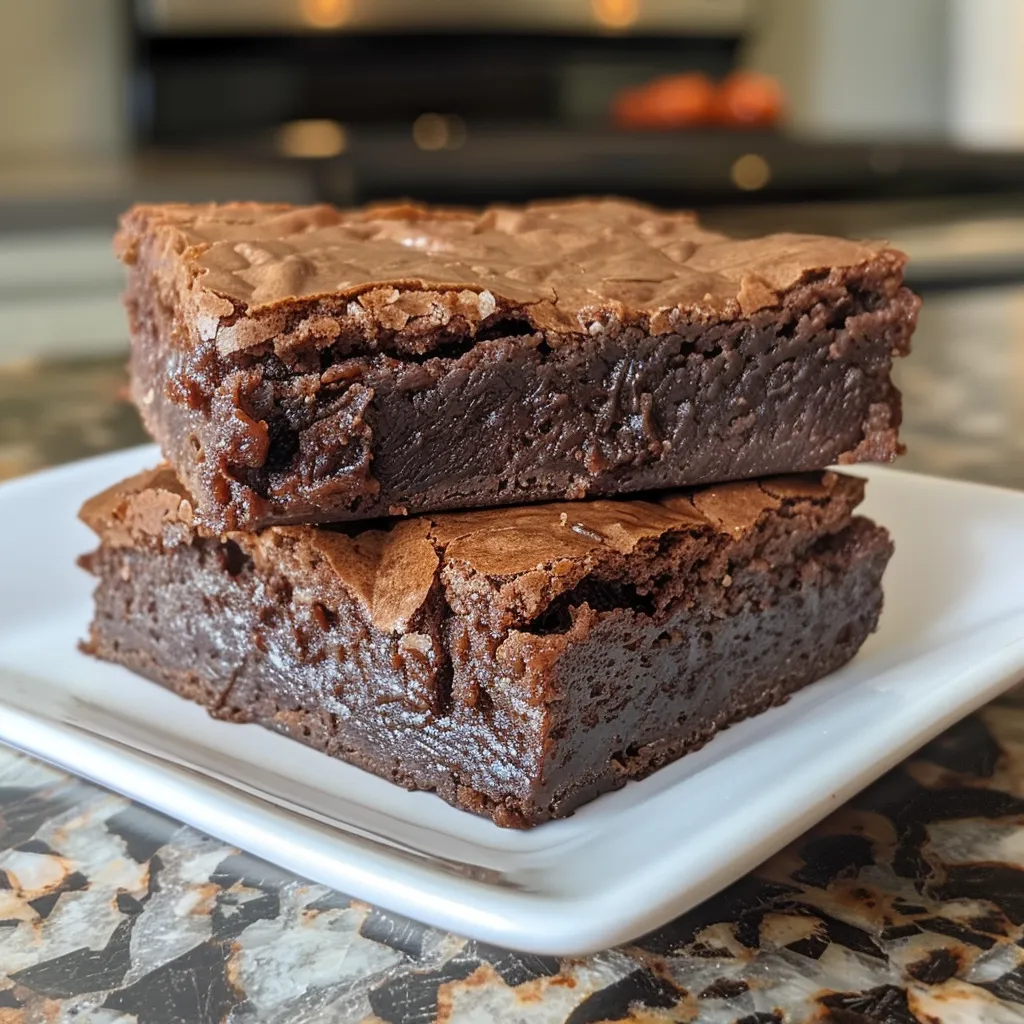
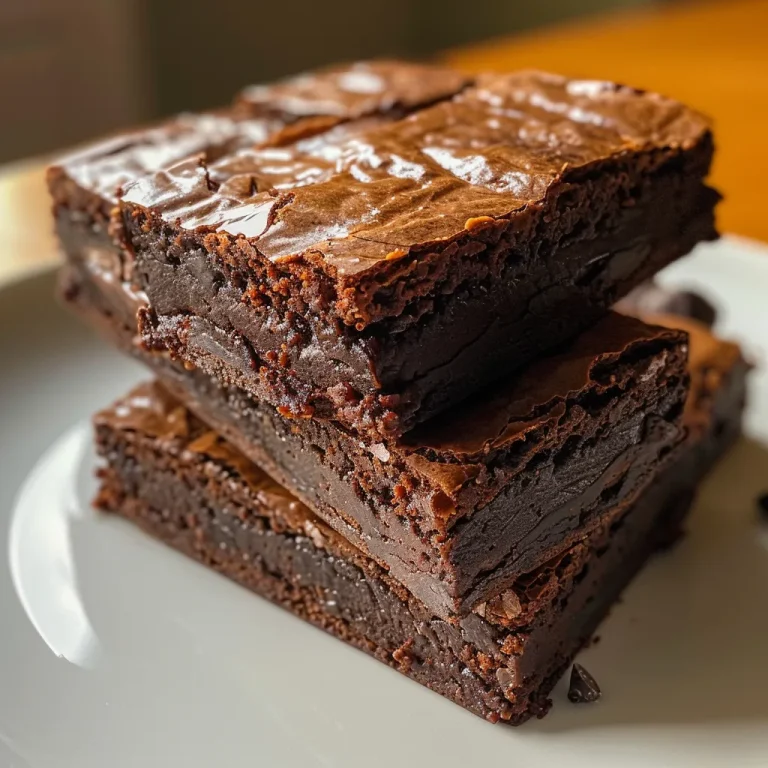
Juicy, rich chocolate brownies with a moist texture and a sprinkle of chocolate chunks.

Now, let’s get started on making these brownies that will tantalize your taste buds!

  1. Preheat the oven: Set your oven to 335°F (170°C). Line a 9” baking pan with parchment paper and lightly coat it with butter or oil to prevent sticking.
  2. Melt the chocolate and butter: In a microwave-safe bowl, combine the butter, 1 oz of semi-sweet chocolate, and 3 oz of dark chocolate. Heat in 20-second increments, stirring in between until melted and smooth. Avoid overheating!
  3. Whisk eggs and sugar: In a standing mixer, whisk the eggs and sugar together at medium-high speed for 3-5 minutes until the mixture is thick and ribbony. This step is crucial for that shiny brownie crust.
  4. Combine chocolate mixture: Pour the melted chocolate and butter mixture into the egg and sugar mixture, gently whisking at low speed until just combined.
  5. Add coffee: Mix the instant coffee with hot water and fold it into the batter.
  6. Sift and fold: Sift in the flour, cocoa powder, and salt, gently folding them into the wet ingredients without deflating the batter.
  7. Incorporate chocolate chips: Finally, fold in the chocolate chips or chunks, ensuring an even distribution throughout the batter.
  8. Pour and spread: Pour the batter into the lined pan, spreading it evenly. For an extra chocolatey touch, add more chocolate chunks on top.
  9. Bake the brownies: Bake for 20-25 minutes. I recommend checking at around 22 minutes for that perfect fudgy texture.
  10. Cool and serve: Let the brownies cool to room temperature. Cut with a sharp knife, and enjoy!

Pro Tips for Perfect Brownies

To elevate your brownie game even further, keep these expert tips in mind:

  • Use quality ingredients: The type of chocolate you choose makes a significant difference in flavor.
  • Measure accurately: Precision in measuring ingredients ensures consistent results every time.
  • Don’t overmix: When incorporating dry ingredients, mix just until combined to keep your brownies fudgy.
  • Check doneness carefully: Use the toothpick test; a few moist crumbs should cling to it when done.
  • Let them cool: Allow brownies to cool completely for cleaner cuts and enhanced flavors.
  • Experiment with add-ins: Try nuts, caramel swirls, or different chocolate types for variety.
  • Store properly: Keep brownies in an airtight container to maintain their moisture.
  • Don’t rush the process: Good things take time; enjoy the baking experience!

Common Mistakes and Troubleshooting

Even the best of us can stumble in the kitchen. Here are some common pitfalls and how to avoid them:

  • Dry brownies: Overbaking is the main culprit. Keep a close eye on them in the last few minutes.
  • Too cakey: Overmixing the batter can lead to a cake-like texture. Mix just enough!
  • Not enough chocolate flavor: Ensure you’re using quality chocolate and cocoa powder.
  • Brownies sticking to the pan: Make sure to line the pan and grease it well before pouring in the batter.

Delicious Variations to Try

Bored with the classic fudgy brownie? Here are four exciting variations to consider:

  • Nutty Brownies: Fold in chopped walnuts or pecans for a delightful crunch.
  • Peanut Butter Swirl: Drop spoonfuls of peanut butter into the batter and swirl with a knife for a nutty flavor.
  • Mint Chocolate Brownies: Add a few drops of peppermint extract to the batter for a refreshing twist.
  • Salted Caramel Brownies: Drizzle caramel sauce over the brownies before baking for a sweet contrast.

Storage and Make-Ahead Instructions

Want to enjoy these brownies later? Here’s how to store them:

  • At room temperature: Keep brownies in an airtight container for up to 3 days.
  • In the fridge: Store in a sealed container for up to a week. Just remember to bring them to room temperature before serving for the best texture.
  • Can they be frozen?: Yes! Wrap individual brownies tightly in plastic wrap and store in a freezer-safe bag for up to 3 months. Thaw at room temperature before enjoying.

Frequently Asked Questions

Here are some common questions about making fudgy brownies:

  • Can I use dark chocolate instead of semi-sweet? Yes, but be mindful of the sweetness level as dark chocolate is less sweet.
  • What if I don’t have instant coffee? You can omit it, but it does enhance the chocolate flavor beautifully.
  • Can I use coconut oil instead of butter? Yes, but it may impart a slight coconut taste to the brownies.
  • How can I tell when brownies are done? Look for a shiny top and a slight jiggle in the center; a toothpick should come out with a few moist crumbs.
  • What’s the best way to cut brownies? Use a sharp knife and clean it between cuts for neat squares.
  • Can I make this recipe gluten-free? Yes, substitute all-purpose flour with a gluten-free blend.
  • Why are my brownies cakey? This usually happens if they are overbaked or overmixed. Stick to the instructions for best results.
  • Can I add other flavors? Absolutely! Experiment with different extracts or spices for unique flavors.

Nutritional Tips and Dietary Adaptations

As we enjoy our brownies, it’s essential to consider dietary needs:

  • Lower sugar options: Substitute some sugar with applesauce or mashed bananas for a healthier choice.
  • Vegan adaptations: Use flax eggs (1 tbsp flaxseed meal + 2.5 tbsp water per egg) and dairy-free chocolate.
  • Protein boost: Incorporate protein powder into the batter for a more filling treat.

Essential Equipment Recommendations

To ensure your brownie-making experience is smooth, here are some kitchen essentials:

  • Mixing bowls: A set of mixing bowls in various sizes is crucial for prepping ingredients.
  • Measuring cups and spoons: Accurate measurements lead to perfect brownies every time!
  • Whisk and spatula: Essential tools for mixing and folding ingredients gently.
  • Baking pan: A good quality 9” square pan is ideal for this recipe.
  • Parchment paper: Prevents sticking and makes cleanup a breeze.

Serving Suggestions

Now that you’ve made these incredible brownies, how can you serve them? Here are some delightful ideas:

  • With ice cream: A scoop of vanilla or salted caramel ice cream on top makes for a heavenly dessert.
  • Drizzled with chocolate sauce: A little extra chocolate never hurts! Drizzle some warm chocolate sauce over the top.
  • Sprinkled with sea salt: A sprinkle of flaky sea salt enhances the chocolate flavor and adds a gourmet touch.

In conclusion, making these fudgy brownies is more than just baking; it’s about creating an experience to be shared with loved ones. So gather your ingredients, follow this easy recipe, and let the aroma of chocolate fill your kitchen. Thank you for joining me on this delicious journey, and happy baking!

THE BEST FUDGY BROWNIES RECIPE

Prep Time 15 minutes
Cook Time 25 minutes
Total Time 40 minutes
Servings 9 pieces
Calories 250
Indulge in these rich, fudgy brownies with a shiny crust, perfect for chocolate lovers.

Ingredients

Chocolate

  • 1 oz semi sweet chocolate ((28g))
  • 3 oz high quality dark chocolate, 60-70% cocoa ((85g))
  • 10 tbsp unsalted butter ((140g))
  • 3/4 cup sugar ((about 165g))
  • 2 eggs eggs, at room temperature
  • 1 tsp instant coffee (mixed with 1 tbsp hot water)
  • 1/2 cup all purpose flour ((about 65g))
  • 1/3 cup cocoa powder ((about 35g), Dutch processed preferred)
  • 3/4 tsp salt
  • 2 oz chocolate chips or chopped chocolate ((55g, mix milk and semi-sweet))

Instructions 

  • Preheat oven to 335°F (170°C). Line a 9-inch pan with parchment and butter.
  • Melt butter and chocolates in microwave in 20-second intervals, stirring each time.
  • Whisk eggs and sugar until thick and ribbony, about 3-5 minutes.
  • Combine melted chocolate mixture with egg mixture, then fold in coffee, dry ingredients, and chocolate chips.
  • Pour batter into pan, bake for 20-25 minutes, then cool and cut.
Notes

For extra fudginess, slightly underbake by a minute or two.
Calories: 250kcal
Cost: $15
Course: Dessert
Keyword: brownies

Welcome to the World of Decadent Brownies!

Welcome, fellow food lovers! Today, we are diving into the delightful universe of brownies, where each bite is a little piece of heaven. Whether you’re celebrating a special occasion or simply indulging your sweet tooth, this brownies recipe homemade will transform your kitchen into a sweet sanctuary. Let’s embark on this culinary adventure together!

Why You’ll Love This Recipe

  • Fudgy Perfection: Experience the rich, fudgy texture that melts in your mouth, making every bite a celebration of chocolate.
  • Simple Ingredients: With just a handful of pantry staples, you can whip up these brownies in no time, perfect for those spontaneous cravings!
  • Customizable Fun: This recipe is a blank canvas—add nuts, swirls of caramel, or even a sprinkle of sea salt to make it your own!
  • Perfect for Sharing: Bake a batch and watch your friends and family gather around, eager to savor your delicious creation.
  • Gluten-Free Option: With a few adjustments, you can easily make these brownies gluten-free, catering to all dietary needs.

Ingredients Breakdown

Let’s gather our ingredients! Here’s what you’ll need to create these luscious brownies:

  • 1/2 cup unsalted butter: For that rich, buttery flavor. If you want a dairy-free option, use coconut oil instead.
  • 1 cup granulated sugar: Sweetness that balances the rich cocoa.
  • 1/2 cup brown sugar: Adds depth and moisture to the brownies.
  • 2 large eggs: Essential for binding and giving structure.
  • 1 tsp vanilla extract: Enhances the chocolate flavor.
  • 1/2 cup all-purpose flour: The base. Substitute with almond or oat flour for a gluten-free version.
  • 1/3 cup unsweetened cocoa powder: The star of the show! Use high-quality cocoa for the best flavor.
  • 1/4 tsp salt: Balances the sweetness and enhances flavors.

How to Make the Best Homemade Brownies

Side view of moist brownies showcasing their fudgy texture.

Time to get baking! Follow these simple steps for brownie bliss:

  1. Preheat your oven to 350°F (175°C). Grease an 8×8 inch baking pan or line it with parchment paper for easy removal.
  2. Melt the butter in a medium saucepan over low heat. Let it cool slightly before proceeding.
  3. In a large bowl, mix together the melted butter, granulated sugar, and brown sugar until creamy.
  4. Beat in the eggs one at a time, then stir in the vanilla extract.
  5. In another bowl, sift together the flour, cocoa powder, and salt. Gradually combine the dry ingredients into the wet mixture until just blended.
  6. Pour the batter into the prepared pan and bake for 20-25 minutes or until a toothpick inserted comes out with moist crumbs.

Pro Tips for Brownie Mastery

  • Don’t Overmix: Mix just until combined for that perfect fudgy texture.
  • Use Room Temperature Ingredients: This helps in achieving a smooth batter.
  • Check for Doneness: The brownies should be set around the edges but still soft in the center for that gooey bite.
  • Let Them Cool: Allow brownies to cool in the pan before cutting to prevent them from crumbling.
  • Experiment with Add-Ins: Try adding walnuts, chocolate chips, or even a swirl of peanut butter for a twist!
  • Storage Tips: Store in an airtight container at room temperature for up to 4 days or refrigerate for up to a week.
  • Make Ahead: You can prepare the batter ahead of time and refrigerate it for up to 24 hours. Bake when you’re ready!
  • Freezing: Cut brownies into squares and freeze for up to 3 months. Thaw at room temperature before serving.

Common Mistakes & Troubleshooting

Even the best bakers make mistakes! Here are some common pitfalls and how to avoid them:

  • Dry Brownies: Overbaking is usually the culprit; keep an eye on them in the oven!
  • Too Cakey: This can happen if you overmix the batter. Remember, less is more!
  • Not Sweet Enough: If you find your brownies lacking sweetness, consider adding a touch more sugar next time.
  • Crumbly Texture: Ensure all ingredients are at room temperature and mix just until combined.

Delicious Variations

Want to switch things up? Try these fabulous variations:

  • Peppermint Brownies: Add peppermint extract and top with crushed candy canes for a festive twist!
  • Nutty Brownies: Incorporate chopped pecans or walnuts into the batter for a satisfying crunch.
  • Cheesecake Swirl Brownies: Add a layer of cheesecake batter on top before baking for a rich dessert.
  • Vegan Brownies: Substitute eggs with flaxseed meal and use a plant-based butter for a vegan delight.

Storage & Make-Ahead Instructions

To keep your brownies fresh and tasty:

  • Room Temperature: Store in an airtight container for up to 4 days.
  • Refrigeration: They can last up to a week in the fridge.
  • Freezing: Wrap brownies individually in plastic wrap and store in a freezer bag for up to 3 months. Thaw at room temperature before enjoying!

Frequently Asked Questions

  • What can I substitute for butter? You can use coconut oil or applesauce for a lighter option.
  • Can I make these brownies gluten-free? Yes! Substitute all-purpose flour with almond or gluten-free flour.
  • How do I know when my brownies are done? A toothpick inserted should come out with a few moist crumbs but not wet batter.
  • Can I use cocoa powder instead of chocolate? Yes, cocoa powder works beautifully in brownies.
  • How should I store leftover brownies? Keep them in an airtight container at room temperature or refrigerate.
  • Can I add chocolate chips? Absolutely! Fold in chocolate chips for extra gooeyness.
  • What’s the best way to cut brownies? Use a sharp knife and cut while they are slightly warm for clean edges.
  • Can I make the batter ahead of time? Yes, refrigerate the batter and bake it within 24 hours for the best results.

Nutritional Tips & Dietary Adaptations

Looking to make your brownies a bit healthier? Here are some tips:

  • Reduce Sugar: You can cut back on the sugar by 1/4 cup without sacrificing taste!
  • Use Whole Wheat Flour: For added fiber and nutrients, swap in whole wheat flour.
  • Add Fiber: Mix in some ground flaxseed or chia seeds for an extra health boost.

Essential Equipment for Brownie Baking

Make sure you have these tools handy:

  • 8×8 inch Baking Pan: Perfect for achieving that ideal brownie thickness.
  • Mixing Bowls: A set of different sizes will help you combine ingredients easily.
  • Measuring Cups & Spoons: Accurate measurements are key to perfect brownies.
  • Spatula: For mixing and spreading the batter evenly in the pan.

Serving Suggestions

How about some delightful ways to serve your brownies?

  • With Ice Cream: A warm brownie topped with a scoop of vanilla ice cream is pure bliss.
  • Drizzle with Caramel: Add a sweet touch with a drizzle of caramel sauce.
  • Dust with Powdered Sugar: For a simple yet elegant presentation, dust your brownies with powdered sugar.

Conclusion

Now that you have the ultimate brownies recipe homemade in your arsenal, it’s time to gather your loved ones and create delicious memories. Remember, baking is not just about the end product; it’s about the joy of creating and sharing. So roll up your sleeves, preheat that oven, and let’s make some magic happen in the kitchen! Happy baking!

Brownies Recipe Homemade

Prep Time 10 minutes
Cook Time 25 minutes
Total Time 35 minutes
Servings 9 pieces
Calories 250
Delicious homemade brownies with rich chocolate flavor and a fudgy texture, perfect for satisfying your sweet tooth.

Ingredients

Dairy and Baking

  • 0.5 cup unsalted butter
  • 1 cup granulated sugar
  • 0.5 cup brown sugar
  • 2 large eggs
  • 1 tsp vanilla extract
  • 0.5 cup all-purpose flour
  • 0.33 cup unsweetened cocoa powder
  • 0.25 tsp salt

Instructions 

  • Preheat oven to 350°F (175°C). Grease or line an 8x8 inch pan.
  • Melt butter, then mix with sugars until creamy.
  • Beat in eggs and vanilla until smooth.
  • Stir in flour, cocoa, and salt until just combined.
  • Pour batter into pan and bake for 20-25 minutes.

Notes

For extra flavor, add chocolate chips or nuts.
Calories: 250kcal
Cost: $10
Course: Dessert
Cuisine: American
Keyword: brownies

Welcome to the Joy of Effortless Banana Pancakes!

Ah, the humble banana pancake! A dish that brings warmth and comfort to breakfast tables everywhere. With just three simple ingredients, you can whip up a delightful stack that not only tantalizes the taste buds but also celebrates the joys of cooking. Whether you’re a busy parent, a college student, or just someone who loves a good breakfast, this recipe is your ticket to a quick and nutritious meal. Let’s dive into the world of 3-Ingredient Banana Pancakes and discover how easy it is to create a delicious morning treat!

Why You’ll Love This Recipe

  • Quick and Easy: With only three ingredients, these pancakes come together in mere minutes, making them an ideal choice for busy mornings.
  • Nutritious and Wholesome: Packed with ripe bananas, these pancakes are naturally sweet and provide essential vitamins and minerals, making them a healthy breakfast option.
  • Customizable Flavors: Add your favorite mix-ins, like chocolate chips or blueberries, to elevate the flavor profile and suit your cravings.
  • Gluten-Free Option: Replace all-purpose flour with oat flour for a gluten-free version that doesn’t compromise on taste.
  • Minimal Cleanup: With just one bowl needed for mixing, you’ll spend less time cleaning and more time enjoying your pancakes!

Ingredient Breakdown: What You Need

Before you start cooking, let’s gather our ingredients. This recipe is a wonderful way to use up those overripe bananas sitting on your counter. Here’s what you’ll need:

  • 1 medium ripe banana: About ½ cup when mashed. The more ripe the banana, the sweeter your pancakes will be!
  • 1 large egg: This binds the ingredients together and adds protein.
  • ¼ cup all-purpose flour or oat flour: Use oat flour for a gluten-free option. Both flours yield delicious results.
  • Optional Add-ins: Consider adding ¼ tsp of cinnamon or vanilla extract for extra flavor. You can also fold in 2 tbsp of chocolate chips or blueberries for a fruity twist!
  • Optional Protein Boost: Add 1 tbsp of protein powder to increase the nutritional value.

Step-by-Step Instructions for Banana Pancakes

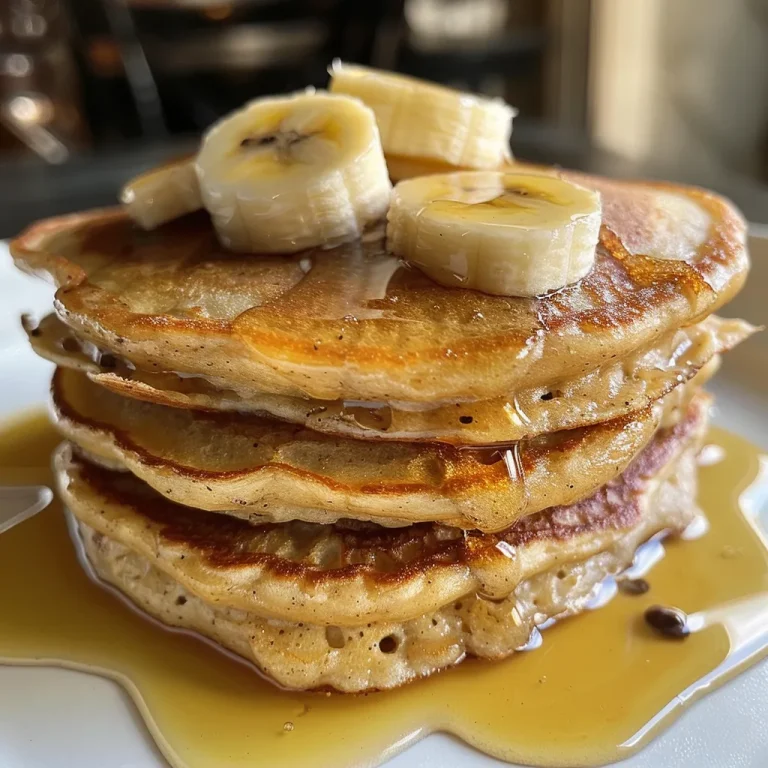
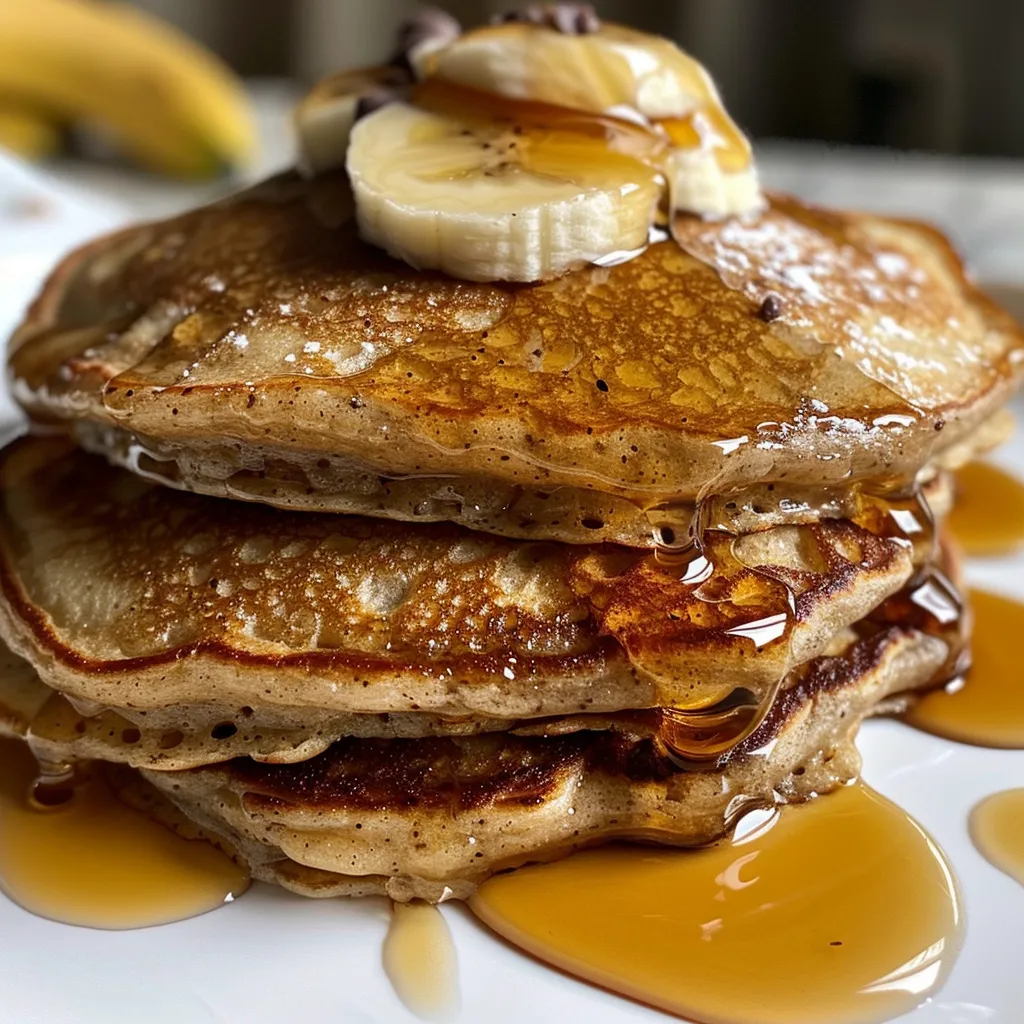
Delicious golden-brown pancakes with chocolate chips, served on a plate.

Now that we have everything ready, let’s get cooking!

  1. Mash the banana: Peel the banana and mash it in a bowl with a fork until smooth. For quicker prep, toss it in a blender and pulse for about 10 seconds.
  2. Mix the batter: Add the egg to the mashed banana. Whisk or blend until fully combined. Sprinkle in the flour (or oat flour) and stir gently until just mixed.
  3. Heat the skillet: Place a nonstick skillet over medium heat and add a tiny pat of butter or a drizzle of oil. Let it heat for 1-2 minutes.
  4. Cook the pancakes: Pour 2-3 tablespoons of batter per pancake onto the skillet. Cook for 2-3 minutes until bubbles form, then flip and cook for another 1-2 minutes until golden brown.
  5. Serve immediately: Stack the pancakes on a plate and top with fresh fruit, maple syrup, or yogurt for a delightful breakfast experience!

Pro Tips for Perfect Pancakes

  • Use overripe bananas: The riper the banana, the better the flavor and texture of your pancakes.
  • Don’t overmix the batter: Mix until just combined to keep your pancakes light and fluffy.
  • Control the heat: Cook on medium heat to ensure pancakes are cooked through without burning.
  • Keep pancakes warm: If cooking in batches, keep the pancakes warm in a low oven while you finish cooking the rest.
  • Experiment with flavors: Add nuts, seeds, or other spices to personalize your pancakes.
  • Use parchment paper: If storing pancakes, place parchment paper between layers to prevent sticking.
  • Check for doneness: Ensure pancakes are golden brown and cooked through by checking the center with a toothpick.
  • Make mini pancakes: For bite-sized treats, use a smaller amount of batter for each pancake.

Common Mistakes and Troubleshooting

Even the best of us can run into a few hiccups in the kitchen. Here are some common mistakes to avoid:

  • Pancakes are too dense: This could be due to overmixing the batter. Mix gently until just combined!
  • Pancakes are sticking to the pan: Make sure your skillet is adequately heated and greased. Nonstick pans work best.
  • Pancakes are falling apart: Ensure your bananas are mashed well and the batter is not too thick. A little extra egg can help bind it.

Delicious Variations to Try

Feeling adventurous? Here are some delicious alternatives to spice up your pancakes:

  • Chocolate Banana Pancakes: Add 2 tbsp of cocoa powder to the batter for a rich chocolate flavor.
  • Peanut Butter Banana Pancakes: Stir in 2 tbsp of peanut butter for a nutty twist.
  • Coconut Banana Pancakes: Fold in ¼ cup of shredded coconut for added texture and flavor.
  • Savory Spinach and Feta Pancakes: For a twist, add sautéed spinach and crumbled feta instead of sweet ingredients.

Storage and Make-Ahead Instructions

Want to prepare in advance? Here’s how:

  • Storing cooked pancakes: Let pancakes cool completely, then stack them with parchment paper between each pancake. Place in an airtight container and refrigerate for up to 3 days.
  • Freezing pancakes: For longer storage, freeze pancakes in a single layer on a baking sheet. Once frozen, transfer to a freezer bag. They can be kept for up to 2 months!
  • Reheating pancakes: Reheat in a toaster, microwave, or skillet until warmed through.

FAQs About Banana Pancakes

  • Can I make these pancakes vegan? Yes! Replace the egg with a flax egg (1 tbsp flaxseed meal mixed with 2.5 tbsp water) for a vegan alternative.
  • How can I make banana pancakes without flour? Simply omit the flour and increase the amount of banana and egg. The pancakes will be more like a thicker omelet!
  • Can I use frozen bananas? Absolutely! Just thaw them and mash well before using.
  • What can I serve with banana pancakes? They pair beautifully with maple syrup, honey, yogurt, or fresh fruit.
  • Can I add protein to my pancakes? Yes! Consider adding protein powder or Greek yogurt for a nutritional boost.
  • How do I know when my pancakes are cooked? Look for bubbles forming on the surface and a golden-brown color on both sides.
  • Can I make them ahead of time? Yes! Follow the storage guidelines above for easy make-ahead breakfasts.
  • What’s the best way to serve banana pancakes? Stack them high and top with your favorite fresh fruits and a drizzle of syrup for a stunning presentation!

Nutritional Tips and Dietary Adaptations

These pancakes are not only delicious but can also be adapted to fit various dietary needs:

  • Gluten-Free: Use oat flour or other gluten-free flour alternatives.
  • Lower Sugar: Skip any added sweeteners as the ripe banana provides natural sweetness.
  • High-Protein: Incorporate protein powder or serve with Greek yogurt on the side.

Recommended Equipment for Success

To make your pancake-making journey smooth and enjoyable, here are some recommended tools:

  • Nonstick skillet: A quality nonstick skillet ensures even cooking and easy pancake flipping.
  • Mixing bowls: Have a medium bowl for mixing your batter and a small bowl for mashing bananas.
  • Spatula: A flexible spatula is essential for flipping pancakes without breaking them.
  • Measuring cups and spoons: Accurate measurements lead to perfectly consistent pancakes.

Serving Suggestions for a Beautiful Breakfast

Presentation can elevate your breakfast! Here are some serving suggestions:

  • Fruit Medley: Serve with a colorful mix of berries, banana slices, and a sprinkle of mint for freshness.
  • Yogurt Parfait: Layer pancakes with yogurt and fruit for a beautiful parfait.
  • Drizzled Honey: A light drizzle of honey or maple syrup enhances the sweetness.
  • Nut Butter Topping: Spread almond or peanut butter on top for added richness and protein.

In conclusion, creating 3-Ingredient Banana Pancakes is not just about making breakfast; it’s about celebrating simplicity, health, and the joy of cooking. Let each bite take you back to cherished moments, just like the ones I had in my father’s kitchen in Seville. So grab those ripe bananas and let’s get flipping! Your mornings are about to get a whole lot tastier!

No-Fuss 3-Ingredient Banana Pancakes

Prep Time 5 minutes
Cook Time 5 minutes
Total Time 10 minutes
Servings 2 pancakes
Calories 210
Quick and easy banana pancakes made with just three ingredients, perfect for a healthy breakfast or snack.

Ingredients

Main ingredients

  • 1 medium ripe banana ((½ cup mashed))
  • 1 large egg
  • ¼ cup all-purpose flour (or oat flour for gluten-free)
  • ¼ tsp cinnamon or vanilla extract (optional)
  • 2 tbsp chocolate chips or blueberries (optional)
  • 1 tbsp protein powder (for extra nutrition, optional)

Instructions 

  • Peel and mash the banana until smooth.
  • Add the egg and whisk until combined. Stir in flour and optional ingredients.
  • Heat a nonstick skillet over medium heat with a little butter or oil.
  • Pour batter in 2-3 tbsp portions; cook 2-3 mins until bubbles form, then flip and cook 1-2 mins more.
  • Serve warm with toppings of choice.

Notes

For fluffier pancakes, let the batter rest for a minute before cooking.
Calories: 210kcal
Cost: $5
Course: Breakfast
Cuisine: American
Keyword: Banana

Welcome to the World of Red Velvet Cupcakes!

Ah, the enchanting realm of red velvet cupcakes! With their striking crimson hue and velvety texture, these delightful treats bring a burst of joy to any occasion. Whether it’s a birthday bash, a romantic dinner, or a festive gathering, these cupcakes topped with luscious cream cheese frosting are sure to steal the spotlight. Join me, Rafael, as we explore the depths of flavor and joy in each bite, discovering why these cupcakes are not just desserts, but a celebration of life!

Why You’ll Love This Recipe

This recipe is not just about baking; it’s about crafting a masterpiece that delights the senses. Here are five specific benefits that make this red velvet cupcake recipe a must-try:

  • Irresistible Flavor: The combination of cocoa powder and buttermilk creates a rich, tangy flavor that’s simply unforgettable.
  • Perfect Texture: Using cake flour ensures these cupcakes are soft, tender, and beautifully domed, making each bite a dream.
  • Easy to Follow: With clear steps and handy tips, even novice bakers will find success in the kitchen!
  • Customizable: This recipe serves as a fantastic base for various toppings and mix-ins, allowing for creative expression.
  • Memorable Presentation: The vibrant red color, complemented by white cream cheese frosting, makes these cupcakes visually stunning, perfect for any celebration.

Ingredient Breakdown

Let’s dive into the key ingredients that make these velvet cupcakes so special, along with some substitutions to suit your pantry:

  • Cake Flour: This low-protein flour keeps the texture light and fluffy. If unavailable, you can substitute with all-purpose flour but expect a denser cupcake.
  • Cocoa Powder: Natural unsweetened cocoa powder adds depth. Feel free to use Dutch-processed cocoa for a richer flavor.
  • Baking Soda: This leavening agent helps the cupcakes rise, contributing to their delightful texture.
  • Buttermilk: Adds moisture and a slight tang. If you don’t have it, mix milk with a tablespoon of vinegar or lemon juice to create a quick buttermilk substitute.
  • Red Food Coloring: Essential for that signature red hue. Use gel food coloring for more vibrant results without altering the batter’s consistency.
  • Cream Cheese

Step-by-Step Guide: How to Make Red Velvet Cupcakes

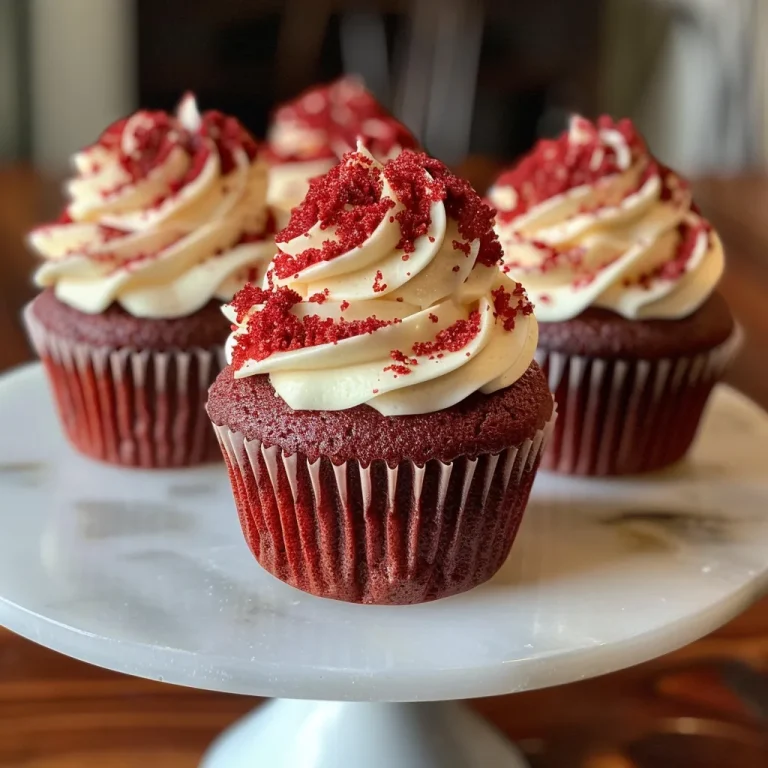
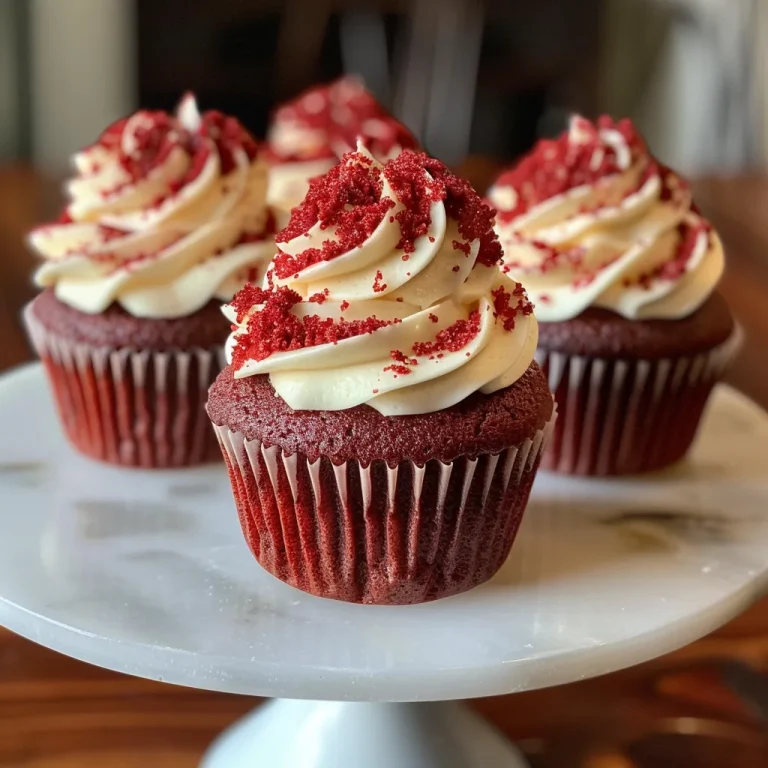
Side view of a moist red velvet cupcake topped with a smooth layer of cream cheese frosting.

Ready to create these delightful treats? Follow these simple steps:

  1. Preheat the Oven: Set your oven to 350°F (180°C). Line two standard muffin pans with 16 cupcake liners.
  2. Sift & Mix Dry Ingredients: In a large bowl, sift together the cake flour, cocoa powder, baking soda, and salt. Set aside.
  3. Cream Butter & Sugar: In a mixer, beat the softened butter and granulated sugar on medium speed for about 4-5 minutes until light and fluffy.
  4. Add Wet Ingredients: Mix in the egg, oil, food coloring, vanilla extract, and vinegar, ensuring everything is well combined.
  5. Combine Dry & Wet Ingredients: Gradually add the dry ingredients to the wet mixture, alternating with the buttermilk. Mix just until combined to avoid overmixing.
  6. Fill Cupcake Liners: Distribute the batter evenly among the liners, filling each about halfway.
  7. Bake: Bake for about 18 minutes, or until the tops spring back when lightly touched. A toothpick should come out clean.
  8. Cool the Cupcakes: Allow the cupcakes to cool completely on a wire rack before frosting.

How to Make Cream Cheese Frosting

No red velvet cupcake is complete without its dreamy frosting! Here’s how to whip up the perfect cream cheese frosting:

  1. Beat the Cream Cheese: In a mixing bowl, beat the softened cream cheese until smooth.
  2. Add Butter: Incorporate the softened butter and mix until well combined and fluffy.
  3. Incorporate Sugar: Gradually add the powdered sugar and vanilla extract, mixing until smooth and creamy.
  4. Frost the Cupcakes: Once the cupcakes are completely cool, pipe or spread the frosting on top generously!

Expert Pro Tips

To elevate your baking game, consider these expert insights:

  • Room Temperature Ingredients: Ensure all ingredients, especially eggs and butter, are at room temperature for a smoother batter.
  • Don’t Overmix: Mix just until combined to maintain the tender texture of your cupcakes.
  • Temperature Check: Always check the doneness of your cupcakes with a toothpick; it should come out clean or with a few crumbs.
  • Cooling Time: Let the cupcakes cool completely before frosting to prevent the cream cheese from melting.
  • Test Your Oven: Oven temperatures can vary, so consider using an oven thermometer for accurate baking.
  • Frosting Consistency: If your frosting is too thick, add a splash of milk; if too thin, add more powdered sugar.
  • Experiment with Flavors: Add a touch of almond extract or citrus zest to the frosting for a unique twist.
  • Make It a Layer Cake: Transform this recipe into a stunning layer cake for a show-stopping dessert.

Common Mistakes and Troubleshooting

Even the best bakers encounter hiccups. Here’s how to troubleshoot:

  • Flat Cupcakes: This could be due to expired baking soda. Always check the freshness before use.
  • Dry Texture: Overbaking is a common culprit. Keep a close eye on your cupcakes during the last few minutes of baking.
  • Frosting Issues: If your frosting is too runny, re-chill it for about 30 minutes to firm it up before frosting the cupcakes.
  • Uneven Baking: Ensure your oven rack is centered and not overcrowded to allow proper air circulation.

Delicious Variations on Red Velvet Cupcakes

Feel like getting creative? Here are some delightful variations to try:

  • Chocolate Chip Red Velvet: Fold in semi-sweet chocolate chips for an added layer of flavor and texture.
  • Red Velvet Whoopie Pies: Use the same batter to create two cookie-like cakes with cream cheese frosting sandwiched in between.
  • Nutty Delight: Add chopped pecans or walnuts to the batter for a crunchy twist.
  • Spice It Up: Incorporate cinnamon or nutmeg into the batter for a warm, spiced flavor profile.

Storage and Make-Ahead Instructions

These cupcakes can be made ahead of time, making them perfect for parties:

  • Storing Cupcakes: Keep unfrosted cupcakes in an airtight container at room temperature for up to 3 days. Frosted cupcakes should be refrigerated for up to 5 days.
  • Make-Ahead Tips: Bake the cupcakes a day in advance and frost them on the day of your event for optimal freshness.

Frequently Asked Questions

Here are some common queries about red velvet cupcakes:

  • Can I use all-purpose flour instead of cake flour? Yes, but your cupcakes might be denser.
  • What can I substitute for buttermilk? Mix milk with vinegar or lemon juice to create a quick substitute.
  • How do I make cream cheese frosting less sweet? Add a pinch of salt or a splash of lemon juice to balance the sweetness.
  • Can I freeze red velvet cupcakes? Absolutely! Freeze unfrosted cupcakes in a freezer-safe container for up to 3 months.
  • What’s the best way to decorate red velvet cupcakes? Use a piping bag to create beautiful swirls or simple dollops of frosting.
  • How do I know when the cupcakes are done baking? Insert a toothpick into the center; it should come out clean or with a few crumbs.
  • Can I make these cupcakes gluten-free? Yes, substitute cake flour with a gluten-free blend, ensuring it’s suitable for baking.
  • What’s the origin of red velvet cake? It’s believed to have originated in the 1920s, becoming popular for its unique flavor and vibrant color.

Nutritional Tips and Dietary Adaptations

For those mindful of dietary needs, here are some tips:

  • Make it Vegan: Substitute butter with vegan margarine and use flax eggs instead of regular eggs.
  • Reduce Sugar: Swap granulated sugar with a natural sweetener like stevia or monk fruit for a lower-calorie option.
  • Make it Low-Carb: Use almond flour or coconut flour and sugar alternatives to adapt this recipe for a low-carb diet.

Essential Equipment Recommendations

Here are some tools that will make your baking experience smoother:

  • Stand Mixer: A great investment for mixing batter and frosting evenly.
  • Silicone Spatula: Perfect for scraping down the sides of bowls and ensuring no batter goes to waste.
  • Oven Thermometer: Helps maintain accurate oven temperatures for consistent baking results.
  • Measuring Cups and Spoons: Essential for precise ingredient measurements, ensuring the perfect balance of flavors.

Serving Suggestions

Finally, let’s talk about how to serve these beauties:

  • Pair with Coffee: These cupcakes are delightful with a cup of coffee or espresso, enhancing the flavors beautifully.
  • Serve at Room Temperature: For the best texture and taste, allow the cupcakes to sit at room temperature for a bit before serving.
  • Garnish: Add edible flowers or a dusting of cocoa powder on top of the frosting for an elegant touch.

Conclusion: Celebrate with Every Bite!

Red velvet cupcakes are more than a dessert; they are a way to connect, celebrate, and create lasting memories with loved ones. With this comprehensive guide, you’re now equipped to bake cupcakes that will delight and impress. So grab your apron, gather your ingredients, and let’s make some magic happen in the kitchen! Happy baking, my friends!

Red Velvet Cupcakes with Cream Cheese Frosting Recipe

Prep Time 20 minutes
Cook Time 18 minutes
Total Time 38 minutes
Servings 16 cupcakes
Calories 250
Delight in these moist red velvet cupcakes topped with rich cream cheese frosting, perfect for any celebration.

Ingredients

Dry Ingredients

  • 1 ⅓ cups cake flour ((145 grams))
  • 2 tablespoons unsweetened cocoa powder ((10 grams))
  • ½ teaspoon baking soda
  • ¼ teaspoon salt

Wet Ingredients

  • ¼ cup unsalted butter, softened ((60 grams))
  • 1 cup granulated sugar ((200 grams))
  • 1 large egg (room temperature)
  • ¼ cup oil ((60 ml))
  • 1 tablespoon liquid red food coloring ((15 ml))
  • 1 teaspoon vanilla extract
  • ½ teaspoon white vinegar
  • cup buttermilk ((160 ml))

Frosting Ingredients

  • ½ cup unsalted butter, softened ((115 grams))
  • 1 (8-ounce) package brick-style cream cheese, softened ((226 grams))
  • 2 cups powdered sugar ((240 grams))
  • 1 teaspoon vanilla extract

Instructions 

  • Preheat oven to 350°F (180°C) and line pans with cupcake liners.
  • Mix dry ingredients; set aside.
  • Cream butter and sugar, then add egg, oil, food coloring, vanilla, and vinegar.
  • Alternate adding dry ingredients and buttermilk; fill liners halfway.
  • Bake for 18 minutes, cool completely, then frost with cream cheese frosting.

Notes

Ensure cupcakes are fully cooled before frosting to prevent melting.
Calories: 250kcal
Cost: $15
Course: Dessert
Cuisine: American
Keyword: cream cheese, cupcakes, red velvet

Celebrate Love with Chocolate Covered Strawberry Heart Pops

Welcome to a delightful journey where love and flavor intertwine! Today, we’re creating Chocolate Covered Strawberry Heart Pops that are not just a treat but a celebration of life’s sweetest moments. Imagine juicy strawberries, perfectly dipped in rich chocolate, making them an ideal dessert for any occasion—from birthdays to Valentine’s Day. Whether you’re surprising a loved one or hosting a gathering, these heart pops are sure to steal the show!

This recipe is simple yet elegant, allowing you to enjoy the process of creating something beautiful and delicious. And trust me, the joy of sharing these treats is one of the best parts! Let’s dive in!

Why You’ll Love This Recipe

  • Quick and Easy: With just a few ingredients and simple steps, you can whip up these heart pops in no time!
  • Visually Stunning: Their heart shape and glossy chocolate coating make these pops not only delicious but an eye-catching centerpiece for your dessert table.
  • Customizable: Add your favorite toppings—sprinkles, crushed nuts, or coconut flakes—to make them uniquely yours!
  • Perfect for Any Occasion: These pops are great for Valentine’s Day, anniversaries, birthdays, or just to brighten someone’s day.
  • Fresh Ingredients: Using fresh strawberries means you’ll enjoy a burst of flavor that pairs beautifully with chocolate.

Ingredients You’ll Need

Gather these fresh ingredients to create your heart pops:

  • 24 fresh strawberries: Make sure they are hulled and dried completely for the best chocolate adherence.
  • 8 oz semisweet chocolate chips: Melting chocolate is essential; feel free to use dark chocolate for a richer flavor.
  • 12 lollipop sticks: These will hold your strawberries upright and make them easy to enjoy.
  • 1 tbsp coconut oil: This helps to achieve a smooth melting chocolate and can be adjusted based on preference.

How to Make Chocolate Covered Strawberry Heart Pops

Follow these simple steps to create your own Chocolate Covered Strawberry Heart Pops:

  1. Wash and hull the strawberries, then pat them dry completely; moisture can prevent the chocolate from sticking.
  2. Insert lollipop sticks into the stems of the strawberries, ensuring they are secure.
  3. In a microwave-safe bowl, melt the chocolate chips with coconut oil in 30-second intervals, stirring in between until smooth.
  4. Dip each strawberry into the melted chocolate, ensuring it’s fully coated. Let excess chocolate drip off.
  5. Place the dipped strawberries on parchment paper and refrigerate until the chocolate sets, about 15-30 minutes.
  6. Serve chilled or store in the refrigerator until ready to enjoy!

Tips & Tricks for the Perfect Heart Pops

  • Choosing Strawberries: Opt for firm and ripe strawberries for maximum flavor and stability when dipping.
  • Temper the Chocolate: For a shiny finish, consider tempering the chocolate before dipping to achieve that professional look.
  • Quality Ingredients: Use high-quality chocolate for the best taste; your pops will reflect the quality of your ingredients.
  • Stay Cool: If your kitchen is warm, work in batches to keep the chocolate from melting too quickly.
  • Experiment with Flavors: Try adding a splash of vanilla extract or a pinch of sea salt to the melted chocolate for an extra flavor boost!

Common Mistakes and Troubleshooting

Here are some common pitfalls and how to avoid them:

  • Chocolate Not Sticking: Ensure strawberries are completely dry. Any moisture can prevent the chocolate from adhering properly.
  • Chocolate Too Thick: If your chocolate is too thick, add a bit more coconut oil to achieve a better dipping consistency.
  • Uneven Coating: To get an even coat, twirl the strawberry in the chocolate and tap gently on the bowl to remove excess.

Delicious Variations of Chocolate Covered Strawberry Heart Pops

Feeling adventurous? Here are some fun variations to try:

  • White Chocolate Pops: Switch to white chocolate for a different flavor profile. Add food coloring for a festive touch!
  • Nutty Delight: Roll the dipped strawberries in crushed nuts or toffee bits for an added crunch.
  • Coconut Bliss: After dipping, roll the pops in shredded coconut for a tropical twist.
  • Drizzled Chocolate: After the chocolate sets, drizzle a contrasting chocolate over the pops for a beautiful finish.

Storage and Make-Ahead Instructions

If you want to prepare these heart pops ahead of time, here’s how to store them:

  • Store the pops in an airtight container in the fridge for up to 3 days. They’re best enjoyed fresh!
  • If you need to make them in advance, keep the chocolate-dipped strawberries in the fridge until your event.

Nutrition Information

Each heart pop is a delightful mix of flavors. Here’s a rough estimate of the nutrition per serving:

  • Calories: Approximately 100 calories per pop (may vary based on chocolate and size of strawberries).
  • Fat: 6g (primarily from chocolate).
  • Carbohydrates: 12g (natural sugars from strawberries and chocolate).

Frequently Asked Questions (FAQ)

  • Can I use frozen strawberries? While fresh strawberries yield the best flavor, you can use frozen ones; just thaw and dry them thoroughly.
  • What kind of chocolate should I use? Semisweet chocolate chips work well, but feel free to explore dark or white chocolate for different flavors.
  • How long do they last in the fridge? They can be stored in the fridge for up to 3 days, but they are best enjoyed fresh.
  • Can I make these vegan? Absolutely! Use dairy-free chocolate chips and omit the coconut oil if you prefer.
  • What toppings can I use? Get creative! Sprinkles, crushed cookies, or even edible glitter can make your pops festive.
  • How do I make them more festive? Use food coloring in your chocolate, or decorate with heart-shaped sprinkles!
  • Can I use lollipop sticks? Yes! Lollipop sticks not only make them easy to eat but also add to the fun presentation.
  • Can I prepare these for a party? Definitely! These heart pops are ideal for parties and can be made ahead of time for convenience.

Equipment Recommendations

Here’s what you’ll need to make your heart pops:

  • Microwave-safe bowl: For melting chocolate.
  • Parchment paper: To place the dipped strawberries for cooling.
  • Lollipop sticks: To help you hold and enjoy the pops.

Serving Suggestions

These heart pops can be served in various creative ways:

  • On a stick: Serve them as is for a fun, easy dessert.
  • On a platter: Arrange them on a decorative platter for a stunning dessert display.
  • With Dipping Sauces: Consider serving with chocolate sauce or caramel for dipping!

Conclusion

Chocolate Covered Strawberry Heart Pops are more than just a dessert; they’re an invitation to celebrate love, joy, and togetherness. With their vibrant colors, delightful flavors, and endless possibilities for customization, these heart pops are bound to create lasting memories. So, gather your loved ones, roll up your sleeves, and let this delightful treat bring joy to your table. Happy cooking!

Chocolate Covered Strawberry Heart Pops Recipe

Prep Time 15 minutes
Cook Time 10 minutes
Total Time 25 minutes
Servings 12 pieces
Calories 150
Delight in these adorable and delicious chocolate-covered strawberry pops, perfect for special occasions or a sweet treat.

Ingredients

Fruits

  • 24 pieces fresh strawberries, hulled

Chocolate

  • 8 oz semisweet chocolate chips

Sticks

  • 12 pieces lollipop sticks

Coconut Oil

  • 1 tbsp coconut oil

Instructions 

  • Wash, hull, and dry strawberries.
  • Insert sticks into strawberries.
  • Melt chocolate with coconut oil until smooth.
  • Dip strawberries into chocolate and place on parchment.
  • Refrigerate until chocolate sets, then serve.

Notes

Ensure strawberries are completely dry before dipping to prevent chocolate from seizing.
Calories: 150kcal
Cost: $15
Course: Dessert
Cuisine: American
Keyword: chocolate, Pops, strawberry

Start Your Day Right with Healthy Breakfast Muffins!

Welcome to the delightful world of healthy breakfast muffins! If you’re a busy parent or someone always on the go, you know how vital it is to kickstart your day with nutritious and delicious food. These muffins are not just easy to whip up but also packed with wholesome ingredients that will fuel your family’s morning adventures. Whether you’re rushing to get the kids to school or preparing for a busy workday, these muffins are your secret weapon. Let’s dive into why you’ll love making these muffins!

Why You’ll Love This Recipe

  • Versatile and Customizable: You can tweak the ingredients to suit your family’s tastes. Add chocolate chips, nuts, or your favorite fruits to create a muffin that everyone loves!
  • Nutritious Ingredients: Made with whole wheat flour and natural sweeteners, these muffins are a healthy breakfast choice that doesn’t compromise on taste.
  • Quick and Easy: With simple steps and minimal prep time, these muffins can be in the oven in just 15 minutes!
  • Perfect for Busy Mornings: Prepare a batch ahead of time, and you’ll have nutritious breakfast options ready to go for busy school mornings.
  • Family-Friendly: Kids love them! These muffins are a hit with children and adults alike, making breakfast time a joyful experience.

Ingredients Breakdown

Let’s take a closer look at what you’ll need to create these delicious breakfast muffins:

  • 2 cups whole wheat flour: A nutritious base that’s high in fiber. You can substitute with almond flour for a gluten-free option.
  • 1 tsp baking powder: Ensures your muffins rise perfectly!
  • ½ tsp baking soda: Adds fluffiness to your muffins.
  • ¼ tsp sea salt: Enhances the overall flavor.
  • 1 tsp ground cinnamon: Adds warmth and depth to the flavor profile.
  • 2 large eggs: Provides structure. For a vegan option, substitute with flax eggs.
  • ⅓ cup coconut oil: Adds moisture. You can opt for unsweetened applesauce to lower the fat content.
  • ½ cup pure maple syrup or honey: Natural sweeteners that keep the muffins moist.
  • ¾ cup unsweetened Greek yogurt: For creaminess and protein. Dairy-free yogurt works just as well!
  • 2 tsp pure vanilla extract: Enhances the sweetness and flavor.
  • 1-1 ½ cups of mix-ins: Choose from blueberries, shredded carrots, apples, raisins, nuts, or even chocolate chips!

Step-by-Step Instructions

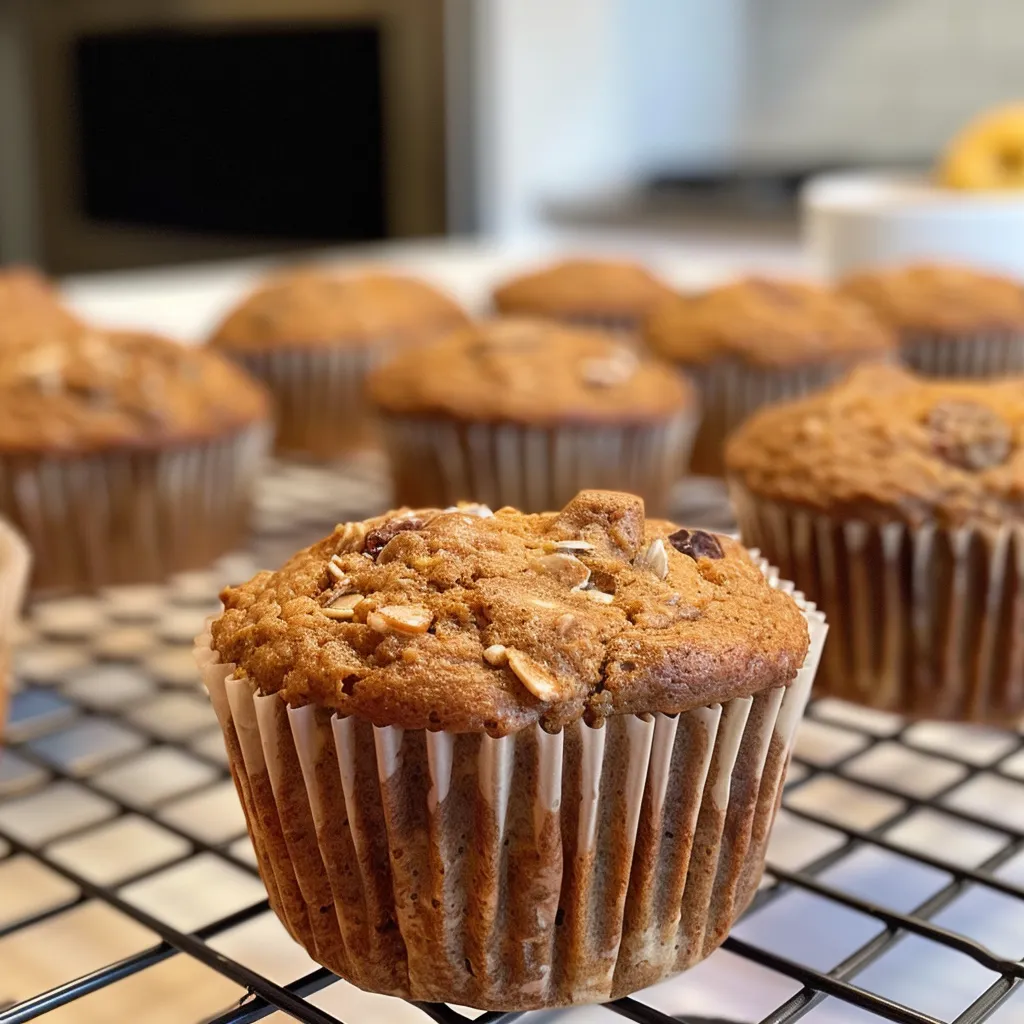
Side view of freshly baked whole wheat muffins with mixed fruit peeking through.

Ready to transform your ingredients into something magical? Follow these easy steps:

  • Step 1: Prep Your Muffin Tin: Line a 12-cup muffin tin with paper liners or spray with nonstick spray. Preheat the oven to 350°F (175°C).
  • Step 2: Mix the Dry Ingredients: In a large bowl, whisk together the whole wheat flour, cinnamon, baking powder, baking soda, and salt until well combined.
  • Step 3: Combine Wet Ingredients: In another bowl, beat the eggs and then add in the yogurt, melted coconut oil, maple syrup, and vanilla extract. Mix until smooth and creamy.
  • Step 4: Fold Together & Add Mix-Ins: Gently incorporate the wet mixture into the dry ingredients. Then, fold in your chosen mix-ins.
  • Step 5: Fill & Bake: Spoon the batter into the prepared muffin cups, filling each about ¾ full. Bake for 18-22 minutes, or until a toothpick inserted in the center comes out clean.

Pro Tips for Muffin Mastery

Here are some expert insights to elevate your baking game:

  • Don’t Overmix: Mix just until combined to keep your muffins light and fluffy.
  • Let Them Cool: Allow muffins to cool in the tin for 5 minutes before transferring them to a wire rack.
  • Experiment with Flavors: Try adding spices like nutmeg or cardamom for a unique twist.
  • Check Doneness: Use the toothpick test to ensure your muffins are perfectly baked.
  • Store Properly: Keep muffins in an airtight container for freshness. They can also be frozen for later enjoyment!
  • Use Fresh Ingredients: Fresh ingredients yield the best flavor and texture.
  • Adjust Sweetness: Depending on your taste, you can reduce the amount of syrup or honey.
  • Make Mini Muffins: Adjust baking time to create bite-sized versions that are perfect for kids!

Common Mistakes and Troubleshooting

Baking can sometimes be tricky! Here are some common pitfalls and how to avoid them:

  • Muffins Too Dense: This could be from overmixing or using too much flour. Measure carefully and mix gently.
  • Too Sweet: If your muffins are overly sweet, reduce the amount of syrup or honey in future batches.
  • Not Rising: Ensure your baking powder and soda are fresh! They need to be activated to create lift.
  • Dry Muffins: This can happen from overbaking or not enough moisture. Keep an eye on the time and ensure you’re using adequate wet ingredients.

Muffin Variations

Feeling adventurous? Try these variations for a delightful twist:

  • Chocolate Chip Delight: Fold in 1 cup of dark chocolate chips for a sweet treat.
  • Berry Burst: Use a mix of fresh berries like raspberries, blueberries, and strawberries for a fruity explosion.
  • Veggie Power: Incorporate shredded zucchini or carrots for added nutrition.
  • Nutty Banana: Mix in mashed bananas and walnuts for a classic combo.

Storage and Make-Ahead Instructions

These muffins are perfect for meal prep! Here’s how to store them:

  • Room Temperature: Keep in an airtight container for up to 3 days.
  • Refrigerator: Store in the fridge for up to a week.
  • Freezer: Freeze muffins for up to 3 months. Thaw overnight in the fridge before enjoying!

Frequently Asked Questions

Here are some common queries about these healthy breakfast muffins:

  • Can I make these muffins vegan? Yes! Substitute eggs with flax eggs and use dairy-free yogurt.
  • How do I know when my muffins are done? Insert a toothpick in the center; it should come out clean.
  • Can I use all-purpose flour instead of whole wheat? Yes, but the muffins won’t be as nutritious.
  • What are some good mix-ins? Nuts, seeds, dried fruit, and chocolate chips work wonderfully!
  • Can I reduce the sugar? Absolutely! Adjust to your taste preference.
  • How long do they take to bake? Typically, they need 18-22 minutes.
  • What’s the best way to reheat them? Microwave for a few seconds or pop them in the toaster for a crisp finish.
  • Can I double the recipe? Yes, just ensure you have enough muffin tins or bake in batches!

Nutrition Tips and Dietary Adaptations

These muffins are naturally healthy, but here are more ways to adapt them:

  • Gluten-Free: Use almond flour or a gluten-free flour blend for a gluten-free option.
  • Lower Sugar: Substitute honey or maple syrup with mashed bananas for natural sweetness.
  • Add Protein: Incorporate protein powder into the batter for a protein boost.
  • Increase Fiber: Add chia seeds or flaxseeds for additional fiber and omega-3s.

Essential Equipment Recommendations

To make the best muffins, consider these kitchen essentials:

  • Muffin Tin: A quality non-stick muffin tin ensures easy removal.
  • Mixing Bowls: A set of various sizes helps in organizing the ingredients.
  • Whisk: Perfect for mixing dry ingredients thoroughly.
  • Measuring Cups & Spoons: Accurate measurements are crucial for baking success.
  • Cooling Rack: Allows muffins to cool evenly, preventing sogginess.

Serving Suggestions

Serve your muffins warm with:

  • Fresh Fruit: A side of seasonal fruit adds color and nutrition.
  • Yogurt: A dollop of yogurt complements the muffins beautifully.
  • Nut Butter: Spread almond or peanut butter for an extra protein punch.
  • Honey or Maple Syrup: Drizzle on top for added sweetness.

These healthy breakfast muffins are more than just a quick meal; they’re a celebration of wholesome ingredients and family bonding. So gather your loved ones, fire up the oven, and enjoy the magic of baking together. Happy cooking!

Healthy Breakfast Muffins for Busy School Mornings

Prep Time 10 minutes
Cook Time 20 minutes
Total Time 30 minutes
Servings 12 muffins
Calories 180
Start your day with these nutritious and easy-to-make muffins, perfect for busy mornings and customizable with your favorite mix-ins.

Ingredients

Dry Ingredients

  • 2 cups whole wheat flour (or almond flour for gluten-free)
  • 1 tsp baking powder
  • ½ tsp baking soda
  • ¼ tsp sea salt
  • 1 tsp ground cinnamon

Wet Ingredients

  • 2 large eggs (swap for flax eggs for vegan)
  • 1/3 cup coconut oil (melted; sub with unsweetened applesauce to lower fat)
  • ½ cup pure maple syrup or honey
  • ¾ cup unsweetened Greek yogurt (dairy-free yogurt works too)
  • 2 tsp pure vanilla extract

Mix-ins

  • 1-1 ½ cups of mix-ins (blueberries, shredded carrots, apples, raisins, nuts, or chocolate chips)

Instructions 

  • Line a 12-cup muffin tin and preheat oven to 350°F (175°C).
  • Mix dry ingredients in a large bowl; whisk together.
  • Combine wet ingredients in a separate bowl until smooth.
  • Fold wet into dry, then add mix-ins last.
  • Fill muffin cups ¾ full and bake for 18-22 minutes until golden and a toothpick comes out clean.

Notes

You can customize these muffins with your favorite mix-ins for added flavor and nutrition.
Calories: 180kcal
Cost: $15
Course: Breakfast
Cuisine: American
Keyword: Muffins

Indulge in the Magic of Hot Cocoa Cake

As winter wraps its chilly arms around us, there’s nothing quite like the warmth of a decadent dessert to brighten our spirits. Enter the Hot Cocoa Cake—a rich, chocolatey delight that not only warms your heart but also becomes a centerpiece for family gatherings and cozy evenings. With layers of moist chocolate cake, fluffy marshmallow frosting, and a glossy chocolate ganache, this cake is more than just a dessert; it’s an experience that invites you to celebrate life’s sweetest moments.

Why You’ll Love This Recipe

This Hot Cocoa Cake isn’t just another chocolate dessert; it’s a celebration of flavors and textures, each bite transporting you to a winter wonderland. Here are five reasons why this cake deserves a spot in your recipe book:

  • Rich Chocolatey Flavor: Infused with hot cocoa and chocolate, each bite is a burst of indulgence.
  • Moist and Tender Texture: The addition of buttermilk and hot coffee ensures a cake that’s soft, tender, and utterly irresistible.
  • Fluffy Marshmallow Frosting: Light as a cloud, this frosting perfectly complements the cake’s richness.
  • Visual Appeal: With its glossy ganache and colorful toppings, it’s a showstopper at any gathering.
  • Easy to Customize: From flavor variations to creative toppings, the possibilities are endless!

Ingredients You’ll Need

Gathering the right ingredients is key to achieving that perfect hot cocoa flavor. Here’s what you’ll need:

  • 1¾ cups all-purpose flour: The foundation of your cake.
  • ¾ cup unsweetened cocoa powder: For that deep chocolate flavor.
  • 2 cups granulated sugar: Sweetness that balances the cocoa.
  • 1½ tsp baking powder: To help the cake rise.
  • 1½ tsp baking soda: For leavening.
  • ½ tsp salt: Enhances all the flavors.
  • ½ cup vegetable oil: Adds moisture and richness.
  • 2 large eggs (room temperature): Binds the ingredients together.
  • 1 cup buttermilk (room temperature): Ensures a tender crumb.
  • 2 tsp pure vanilla extract: A touch of warmth.
  • 1 cup hot water or hot brewed coffee: Deepens the chocolate flavor.
  • 4 large egg whites: For the marshmallow frosting.
  • 1 cup granulated sugar: Sweetens the frosting.
  • ¼ tsp cream of tartar: Stabilizes the egg whites.
  • 1 tsp vanilla extract: Adds flavor to the frosting.
  • ½ cup heavy cream: For the ganache.
  • 4 oz semisweet chocolate, finely chopped: The star of the ganache.
  • 1 tbsp unsalted butter: Adds richness to the ganache.
  • Mini marshmallows (optional): For decoration.
  • Shaved chocolate or cocoa powder (optional): For an elegant finish.
  • Crushed peppermint (optional): Adds a festive twist.

Step-by-Step Instructions

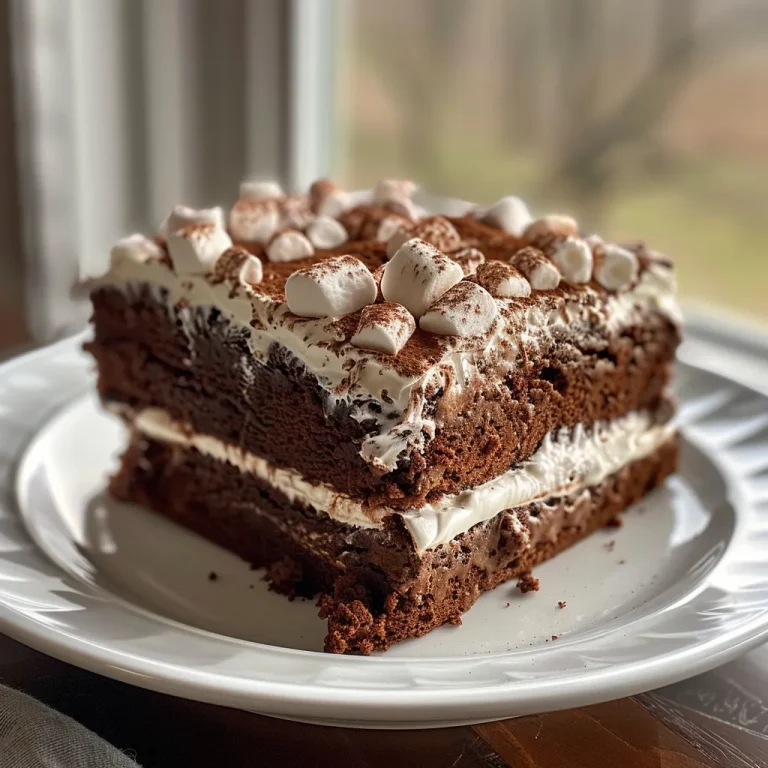
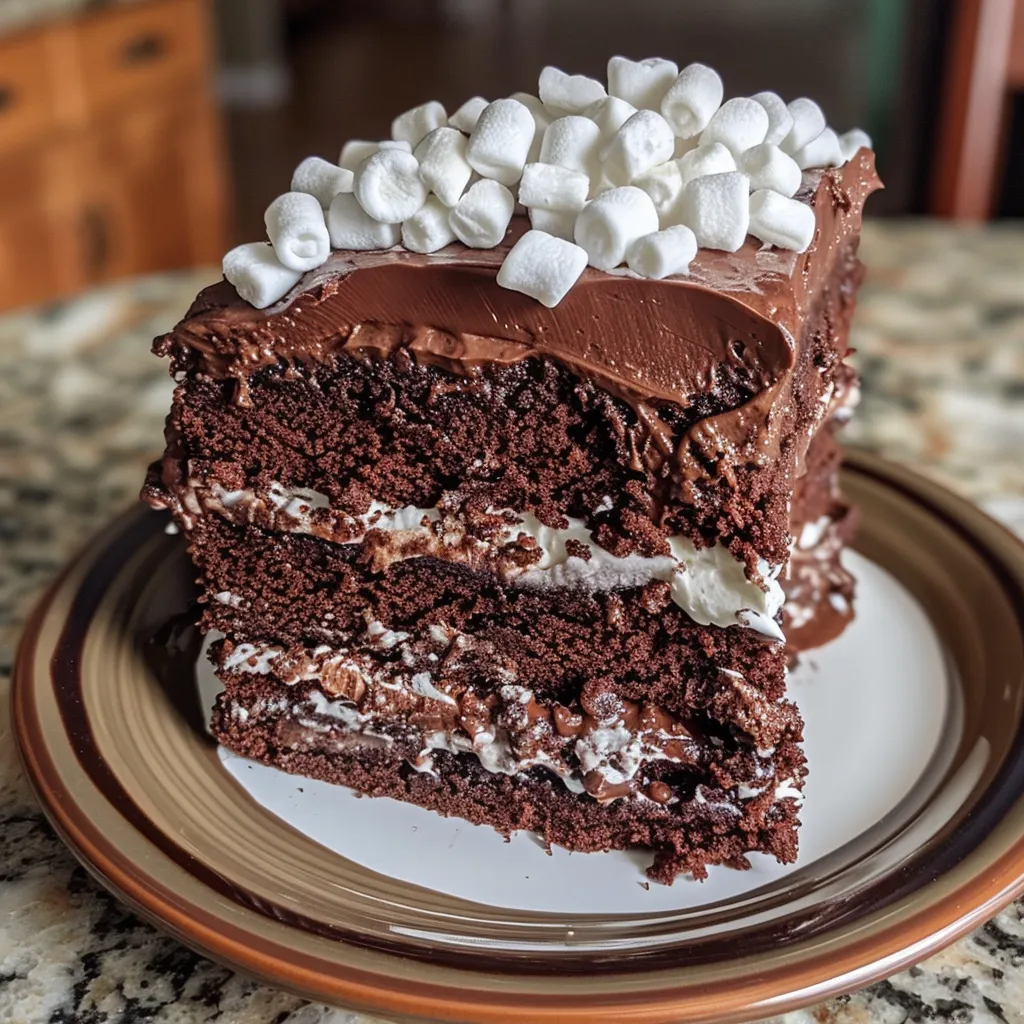
Rich chocolate Hot Cocoa Cake displayed with a glossy chocolate ganache and decorative chocolate shavings.

Let’s bring this cake to life! Follow these simple steps for a delightful baking experience:

  • Step 1: Preheat the oven: Set it to 350°F (175°C). Grease and flour two 8-inch round cake pans, and line the bottoms with parchment paper for easy removal.
  • Step 2: Mix dry ingredients: In a large bowl, whisk together flour, cocoa powder, baking powder, baking soda, and salt until well combined.
  • Step 3: Combine wet ingredients: In another bowl, beat together sugar, vegetable oil, eggs, and vanilla extract until smooth. Stir in the buttermilk until well blended.
  • Step 4: Combine mixtures: Gradually add the dry ingredients to the wet mixture, mixing just until combined. Slowly pour in the hot water or coffee and stir until the batter is silky and pourable.
  • Step 5: Bake the cake: Divide the batter evenly between the prepared pans. Bake for 30–35 minutes or until a toothpick inserted into the center comes out clean.
  • Step 6: Cool the cakes: Let the cakes cool in the pans for 10 minutes. Carefully transfer them to a wire rack to cool completely before frosting.
  • Step 7: Prepare the marshmallow frosting: Place egg whites, sugar, and cream of tartar in a heatproof bowl over simmering water. Whisk constantly until the mixture is warm and sugar dissolves. Remove from heat and beat with an electric mixer for 6–8 minutes until stiff peaks form. Beat in vanilla extract.
  • Step 8: Make the chocolate ganache: Heat heavy cream in a small saucepan until just simmering. Pour it over the chopped chocolate and let sit for 1 minute. Stir until smooth and glossy, then whisk in the butter.
  • Step 9: Assemble the cake: Place one cake layer on a serving plate. Spread a thick layer of marshmallow frosting over it, add the second layer, and cover the entire cake with the remaining frosting.
  • Step 10: Drizzle ganache: Drizzle the chocolate ganache over the top, allowing it to drip down the sides naturally. Decorate with mini marshmallows, chocolate curls, or crushed peppermint for an extra festive touch.
  • Step 11: Chill: Refrigerate for 15–20 minutes to let everything set before slicing.

Pro Tips for Perfect Hot Cocoa Cake

To ensure your cake is a showstopper, consider these expert tips:

  • Use room temperature ingredients: This helps to create a smooth batter, leading to a lighter cake.
  • Don’t overmix the batter: Mix until just combined to avoid a dense texture.
  • Test for doneness: Use a toothpick; it should come out clean or with a few moist crumbs.
  • Let cakes cool completely: This prevents the frosting from melting off.
  • Whip frosting until stiff peaks form: This ensures it holds its shape when spread on the cake.
  • Chill the ganache before drizzling: This helps it set quickly and creates a beautiful finish.
  • Experiment with flavors: Add a hint of orange zest or espresso powder for a flavor twist.
  • Layer creatively: Consider adding chocolate chips or crushed cookies between the cake layers for added texture.

Common Mistakes and Troubleshooting

Even the best bakers can run into issues. Here’s how to troubleshoot common mistakes:

  • Dry cake: Ensure you’re measuring flour correctly. Too much flour can lead to dryness.
  • Frosting not holding shape: Make sure to whip your egg whites to stiff peaks and avoid overwhipping.
  • Ganache too runny: If it’s too thin, let it sit for a few minutes to thicken before using.

Variations to Try

This Hot Cocoa Cake is incredibly versatile! Here are a few delightful variations:

  • Chocolate Peppermint Cake: Incorporate crushed peppermint candies into the frosting and top with peppermint-flavored ganache.
  • Mocha Cake: Substitute coffee for hot water in the cake batter and add a dash of espresso powder for an extra kick.
  • Nutty Delight: Add chopped walnuts or hazelnuts into the batter for a crunchy texture.
  • Spiced Cocoa Cake: Mix in a teaspoon of cinnamon and a pinch of nutmeg for a warm, spiced flavor.

Storage and Make-Ahead Instructions

This cake can be made ahead of time and stored properly:

  • Refrigeration: Store leftovers in an airtight container in the refrigerator for up to 4 days.
  • Freezing: Freeze unfrosted cake layers wrapped tightly in plastic wrap for up to 2 months. Thaw in the fridge before frosting.
  • Make-ahead frosting: The marshmallow frosting can be made a day in advance and stored in the fridge. Re-whip before using.

Frequently Asked Questions

Got questions? We’ve got answers! Here are some common inquiries:

  • Can I use a different type of flour? Yes, you can substitute with cake flour for a lighter texture.
  • What can I use instead of buttermilk? You can use milk mixed with a tablespoon of vinegar or lemon juice as a substitute.
  • How do I know when the cake is done? A toothpick inserted into the center should come out clean.
  • Can I make this cake gluten-free? Yes, use a 1:1 gluten-free flour blend.
  • How do I store the cake? Keep it in an airtight container in the refrigerator for up to 4 days.
  • Can I add other flavors to the frosting? Absolutely! Consider adding almond extract or cocoa powder for variety.
  • Is it necessary to chill the ganache? Chilling helps it set quickly, but you can use it warm for a different effect.
  • Can I make this cake in advance? Yes, the cake can be baked and frozen ahead of time.

Nutritional Tips and Dietary Adaptations

If you’re looking for a lighter version or have specific dietary needs, here are some tips:

  • Reduced sugar: Use a sugar substitute like stevia or erythritol for a lower-calorie cake.
  • Gluten-free option: Substitute all-purpose flour with a gluten-free blend.
  • Dairy-free adaptation: Replace buttermilk with almond milk mixed with vinegar.
  • Lower fat: Use apple sauce instead of oil for a healthier cake.

Equipment Recommendations

To achieve the best results, here’s a list of recommended equipment:

  • Two 8-inch round cake pans: For even baking and easy layering.
  • Mixing bowls: Both large and medium for easy ingredient mixing.
  • Electric mixer: For whipping egg whites and mixing batter effectively.
  • Heatproof bowl: Essential for making ganache over simmering water.
  • Wire rack: For cooling the cakes without trapping moisture.

Serving Suggestions

When it’s time to serve, consider these delightful suggestions:

  • Pair it with ice cream: A scoop of vanilla bean ice cream complements the rich chocolate.
  • Serve with coffee: A cup of freshly brewed coffee or hot cocoa enhances the experience.
  • Add fresh fruit: Slices of strawberries or raspberries add a refreshing contrast.
  • Top with whipped cream: A dollop of whipped cream adds lightness.

So there you have it! A comprehensive guide to creating the ultimate Hot Cocoa Cake. Remember, this isn’t just about baking; it’s about sharing joy, warmth, and love, one slice at a time. So roll up your sleeves, grab your favorite ingredients, and let’s create something magical together!

Hot Cocoa Cake

Prep Time 30 minutes
Cook Time 35 minutes
Total Time 1 hour 5 minutes
Servings 12 pieces
Calories 520
A rich and moist chocolate cake layered with marshmallow frosting and topped with chocolate ganache, perfect for chocolate lovers.

Ingredients

Dry ingredients

  • cups all-purpose flour
  • ¾ cup unsweetened cocoa powder
  • 2 cups granulated sugar
  • tsp baking powder
  • tsp baking soda
  • ½ tsp salt

Wet ingredients

  • ½ cup vegetable oil
  • 2 large eggs (room temperature)
  • 1 cup buttermilk (room temperature)
  • 2 tsp pure vanilla extract
  • 1 cup hot water or hot brewed coffee

Frosting and topping

  • 4 large egg whites
  • 1 cup granulated sugar
  • ¼ tsp cream of tartar
  • 1 tsp vanilla extract
  • ½ cup heavy cream
  • 4 oz semisweet chocolate, finely chopped
  • 1 tbsp unsalted butter

Optional toppings

  • to taste Mini marshmallows (optional)
  • to taste Shaved chocolate or cocoa powder (optional)
  • to taste Crushed peppermint (optional)

Instructions 

  • Preheat oven to 350°F (175°C). Grease, flour, and line two 8-inch pans.
  • Mix dry ingredients; in another bowl, beat wet ingredients. Combine and add hot water until batter is smooth.
  • Divide batter into pans; bake for 30–35 minutes. Cool completely before frosting.
  • Prepare meringue: whisk egg whites, sugar, and cream of tartar over simmering water until warm, then beat until stiff peaks form. Add vanilla.
  • Heat cream, pour over chocolate and butter, stir until smooth. Frost cake, drizzle ganache, and decorate as desired.

Notes

Refrigerate for 15–20 minutes before slicing to set the frosting and ganache.
Calories: 520kcal
Cost: $15
Course: Dessert
Cuisine: American
Keyword: chocolate

Discover the Joy of Baking: Red Velvet Cupcakes

Welcome to the world of baking where every sweet treat tells a story! Today, we’re diving into the delightful realm of red velvet cupcakes, a classic that brings a splash of color and joy to any occasion. With their rich, velvety texture and a luscious cream cheese frosting that melts in your mouth, these cupcakes are more than just a dessert; they’re a celebration of love, family, and the simple pleasures of life. Let’s whisk up some joy, shall we?

Why You’ll Love This Recipe

  • Irresistible Flavor: The subtle hint of cocoa combined with the tangy buttermilk creates a unique flavor profile that’s simply enchanting.
  • Beautiful Presentation: The vibrant red color makes these cupcakes visually stunning, perfect for celebrations, parties, or just because!
  • Easy to Make: With straightforward steps and common ingredients, even novice bakers can create these delightful treats with ease.
  • Versatile Treat: These cupcakes are perfect for various occasions, from birthdays to weddings, or simply as a sweet indulgence on a cozy evening.
  • Make Ahead Option: You can prepare the batter and frosting in advance, making them a convenient choice for busy bakers!

Ingredients for Red Velvet Cupcakes

To create these dreamy cupcakes, gather the following ingredients:

  • 1 1/4 cups all-purpose flour: The cornerstone for our cupcake base.
  • 3/4 cup granulated sugar: Sweetness that balances the flavors perfectly.
  • 1 tbsp unsweetened cocoa powder: Adds a touch of chocolate flavor without overpowering the red hue.
  • 1/2 tsp baking soda: For that perfect rise!
  • 1/4 tsp salt: Enhances the overall flavor.
  • 1/2 cup vegetable oil: Ensures moist and tender cupcakes.
  • 1/2 cup buttermilk: The secret to that classic tangy flavor.
  • 1 large egg: Binds everything together.
  • 1/2 tbsp white vinegar: Reacts with baking soda to create a light texture.
  • 1 tsp vanilla extract: Adds warmth and depth to the flavor.
  • 1 tbsp red food coloring: Gives our cupcakes that iconic hue.
  • 8 oz cream cheese, softened: The star of our frosting!
  • 1/4 cup unsalted butter, softened: For creamy consistency in the frosting.
  • 2 cups powdered sugar: Sweetens the frosting without being too heavy.
  • 1 tsp vanilla extract: For that extra touch of flavor in the frosting.

Step-by-Step Instructions

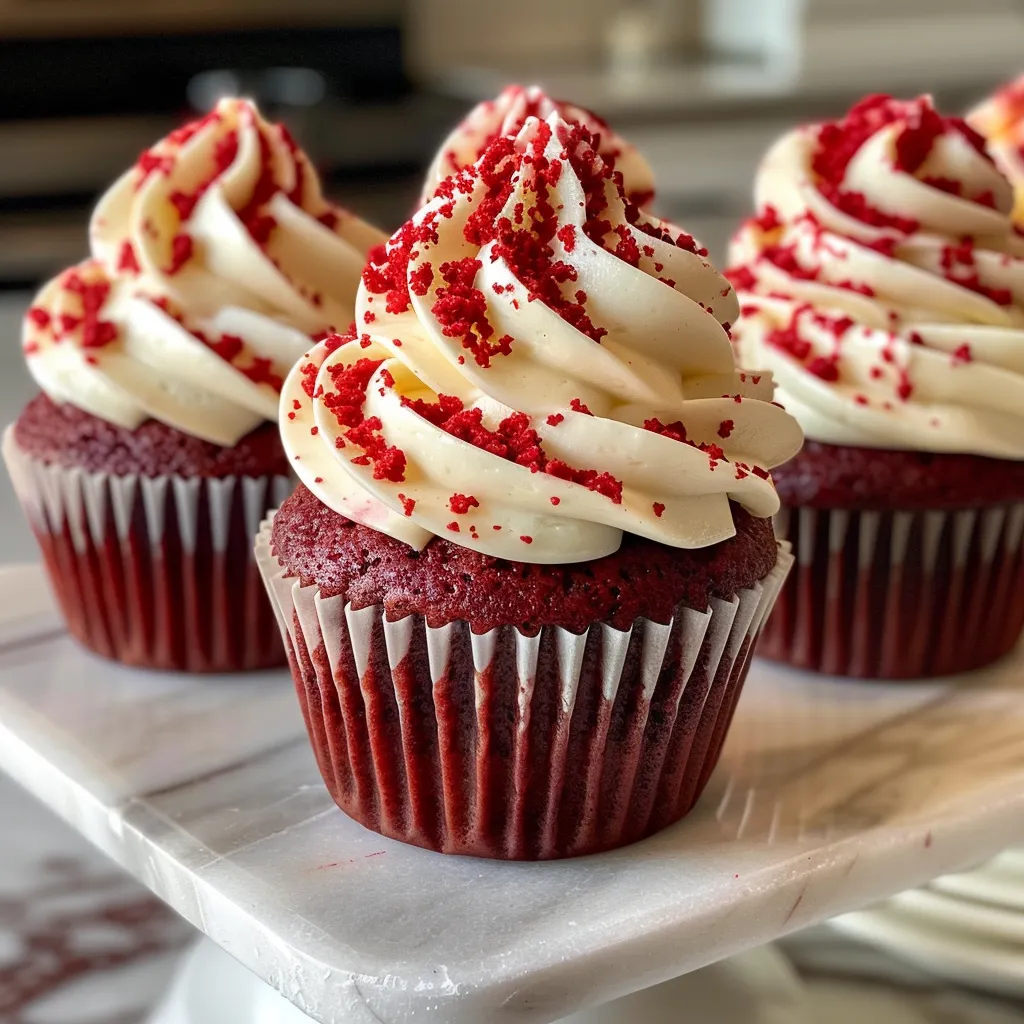
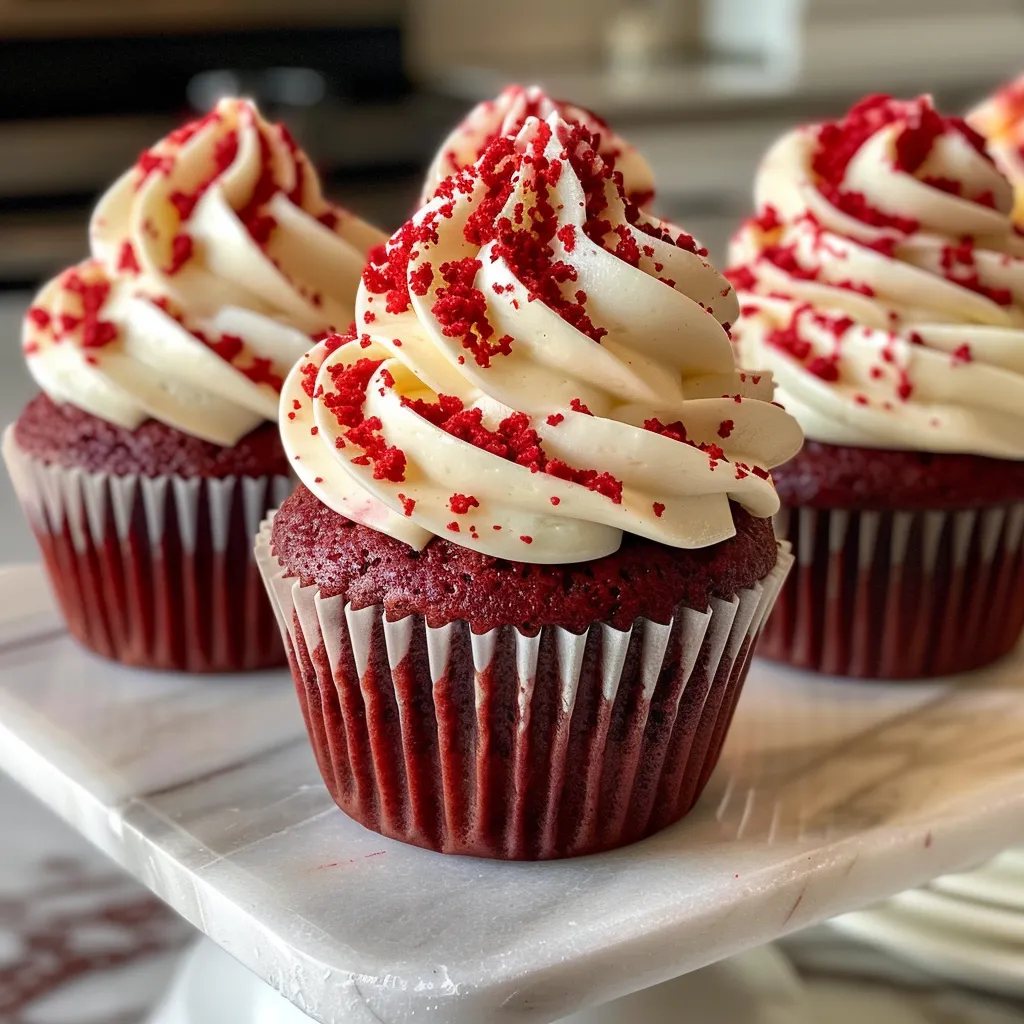
Red velvet cupcakes displayed with rich cream cheese icing in a side profile.

Let’s get started on your journey to baking perfection!

  1. Preheat the oven: Set to 350°F (175°C). Line a muffin tin with cupcake liners.
  2. Mix dry ingredients: In a medium bowl, whisk together the flour, sugar, cocoa powder, baking soda, and salt until well combined.
  3. Prepare wet ingredients: In a separate bowl, beat the egg. Add the vegetable oil, buttermilk, vinegar, vanilla, and red food coloring. Mix until smooth.
  4. Combine mixtures: Slowly pour the wet ingredients into the dry ingredients. Mix until just combined, ensuring there are no lumps.
  5. Fill the liners: Divide the batter evenly among cupcake liners, filling each about 2/3 full.
  6. Bake: Place in the oven and bake for 18–20 minutes. Check for doneness by inserting a toothpick; if it comes out clean, they’re ready!
  7. Cool: Allow the cupcakes to cool in the tin for 5 minutes, then transfer to a wire rack to cool completely.
  8. Make the frosting: Beat the softened cream cheese and butter together until smooth. Gradually add powdered sugar and vanilla extract, beating until fluffy.
  9. Frost your cupcakes: Once cooled, generously frost the cupcakes with cream cheese frosting and garnish with red velvet crumbs or festive toppings if desired.

Pro Tips for Perfect Red Velvet Cupcakes

  • Room Temperature Ingredients: Ensure all your wet ingredients are at room temperature for smoother batter consistency.
  • Don’t Overmix: Mix the batter just until combined to avoid dense cupcakes.
  • Check Oven Temperature: Use an oven thermometer to ensure accurate baking temperatures for perfect results.
  • Cool Completely: Allow cupcakes to cool completely before frosting to prevent melting.
  • Experiment with Flavors: Add a splash of almond extract for a unique twist on the classic flavor.
  • Frosting Consistency: If frosting is too thick, add a splash of milk; if too thin, add more powdered sugar.
  • Use Quality Food Coloring: A good quality red food coloring will give you the most vibrant color.
  • Storage: Store cupcakes in an airtight container at room temperature for up to 3 days.

Common Mistakes and Troubleshooting

Even the best bakers encounter hiccups. Here are a few common mistakes and how to avoid them:

  • Dry Cupcakes: This can happen from overbaking. Keep an eye on the clock and test with a toothpick.
  • Flat Cupcakes: Ensure your baking soda is fresh and not expired, as old leavening agents can lead to flat results.
  • Crumbly Frosting: If your cream cheese frosting is crumbly, it may be due to using cold ingredients. Always use softened cream cheese and butter.
  • Too Sweet: If the frosting is too sweet for your taste, add a pinch of salt to balance the flavors.

Delightful Variations

Looking to switch things up? Here are some delicious variations on the classic red velvet cupcake:

  • Chocolate Chip Velvet: Add semi-sweet chocolate chips to the batter for a delightful surprise.
  • Nutty Twist: Fold in chopped walnuts or pecans for added texture and flavor.
  • Coconut Velvet: Substitute some of the flour with coconut flour and top with shredded coconut for a tropical flair.
  • Spiced Velvet: Incorporate a teaspoon of cinnamon or nutmeg into the batter for a warm, spiced flavor.

Storage and Make-Ahead Instructions

Want to bake ahead of time? Here are some helpful tips:

  • Make Ahead: Prepare the batter a day in advance and refrigerate. Bring to room temperature before baking.
  • Store Frosting: Cream cheese frosting can be made ahead and stored in the refrigerator for up to a week. Just re-whip before using.
  • Freezing Cupcakes: Freeze unfrosted cupcakes in an airtight container for up to 3 months. Thaw before frosting.

FAQs About Red Velvet Cupcakes

  • Why is it called red velvet? The name comes from the cake’s soft, velvety texture and its beautiful red color, traditionally enhanced by cocoa powder.
  • Can I make these gluten-free? Absolutely! Substitute all-purpose flour with a gluten-free blend.
  • What can I use instead of buttermilk? You can make your own by adding a tablespoon of vinegar or lemon juice to regular milk and letting it sit for 5 minutes.
  • How do I know when the cupcakes are done? Insert a toothpick into the center; if it comes out clean, they’re ready!
  • Can I use liquid food coloring? While you can, gel food coloring provides a more vibrant color without affecting the batter’s consistency.
  • What’s the best way to store leftovers? Keep them in an airtight container at room temperature for up to 3 days or refrigerate for up to a week.
  • How can I make the frosting less sweet? Add a pinch of salt or a splash of lemon juice to balance the sweetness.
  • Can I use this recipe for a cake instead of cupcakes? Yes, simply adjust the baking time to around 25-30 minutes for a 9-inch round cake.

Nutritional Information and Dietary Adaptations

For those keeping an eye on nutrition, here are some tips:

  • Lower Sugar: Substitute granulated sugar with coconut sugar or a sugar alternative.
  • Healthier Fat: Use applesauce instead of oil for a lower-fat option.
  • Vegan Adaptation: Substitute the egg with a flax egg (1 tbsp ground flaxseed + 3 tbsp water) and use non-dairy milk and butter.

Necessary Equipment for Baking

  • Mixing Bowls: A set of mixing bowls in various sizes will be essential for combining ingredients.
  • Cupcake Pan: A standard muffin tin is perfect for baking your cupcakes.
  • Electric Mixer: A hand mixer or stand mixer will make the frosting process a breeze.
  • Measuring Cups and Spoons: Accurate measurements are key to baking success.
  • Cooling Rack: Allows your cupcakes to cool evenly and prevents sogginess.

Serving Suggestions

Presenting your cupcakes beautifully can enhance the experience:

  • Festive Toppings: Garnish with sprinkles, edible glitter, or fresh berries for an extra touch of flair.
  • Presentation: Serve on a colorful platter or tiered stand to elevate the visual appeal.
  • Pair with Beverages: Enjoy with a cup of coffee, tea, or a glass of milk for a delightful treat pairing.

Now that you have all the knowledge and tips you need, it’s time to bring the joy of baking into your kitchen! Gather your loved ones, put on some music, and let the aroma of freshly baked red velvet cupcakes fill the air. Remember, cooking is not just a task, but an experience — a chance to create, share, and celebrate. Happy baking!

Red Velvet Cupcakes

Prep Time 20 minutes
Cook Time 20 minutes
Total Time 40 minutes
Servings 12 cupcakes
Calories 250
Delight in these moist and vibrant red velvet cupcakes topped with creamy frosting, perfect for any celebration.

Ingredients

Dry ingredients

  • 1 1/4 cups all-purpose flour
  • 3/4 cup granulated sugar
  • 1 tbsp unsweetened cocoa powder
  • 1/2 tsp baking soda
  • 1/4 tsp salt

Wet ingredients

  • 1/2 cup vegetable oil
  • 1/2 cup buttermilk
  • 1 large egg
  • 1/2 tbsp white vinegar
  • 1 tsp vanilla extract
  • 1 tbsp red food coloring

Frosting

  • 8 oz cream cheese, softened
  • 1/4 cup unsalted butter, softened
  • 2 cups powdered sugar
  • 1 tsp vanilla extract

Instructions 

  • Preheat oven to 350°F (175°C). Line a muffin tin with cupcake liners.
  • Mix dry ingredients in a bowl. In another, beat egg and add wet ingredients. Combine until smooth.
  • Fill cupcake liners 2/3 full with batter. Bake for 18–20 minutes. Cool on wire rack.
  • Beat cream cheese and butter until smooth. Add powdered sugar and vanilla; beat until fluffy.
  • Frost cooled cupcakes and garnish as desired.

Notes

Ensure cupcakes are fully cooled before frosting to prevent melting.
Calories: 250kcal
Cost: $15
Course: Dessert
Cuisine: American
Keyword: red velvet

Discover the Heartwarming Delight of Baked Cinnamon Apples

As autumn sweeps in with its crisp air and vibrant leaves, there’s nothing quite like the aroma of baked cinnamon apples wafting through your home. This simple yet indulgent recipe captures the essence of the season, transforming fresh apples into a warm, comforting dessert that’s perfect for cozy gatherings around the table. In this article, we’ll dive into an easy-to-follow recipe for baked apples, explore their many health benefits, and provide tips and tricks to ensure your dish is a resounding success.

Whether you’re hosting a family dinner or looking for a sweet treat to enjoy on a chilly evening, baked cinnamon apples are a delightful way to celebrate the flavors of fall. Let’s get started!

Why You’ll Love This Recipe

  • Quick and Easy: With just a few simple ingredients and minimal prep time, you can whip up this delicious dessert in no time.
  • Healthy Treat: Apples are naturally sweet and packed with vitamins, making this a guilt-free indulgence.
  • Aromatic Bliss: The combination of cinnamon and baked apples creates an irresistible aroma that fills your kitchen with warmth.
  • Customizable: This recipe serves as a base that you can modify with your favorite toppings or add-ins.
  • Perfect for Gatherings: Serve warm with ice cream or whipped cream, making it a crowd-pleaser at any event.

Ingredients Breakdown

To make the best baked cinnamon apples, gather the following ingredients:

  • 6 large apples: Choose a mix of tart (like Granny Smith) and sweet (like Honeycrisp) apples for a balanced flavor.
  • 1/2 cup brown sugar: This adds sweetness and a lovely caramelization when baked.
  • 1 1/2 tablespoons cinnamon: Essential for that warm, spicy flavor we all adore.
  • 1/8 teaspoon sea salt: Enhances the sweetness of the apples.
  • 1 teaspoon vanilla extract: Adds depth and warmth.
  • 1 tablespoon water: Helps to create a steam effect while baking.
  • 2 teaspoons cornstarch: Thickens the juices from the apples.
  • 2 tablespoons unsalted butter: Cut into small chunks, it adds richness to the dish.

How to Make Baked Cinnamon Apples

Juicy cinnamon-spiced apple slices layered in a dish.

Follow these steps to create your delicious baked cinnamon apples:

  1. Preheat the oven: Set your oven to 350°F (175°C).
  2. Prepare the apples: Peel, core, and slice the apples into uniform 1/2-inch thick slices.
  3. Make the slurry: In a small bowl, combine the water and cornstarch to make a slurry.
  4. Combine the ingredients: Place the sliced apples in a 9×13-inch baking dish. Sprinkle with brown sugar, cinnamon, vanilla extract, and salt. Drizzle the cornstarch mixture over the apples and mix well.
  5. Top with butter: Evenly distribute the butter chunks on top of the apples.
  6. Bake: Cover loosely with foil and bake for 45 minutes. Remove the foil, stir the apples, and continue baking for an additional 10-15 minutes until the apples are fork-tender.
  7. Serve: Enjoy warm, ideally with whipped cream or vanilla ice cream!

Pro Tips for Perfect Baked Apples

  • Choose the right apples: A mix of sweet and tart apples gives the best flavor and texture.
  • Don’t skip the cornstarch: It thickens the juices, preventing a soupy mess.
  • Experiment with spices: Try adding nutmeg, ginger, or allspice for a different flavor profile.
  • Adjust sweetness: Feel free to reduce the brown sugar if you prefer a less sweet dish.
  • Use a glass dish: It allows you to monitor the baking process easily.
  • Let them cool slightly: This will help the flavors meld and make serving easier.
  • Pair with toppings: Consider adding crushed nuts or granola for added texture.
  • Double the recipe: If you’re entertaining, making a larger batch is usually a hit.

Common Mistakes and Troubleshooting

Don’t let common pitfalls ruin your baked apple experience. Here are some tips to troubleshoot:

  • Apples are mushy: You may have overbaked them. Monitor closely during the last few minutes.
  • Not sweet enough: Adjust the brown sugar according to your taste preferences.
  • Juices are too runny: Increase the cornstarch in your slurry next time.
  • Flavor is bland: Don’t hesitate to add extra spices or even a splash of lemon juice for brightness.

Recipe Variations

Get creative with these delightful variations on the classic baked cinnamon apples:

  • Nutty Delight: Add chopped walnuts or pecans for added crunch and flavor.
  • Caramel Apples: Drizzle caramel sauce over the apples before baking for a decadent treat.
  • Fruit Medley: Mix in other fruits like pears or cranberries for a unique twist.
  • Oat Topping: Combine oats, brown sugar, and butter to create a crumbly topping for a baked fruit crisp.

Storage and Make-Ahead Instructions

Want to prepare your baked apples in advance? Here’s how:

  • Storing leftovers: Store any leftover baked apples in an airtight container in the fridge for up to 5 days.
  • Reheating: Warm in the oven at 350°F until heated through, or microwave in short bursts.
  • Make ahead: Prepare the dish and refrigerate it before baking. Just add an extra 10 minutes to the baking time.

Frequently Asked Questions

Here are some common questions about baked cinnamon apples:

  • Do I need to peel the apples? While it’s traditional to peel them, you can leave the skin on if you prefer a rustic texture.
  • Can I use frozen apples? Fresh apples yield the best results; however, you can use thawed frozen apples in a pinch.
  • How do I know when they’re done? The apples should be fork-tender but not completely mushy.
  • What can I serve with baked apples? Pair them with ice cream, whipped cream, or even yogurt for a delicious contrast.
  • Can I make this recipe gluten-free? Yes, this recipe is naturally gluten-free!
  • Is this suitable for vegans? Substitute the butter with a vegan alternative and it’s vegan-friendly!
  • Can I freeze baked apples? Yes! Freeze them in an airtight container, and reheat directly from frozen.
  • How can I make this recipe healthier? Reduce the sugar or use a sugar substitute and add more spices for flavor.

Nutritional Tips and Dietary Adaptations

Here are some tips to make your baked apples healthier:

  • Decrease sugar: You can reduce the amount of brown sugar without sacrificing flavor.
  • Use natural sweeteners: Consider using honey or maple syrup as alternatives.
  • Add fiber: Incorporate oats or nuts for added fiber and nutrients.

Essential Equipment for Baked Apples

Ensure you have these kitchen tools on hand:

  • 9×13-inch baking dish: Perfect size for this recipe.
  • Mixing bowls: For combining ingredients.
  • Measuring cups and spoons: Essential for accuracy.
  • Sharp knife: For peeling and slicing apples.

Serving Suggestions for a Festive Touch

When serving your baked cinnamon apples, consider these festive ideas:

  • Add a scoop of ice cream: Vanilla or caramel ice cream pairs beautifully with warm apples.
  • Garnish with whipped cream: A dollop adds an elegant touch.
  • Sprinkle with nuts: Chopped pecans or walnuts add crunch and flavor contrast.
  • Serve with a side of yogurt: A tangy yogurt complements the sweetness of the apples.

Now that you’re equipped with everything you need to create this delightful dish, I invite you to gather your ingredients and let the kitchen become your haven of warmth and joy. Happy baking, and may your home be filled with the sweet scent of baked cinnamon apples!

Baked Cinnamon Apples

Prep Time 15 minutes
Cook Time 55 minutes
Total Time 1 hour 10 minutes
Servings 4 servings
Calories 250
A warm and comforting dessert featuring tender baked apples infused with cinnamon and vanilla, topped with butter.

Ingredients

Fruits

  • 6 large apples (peeled, cored, and sliced)
  • 0.5 cup brown sugar
  • 1.5 tablespoons cinnamon
  • 1/8 teaspoon sea salt
  • 1 teaspoon vanilla extract
  • 1 tablespoon water
  • 2 teaspoons cornstarch
  • 2 tablespoons unsalted butter (cut into small chunks)

Instructions 

  • Preheat oven to 350°F (175°C).
  • Combine water and cornstarch to make a slurry; set aside.
  • Place sliced apples in a baking dish, sprinkle with sugar, cinnamon, vanilla, and salt. Drizzle with slurry and mix. Top with butter chunks.
  • Cover loosely with foil and bake for 45 minutes. Remove foil, stir, and bake uncovered for 10-15 minutes until tender.
  • Serve warm, optionally with whipped cream or ice cream.

Notes

For extra flavor, add a pinch of nutmeg or serve with a drizzle of caramel sauce.
Calories: 250kcal
Cost: $8
Course: Dessert
Cuisine: American
Keyword: Apples

Discover the Magic of 4-Layer Chocolate Heaven

Welcome to a delightful journey through the world of desserts! Today, I’m excited to share a recipe that not only satisfies your sweet tooth but also transforms any gathering into a memorable celebration: the 4-layer Chocolate Heaven. This dessert is a luscious combination of rich dark chocolate, creamy layers, and a hint of coffee that will make your taste buds dance with joy. Whether it’s a birthday, anniversary, or simply a Sunday family dinner, this dessert is sure to impress. So grab your apron, and let’s dive into this chocolatey adventure!

Why You’ll Love This Recipe

There are countless reasons to fall in love with this 4-layer Chocolate Heaven. Here are just a few:

  • Decadent Layers: Experience the perfect balance of flavors and textures with each layer, from the rich chocolate pudding to the fluffy ganache.
  • Simple Ingredients: With just a handful of ingredients like chocolate, cream, and coffee, you can create a masterpiece that looks and tastes gourmet.
  • Make-Ahead Friendly: Perfect for busy hosts, this dessert can be prepared a day in advance, allowing you to enjoy your event without stress.
  • Customizable: Feel free to make this recipe your own by adding flavors or garnishes that excite your palate.
  • Impressive Presentation: The beautiful layers make for a stunning centerpiece that will have everyone reaching for their forks!

Ingredient Breakdown

Let’s take a closer look at the ingredients you’ll need to make this heavenly dessert, along with some handy substitutions:

  • Milk (2 cups or 480ml): Whole milk works best for a creamy texture, but you can substitute with almond or oat milk for a dairy-free option.
  • Heavy Cream (½ cup or 115ml): This adds richness. For a lighter option, use half-and-half or coconut cream.
  • Dark Chocolate (1 cup or 175g, chopped): Choose high-quality chocolate for the best flavor. You can also use semi-sweet chocolate if you prefer a sweeter taste.
  • Cornflour (3 tablespoons or 30g): Essential for thickening the pudding; arrowroot powder can be a gluten-free alternative.
  • Sugar (6 tablespoons or 75g): Regular granulated sugar works, but feel free to use coconut sugar or a sugar substitute for a healthier version.
  • Cocoa Powder (2 tablespoons or 15g): Unsweetened cocoa powder gives depth to the pudding; don’t skip this!
  • Butter (2 tablespoons or 25g): Adds richness; for a dairy-free version, use coconut oil or vegan butter.
  • Vanilla Extract (1 teaspoon or 5ml): Enhances all flavors; always opt for pure vanilla extract for the best aroma.
  • Fresh Cream (½ cup or 115ml): For the ganache, you can substitute with whipped coconut cream for a vegan option.
  • Instant Coffee Powder (1 tablespoon or 12g): This adds depth—feel free to use espresso powder for a stronger coffee flavor.
  • Warm Water (1 cup or 240ml): Used for the coffee soak.
  • Cake Pieces (15 pieces): Utilize chocolate, vanilla, or even sponge cake as your base layer.
  • Cocoa Powder (for dusting): Use this as a finishing touch for a sophisticated look.

Step-by-Step Instructions

Side view of a decadent four-layer chocolate cake showcasing rich chocolate layers and smooth cream.

Now that we have everything we need, let’s get started with the preparation!

  1. Prepare the Dry Ingredients: In a large bowl, combine sugar, cornflour, and cocoa powder. Whisk until well mixed.
  2. Make the Pudding: In a heavy-bottom saucepan over medium heat, combine chopped chocolate, milk, and heavy cream. Stir until melted and slightly warm. Gradually pour this mixture over the dry ingredients while whisking continuously.
  3. Cook the Pudding: Transfer the mixture back into the saucepan and bring to a gentle boil, stirring constantly. Once thickened, set aside to cool slightly.
  4. Prepare the Ganache: In a bowl, combine chopped chocolate and fresh cream. Microwave for 40 seconds, then let it sit for a minute before stirring until smooth.
  5. Make the Coffee Soak: In a bowl, mix instant coffee powder with warm water and set aside.
  6. Layer the Dessert: In a square dish, lay down the first layer of chocolate cake slices, brushing or pouring the coffee soak over them. Add a generous layer of pudding, spreading it evenly.
  7. Add More Layers: Repeat the process with another layer of chocolate cake, coffee soak, and top with ganache, spreading it corner to corner.
  8. Chill and Serve: Allow the dessert to set in the refrigerator for at least 2-3 hours. Once set, dust with cocoa powder before serving.

Pro Tips for Perfect Layers

To ensure your 4-layer Chocolate Heaven turns out flawlessly, keep these expert tips in mind:

  • Use Quality Ingredients: High-quality chocolate and fresh cream are essential for rich flavor.
  • Cool the Pudding: Allow the pudding to cool slightly before layering to prevent it from melting the cake.
  • Layer Evenly: Spread each layer evenly from corner to corner for a beautiful presentation.
  • Chill Properly: Allow enough time in the refrigerator for the layers to set beautifully.
  • Experiment with Flavors: Consider adding a layer of fruit or nuts for added texture and flavor.
  • Mind the Cake Size: Ensure your cake slices are uniform for even soaking.
  • Be Patient: Letting it chill fully is key for the best texture.

Common Mistakes and Troubleshooting

Even the best of us can run into issues. Here’s how to troubleshoot common problems:

  • Pudding is Too Thin: If your pudding isn’t thickening, ensure you’ve whisked the cornflour properly and brought it to a full boil.
  • Cake is Soggy: Be cautious with how much coffee soak you apply; a little goes a long way!
  • Ganache Isn’t Smooth: If it’s grainy, ensure the chocolate is fully melted and mixed with the cream properly.
  • Layers Are Uneven: Use a spatula to spread layers evenly if they seem uneven.

Delicious Variations

Feel free to mix things up with these delightful variations:

  • Nutty Chocolate Heaven: Add chopped nuts like hazelnuts or almonds in between layers for a crunchy texture.
  • Fruit-Infused Layers: Incorporate fresh raspberries or strawberries for a fruity twist.
  • Mint Chocolate Heaven: Add a few drops of mint extract to the ganache for a refreshing taste.
  • Spiced Chocolate: Add a sprinkle of cinnamon or chili powder to the pudding for a warm, spicy note.

Storage and Make-Ahead Instructions

This dessert can be made ahead of time and stored in the refrigerator:

  • Storage: Cover the dessert with plastic wrap and keep it chilled for up to 3 days. It tastes even better after a day of chilling!
  • Make-Ahead: Prepare the pudding and ganache a day in advance. Layer and chill just before serving for the best texture.

Frequently Asked Questions

Here are some common questions about this recipe:

  • Can I use milk alternatives? Yes, almond or oat milk can be used in place of regular milk.
  • How long does it take to set? The dessert requires at least 2-3 hours in the refrigerator to set properly.
  • Can I freeze this dessert? Freezing is not recommended, as it affects the texture of the layers.
  • What can I serve with this dessert? Fresh berries, whipped cream, or a drizzle of chocolate sauce complement this dessert beautifully.
  • Is it possible to make this gluten-free? Yes, use gluten-free cake and ensure all other ingredients are gluten-free.
  • How can I make this recipe vegan? Substitute dairy products with plant-based alternatives and use a vegan cake.
  • What type of cake works best? Chocolate or vanilla sponge cake works best, but feel free to experiment!
  • Can I add a layer of fruit? Absolutely! Fresh fruit can add a refreshing twist to your dessert.

Nutritional Tips and Dietary Adaptations

This dessert can be tailored to fit various dietary needs:

  • Low Sugar: Use sugar substitutes like stevia or erythritol.
  • Dairy-Free: Opt for plant-based creams and milk alternatives.
  • Gluten-Free: Choose gluten-free cake and ensure all ingredients are certified gluten-free.

Equipment Recommendations

To create this delicious dessert, you’ll need:

  • Mixing Bowls: A set of different sizes is handy for combining ingredients.
  • Whisk: For mixing dry ingredients and pudding smoothly.
  • Heavy-Bottom Saucepan: Essential for even heating while preparing the pudding.
  • Spatula: Perfect for spreading layers evenly.
  • Square Baking Dish: Ideal for layering your dessert beautifully.

Serving Suggestions

When it comes to serving your 4-layer Chocolate Heaven, consider these options:

  • Garnish: Top with fresh berries or a dollop of whipped cream for added flair.
  • Chocolate Shavings: Add a sprinkle of chocolate shavings or curls for a gourmet touch.
  • Mint Leaves: Fresh mint leaves can enhance the visual appeal and flavor.

Now that you have the complete guide to creating this magnificent 4-layer Chocolate Heaven, it’s time to gather your loved ones around the table. Cooking is not just about the food; it’s about creating memories, sharing stories, and celebrating life’s sweet moments together. So let’s make this dessert and cherish every delightful bite! Enjoy your culinary adventure, and happy cooking!

4-layer Chocolate Heaven

Prep Time 30 minutes
Cook Time 20 minutes
Total Time 50 minutes
Servings 8 pieces
Calories 650
A decadent layered dessert featuring rich chocolate pudding, coffee-soaked cake, and ganache, perfect for chocolate lovers.

Ingredients

Dairy & Chocolate

  • 2 cups milk
  • ½ cup heavy cream
  • 1 cup dark chocolate, chopped
  • 3 tablespoon cornflour
  • 6 tablespoon sugar
  • 2 tablespoon cocoa powder
  • 2 tablespoon butter
  • 1 teaspoon vanilla
  • ½ cup fresh cream
  • ½ cup dark chocolate, chopped
  • 1 tablespoon instant coffee powder
  • 1 cup warm water

Cake & Dusting

  • 15 pieces cake pieces
  • Cocoa powder for dusting

Instructions 

  • Mix sugar, cornflour, and cocoa powder in a bowl.
  • Heat chopped chocolate, milk, and cream; pour into dry ingredients while whisking.
  • Return mixture to saucepan, boil while whisking; set aside.
  • Make ganache by microwaving chopped chocolate and fresh cream, then stir until smooth.
  • Mix instant coffee with warm water for soak.
  • Layer cake slices in a dish, brush with coffee soak, add pudding, then repeat with ganache on top. Chill for 2-3 hours, dust with cocoa powder before serving.

Notes

Ensure to chill the dessert for best results and dust with cocoa powder just before serving.
Calories: 650kcal
Cost: $15
Course: Dessert
Cuisine: International
Keyword: chocolate