Author

rafael

Browsing

Experience the Mediterranean: A Flavorful Journey Awaits

Welcome to a culinary adventure that will transport your taste buds straight to the sun-kissed shores of the Mediterranean! This Lemon Herb Baked White Fish recipe is not just a dish; it’s a celebration of fresh ingredients, vibrant flavors, and cherished moments around the dinner table. Whether you’re preparing a cozy weeknight meal or hosting a festive gathering, this recipe is your passport to a delightful dining experience. Let’s dive into the essence of Mediterranean cooking, where simplicity meets sophistication, and every bite tells a story.

Why You’ll Love This Recipe

  • Quick and Easy: Ready in just 15 minutes, this recipe is perfect for busy weeknights.
  • Flavor Explosion: The combination of zesty lemon and fresh herbs enhances the natural taste of the fish, making it a mouthwatering experience.
  • Healthy and Nutritious: Packed with lean protein and healthy fats from olive oil or butter, this dish is both satisfying and nourishing.
  • Versatile Pairings: Serve it with a variety of sides — from roasted vegetables to fluffy quinoa — for a well-rounded meal.
  • Family-Friendly: With its mild flavor profile, this baked white fish is sure to be a hit with both kids and adults.

Ingredients to Gather for Your Culinary Masterpiece

Let’s prepare our ingredients! Here’s what you’ll need for this splendid dish:

  • 4 white fish fillets: Choose from cod, tilapia, or halibut, each about 6 oz. These fish are known for their mild flavors and flaky textures.
  • 1/4 cup unsalted butter or olive oil: Both options keep the fish moist and add richness, but olive oil gives a lighter finish.
  • 1 large lemon: Sliced into thin rounds and juiced; this lemon is essential for that bright, tangy flavor.
  • 2 tablespoons fresh parsley: Chopped for a burst of freshness.
  • 1 tablespoon fresh thyme leaves: Adds a fragrant herbal note that complements the fish beautifully.
  • 1 teaspoon black pepper: Freshly cracked for a hint of spice.
  • 1/2 teaspoon red pepper flakes: Optional, but they provide a delightful kick!
  • 1/2 teaspoon salt: To enhance all the flavors.

How to Make Lemon Herb Baked White Fish

Juicy lemon herb baked fish garnished with lemon slices and parsley.

Now, let’s bring it all together! Follow these simple steps to create your flavorful masterpiece:

  • Step 1: Preheat your oven to 400 degrees Fahrenheit (200 degrees Celsius).
  • Step 2: In a small bowl, mix melted butter or olive oil with the juice of half a lemon, chopped parsley, thyme, black pepper, red pepper flakes (if using), and salt. Stir until well combined.
  • Step 3: Arrange the fish fillets in a single layer in a shallow baking pan. Ensure the pan is just large enough to hold the fish without overcrowding.
  • Step 4: Pour the prepared lemon and butter mixture evenly over each fish fillet, ensuring they are well coated.
  • Step 5: Top each fillet with several lemon slices and scatter a few extra around the pan.
  • Step 6: Bake for 12-15 minutes, or until the fish is opaque and flakes easily. Start checking for doneness around 10 minutes to avoid overcooking.
  • Step 7: Serve immediately, spooning the flavorful pan juices over the fish. Enjoy!

Pro Tips for Perfect Lemon Herb Baked White Fish

  • Choose Fresh Fish: For the best flavor, opt for fresh fish fillets. If using frozen, ensure they are completely thawed before cooking.
  • Don’t Overcook: Fish cooks quickly; keep an eye on it to maintain that tender, flaky texture.
  • Experiment with Herbs: Feel free to mix in other fresh herbs like dill or basil for a unique twist.
  • Add Citrus Zest: Zest the lemon before slicing and sprinkle over the fish for an extra burst of flavor.
  • Use a Thermometer: For precision, use a cooking thermometer; fish should reach an internal temperature of 145°F (63°C).
  • Let it Rest: Allow the fish to rest for a couple of minutes after baking to enhance the flavors.
  • Serve with a Side: Pair with a simple salad or crusty bread to soak up the delicious juices.
  • Keep it Moist: The generous lemon-butter mixture helps ensure the fish stays moist and flavorful.

Common Mistakes to Avoid

  • Overcrowding the Pan: Make sure the fish fillets are not touching to allow for even cooking.
  • Not Checking for Doneness: Every oven is different; start checking the fish at 10 minutes.
  • Using Dried Herbs: Fresh herbs provide the best flavor; avoid dried herbs if possible.
  • Skipping the Liquid Base: The butter or olive oil mixture is crucial for a moist and flavorful result.

Delicious Variations to Try

Want to switch things up? Here are a few delicious variations of this recipe:

  • Asian-Inspired: Add soy sauce and ginger to the butter mixture for an Asian flair.
  • Spicy Southwest: Use cumin, paprika, and lime juice for a zesty kick.
  • Herbed Mediterranean: Incorporate oregano and feta cheese for a classic Mediterranean twist.
  • Garlic Lovers: Add minced garlic to the butter mixture for an extra punch of flavor.

Storage and Make-Ahead Instructions

This dish is best enjoyed fresh, but if you have leftovers, here’s how to store them:

  • Refrigeration: Store baked fish in an airtight container in the fridge for up to 3 days.
  • Freezing: For longer storage, freeze the fish in a freezer-safe container for up to 2 months. Thaw in the refrigerator before reheating.
  • Reheating: Gently reheat in the oven or microwave, being careful not to overcook.

Nutritional Insights and Dietary Adaptations

This Lemon Herb Baked White Fish is not only delicious but also nutritious. Each serving is rich in protein, omega-3 fatty acids, and vitamins from the fresh herbs and lemon. Here are some dietary adaptations you can make:

  • Gluten-Free: This recipe is naturally gluten-free, making it a safe choice for those with gluten sensitivities.
  • Dairy-Free: Substitute olive oil for butter to keep it dairy-free.
  • Paleo-Friendly: This dish fits well within a paleo diet, emphasizing whole foods without processed ingredients.

Essential Equipment for Success

To create this delicious baked fish, you’ll need:

  • Baking Pan: A shallow baking pan or a sheet pan with raised edges to hold the fish fillets.
  • Mixing Bowl: For combining the butter and seasoning mixture.
  • Measuring Cups and Spoons: Accurate measurements ensure the perfect balance of flavors.
  • Cooking Thermometer: For checking the fish’s doneness.

Serving Suggestions to Elevate Your Meal

To make your meal complete, consider these serving ideas:

  • Fresh Green Salad: A simple arugula, cucumber, and cherry tomato salad drizzled with olive oil and lemon.
  • Grilled Vegetables: Serve with grilled zucchini, peppers, and asparagus for a colorful plate.
  • Couscous or Quinoa: Fluffy grains make a great base to soak up the delicious pan juices.
  • Crusty Bread: Perfect for sopping up every last drop of the flavorful juices.

Frequently Asked Questions (FAQs)

  • What type of white fish is best for this recipe? Mild-flavored fish like cod, tilapia, or halibut work wonderfully.
  • Can I use frozen fish fillets? Yes, but ensure they are fully thawed before cooking.
  • How do I know when the fish is done? The fish should be opaque and flake easily with a fork.
  • Can I prepare this dish ahead of time? You can prepare the seasoning mixture in advance, but it’s best to bake the fish fresh.
  • What can I substitute for butter? Olive oil is a great alternative that keeps the dish healthy.
  • Is this recipe suitable for meal prep? Absolutely! It stores well and can be reheated for quick meals.
  • Can I add more spices? Yes, feel free to customize with your favorite spices for added flavor.
  • What should I serve with baked white fish? Roasted vegetables, salads, or grains like quinoa pair beautifully with this dish.

Conclusion: Join the Celebration!

This Lemon Herb Baked White Fish recipe embodies everything I love about Mediterranean cooking — the fresh flavors, the simplicity, and the joy of sharing a meal with loved ones. So gather around the table, pour a glass of your favorite wine, and savor each bite as you create new memories. Cooking is not just about the food; it’s about the moments we share. Enjoy this delightful dish, and let the Mediterranean spirit inspire you in the kitchen!

Lemon Herb Baked White Fish

Prep Time 10 minutes
Cook Time 15 minutes
Total Time 25 minutes
Servings 4 servings
Calories 250
A simple, flavorful dish featuring tender white fish baked with fresh lemon and herbs, perfect for a quick and healthy meal.

Ingredients

White Fish Fillets

  • 4 pieces white fish fillets (like cod, tilapia, or halibut) (about 6 oz each)
  • 1/4 cup unsalted butter or olive oil (melted)
  • 1 large lemon (sliced into thin rounds, plus extra for juicing)
  • 2 tablespoons fresh parsley (chopped)
  • 1 tablespoon fresh thyme leaves
  • 1 teaspoon black pepper (freshly cracked)
  • 1/2 teaspoon red pepper flakes (optional, for a kick)
  • 1/2 teaspoon salt

Instructions 

  • Preheat oven to 400°F (200°C).
  • Mix melted butter, lemon juice, parsley, thyme, pepper, red pepper flakes, and salt.
  • Arrange fish in a baking dish and pour the mixture over, then top with lemon slices.
  • Bake for 12-15 minutes until fish flakes easily.
  • Serve immediately with pan juices spooned over.

Notes

Ensure not to overcook the fish for best moistness and flavor.
Calories: 250kcal
Cost: $15
Course: Main Course
Cuisine: American
Keyword: fish, herbs, lemon

A Slice of Sunshine Awaits: Your Ultimate Greek Yogurt Lemon Coffee Cake Guide

Welcome to a delightful journey where the zesty aroma of fresh lemons meets the creamy richness of Greek yogurt! This Greek Yogurt Lemon Coffee Cake is not just a dessert; it’s a celebration of flavors that brings sunshine to your table, whether it’s an afternoon gathering, a cozy coffee break, or a festive family feast. As someone who cherishes the Mediterranean spirit, I assure you that this cake will spark joy in your kitchen and hearts alike.

In this comprehensive guide, we’ll explore everything from the ingredients to expert tips, storage solutions, and even variations to cater to your unique taste! So grab your apron, and let’s dive into this culinary adventure together!

Why You’ll Love This Recipe

There are countless reasons to fall in love with this Greek Yogurt Lemon Coffee Cake, but here are the top five:

  • Moist and Tender Texture: Thanks to the Greek yogurt, this cake remains incredibly soft and fluffy, ensuring that every slice is a delightful experience.
  • Bright Lemon Flavor: With the zest and juice of fresh lemons, this coffee cake has a tangy sweetness that brightens your palate without being overwhelming.
  • Versatile Enjoyment: Perfect for any time of day, whether you’re enjoying it with your morning coffee, as an afternoon snack, or as a light dessert post-dinner.
  • Healthier Option: Using Greek yogurt not only adds moisture but also boosts the nutritional profile of the cake, making it a guilt-free indulgence.
  • Easy to Make: With simple ingredients and straightforward steps, this recipe is perfect for both novice and experienced bakers.

Detailed Ingredient Breakdown

Let’s take a closer look at the ingredients that bring this cake to life, along with some substitution options to cater to your needs:

  • 8 oz Greek Yogurt Cream Cheese: This is the star of the show! You can substitute with plain cream cheese if desired, but Greek yogurt adds an extra layer of tanginess.
  • 1/4 cup Granulated Sugar: Sweetness is essential, but feel free to adjust based on your preference or use coconut sugar for a healthier option.
  • 1 Egg: Vital for binding; consider a flaxseed meal substitute for a vegan version.
  • 1 1/2 tsp Freshly Squeezed Lemon Juice: Fresh is best! Bottled lemon juice can work, but it won’t have the same vibrant flavor.
  • 1 1/2 cups All-Purpose Flour: You can use whole wheat flour for added fiber or a gluten-free blend if needed.
  • 1/2 tsp Baking Powder: Essential for leavening; make sure it’s fresh for the best results.
  • 1/4 tsp Baking Soda: This enhances the rise; it’s crucial to balance the acidity of the yogurt.
  • 1/4 tsp Salt: A pinch of salt elevates the flavors.
  • 1/2 cup Vegetable Oil: For moisture, you can replace it with melted coconut oil for a hint of tropical flavor.
  • 3/4 cup Sugar: This is for the cake batter; adjust for sweetness preference.
  • Zest from 1 Lemon: This adds a burst of flavor; don’t skip it!
  • 1 tbsp Lemon Juice: Use extra if you want more lemon flavor.
  • 1/2 cup Flour: For the crumb topping; use oats for a crunchy twist.
  • 2 tbsp Unsalted Butter, Cold and Cubed: This helps create a crisp topping; you can use coconut oil for a dairy-free option.
  • Powdered Sugar for Dusting: Optional, but it adds a lovely finish.

Step-by-Step Instructions to Create Your Cake

A golden-brown Greek yogurt lemon coffee cake with a rich, textured surface.

Now, let’s get to the fun part—baking! Follow these easy steps to whip up your Greek Yogurt Lemon Coffee Cake:

  1. Preheat Oven: Preheat your oven to 350°F (175°C) and prepare a baking dish by greasing it or lining it with parchment paper.
  2. Prepare the Cream Cheese Filling: In a mixing bowl, combine the softened Greek yogurt cream cheese, 1/4 cup granulated sugar, 1 egg, and 1 1/2 tsp lemon juice. Mix until smooth and creamy.
  3. Mix Dry Ingredients: In another bowl, whisk together 1 1/2 cups of flour, 1/2 tsp baking powder, 1/4 tsp baking soda, and 1/4 tsp salt until well combined.
  4. Combine Wet Ingredients: In a large bowl, whisk together 1/2 cup vegetable oil, 3/4 cup sugar, 1 egg, 1/2 cup Greek yogurt, zest from 1 lemon, and 1 tbsp lemon juice. Mix until smooth.
  5. Combine Mixtures: Gradually add the dry ingredients to the wet mixture, stirring until just combined. Do not overmix!
  6. Layer the Batter: Pour half of the batter into the prepared baking dish, followed by the cream cheese filling, and then top with the remaining batter. Use a spatula to smooth the top.
  7. Prepare the Crumb Topping: In a small bowl, mix 1/2 cup flour, 1/4 cup sugar, and the cold cubed butter until crumbly. Sprinkle this mixture over the top of the cake.
  8. Bake: Bake in the preheated oven for 30-35 minutes, or until a toothpick inserted in the center comes out clean.
  9. Cool and Serve: Let the cake cool in the baking dish for about 10 minutes before transferring it to a wire rack. Dust with powdered sugar before serving.

Expert Tips for Baking Success

To ensure your Greek Yogurt Lemon Coffee Cake turns out perfectly every time, here are some expert insights:

  • Room Temperature Ingredients: Using eggs and yogurt at room temperature helps the batter mix more evenly, resulting in a better texture.
  • Don’t Overmix: Gently folding in the dry ingredients prevents the cake from becoming dense and dry.
  • Cool the Cake Properly: Allow the cake to cool completely before slicing to maintain its structure and moisture.
  • Experiment with Flavors: Feel free to incorporate fresh berries or nuts into the cake batter for added flavor and texture.
  • Use Lemon Zest Generously: The zest enhances the lemon flavor without adding extra acidity, creating a balanced taste.
  • Storage Tips: Keep leftovers covered at room temperature for up to 3 days or refrigerate for a week.
  • Freezing for Later: This cake freezes beautifully. Wrap slices in plastic wrap and store in an airtight container for up to 3 months.
  • Presentation Matters: A simple dusting of powdered sugar adds a beautiful finish to your cake and elevates its appearance.
  • Pair with Beverages: This cake pairs wonderfully with coffee, tea, or a glass of fresh lemonade for a refreshing treat.

Common Mistakes and Troubleshooting

Even the best bakers make mistakes! Here are some common pitfalls and how to avoid them:

  • Dry Cake: This usually happens due to overbaking or using too much flour. Make sure to measure accurately and check for doneness a few minutes early.
  • Dense Texture: Overmixing the batter can lead to a heavy cake. Mix just until combined.
  • Flavorless Cake: Always use fresh ingredients, especially lemons, to ensure the best flavor.
  • Crumb Topping Too Dense: Ensure your butter is cold when making the crumb mixture. This keeps it crumbly rather than mushy.

Fun Variations to Try

Want to switch things up? Here are some delightful variations for your Greek Yogurt Lemon Coffee Cake:

  • Berry Delight: Add 1 cup of fresh blueberries or raspberries to the batter for a fruity twist!
  • Nutty Crunch: Fold in 1/2 cup of chopped walnuts or almonds for an added crunch.
  • Spiced Zest: Incorporate a pinch of cinnamon or nutmeg into the batter for a warm, spiced flavor.
  • Lemon Poppy Seed: Add 2 tablespoons of poppy seeds to the batter for a delightful texture and flavor.

Storage and Make-Ahead Instructions

Planning ahead? Here’s how to store your cake and make it in advance:

  • Room Temperature: Store the cake covered at room temperature for up to 3 days.
  • Refrigeration: For longer freshness, keep it in the fridge for up to 1 week.
  • Freezing: Wrap slices in plastic wrap and store in an airtight container in the freezer for up to 3 months.
  • Make-Ahead: You can prepare the batter a day in advance and keep it covered in the fridge until you’re ready to bake.

Frequently Asked Questions (FAQs)

Here are some common questions about this recipe:

  • Can I replace Greek yogurt with sour cream? Yes, sour cream can be used as a substitute, but the flavor will differ slightly.
  • What can I use instead of eggs? Flaxseed meal or applesauce can work as egg substitutes in this recipe.
  • How can I make this cake gluten-free? Use a gluten-free flour blend to replace all-purpose flour.
  • Can I use frozen lemons? Yes, frozen lemons can be used, but fresh lemons provide the best flavor.
  • Is this cake suitable for breakfast? Absolutely! It’s a great way to start your day with a touch of sweetness.
  • What’s the best way to serve this cake? Serve it plain or with a dollop of whipped cream for added indulgence.
  • How can I enhance the lemon flavor? Add more lemon zest or juice to the batter according to your taste.
  • Can I make mini cakes? Yes, you can bake this recipe in muffin tins for delightful mini versions!

Nutritional Tips and Dietary Adaptations

This Greek Yogurt Lemon Coffee Cake is not only delicious but can also be adapted to fit various dietary needs:

  • Low-Calorie Option: Use low-fat Greek yogurt and reduce the sugar for a lighter version.
  • Vegan Variation: Substitute eggs with flaxseed meal and use vegan yogurt and butter.
  • Whole Grain Twist: Replace all-purpose flour with whole wheat flour for added fiber.

Equipment Recommendations

To ensure a seamless baking experience, here are some essential tools:

  • Mixing Bowls: A set of varied sizes will help you mix ingredients easily.
  • Measuring Cups and Spoons: Accurate measurements are key for baking success.
  • Whisk and Spatula: For mixing and folding ingredients without overworking the batter.
  • Baking Dish: A 9×13 inch cake pan is perfect for this recipe.
  • Wire Rack: Ideal for cooling the cake after baking.

Serving Suggestions

Your Greek Yogurt Lemon Coffee Cake is versatile and pairs well with various accompaniments:

  • Fresh Berries: Serve with a side of strawberries, blueberries, or raspberries for a refreshing touch.
  • Whipped Cream: A dollop of whipped cream adds a creamy, luxurious finish.
  • Coffee or Tea: Pair a slice with your favorite brew to enhance the flavors.
  • Iced Tea: A chilled glass of lemon iced tea complements the cake beautifully.

In conclusion, this Greek Yogurt Lemon Coffee Cake is not just a recipe; it’s a heartfelt experience filled with vibrant flavors and cherished memories. Whether you’re baking for a special occasion or simply for yourself, remember that cooking is about joy and discovery. So, gather your loved ones, share a slice, and let the Mediterranean spirit fill your home. Happy baking!

Irresistible Greek Yogurt Lemon Coffee Cake

Prep Time 20 minutes
Cook Time 35 minutes
Total Time 55 minutes
Servings 8 pieces
Calories 350
A delightful coffee cake featuring tangy lemon and creamy Greek yogurt, perfect for breakfast or dessert.

Ingredients

Dough

  • 1 1/2 cups all-purpose flour
  • 1/4 cup granulated sugar
  • 1 egg egg
  • 8 oz greek yogurt cream cheese, softened (or plain cream cheese)
  • 1 1/2 tsp freshly squeezed lemon juice
  • 1/2 cup vegetable oil

Filling

  • 3/4 cup sugar
  • 1 egg egg
  • 1/2 cup greek yogurt
  • Zest from 1 lemon lemon zest
  • 1 tbsp lemon juice (use extra for more lemon flavor)

Topping

  • 1/2 cup flour
  • 1/4 cup sugar
  • 2 tbsp unsalted butter, cold and cubed

Dusting

  • Powdered sugar for dusting

Instructions 

  • Preheat oven to 350°F (175°C). Mix dry ingredients for the batter and combine with wet ingredients until smooth.
  • Prepare the lemon filling by mixing Greek yogurt, sugar, egg, lemon zest, and lemon juice.
  • Pour batter into a greased baking pan, spread lemon filling over it, and sprinkle topping mixture on top.
  • Bake for 35 minutes or until golden brown. Let cool and dust with powdered sugar before serving.

Notes

Ensure not to overmix the batter for a tender crumb.
Calories: 350kcal
Cost: $15
Course: Breakfast, Dessert
Cuisine: Greek
Keyword: Coffee Cake, lemon, Yogurt

A Sweet Journey Awaits: Discover the Joy of Baking a Strawberry Sheet Cake

Welcome, dear friends! Today, we embark on a delightful culinary adventure as we explore the vibrant world of Fresh Strawberry Vanilla Sheet Cake. This recipe is not just about baking; it’s about celebrating the sweetness of life, the love of family, and the joy of sharing delicious moments together. Imagine the warm aroma of vanilla wafting through your kitchen, mingling with the bright scent of fresh strawberries. As we dive into this recipe, you’ll find that every bite is a slice of sunshine, perfect for summer gatherings or cozy family dinners. Let’s get started!

Why You’ll Love This Recipe

This strawberry sheet cake is a must-try for several reasons:

  • Unforgettable Flavor: Bursting with fresh strawberries, this cake captures the essence of summer and will leave your taste buds dancing with joy.
  • Simple and Quick: With straightforward steps and easy-to-find ingredients, you can whip up this cake in no time, making it perfect for any occasion.
  • Perfect for Sharing: The generous size of this sheet cake makes it ideal for gatherings, ensuring there’s enough to go around for family and friends.
  • Customizable: Whether you prefer cream cheese frosting or a light whipped topping, this cake can adapt to your personal taste preferences.
  • Make-Ahead Friendly: You can prepare this cake ahead of time, allowing you to enjoy your celebrations without the last-minute rush.

Essential Ingredients for Your Strawberry Sheet Cake

To craft this beautiful cake, you’ll need the following ingredients. I’ll also share some handy substitutions to make this recipe work for you!

  • Cake Flour (2 1/2 cups): Use all-purpose flour if unavailable, but for a lighter texture, stick with cake flour.
  • Baking Powder (1 1/2 tsp): Ensure it’s aluminum-free for a cleaner taste.
  • Baking Soda (1/2 tsp): This will help the cake rise beautifully.
  • Salt (1/2 tsp): A pinch enhances the flavors.
  • Unsalted Butter (1/2 cup + 3/4 cup): At room temperature, crucial for creating a fluffy texture.
  • Granulated Sugar (1 1/4 cups): Sweetness is key; you can also use coconut sugar for a healthier twist.
  • Vanilla Extract (2 tsp + 1 1/2 tsp): Pure vanilla extract adds depth—avoid imitation if you can.
  • Large Eggs (2): Ensure they’re at room temperature for better emulsification.
  • Buttermilk (1 cup): If you don’t have buttermilk, create your own by adding 1 tablespoon of vinegar to regular milk.
  • Plain Fat-Free Greek Yogurt (1/2 cup): Adds moisture and richness to the cake.
  • Fresh Sliced Strawberries (1 cup + 2 cups): The star of the show! Use ripe strawberries for the best flavor.
  • Cream Cheese (4 oz): For that luscious frosting experience.
  • Powdered Sugar (3 cups): Sweetens the frosting to perfection.

Step-by-Step: How to Make Your Strawberry Sheet Cake

Close-up of a delicious strawberry vanilla sheet cake topped with fresh sliced strawberries.

Now, let’s get to the heart of the matter—baking this delicious creation! Follow these steps carefully to ensure success:

  1. Preheat your oven: Set it to 350°F (175°C). Prepare a 13 x 9” baking pan by spraying it with nonstick spray and lining it with parchment paper.
  2. Mix the dry ingredients: In a medium bowl, whisk together your cake flour, baking powder, baking soda, and salt. This step is crucial for an evenly risen cake.
  3. Cream the butter and sugar: In a larger mixing bowl, beat the room-temperature butter and granulated sugar on medium speed until light and fluffy, about 3-5 minutes. Add the vanilla and mix well.
  4. Incorporate the eggs: Add the eggs one at a time, mixing well after each addition until fully combined.
  5. Combine wet ingredients: In a separate small bowl, mix the buttermilk and Greek yogurt until smooth. This combination adds moisture and tang.
  6. Alternate mixing: Gradually add the dry ingredients to the wet ingredients in three parts, alternating with the buttermilk mixture. Start and end with the flour mixture for best results.
  7. Prepare the batter: Gently spoon the batter into your prepared baking pan, smoothing it out with an offset spatula. Tap the pan on the counter to release any air bubbles.
  8. Add strawberries: Top the batter with sliced strawberries, pressing them gently into the cake batter.
  9. Bake: Place in the oven and bake for 25 to 28 minutes, or until the top is golden and a toothpick inserted in the center comes out clean. Let cool in the pan on a wire rack.
  10. Make the frosting: In a medium bowl, beat the room-temperature butter and cream cheese until smooth. Gradually add the powdered sugar, mixing until well combined, then beat for another minute until fluffy.
  11. Finish the cake: Once the cake is completely cool, dollop the frosting over the top and swirl it with an offset spatula. Chill in the refrigerator for 20 minutes before serving.

Expert Tips for Perfecting Your Strawberry Sheet Cake

Here are some pro tips to ensure your cake is nothing short of spectacular:

  • Room temperature ingredients: Always use room temperature eggs, butter, and dairy for a well-emulsified batter.
  • Don’t overmix: Once you add the dry ingredients, mix only until just combined to keep the cake light and fluffy.
  • Use fresh strawberries: Always opt for ripe, fresh strawberries for maximum flavor and sweetness.
  • Check doneness early: Ovens can vary, so start checking your cake a few minutes before the recommended baking time.
  • Frosting variations: Experiment with different frostings, like a light whipped cream or a strawberry glaze, for a delightful twist.
  • Cool completely: Make sure your cake is completely cool before frosting to prevent melting and sliding.
  • Layer it up: For an extra special treat, consider making this cake as layers, adding frosting and strawberries between each layer.
  • Garnish wisely: Fresh mint leaves or a sprinkle of powdered sugar can elevate the presentation.

Common Mistakes and Troubleshooting

Even the best bakers can face challenges. Here are some common pitfalls and how to avoid them:

  • Dry cake: This can happen if you overbake. Always keep an eye on your cake, especially towards the end of the baking time.
  • Dense texture: Overmixing the batter can lead to a heavy cake. Mix just until combined!
  • Frosting issues: If your frosting is too thick, add a splash of milk. If too thin, add more powdered sugar.
  • Strawberries sinking: Tossing them in a little flour before adding them to the batter can help keep them afloat.

Delicious Variations to Try

Feeling adventurous? Here are some scrumptious variations to elevate your strawberry sheet cake:

  • Chocolate Strawberry Sheet Cake: Add cocoa powder to the batter and top with chocolate ganache for a decadent treat.
  • Nutty Strawberry Crunch: Fold in toasted nuts like almonds or walnuts for added texture and flavor.
  • Strawberry Lemonade Cake: Mix in lemon zest and juice for a refreshing citrus twist.
  • Vegan Strawberry Cake: Substitute eggs with flaxseed meal and use dairy-free yogurt and butter for a plant-based version.

Storage and Make-Ahead Instructions

This cake is perfect for planning ahead! Here’s how to store and prepare:

  • Make-Ahead: You can bake the cake a day in advance and frost it the day you plan to serve it.
  • Storing the cake: Keep the cake tightly covered in the refrigerator for up to 2 days for optimal freshness.
  • Freezing: You can freeze the unfrosted cake for up to 3 months. Wrap it tightly in plastic wrap and aluminum foil before freezing.
  • Thawing: To thaw, place the frozen cake in the fridge overnight before frosting and serving.

Frequently Asked Questions

Let’s address some common queries about this delightful cake:

  • Can I use frozen strawberries? Yes, but make sure to thaw and drain them before use to avoid excess moisture.
  • What can I serve with this cake? Pair it with whipped cream, ice cream, or fresh mint for a delightful dessert experience.
  • How do I know when the cake is done? A toothpick inserted in the center should come out clean or with a few moist crumbs attached.
  • Can I make this gluten-free? Yes, you can substitute the cake flour with a gluten-free flour blend.
  • What’s the best way to frost the cake? Use an offset spatula to create beautiful swirls for a professional finish.
  • How long does the frosting last? The cream cheese frosting can be stored in the fridge for up to a week.
  • Can I add other fruits? Absolutely! Berries like blueberries or raspberries could make a delightful addition.
  • Is this cake suitable for birthdays? Definitely! Its vibrant flavors and beautiful presentation make it a perfect birthday treat.

Nutritional Tips and Dietary Adaptations

This cake can be adapted to meet various dietary needs:

  • Lower Sugar: Reduce the sugar in the cake and frosting without sacrificing flavor—use natural sweeteners if desired.
  • Fat-Free Options: Swap out regular butter for a plant-based butter or use applesauce for a lighter cake.
  • Protein Boost: Incorporate protein powder into the batter for a nutritious twist.

Essential Equipment for Your Baking Adventure

To ensure a smooth baking process, gather the following equipment:

  • Mixing Bowls: A set of varying sizes will help in organizing your ingredients.
  • Hand or Stand Mixer: For creaming butter and sugar to perfection.
  • Baking Pan: A 13 x 9” pan is ideal for this recipe.
  • Offset Spatula: Perfect for spreading frosting evenly.
  • Wire Rack: Essential for cooling your cake completely.

Serving Suggestions to Elevate Your Experience

When it comes to serving your strawberry sheet cake, think outside the box:

  • Pair with Ice Cream: A scoop of vanilla ice cream on the side takes this cake to the next level.
  • Add Fresh Mint: A sprig of mint not only adds color but also a refreshing contrast to the sweetness.
  • Drizzle with Chocolate: A light chocolate drizzle can add a rich contrast and beautiful presentation.
  • Layer with Cream: Serve each slice with a dollop of whipped cream for a luxurious touch.

As we wrap up this baking journey, remember that every slice of this Fresh Strawberry Vanilla Sheet Cake is more than just a dessert; it’s an invitation to gather, share, and create memories. Embrace the joy of baking, and let your kitchen be filled with laughter and delicious aromas. Happy baking, my friends! 🍰

Experience the Joy of Mediterranean Flavors with Spinach Artichoke Stuffed Chicken

Welcome to a culinary journey that captures the essence of Mediterranean cooking! This Spinach Artichoke Stuffed Chicken is more than just a meal; it’s a celebration of flavors, textures, and the warmth of sharing food with loved ones. Imagine biting into juicy chicken breasts, generously filled with a creamy, cheesy mixture of spinach and artichokes, all roasted to perfection. Whether it’s a cozy family dinner or a festive gathering, this dish is bound to impress and satisfy.

In this article, we will explore everything you need to know about making this delightful dish, from the ingredients to expert tips, variations, and more. Let’s dive into the heart of the recipe!

Why You’ll Love This Recipe

Here are just a few reasons why this spinach artichoke stuffed chicken is destined to become a favorite:

  • Deliciously Cheesy Filling: The combination of cream cheese, mozzarella, and Parmesan creates a rich and flavorful stuffing that melts in your mouth.
  • Easy to Prepare: With straightforward steps, you can whip this up even on busy weeknights, making it perfect for any occasion.
  • Impressive Presentation: Stuffed chicken breasts look elaborate but are surprisingly easy to make. Your guests will think you’ve spent hours in the kitchen!
  • Healthy and Satisfying: Packed with vegetables and protein, this dish is both nutritious and filling, perfect for those mindful of their diet.
  • Customizable for Everyone: Whether you’re serving picky eaters or adventurous foodies, this recipe can be easily adapted to suit various tastes.

Ingredients for Spinach Artichoke Stuffed Chicken

Let’s gather our ingredients for this mouthwatering dish!

  • 4 boneless, skinless chicken breasts: The foundation of our dish; ensure they are fresh for the best flavor.
  • 1 cup fresh spinach, chopped: Adds a vibrant color and a nutritious boost. You can substitute with frozen spinach if fresh is unavailable.
  • 1 cup artichoke hearts, chopped: These tender morsels bring unique flavor; canned or frozen works well.
  • 1 cup cream cheese, softened: The creamy base of our filling that binds everything together.
  • 1/2 cup mozzarella cheese, shredded: For that gooey, melty goodness.
  • 1/4 cup Parmesan cheese, grated: Adds a nutty flavor and richness to the filling.
  • 2 cloves garlic, minced: Because every Mediterranean dish needs garlic!
  • 1 teaspoon onion powder: For an extra depth of flavor.
  • 1 teaspoon salt: Essential for enhancing the flavors.
  • 1/2 teaspoon black pepper: A touch of spice to round out the taste.
  • 1 tablespoon olive oil: For searing the chicken to golden perfection.

How to Make Spinach Artichoke Stuffed Chicken

Side angle of Spinach Artichoke Stuffed Chicken, showcasing melted cheese and vibrant greens.

Now that we have our ingredients ready, let’s move on to preparing this delightful dish.

  1. Preheat the Oven: Start by preheating your oven to 375°F (190°C). This ensures your chicken cooks evenly.
  2. Prepare the Stuffing: In a bowl, mix together the spinach, artichoke hearts, cream cheese, mozzarella cheese, Parmesan cheese, garlic, onion powder, salt, and pepper until well combined.
  3. Stuff the Chicken: Carefully slice a pocket into each chicken breast. Be cautious not to cut all the way through. Stuff each pocket with the spinach-artichoke mixture, ensuring it’s generously filled.
  4. Sear the Chicken: Heat olive oil in a skillet over medium heat. Sear the stuffed chicken breasts for 3-4 minutes on each side until golden brown. This step adds a beautiful crust.
  5. Bake the Chicken: Transfer the chicken to a baking dish and bake in the preheated oven for 25-30 minutes, or until the chicken is cooked through and reaches an internal temperature of 165°F (75°C).
  6. Rest and Serve: Let the chicken rest for a few minutes before slicing and serving. This allows the juices to redistribute for maximum flavor.

Pro Tips for Success

Here are some expert insights to help you make the most of your cooking experience:

  • Use Fresh Ingredients: Whenever possible, opt for fresh spinach and artichokes. They enhance the flavor significantly!
  • Don’t Overstuff: While it’s tempting to load up the filling, overstuffing can cause the chicken to burst, leading to a messy presentation.
  • Let it Rest: Allowing the chicken to rest post-baking ensures a juicier bite and makes slicing much easier.
  • Experiment with Spices: Feel free to add red pepper flakes or Italian herbs for an extra kick of flavor.
  • Opt for Cheese Variety: Mix it up! Add goat cheese or feta for a tangy twist in the filling.
  • Serve with a Sauce: Consider drizzling with a balsamic reduction or a lemon garlic sauce for added zest.
  • Meal Prep Friendly: This dish can be assembled in advance and stored in the fridge for a couple of days before baking.
  • Use a Meat Thermometer: Ensure your chicken is perfectly cooked without guesswork.

Common Mistakes and Troubleshooting

Even seasoned cooks can encounter challenges. Here are some common issues and how to avoid them:

  • Dry Chicken: Avoid overcooking your chicken by monitoring its internal temperature. Use a meat thermometer!
  • Filling Leakage: If your stuffing leaks during cooking, try reducing the amount of filling or ensuring your chicken pockets are well sealed.
  • Uneven Cooking: If your chicken breasts are uneven in thickness, pound them to a uniform thickness for even cooking.
  • Too Much Salt: Taste your stuffing before stuffing the chicken. Adjust salt to your preference.

Variations to Try

Want to switch things up? Here are some delicious variations you can try:

  • Bacon-Wrapped Spinach Artichoke Stuffed Chicken: Add a savory twist by wrapping the stuffed chicken in crispy bacon before baking.
  • Sun-Dried Tomato Spinach Artichoke Stuffed Chicken: Incorporate chopped sun-dried tomatoes into the filling for a tangy flavor.
  • Pesto Spinach Artichoke Stuffed Chicken: Blend in some pesto for a burst of herby goodness.
  • Mexican Spinach Artichoke Stuffed Chicken: Spice things up with jalapeños and pepper jack cheese in the filling.

Storage and Make-Ahead Instructions

This dish is not only delicious but also great for meal prep!

  • Refrigeration: Store any leftovers in an airtight container in the refrigerator for up to 3 days.
  • Freezing: You can freeze uncooked, stuffed chicken for up to 2 months. Just thaw overnight in the fridge before cooking.
  • Reheating: To reheat, place in a preheated oven at 350°F (175°C) until warmed through, about 15-20 minutes.

Frequently Asked Questions

Curious about more details? Here are some common questions:

  • Can I use frozen spinach? Yes, just be sure to thaw and drain it well before mixing into the filling.
  • What can I serve with this dish? This stuffed chicken pairs beautifully with a side salad, roasted vegetables, or a light pasta dish.
  • Can I make this dish ahead of time? Absolutely! Assemble the chicken and store it in the fridge until you’re ready to cook.
  • Is this dish gluten-free? Yes, as long as all the ingredients are gluten-free, this recipe is safe for gluten-sensitive individuals.
  • How do I know when the chicken is done? The chicken is fully cooked when it reaches an internal temperature of 165°F (75°C).
  • Can I substitute the chicken? Yes! Try using pork chops or turkey breasts for a different flavor profile.
  • What’s the best way to slice stuffed chicken? Allow it to rest for a few minutes, then slice against the grain for the best texture.
  • Can I add other vegetables to the filling? Definitely! Feel free to add mushrooms, bell peppers, or zucchini for extra flavor and nutrition.

Nutrition Tips and Dietary Adaptations

This spinach artichoke stuffed chicken can fit various dietary needs:

  • Low-Carb Option: Skip the breading and serve with a side of sautéed greens for a low-carb meal.
  • Dairy-Free Option: Substitute cream cheese with cashew cream or dairy-free cheese alternatives.
  • Higher Protein: Add more cheese or serve with a protein-rich side like quinoa or lentils for an extra boost.

Equipment Recommendations

Here’s what you’ll need to make this recipe:

  • Sharp Knife: For easily slicing pockets into the chicken breasts.
  • Mixing Bowl: To combine all the stuffing ingredients.
  • Skillet: For searing the chicken before baking.
  • Baking Dish: A good-quality dish for even cooking in the oven.
  • Meat Thermometer: To check that the chicken is cooked to perfection.

Serving Suggestions

To elevate your meal even further, consider these serving ideas:

  • With a Side Salad: A fresh garden salad drizzled with vinaigrette complements the rich flavors of the chicken.
  • Over Rice or Quinoa: Serve the stuffed chicken over a bed of fluffy rice or quinoa for a complete meal.
  • With Garlic Bread: Pair with warm garlic bread for a comforting dining experience.

In conclusion, this Spinach Artichoke Stuffed Chicken is not just a recipe; it’s a doorway to Mediterranean delight that brings friends and family together around the table. With its creamy filling and tender chicken, it’s sure to become a staple in your cooking repertoire. So, gather your ingredients, put on some music, and let’s make some magic in the kitchen!

Spinach Artichoke Stuffed Chicken: Enjoy Cheesy Flavor Rolls!

Prep Time 15 minutes
Cook Time 30 minutes
Total Time 45 minutes
Servings 4 pieces
Calories 450
Delight in tender chicken breasts filled with a creamy spinach and artichoke mixture, baked to perfection for a cheesy, savory meal.

Ingredients

Chicken

  • 4 pieces boneless, skinless chicken breasts
  • 1 cup fresh spinach, chopped
  • 1 cup artichoke hearts, chopped
  • 1 cup cream cheese, softened
  • 1/2 cup mozzarella cheese, shredded
  • 1/4 cup Parmesan cheese, grated
  • 2 cloves garlic, minced
  • 1 teaspoon onion powder
  • 1 teaspoon salt
  • 1/2 teaspoon black pepper
  • 1 tablespoon olive oil

Instructions 

  • Preheat oven to 375°F (190°C).
  • Mix spinach, artichokes, cream cheese, mozzarella, Parmesan, garlic, onion powder, salt, and pepper.
  • Slice pockets into chicken breasts and stuff with mixture.
  • Sear stuffed chicken in olive oil for 3-4 minutes per side.
  • Bake in oven for 25-30 minutes until cooked through.

Notes

Ensure chicken is fully cooked before serving.
Calories: 450kcal
Cost: $15
Course: Main Course
Cuisine: American
Keyword: Artichoke, cheesy, Chicken, Spinach

Welcome to the Tropical Paradise of Mango Pudding!

Are you ready to embark on a culinary journey that transports you to sun-soaked beaches and vibrant markets? This Easy Mango Pudding Recipe is your passport to tropical bliss! With just a few simple ingredients, you can whip up a creamy, dreamy dessert that’s as delightful to eat as it is to make. Using ripe mangoes and luscious coconut milk, this pudding is not just a treat but a celebration of flavors that will have your taste buds dancing. Join me as we dive into the art of creating the perfect mango pudding!

Why You’ll Love This Recipe

  • Quick and Easy: With just a few steps, you can create a dessert that impresses without the fuss.
  • Fresh Ingredients: Using ripe mangoes means vibrant flavor and natural sweetness, making your pudding a guilt-free indulgence.
  • Customizable: This recipe is versatile! Swap in different fruits or adjust sweetness to your liking.
  • Perfect for Any Occasion: Whether it’s a summer BBQ or a cozy dinner, this pudding fits right in.
  • Vegan-Friendly: Easy to adapt with agar agar for a delightful vegan version, ensuring everyone can enjoy!

Ingredients You’ll Need

Let’s gather our ingredients for this tropical delight. Here’s what you’ll need:

  • 12 oz fully ripened mangoes: Peeled, pitted, and diced for that luscious mango puree.
  • 2 tbsp cold water: To bloom the gelatin and give your pudding the perfect texture.
  • 1.5 tbsp gelatin or 1.5 tsp agar agar: Either works wonderfully to set your pudding — choose agar agar for a vegan option.
  • 1.5 tbsp white granulated sugar: Adjust based on the sweetness of your mangoes.
  • 0.54 cups coconut milk: Full-fat for creaminess, or substitute with evaporated milk for a different flavor.
  • 4 tbsp evaporated milk or extra coconut milk: For a drizzle on top, adding an extra touch of creaminess!

How to Make Easy Simple Mango Pudding Recipe

Side view of a vibrant yellow mango pudding in a clear glass with a smooth texture.

Now that we have our ingredients, let’s get cooking!

  • Step 1 — Blend the Mangoes: Transfer the diced mangoes to a blender or food processor. Blend until smooth. For an ultra-smooth texture, strain the puree through a fine mesh sieve.
  • Step 2 — Bloom the Gelatin: In a small bowl, mix the cold water with the gelatin and let it sit until thickened. This step is crucial for achieving that perfect pudding consistency!
  • Step 3 — Combine Ingredients: Add sugar, coconut milk, and the mango puree to the bloomed gelatin. Whisk everything together until smooth and well-combined.
  • Step 4 — Dissolve the Gelatin: Pour the mango and gelatin mixture into a pot and gently warm it over low heat, stirring frequently. Avoid bringing it to a boil to maintain that silky texture.
  • Step 5 — Chill: Pour the warm mixture into serving bowls or molds. Refrigerate for at least 6 hours or overnight until fully set and firm.
  • Step 6 — Serve and Enjoy: Serve chilled with a drizzle of evaporated milk or coconut milk. Enjoy your refreshing mango pudding with friends and family!

Expert Tips for the Perfect Mango Pudding

  • Choose the right mangoes: Opt for fully ripe, tender mangoes for the best flavor.
  • Don’t rush the blooming: Allow the gelatin to bloom properly for a smooth pudding.
  • Temperature matters: When heating the mixture, keep the temperature low to avoid curdling.
  • Experiment with flavors: Add lime juice or zest for a citrusy twist!
  • Try different milks: Almond or oat milk can be great substitutes for coconut milk.
  • For added texture: Fold in some diced mango or toasted coconut before chilling.
  • Make ahead: This pudding keeps well in the fridge for up to 3 days, making it a perfect make-ahead dessert.
  • Presentation counts: Serve in clear bowls or jars to show off the beautiful layers!

Common Mistakes and Troubleshooting

Even the best cooks can stumble! Here are some common pitfalls and how to avoid them:

  • Gelatin not setting: Ensure you’ve bloomed the gelatin properly and followed the heating instructions.
  • Pudding too sweet: Adjust the sugar based on your mangoes’ ripeness. Taste before adding!
  • Texture too grainy: Blend thoroughly and strain if necessary for a smooth finish.
  • Too much coconut flavor: Use lighter coconut milk or mix with regular milk for a balanced taste.

Variations of Mango Pudding

Mix things up with these fun variations:

  • Mango Coconut Chia Pudding: Add chia seeds for a nutrient boost and a delightful texture.
  • Matcha Mango Fusion: Swirl in some matcha powder to create a vibrant green contrast.
  • Tropical Fruit Medley: Layer with other tropical fruits like pineapple or passionfruit for added flavor.
  • Mango Sticky Rice Pudding: Serve atop sweet sticky rice for a delicious fusion of flavors and textures!

Storage and Make-Ahead Instructions

This mango pudding is perfect for meal prep or entertaining!

  • Storage: Keep covered in the refrigerator for up to 3 days. Make sure it’s well-sealed to avoid absorbing other flavors.
  • Make-Ahead: Prepare the pudding a day in advance for a stress-free dessert on the day of your event.

Frequently Asked Questions

Let’s address some common questions about this delightful dessert:

  • Can I use frozen mangoes? Yes! Just thaw them completely and blend until smooth.
  • Is this recipe gluten-free? Absolutely! All ingredients used are gluten-free.
  • Can I substitute the gelatin? Yes, agar agar works well as a vegan alternative.
  • What can I serve with mango pudding? Consider pairing it with fresh fruit, whipped cream, or a sprinkle of toasted coconut.
  • How can I make it sweeter? Adjust the sugar or use sweetened coconut milk for a sweeter taste.
  • Is it possible to make this pudding in advance? Yes! It’s perfect for making ahead of time and will last in the fridge for several days.
  • Can I add spices? Certainly! A dash of cinnamon or cardamom can elevate the flavor.
  • What’s the best way to serve it? Chill in individual cups or bowls for a beautiful presentation!

Nutritional Tips and Dietary Adaptations

This dessert can fit into various dietary needs:

  • Low-Calorie Version: Use less sugar or opt for a sugar substitute.
  • High-Protein Option: Add Greek yogurt for a protein boost and creaminess.
  • Allergy-friendly: Substitute coconut milk with almond or oat milk if allergies are a concern.

Equipment Recommendations

Here’s what you’ll need to create the ultimate mango pudding:

  • Blender: For creating a smooth mango puree.
  • Mixing Bowls: For combining your ingredients and blooming the gelatin.
  • Measuring Cups and Spoons: Accuracy is key for the perfect pudding consistency.
  • Fine Mesh Sieve: Optional, for extra smoothness in the mango puree.
  • Serving Bowls or Molds: To chill and present your delightful pudding.

Serving Suggestions

Serving this pudding is just as fun as making it! Here are some ideas:

  • Garnish with Fresh Mint: Add a sprig of mint for a pop of color and freshness.
  • Drizzle of Coconut Cream: Elevate the creaminess with a drizzle of thick coconut cream.
  • Top with Fruit or Granola: Fresh berries or crunchy granola can add a delightful contrast to the creamy pudding.

Conclusion: A Celebration of Flavors Awaits!

Your journey to the tropics has just begun with this Easy Mango Pudding Recipe. It’s not just a dessert; it’s a celebration of ripe mangoes, creamy coconut milk, and the joy of sharing food with loved ones. So grab your ingredients, turn up the music, and let the flavors of the Mediterranean and beyond fill your kitchen with warmth and happiness. Enjoy your mango pudding, and remember — every bite is a little piece of paradise!

Easy Simple Mango Pudding Recipe

Prep Time 10 minutes
Cook Time 15 minutes
Total Time 25 minutes
Servings 4 servings
Calories 180
A quick and delicious mango pudding perfect for a refreshing treat. Made with ripe mangoes and a smooth gelatin base, it's easy to prepare and delightful to enjoy.

Ingredients

Fruits

  • 12 oz fully ripened and tender mangoes, peeled, pitted, and diced
  • 2 tbsp cold water
  • 1.5 tbsp gelatin or agar agar powder (for vegan version)
  • 1.5 tbsp white granulated sugar
  • 0.54 cups coconut milk (full fat) (or substitute with evaporated milk, heavy cream, or evaporated coconut milk)
  • 4 tbsp evaporated milk or coconut milk (for vegan version)

Instructions 

  • Blend mangoes until smooth, then strain for extra smoothness.
  • Mix cold water with gelatin and let bloom, then add sugar, coconut milk, and mango puree. Whisk until combined.
  • Warm the mixture gently over low heat until gelatin dissolves, avoiding boiling.
  • Pour into molds or bowls and refrigerate for at least 6 hours until set.
  • Serve chilled with a drizzle of evaporated or coconut milk.

Notes

Use ripe mangoes for best flavor and sweetness.
Calories: 180kcal
Cost: $10
Course: Dessert
Cuisine: International
Keyword: Mango

Start Your Day Right with a Strawberry Banana Smoothie

Welcome to a delightful journey through the vibrant world of smoothies! Today, we’re diving into a classic that never fails to brighten your mornings: the Strawberry Banana Smoothie. This refreshing blend of frozen strawberries and ripe bananas, enhanced with creamy yogurt and a hint of honey, is not just a drink; it’s an experience. As someone who grew up in the heart of Seville, I can tell you, every sip captures the sun-kissed essence of Mediterranean life. So, let’s mix, blend, and savor this delightful concoction!

Why You’ll Love This Recipe

This strawberry banana smoothie isn’t just delicious; it’s packed with benefits that make it a must-have in your morning routine:

  • Quick & Easy: Ready in under 5 minutes, perfect for busy mornings.
  • Nutritious: Rich in vitamins C and B6, potassium, and antioxidants, making it a healthful choice.
  • Versatile: Perfect as a breakfast option or a post-workout snack, providing energy and nourishment.
  • Family-Friendly: A hit among kids and adults alike, ensuring everyone gets their dose of fruit.
  • Customizable: With endless variations and substitutions, you can personalize it to your taste!

Ingredients Breakdown

Let’s look at the ingredients that make this strawberry banana smoothie sing:

  • 1 cup frozen strawberries: These provide the base and a vibrant pink color, along with a refreshing taste.
  • 1 ripe banana: Adds natural sweetness and a creamy texture. Choose a banana that’s just ripe for the best flavor!
  • 1/2 cup milk: Whether you prefer dairy or non-dairy, almond milk is a fantastic choice for a subtle nutty flavor.
  • 1/4 cup Greek yogurt (optional): For an extra creamy texture and a protein boost, Greek yogurt is a superb addition.
  • 1 tablespoon honey or maple syrup (optional): Sweeten to taste; honey adds a floral note, while maple syrup offers a cozy flavor.
  • 1/4 teaspoon vanilla extract (optional): A splash of vanilla elevates the flavor profile.
  • A few ice cubes (optional): For those who love a frosty drink, ice cubes can enhance the chill factor.
  • Optional toppings: Fresh strawberries, banana slices, granola, or chia seeds can add texture and visual appeal.

How to Make the Perfect Strawberry Banana Smoothie

Side view of a creamy strawberry banana smoothie with ice cubes and garnished with fruit.

Ready to blend? Follow these simple steps:

  1. Gather all ingredients and ensure your fruit is prepped (washed, hulled, and sliced).
  2. Add milk, banana, yogurt (if using), sweetener, vanilla extract, and frozen strawberries to the blender.
  3. For a thicker smoothie, add a few ice cubes.
  4. Blend on low speed, then gradually increase to high. Blend until completely smooth (about 30–60 seconds).
  5. Taste and adjust consistency or sweetness as needed with more milk or sweetener.
  6. Pour into a tall glass or smoothie cup.
  7. Add desired toppings such as sliced fruit or granola.
  8. Serve immediately and enjoy fresh!

Pro Tips for Blending Like a Pro

Want to elevate your smoothie game? Here are some expert insights:

  • Use Frozen Fruit: For a thicker, creamier texture, always opt for frozen strawberries and bananas.
  • Layering Matters: Add liquids first, then solid ingredients. This helps the blender mix everything evenly.
  • Don’t Over-Blend: Blend just until smooth. Over-blending can lead to a watery texture.
  • Experiment with Greens: Toss in a handful of spinach or kale for added nutrients without altering the flavor.
  • Use a High-Speed Blender: A powerful blender can crush ice and frozen fruit effortlessly, yielding a silky smoothie.
  • Adjust Sweetness: Always start with less sweetener; you can always add more but can’t take it away!
  • Chill Your Glass: A chilled glass keeps your smoothie cold longer, enhancing the drinking experience.
  • Prep Ahead: Make smoothie packs by pre-portioning ingredients in freezer bags for quick blending on busy mornings.

Common Mistakes and Troubleshooting

Even the best of us can stumble. Here’s how to avoid common pitfalls:

  • Too Thick: Add more milk a tablespoon at a time until you reach your desired consistency.
  • Too Sweet: Balance out with a squeeze of lemon juice to cut through the sweetness.
  • Not Blending Enough: If you have chunks, keep blending! It’s all about achieving a smooth mixture.
  • Unbalanced Flavor: If it’s too fruity, a touch of salt can enhance the overall flavor.

Delicious Variations to Try

Feeling adventurous? Here are some variations that can spice up your smoothie:

  • Peanut Butter Banana Smoothie: Add a tablespoon of peanut butter for a creamy, nutty twist.
  • Berry Blast: Substitute half of the strawberries with blueberries or raspberries for a mixed berry delight.
  • Chocolate Twist: Add a tablespoon of cocoa powder or chocolate protein powder for a chocolaty indulgence.
  • Mango Madness: Use mango chunks instead of banana for a tropical flavor experience.

Storage and Make-Ahead Instructions

Want to prep for the week? Here’s how to store your smoothies:

  • Refrigerate: If you have leftovers, store them in an airtight container for up to 24 hours. Give it a good shake before enjoying!
  • Freezer Packs: Prepare smoothie packs with all ingredients (except liquids) in freezer bags for a quick blend on busy days.

Frequently Asked Questions

Got questions? Let’s answer some common ones:

  • Can I use fresh strawberries instead of frozen? Yes, but your smoothie will be less thick. Consider adding more ice cubes.
  • Is this smoothie vegan? Yes, just use non-dairy milk and skip the yogurt or use a plant-based alternative.
  • How can I make this smoothie more filling? Add a scoop of protein powder or oats for added fiber and protein.
  • Can I make this smoothie ahead of time? Yes, but it’s best consumed fresh. You can prep the ingredients ahead of time and blend when ready.
  • What’s the best blender for smoothies? A high-speed blender works best for a smooth texture, but any blender will do in a pinch.
  • Can I add vegetables to this smoothie? Absolutely! Spinach or kale can be added without changing the flavor much.
  • How long can I store this smoothie? It’s best to drink it fresh, but you can keep it in the fridge for up to 24 hours.
  • Is this smoothie good for weight loss? Yes! It’s low in calories and high in nutrients, making it a great option for a healthy diet.

Nutritional Tips and Dietary Adaptations

This smoothie is not only refreshing but can also cater to various dietary needs:

  • Low-Calorie Option: Use unsweetened almond milk and skip the sweeteners for a lighter drink.
  • Keto-Friendly: Replace bananas with avocado for a creamy, low-carb alternative.
  • High-Protein: Add Greek yogurt or a protein powder to boost your protein intake.

Equipment Recommendations

For the best results, here’s what I recommend:

  • High-Speed Blender: A must-have for achieving that perfect smooth consistency.
  • Measuring Cups: To get the right proportions for your ingredients.
  • Spatula: To help scrape down the sides of the blender for even blending.

Serving Suggestions

How to enjoy your strawberry banana smoothie:

  • Garnish with Fresh Fruit: Top with sliced strawberries or banana for a beautiful presentation.
  • Pair with Breakfast: Serve alongside whole-grain toast or oatmeal for a balanced meal.
  • Take It On-the-Go: Pour into a travel mug for a nutritious boost while you’re out and about.

Conclusion

In the world of smoothies, the strawberry banana smoothie stands as a timeless classic. Not only does it bring a burst of flavor and nutrition to your mornings, but it also encapsulates the joy of cooking and sharing. So grab your blender, gather your ingredients, and let’s celebrate the simple pleasure of making something delicious. Here’s to many more joyful mornings filled with smoothies that inspire and nourish!

Strawberry Banana Smoothie

Prep Time 5 minutes
Total Time 5 minutes
Servings 2 cups
Calories 250
A delicious and refreshing smoothie combining strawberries, banana, and yogurt for a healthy treat.

Ingredients

Fruits

  • 1 cup frozen strawberries
  • 1 piece ripe banana, peeled and sliced
  • 1/2 cup milk (dairy or non-dairy, almond milk recommended)
  • 1/4 cup Greek yogurt (optional)
  • 1 tablespoon honey or maple syrup (optional, to taste)
  • 1/4 teaspoon vanilla extract (optional)
  • A few ice cubes ice cubes (optional)

Optional toppings

  • N/A fresh strawberries, banana slices, granola, chia seeds

Instructions 

  • Combine milk, banana, yogurt (if using), sweetener, vanilla, and strawberries in a blender.
  • Add ice cubes if desired, then blend until smooth (30–60 seconds).
  • Pour into a glass, add toppings, and serve immediately.

Notes

Adjust sweetness and thickness with more or less milk and sweetener as desired.
Calories: 250kcal
Cost: $10
Course: Breakfast, Snack
Cuisine: American
Keyword: Fruit, Smoothie

Indulge in a Tropical Delight: Your Guide to Mango Pudding

Do you crave a dessert that transports you straight to a sun-soaked tropical paradise? Look no further than this mango pudding recipe! Crafted with luscious, ripe mangoes and creamy coconut milk, this pudding is a celebration of flavors and textures that will brighten any day. In just a few simple steps, you’ll create a velvety dessert that not only satisfies your sweet tooth but also encapsulates the essence of Mediterranean culinary traditions.

Why You’ll Love This Recipe

Here are just a few reasons this mango pudding should be your go-to dessert:

  • Quick and Easy: With just a handful of ingredients and straightforward steps, you can whip up this dessert in no time.
  • Fresh and Flavorful: The vibrant taste of ripe mangoes combined with rich coconut milk creates an explosion of flavor with every spoonful.
  • Customizable: Whether you prefer a vegan version or want to add a twist with different toppings, this recipe is versatile to suit your tastes.
  • Health Benefits: Mangoes are rich in vitamins and antioxidants, making this dessert a guilt-free indulgence.
  • Perfect for Any Occasion: Whether it’s a casual family dinner or a festive gathering, this pudding is sure to impress your guests.

Ingredients Breakdown

To make this delightful mango pudding, you’ll need the following ingredients:

  • 12 oz mangoes: Choose fully ripened, tender mangoes for the best flavor. Avoid sour varieties.
  • 0.54 cups coconut milk: Use full-fat coconut milk for a rich, creamy texture. You can substitute with evaporated milk or heavy cream if desired.
  • 2 tbsp cold water: This will help activate the gelatin.
  • 1.5 tbsp white granulated sugar: Adjust to taste; this sweetens the pudding perfectly.
  • 1.5 tbsp gelatin: This is essential for setting the pudding. For a vegan alternative, use 1.5 tsp agar agar powder.
  • 4 tbsp evaporated milk: Adds a silky smoothness; feel free to substitute with coconut milk for a fully vegan option.

Pro Tips for Perfect Mango Pudding

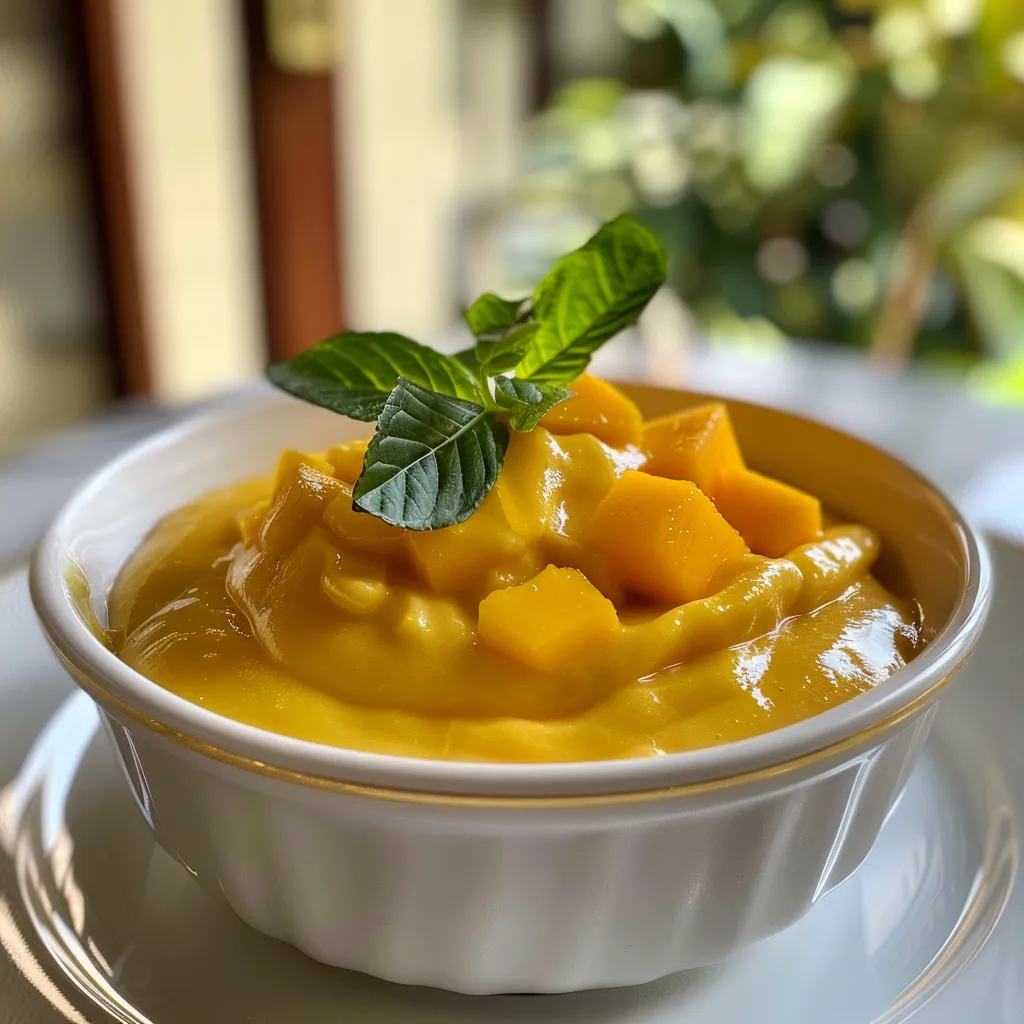
Lush mango pudding with a smooth texture, garnished elegantly.

To ensure your mango pudding turns out flawlessly, keep these expert tips in mind:

  • Choosing the Right Mango: Opt for mangoes that are sweet, fragrant, and slightly soft to the touch. This ensures maximum flavor.
  • Thoroughly Blend: Blend the mangoes until completely smooth to avoid any fibrous texture in the pudding.
  • Gelatin Activation: Allow the gelatin to bloom in cold water before adding it to the mixture to achieve the best consistency.
  • Temperature Control: Heat the mixture gently, avoiding boiling, as high temperatures can affect the gelatin’s setting ability.
  • Refrigerate Overnight: For the best results, let the pudding set overnight in the refrigerator, ensuring a perfect texture.
  • Experiment with Toppings: Top with fresh fruits, shredded coconut, or a drizzle of honey for added flavor and presentation.
  • Serving Temperature: Serve chilled for a refreshing treat, especially on warm days.
  • Presentation Matters: Use beautiful glassware to serve, as the vibrant yellow of the pudding will brighten up any table.

Avoid These Common Mistakes

Even the best chefs can make mistakes! Here are some common pitfalls to avoid:

  • Using Unripe Mangoes: Always choose ripe mangoes for optimal sweetness and flavor.
  • Not Blooming Gelatin Properly: Failing to hydrate the gelatin can result in a lumpy pudding.
  • Overheating the Mixture: Keep the temperature low when warming the mixture to prevent the gelatin from losing its setting power.
  • Skipping the Refrigeration: Don’t rush the chilling process; a few hours in the fridge makes all the difference.

Variations to Try

Feeling adventurous? Here are some delightful variations of the classic mango pudding:

  • Tropical Fusion: Add passion fruit puree for a tangy twist.
  • Coconut Cream Delight: Top with whipped coconut cream for an extra layer of creaminess.
  • Berry Bliss: Serve with a medley of fresh berries for a pop of color and flavor.
  • Chocolate Drizzle: For the chocolate lovers, drizzle melted dark chocolate on top before serving.

Storage and Make-Ahead Instructions

This mango pudding is perfect for meal prepping or making ahead of time:

  • Refrigeration: Store in an airtight container in the refrigerator for up to 4 days.
  • Freezing: While it’s best enjoyed fresh, you can freeze it for up to a month. Just remember to let it thaw overnight in the fridge before serving.
  • Make-Ahead: Prepare the pudding a day in advance to allow the flavors to meld beautifully.

Frequently Asked Questions

Here are some common questions about making mango pudding:

  • Can I use frozen mangoes? Yes, thaw frozen mangoes and make sure to drain any excess liquid before blending.
  • What if I don’t have gelatin? You can substitute with agar agar or cornstarch as a thickening agent.
  • Is this pudding vegan? Yes, simply use agar agar and coconut milk to make it vegan-friendly.
  • Can I make this pudding sugar-free? Yes, feel free to use sugar alternatives like stevia or monk fruit sweetener.
  • How long does it take to set? Allow at least 6 hours in the refrigerator for the pudding to set perfectly.
  • Can I add other flavors? Absolutely! Try adding vanilla extract or lime juice for an exciting twist.
  • What is the best way to serve this pudding? Serve it chilled, garnished with fruits or a sprinkle of coconut for that extra tropical feel.
  • How can I tell if the pudding is set? The pudding should be firm to the touch but still jiggle slightly when shaken.

Nutritional Tips and Dietary Adaptations

This mango pudding can be adapted to fit various dietary needs:

  • Low-Carb Version: Use a low-carb sweetener and serve with nuts instead of fruit.
  • Dairy-Free: Stick with coconut milk and avoid any dairy products.
  • Nut-Free: Ensure to use ingredients that are free from nuts, especially in toppings.

Equipment Recommendations

To make your cooking experience smoother, here are some essential tools:

  • High-Speed Blender: For a silky smooth mango puree.
  • Mixing Bowls: Use a large bowl for mixing ingredients.
  • Fine Sieve: Optional, but recommended for an ultra-smooth pudding.
  • Measuring Cups and Spoons: Accurate measurements are key for the perfect pudding.
  • Serving Dishes: Prepare beautiful serving dishes to showcase your creation.

Serving Suggestions

Elevate your mango pudding experience with these serving ideas:

  • Fresh Fruit Topping: Top with slices of fresh mango, kiwi, or berries.
  • Mint Leaves: Garnish with fresh mint for a refreshing contrast.
  • Coconut Flakes: Sprinkle toasted coconut flakes for added texture.
  • Chocolate Shavings: A decadent touch for chocolate lovers!

In conclusion, making this tropical mango pudding is not just about creating a dessert; it’s about embracing the joy of cooking and sharing flavors that resonate with culture and tradition. So gather your ingredients, invite your loved ones, and savor every delicious bite of this bright and beautiful treat!

Mango Pudding

Prep Time 15 minutes
Cook Time 10 minutes
Total Time 25 minutes
Servings 4 servings
Calories 150
A creamy and refreshing mango pudding perfect for a quick dessert. Made with ripe mangoes and gelatin or agar agar, it's easy to prepare and delightfully smooth.

Ingredients

Fruits and liquids

  • 12 oz mangoes (fully ripened and tender, avoid sour mangoes)
  • 0.54 cups coconut milk (full fat; or substitute with evaporated milk, heavy cream, or evaporated coconut milk)
  • 2 tbsp cold water
  • 1.5 tbsp white granulated sugar
  • 1.5 tbsp gelatin (or 1.5 tsp agar agar powder for vegan)
  • 4 tbsp evaporated milk (or coconut milk for vegan)

Instructions 

  • Peel, pit, and blend mangoes into a smooth puree. Strain if desired.
  • Mix cold water and gelatin; let sit for 30-45 seconds.
  • Add sugar, coconut milk, and mango puree; whisk until smooth.
  • Heat mixture gently until gelatin dissolves, about 4-5 minutes. Pour into molds or bowls.
  • Refrigerate for at least 6 hours until set. Serve with extra coconut or evaporated milk.

Notes

Use ripe mangoes for best flavor and texture.
Calories: 150kcal
Cost: $10
Course: Dessert
Cuisine: International
Keyword: Mango

Welcome to the vibrant world of lemon coconut cake, a dessert that sings with the zesty brightness of fresh lemons and the rich creaminess of coconut. This cake is not just a treat; it’s a celebration of flavors that brightens any occasion! Today, I’ll guide you through every step of creating this delightful recipe, transforming simple ingredients into a festive masterpiece that offers a slice of sunshine in every bite.

Why You’ll Love This Recipe

This cake is not just about taste; it’s about experience! Here are a few reasons why this lemon coconut cake will become your go-to recipe:

  • Bright and Zesty Flavor: The combination of tangy lemon juice and creamy coconut creates a symphony of flavors that dance on your palate.
  • Perfect for Any Occasion: Whether it’s a birthday, a sunny picnic, or just a Tuesday treat, this cake fits right in.
  • Customizable Layers: With the option for lemon curd filling and coconut frosting, you can adjust the flavors to suit your preferences.
  • Visually Stunning: Layers of lemon zest and shredded coconut make this cake not only delicious but also a showstopper!
  • Easy to Make: With clear steps and tips, even a novice baker can achieve perfection!

Ingredients You’ll Need

Let’s dive into the heart of our cake! Here’s what you’ll need to create this luscious lemon coconut cake:

  • 5 large egg whites: Essential for a fluffy texture.
  • 1 ½ cup canned unsweetened full-fat coconut milk: This adds richness and moisture.
  • 1 tablespoon coconut flavoring or extract: For an extra kick of coconut goodness.
  • 3 cups cake flour: The secret to a light and airy cake.
  • 2 ⅓ cups granulated sugar: Sweetness to balance the tart lemon.
  • 4 ½ teaspoons baking powder: Our leavening agent for perfect rise.
  • ½ teaspoon salt: Enhances all the flavors.
  • 1 cup unsalted butter, softened to room temperature: For richness and flavor.
  • 1 cup freshly squeezed lemon juice: The star of our show!
  • 3 lemons, zested: For that intense lemon fragrance.
  • 10 large egg yolks: Adds richness and color.
  • 8 oz full-fat cream cheese, cubed and softened: For our creamy frosting.
  • 1 cup powdered sugar: For sweetness in the frosting.
  • 2 ½ cups heavy cream: To whip into fluffy clouds.
  • 1 ½ cups sweetened shredded coconut: For that delightful texture and flavor.

Pro Tips for Baking Success

To ensure your lemon coconut cake comes out perfectly, consider these expert tips:

  • Room Temperature Ingredients: Ensure butter, eggs, and cream cheese are at room temperature for smooth mixing.
  • Measure Flour Correctly: Spoon and level flour instead of scooping directly from the bag to avoid a dense cake.
  • Don’t Overmix: Mix just until combined to keep the cake tender.
  • Use Fresh Lemons: Fresh juice and zest deliver the best flavor compared to bottled alternatives.
  • Cool Completely: Let your cake cool completely before frosting to prevent melting.
  • Whip Cream Just Right: Beat heavy cream until stiff peaks form for the fluffiest frosting.
  • Chill the Cake: Refrigerate the cake for an hour after frosting to set everything beautifully.
  • Test for Doneness: Insert a toothpick into the center; it should come out clean or with a few moist crumbs.

Common Mistakes & Troubleshooting

Slice of moist Lemon Coconut Cake showcasing layers of lemon and coconut cream filling.

Even seasoned bakers can run into issues. Here’s how to avoid common pitfalls:

  • Dense Cake: This often results from overmixing or incorrect flour measurement.
  • Too Sweet: Balance sweetness by adjusting the sugar or incorporating a tangy component like lemon curd.
  • Frosting Not Sticking: Ensure the cake is completely cooled and the frosting is whipped to stiff peaks.
  • Overbaked Cake: Keep an eye on your cake and check for doneness a few minutes before the timer goes off.

Variations to Try

Feel like mixing things up? Here are a few delicious variations to explore:

  • Lemon Coconut Layer Cake: Stack multiple layers for a towering delight.
  • Gluten-Free Option: Substitute cake flour with a gluten-free blend.
  • Adding Berries: Incorporate fresh berries within the layers for an added burst of flavor.
  • Coconut Cream Frosting: Use whipped coconut cream instead of heavy cream for a lighter frosting.

Storage and Make-Ahead Instructions

Want to prepare your lemon coconut cake ahead of time? Here’s how to store it:

  • In the Fridge: Store leftover cake in an airtight container for up to 5 days.
  • Frozen Layers: Freeze cake layers wrapped in plastic wrap for up to 3 months. Thaw completely before frosting.
  • Frosting Storage: Keep frosting in the fridge for up to 3 days; re-whip before use.

Frequently Asked Questions

Got questions? I’ve got answers! Here’s what others often ask about this lemon coconut cake:

  • Can I use all-purpose flour instead of cake flour? Yes, but your cake may be denser. For best results, stick with cake flour.
  • What’s the best way to zest a lemon? Use a microplane or fine grater to avoid the bitter white pith.
  • Can I make this cake dairy-free? Absolutely! Substitute milk with coconut cream and use dairy-free butter.
  • How do I ensure my cake rises properly? Make sure your baking powder is fresh and that you measure accurately.
  • What can I use instead of coconut milk? Almond milk or any non-dairy milk can work, but the flavor will differ.
  • How can I make it less sweet? Reduce the sugar in the cake or use a tart lemon curd filling.
  • Is it possible to add a filling? Yes! Lemon curd makes a fabulous filling between layers.
  • Can I serve this cake at room temperature? Yes, it’s delicious at room temperature or chilled!

Nutrition Tips and Dietary Adaptations

If you’re interested in health-conscious adaptations:

  • Reduce Sugar: Use a sugar substitute like erythritol for lower-calorie options.
  • Add Fiber: Incorporate whole grain flour for a nutrition boost.
  • Lower Fat: Use Greek yogurt in place of cream cheese for a lighter frosting.

Essential Equipment Recommendations

Gathering the right tools can make all the difference. Here are my must-haves for this recipe:

  • Mixing Bowls: A set of mixing bowls in various sizes for all your ingredients.
  • Electric Mixer: A stand mixer or hand mixer for whipping cream and batter.
  • Measuring Cups and Spoons: Precision is key in baking!
  • Cake Pans: Use 9-inch round cake pans for even baking.
  • Offset Spatula: Perfect for spreading frosting smoothly.

Serving Suggestions

How to serve your lemon coconut cake for maximum enjoyment:

  • With Fresh Berries: Serve slices with a side of fresh berries for a pop of color and flavor.
  • Drizzle of Lemon Glaze: A light lemon glaze adds the perfect finishing touch.
  • Pair with Tea or Coffee: This cake goes wonderfully with a cup of tea or coffee.

As you embark on this delightful baking journey, remember that cooking is not just about following recipes; it’s about creating memories and sharing joy. Enjoy every slice of your lemon coconut cake, and don’t forget to invite friends over to taste your creation. Happy baking!

Lemon Coconut Cake

Prep Time 30 minutes
Cook Time 45 minutes
Total Time 1 hour 15 minutes
Servings 12 pieces
Calories 450
A moist and flavorful cake combining the tang of lemon with the richness of coconut, perfect for any celebration.

Ingredients

Egg Whites

  • 5 large egg whites

Coconut Milk

  • 1 ½ cup canned unsweetened full-fat coconut milk (divided)

Coconut Flavoring

  • 1 tablespoon coconut flavoring or extract

Cake Flour

  • 3 cups cake flour

Granulated Sugar

  • 2 ⅓ cups granulated sugar

Baking Powder

  • 4 ½ teaspoons baking powder

Salt

  • ½ teaspoon salt

Unsalted Butter

  • 1 cup unsalted butter (softened to room temperature)

Butter

  • ½ cup butter

Granulated Sugar

  • 1 cup granulated sugar

Lemon Juice

  • 1 cup freshly squeezed lemon juice (about 3-4 lemons)

Lemons

  • 3 lemons zested lemons

Egg Yolks

  • 10 large egg yolks

Cream Cheese

  • 8 oz full-fat cream cheese (cubed and softened)

Powdered Sugar

  • 1 cup powdered sugar

Coconut Flavoring/Extract

  • 1 teaspoon coconut flavoring/extract or vanilla extract

Salt

  • ¼ teaspoon salt

Heavy Cream

  • 2 ½ cups heavy cream

Shredded Coconut

  • 1 ½ cups sweetened shredded coconut

Instructions 

  • Preheat oven and prepare cake pans.
  • Mix dry ingredients and creamed butter, then add egg yolks, lemon juice, and zest.
  • Whip egg whites until stiff peaks form and fold into batter.
  • Bake until golden and cool completely.
  • Prepare frosting with cream cheese, powdered sugar, coconut flavoring, and heavy cream; assemble and decorate the cake.

Notes

Ensure all ingredients are at room temperature for best results.
Calories: 450kcal
Cost: $15
Course: Dessert
Cuisine: American
Keyword: cake, coconut, lemon

Welcome to Your Green Detox Journey

Are you ready to elevate your health and skin with a vibrant, nutrient-packed drink? This Green Detox Smoothie is not just a drink; it’s a celebration of nature’s best offerings, designed to make you feel radiant inside and out. Packed with fresh greens, hydrating fruits, and a sprinkle of superfood goodness, this smoothie delivers an energizing kick that you can enjoy any time of the day. Let’s dive into the delightful world of green smoothies that nourish your body and brighten your skin!

Why You’ll Love This Recipe

This green detox smoothie isn’t just delicious; it’s a powerhouse of benefits that will have you glowing from the inside out. Here are five reasons to adore this recipe:

  • Brightens Your Skin: The combination of spinach and green apple works wonders for your complexion, giving it a fresh, luminous glow.
  • Boosts Hydration: Coconut water and cucumber keep you hydrated, which is essential for maintaining skin elasticity and overall health.
  • Supports Digestion: Chia seeds and ginger aid digestion, helping to keep your gut happy and functioning optimally.
  • Easy to Customize: This smoothie is versatile; you can tweak it to suit your taste, whether you prefer a sweeter blend or a more tangy kick.
  • Quick and Convenient: Perfect for busy mornings, this smoothie takes just minutes to prepare and can even be made ahead!

Ingredients Breakdown

Ready to blend? Here’s what you need for this green detox smoothie and some handy substitutions to keep your creativity flowing:

  • 1 cup unsweetened coconut water or water: This forms the base of your smoothie. If you prefer a creamier texture, use almond milk instead.
  • 1 packed cup baby spinach or kale: Both are excellent sources of vitamins A, C, and K. If you’re not a fan of these greens, try Swiss chard or collard greens.
  • 1/2 small cucumber, sliced: For hydration and crunch! You can also use zucchini for a similar effect.
  • 1/2 green apple or pear, chopped: Adds natural sweetness. A ripe banana can also work for creaminess.
  • 1/2 frozen banana: This gives the smoothie a creamy texture. Fresh banana works too, but your smoothie will be less cold.
  • 1 tablespoon fresh lemon juice: Brightens the flavor and enhances vitamin C. For a twist, try lime juice!
  • 1/2 inch fresh ginger, peeled: Adds a zesty kick and aids digestion. If you prefer milder flavors, reduce the amount.
  • 1 tablespoon chia seeds or ground flaxseed: These are rich in omega-3 fatty acids and fiber. You can skip them if you’re short on time.
  • Optional: 1/4 avocado: This adds creaminess and healthy fats. If you’re avoiding fats, you can omit it.
  • Optional: handful of mint: For a refreshing twist! Basil is another great herb to consider.

Expert Tips for the Perfect Smoothie

Close-up view of a green smoothie, showcasing its thick texture and fresh ingredients like spinach and cucumber.

Let’s ensure your green detox smoothie turns out perfectly every time. Here are some pro tips:

  • Layer Your Ingredients: Always add liquids first, followed by soft ingredients, and then the harder ones. This helps your blender do its magic smoothly.
  • Adjust Texture: If your smoothie is too thick, add a splash more water; if it’s too thin, throw in some ice or an extra banana for thickness.
  • Taste and Tweak: Don’t hesitate to adjust flavors. More lemon for brightness or extra ginger for a spicy kick can transform your smoothie.
  • Use Frozen Fruits: Frozen fruits can enhance the smoothie’s creaminess and chill it perfectly. Stock up on seasonal fruits to freeze for later!
  • Blend in Stages: If you have a low-powered blender, blend the greens and liquid first until smooth, then add the rest of the ingredients.
  • Experiment with Add-Ins: Try adding protein powder, nut butter, or even oats for an extra boost of energy.
  • Don’t Overdo It: While it’s tempting to add all the superfoods, stick to a few key ingredients to maintain balance.
  • Stay Mindful of Sugar: If you’re using sweeter fruits, balance with greens or lemon to keep sugar levels in check.

Common Mistakes and Troubleshooting

Even the best of us make mistakes in the kitchen! Here’s how to troubleshoot common issues:

  • Too Thick?: Add a little more liquid until you reach your desired consistency.
  • Too Sweet?: A splash more lemon juice can cut through sweetness and balance the flavors.
  • Too Bitter?: If the greens are overpowering, add a small amount of honey or maple syrup to sweeten.
  • Separation Issues: If your smoothie separates after blending, give it a quick stir before drinking; this is normal with homemade smoothies.

Variations of the Green Detox Smoothie

Shake things up with these exciting variations of your green detox smoothie:

  • Tropical Green Detox: Swap the apple for pineapple and add a bit of coconut milk for a tropical twist.
  • Berry Blast: Add a handful of mixed berries for a deliciously sweet and antioxidant-rich option.
  • Chocolate Green Delight: Toss in a tablespoon of cocoa powder for a rich, chocolatey flavor that satisfies sweet cravings.
  • Nutty Green Smoothie: Add a tablespoon of almond butter for an extra protein punch and creaminess.

Storage and Make-Ahead Instructions

Want to save time? Here’s how to store your green detox smoothie:

  • Make-Ahead: You can prep smoothie bags with all the ingredients (except liquid) and store them in the freezer. Just blend with your choice of liquid in the morning.
  • Storing Leftovers: If you have leftovers, store them in an airtight container in the fridge for up to 24 hours. Shake well before drinking.

Frequently Asked Questions

Got questions? We’ve got answers! Here are some common inquiries about the green detox smoothie:

  • Can I use frozen greens? Yes! Frozen spinach or kale works perfectly fine and can even make your smoothie creamier.
  • Is this smoothie good for weight loss? Yes! It’s low in calories while being rich in nutrients, making it a great choice for weight management.
  • Can I add protein powder? Absolutely! Adding a scoop of your favorite protein powder can enhance the smoothie’s nutrient profile.
  • How often should I drink this smoothie? You can enjoy this smoothie daily or a few times a week as part of a balanced diet.
  • What if I don’t like spinach? Feel free to substitute with kale, Swiss chard, or even lettuce for a different flavor profile.
  • Can I make this smoothie vegan? Yes! All ingredients are naturally vegan; just ensure your protein powder (if used) is also plant-based.
  • What’s the best time to drink this smoothie? Morning is ideal, but it’s a refreshing beverage any time of day!
  • Can kids enjoy this smoothie? Yes! It’s a fun and tasty way for kids to get their greens.

Nutrition Tips and Dietary Adaptations

Enhance the health benefits of your green detox smoothie with these nutrition tips:

  • For Extra Fiber: Add a tablespoon of psyllium husk or oats to improve digestion and satiety.
  • For Healthy Fats: Include nuts or seeds to help absorb fat-soluble vitamins from the greens.
  • For Low-Carb Options: Skip the banana and use more avocado, which is low in carbs and high in healthy fats.

Equipment Recommendations

To make your smoothie experience seamless, consider these essential kitchen tools:

  • High-Powered Blender: Invest in a good-quality blender to achieve that ultra-smooth texture.
  • Measuring Cups and Spoons: Ensure accuracy in your ingredient measurements for consistent results.
  • Spatula: A spatula can help you scrape down the sides of the blender to get every last drop of goodness.

Serving Suggestions

How about pairing your green detox smoothie with something delightful? Here are some serving ideas:

  • Nut Butter Toast: Enjoy a slice of whole-grain toast with almond or peanut butter for a complete breakfast.
  • Fruit Salad: A light fruit salad on the side complements the smoothie perfectly.
  • Granola Parfait: Layer your smoothie with yogurt and granola for a delicious parfait!

Conclusion

Your journey into the world of green detox smoothies is just beginning! This nourishing green detox smoothie is a simple yet powerful way to boost your health, brighten your skin, and invigorate your spirit. So grab your blender, mix up this recipe, and sip your way to radiance. Remember, cooking is not just about feeding your body; it’s a joyful celebration of culture, family, and creativity. Cheers to your health and happiness!

Green Detox Smoothie For Glowing Skin

Prep Time 5 minutes
Total Time 5 minutes
Servings 1 cup
Calories 180
A refreshing smoothie packed with greens and citrus to boost your skin’s glow and energy.

Ingredients

Liquid

  • 1 cup unsweetened coconut water or water

Soft ingredients

  • 1 cup baby spinach or kale
  • 0.5 small cucumber, sliced

Chopped fruit

  • 0.5 green apple or pear green apple or pear, chopped
  • 0.5 frozen banana frozen banana

Flavorings and seeds

  • 1 tablespoon fresh lemon juice
  • 0.5 inch fresh ginger, peeled
  • 1 tablespoon chia seeds or ground flaxseed

Optional add-ins

  • 1/4 avocado avocado
  • handful mint mint

Instructions 

  • Add liquids first, then soft ingredients, then harder ingredients.
  • Blend until smooth and silky.
  • If too thick, add water; if too thin, add ice or more banana.
  • Taste and adjust with lemon or ginger as desired.

Notes

Use fresh ingredients for best flavor and nutrition.
Calories: 180kcal
Cost: $12
Course: Smoothie
Cuisine: Healthy
Keyword: detox, Green, Skin

Layers of Joy: The Magic of Strawberry Shortcake Trifles

Welcome, dear friends! Today, we’re going to embark on a delightful culinary journey as we explore the enchanting world of strawberry shortcake trifles. These mini masterpieces are not only a feast for the eyes but also a celebration of flavors, combining fresh strawberries, luscious whipped cream, and moist cake in a way that makes every gathering feel like a special occasion. Whether you’re preparing for a summer picnic, a birthday bash, or simply craving something sweet, this recipe is sure to bring smiles and warmth to your table. Let’s dive into the layers of joy!

Why You’ll Love This Recipe

This strawberry shortcake trifle recipe isn’t just about satisfying your sweet tooth; it’s a celebration of flavors and textures. Here are five reasons to fall in love with this dish:

  • Versatile Delight: These trifles can be customized with various fruits and flavors, making them perfect for any season or occasion.
  • Easy to Assemble: No need for fancy baking skills! Layering the ingredients is simple and fun, making it a great activity for family and friends.
  • Visual Appeal: The beautiful layers of strawberries, cream, and cake create a stunning presentation that will impress your guests.
  • Make-Ahead Friendly: Prepare these trifles a day in advance to save time and enhance the flavors as they meld together.
  • Perfect Portion Control: Individual servings in jars mean everyone gets their own delicious dessert, reducing the urge to overindulge!

Strawberry Shortcake Trifle Ingredients

Gather the following ingredients to create your own strawberry shortcake trifles. Feel free to explore substitutions to suit your taste:

  • All-purpose flour: 2 cups (284g), plus more for dusting the pan.
  • Cornstarch: 3 tablespoons (26g) for a light texture.
  • Salt: 1/2 teaspoon, essential for flavor balance.
  • Baking soda: 1/2 teaspoon to help the cake rise.
  • Baking powder: 1/2 teaspoon, ensures a fluffy cake.
  • Unsalted butter: 12 tablespoons (170g), softened, for richness.
  • Granulated sugar: 1 1/2 cups (315g), sweetens the cake and cream.
  • Lemon zest: 1 teaspoon, adds a refreshing citrus note.
  • Large eggs: 4, for structure and moisture.
  • Vanilla extract: 1 1/2 teaspoons, enhances the flavor.
  • Sour cream: 1 cup (283g), light version works too, for creaminess.
  • Fresh strawberries: 2 lbs, diced, plus 12 small whole for garnish.
  • Powdered sugar: 3/4 cup (90g), for the whipped cream.
  • Heavy cream: 2 cups (475ml), for the ultimate whipped topping.
  • Cream cheese: 6 oz (170g), softened for a decadent layer.
  • Vanilla extract: 1/2 teaspoon, for the cream layer.

Pro Tips for the Best Trifle

Juicy strawberry shortcake trifles in a clear glass, showcasing vibrant red strawberries and whipped cream.

To make your strawberry shortcake trifles unforgettable, keep these expert tips in mind:

  • Use Fresh Ingredients: Opt for ripe strawberries to ensure maximum flavor and sweetness.
  • Layer Wisely: Start with cake, then add cream, followed by strawberries. This creates a perfect blend of textures.
  • Chill Before Serving: Allow the assembled trifles to chill in the fridge for at least 2 hours. This helps the flavors meld beautifully.
  • Experiment with Flavors: Try adding a splash of liqueur to the cream or using different fruits for a unique twist.
  • Presentation Matters: Use clear glass jars or cups to showcase the stunning layers and colors.
  • Don’t Overwhip the Cream: Stop whipping when soft peaks form for a light, airy texture.
  • Consider Gluten-Free Options: Substitute all-purpose flour with a gluten-free blend for a delightful version everyone can enjoy.
  • Use a Piping Bag: For a more decorative whipped cream layer, pipe the cream onto the strawberries for a beautiful finish.

Common Mistakes and Troubleshooting

Even the best chefs make mistakes! Here are some common errors and how to avoid them:

  • Dry Cake: Avoid overbaking! Keep an eye on the cake as it bakes; it should be golden brown and a toothpick should come out clean.
  • Too Watery Cream: If your whipped cream is too runny, ensure your bowl and beaters are cold before whipping and avoid over-whipping.
  • Strawberries Turning Mushy: Use fresh strawberries and avoid cutting them too far in advance to maintain their texture.
  • Overly Sweet Trifle: Balance sweetness by reducing sugar in the cream or adding a pinch of salt to enhance flavors.

Delicious Variations of Strawberry Shortcake Trifles

Feel free to get creative with your trifles! Here are some variations to try:

  • Mixed Berry Trifle: Substitute strawberries with a mix of raspberries, blueberries, and blackberries for a berry medley.
  • Chocolate Strawberry Trifle: Add layers of chocolate cake and chocolate ganache for a decadent twist.
  • Banana Cream Trifle: Substitute some strawberries with sliced bananas and add a layer of banana pudding for a tropical flair.
  • Peach Melba Trifle: Use fresh peach slices and raspberry sauce instead of strawberries for a summery delight.

Storage and Make-Ahead Instructions

Want to prepare your trifles in advance? Here’s how:

  • Make-Ahead: Assemble your trifles a day in advance. They taste even better after chilling overnight!
  • Storage: Keep the trifles covered in the refrigerator for up to 3 days. However, best consumed within 2 days for fresh taste.

Frequently Asked Questions

Here are some common questions about strawberry shortcake trifles:

  • Can I freeze the trifles? No, it’s best to avoid freezing as the texture of the cream and strawberries will change.
  • What can I use instead of sour cream? Greek yogurt works beautifully as a substitute for sour cream.
  • How do I make my whipped cream more stable? Add a tablespoon of cornstarch or instant pudding mix to the cream while whipping to help stabilize it.
  • Can I use store-bought cake? Absolutely! Using store-bought pound cake can save time and still taste delicious.
  • How can I make this recipe vegan? Substitute dairy products with plant-based alternatives like coconut cream and almond milk.
  • What type of container is best for serving? Clear glass jars or cups are ideal for showcasing the beautiful layers of this dessert.
  • Can I use frozen strawberries? Fresh strawberries are recommended for the best flavor and texture, but frozen can be used if thawed and drained.
  • How long do these keep? Best enjoyed within 2-3 days when stored in the refrigerator.

Nutrition Tips and Dietary Adaptations

If you’re looking to adjust this recipe for dietary preferences, consider the following:

  • Lower Sugar Options: Use a sugar substitute like stevia or erythritol for a lower-calorie version.
  • Gluten-Free: Utilize gluten-free all-purpose flour to accommodate those with gluten sensitivities.
  • Dairy-Free: Substitute heavy cream with coconut cream and use dairy-free cream cheese.

Equipment Recommendations

To make these trifles, here’s what you’ll need:

  • Mixing Bowls: A set of mixing bowls in various sizes for preparing each layer.
  • Electric Mixer: A hand or stand mixer for whipping cream and mixing the cake batter.
  • Measuring Cups and Spoons: Accurate measurements are key to achieving the best results.
  • Clear Glass Jars or Cups: Perfect for serving and showing off those beautiful layers!

Serving Suggestions

When it’s time to serve, consider these ideas for an extra touch of charm:

  • Garnish with Fresh Mint: A sprig of mint on top adds a refreshing touch and a pop of color.
  • Pair with a Glass of Sparkling Wine: Elevate your dessert experience with a bubbly drink to complement the sweetness.
  • Decorative Toppings: Drizzle with chocolate sauce or add shaved chocolate for an elegant finish.

In conclusion, strawberry shortcake trifles are a beautiful, delicious way to celebrate any occasion! With layers of creaminess, fruity freshness, and cake bliss, they are sure to become a family favorite. So grab your ingredients, put on some music, and let’s create something magical together that will not only fill bellies but also warm hearts. Bon appétit!

Strawberry Shortcake Trifles

Prep Time 30 minutes
Cook Time 20 minutes
Total Time 50 minutes
Servings 8 servings
Calories 450
A delightful layered dessert combining tender cake, fresh strawberries, and creamy toppings, perfect for summer gatherings.

Ingredients

Cake

  • 284 g all-purpose flour (plus more for dusting pan)
  • 26 g cornstarch
  • 0.5 tsp salt
  • 0.5 tsp baking soda
  • 0.5 tsp baking powder
  • 170 g unsalted butter (softened)
  • 315 g granulated sugar
  • 1 tsp lemon zest
  • 4 large eggs
  • 1.5 tsp vanilla extract
  • 283 g sour cream (light preferred)

Filling & Topping

  • 907 g fresh strawberries (diced, plus 12 small whole for garnish)
  • 45 g granulated sugar
  • 475 ml heavy cream
  • 170 g cream cheese (softened)
  • 0.5 tsp vanilla extract
  • 90 g powdered sugar

Instructions 

  • Prepare the cake batter by mixing dry ingredients, then add wet ingredients and bake until golden.
  • Slice the cooled cake into cubes.
  • Mix diced strawberries with sugar and set aside.
  • Whip heavy cream with powdered sugar and vanilla until stiff peaks form.
  • Layer cake cubes, strawberries, and whipped cream in glasses or bowls, then top with whole strawberries.

Notes

Use fresh strawberries for best flavor and texture.
Calories: 450kcal
Cost: $15
Course: Dessert
Cuisine: American
Keyword: Strawberries