Author

rafael

Browsing

Sunshine in Every Slice: Discover the Irresistible Orange Almond Cake

Welcome, my friends! Today, we’re diving into a delightful journey that captures the essence of Mediterranean sunshine — the Irresistible Orange Almond Cake. This cake is not just a dessert; it’s a celebration of flavors, a warm hug in every bite, and a perfect centerpiece for gatherings. Whether you’re hosting a festive dinner or simply indulging in a sweet moment, this cake will brighten your day. Let’s explore the rich history and vibrant ingredients that make this cake a must-try!

Why You’ll Love This Recipe

  • Citrus Bliss: The fresh oranges infuse the cake with a zesty brightness that lifts your spirits.
  • Moist and Flavorful: Thanks to ground almonds, this cake is incredibly moist with a delightful texture that melts in your mouth.
  • Gluten-Free Delight: Made without flour, this cake is perfect for gluten-sensitive friends while still being incredibly satisfying.
  • Simple Ingredients: With just a few pantry staples, you can whip up this cake in no time. Perfect for those spontaneous baking moments!
  • Versatile Treat: Whether served plain, dusted with powdered sugar, or layered with a citrus buttercream, this cake is adaptable for any occasion.

Ingredients for Irresistible Orange Almond Cake

Let’s gather the essentials! Here’s what you’ll need to create this delicious masterpiece:

  • 2 large oranges: Fresh, high-quality oranges are recommended for the best flavor. Use organic if possible!
  • 1 cup ground almonds: Weigh for accuracy, as almond sizes can vary. This is the heart of the cake!
  • 1 cup granulated sugar: Adds sweetness and balances the tartness of the oranges.
  • 4 large eggs: Essential for binding and creating a light texture.
  • 1 teaspoon baking powder: This will help the cake rise beautifully.
  • 1/2 teaspoon salt: Enhances all the flavors in your cake.
  • 1/4 cup olive oil (or melted butter): Adds moisture and richness. I love the flavor olive oil brings!
  • Powdered sugar: For dusting, optional but oh-so-pretty!

Directions to Create Your Orange Almond Cake

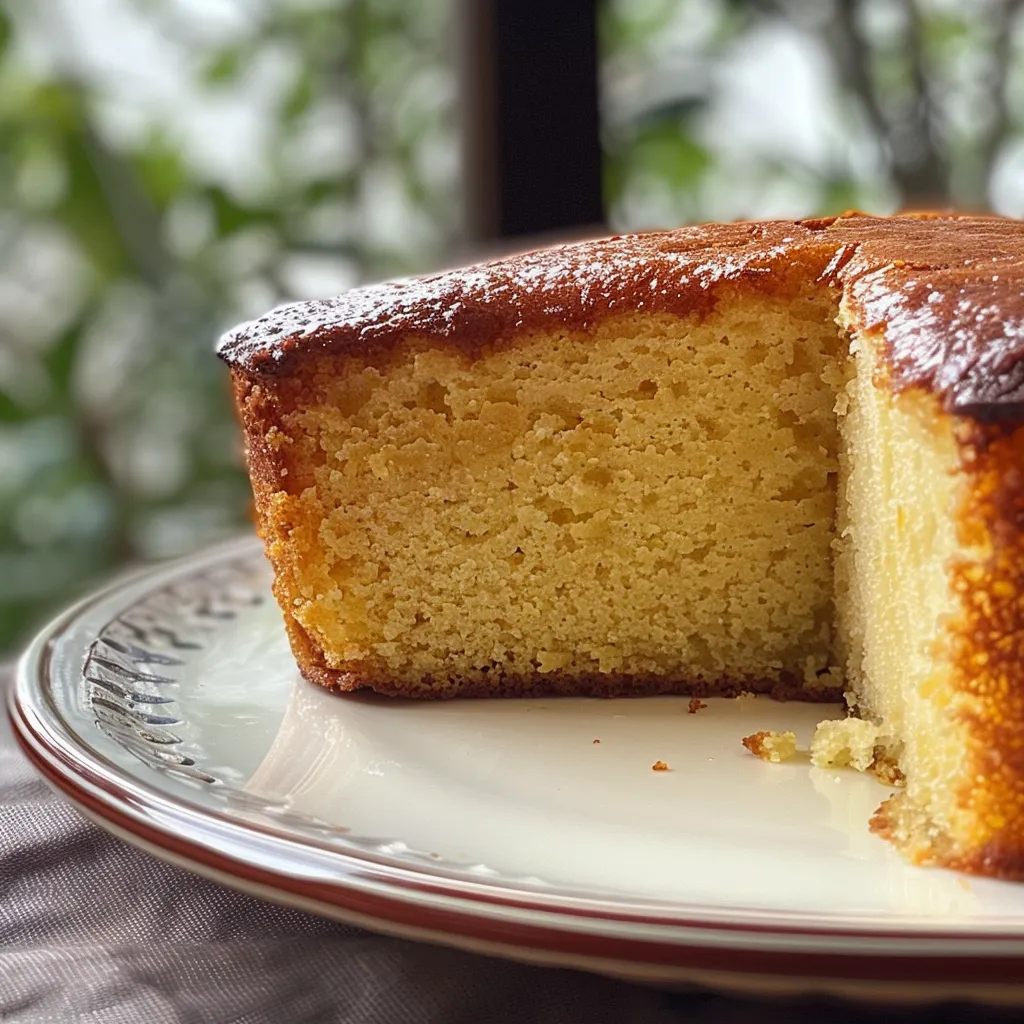
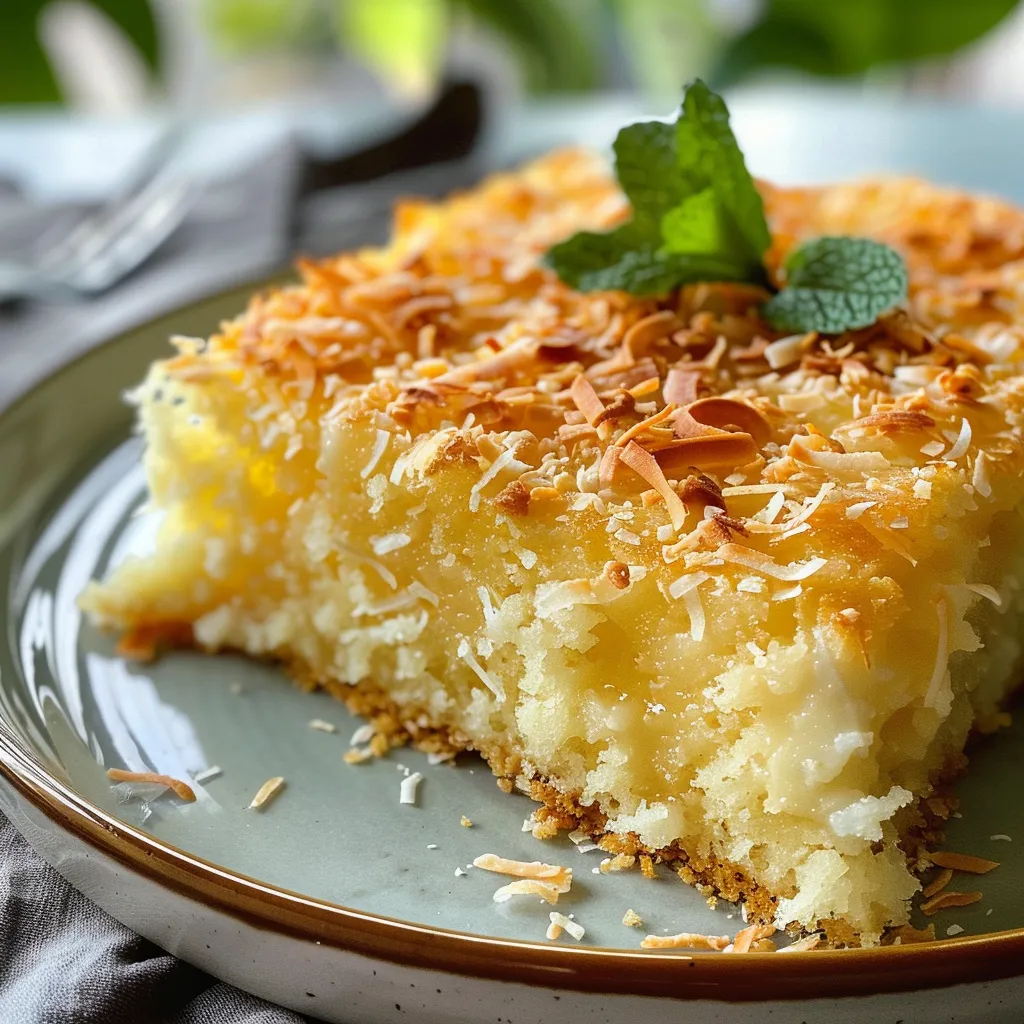
A delectable slice of orange almond cake, showcasing its vibrant orange tint and crumbly almond topping.

Are you ready to bake? Let’s get started! Follow these steps for a cake that’s sure to impress:

  1. Preheat the Oven: Preheat your oven to 350°F (175°C). Grease and line a 9-inch round cake pan with parchment paper.
  2. Prepare the Oranges: Boil the whole oranges in water for about 30 minutes or until soft. Let them cool, then cut and remove the seeds. Puree the entire fruit in a blender.
  3. Mix the Wet Ingredients: In a large bowl, whisk together the orange puree, eggs, and olive oil until well combined.
  4. Combine Dry Ingredients: In another bowl, mix the ground almonds, sugar, baking powder, and salt.
  5. Blend Together: Gradually add the dry ingredients to the wet mixture, stirring gently until fully combined.
  6. Pour and Bake: Pour the batter into the prepared cake pan and smooth the top. Bake for 40-45 minutes or until a toothpick inserted into the center comes out clean.
  7. Cool and Serve: Allow the cake to cool in the pan for 10 minutes before transferring it to a wire rack. Dust with powdered sugar before serving, if desired.

Expert Tips for Baking Success

Here are some pro tips to ensure your irresistible orange almond cake turns out perfectly:

  • Use Fresh Ingredients: Always opt for fresh oranges and high-quality almonds to enhance the flavor of your cake.
  • Check Oven Temperature: Ovens can vary; use an oven thermometer to ensure accurate temperature for even baking.
  • Don’t Overmix: Mix until just combined to avoid a dense texture; some lumps are perfectly fine!
  • Let It Rest: Allow the cake to cool completely before slicing for the best texture and flavor.
  • Experiment with Flavors: Consider adding a splash of almond extract for an extra layer of flavor!
  • Use a Springform Pan: For easy removal, a springform pan works wonders, especially for delicate cakes.
  • Pair with Whipped Cream: A dollop of whipped cream or a scoop of vanilla ice cream elevates the cake to new heights.
  • Store Properly: Keep the cake wrapped at room temperature for up to 3 days, or refrigerate for longer freshness.

Common Mistakes and Troubleshooting

Even the best bakers encounter challenges. Here are some common mistakes to avoid:

  • Overbaking: Keep a close eye on the cake; if it’s dry, it’s overbaked! Aim for a moist crumb.
  • Too Much Sugar: Adjust the sugar to your taste; the oranges provide natural sweetness.
  • Using Old Oranges: Stale oranges can lead to a less vibrant flavor. Always use fresh!
  • Inaccurate Measurements: Invest in a kitchen scale for precision, especially with ground almonds.

Variations of Irresistible Orange Almond Cake

If you’re feeling adventurous, here are some exciting variations to try:

  • Chocolate Drizzle: Melt dark chocolate and drizzle over the cooled cake for a decadent touch.
  • Citrus Medley: Incorporate other citrus fruits like lemons or limes for a vibrant flavor twist.
  • Nutty Topping: Top with toasted almonds or hazelnuts for added crunch and flavor.
  • Layered Delight: Create a layered cake by baking two rounds and filling with orange curd or whipped cream.

Storage and Make-Ahead Instructions

Planning ahead? Here’s how to store your cake properly:

  • Room Temperature: The cake lasts for up to 3 days at room temperature when wrapped tightly.
  • Refrigerate: For extended freshness, store in the fridge for up to a week. Just be sure to cover it!
  • Freezing: You can freeze slices for up to a month. Wrap them well to avoid freezer burn, and thaw before serving.

Frequently Asked Questions

Here are some common questions and answers about this delicious cake:

  • Can I make this cake ahead of time? Yes, this cake stores well and can be made up to 3 days in advance.
  • Is this cake gluten-free? Absolutely! It’s made with ground almonds instead of flour.
  • Can I substitute the oranges? You can use other citrus fruits, but adjust the sugar accordingly.
  • What can I serve with this cake? It pairs beautifully with whipped cream, a scoop of ice cream, or fresh fruit.
  • How do I know when the cake is done? A toothpick inserted in the center should come out clean or with a few moist crumbs.
  • Can I add frosting? Yes! A light citrus buttercream or cream cheese frosting complements the flavors beautifully.
  • What’s the best way to store leftovers? Wrap tightly and store in an airtight container in the fridge or at room temperature.
  • Can I use almond flour instead of ground almonds? Yes, almond flour works well for this recipe, but ensure it’s finely ground.

Nutritional Tips and Dietary Adaptations

This Orange Almond Cake is not only a treat for the taste buds but can be adapted for various dietary needs:

  • Low Sugar Option: Reduce the sugar by half and consider using a natural sweetener like honey or maple syrup.
  • Nut-Free Version: Swap ground almonds for ground oats or sunflower seeds for a nut-free alternative.
  • Vegan Adaptation: Replace eggs with flaxseed meal and use coconut oil instead of olive oil for a vegan twist.

Recommended Equipment

Here’s a quick list of equipment that will make your baking experience smoother:

  • 9-inch Round Cake Pan: Essential for the perfect shape.
  • Blender or Food Processor: For pureeing the oranges effortlessly.
  • Mixing Bowls: A set of various sizes is always handy for mixing ingredients.
  • Whisk: A good whisk is crucial for aerating your batter.
  • Cooling Rack: To cool your cake evenly and prevent sogginess.

Serving Suggestions

Now that you’ve baked this stunning cake, here are some delightful serving suggestions:

  • Garnish with Fresh Fruit: Add slices of oranges or berries on top for a fresh touch.
  • Drizzle with Honey: A light drizzle of honey adds sweetness and a lovely sheen.
  • Serve with Tea or Coffee: Pairing this cake with a warm beverage creates the perfect afternoon treat.

Conclusion: Join the Celebration with Orange Almond Cake

There you have it, friends! The Irresistible Orange Almond Cake is not just a recipe; it’s an invitation to celebrate life, flavor, and togetherness. Whether you savor it alone or share it with loved ones, this cake is sure to become a cherished addition to your culinary repertoire. So, roll up your sleeves, gather your ingredients, and let’s create something beautiful together. Happy baking!

Irresistible Orange Almond Cake

Prep Time 15 minutes
Cook Time 45 minutes
Total Time 1 hour
Servings 8 pieces
Calories 350
This moist and flavorful orange almond cake combines fresh citrus with nutty richness, perfect for any occasion.

Ingredients

Fruits

  • 2 large oranges (Fresh, high-quality oranges recommended for best flavor.)

Dry ingredients

  • 1 cup ground almonds (Weigh for accuracy, as almond sizes can vary.)
  • 1 cup granulated sugar
  • 1 teaspoon baking powder
  • 1/2 teaspoon salt
  • 1/4 cup olive oil (or melted butter)

Optional toppings

  • Powdered sugar (for dusting, optional)

Instructions 

  • Preheat the oven to 350°F (175°C). Grease a cake pan.
  • Boil the oranges for 30 minutes, then blend until smooth.
  • Mix orange puree with ground almonds, sugar, baking powder, salt, and eggs.
  • Pour batter into the prepared pan and bake for 45 minutes.
  • Allow to cool, then dust with powdered sugar if desired.
Notes

This cake is best enjoyed fresh but can be stored for a day or two in an airtight container.
Calories: 350kcal
Cost: $15
Course: Dessert
Cuisine: European
Keyword: almond, cake, orange

Sweeten Your Day with Strawberry Shortcake Cups

Welcome to the delightful world of strawberry shortcake cups! If you’re looking for a dessert that not only tantalizes the taste buds but also celebrates the beauty of fresh strawberries and fluffy cream, you’ve come to the right place. This incredible recipe is a delightful twist on a classic, perfect for any gathering or as a sweet treat to enjoy at home. With layers of juicy strawberries, light cake, and airy whipped cream, every bite sings of summer! Let’s dive into the details of this delightful dessert and make your next occasion unforgettable.

Why You’ll Love This Recipe

  • Easy to Prepare: With simple ingredients and straightforward steps, you can whip up these shortcake cups in no time, even if you’re a kitchen novice!
  • Fresh Ingredients: Using ripe strawberries and homemade whipped cream elevates this dessert, enhancing the sweetness of fresh flavors.
  • Customizable: You can easily switch ingredients to suit dietary preferences or personal tastes, making this recipe versatile and inclusive.
  • Perfect for Any Occasion: Whether it’s a summer party, a family gathering, or a quiet evening treat, these cups are sure to impress.
  • Individual Servings: Each cup is a perfectly portioned delight, making it easy for guests to enjoy without the fuss of cutting a cake.

Gather Your Ingredients

Before we get started, let’s review the ingredients you’ll need for making these scrumptious strawberry shortcake cups:

  • 2 cups of strawberries, chopped – Use the ripest, juiciest strawberries for maximum flavor.
  • 1/4 cup granulated sugar – This will help to sweeten the strawberries and create a lovely syrup.
  • 1 teaspoon vanilla extract – Adds a beautiful aroma and flavor depth.
  • 1 cup all-purpose flour – The base for your cake layers.
  • 1/4 cup granulated sugar (for the cake) – Sweetens the cake nicely without overpowering.
  • 2 teaspoons baking powder – To give your cake a light, fluffy texture.
  • 1/4 teaspoon salt – Balances the sweetness and enhances flavors.
  • 1/2 cup milk – Keeps the cake moist and tender.
  • 1/3 cup vegetable oil – Ensures a rich texture in your cake.
  • 1 large egg – Binds the ingredients together.
  • 1 cup heavy whipping cream – For the luscious whipped topping.
  • Additional sugar (optional) – For sweetening the whipped cream to your taste.

Step-by-Step Instructions

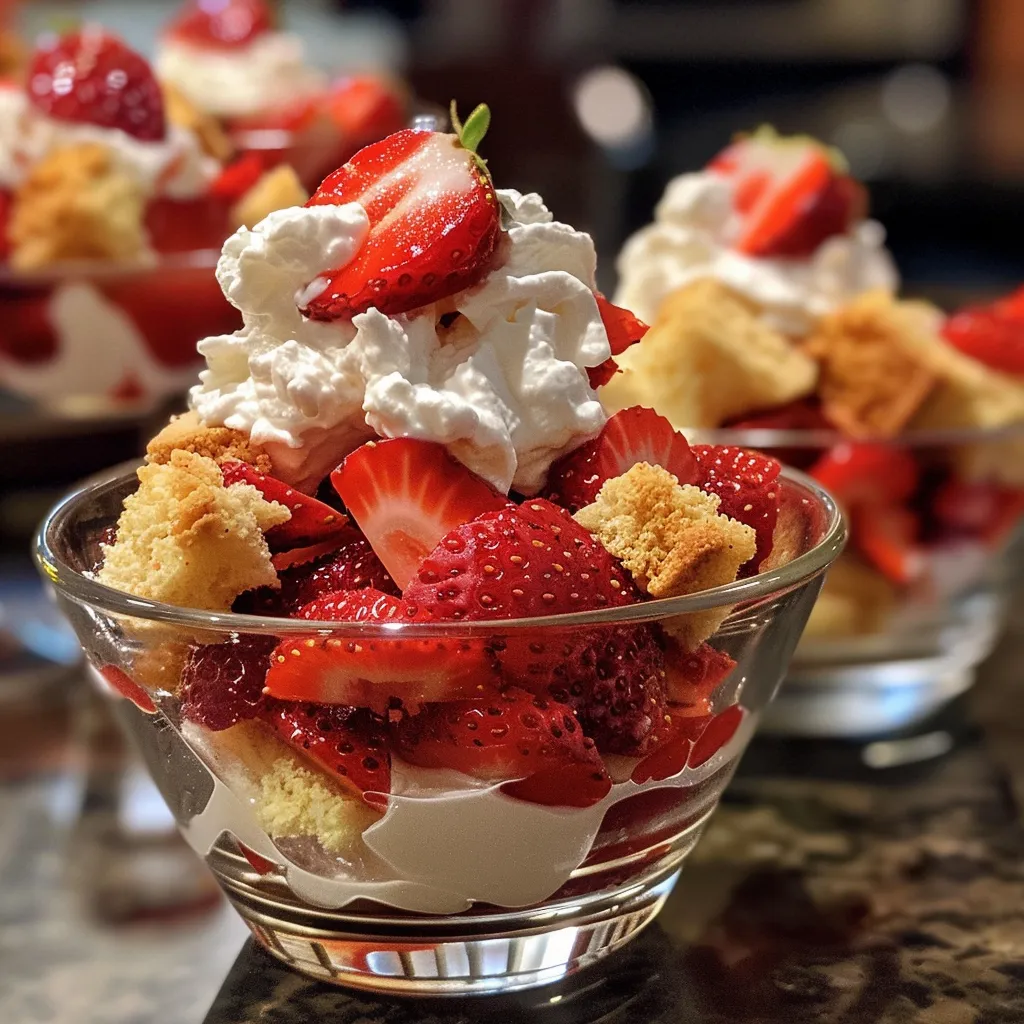
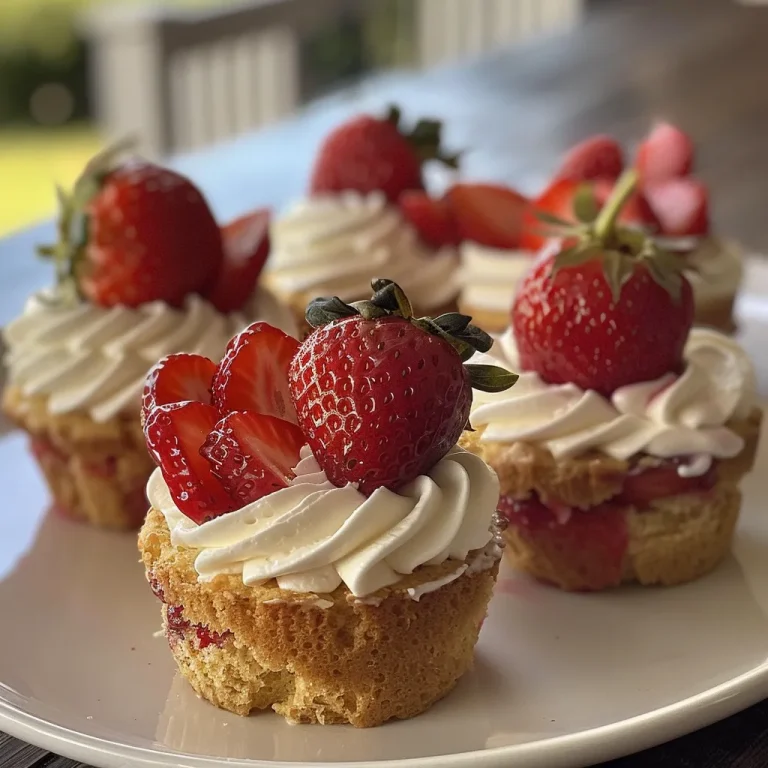
Side angle photo showcasing a vibrant Strawberry Shortcake Cup, topped with strawberries and cream.

Now that you have all your ingredients ready, let’s get cooking!

  1. Prepare the Strawberries: In a bowl, combine the chopped strawberries with 1/4 cup of granulated sugar and vanilla extract. Let them sit for about 30 minutes to create a beautiful syrup.
  2. Make the Cake Batter: In a mixing bowl, whisk together the flour, 1/4 cup of sugar, baking powder, and salt. In another bowl, combine the milk, vegetable oil, and egg. Gradually add the wet ingredients to the dry ingredients, mixing until just combined.
  3. Bake the Cake: Preheat your oven to 350°F (175°C). Pour the batter into a greased baking dish and bake for 20-25 minutes or until a toothpick inserted into the center comes out clean. Allow the cake to cool completely.
  4. Prepare the Whipped Cream: In a chilled bowl, beat the heavy whipping cream until soft peaks form. You can add additional sugar to taste if you prefer a sweeter topping.
  5. Assemble the Cups: Once the cake is cool, cut it into small cubes. In serving cups, layer the cake cubes, followed by a generous spoonful of the syrupy strawberries, and top with a dollop of whipped cream. Repeat the layers until the cups are filled.

Expert Tips for Perfect Strawberry Shortcake Cups

  • Choose the Right Strawberries: Look for strawberries that are deep red and fragrant for the best flavor.
  • Chill Your Equipment: For the fluffiest whipped cream, chill your mixing bowl and beaters beforehand.
  • Don’t Overmix the Batter: Mix until just combined to keep the cake tender and light.
  • Layer Smartly: For aesthetic appeal, try to layer the ingredients in clear cups so guests can see the beautiful colors.
  • Experiment with Flavors: Add a splash of almond extract or citrus zest to the whipped cream for a unique twist.
  • Make Ahead: You can prepare the strawberries and cake a day in advance. Just assemble the cups right before serving.
  • Storage Tips: These cups are best enjoyed fresh but can be stored in the fridge for up to 2 days. Cover them with plastic wrap to keep the whipped cream from deflating.

Common Mistakes and Troubleshooting

Even the best chefs encounter hiccups. Here are some common issues and how to solve them:

  • Dry Cake: This can happen if you overbake. Keep an eye on it and check for doneness a few minutes before the timer goes off.
  • Runny Whipped Cream: If your whipped cream isn’t holding its shape, make sure the cream is cold and consider using a stabilizer like gelatin.
  • Too Much Sugar: If your strawberries are too sweet, balance it with a squeeze of lemon juice.

Delicious Variations to Try

Feel free to get creative with these variations:

  • Chocolate Lovers: Add chocolate pudding layers between the cake and whipped cream for a decadent twist.
  • Berry Medley: Combine strawberries with other berries like blueberries or raspberries for a fruity explosion.
  • Nutty Crunch: Sprinkle crushed cookies or nuts between layers for added texture.
  • Gluten-Free Option: Substitute regular flour with a gluten-free blend to make this dessert accessible for everyone.

Storage and Make-Ahead Instructions

If you want to prepare these strawberry shortcake cups in advance, here’s how:

  • Prepare the Cake: Bake and cool the cake, then store it wrapped tightly in plastic wrap at room temperature for up to 2 days.
  • Store Strawberries Separately: Keep the strawberries in the fridge in an airtight container until you’re ready to assemble.
  • Whipped Cream Storage: Whipped cream can be made ahead and stored in the fridge, but for the best texture, whip it just before serving.

Frequently Asked Questions

Here are some common questions about making strawberry shortcake cups:

  • Can I use frozen strawberries? Yes, but thaw them and drain excess liquid before using.
  • What can I substitute for heavy cream? You can use a dairy-free whipped topping or coconut cream for a lighter option.
  • How do I make the cake ahead of time? Bake the cake, let it cool, and then wrap it tightly to keep it fresh until you’re ready to assemble.
  • Can I use store-bought whipped cream? Absolutely! It saves time and can be just as delicious.
  • What if I don’t have cake flour? All-purpose flour works fine; just add an extra tablespoon of cornstarch to lighten it.
  • How long can I store these cups? They are best enjoyed fresh but can last in the fridge for 1-2 days.
  • Can I add alcohol to the strawberries? A splash of rum or liqueur can enhance the flavor beautifully!
  • Is this recipe suitable for kids? Yes! It’s a fun and interactive dessert that kids will love to help assemble.

Nutrition Tips and Dietary Adaptations

For those mindful of nutrition, here are some tips:

  • Reduce Sugar: You can cut down on sugar in the cake and whipped cream to make it healthier.
  • Use Whole Wheat Flour: Swap some of the all-purpose flour for whole wheat for added fiber.
  • Vegan Option: Substitute the egg with flaxseed meal and use non-dairy milk and cream for a vegan-friendly dessert.

Essential Equipment You’ll Need

To create your strawberry shortcake cups, you’ll need:

  • Mixing Bowls: For combining ingredients and preparing the batter.
  • Whisk or Mixer: For whipping the cream and mixing the batter.
  • Baking Dish: To bake the cake layers.
  • Measuring Cups and Spoons: For accurate ingredient measurements.
  • Clear Serving Cups: To showcase the beautiful layers of this incredible dessert.

Serving Suggestions

Serve these delightful cups chilled and enjoy with:

  • Fresh Mint: A sprig of mint adds a pop of color and freshness.
  • Chocolate Shavings: For a decadent finish, sprinkle dark chocolate shavings on top.
  • Citrus Zest: A little lemon or orange zest can brighten up the flavors beautifully.

Conclusion: Celebrate with Strawberry Shortcake Cups!

These strawberry shortcake cups are not just a dessert; they are a celebration of flavors, colors, and textures that invite you to gather friends and family around the table. With every spoonful, you’ll be indulging in a delightful experience that’s sure to bring smiles. So grab your ingredients and let’s make some memories with this delightful dessert!

Strawberry Shortcake Cups: An Incredible Ultimate Recipe with 10 Amazing Ingredients

Prep Time 15 minutes
Cook Time 20 minutes
Total Time 35 minutes
Servings 4 cups
Calories 350
Delight in these easy-to-make strawberry shortcake cups, combining fresh strawberries, fluffy cake, and whipped cream for a perfect treat.

Ingredients

Fruits

  • 2 cups strawberries, chopped
  • 1/4 cup granulated sugar
  • 1 teaspoon vanilla extract

Cake

  • 1 cup all-purpose flour
  • 1/4 cup granulated sugar (for cake)
  • 2 teaspoons baking powder
  • 1/4 teaspoon salt
  • 1/2 cup milk
  • 1/3 cup vegetable oil
  • 1 large egg

Whipped Cream

  • 1 cup heavy whipping cream
  • Additional sugar for sweetening whipped cream (optional)

Instructions 

  • Mix flour, sugar, baking powder, and salt. Add milk, oil, and egg; stir until smooth. Bake at 350°F (175°C) for 15-20 minutes.
  • Chop strawberries and mix with sugar and vanilla. Let sit for 10 minutes.
  • Whip heavy cream until soft peaks form, sweeten if desired.
  • Assemble cups with cake, strawberries, and whipped cream. Serve immediately.

Notes

Use fresh strawberries for best flavor and texture.
Calories: 350kcal
Cost: $12
Course: Dessert
Cuisine: American
Keyword: Strawberries

Welcome to the delightful world of carrot cake, where every bite is a celebration of flavor, nostalgia, and love. With its moist texture and rich cream cheese frosting, this cake is not just a dessert; it’s a memory on a plate. Whether you’re baking for a birthday, a cozy family gathering, or simply to indulge your sweet tooth, this carrot cake with cream cheese frosting is bound to bring smiles to your table. Let’s dive into the heart of this recipe that encapsulates the warmth of Mediterranean cooking, combining tradition with a modern twist!

Why You’ll Love This Recipe

Here are just a few reasons why this carrot cake with cream cheese frosting will become your new favorite:

  • Rich Flavor Profile: The combination of spices like cinnamon and nutmeg with fresh carrots creates a deep, satisfying flavor that’s simply irresistible.
  • Moist Texture: This cake is incredibly moist thanks to the use of vegetable oil and grated carrots, ensuring every slice is tender and delightful.
  • Versatile Decor: The neutral flavor of carrot cake pairs beautifully with various toppings, making it a perfect canvas for your creative decorating ideas.
  • Family Friendly: Loved by kids and adults alike, this cake is a fantastic way to incorporate vegetables into dessert, making it a hit for family gatherings.
  • Easy to Customize: You can easily adapt this recipe by adding nuts, fruits, or even swapping out the frosting, allowing you to make it your own!

Ingredient Breakdown

Let’s take a closer look at the ingredients that make this carrot cake truly special:

  • All-purpose flour: Provides the structure of the cake; you can substitute with whole wheat flour for a healthier option.
  • Baking soda: Helps the cake rise beautifully; ensure it’s fresh for best results.
  • Cinnamon and nutmeg: These spices add warmth and depth; feel free to adjust to your taste.
  • Vegetable oil: Keeps the cake moist; you can use melted coconut oil for a different flavor.
  • Granulated and brown sugar: The mix adds sweetness and a hint of caramel flavor from the brown sugar.
  • Fresh carrots: The star ingredient; grate them finely for a smoother cake texture.
  • Cream cheese and butter: The base for the frosting; using softened ingredients ensures a creamy blend.
  • Powdered sugar: Adds sweetness to the frosting; adjust the quantity based on your sweetness preference.

Pro Tips for Perfecting Your Carrot Cake

Here are some expert insights to ensure your carrot cake turns out perfect every time:

  • Room temperature ingredients: Always use room temperature eggs and butter for a smoother batter and frosting.
  • Don’t overmix the batter: Gently fold the dry ingredients into the wet to avoid a dense cake.
  • Fresh carrots: Use fresh, high-quality carrots for the best flavor and moisture.
  • Spice it up: Feel free to experiment with additional spices like ginger or allspice for a unique twist.
  • Frosting variations: Try adding orange zest or a splash of vanilla to your cream cheese frosting for extra flavor.
  • Cooling the cake: Let the cake cool completely before frosting to prevent melting and sliding.
  • Layer it up: For an impressive presentation, consider making a three-layer carrot cake for added height and drama.
  • Chill the frosting: If it feels too soft, chill your frosting for a bit to make it easier to spread.

Common Mistakes and Troubleshooting

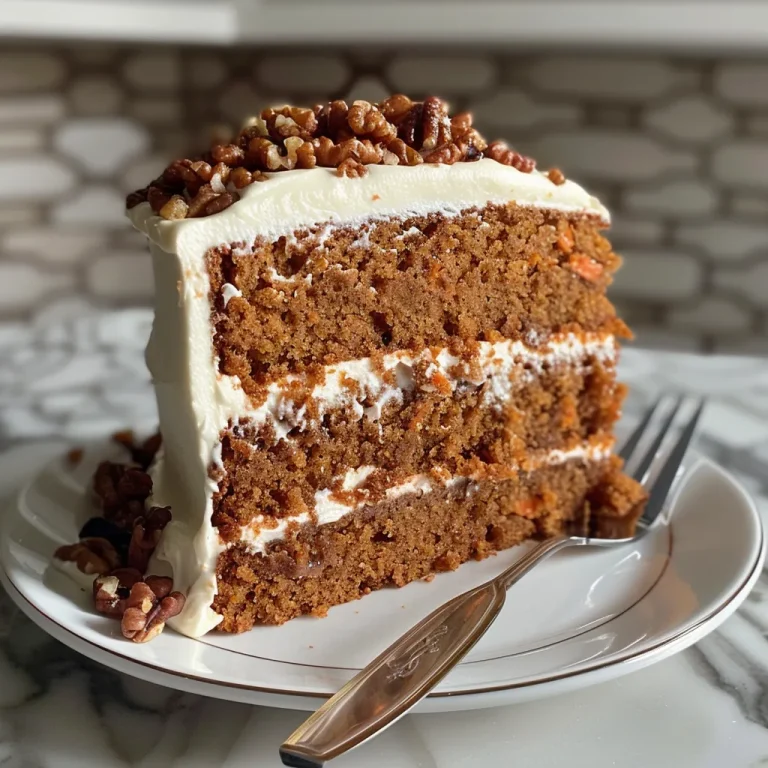
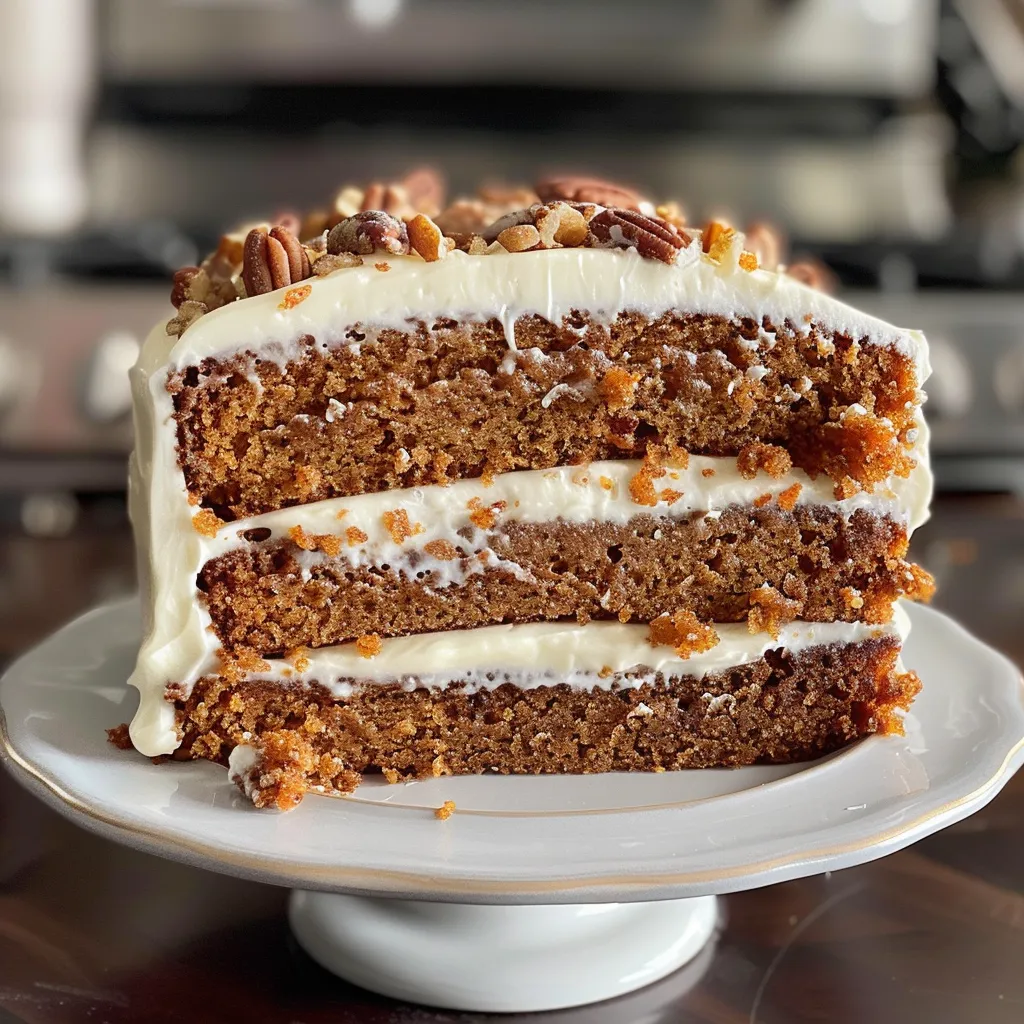
Juicy carrot cake slice with smooth cream cheese frosting in vibrant colors.

Even the best bakers can encounter hiccups. Here’s how to troubleshoot:

  • Flat Cake: If your cake doesn’t rise, check if your baking soda is fresh or if you overmixed the batter.
  • Dry Cake: Ensure you’re measuring ingredients accurately; too much flour can lead to dryness.
  • Crumbly Frosting: If your frosting is too crumbly, add a splash of milk until you reach the desired consistency.

Variations on the Classic Carrot Cake

Want to switch things up? Here are some fun variations:

  • Carrot Cake with Pineapple: Add crushed pineapple for extra moisture and a tropical twist.
  • Nutty Delight: Mix in walnuts or pecans for crunch and flavor; toast them for an extra depth.
  • Raisin and Spice: Incorporate raisins or currants for a chewy texture and added sweetness.
  • Vegan Carrot Cake: Substitute eggs with flaxseed meal and use vegan cream cheese for a plant-based version.

Storage and Make-Ahead Instructions

Want to enjoy your cake later? Here’s how to store it:

  • Refrigeration: Store your carrot cake in an airtight container in the fridge for up to a week.
  • Freezing: Wrap slices in plastic wrap, then foil, and freeze for up to three months for a quick treat.
  • Make-Ahead: You can bake the cake layers two days in advance; just keep them wrapped tightly until ready to frost.

Comprehensive FAQ

Here are some frequently asked questions to help you:

  • Can I use whole wheat flour? Yes! It will give a nuttier flavor and slightly denser texture.
  • How can I make this cake gluten-free? Substitute all-purpose flour with a 1:1 gluten-free baking blend.
  • What if I don’t have cream cheese? You can use mascarpone or a dairy-free cream cheese alternative.
  • Is carrot cake healthy? While it contains sugar, the carrots provide vitamins; consider reducing sugar for a healthier option.
  • Can I add more spices? Absolutely! Feel free to experiment with ginger or cardamom for a unique flavor profile.
  • How do I prevent the cake from sticking? Grease and flour your pans well or use parchment paper for easier removal.
  • Can I make mini carrot cakes? Yes! Just adjust the baking time to fit smaller pans.
  • What’s the best way to serve carrot cake? Serve with a dollop of whipped cream or alongside fresh fruit for a refreshing contrast.

Nutrition Tips and Dietary Adaptations

Looking to make your cake healthier? Here are some ideas:

  • Reduce sugar: You can cut the sugar by 25% without compromising flavor.
  • Use unsweetened applesauce: Swap some oil with applesauce for lower fat content.
  • Add nuts and seeds: Boost the nutritional profile by adding flaxseeds or chia seeds to the batter.

Equipment Recommendations

Here’s what you’ll need to create your masterpiece:

  • Mixing bowls: A set of various sizes will help with ingredient prep.
  • Electric mixer: Makes beating the batter and frosting a breeze.
  • 9-inch round cake pans: Ensures even baking and perfectly shaped layers.
  • Parchment paper: Helps prevent sticking for easy cake removal.

Serving Suggestions

Ready to serve up your delicious carrot cake? Here are some pairing ideas:

  • Ice Cream: A scoop of vanilla ice cream complements the sweetness of the cake perfectly.
  • Fresh Fruit: Serve with a side of citrus fruits to balance the sweetness.
  • Hot Beverages: Pair with a cup of coffee or chai latte for a cozy dessert experience.

Now that you have all the tools, tips, and variations at your disposal, it’s time to bring this carrot cake with cream cheese frosting into your kitchen. Indulge in the lush flavors of homemade goodness and create sweet memories with every slice. Happy baking and enjoy your feast!

Carrot Cake with Cream Cheese Frosting

Prep Time 20 minutes
Cook Time 35 minutes
Total Time 55 minutes
Servings 12 slices
Calories 450
A moist and flavorful carrot cake layered with rich cream cheese frosting, perfect for any celebration or indulgent treat.

Ingredients

Dry Ingredients

  • 2 cups all-purpose flour
  • 2 tsp baking soda
  • 2 tsp cinnamon
  • 1/2 tsp nutmeg
  • 1/2 tsp salt

Wet Ingredients

  • 1 1/4 cups vegetable oil
  • 1 cup granulated sugar
  • 1 cup brown sugar
  • 4 large eggs
  • 2 tsp vanilla extract

Add-ins

  • 3 cups grated carrots
  • 1 cup chopped walnuts or pecans (optional)
  • 1/2 cup crushed pineapple, drained (optional)
  • 1/2 cup raisins (optional)

Frosting

  • 8 oz cream cheese, softened
  • 1/2 cup unsalted butter, softened
  • 3 –4 powdered sugar
  • 1 tsp vanilla extract

Instructions 

  • Preheat oven to 350°F (175°C). Grease and flour pans or line with parchment.
  • Mix dry ingredients in a bowl. Beat wet ingredients until smooth. Combine and fold in carrots and optional add-ins.
  • Divide batter into pans and bake for 30-35 minutes. Cool completely before frosting.
  • Beat cream cheese and butter until smooth. Gradually add powdered sugar, vanilla, and salt to make frosting.
  • Frost cooled cakes, assemble, and decorate as desired. Serve and enjoy!

Notes

Use fresh ingredients and avoid overmixing for a light, fluffy cake. Store leftovers in the fridge for up to a week.
Calories: 450kcal
Cost: $15
Course: Dessert
Cuisine: American
Keyword: cake, carrot, frosting

Embark on a Culinary Journey with Mediterranean Baked Fish

Welcome to a vibrant celebration of flavors that transports you straight to the sun-kissed shores of the Mediterranean! This Mediterranean baked fish recipe is not just a dish; it’s a feast for the senses. With fresh fish fillets, colorful vegetables, and aromatic spices, every bite is a reminder of family gatherings, laughter, and the joy of cooking. Are you ready to dive into the heart of Mediterranean cuisine? Let’s set the stage for your culinary adventure!

Why You’ll Love This Recipe

This Mediterranean baked fish isn’t just delicious; it’s also practical and nutritious! Here are five reasons to adore this recipe:

  • Flavor Explosion: The combination of garlic, olive oil, and fresh vegetables creates a dish bursting with Mediterranean flavors that will tantalize your taste buds.
  • Healthy and Wholesome: Packed with lean protein and vibrant veggies, this recipe is a guilt-free option that nourishes your body.
  • Easy to Prepare: In just a few simple steps, you can create a restaurant-quality meal that requires minimal effort and cleanup.
  • Customizable: This recipe allows for easy substitutions, letting you modify it based on your preferences or what you have on hand.
  • A Perfect Dish for Gatherings: Whether it’s a family dinner or a festive occasion, this Mediterranean baked fish will impress your guests and make them feel at home.

Ingredients You’ll Need

Let’s gather our ingredients! Here’s what you’ll need to create this culinary masterpiece:

  • 4 fillets White Fish (cod, halibut, or sea bass): Ensure they’re fresh and firm for the best texture.
  • 3 tablespoons Olive Oil: This adds richness and helps the vegetables roast beautifully.
  • 2 cloves Garlic, Minced: The aromatic magic that elevates the dish.
  • 1 cup Cherry Tomatoes, Halved: These will burst with sweetness, adding a delightful contrast.
  • 1 medium Bell Pepper, Thinly Sliced: Any color adds a lovely sweetness.
  • 1 medium Zucchini, Thinly Sliced: It softens beautifully while cooking.
  • 1 medium Lemon, Sliced: A bright addition that enhances all the flavors.
  • 1 teaspoon Dried Oregano: A classic Mediterranean herb that brings everything together.
  • 1 teaspoon Paprika: Smoked paprika adds a lovely smoky depth.
  • to taste Salt: Enhances all the flavors.
  • to taste Pepper: For a gentle kick.
  • Fresh Parsley, Chopped: For garnish, adding a pop of color and freshness.

How to Make Easy Mediterranean Baked Fish

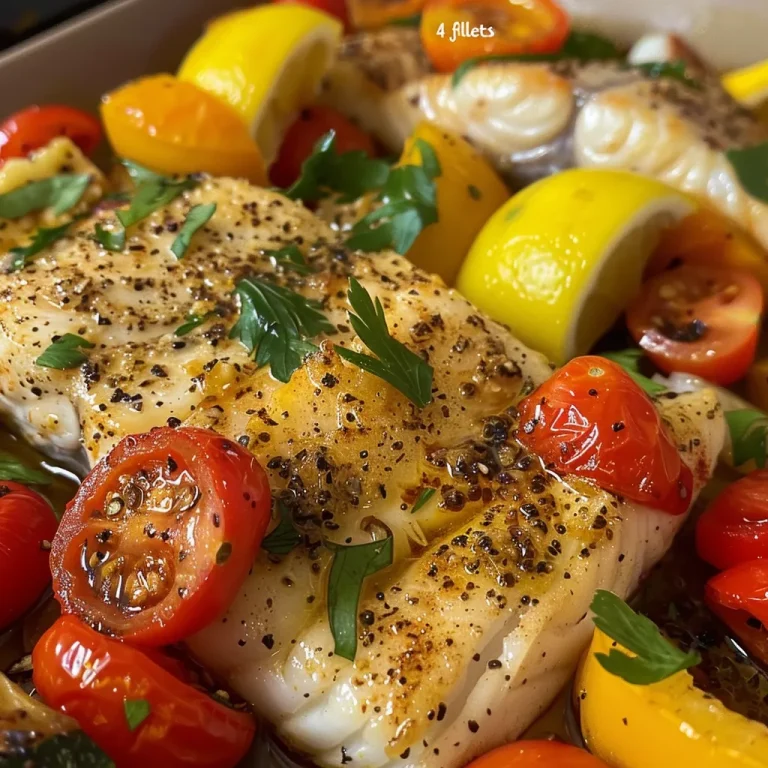
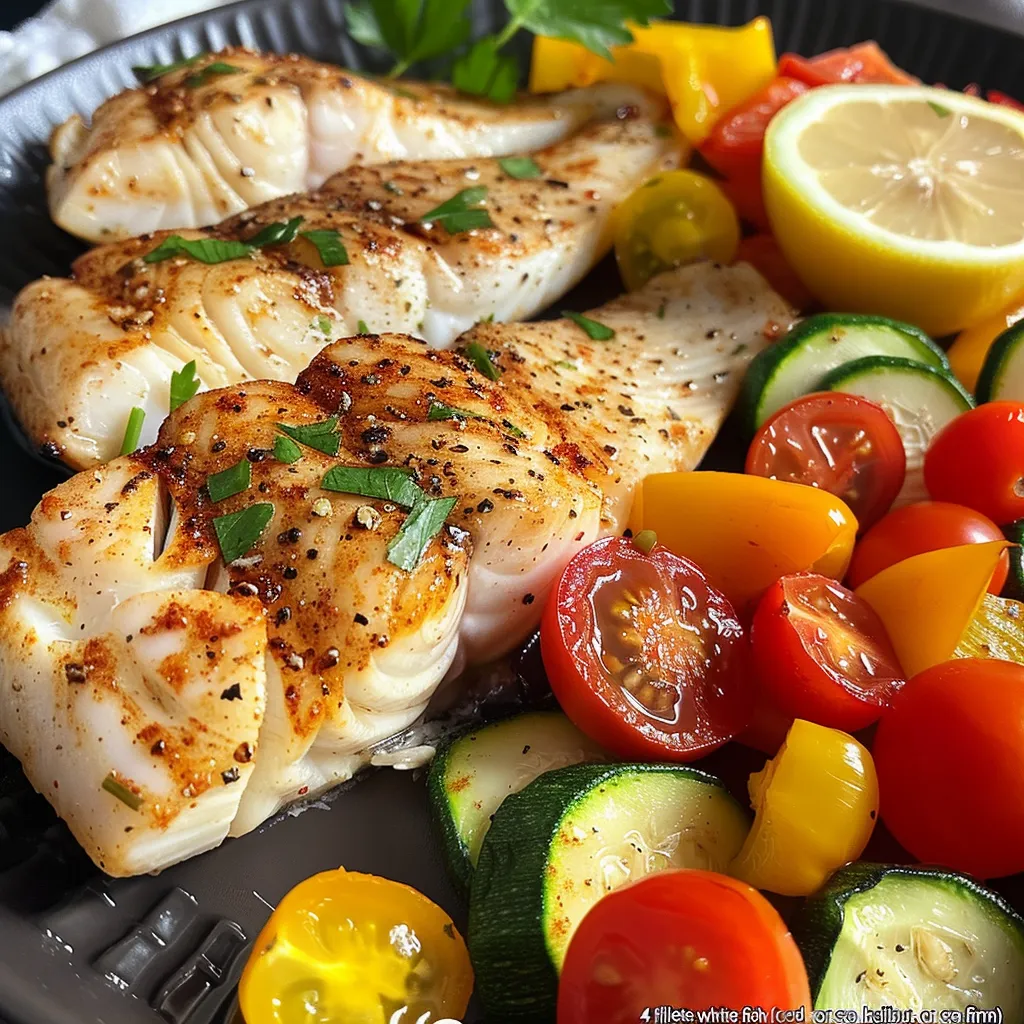
Juicy white fish fillets surrounded by colorful vegetables on a baking dish.

Now that we have everything ready, let’s jump into the cooking process! Follow these steps for a succulent dish:

Step 1: Prep the Oven and Baking Dish

Preheat your oven to 400°F (200°C). While it’s warming, lightly grease a baking dish with a drizzle of olive oil.

Step 2: Make the Marinade

In a mixing bowl, combine olive oil, minced garlic, dried oregano, paprika, salt, and pepper. This flavorful marinade will infuse your fish with deliciousness.

Step 3: Marinate the Fish

Place your fish fillets in the greased baking dish and drizzle the marinade over them, ensuring they are well-coated. Let them marinate for at least 15 minutes to soak up all those lovely flavors.

Step 4: Toss the Veggies

In the same bowl, toss the cherry tomatoes, bell pepper, and zucchini with a bit more olive oil, salt, and pepper. This will ensure they’re flavorful and ready to roast.

Step 5: Assemble and Bake

Arrange the marinated fish in the baking dish and surround them with the tossed vegetables. Layer the lemon slices on top of the fish for a zesty kick. Bake in the preheated oven for about 20-25 minutes or until the fish flakes easily with a fork.

Step 6: Rest and Serve

Once baked, remove the dish from the oven and let it rest for a few minutes. Garnish with fresh parsley before serving. Enjoy the fruits of your labor!

Expert Tips for Making the Best Mediterranean Baked Fish

To ensure your dish turns out perfectly, keep these pro tips in mind:

  • Choose Fresh Fish: Opt for fish that smells fresh, not fishy, and has bright, clear eyes.
  • Customize the Vegetables: Feel free to add or substitute vegetables like asparagus, artichokes, or olives based on your preference.
  • Use Quality Olive Oil: A good quality extra virgin olive oil will elevate the flavors in your dish.
  • Don’t Overcook: Fish is done when it flakes easily with a fork. Keep an eye on it to avoid dryness.
  • Serve with a Side: Pair your baked fish with a fresh salad or crusty bread to soak up the delicious juices.
  • Experiment with Herbs: Fresh herbs like basil or thyme can add wonderful layers of flavor.
  • Make It a Meal: Serve with a side of couscous or quinoa for a heartier meal.
  • Watch the Temperature: Ensure your oven is accurately calibrated to avoid uneven cooking.

Common Mistakes and Troubleshooting

Even the best cooks can make mistakes! Here are some common pitfalls and how to avoid them:

  • Overcrowding the Dish: Ensure you don’t overcrowd the baking dish; this can steam the fish instead of roasting it.
  • Skipping the Marinade: Don’t skip marinating the fish; it’s key for infusing flavor.
  • Not Preheating the Oven: Always preheat your oven to ensure even cooking.
  • Ignoring the Fish Thickness: Thicker fillets may require more cooking time; adjust accordingly.

Variations to Try

Get creative with your Mediterranean baked fish! Here are some fun variations:

  • Spicy Kick: Add a pinch of red pepper flakes to the marinade for a spicy twist.
  • Herb-Infused: Use fresh herbs like dill or tarragon for a fresh flavor boost.
  • Mediterranean Style: Include olives and capers for a briny punch.
  • Cheesy Delight: Top with feta cheese before baking for a creamy finish.

Storage and Make-Ahead Instructions

If you have leftovers or want to prepare ahead of time:

  • Refrigeration: Store any leftovers in an airtight container in the fridge for up to 3 days.
  • Freezing: You can freeze the baked fish (without veggies) for up to 2 months. Thaw in the fridge before reheating.
  • Make Ahead: Marinate the fish and prepare the vegetables a day in advance – just keep them covered in the fridge until ready to bake.

Comprehensive FAQ

Here are some common questions about Mediterranean baked fish:

  • What type of fish works best? You can use any firm white fish like cod, halibut, or sea bass.
  • Can I use frozen fish? Yes, but make sure to thaw it completely before marinating and cooking.
  • What should I serve with it? Fresh salads, rice, or crusty bread pair beautifully with this dish.
  • Can I grill this dish instead? Absolutely! Just follow the same marinade and grill over medium heat.
  • How do I know when the fish is done? The fish should flake easily with a fork and be opaque in color.
  • Can I use different vegetables? Yes! Feel free to experiment with various seasonal vegetables.
  • Is this recipe gluten-free? Yes, all ingredients are naturally gluten-free!
  • How can I make it dairy-free? This recipe is naturally dairy-free; no adjustments are needed.

Nutritional Tips and Dietary Adaptations

This Mediterranean baked fish recipe is not only flavorful but also healthy. Here are some nutritional tips:

  • Low in Calories: Fish is a great source of lean protein, keeping your meal light.
  • Rich in Omega-3s: Enjoy heart-healthy fats found in fish, essential for overall well-being.
  • Vegan Adaptation: Substitute fish with portobello mushrooms or marinated tofu for a plant-based option.
  • Whole30 Compliant: This recipe fits perfectly into Whole30 or paleo diets with no added sugars or grains.

Equipment Recommendations

To ensure your cooking experience is seamless, here’s a list of essential equipment:

  • Baking Dish: A glass or ceramic baking dish works well for even cooking.
  • Mixing Bowls: Use for marinating the fish and tossing the vegetables.
  • Measuring Cups and Spoons: Accurate measurements ensure the perfect blend of flavors.
  • Fish Spatula: Ideal for flipping or serving delicate fish fillets without breaking them.

Serving Suggestions

Enhance your Mediterranean baked fish experience with these serving suggestions:

  • Fresh Salad: A simple arugula or mixed greens salad drizzled with lemon vinaigrette.
  • Grain Bowl: Serve over a bed of quinoa or couscous for a satisfying meal.
  • Crusty Bread: Offer crusty bread to mop up the delicious juices from the dish.
  • Wine Pairing: A crisp white wine like Sauvignon Blanc or a light rosé complements the flavors beautifully.

In conclusion, this Mediterranean baked fish recipe is a celebration of flavors that brings people together. With its vibrant ingredients and straightforward preparation, it’s perfect for any occasion. So gather your loved ones, spread out the feast, and enjoy the journey of flavors that only Mediterranean cooking can provide!

Best Mediterranean Baked Fish Recipe Ever

Prep Time 10 minutes
Cook Time 20 minutes
Total Time 30 minutes
Servings 4 servings
Calories 350
Enjoy a flavorful and healthy Mediterranean-inspired baked fish dish with fresh vegetables and aromatic herbs.

Ingredients

Protein

  • 4 fillets White Fish (cod, halibut, or sea bass) (ensuring they're fresh and firm)
  • 3 tablespoons Olive Oil (for richness and to help everything roast perfectly)
  • 2 cloves Garlic, Minced (pungent, aromatic magic)
  • 1 cup Cherry Tomatoes, Halved (they'll burst with sweetness)
  • 1 medium Bell Pepper, Thinly Sliced (any color adds a lovely sweetness)
  • 1 medium Zucchini, Thinly Sliced (it softens beautifully)
  • 1 medium Lemon, Sliced (adds brightness)
  • 1 teaspoon Dried Oregano (classic Mediterranean herb)
  • 1 teaspoon Paprika (smoked paprika is a lovely option)
  • to taste Salt (to enhance flavor)
  • to taste Pepper (for a gentle kick)
  • Fresh Parsley, Chopped (for garnish)

Instructions 

  • Preheat oven to 400°F (200°C). Arrange fish fillets on a baking sheet.
  • Mix olive oil, minced garlic, oregano, paprika, salt, and pepper. Brush over fish and vegetables.
  • Scatter cherry tomatoes, bell pepper, zucchini, and lemon slices around the fish.
  • Bake for 15-20 minutes until fish is cooked through and vegetables are tender.
  • Garnish with chopped parsley before serving.

Notes

Use fresh herbs for the best flavor and adjust seasoning to taste.
Calories: 350kcal
Cost: $15
Course: Main Course
Cuisine: Mediterranean
Keyword: fish

Welcome to a Slice of Sunshine!

Celebrate the joy of baking with this Moist Lemon Yogurt Cake recipe! Light, fluffy, and gluten-free, it’s the perfect treat to add a burst of sunshine to your table. Join me in exploring simple ingredients that come alive with flavor, turning your kitchen into a vibrant Mediterranean haven. Let’s embark on this culinary adventure together!

Why You’ll Love This Recipe

  • Mouthwatering Flavor: This lemon yogurt cake is infused with fresh lemon juice and zest, delivering a citrusy punch that dances on your palate.
  • Gluten-Free Goodness: Made with almond flour instead of traditional white flour, this recipe is ideal for those seeking gluten-free desserts without sacrificing taste.
  • Simple Ingredients: With just a handful of pantry staples, you can whip up this delightful cake without the fuss.
  • Perfectly Moist Texture: The addition of Greek yogurt ensures a moist, tender crumb that will have your guests reaching for seconds.
  • Versatile and Adaptable: This lemon yogurt cake pairs wonderfully with various toppings and can be easily customized to suit your preferences.

Ingredients Breakdown

Let’s dive into the vibrant ingredients that make this lemon yogurt cake shine:

  • 1 1/2 cups almond flour: This gluten-free flour adds a nutty flavor and a moist texture.
  • 1/2 cup plain Greek yogurt: Provides creaminess and helps keep the cake moist.
  • 2 large eggs (room temperature): Essential for binding the ingredients together and creating a light structure.
  • 1/3 cup honey or maple syrup: Natural sweeteners that enhance the cake’s flavor.
  • 2 tbsp fresh lemon juice: The star ingredient that brings brightness to every bite.
  • 1 tbsp lemon zest (finely grated): Adds an extra layer of lemony goodness.
  • 1 tsp baking powder: The leavening agent that helps the cake rise.
  • 1/4 tsp fine sea salt: A pinch of salt enhances the flavors.
  • 1 tsp vanilla extract: For a warm, aromatic touch.

Pro Tips for Baking Success

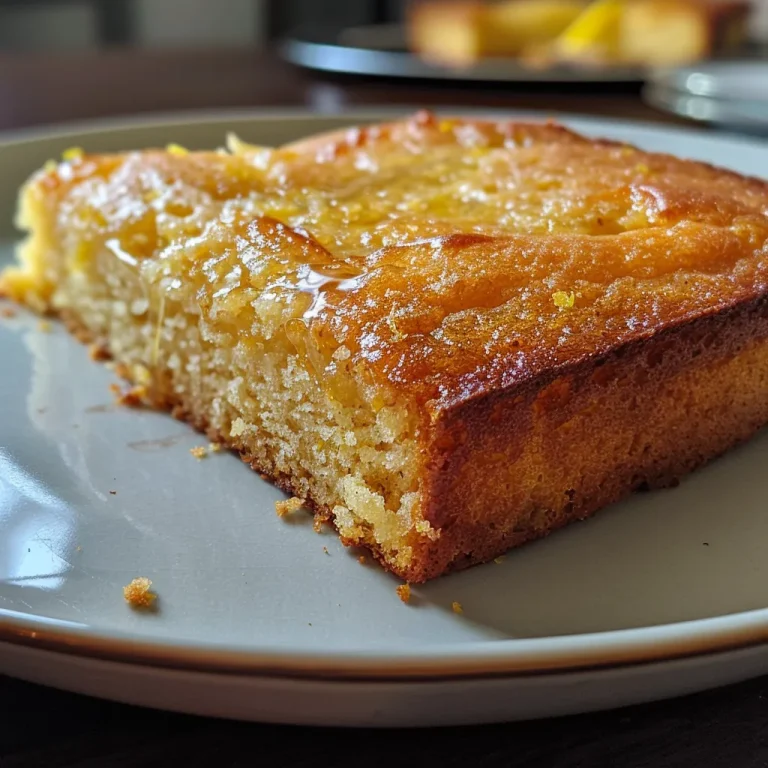
Side view of a gluten-free lemon yogurt cake with a golden crust and moist interior.

Ready to bake? Here are some expert insights to ensure your lemon yogurt cake turns out perfectly every time:

  • Room Temperature Ingredients: Ensure your eggs and yogurt are at room temperature for better mixing and a fluffier texture.
  • Don’t Overmix: Gently combine your ingredients to avoid a dense cake. Overmixing can lead to a tough texture.
  • Check for Doneness: Insert a toothpick in the center; it should come out mostly clean for the perfect bake.
  • Cool Properly: Allow the cake to cool in the pan for 10 minutes before transferring it to a wire rack to cool completely.
  • Experiment with Sweeteners: Feel free to adjust the sweetness by using more or less honey/maple syrup according to your taste.
  • Use Fresh Lemons: Fresh lemon juice and zest provide the best flavor compared to bottled alternatives.
  • Store Correctly: Keep the cake in an airtight container to maintain its moisture.
  • Try Different Toppings: A lemon glaze or a sprinkle of powdered sugar can elevate your cake’s presentation and flavor.

Common Mistakes and Troubleshooting

Even the best bakers encounter hiccups. Here’s how to troubleshoot common issues:

  • Dense Cake: This can happen from overmixing. Be sure to mix just until combined.
  • Dry Cake: Ensure not to overbake. The cake should be golden and a toothpick should come out with a few moist crumbs.
  • Too Sweet: Adjust the honey or syrup to your preference; reduce it if you find it too sweet.
  • Flavorless Cake: Always use fresh ingredients; stale baking powder or old lemons can diminish flavor.

Variations to Explore

Want to mix things up? Here are some delightful variations of this lemon yogurt cake:

  • Blueberry Lemon Yogurt Cake: Fold in a cup of fresh blueberries for a fruity twist.
  • Coconut Lemon Yogurt Cake: Add 1/2 cup of shredded coconut to the batter for a tropical flavor.
  • Glazed Lemon Yogurt Cake: Drizzle a simple lemon glaze (mix lemon juice with powdered sugar) on top once cooled.
  • Chocolate Chip Lemon Yogurt Cake: Stir in 1/2 cup of dark chocolate chips for a decadent treat.

Storage and Make-Ahead Instructions

This lemon yogurt cake is perfect for preparing in advance:

  • Room Temperature: Store in an airtight container for up to 3 days.
  • Refrigeration: For longer storage, keep it in the fridge for up to a week.
  • Freezing: Wrap slices tightly in plastic wrap and freeze for up to 3 months. Thaw in the refrigerator before enjoying.

Comprehensive FAQ

Here are answers to some frequently asked questions about this recipe:

  • Can I use regular yogurt instead of Greek yogurt?: Yes, but the texture may vary slightly. Greek yogurt provides a creamier consistency.
  • Is almond flour interchangeable with other flours?: Yes, but the texture and flavor will differ. If you want a substitute, try a gluten-free flour blend.
  • How do I know when the cake is done?: A toothpick inserted in the center should come out with a few moist crumbs, not wet batter.
  • Can I add nuts?: Absolutely! Chopped walnuts or almonds can add a lovely crunch.
  • What can I serve with lemon yogurt cake?: Pair it with fresh fruit, whipped cream, or a scoop of vanilla ice cream for a delightful dessert.
  • How should I store leftovers?: Keep them in an airtight container at room temperature or refrigerate for longer freshness.
  • Can I make this cake vegan?: Substitute eggs with flaxseed meal or applesauce, and use a plant-based yogurt and sweetener.
  • What’s the best way to serve this cake?: Slice and serve with a dusting of powdered sugar or a drizzle of lemon glaze for added flair.

Nutritional Tips and Dietary Adaptations

This cake is not only delicious but also has nutritional benefits:

  • High in Protein: Greek yogurt adds protein, making this cake a more satisfying dessert option.
  • Low Glycemic Index: Using honey or maple syrup instead of refined sugar helps maintain steady energy levels.
  • Rich in Healthy Fats: Almond flour provides healthy fats that can aid in nutrient absorption.

Equipment Recommendations

To create the perfect lemon yogurt cake, have these tools on hand:

  • 8×4-inch loaf pan: Ideal for shaping your cake. Consider using one with a non-stick coating.
  • Mixing bowls: Use a large bowl for combining wet ingredients and a separate bowl for dry.
  • Whisk: A whisk is perfect for mixing ingredients until frothy.
  • Measuring cups and spoons: Accurate measurements are essential for baking success.

Serving Suggestions

Serve this cake in style! Here are a few ideas to elevate your presentation:

  • Fresh Berries: Garnish with a handful of mixed berries for a pop of color and flavor.
  • Lemon Zest: Sprinkle extra lemon zest on top for a vibrant finish.
  • Whipped Cream: Add a dollop of whipped cream or coconut cream for a luscious touch.
  • Mint Leaves: A few fresh mint leaves can add a refreshing contrast.

Conclusion

There you have it! A delightful journey into the world of baking with this gluten-free lemon yogurt cake. With its irresistible flavor and moist texture, it’s bound to become a favorite at your gatherings. Enjoy each slice as a celebration of life’s simple pleasures, and don’t forget to share your experiences in the kitchen. Happy baking, my friends!

Moist Lemon Yogurt Cake (No White Flour) – Easy & Gluten-Free

Prep Time 10 minutes
Cook Time 40 minutes
Total Time 50 minutes
Servings 8 slices
Calories 250
A light, moist, and gluten-free lemon yogurt cake that’s perfect for any occasion. Made with almond flour and fresh lemon, it’s both flavorful and healthy.

Ingredients

Dry ingredients

  • 1 1/2 cups almond flour
  • 1 tsp baking powder baking powder
  • 1/4 tsp fine sea salt sea salt

Wet ingredients

  • 1/2 cup plain Greek yogurt
  • 2 large eggs (room temperature)
  • 1/3 cup honey or maple syrup
  • 2 tbsp fresh lemon juice
  • 1 tbsp lemon zest (finely grated)

Additional flavoring

  • 1 tsp vanilla extract vanilla extract

Instructions 

  • Preheat oven to 350°F (175°C). Line or grease an 8×4‑inch loaf pan.
  • Whisk eggs, Greek yogurt, honey, lemon juice, lemon zest, and vanilla until combined.
  • Stir in almond flour, baking powder, and salt until a thick batter forms.
  • Pour batter into pan, smooth the top, and bake for 35–45 minutes until golden and a toothpick comes out clean.
  • Cool in pan for 10 minutes, then transfer to a wire rack and cool for at least 20 minutes before slicing.

Notes

Using fresh lemon juice and zest enhances the flavor. Store leftovers in an airtight container in the fridge.
Calories: 250kcal
Cost: $12
Course: Dessert
Cuisine: American
Keyword: gluten free, lemon, Yogurt

Embark on a Flavorful Journey: Discover the Pineapple Coconut Dream Cake

Welcome to a vibrant culinary adventure! Today, we’re diving into the world of tropical flavors with a delightful treat that will whisk you away to sun-kissed beaches and warm ocean breezes: the Pineapple Coconut Dream Cake. This enchanting dessert masterfully combines the sweet tang of pineapple and the creamy richness of coconut, creating a light, fluffy cake that’s perfect for any celebration. With every bite, you’ll experience a burst of sunshine that not only pleases the palate but also brings joy to your heart. Ready to bake? Let’s get started!

Why You’ll Love This Recipe

  • Tropical Bliss: This cake is a perfect balance of sweet and tangy, making it a refreshing dessert that transports you to a tropical paradise with each bite.
  • Easy to Make: With simple ingredients and straightforward steps, this recipe is perfect for both novice bakers and seasoned pros.
  • Perfect for Celebrations: Whether it’s a birthday, holiday, or just a sunny day, this cake is a showstopper that will wow your guests.
  • Make-Ahead Friendly: This cake can be prepared in advance, giving you more time to enjoy with family and friends.
  • Flexible Variations: Customize this recipe to suit your taste or dietary preferences. The possibilities are endless!

Ingredient Breakdown

Before we dive into the baking, let’s explore the ingredients that create this tropical masterpiece.

  • 1 box yellow cake mix: This forms the base of our cake. You can also use a homemade cake recipe if preferred.
  • Water, oil, and eggs: Follow the instructions on the cake mix box for the exact amounts. These ingredients keep the cake moist and fluffy.
  • 1 (20 oz) can crushed pineapple with juice: Adds natural sweetness and moisture. For a more intense flavor, consider using fresh pineapple.
  • 1 (3.4 oz) box instant vanilla pudding: This ingredient enhances the creaminess of the cake and contributes to its delightful texture.
  • 2 cups cold milk: Essential for mixing with the pudding and cream cheese, providing a rich consistency.
  • 1 (8 oz) package cream cheese, room temperature: Cream cheese gives the cake a rich and tangy flavor, making it a true dream.
  • 1 (8 oz) container whipped topping, thawed: This lightens the cake’s frosting and adds a fluffy finish.
  • 1.5 cups shredded coconut: Whether sweetened or unsweetened, coconut brings a chewy texture and enhances the tropical vibe.

Step-by-Step Instructions

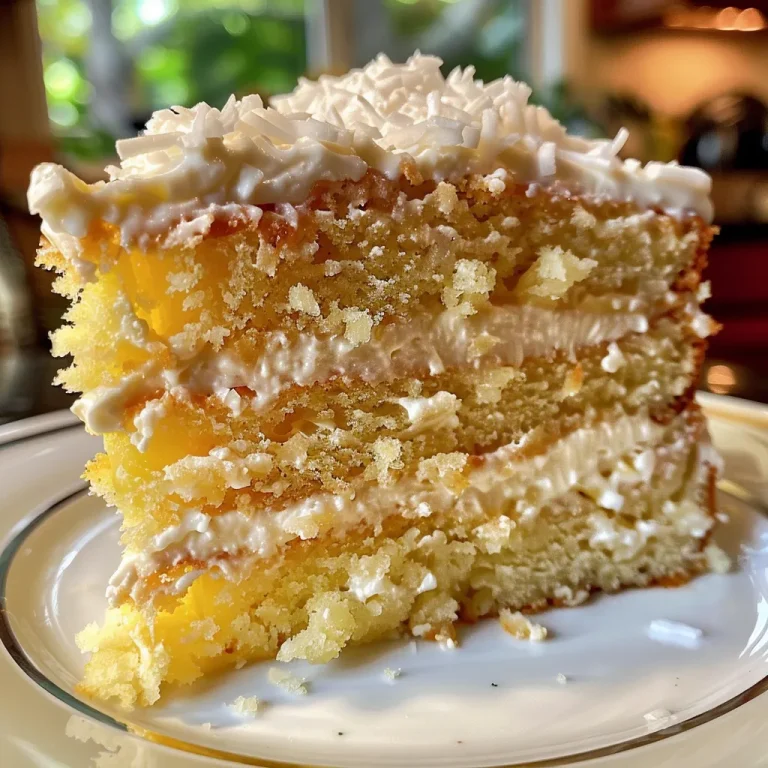
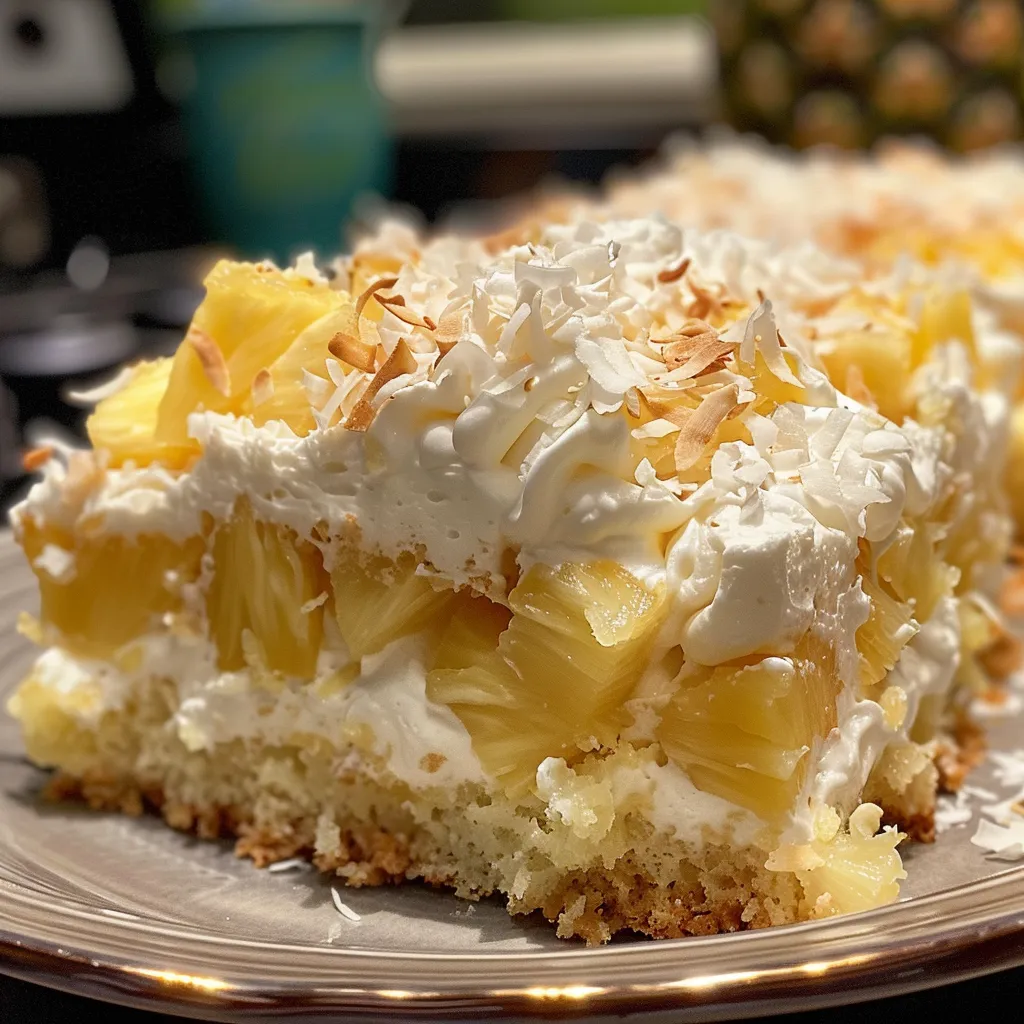
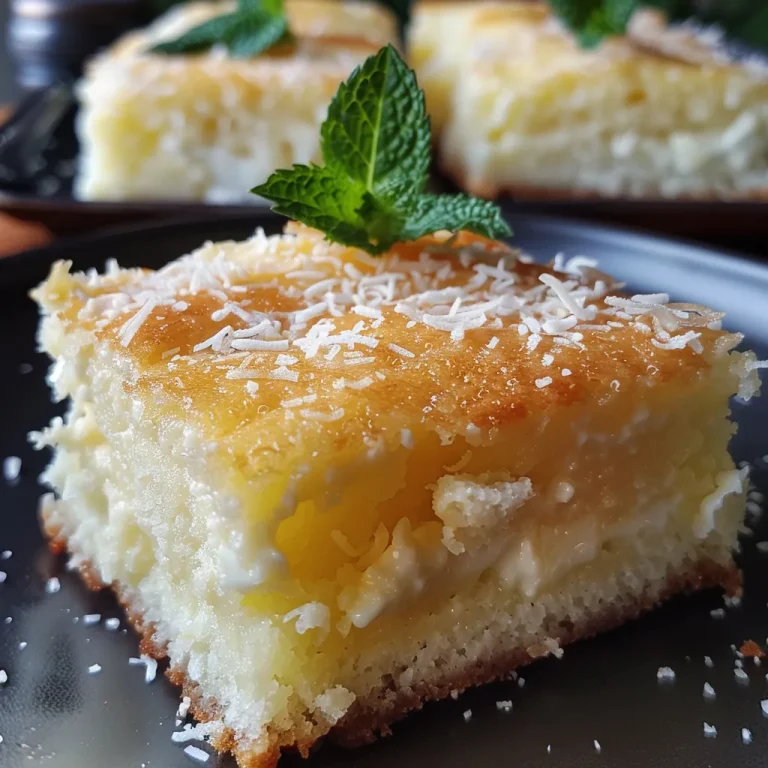
A succulent slice of Pineapple Coconut Dream Cake showcasing moist layers and pineapple chunks.

Now that we have our ingredients ready, let’s walk through the steps to create our Pineapple Coconut Dream Cake.

  • 1. Prepare the Cake: Follow the directions on the yellow cake mix box to prepare the cake in a 13×9 baking pan. Make sure to allow it to cool completely before moving on to the next steps.
  • 2. Mix the Creamy Layer: In a large mixing bowl, combine the instant vanilla pudding, cold milk, and softened cream cheese. Beat until smooth and creamy.
  • 3. Poke Holes: Using the back of a wooden spoon, poke holes evenly all over the cooled cake. This will allow the pudding mixture to soak into the cake.
  • 4. Add the Pudding Mixture: Pour half of the creamy pudding mixture over the cake, spreading it evenly across the surface.
  • 5. Layer the Pineapple: Spread the crushed pineapple (with juice) evenly over the pudding layer, ensuring a generous coverage.
  • 6. Finish with Pudding: Pour the remaining pudding mixture over the pineapple layer and spread evenly.
  • 7. Top with Whipped Topping: Spread the thawed whipped topping over the entire cake, creating a luscious layer.
  • 8. Toast the Coconut: In a sauté pan over medium heat, toast the shredded coconut, stirring constantly until golden brown. Allow it to cool.
  • 9. Garnish: Sprinkle the toasted coconut over the top of the cake for that extra crunch and flavor.
  • 10. Refrigerate: Cover the cake and refrigerate for at least 2 hours, or ideally overnight, allowing the flavors to meld beautifully.

Pro Tips for the Perfect Cake

  • Room Temperature Ingredients: Ensure your cream cheese is at room temperature for a smooth blending with the pudding.
  • Don’t Rush the Cooling: Allow your cake to cool completely; this prevents sogginess when adding the pudding layers.
  • Toast with Care: Watch the coconut closely while toasting to avoid burning, as it can darken quickly.
  • Chill Time Matters: Letting the cake set in the fridge enhances the flavor and texture, making each bite even more delightful.
  • Try Fresh Pineapple: For a bolder flavor, consider using fresh pineapple instead of canned.
  • Experiment with Flavors: Infuse the whipped topping with a splash of coconut extract for an extra tropical kick.
  • Layering Technique: Ensure even layering for a beautiful presentation when served.
  • Serve Chilled: This cake is best enjoyed cold, making it a refreshing dessert on warm days.

Common Mistakes and Troubleshooting

Even the best bakers can run into a few bumps along the way. Here are some common pitfalls and how to avoid them:

  • Too Dense: If your cake is dense, it may not have been mixed enough or the ingredients weren’t at room temperature. Ensure proper mixing and ingredient temperatures.
  • Dry Cake: Overbaking can lead to dryness. Keep an eye on the baking time and perform a toothpick test to check for doneness.
  • Soggy Base: Avoid making the holes too deep when poking the cake; they should be just enough to allow the pudding to seep in without over-soaking.
  • Not Setting: If your cake doesn’t set, ensure you refrigerated it long enough for the pudding and whipped topping to firm up.

Delicious Variations

Don’t hesitate to make this cake your own! Here are some fun variations to try:

  • Chocolate Coconut Dream: Add cocoa powder to the cake mix for a chocolatey twist.
  • Key Lime Coconut Dream: Replace pineapple with fresh key lime juice for a zesty flavor.
  • Berry Coconut Fusion: Incorporate fresh berries like strawberries or blueberries into the layers for a pop of color.
  • Nutty Coconut Delight: Add chopped nuts like pecans or macadamias to the topping for added crunch.

Storage and Make-Ahead Instructions

This cake is perfect for preparing ahead of time. Simply follow these tips:

  • Make-Ahead: Prepare and assemble the cake a day in advance. Just cover it tightly and refrigerate.
  • Storage: Keep leftovers in the fridge, covered, for up to 5 days. The flavors only get better over time!
  • Freezing: For longer storage, you can freeze the cake without the topping for up to 3 months. Thaw in the fridge before serving.

Comprehensive FAQ

Got questions? We’ve got answers! Here are some common queries about our Pineapple Coconut Dream Cake.

  • Can I use a different cake mix? Yes! Feel free to experiment with any flavor of cake mix you love.
  • Is there a dairy-free option? Absolutely! Use dairy-free milk and cream cheese substitutes.
  • How can I make it gluten-free? Swap the yellow cake mix for a gluten-free version, and ensure all other ingredients are gluten-free.
  • What other fruits can I add? Consider adding mango or banana for an exciting twist!
  • Can I adjust the sweetness? Yes! You can reduce the sugar in the pudding mix if you prefer a less sweet cake.
  • What should I serve with it? A scoop of vanilla ice cream or a dollop of whipped cream pairs wonderfully!
  • How do I know when the cake is done baking? Insert a toothpick in the center; if it comes out clean, your cake is ready!
  • Can I make it in a different pan? Yes! Use round pans or even a cupcake tray for individual servings.

Nutritional Tips and Dietary Adaptations

For those mindful of their diet, here are some tips:

  • Reduce Sugar: Opt for sugar-free pudding and cake mix to lower the overall sugar content.
  • Low-Fat Options: Use low-fat cream cheese and whipped topping for a lighter version.
  • Protein Boost: Add a scoop of protein powder to the pudding mix for an extra nutrient kick.

Equipment Recommendations

Here’s a handy list of tools you’ll need to create your dream cake:

  • Mixing Bowls: A set of mixing bowls for combining ingredients.
  • Electric Mixer: For a smooth and creamy pudding mixture.
  • Baking Pan: A 13×9 inch baking pan for the cake.
  • Wooden Spoon: Perfect for poking holes in the cake and mixing.
  • Sauté Pan: For toasting the coconut.

Serving Suggestions

When it’s time to serve this delightful cake, consider these suggestions:

  • Garnish: Decorate with fresh pineapple slices or mint leaves for a vibrant presentation.
  • Pair with Beverages: Serve with a refreshing iced tea or tropical fruit punch.
  • Individual Portions: Cut into squares and serve on colorful plates for a festive look.

Conclusion: A Slice of Paradise Awaits

There you have it! The Pineapple Coconut Dream Cake is not just a dessert; it’s an experience, a celebration of flavors, and a perfect companion for any occasion. Each slice brings a taste of paradise, reminding us of the joy found in sharing food with loved ones. So gather your ingredients, put on some lively music, and let’s bake a cake that will create memories for years to come. Enjoy every moment, and don’t forget to share your delightful creations with us!

Pineapple Coconut Dream Cake

Prep Time 30 minutes
Cook Time 20 minutes
Total Time 50 minutes
Servings 12 pieces
Calories 350
A luscious layered cake combining pineapple, coconut, and creamy vanilla pudding for a tropical treat.

Ingredients

Cake

  • 1 box yellow cake mix
  • Water, oil, and eggs as directed on cake mix box as directed on cake mix box
  • 1 can (20 oz) crushed pineapple with juice
  • 1 box (3.4 oz) instant vanilla pudding
  • 2 cups cold milk

Cream Cheese Mixture

  • 1 8 oz package cream cheese (room temperature)
  • 1 8 oz container whipped topping (thawed)
  • 1.5 cups shredded coconut (sweetened or unsweetened)

Instructions 

  • Prepare and bake the yellow cake in a 13×9 pan; cool completely.
  • Mix vanilla pudding, milk, and cream cheese until smooth.
  • Poke holes in cooled cake; spread half of pudding mixture over it.
  • Spread pineapple evenly over pudding layer; add remaining pudding on top.
  • Top with whipped topping, toast coconut, then refrigerate for at least 2 hours.

Notes

Chill the cake thoroughly before serving for best flavor and texture.
Calories: 350kcal
Cost: $15
Course: Dessert
Cuisine: Tropical
Keyword: cake, coconut, pineapple

Awaken Your Senses with the Perfect Iced Matcha Latte

Welcome to a delightful journey into the vibrant world of the iced matcha latte—a refreshing beverage that not only tantalizes your taste buds but also nourishes your spirit. This recipe showcases the delicate balance of rich matcha flavor, creamy milk, and a hint of sweetness, perfect for summer afternoons or any time you need a revitalizing pick-me-up. Get ready to sip on serenity with the iced matcha latte that can easily become your new favorite drink!

Why You’ll Love This Recipe

There are countless reasons to embrace the iced matcha latte, but here are five specific benefits that will make you want to whip up this delicious drink:

  • Health Boost: Matcha is packed with antioxidants, providing a great source of energy without the jitters often associated with coffee.
  • Customizable Flavor: Adjust the sweetness or creaminess to your liking—add more maple syrup or try different types of milk for a unique twist!
  • Quick and Easy: This recipe takes just minutes to prepare, making it a convenient choice for busy mornings or relaxing afternoons.
  • Eye-Catching Presentation: The beautiful two-tone effect of matcha layered over milk not only tastes great but also looks stunning in any glass.
  • Mindful Experience: Whisking matcha can be a meditative practice, allowing you to take a moment for yourself amidst a busy day.

Ingredients You’ll Need

Here’s a detailed breakdown of the ingredients for your iced matcha latte, along with some great substitutions:

  • 1 ½ tsp matcha powder: Use ceremonial grade for a smoother taste or culinary grade for a stronger flavor.
  • 2 Tbsp warm water: Water should be around 175°F for optimal mixing—too hot can make the matcha bitter.
  • 1-2 tsp maple syrup: Adjust to taste; honey or agave syrup also work well.
  • 1 cup cold milk: Dairy, oat, almond, or coconut milk are all excellent options—choose your favorite!
  • ¼ tsp vanilla extract: Adds a lovely aromatic note that enhances the overall flavor.
  • 1 cup ice cubes: Essential for that refreshing cold drink experience.
  • Optional add-ins: 2 Tbsp strawberry purée for a fruity twist, ¼ cup vanilla cold foam for a creamy finish, or a splash of coconut milk for a tropical vibe.

Step-by-Step Guide to Making Your Iced Matcha Latte

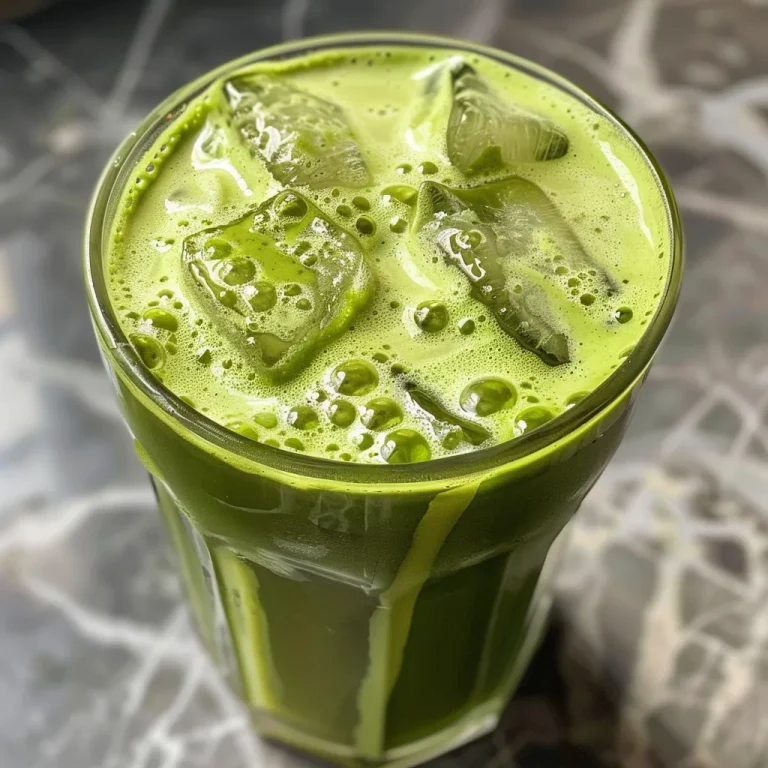
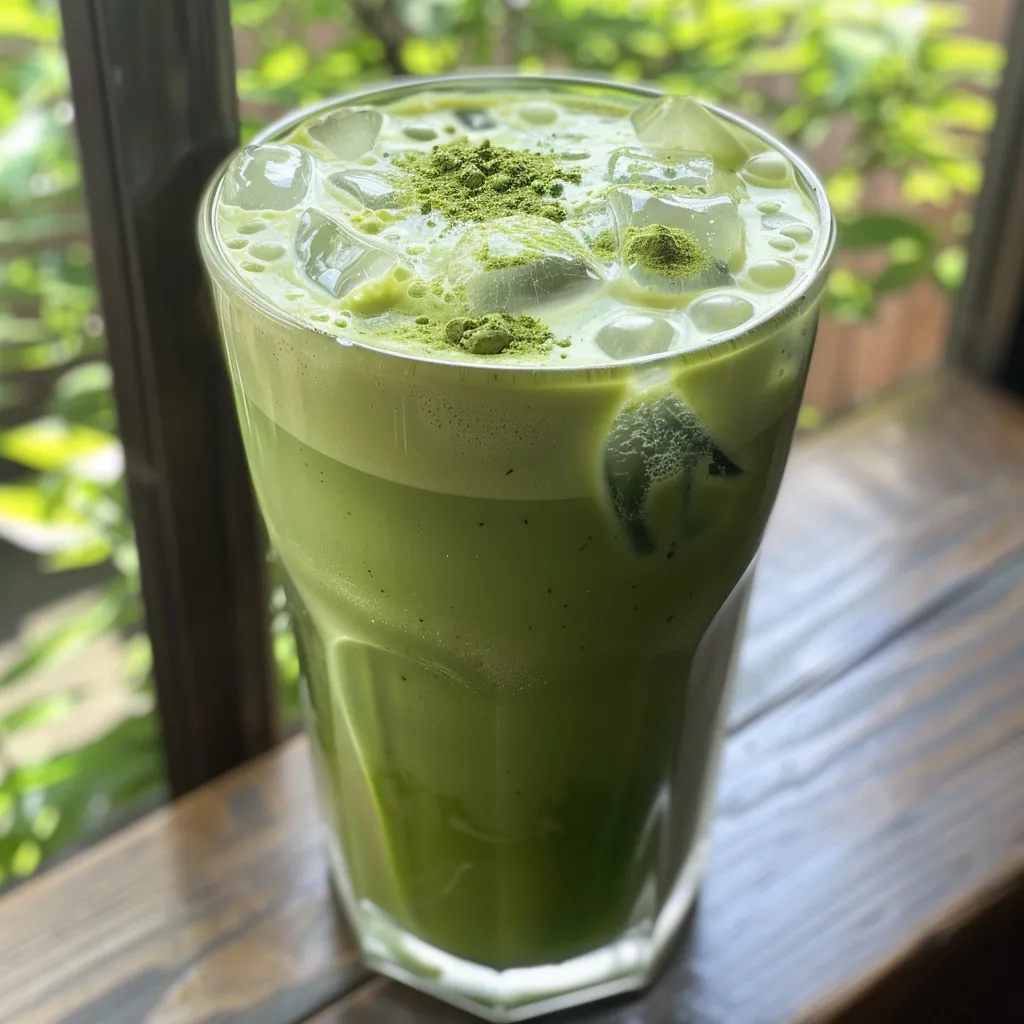
An iced matcha latte with a vibrant green color, layered with strawberry purée and cold foam.

Let’s dive into the simple steps to create this delicious drink:

  1. Sift: Sift the matcha powder into a bowl to break up any clumps.
  2. Mix: Add warm water and whisk in a zigzag motion until the mixture is smooth and lightly foamy.
  3. Sweeten: Stir in maple syrup, ensuring it dissolves completely.
  4. Ice it up: Fill a tall glass with ice cubes.
  5. Layer: Pour the milk and vanilla extract over the ice, leaving some room at the top.
  6. Top it off: Gently layer the matcha over the back of a spoon onto the milk for that stunning two-tone effect.
  7. Enjoy: Stir gently and savor the delightful blend, or sip as-is to appreciate the layered beauty!

Pro Tips for the Best Iced Matcha Latte

Before you start mixing, check out these expert insights to elevate your iced matcha experience:

  • Quality matters: Invest in high-quality matcha for the best flavor and health benefits.
  • Temperature control: Ensure water isn’t boiling to prevent bitterness; a thermometer is handy!
  • Whisking technique: Use a bamboo whisk (chasen) for the best frothy texture, but a milk frother or even a jar can work.
  • Flavor experiment: Try adding spices like cinnamon or cardamom for a unique twist.
  • Cooling hack: Chill your glass beforehand for an extra refreshing experience.
  • Sweetness levels: Start with less sweetener and adjust to your preference.
  • Mix it well: Stir thoroughly before sipping to blend the flavors together.
  • Make ahead: Prepare your matcha base ahead of time and store in the fridge for quick assembly.

Common Mistakes and Troubleshooting

Even the best chefs make mistakes! Here are some common pitfalls and how to avoid them:

  • Clumpy matcha: Always sift your matcha before mixing to avoid lumps.
  • Bitterness: Use cooler water when mixing the matcha—boiling water can make it taste bitter.
  • Weak flavor: Adjust the amount of matcha powder to suit your taste; start with the recommended amount and add more if desired.
  • Too sweet: If you find it overly sweet, balance it out with more milk or a little extra matcha.

Flavor Variations to Try

Feeling adventurous? Here are some delicious variations of the classic iced matcha latte:

  • Iced Strawberry Matcha Latte: Add strawberry purée for a fruity twist that’s both refreshing and indulgent.
  • Matcha Coconut Cooler: Swap regular milk for coconut milk and add a splash of coconut syrup for a tropical feel.
  • Iced Lavender Matcha Latte: Infuse your milk with lavender for a floral note that pairs beautifully with matcha.
  • Vanilla Cold Foam Matcha: Top your latte with vanilla cold foam to create a luxurious layer of creaminess.

Storage and Make-Ahead Instructions

Want to enjoy your iced matcha latte later? Here’s how to store it properly:

  • Refrigerate: You can prepare the matcha mixture in advance and keep it in the fridge for up to 24 hours.
  • Ice cubes: For a less diluted drink, freeze some of your milk or matcha mixture into ice cubes to use later.
  • Stir before serving: Always give your drink a good stir before enjoying, especially if it’s been sitting for a while.

Frequently Asked Questions

Here are some common questions about the iced matcha latte:

  • What is matcha? Matcha is a finely ground powder made from specially grown green tea leaves, known for its vibrant color and rich taste.
  • Can I use other sweeteners? Absolutely! Honey, agave, or stevia can be used instead of maple syrup.
  • Is this recipe vegan? Yes, simply use non-dairy milk and a plant-based sweetener.
  • How does matcha compare to regular green tea? Matcha contains more antioxidants and provides a more sustained energy boost due to its unique preparation method.
  • Can I make this iced matcha latte without sugar? Yes! You can skip the sweetener or use a sugar substitute.
  • What’s the best milk for matcha? Oat milk and almond milk are popular choices, but feel free to use your favorite milk.
  • How do I store leftover matcha? Keep it in an airtight container in the fridge for up to a week, but it’s best enjoyed fresh!
  • Can I use matcha in baking? Yes! Matcha powder can be used in various recipes, from cookies to cakes.

Nutritional Tips and Dietary Adaptations

Here are some tips to make your iced matcha latte fit your dietary needs:

  • Gluten-Free: All listed ingredients are gluten-free, making this recipe suitable for those with gluten sensitivities.
  • Low-Calorie Option: Use unsweetened almond milk and reduce or eliminate sweeteners for a lower-calorie drink.
  • Protein Boost: Add a scoop of protein powder to your latte for an extra nutritional kick!

Equipment Recommendations

To make your iced matcha latte, here’s what you’ll need:

  • Bamboo whisk (chasen): Ideal for achieving the perfect frothy texture.
  • Matcha bowl: A small bowl specifically for mixing matcha.
  • Measuring spoons: For precise ingredient measurements.
  • Tall glass: To showcase the beautiful layers of your iced matcha latte.

Serving Suggestions

Enhance your iced matcha latte experience with these delightful serving suggestions:

  • Pair with Sweet Treats: Enjoy your latte alongside a slice of matcha cake or almond biscotti for a perfect afternoon tea.
  • Create a Matcha Bar: Set up a DIY matcha bar at a gathering, offering guests various toppings and milk options.
  • Garnish: Top with fresh mint leaves or a sprinkle of matcha powder for a beautiful presentation.

Final Thoughts

Your journey into the world of iced matcha lattes can be as simple or as elaborate as you choose. With this recipe, you have the tools to create a delicious and visually stunning drink that brings a taste of Mediterranean joy into your kitchen. So gather your ingredients, invite a friend, and celebrate the art of making an iced matcha latte that transforms your afternoons into moments of pure bliss. Happy sipping!

Iced Matcha Latte Recipe

Prep Time 10 minutes
Cook Time 5 minutes
Total Time 15 minutes
Servings 1 cup
Calories 150
A refreshing and vibrant iced matcha latte with a layered look and tropical twist, perfect for a cool treat.

Ingredients

matcha powder

  • 1.5 tsp matcha powder (ceremonial or vibrant culinary grade)

warm water

  • 2 Tbsp warm water (about 175°F)

sweetener

  • 1-2 tsp maple syrup

milk

  • 1 cup cold milk (dairy or non-dairy like oat or almond)

vanilla extract

  • ¼ tsp vanilla extract

ice cubes

  • 1 cup ice cubes

strawberry purée

  • 2 Tbsp strawberry purée (for an iced strawberry matcha latte)

vanilla cold foam

  • ¼ cup vanilla cold foam

coconut milk

  • Splash coconut milk (for a tropical twist)

Instructions 

  • Sift matcha into a bowl to break up clumps.
  • Add warm water and whisk until smooth and foamy.
  • Stir in maple syrup to dissolve.
  • Fill a glass with ice, pour milk and vanilla over it.
  • Layer matcha over the milk for a layered look, then stir and serve.

Notes

Adjust sweetness and milk type to taste for best results.
Calories: 150kcal
Cost: $15
Course: beverage
Cuisine: fusion
Keyword: matcha

Welcome to a Flavorful Journey: The Strawberry Banana Protein Smoothie

Start your day with a burst of energy! Discover how a simple Strawberry Banana Protein Smoothie can transform your mornings into a vibrant celebration of flavor and nutrition. Join me, Rafael, as we blend fresh strawberries, ripe bananas, and creamy yogurt into a delightful drink that’s as nourishing as it is delicious. This smoothie is not just a treat for your taste buds; it’s a wholesome way to kickstart your day or refuel after a workout.

Why You’ll Love This Recipe

  • Quick and Easy: This strawberry banana protein smoothie is ready in just 5 minutes, making it perfect for busy mornings.
  • Nutritious Boost: Packed with protein from Greek yogurt and protein powder, it’s ideal for post-workout recovery or a quick breakfast.
  • Natural Sweetness: The combination of strawberries and bananas creates a naturally sweet flavor, eliminating the need for added sugars.
  • Customizable: You can easily tweak the ingredients based on your dietary needs or what you have on hand.
  • Visually Appealing: With its vibrant pink hue, this smoothie will brighten up your meal, making it a feast for the eyes as well.

Ingredients for Your Strawberry Banana Protein Smoothie

Let’s gather our ingredients! Here’s what you’ll need:

  • 1 cup fresh strawberries (hulled)
  • 1 ripe banana (sliced)
  • 1 scoop vanilla protein powder (about 30g)
  • 1/2 cup Greek yogurt (plain or flavored)
  • 1 cup milk (or plant-based milk)
  • 1 tablespoon honey (optional)

Ingredient Breakdown and Substitutions

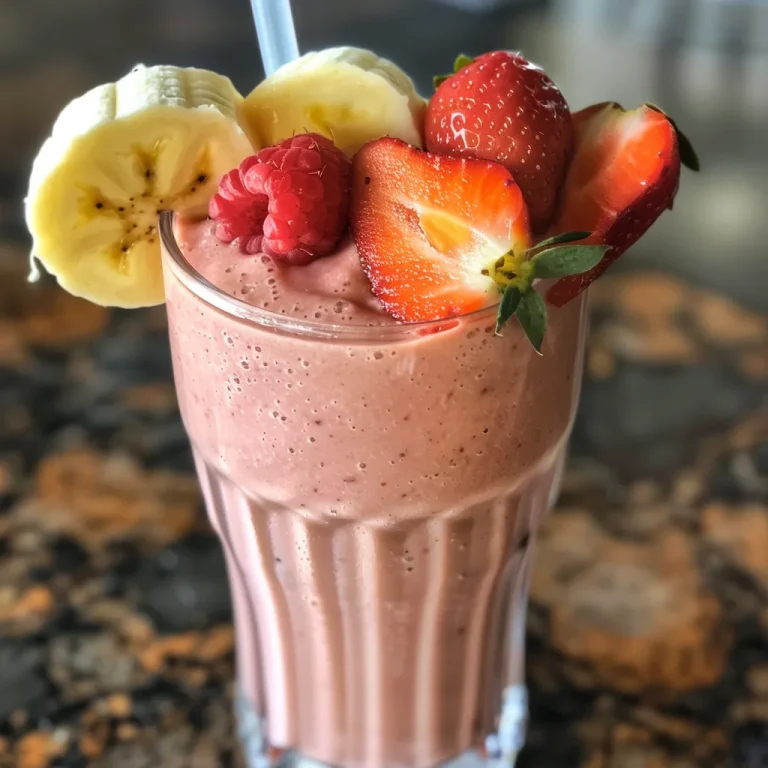
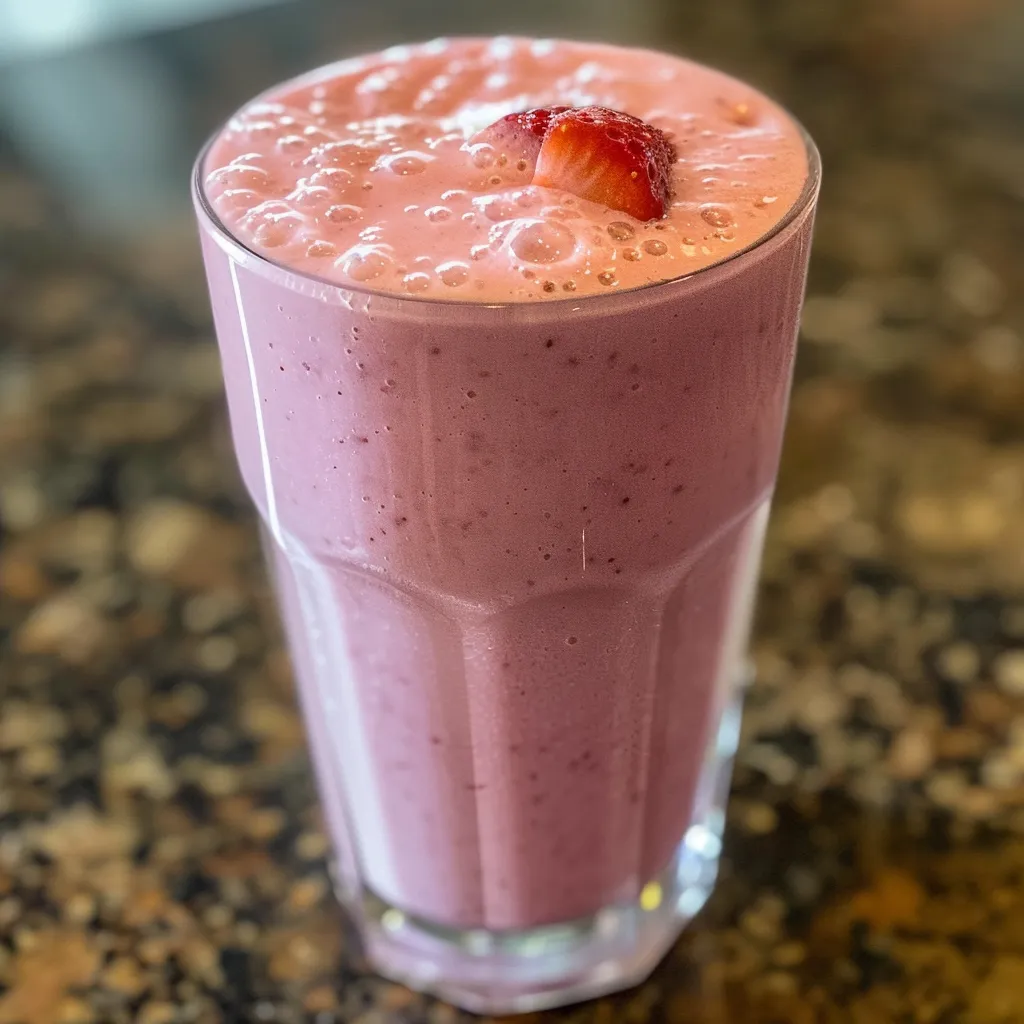
Side view of a vibrant smoothie made with strawberries and bananas, garnished with a slice of banana.

Each ingredient plays a crucial role in the flavor and nutrition of this smoothie. Here’s a closer look:

  • Strawberries: Rich in antioxidants, strawberries add a lovely sweetness. If fresh strawberries aren’t available, use frozen ones for a chilled effect.
  • Banana: Bananas provide natural sweetness and creaminess. Overripe bananas are perfect for this recipe, as they are sweeter.
  • Protein Powder: I recommend vanilla protein powder for flavor, but feel free to use any protein powder you like (whey, plant-based, etc.).
  • Greek Yogurt: This adds creaminess and additional protein. You can substitute it with regular yogurt or a dairy-free version if needed.
  • Milk: Whole milk will yield a richer smoothie, while almond or oat milk can make it lighter and dairy-free.
  • Honey: This is optional; you can sweeten with maple syrup or agave if preferred.

How to Make Your Strawberry Banana Protein Smoothie

Ready to blend? Follow these simple steps:

  • Gather all your ingredients.
  • Wash the strawberries under cool water and hull them.
  • Peel and slice the banana into chunks.
  • In a blender, combine strawberries, banana slices, protein powder, Greek yogurt, and milk. Blend on high until smooth (about 30–40 seconds).
  • Taste the smoothie; add honey if desired and blend briefly again.
  • Pour into glasses and enjoy immediately.

Pro Tips for the Perfect Smoothie

Let’s ensure your smoothie turns out amazing every time!

  • Texture Matters: For a thicker smoothie, add more yogurt or use less milk. If you prefer it thinner, simply add more milk.
  • Blend in Batches: If your blender is small, blend in batches to ensure everything is well combined.
  • Chill Your Ingredients: For a refreshing smoothie, chill your strawberries and banana before blending, or add a handful of ice cubes.
  • Experiment with Flavors: Spice things up by adding a pinch of cinnamon or a splash of vanilla extract.
  • Boost Your Nutrition: Toss in a handful of spinach or kale for added vitamins without altering the taste significantly.
  • Don’t Forget the Garnish: Top with sliced strawberries, banana, or a sprinkle of chia seeds for a visual and nutritional boost.
  • Blend Until Smooth: Ensure there are no chunks! Blend longer if necessary for a silky texture.
  • Use Fresh Ingredients: The fresher your ingredients, the tastier your smoothie will be!

Common Mistakes and Troubleshooting

Here are some common issues and how to fix them:

  • Too Thick: Add more milk gradually until you reach your desired consistency.
  • Too Sweet: If it’s too sweet for your taste, add a splash of lemon juice to balance it out.
  • Too Chunky: Blend longer or ensure your ingredients are cut into smaller pieces before blending.
  • Flavor Issues: If the smoothie tastes bland, try adding a pinch of salt or more fruit to enhance the flavor.

Delicious Variations to Try

Feeling adventurous? Here are some fun variations to keep your smoothie routine exciting:

  • Tropical Twist: Substitute half the strawberries with mango for a tropical flavor.
  • Nutty Delight: Add a tablespoon of almond butter or peanut butter for a nutty flavor and extra protein.
  • Berry Blast: Mix in other berries like blueberries or raspberries for a mixed berry smoothie.
  • Chocolate Banana: Add a tablespoon of cocoa powder for a chocolatey twist that satisfies your sweet tooth.

Storage and Make-Ahead Instructions

Need to prepare in advance? Here’s how to store your smoothie:

  • In the Fridge: Store in an airtight container for up to 24 hours. Shake or stir before drinking.
  • Freezing: Freeze individual portions in ice cube trays or freezer bags. Blend with milk when ready to enjoy.

Frequently Asked Questions

Let’s clear up some common queries!

  • Can I use other fruits? Absolutely! Try using pineapple, peaches, or any seasonal fruits you enjoy.
  • Is this smoothie suitable for kids? Yes! It’s a nutritious and delicious option for children.
  • How can I make it dairy-free? Use plant-based yogurt and milk alternatives like almond or coconut milk.
  • What if I don’t have protein powder? You can skip it, but consider adding extra Greek yogurt for more protein.
  • Can I use frozen bananas? Yes! Frozen bananas make the smoothie extra creamy and refreshing.
  • Is it good for weight loss? This smoothie can be part of a balanced diet, especially when made with low-calorie ingredients.
  • Can I make it ahead of time? Yes, but for the best flavor and texture, blend fresh ingredients just before consumption.
  • How can I increase fiber content? Add chia seeds or flaxseeds for a fiber boost.

Nutritional Tips and Dietary Adaptations

Want to make it even healthier? Here are some tips:

  • Protein Boost: Increase protein by adding an extra scoop of protein powder or more Greek yogurt.
  • Low Sugar: Use unsweetened yogurt and skip the honey for a low-sugar option.
  • High Fiber: Include oatmeal or flaxseeds to enhance fiber content and keep you fuller longer.

Essential Equipment for Smoothie Perfection

Here’s what you’ll need:

  • High-Speed Blender: A quality blender is crucial for achieving a smooth consistency.
  • Measuring Cups: Accurate measurements help in maintaining the perfect balance of flavors.
  • Airtight Containers: Great for storing leftovers and make-ahead portions.

Serving Suggestions

This delightful smoothie can be enjoyed in various ways:

  • Pair it with a slice of whole-grain toast topped with avocado for a filling breakfast.
  • Serve in a chilled glass with a colorful straw for a fun touch.
  • Top with granola or nuts for a crunchy texture and an extra boost of nutrition.

Wrap Up Your Culinary Adventure!

There you have it — a comprehensive guide to creating a Strawberry Banana Protein Smoothie that’s delicious, nutritious, and wonderfully versatile! Whether you’re fueling up for the day or replenishing after a workout, this smoothie is your perfect companion. Let the vibrant flavors and enticing aromas fill your kitchen and invigorate your mornings. Now, go grab a plate (or a glass!) and join me in the joy of cooking and sharing delicious moments!

Strawberry Banana Protein Smoothie

Prep Time 5 minutes
Total Time 5 minutes
Servings 2 cups
Calories 250
A delicious and nutritious smoothie perfect for a quick breakfast or post-workout refreshment.

Ingredients

Fruits

  • 1 cup fresh strawberries (hulled)
  • 1 ripe banana (sliced) banana

Protein Powder

  • 1 scoop (about 30g) vanilla protein powder

Dairy & Liquids

  • 1/2 cup Greek yogurt (plain or flavored)
  • 1 cup milk (or plant-based milk)
  • 1 tablespoon honey (optional)

Instructions 

  • Wash strawberries and hull them.
  • Peel and slice the banana.
  • Combine all ingredients in a blender and blend until smooth.
  • Add honey if desired and blend briefly.
  • Pour into glasses and serve immediately.

Notes

You can substitute almond milk for a dairy-free option.
Calories: 250kcal
Cost: $10
Course: Breakfast
Cuisine: American
Keyword: Smoothie

Creating a Fresh Fruit Tart: A Delicious Journey

Welcome to the enchanting world of dessert-making where we celebrate the vibrant flavors of the Mediterranean through a delightful Fresh Fruit Tart! This classicFrench fruit tart recipe is not just a treat for the taste buds; it’s a feast for the eyes, combining a buttery, flaky crust with a luscious vanilla custard and a medley of seasonal fruits. Join me, Rafael, as we embark on this culinary adventure that echoes the joy of family gatherings and the warmth of shared meals.

In this comprehensive guide, I’ll walk you through every step of creating this stunning dessert, ensuring that you not only learn how to make a fruit tart but also appreciate the art behind it. Let’s dive into the sweet details!

Why You’ll Love This Recipe

This fruit tart is more than just a dessert; it’s an experience! Here are a few reasons why you’ll adore this recipe:

  • Stunning Presentation: The vibrant colors of seasonal fruits create a visually appealing centerpiece for any occasion.
  • Versatile Ingredients: You can easily customize the tart with your favorite fruits, making it perfect for any season.
  • Deliciously Creamy: The rich vanilla custard filling adds a creamy texture that complements the fresh fruits beautifully.
  • Easy to Make: With a little patience and love, this classic tart is achievable for cooks of all skill levels.
  • Perfect for Celebrations: Whether it’s a birthday, holiday, or simply a gathering of friends, this tart brings joy and sweetness to the table.

Ingredient Breakdown

To create the ultimate fresh fruit tart, gather the following ingredients. Each component plays a crucial role in achieving that perfect balance of flavors and textures:

  • 1 1/2 cups whole milk: Essential for a creamy custard base.
  • 1/2 cup heavy cream: Adds richness to the filling.
  • 1/2 cup sugar (divided): Sweetens both the custard and the crust.
  • Pinch of salt: Enhances the overall flavor.
  • 3 tablespoons cornstarch: Helps thicken the custard.
  • 4 tablespoons cold butter (cut into pieces): Creates a flaky crust.
  • 5 egg yolks: Provides richness and color to the custard.
  • 1/2 teaspoon vanilla extract: Adds aromatic flavor to the custard.
  • 1 teaspoon cognac (optional): A touch of sophistication to the custard.
  • 2 tablespoons heavy cream (cold): For whipping to top the tart.
  • 1 large egg: For egg wash on the crust.
  • 1/2 teaspoon pure vanilla extract: Enhances the crust’s flavor.
  • 1 1/3 cups all-purpose flour: The foundation of your tart crust.
  • 1/2 cup confectioners’ sugar: For sweetness in the crust.
  • 1/4 teaspoon salt: Balances the sweetness.
  • 1/2 cup unsalted butter (1 stick): For a rich, buttery flavor.
  • Assorted fresh seasonal fruit (about 1 pint or 2 to 2 1/2 cups): Think strawberries, blueberries, kiwi, and more!
  • 1/4 to 1/2 cup apricot preserves (optional): For a beautiful glaze finish.

Feel free to substitute ingredients based on availability or dietary preferences. For instance, you can use almond milk instead of whole milk or coconut cream for a dairy-free option.

Step-by-Step Instructions

Side view of a colorful fruit tart showcasing kiwi, berries, and a creamy filling.

Now that we have our ingredients ready, let’s bring this fruit tart to life! Follow these simple steps:

  1. Prepare the Tart Crust: In a mixing bowl, combine the flour, confectioners’ sugar, and salt. Add the cold butter and mix until the mixture resembles coarse crumbs. Then, add the egg and vanilla extract, mixing until a dough forms. Wrap in plastic and chill for at least 30 minutes.
  2. Blind Bake the Crust: Preheat your oven to 375°F (190°C). Roll out the chilled dough and fit it into a tart pan. Prick the bottom with a fork, cover with parchment paper, and fill with pie weights or beans. Bake for 15 minutes, then remove the weights and parchment and bake for another 10 minutes until golden brown. Allow to cool.
  3. Make the Pastry Cream: In a saucepan, heat the whole milk, heavy cream, and half of the sugar over medium heat until just simmering. In a separate bowl, whisk together the egg yolks, cornstarch, remaining sugar, and salt. Gradually whisk the hot milk mixture into the yolks, then return it to the saucepan. Cook over medium heat, stirring constantly until thickened. Remove from heat and stir in vanilla and cognac. Let cool.
  4. Fill the Tart: Once the crust has cooled, pour the pastry cream into the crust, smoothing it with a spatula. Chill for at least 2 hours to set.
  5. Prepare the Fruit: While the tart is chilling, wash and slice your fresh fruits. Be creative and colorful with your choices!
  6. Assemble the Tart: Arrange the fresh fruit beautifully on top of the pastry cream. If using, warm the apricot preserves slightly and brush over the fruit for a beautiful glaze.

Pro Tips for Success

To ensure your fresh fruit tart turns out perfectly, consider these expert insights:

  • Chill Your Ingredients: Keeping your butter and cream cold helps achieve a flaky crust and a rich filling.
  • Blind Baking is Key: Always blind bake your tart crust to prevent a soggy bottom.
  • Use Fresh Fruits: Opt for seasonal and ripe fruits for the best flavor and color.
  • Experiment with Flavors: Add a splash of lemon juice or zest to the pastry cream for a refreshing twist.
  • Cover the Tart: If not serving immediately, cover the tart loosely with plastic wrap to avoid drying out.
  • Serve with Whipped Cream: A dollop of whipped cream elevates each slice to new heights of indulgence.
  • Keep it Simple: The beauty of this tart lies in its simplicity—let the flavors shine!
  • Practice Patience: Allow enough chilling time for the custard to set properly before adding the fruit.

Common Mistakes to Avoid

Even the best chefs can make missteps in the kitchen. Here are common pitfalls to watch out for:

  • Skipping the Chilling Step: Don’t rush the chilling process of the crust and custard; it’s crucial for texture.
  • Overmixing the Dough: Mix just until combined to avoid a tough crust.
  • Using Unripe Fruit: Unripe or overly soft fruit can ruin the tart’s aesthetic and flavor.
  • Neglecting to Prick the Crust: Failing to prick the crust can lead to air bubbles forming during baking.

Delicious Variations

Feeling adventurous? Here are some creative twists on this classic fruit tart:

  • Chocolate Fruit Tart: Add melted chocolate to the pastry cream for a rich chocolate version.
  • Citrus Fruit Tart: Use a variety of citrus fruits like oranges, grapefruits, and lemons for a refreshing tart.
  • Berry Tart: Fill the tart with a mix of berries such as strawberries, blueberries, and raspberries for a berry explosion.
  • Nutty Delight: Incorporate ground nuts such as almonds or hazelnuts into the crust for an added crunch.

Storage and Make-Ahead Instructions

Your fresh fruit tart can be prepared in advance! Here’s how to store it:

  • Refrigerate the Tart: Store the assembled tart in the refrigerator for up to 2 days. Keep it covered to prevent drying out.
  • Make Ahead of Time: Prepare the crust and pastry cream a day in advance. Assemble the tart on the day you plan to serve it.
  • Freezing Option: While the assembled tart doesn’t freeze well, the crust can be frozen for up to 3 months.

Frequently Asked Questions

Here are some common questions about making fruit tarts:

  • Can I use frozen fruit? Yes, but fresh fruit is recommended for the best flavor and texture.
  • How do I prevent a soggy crust? Blind bake your crust thoroughly and ensure the pastry cream is cooled before adding the fruit.
  • What can I substitute for heavy cream? You can use coconut cream or a dairy-free heavy cream alternative.
  • How do I know when the custard is thick enough? It should coat the back of a spoon and hold a line when you run your finger through it.
  • Can I make the tart crust gluten-free? Absolutely! Substitute with a gluten-free flour blend.
  • What’s the best way to slice the tart? Use a sharp knife dipped in warm water for clean cuts.
  • Can I make mini fruit tarts? Yes! Use a muffin tin for individual servings.
  • How long can I store leftover tart? The tart can be stored in the refrigerator for up to 2 days, but it’s best enjoyed fresh.

Nutritional Tips and Dietary Adaptations

This fruit tart can be adjusted to fit various dietary needs:

  • Low-Sugar Option: Use a sugar substitute to reduce the sugar content.
  • Dairy-Free Variation: Replace milk and cream with plant-based alternatives.
  • Vegan Option: Use vegan butter and substitute the egg yolks with flaxseed meal or chia seeds.

Equipment Recommendations

To create this tart, you’ll need a few essential tools:

  • Tart Pan: A removable bottom tart pan makes for easy serving.
  • Whisk: For blending the custard ingredients smoothly.
  • Rolling Pin: For rolling out the tart dough evenly.
  • Mixing Bowls: A set of different sizes for mixing and preparing ingredients.

Serving Suggestions

When it’s time to serve your stunning fruit tart, consider these delightful accompaniments:

  • Fresh Whipped Cream: Lightly sweetened whipped cream adds an airy texture.
  • Mint Leaves: A sprinkle of fresh mint enhances flavor and adds color.
  • Chocolate Shavings: For chocolate lovers, a sprinkle of chocolate shavings elevates the dessert.

Now that you’re armed with all the knowledge and tips to create a beautiful and delicious Fresh Fruit Tart, it’s time to gather your ingredients and start baking! Remember, cooking is not just about feeding the body but also nourishing the soul. Enjoy this journey and celebrate the joy of cooking!

Fresh Fruit Tart Recipe

Prep Time 30 minutes
Cook Time 20 minutes
Total Time 50 minutes
Servings 8 pieces
Calories 350
A delightful and colorful dessert featuring a buttery crust, creamy filling, and fresh seasonal fruit.

Ingredients

Dough

  • 1 1/3 cups all-purpose flour
  • 1/2 cup confectioners’ sugar
  • 1/4 teaspoon salt
  • 1/2 cup unsalted butter (cold, cut into pieces)
  • 1 large egg

Custard Filling

  • 1 1/2 cups whole milk
  • 1/2 cup heavy cream
  • 1/2 cup sugar (divided)
  • 3 tablespoons cornstarch
  • 1/2 teaspoon vanilla extract

Fruit Topping

  • about 2 to 2 1/2 cups assorted fresh seasonal fruit (e.g., kiwi, berries, etc.)
  • 1/4 to 1/2 cup apricot preserves (optional)

Instructions 

  • Prepare the tart crust by mixing flour, confectioners’ sugar, salt, and butter until crumbly. Add egg and form dough, then chill.
  • Roll out the dough and fit into a tart pan. Bake at 350°F (175°C) for 15-20 minutes until golden. Cool completely.
  • Whisk together milk, cream, sugar, cornstarch, egg yolks, and vanilla. Cook over medium heat until thickened. Chill the custard.
  • Spread the custard into the cooled tart shell. Arrange fresh fruit on top and brush with apricot preserves if desired.
  • Chill the tart for at least 1 hour before serving. Enjoy!

Notes

Use seasonal fruits for best flavor and presentation.
Calories: 350kcal
Cost: $15
Course: Dessert
Cuisine: American
Keyword: Fruit, tart

Unleash the Flavor: Discover the Joy of Creamy Coconut Custard Cake

Welcome, dear friends! Today, we embark on a delightful culinary journey where the sun-kissed flavors of the tropics meet the joyful atmosphere of home cooking. My Creamy Coconut Custard Cake is not just a dessert; it’s a celebration of flavors and textures that dance on your palate. Whether you’re hosting a family gathering or simply treating yourself, this cake is sure to impress. Let’s dive into the luscious world of coconut custard, where each bite transports you to a beachside paradise!

Why You’ll Love This Recipe

This Coconut Custard Cake is more than just a treat; it’s an experience. Here are some reasons why this recipe will become your go-to dessert:

  • Heavenly Flavor: The combination of creamy coconut milk and rich custard delivers a burst of tropical flavor that’s simply irresistible.
  • Easy to Make: With straightforward steps, this cake is accessible for bakers of all levels, ensuring you can whip it up without stress.
  • Perfect for Any Occasion: Whether it’s a birthday, holiday, or just a sunny afternoon, this cake fits beautifully into any celebration.
  • Impressive Presentation: The custard layer creates a stunning visual appeal that’s sure to wow your guests.
  • Customizable: Feel free to make it your own with various toppings and flavor additions!

Ingredients Breakdown

To create this delightful coconut custard cake, you’ll need a simple list of ingredients, many of which you might already have at home. Here’s what you’ll need:

  • 1 ½ cups (190g) all-purpose flour: The base for our cake, providing structure.
  • ¾ cup (150g) granulated sugar: Sweetness to balance the flavors.
  • 2 tsp baking powder: For that perfect rise.
  • ½ tsp salt: Enhances flavor and balances sweetness.
  • ½ cup (115g) unsalted butter, softened: Adds richness and moisture.
  • 3 large eggs, room temperature: Essential for a fluffy texture.
  • 1 tsp vanilla extract: A must for flavor enhancement.
  • ¾ cup (60g) unsweetened shredded coconut: For that delightful coconut texture.
  • 1 ½ cups (360ml) full-fat coconut milk: The star ingredient contributing creaminess.
  • ⅓ cup (65g) granulated sugar: Sweetens the custard layer.
  • 3 tbsp cornstarch: Thickens the custard.
  • 3 large egg yolks: For a rich custard base.
  • 1 tsp vanilla extract: Adds depth to the custard flavor.
  • Pinch of salt: Balances sweetness in the custard.
  • ¼ cup (20g) toasted shredded coconut (optional garnish): Adds texture and visual appeal.
  • Fresh mint leaves (optional garnish): A refreshing touch for presentation.

Preparation Steps

Side view of a delectable creamy coconut custard cake, featuring layers of coconut and a glossy custard finish.

Now, let’s get cooking! Follow these steps to create your creamy coconut custard cake:

  1. Preheat your oven: Set it to 350°F (175°C). Grease an 8-inch baking pan or line it with parchment paper for easy removal.
  2. Mix dry ingredients: In a large mixing bowl, whisk together flour, sugar, baking powder, and salt. Set aside.
  3. Cream the butter: Using an electric mixer, beat softened butter with the dry ingredients until the mixture resembles coarse crumbs.
  4. Add eggs: Incorporate eggs one at a time, beating well after each addition. Stir in vanilla extract and shredded coconut until you achieve a thick, moist batter.
  5. Prepare the pan: Transfer the cake batter to the prepared pan, spreading it evenly with a spatula.
  6. Make the custard: In a medium saucepan, whisk together coconut milk, sugar, cornstarch, egg yolks, vanilla extract, and salt until smooth. Cook over medium heat, stirring constantly, until thickened and glossy (about 5-7 minutes). Remove from heat immediately.
  7. Combine layers: Pour the warm custard evenly over the cake batter in the pan, smoothing the top gently.
  8. Bake: Place the cake in the oven and bake for 35-40 minutes, until the top is set but slightly jiggly. Insert a toothpick into the cake base; it should come out mostly clean.
  9. Cool down: Allow the cake to cool on a wire rack for at least 30 minutes, then chill it in the refrigerator for 2-3 hours before serving.
  10. Garnish and serve: Before serving, optionally garnish with toasted shredded coconut and fresh mint leaves for an extra touch of tropical flair.

Pro Tips for the Best Coconut Custard Cake

Here are some expert insights to elevate your baking game:

  • Room temperature ingredients: Ensure your eggs and butter are at room temperature for a smoother batter and better rise.
  • Don’t rush the custard: Stir constantly and cook until thickened to avoid a runny custard layer.
  • Check for doneness: The cake should be lightly golden and the custard should jiggle slightly when you remove it from the oven.
  • Make ahead: This cake can be made a day in advance; the flavors deepen and improve overnight.
  • Storage tip: Store leftovers covered in the refrigerator for up to 3 days to maintain freshness.
  • Coconut variations: Experiment with using different types of coconut (like sweetened or flavored) for unique twists.
  • Texture tweak: For a thicker custard, add an extra tablespoon of cornstarch.
  • Try different milks: If you want a lighter version, you can substitute coconut milk with almond or oat milk.

Common Mistakes and Troubleshooting

Sometimes baking doesn’t go as planned; here are common pitfalls and how to avoid them:

  • Overmixing the batter: This can lead to a dense cake. Mix just until combined.
  • Not cooling properly: Let the cake cool completely before chilling; this helps prevent excess moisture.
  • Skipping the chilling step: Chilling allows the custard to set properly, ensuring the right texture.

Delicious Variations

Make this cake your own with these tempting variations:

  • Pineapple Coconut Cake: Add crushed pineapple to the batter for a tropical twist.
  • Chocolate Coconut Custard Cake: Swirl in melted chocolate for a rich, decadent flavor.
  • Spiced Coconut Cake: Add a pinch of nutmeg or cinnamon for warmth.
  • Fruit Topped Delight: Serve with fresh berries or mango slices for a refreshing complement.

Storage and Make-Ahead Instructions

This cake is perfect for preparing in advance. Here’s how to store it:

  • Refrigeration: Cover and store the cake in the fridge for up to 3 days. The custard layer will maintain its creamy texture.
  • Freezing: You can freeze the cake for up to a month. Wrap it tightly in plastic wrap and then foil to prevent freezer burn.
  • Thawing: To enjoy, thaw in the refrigerator overnight and serve chilled.

FAQs About Creamy Coconut Custard Cake

Let’s address some common questions:

  • Can I use sweetened coconut flakes instead of unsweetened? Yes, but reduce the sugar in the recipe slightly to balance the sweetness.
  • Can I make this cake ahead of time? Absolutely! It’s actually better the next day after the flavors meld.
  • Can I use canned coconut cream instead of coconut milk? Yes, but you may need to adjust the liquid content to achieve the right consistency.
  • What can I use if I don’t have coconut milk? Almond milk or oat milk can be good substitutes, though they will alter the flavor slightly.
  • How do I know when the cake is done? The top should be set but slightly jiggly, and a toothpick should come out mostly clean.
  • Can I add other flavors to the custard? Yes! Adding a bit of lime or orange zest can brighten the flavors.
  • Is this cake gluten-free? To make it gluten-free, use a 1:1 gluten-free flour blend.
  • How should I serve this cake? It’s delicious on its own, but feel free to top it with whipped cream or fresh fruit for an added treat!

Nutritional Information & Dietary Adaptations

This cake is not only delicious but can also be tailored to fit your dietary needs:

  • Caloric Information: A typical slice contains around 250 calories, making it a moderate indulgence.
  • Dairy-Free Option: Use coconut milk and dairy-free butter for a fully dairy-free dessert.
  • Low-Sugar Version: Substitute granulated sugar with a sugar alternative like stevia or erythritol.

Essential Equipment Recommendations

To ensure your baking experience is smooth, here are some recommended tools:

  • 8-inch Baking Pan: Essential for achieving the perfect cake size.
  • Electric Mixer: Makes whipping the batter a breeze.
  • Whisk: Crucial for mixing the custard ingredients thoroughly.
  • Spatula: For spreading the batter evenly in the pan.
  • Wire Rack: Ideal for cooling the cake evenly.

Serving Suggestions

Present your cake beautifully to impress your guests:

  • Garnish: Top with toasted coconut and fresh mint leaves for a pop of color.
  • Pair with Beverages: Serve with a refreshing coconut smoothie or a cup of herbal tea.
  • Accompaniment: A scoop of vanilla ice cream pairs wonderfully with the cake’s creamy texture.

In Conclusion: A Slice of Paradise Awaits!

As we wrap up our culinary adventure, I hope you’re inspired to create this Creamy Coconut Custard Cake and share it with loved ones. Cooking is about bringing people together, and this cake is the perfect centerpiece for any gathering. So gather your ingredients, put on your favorite music, and let’s make some magic in the kitchen! Remember, every slice of this cake is a bite of sunshine and joy. Happy baking, my friends!

Creamy Coconut Custard Cake

Prep Time 20 minutes
Cook Time 40 minutes
Total Time 1 hour
Servings 8 pieces
Calories 420
A luscious cake combining coconut and custard flavors, perfect for a tropical treat.

Ingredients

Dry ingredients

  • 1.5 cups all-purpose flour
  • 0.75 cup granulated sugar
  • 2 tsp baking powder
  • 0.5 tsp salt

Wet ingredients

  • 0.5 cup unsalted butter, softened
  • 3 large eggs, room temperature
  • 1 tsp vanilla extract
  • 0.75 cup unsweetened shredded coconut
  • 1.5 cups full-fat coconut milk
  • 0.33 cup granulated sugar
  • 3 tbsp cornstarch
  • 3 large egg yolks

Garnish (optional)

  • 0.25 cup toasted shredded coconut (optional garnish)

Fresh mint leaves

Instructions 

  • Preheat oven to 350°F (175°C). Grease an 8-inch pan.
  • Mix dry ingredients; beat with butter until crumbly. Add eggs, vanilla, and coconut; combine.
  • Pour batter into pan. Whisk coconut milk, sugar, cornstarch, egg yolks, vanilla, and salt; cook until thickened.
  • Pour custard over batter, bake 35-40 mins. Cool, then chill for 2-3 hours.
  • Garnish with toasted coconut and mint leaves before serving.

Notes

Chilling enhances flavor and texture. Optional garnish adds visual appeal.
Calories: 420kcal
Cost: $15
Course: Dessert
Cuisine: Tropical
Keyword: coconut