Author

rafael

Browsing

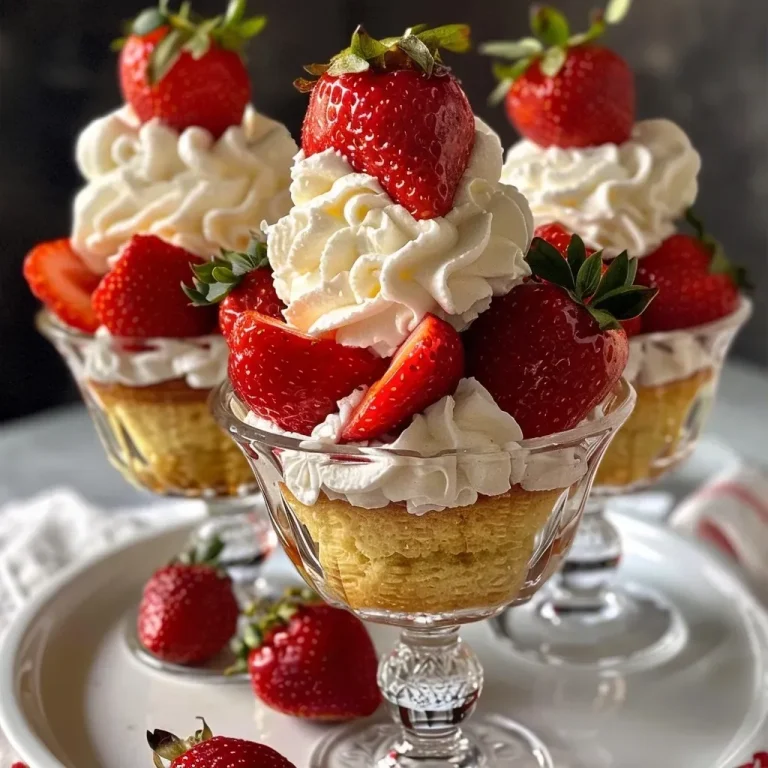
Transform Your Gatherings with Delightful Strawberry Shortcake Cups

Welcome to a world where every gathering is a celebration, and every bite is a sweet memory waiting to happen! Strawberry Shortcake Cups are not just desserts; they are a delightful experience that brings together the freshness of strawberries, the fluffiness of whipped cream, and the rich flavors of cake. In this comprehensive guide, we’ll explore how to create these beautiful cups that will impress your guests and satisfy your sweet tooth. Let’s dive in!

Why You’ll Love This Recipe

There are countless reasons to adore these Strawberry Shortcake Cups. Here are just a few:

  • Easy to Assemble: With simple ingredients and straightforward assembly, you can whip these up in no time, making them perfect for any occasion.
  • Customizable Layers: Each cup can be tailored to personal tastes, allowing for endless variations with fruits, creams, and cakes.
  • Perfect for Any Gathering: Whether it’s a summer barbecue, a birthday party, or a cozy family dinner, these cups will steal the show.
  • Light and Refreshing: The combination of fresh strawberries and whipped cream makes for a light dessert that satisfies without being overly heavy.
  • Visually Stunning: The vibrant colors of the strawberries and the creamy layers create a beautiful presentation that enhances any table setting.

Ingredients Breakdown

To create these delightful strawberry shortcake cups, you’ll need the following ingredients:

  • 2 cups of strawberries, chopped: Fresh, ripe strawberries are essential for the best flavor. You can substitute with other berries like blueberries or raspberries for variation.
  • 1/4 cup granulated sugar: This is used to macerate the strawberries, enhancing their natural sweetness. Adjust the amount based on your taste preference.
  • 1 teaspoon vanilla extract: Adds a warm flavor that complements the sweetness of the strawberries.
  • 1 cup all-purpose flour: The base for your cake. For a gluten-free option, consider using almond flour or a gluten-free flour blend.
  • 1/4 cup granulated sugar (for cake): Sweetens the cake. Again, you can adjust this to suit your taste.
  • 2 teaspoons baking powder: Helps your cake rise and become fluffy.
  • 1/4 teaspoon salt: Balances the sweetness of the cake.
  • 1/2 cup milk: Use whole or 2% milk for richness. Non-dairy alternatives like almond milk also work.
  • 1/3 cup vegetable oil: Keeps your cake moist. You can substitute with melted butter or coconut oil for added flavor.
  • 1 large egg: Binds the ingredients together. For a vegan alternative, use a flax egg or applesauce.
  • 1 cup heavy whipping cream: The star of the show! Whipped cream creates that light, airy texture.
  • Additional sugar for sweetening whipped cream (optional): Adjust to taste depending on how sweet you like your cream.

Step-by-Step Instructions
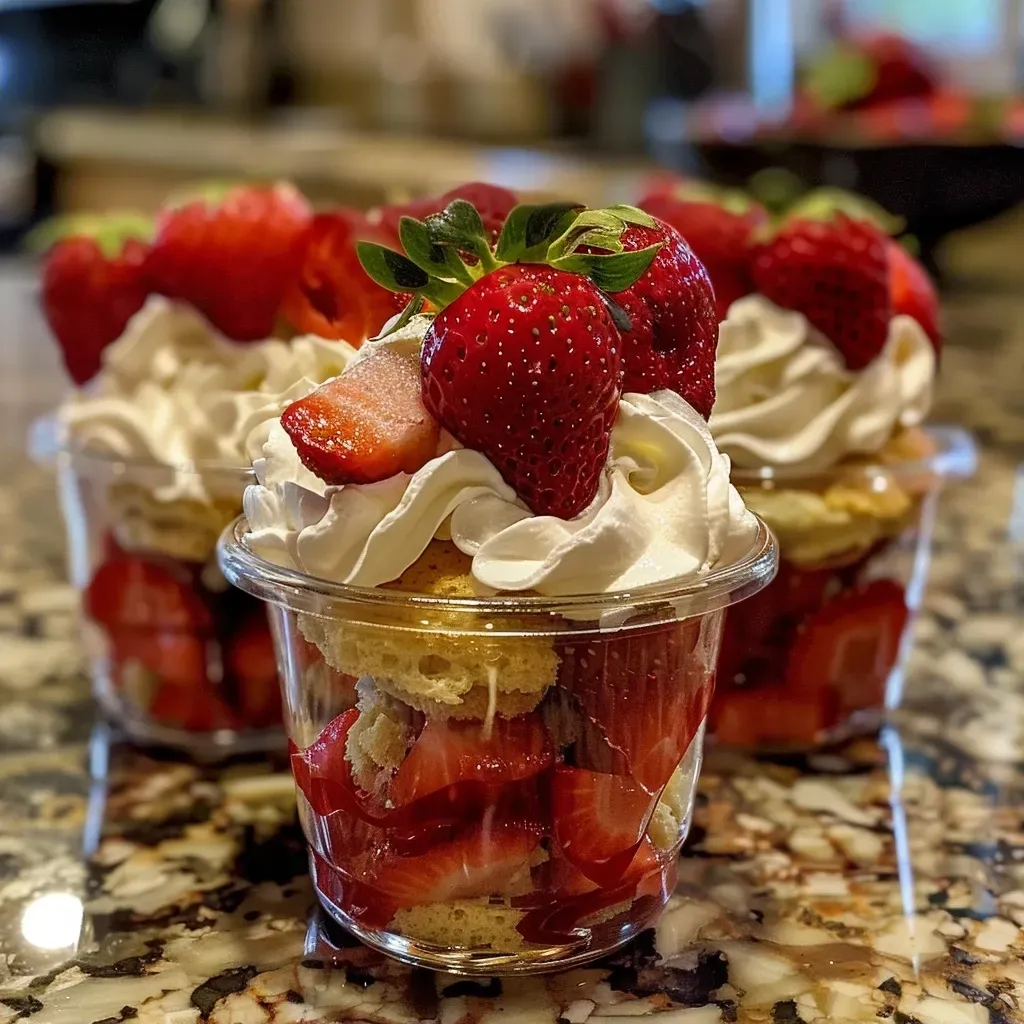
Strawberry Shortcake Cups

Creating your Strawberry Shortcake Cups is a breeze! Follow these steps:

  1. Macerate Strawberries: In a bowl, combine the chopped strawberries, 1/4 cup granulated sugar, and vanilla extract. Let them sit for 10 minutes to release their juices.
  2. Preheat Oven: If you’re baking the cake, preheat your oven to 350°F (175°C).
  3. Mix Dry Ingredients: In a separate bowl, whisk together the all-purpose flour, 1/4 cup sugar, baking powder, and salt.
  4. Combine Wet Ingredients: In another bowl, mix the milk, vegetable oil, and egg until fully combined.
  5. Combine Mixtures: Gradually add the wet ingredients to the dry ingredients, stirring until smooth. Avoid overmixing to keep your cake light.
  6. Bake: Pour the batter into an 8×8-inch baking dish or cupcake liners and bake for 15-20 minutes or until a toothpick comes out clean. Allow to cool.
  7. Whip Cream: In a chilled bowl, beat the heavy whipping cream until soft peaks form. Sweeten with sugar if desired.
  8. Assemble Cups: Once the cake is cool, cut it into cubes. In serving cups or bowls, layer the cake cubes, macerated strawberries, and whipped cream.
  9. Repeat Layers: Continue layering until the cups are filled, finishing with a dollop of whipped cream on top.
  10. Serve Immediately: These cups are best enjoyed right after assembling for optimal freshness.

Pro Tips for Perfect Strawberry Shortcake Cups

To elevate your dessert game, check out these expert tips:

  • Chill Your Cream: Ensure your mixing bowl and beaters are chilled before whipping cream for the best texture.
  • Macerate Longer: For even sweeter strawberries, let them macerate for up to 30 minutes.
  • Layer Creatively: Experiment with different arrangements of cake, strawberries, and cream for aesthetic appeal.
  • Use Fresh Ingredients: Fresh strawberries and high-quality cream make all the difference in flavor.
  • Adjust Sweetness: Taste your whipped cream and strawberries before serving, adjusting sweetness as necessary.
  • Make Ahead: Prepare the cake and strawberries ahead of time, but assemble just before serving to avoid sogginess.
  • Try Different Cakes: Use angel food cake, pound cake, or even store-bought options for quick assembly.
  • Garnish Wisely: Add mint leaves or chocolate shavings on top for a decorative touch.

Common Mistakes and Troubleshooting

Even the best cooks can run into issues. Here’s how to troubleshoot:

  • Cake Too Dense: This can happen if you overmix the batter. Mix just until combined.
  • Whipped Cream Not Holding Shape: Make sure your cream is cold and don’t overbeat; soft peaks should form.
  • Strawberries Too Tart: Adjust sugar to your taste when macerating; let them sit longer for more sweetness.
  • Too Much Liquid: If your strawberries release too much juice, layer them with cake quickly to avoid sogginess.

Delicious Variations

Feel free to get creative! Here are some fun variations on this classic recipe:

  • Chocolate Strawberry Shortcake Cups: Add layers of chocolate mousse between the strawberries and whipped cream for a decadent twist.
  • Berry Medley Cups: Use a mix of strawberries, blueberries, and raspberries for a colorful, flavorful experience.
  • Coconut Cream Cups: Substitute the heavy cream for coconut cream and add shredded coconut for a tropical vibe.
  • Cheesecake Cups: Mix cream cheese into your whipped cream for a rich, cheesecake-inspired flavor.

Storage and Make-Ahead Instructions

To enjoy your Strawberry Shortcake Cups over a few days:

  • Refrigerate: Store assembled cups in the refrigerator for up to 2 hours before serving for best texture.
  • Make Ahead: Bake the cake and macerate the strawberries a day in advance. Assemble just before serving.
  • Freezing: While the assembled cups don’t freeze well, you can freeze the cake and strawberries separately and thaw before assembly.

Frequently Asked Questions

Here are some common queries about Strawberry Shortcake Cups:

  • Can I use frozen strawberries? Yes, but thaw them and drain excess liquid before using.
  • How long do these keep? Assembled cups are best enjoyed fresh but can last in the fridge for up to 2 hours.
  • Can I make these dairy-free? Absolutely! Use coconut cream for the whipped cream and a dairy-free milk alternative for the cake.
  • What’s the best cake to use? Any light cake works well, including sponge, pound, or even store-bought options.
  • Can these be made in advance? Yes, prepare components ahead of time, but assemble just before serving to ensure freshness.
  • How can I make them more festive? Add sprinkles, edible flowers, or flavored syrups for a festive touch.
  • Is this recipe scalable? Absolutely! Adjust the ingredients proportionally for larger gatherings.
  • What if I don’t have individual cups? You can assemble them in a large trifle dish for a stunning presentation!

Nutritional Tips and Dietary Adaptations

Making your dessert healthier can be simple:

  • Reduce Sugar: Substitute granulated sugar with a natural sweetener like honey or agave syrup.
  • Use Whole Grains: Opt for whole wheat flour for added fiber and nutrients.
  • Add Nuts: For extra nutrition, sprinkle chopped nuts on top before serving.
  • Control Portions: Serve in smaller cups to control portion sizes and enjoy guilt-free.

Recommended Equipment

To ensure your Strawberry Shortcake Cups turn out perfectly, here’s what you’ll need:

  • Mixing Bowls: A set of varying sizes will help you manage your ingredients efficiently.
  • Measuring Cups and Spoons: Precision is key for baking success.
  • Whisk: Essential for mixing dry and wet ingredients smoothly.
  • Hand Mixer or Stand Mixer: To whip your cream to perfection.
  • Baking Dish or Cupcake Liners: Choose according to how you wish to bake your cake.
  • Serving Cups or Bowls: Clear glass or elegant serving cups make for a beautiful presentation.

Serving Suggestions

Serve your Strawberry Shortcake Cups with these delightful options:

  • Fresh Mint Leaves: A sprig on top adds a pop of color and freshness.
  • Chocolate Drizzle: A light drizzle of melted chocolate enhances the dessert’s appeal.
  • Flavored Syrups: Drizzle with raspberry or caramel syrup for an extra layer of flavor.
  • Additional Berries: Garnish with whole strawberries or other berries for a beautiful finish.

Conclusion

There you have it! A delightful journey into the world of Strawberry Shortcake Cups. These treats are not just desserts; they are a celebration of flavors, textures, and memories. The next time you gather with friends and family, let these cups be the star of your table. Remember, cooking is about joy, love, and a sprinkle of creativity. So grab your apron, gather your ingredients, and let’s make some magic in the kitchen!

Strawberry Shortcake Cups

Prep Time 20 minutes
Cook Time 20 minutes
Total Time 40 minutes
Servings 4 cups
Calories 350
A delightful layered dessert featuring fresh strawberries, fluffy cake, and whipped cream, perfect for a quick treat or special occasion.

Ingredients

Fruits

  • 2 cups strawberries, chopped (macereated with sugar and vanilla)
  • 1/4 cup granulated sugar
  • 1 teaspoon vanilla extract

Cake

  • 1 cup all-purpose flour
  • 1/4 cup granulated sugar (for cake)
  • 2 teaspoons baking powder
  • 1/4 teaspoon salt
  • 1/2 cup milk
  • 1/3 cup vegetable oil
  • 1 large egg

Whipped Cream

  • 1 cup heavy whipping cream
  • Additional sugar for sweetening whipped cream (optional)

Instructions 

  • Combine strawberries, 1/4 cup sugar, and vanilla; let sit 10 min.
  • Mix dry ingredients; in a separate bowl, combine wet ingredients.
  • Mix wet into dry; pour into baking dish and bake at 350°F (175°C) for 15-20 min. Cool.
  • Whip cream until soft peaks form; sweeten if desired.
  • Cut cake into cubes; layer with strawberries and whipped cream in cups. Repeat layers and top with whipped cream.
Notes

Use fresh strawberries for best flavor and serve immediately.
Calories: 350kcal
Cost: $15
Course: Dessert
Keyword: Strawberries

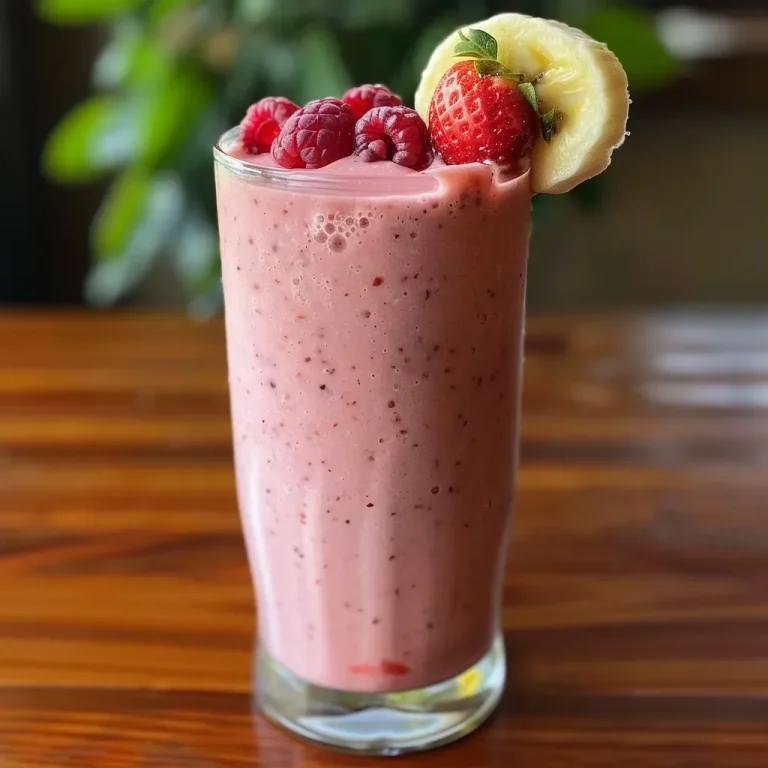
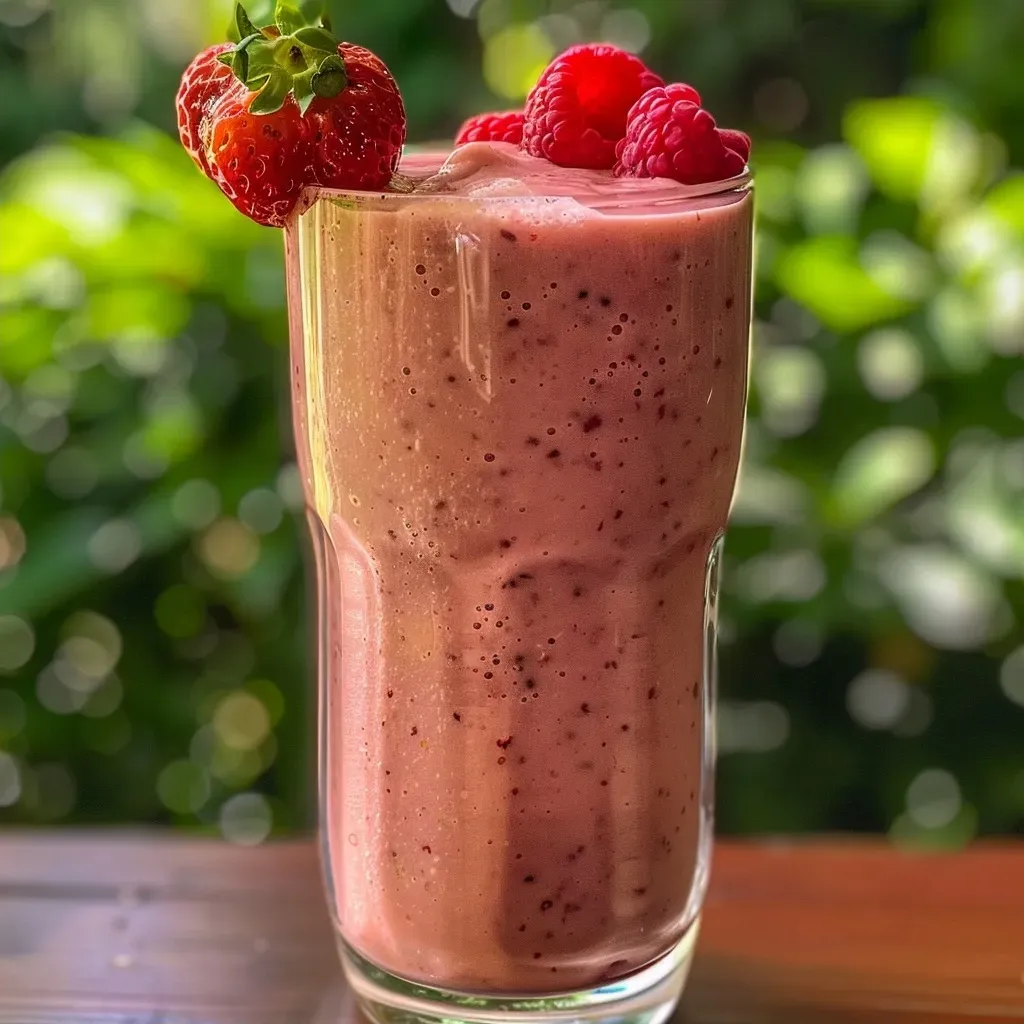
Unleashing Flavor: The Joy of the Pink Strawberry Banana Smoothie

Welcome to a journey of flavor and vibrancy! Today, we’re diving into a delightful concoction that not only tantalizes your taste buds but also nourishes your body and soul. The Pink Strawberry Banana Smoothie is a celebration of fresh, wholesome ingredients, blending the sweetness of ripe bananas and strawberries with the creamy goodness of Greek yogurt. Perfect for breakfast, an afternoon snack, or even a post-workout rejuvenation, this smoothie will brighten your day and leave you feeling invigorated.

With its delightful pink hue and irresistible taste, this smoothie is not just a drink—it’s an experience. So grab your ingredients, and let’s blend our way to happiness!

Why You’ll Love This Recipe

Here are a few reasons why this smoothie will become a staple in your kitchen:

  • Quick and Easy: Whip it up in just 5 minutes, making it perfect for busy mornings.
  • Nutritious Boost: Packed with vitamins, antioxidants, and protein, it fuels your body with essential nutrients.
  • Customizable: Easily adapt the recipe to cater to your taste preferences or dietary needs.
  • Deliciously Creamy: The combination of Greek yogurt and fruits creates a rich and satisfying texture.
  • Family-Friendly: Kids and adults alike will love the vibrant colors and sweet flavors, making it an excellent choice for the whole family!

Ingredients You’ll Need

To create your own Pink Strawberry Banana Smoothie, gather the following ingredients:

  • 1 cup frozen strawberries: These vibrant berries provide a bold fruity flavor and keep the smoothie thick and chilled.
  • 1 ripe banana: Adds natural sweetness and creamy texture, enhancing the overall flavor profile.
  • ½ cup Greek yogurt (or dairy-free yogurt): This ingredient adds protein and a delightful creaminess, making it a filling option.
  • ¾ cup milk (or plant-based milk): Use your preferred milk to achieve the desired consistency.
  • 1 tablespoon honey or maple syrup (optional): For those who enjoy a sweeter touch, this is a great addition.
  • ½ teaspoon vanilla extract: This elevates the flavor, giving the smoothie a warm, inviting aroma.
  • 1 tablespoon chia seeds: These little seeds are packed with omega-3 fatty acids and add a nice texture.
  • ½ cup raspberries: For an extra burst of color and flavor, toss in some raspberries! They also boost the antioxidant content.
  • Protein powder (quantity as desired): For a protein-packed version, feel free to add your favorite protein powder.
  • Ice cubes (if using fresh fruit): To chill your smoothie and give it that refreshing, frosty texture.

Step-by-Step Instructions

Pink Strawberry Banana Smoothie Recipe

Creating the perfect Pink Strawberry Banana Smoothie is simple! Follow these easy steps:

  1. Add the frozen strawberries, ripe banana, Greek yogurt (or dairy-free alternative), milk (or plant-based milk), honey or maple syrup (if using), and vanilla extract into a blender.
  2. Blend all the ingredients on high speed until the mixture is smooth and creamy without lumps.
  3. Taste the smoothie and add more sweetener if desired, blending again briefly to mix.
  4. Pour the smoothie into glasses immediately for the best texture and flavor.
  5. If desired, add optional add-ins like chia seeds, raspberries, protein powder, or ice cubes before blending for added nutrition or texture.

Pro Tips for the Perfect Smoothie

To elevate your smoothie game, consider these expert insights:

  • Use frozen fruits: They not only provide a thicker texture but also keep your smoothie cold without the need for ice.
  • Experiment with flavors: Try adding a handful of spinach or kale for a nutrient boost without altering the taste.
  • Don’t skip the yogurt: It adds creaminess and protein, making your smoothie more satisfying.
  • Chill your glasses: For an extra-refreshing experience, chill your serving glasses in the freezer for a few minutes before pouring.
  • Balance sweetness: Taste your smoothie before serving; if it’s too tart, a little more honey or banana can help balance it.
  • Blend in stages: Start with the liquids and soft ingredients first, then gradually add the frozen items for a smoother blend.
  • Make it a meal: Add oats or nut butter for a filling breakfast option.
  • Presentation matters: Garnish with fresh fruit or a sprinkle of chia seeds for a beautiful finish.

Common Mistakes and Troubleshooting Tips

Here are some common pitfalls and how to avoid them:

  • Too thick: If your smoothie is too thick, add a splash more milk to achieve your desired consistency.
  • Too sweet: If it’s overly sweet, balance it with a squeeze of lemon juice or a handful of greens.
  • Not blending well: Ensure your blender is strong enough; if not, blend in smaller batches.
  • Flavor is bland: Boost flavors with spices like cinnamon or nutmeg, or add a squeeze of fresh citrus.

Variations to Try

Feel free to get creative! Here are some fun variations:

  • Berry Blast: Mix in other berries like blueberries or blackberries for a mixed berry smoothie.
  • Tropical Twist: Add pineapple and coconut milk for a tropical flavor profile.
  • Green Goddess: Incorporate spinach or kale for a nutrient-packed green smoothie.
  • Nutty Banana: Add a tablespoon of almond butter or peanut butter for a nutty flavor and extra protein.

Storage and Make-Ahead Instructions

This smoothie is best enjoyed fresh, but if you need to prepare in advance:

  • Make-ahead: Pre-portion your ingredients and freeze them in bags. In the morning, just blend with your choice of milk.
  • Storage: If you have leftovers, store them in an airtight container in the fridge for up to 24 hours. Shake well before enjoying.

Comprehensive FAQ

Got questions? Here are some answers to common inquiries about the Pink Strawberry Banana Smoothie:

  • Can I use fresh strawberries instead of frozen? Yes, but add ice cubes to achieve the desired texture.
  • Is this smoothie vegan? Yes, simply use dairy-free yogurt and plant-based milk.
  • Can I make this smoothie without yogurt? Absolutely! You can substitute yogurt with additional banana or a vegan yogurt alternative.
  • How can I make this smoothie more filling? Add oats or a scoop of protein powder for a more substantial meal.
  • What if I don’t have Greek yogurt? Any yogurt will work, or you can use silken tofu for a dairy-free option.
  • Can I add greens to this smoothie? Yes! Spinach or kale blends well and adds nutrients without overpowering the flavor.
  • How do I sweeten the smoothie naturally? Use ripe bananas or add a date for natural sweetness.
  • What’s the best way to clean my blender? Blend warm water and a drop of dish soap, then rinse thoroughly.

Nutrition Tips and Dietary Adaptations

This smoothie is not only delicious but can also be tailored to fit various dietary needs:

  • Low-calorie option: Skip the honey and use only the sweetness from the fruits.
  • High-protein version: Add a scoop of your favorite protein powder for an extra protein kick.
  • Dairy-free: Use coconut yogurt and almond milk to keep it dairy-free while still creamy.
  • Low-carb version: Substitute the banana with avocado for a creamy texture without the carbs.

Equipment Recommendations

To make blending seamless, here are some essential tools:

  • High-speed blender: Invest in a good-quality blender to achieve that perfect creamy texture.
  • Measuring cups and spoons: Accurate measurements ensure consistency in flavor and texture.
  • Spatula: Useful for scraping down the sides of the blender to ensure everything blends well.
  • Glass jars: Great for storing leftovers or making smoothie packs ahead of time.

Serving Suggestions

To elevate your smoothie experience, consider these serving ideas:

  • Garnish: Top with sliced fruits, a sprinkle of chia seeds, or a dollop of yogurt.
  • Pair with snacks: Serve alongside whole-grain toast or a handful of nuts for a balanced meal.
  • Creative containers: Serve in mason jars or fun glasses for an inviting presentation.

In conclusion, the Pink Strawberry Banana Smoothie is not just a beverage; it’s a celebration of flavors that nourishes your body and spirit. With its ease of preparation and endless variations, it’s perfect for any occasion. So, gather your ingredients, blend away, and indulge in this vibrant treat that brings joy and health into your life. Cheers to good health and delicious smoothies!

Pink Strawberry Banana Smoothie Recipe

Prep Time 5 minutes
Total Time 5 minutes
Servings 2 cups
Calories 250
A delicious and nutritious smoothie combining strawberries, banana, and yogurt for a refreshing treat.

Ingredients

Fruits and Dairy

  • 1 cup frozen strawberries
  • 1 ripe banana banana
  • ½ cup Greek yogurt or dairy-free yogurt
  • ¾ cup milk or plant-based milk
  • 1 tablespoon honey or maple syrup (optional)
  • ½ teaspoon vanilla extract
  • 1 tablespoon chia seeds
  • ½ cup raspberries
  • as desired quantity protein powder
  • as needed quantity ice cubes (if using fresh fruit)

Instructions 

  • Add the frozen strawberries, banana, yogurt, milk, honey, and vanilla into a blender.
  • Blend on high until smooth and creamy.
  • Taste and add more sweetener if desired, then blend briefly.
  • Pour into glasses immediately and enjoy.
  • Add optional ingredients like chia seeds, raspberries, protein powder, or ice before blending.

Notes

For a thicker smoothie, add more ice or frozen fruit.
Calories: 250kcal
Cost: $10
Course: Breakfast, Snack
Cuisine: American
Keyword: Fruit, Smoothie

Welcome, food lovers! Today, we’re diving into a dish that’s not just a meal but a vibrant celebration of Mediterranean life—Honey Lemon Chicken Skillet. This dish is a true homage to my roots in Seville, where every meal is a joyful gathering filled with laughter, rich aromas, and the warmth of family. Juicy chicken breasts are coated in a sweet and tangy glaze that dances on your palate, creating a culinary experience that’s perfect for any occasion—from busy weeknights to festive gatherings. Let’s embark on this flavorful journey together!

Why You’ll Love This Recipe

There are countless reasons to fall in love with this Honey Lemon Chicken Skillet, and I’m thrilled to share a few of my favorites:

  • Quick and Easy: This dish comes together in under 30 minutes, making it perfect for a weeknight dinner when time is of the essence.
  • One-Pan Wonder: Less cleanup means more time enjoying the meal with loved ones. All the magic happens in one skillet!
  • Flavor Explosion: The combination of honey and fresh lemon juice creates a vibrant sauce that elevates the humble chicken breast into a culinary delight.
  • Family-Friendly: With its sweet and tangy flavors, this dish is a hit with kids and adults alike—perfect for picky eaters!
  • Versatile: This recipe can easily be customized with your favorite vegetables or proteins, making it adaptable to your family’s preferences.

Essential Ingredients

Let’s gather our ingredients for this delightful meal:

  • 4 boneless, skinless chicken breasts: About 6 ounces each, they’re the star of our skillet. You can substitute with thighs for a juicier option.
  • Salt and black pepper: Essential for seasoning and enhancing the flavors of the chicken.
  • Olive oil: This not only helps in cooking the chicken but also adds a beautiful richness to the dish.
  • Garlic: Freshly minced, it infuses the dish with its aromatic essence.
  • Fresh lemon juice: Around 1/4 cup, freshly squeezed from about 2 lemons for the best flavor.
  • Honey: Adds the perfect amount of sweetness to balance the acidity of the lemon.
  • Low sodium chicken broth: For added depth and moisture in the sauce.
  • Lemon zest: A teaspoon of zest brightens up the flavors.
  • Unsalted butter: Adds a luscious finish to our sauce.
  • Fresh parsley: Chopped, for a fresh and vibrant garnish.

Step-by-Step Instructions

Let’s get cooking! Follow these easy steps for a mouthwatering Honey Lemon Chicken Skillet:

  1. Pat the chicken breasts dry with paper towels and season both sides generously with salt and black pepper.
  2. Heat olive oil in a large skillet over medium-high heat until shimmering, which ensures a beautiful sear on the chicken.
  3. Add the chicken breasts to the skillet and cook for 5-6 minutes on each side until golden brown and the internal temperature reaches 165°F. Remove the chicken from the skillet and set aside on a plate.
  4. Reduce the heat to medium and add the minced garlic to the skillet, sautéing for about 30 seconds until fragrant, stirring constantly to avoid burning.
  5. Pour in the fresh lemon juice, honey, and chicken broth, stirring to combine. Bring the mixture to a simmer.
  6. Add the lemon zest and simmer the sauce for 3-4 minutes until it slightly thickens, creating a glossy finish.
  7. Stir in the unsalted butter until melted, enhancing the sauce’s richness.
  8. Return the cooked chicken breasts to the skillet, spooning the sauce over the top. Cook for an additional 2 minutes, allowing the chicken to be coated and heated through.
  9. Sprinkle chopped fresh parsley over the chicken before serving, adding a pop of color and freshness.

Chef’s Pro Tips

Close-up of Honey Lemon Chicken Skillet featuring golden chicken and bright lemon slices.

To ensure your Honey Lemon Chicken Skillet is a smashing success, here are some expert insights:

  • Temperature check: Always use a meat thermometer to ensure your chicken reaches 165°F for safe consumption.
  • Marinate for flavor: For even more depth, marinate the chicken in honey and lemon juice for at least 30 minutes before cooking.
  • Adjust sweetness: If you prefer a sweeter sauce, feel free to add a touch more honey to taste.
  • Vegetable boost: Add seasonal vegetables like bell peppers or asparagus to the skillet during the last 5 minutes for a complete meal.
  • Gluten-free option: Ensure your chicken broth is gluten-free if you’re following a gluten-free diet.
  • Stir constantly: When adding garlic, stir constantly to prevent it from burning, which can turn the flavor bitter.
  • Rest the chicken: Let the chicken rest for a few minutes after cooking to retain moisture and flavor.
  • Serving suggestion: Pair this dish with a light salad or over a bed of fluffy rice or quinoa to soak up the delicious sauce.

Common Mistakes and Troubleshooting

Even seasoned cooks can run into a few hiccups. Here are common mistakes and how to avoid them:

  • Overcooking the chicken: Keep an eye on the cooking time and use a thermometer to avoid dry chicken.
  • Skipping the resting step: Allowing the chicken to rest helps it retain juices—don’t skip this!
  • Burning the garlic: Garlic can burn quickly, so always cook it on medium heat and monitor closely.
  • Too much sauce: If your sauce is too thin, let it simmer longer to reduce and thicken. Conversely, if it’s too thick, add a splash of broth.

Delicious Variations

Feel free to put your own twist on this recipe with these creative variations:

  • Herb-Infused: Add fresh herbs like thyme or rosemary to the sauce for an aromatic touch.
  • Spicy Kick: Incorporate red pepper flakes when sautéing the garlic for a spicy variation.
  • Citrus Medley: Mix in orange juice or zest along with the lemon for a citrus burst.
  • Honey Mustard Twist: Add a tablespoon of Dijon mustard to the sauce for a tangy flavor profile.

Storage and Make-Ahead Instructions

This dish can be prepped ahead of time and stored for later enjoyment:

  • Make-Ahead: Prepare the chicken and sauce in advance; store them separately in airtight containers in the refrigerator for up to 2 days.
  • Reheating: Gently reheat in a skillet over low heat, adding a splash of chicken broth to loosen the sauce.
  • Freezing: You can freeze cooked chicken and sauce in a freezer-safe container for up to 3 months. Thaw in the refrigerator before reheating.

Frequently Asked Questions

Here are some common questions about this delightful dish:

  • Can I use different proteins in my Honey Lemon Chicken Skillet? Absolutely! This recipe works well with chicken thighs, pork, or even tofu for a vegetarian option.
  • What should I serve with my Honey Lemon Chicken Skillet? Pair it with a light salad, fluffy rice, or roasted vegetables for a complete meal.
  • Can I make this recipe ahead of time? Yes, you can prepare the chicken and sauce in advance and store them separately in the refrigerator.
  • How can I make this dish spicier? Add red pepper flakes or a dash of hot sauce to the sauce for an extra kick.
  • What if I don’t have fresh lemon juice? You can use bottled lemon juice, but fresh lemon juice provides the best flavor.
  • Can I substitute honey? Yes, maple syrup or agave nectar can be used as alternatives for a different sweetness.
  • Is this dish gluten-free? Yes, just ensure you use gluten-free chicken broth.
  • How long will leftovers last? Leftovers can be stored in the refrigerator for up to 2 days.

Nutrition Tips and Dietary Adaptations

This Honey Lemon Chicken Skillet is not only delicious but can also fit into various dietary preferences:

  • Low Carb: Serve it over steamed vegetables instead of rice for a low-carb option.
  • Dairy-Free: Omit the butter or substitute with a dairy-free alternative.
  • Whole30 Compliant: Use compliant honey and broth, and skip the butter for a Whole30-friendly version.

Equipment Recommendations

Here’s what you’ll need to create this delightful dish:

  • Skillet: A large, heavy-bottom skillet is ideal for searing the chicken and making the sauce.
  • Meat Thermometer: Essential for ensuring your chicken is perfectly cooked.
  • Cutting Board and Knife: For prepping your ingredients, a good cutting board and sharp knife are must-haves.

Serving Suggestions

To truly elevate your Honey Lemon Chicken Skillet experience, consider these serving ideas:

  • Fresh Salad: A simple arugula salad with lemon vinaigrette complements the dish beautifully.
  • Rice or Quinoa: Serve over a bed of fluffy rice or quinoa to soak up the luscious sauce.
  • Crusty Bread: A slice of crusty bread is perfect for mopping up every last bit of sauce.

In conclusion, this Honey Lemon Chicken Skillet is more than just a meal; it’s an invitation to gather around the table, share stories, and create lasting memories. With its easy preparation, vibrant flavors, and delightful presentation, it’s a dish that will surely impress. So, grab your ingredients, invite your loved ones, and let’s celebrate the joy of cooking and togetherness! Happy cooking, amigos!

Honey Lemon Chicken Skillet

Prep Time 10 minutes
Cook Time 15 minutes
Total Time 25 minutes
Servings 4 servings
Calories 350
A quick and flavorful skillet dish featuring tender chicken in a tangy honey lemon sauce, perfect for a satisfying meal.

Ingredients

Chicken

  • 4 pieces boneless, skinless chicken breasts (about 6 ounces each)
  • 1 teaspoon salt
  • 1/2 teaspoon black pepper
  • 2 tablespoons olive oil
  • 3 cloves garlic, minced
  • 1/4 cup fresh lemon juice (about 2 lemons)
  • 1/4 cup honey
  • 1/2 cup low sodium chicken broth
  • 1 teaspoon lemon zest
  • 1 tablespoon unsalted butter
  • 2 tablespoons chopped fresh parsley

Instructions 

  • Pat chicken dry, season with salt and pepper.
  • Heat oil in skillet over medium-high heat. Cook chicken 5-6 mins per side until golden and cooked through. Remove and set aside.
  • Sauté garlic in skillet 30 seconds. Add lemon juice, honey, and broth; simmer.
  • Add lemon zest, simmer 3-4 mins. Stir in butter until glossy.
  • Return chicken to skillet, coat with sauce, cook 2 mins. Garnish with parsley before serving.

Notes

For extra flavor, marinate chicken in lemon and honey mixture for 30 minutes before cooking.
Calories: 350kcal
Cost: $15
Course: Main Course
Cuisine: American
Keyword: Chicken, Honey, lemon

Whisking Up Sunshine: The Joy of Lemon Yogurt Cake

Welcome to a delightful culinary adventure! Today, we’re celebrating the vibrant flavors of the Mediterranean with a recipe that’s not just a treat for the taste buds but a feast for the senses. This Fluffy Lemon Yogurt Cake is a true expression of the joy of baking, featuring only four simple ingredients that come together to create a cake that is light, airy, and bursting with citrus flavor. Perfect for gatherings, family celebrations, or simply indulging yourself, this cake is a slice of sunshine that brings people together.

Why You’ll Love This Recipe

  • Quick and Easy: With only four ingredients, this easy 4 ingredient cake comes together in no time, making it perfect for both novice and experienced bakers.
  • Light and Fluffy: The combination of Greek yogurt and whipped egg whites gives this cake its signature fluffy texture, making every bite a heavenly experience.
  • Versatile Delight: Whether served as a light dessert or an afternoon snack, this cake adapts beautifully to any occasion, proving to be a crowd-pleaser.
  • Citrus Freshness: The zingy lemon juice and zest infuse the cake with a refreshing brightness that can lift any mood and brighten any gathering.
  • Perfect Make-Ahead Option: This cake actually tastes better when made a day in advance, allowing the flavors to meld beautifully — a perfect treat for planning ahead!

Ingredients Breakdown

Let’s dive into the four main ingredients that make this cake not just simple, but incredibly delicious:

  • Greek Yogurt (3/4 cup or 161 g): This is the star of the show, adding moisture and a rich texture. If you prefer, you can substitute with regular plain yogurt, but Greek yogurt will yield a denser cake.
  • Sweetened Condensed Milk (3/4 cup or 177 ml/238 g): This ingredient sweetens the cake naturally and adds a creamy richness. If you’re looking for a lighter option, consider using a sweetener like honey or maple syrup, but adjust the liquid content accordingly.
  • Eggs (4 large, separated): Eggs provide structure and stability. Ensure they are straight from the fridge for the best results when whipping the egg whites.
  • Lemon Juice and Zest (2 tbsp juice + 1 tbsp zest): Fresh lemon juice and zest bring a punch of flavor and aroma, making the cake bright and refreshing. Feel free to experiment with other citrus fruits like oranges or limes for a unique twist!

How to Make Fluffy Lemon Yogurt Cake

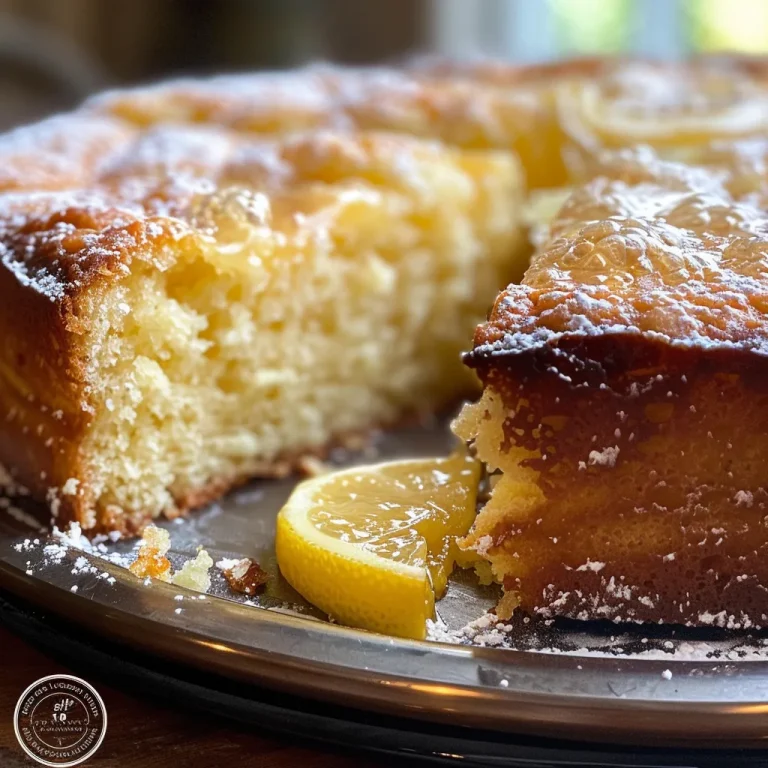
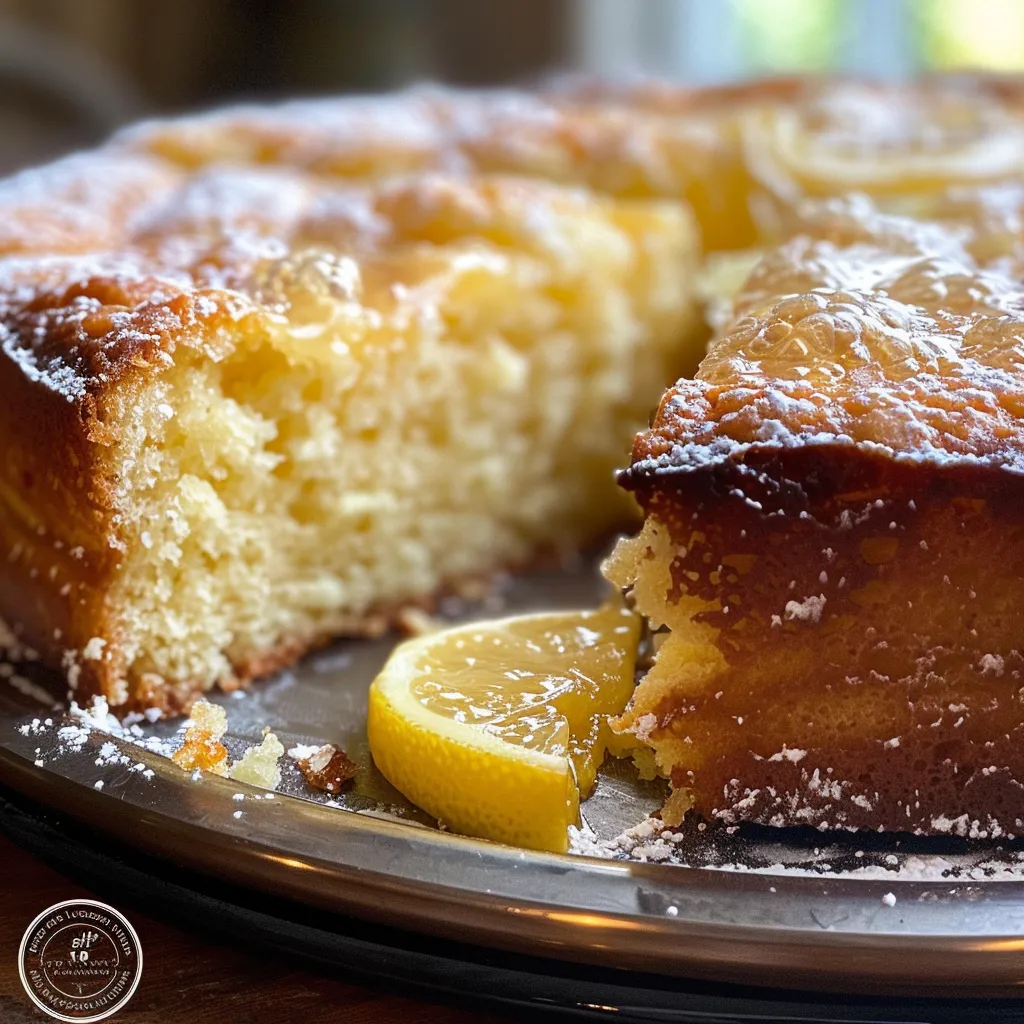
Juicy lemon yogurt cake displayed on a plate, highlighting its light and fluffy layers with a lemony glaze.

Ready to bake? Let’s walk through the steps to create this delightful cake:

  1. Preheat the Oven: Set your oven to 325°F (163°C). Prepare a 7-inch round cake pan by greasing it with cooking spray and lining the bottom with parchment paper. Make sure to grease the sides as well.
  2. Mix the Batter: In a large mixing bowl, combine the yogurt, sweetened condensed milk, and egg yolks. Whisk until smooth and fully incorporated.
  3. Add Citrus: Mix in the lemon juice and zest, adding a burst of freshness to your batter.
  4. Whip the Egg Whites: In a separate bowl, beat the egg whites at high speed until stiff peaks form. This is crucial for achieving that light and fluffy texture.
  5. Fold Gently: Add one third of the whipped egg whites to the yolk mixture and fold gently with a spatula. Repeat this process until all egg whites are incorporated, being careful not to deflate the mixture.
  6. Prepare for Baking: Pour the batter into your prepared pan. To bake the cake in a water bath, place the cake pan into a slightly larger baking pan and fill the outer pan with cold water until it reaches about 5/16 inch up the sides of the inner pan.
  7. Bake: Place the cake in the oven and bake for 45 minutes, or until the top is golden brown. Avoid opening the oven door during baking!
  8. Cool and Chill: Once baked, turn off the oven but keep the cake inside for an additional hour. This gradual cooling prevents collapsing. After an hour, let it cool to room temperature, then refrigerate for several hours or overnight to enhance the flavors.
  9. Serve: Before serving, dust the top with powdered sugar for an elegant finish.

Expert Tips for Perfect Results

  • Use Fresh Ingredients: Fresh lemons and quality Greek yogurt will elevate the flavor of your cake significantly.
  • Pay Attention to Temperature: Ensure that your ingredients, especially eggs, are at room temperature for better emulsification.
  • Don’t Overmix: When folding the egg whites, be gentle to maintain the airy texture — overmixing can lead to a dense cake.
  • Check for Doneness: Use a toothpick to test the center of the cake. It should come out clean when the cake is ready.
  • Perfect Water Bath: Keeping the water level just right is key to avoiding a soggy bottom or overcooked edges.
  • Customize the Flavor: Experiment with different extracts like vanilla or almond for added depth.
  • Serve with Accompaniments: Pair with whipped cream or fresh berries for a delightful presentation.
  • Storage: Store leftovers in an airtight container in the fridge for up to a week — this cake actually gets better with time!

Common Mistakes and Troubleshooting

Even the best bakers encounter hiccups. Here are some common pitfalls and how to avoid them:

  • Cake Sunk in the Middle: This can happen from overmixing or opening the oven door too early. Always wait until the baking time is complete.
  • Dense Texture: If your cake is too dense, it may be due to improperly whipped egg whites or overmixing the batter. Be gentle!
  • Too Sweet: If you find the cake too sweet, try reducing the amount of sweetened condensed milk next time.

Variations to Try

Feeling adventurous? Here are some fun variations:

  • Berry Delight: Fold in fresh berries like blueberries or raspberries into the batter for a fruity twist.
  • Coconut Bliss: Add shredded coconut to the batter for a tropical flair.
  • Chocolate Lovers: Incorporate cocoa powder or chocolate chips for a rich chocolate version of this cake.
  • Almond Zest: Replace lemon juice with almond extract and add sliced almonds for a nutty flavor.

Storage and Make-Ahead Instructions

This cake is perfect for making ahead of time. Here’s how to store it:

  • Refrigerate: Store in an airtight container in the fridge for up to a week. The flavors will deepen as it sits.
  • Freezing: You can also freeze individual slices wrapped in plastic wrap and aluminum foil for up to three months.

Comprehensive FAQs

Here are some of the most common questions about this Lemon Yogurt Cake:

  • Can I make this cake gluten-free? Absolutely! Substitute regular flour with a gluten-free blend.
  • What yogurt works best? Greek yogurt is recommended for its creaminess, but regular yogurt will work too.
  • Can I use lemon juice instead of zest? While zest adds a strong lemon flavor, you can use lemon juice alone; just be mindful of the flavor intensity.
  • How do I know if my cake is done? A toothpick inserted in the center should come out clean.
  • Can I double the recipe? Yes! Just ensure your pans are appropriately sized and adjust baking time as needed.
  • What can I serve with this cake? Fresh berries, whipped cream, or a light lemon glaze pair wonderfully.
  • Is it necessary to chill the cake? Chilling helps develop flavor and texture, but if you’re in a hurry, you can enjoy it right away!
  • How long does it take to bake? The cake typically bakes for about 45 minutes, plus an additional hour in the oven with the heat off.

Nutrition Tips and Dietary Adaptations

This cake can be easily adapted to fit various dietary needs:

  • Low-Sugar Option: Use a sugar substitute in place of sweetened condensed milk.
  • Dairy-Free: Substitute Greek yogurt with a dairy-free yogurt alternative.
  • Lower Calorie: Reduce the amount of condensed milk and replace it with a lower-calorie sweetener.

Equipment Recommendations

To make this cake successfully, here’s what you’ll need:

  • Mixing Bowls: A large bowl for mixing the batter and a separate one for whipping egg whites.
  • Cake Pan: A 7-inch round cake pan is ideal — a one-piece pan is recommended for the water bath method.
  • Whisk: A sturdy whisk for mixing and incorporating the ingredients smoothly.
  • Spatula: A rubber spatula is perfect for folding the egg whites into the batter.

Serving Suggestions

When it’s time to serve, consider these delightful ideas:

  • Garnish: Dust with powdered sugar or drizzle with a light lemon glaze.
  • Pairing: Serve with fresh fruit or a scoop of light sorbet for an extra refreshing touch.
  • Presentation: Plate the cake on a colorful dish to enhance its visual appeal.

This Lemon Yogurt Cake is not just a recipe; it’s an experience that brings joy and connection. So grab your apron, whisk together some sunshine, and let this cake become the star of your next gathering. Enjoy every bite and the company of those you love!

4 Ingredient Fluffy Lemon Yogurt Cake

Prep Time 15 minutes
Cook Time 45 minutes
Total Time 1 hour
Servings 8 slices
Calories 250
A light and airy lemon yogurt cake made with just four ingredients, perfect for a quick and delicious dessert.

Ingredients

Dairy

  • 3/4 cup cup whole milk plain Greek yogurt
  • 3/4 cup cup sweetened condensed milk
  • 4 large eggs, separated (from fridge)
  • 2 tbsp ml lemon juice
  • 1 tbsp ml lemon zest

Instructions 

  • Preheat oven to 325°F (163°C). Grease a 7-inch round cake pan and line the bottom with parchment.
  • Mix yogurt, condensed milk, and egg yolks until smooth. Add lemon juice and zest.
  • Beat egg whites until stiff peaks form. Gently fold into the batter in thirds.
  • Pour batter into the prepared pan set in a water bath. Bake for 45 minutes until browned.
  • Turn off oven, leave cake inside for 1 hour. Cool to room temperature, then refrigerate for several hours or overnight.

Notes

For best flavor, refrigerate the cake overnight before serving.
Calories: 250kcal
Cost: $10
Course: Dessert
Keyword: cake, lemon, Yogurt

Experience the Joy of Crafting a Fresh Fruit Tart

Fruit tarts are a delightful way to celebrate the colors and flavors of the season, combining a buttery crust, rich custard, and fresh, vibrant fruits in every bite. Whether it’s for a festive gathering, a family dinner, or a sweet indulgence on a quiet evening, this recipe for a Fresh Fruit Tart will surely impress your guests and spark joy in your heart. In this guide, we will dive deep into not just how to make this classic dessert, but also explore its variations, tips for perfection, and ways to elevate your tart-making experience.

Why You’ll Love This Recipe

  • Visual Appeal: The vibrant colors of fresh fruits make this tart a stunning centerpiece for any table.
  • Flavor Explosion: The combination of buttery crust, silky pastry cream, and sweet, tart fruits creates a delightful balance of flavors.
  • Customizable: You can use a variety of seasonal fruits, making it easy to adapt this recipe to what you have on hand.
  • Simple Preparation: With a straightforward process, even novice bakers can achieve impressive results.
  • Make-Ahead Friendly: Most components can be prepared in advance, saving time on the day you plan to serve.

Ingredients Breakdown

To create the perfect fresh fruit tart, you’ll need the following ingredients:

  • 1 1/2 cups whole milk: Provides a rich base for your pastry cream.
  • 1/2 cup heavy cream: Adds a luscious texture to the filling.
  • 1/2 cup sugar (divided): Sweetens both the crust and the pastry cream.
  • Pinch of salt: Enhances the overall flavor profile.
  • 3 tablespoons cornstarch: Thickens the pastry cream for a perfect consistency.
  • 4 tablespoons cold butter (cut into pieces): Ensures a flaky tart crust.
  • 5 egg yolks: Enriches the pastry cream and gives it a beautiful color.
  • 1/2 teaspoon vanilla extract: Adds warmth and depth to the cream.
  • 1 teaspoon cognac (optional): Offers a sophisticated flavor boost.
  • 1 large egg: Used for the crust for added richness.
  • 1/2 teaspoon pure vanilla extract: For flavor in the crust.
  • 1 1/3 cups all-purpose flour: The base of your tart crust.
  • 1/2 cup confectioners’ sugar: Sweetens the crust.
  • 1/4 teaspoon salt: Balances the sweetness in the crust.
  • 1/2 cup unsalted butter (1 stick): Essential for a rich, flaky crust.
  • Assorted fresh seasonal fruits (about 1 pint or 2 to 2 1/2 cups): Choose your favorites like kiwi, strawberries, blueberries, or peaches.
  • 1/4 to 1/2 cup apricot preserves (optional): For glazing the fruit and adding shine.

Step-by-Step Instructions

Fresh Fruit Tart Recipe

Follow these steps to create your delicious fresh fruit tart:

1. Make the Tart Crust

Start by preheating your oven to 350°F (175°C). In a bowl, mix the flour, confectioners’ sugar, and salt. Cut in the cold butter until the mixture resembles coarse crumbs. Add the egg and vanilla extract, mixing until a dough forms. Press the dough into a tart pan, ensuring an even layer. Blind bake for 20 minutes, then let it cool.

2. Prepare the Pastry Cream

In a saucepan, combine the milk, heavy cream, sugar, and a pinch of salt. Heat until just under boiling. In a separate bowl, whisk the egg yolks with cornstarch until smooth. Gradually add the hot milk mixture to the egg yolk mixture, whisking constantly. Return to the saucepan and cook over medium heat until thickened. Stir in butter and vanilla extract. Let it cool completely.

3. Assemble the Tart

Once cooled, spread the pastry cream over the tart crust. Arrange your fresh fruits artistically on top. If using, warm the apricot preserves slightly and brush over the fruits for a glossy finish. Chill in the refrigerator before serving.

Pro Tips for Perfecting Your Tart

  • Keep It Cold: Use cold ingredients to ensure your crust remains flaky and tender.
  • Blind Bake Wisely: Blind baking the crust prevents sogginess, allowing it to hold up under the cream and fruit.
  • Use Fresh Fruits: Opt for seasonal and ripe fruits for the best flavor and presentation.
  • Experiment with Glazes: Try different jams or jellies for glazing to enhance the tart’s look and taste.
  • Chill Before Serving: Allow the assembled tart to chill for at least an hour to set the cream.
  • Don’t Overfill: When adding fruits, keep it balanced to avoid overwhelming the tart.
  • Use a Tart Pan: A removable bottom tart pan makes serving easier and ensures a beautiful presentation.
  • Consider Flavor Pairings: Combine different fruits for a delightful mix of flavors, such as strawberries and kiwi or peaches and blueberries.

Common Mistakes and Troubleshooting

Here are some common pitfalls to avoid when making your fresh fruit tart:

  • Overbaking the Crust: Keep an eye on your crust to prevent it from becoming too dark or dry.
  • Pastry Cream Too Thin: Ensure you cook it until it thickens; if it doesn’t, you may need to add more cornstarch next time.
  • Fruit Soggy: Glaze the fruits immediately before serving to maintain their freshness.
  • Crust Crumbling: If your crust is too crumbly, it may need more butter or to be pressed more firmly into the pan.

Creative Variations of Your Fresh Fruit Tart

Feel free to mix things up! Here are some fun variations to try:

  • Chocolate Ganache Tart: Replace pastry cream with a layer of silky chocolate ganache.
  • Nutty Crust: Incorporate ground nuts like almonds or hazelnuts into your crust for added flavor.
  • Exotic Fruits: Experiment with tropical fruits such as mango, pineapple, or passionfruit for a different twist.
  • Herbed Infusion: Add fresh herbs like mint or basil to your pastry cream for an unexpected flavor boost.

Storage and Make-Ahead Instructions

Your fresh fruit tart can be prepared in stages, making it easier to manage:

  • Crust: Can be made a day ahead and stored in an airtight container at room temperature.
  • Pastry Cream: Prepare and refrigerate up to 2 days in advance.
  • Assembled Tart: Best enjoyed the same day, but can be stored in the refrigerator for up to 1 day. Address any sogginess by keeping fruits dry before assembly.

Nutrition Tips and Dietary Adaptations

Looking to adapt this classic recipe? Here are some tips:

  • Gluten-Free Option: Use a gluten-free flour blend for the crust.
  • Dairy-Free Twist: Substitute the milk and cream with plant-based alternatives like almond or coconut milk.
  • Lower Sugar: Reduce or replace sugar in the pastry cream with a natural sweetener like honey or maple syrup.

Equipment Recommendations

For the best results, consider the following tools:

  • Tart Pan: A removable bottom tart pan is ideal for easy serving.
  • Whisk and Mixing Bowls: Essential for preparing your pastry cream and crust.
  • Rolling Pin: For evenly rolling out your tart dough.
  • Sharp Knife: To beautifully slice your fresh fruit.

Serving Suggestions

Enhance your tart experience with these serving ideas:

  • Pair with Whipped Cream: A dollop of freshly whipped cream on the side adds a lovely touch.
  • Complement with Ice Cream: Serve alongside vanilla or coconut ice cream for a decadent treat.
  • Garnish with Mint: Fresh mint leaves brighten up the presentation and add a refreshing flavor.

Frequently Asked Questions

  • Can I use frozen fruit for the tart? Yes, but fresh fruit is recommended for the best texture and flavor.
  • How long does the tart last? The assembled tart is best enjoyed within a day, while components can last longer separately.
  • What can I use if I don’t have a tart pan? A pie dish can work in a pinch, though the shape may vary.
  • Can I add a different filling? Absolutely! Cream cheese or mascarpone can also make delightful fillings.
  • Is it necessary to glaze the fruits? While optional, glazing helps maintain moisture and enhances the tart’s shine.
  • What fruits work best? Berries, kiwi, and stone fruits are excellent choices for their color and flavor.
  • Can I prepare the tart the day before? Yes, prepare the crust and pastry cream ahead of time, but assemble it closer to serving time.
  • How can I make the crust more flavorful? Incorporate zest from citrus fruits or spices like cinnamon into the crust for an extra flavor dimension.

In conclusion, creating a fresh fruit tart is not just about baking; it’s about celebrating flavors, textures, and the joy of sharing with loved ones. With this comprehensive guide, you’re well-equipped to make this classic dessert that sings of sunshine and happiness. So grab your ingredients, invite a friend to join you, and let’s make magic in the kitchen together!

Fresh Fruit Tart Recipe

Prep Time 30 minutes
Cook Time 20 minutes
Total Time 50 minutes
Servings 8 pieces
Calories 350
A delightful and colorful dessert featuring a buttery crust, creamy filling, and fresh seasonal fruit.

Ingredients

Dough

  • 1 1/3 cups all-purpose flour
  • 1/2 cup confectioners’ sugar
  • 1/4 teaspoon salt
  • 1/2 cup unsalted butter (cold, cut into pieces)
  • 1 large egg

Custard Filling

  • 1 1/2 cups whole milk
  • 1/2 cup heavy cream
  • 1/2 cup sugar (divided)
  • 3 tablespoons cornstarch
  • 1/2 teaspoon vanilla extract
  • 2 tablespoons heavy cream ((cold))
  • 1 large egg
  • 1/2 teaspoon vanilla extract

Fruit Topping

  • about 2 to 2 1/2 cups assorted fresh seasonal fruit
  • Kiwi Kiwi
  • 1/4 to 1/2 cup apricot preserves (optional)

Instructions 

  • Prepare the crust by mixing flour, confectioners’ sugar, salt, and butter until crumbly. Add egg and press into tart pan. Bake at 350°F (175°C) for 15-20 minutes.
  • Whisk together milk, heavy cream, sugar, cornstarch, egg yolks, vanilla, and cognac. Cook over medium heat until thickened. Pour into cooled crust.
  • Chill the tart for at least 2 hours. Arrange sliced fresh fruit on top and brush with apricot preserves if desired.

Notes

Use seasonal fruits for the best flavor and presentation.
Calories: 350kcal
Cost: $15
Course: Dessert
Cuisine: French
Keyword: Fruit, tart

Introducing the Bliss of a Strawberry Banana Smoothie

Welcome to a vibrant journey where flavors collide in the most delightful way! Imagine the sweet aroma of ripe strawberries mingling with the creamy richness of banana, all coming together to create a refreshing strawberry banana smoothie. This smoothie isn’t just a drink; it’s an experience that brings joy to every sip. Perfect for breakfast, a post-workout boost, or a mid-afternoon pick-me-up, this banana smoothie is a testament to how simple ingredients can transform into something magical. Let’s dive into why you’ll love crafting this delicious treat!

Why You’ll Love This Recipe

  • Quick and Easy: With only a few ingredients and minimal prep time, you can whip up this smoothie in under 5 minutes.
  • Rich in Nutrients: Packed with vitamins C and B6, potassium, and antioxidants, this smoothie is a powerhouse of nutrition.
  • Versatile and Customizable: You can easily modify the ingredients based on your preferences or what you have on hand.
  • Kid-Friendly: This smoothie is a hit with kids and adults alike, making it a perfect family treat.
  • Perfect for Any Occasion: Whether it’s a sunny breakfast or a refreshing afternoon snack, this smoothie fits right in!

Ingredient Breakdown

Let’s explore the delightful ingredients that come together in your strawberry banana smoothie, along with some smart substitutions to suit your taste and dietary needs.

  • Frozen Strawberries: Using frozen strawberries not only thickens the smoothie but also keeps it chilled. If fresh strawberries are available, feel free to use those as well!
  • Ripe Banana: A ripe banana adds natural sweetness and creaminess. If you’re looking for a stronger banana flavor, opt for a full banana instead of half.
  • Milk: Choose any milk you like—dairy, almond, or oat milk work beautifully. For a creamier texture, whole milk or coconut milk is ideal.
  • Greek Yogurt (Optional): Adding Greek yogurt enhances the creaminess and adds protein. For a dairy-free option, try coconut yogurt.
  • Sweetener (Optional): Adjust sweetness with honey or maple syrup, or leave it out for a naturally sweet smoothie.
  • Vanilla Extract (Optional): A dash of vanilla brings depth to the flavor profile.
  • Ice Cubes (Optional): If you prefer a thicker consistency, add a few ice cubes while blending.
  • Optional Toppings: Garnish with fresh fruit slices, granola, or chia seeds for added texture and flavor.

How to Make the Perfect Strawberry Banana Smoothie

Ready to blend? Here’s a step-by-step guide to creating your smoothie masterpiece.

  1. Gather all ingredients and ensure the fruit is prepped (washed, hulled, and sliced).
  2. Add milk, banana, yogurt (if using), sweetener, vanilla extract, and frozen strawberries to the blender.
  3. Optionally add ice cubes for a thicker smoothie.
  4. Blend on low speed, then gradually increase to high. Blend until completely smooth (30–60 seconds).
  5. Taste and adjust consistency or sweetness as needed with more milk or sweetener.
  6. Pour into a tall glass or smoothie cup.
  7. Add desired toppings such as sliced fruit or granola.
  8. Serve immediately and enjoy fresh!

Pro Tips for Smoothie Success

  • Use Frozen Fruits: Frozen fruits provide a thick, creamy texture without the need for ice.
  • Blend in Stages: Start blending on low to break down ingredients, then switch to high for a smoother finish.
  • Taste as You Go: Adjust sweetness and thickness according to your preference by adding more milk or sweetener.
  • Enhance with Greens: Toss in a handful of spinach or kale for added nutrients without altering the flavor significantly.
  • Experiment with Flavor: Mix in other fruits like mango or pineapple for a tropical twist.
  • Prep Ahead: Prepare smoothie bags with pre-measured ingredients for quick blending on busy mornings.
  • Stay Fresh: Enjoy your smoothie immediately to retain freshness and nutrients.
  • Use Quality Equipment: Invest in a good blender to ensure a smooth consistency and easy blending of tougher ingredients.

Avoid Common Mistakes

Sometimes, smoothies can fall flat. Here are common pitfalls to avoid:

  • Too Thick: If your smoothie is too thick, simply add a splash of milk or water and blend again.
  • Too Sweet: Balance out excessive sweetness by adding a squeeze of lemon juice or a few more strawberries.
  • Texture Issues: If you find chunks in your smoothie, blend for a longer time or cut your ingredients smaller before blending.

Delicious Variations to Try

Get creative with these variations to spice up your strawberry banana smoothie:

  • Berry Blast: Mix in blueberries and raspberries for a mixed berry smoothie experience.
  • Chocolate Delight: Add a tablespoon of cocoa powder or chocolate protein powder for a chocolatey twist.
  • Tropical Paradise: Blend in pineapple and coconut milk for a refreshing tropical flavor.
  • Nutty Banana: Incorporate a tablespoon of almond butter or peanut butter for a nutty flavor and extra protein.

Storage and Make-Ahead Instructions

Want to prepare your smoothie in advance? Here’s how:

  • Make-Ahead Smoothie Packs: Pre-portion ingredients into freezer bags. When ready, just blend straight from the freezer!
  • Refrigeration: If you have leftover smoothie, store it in an airtight container in the fridge for up to 24 hours. Shake or stir before consuming.

Frequently Asked Questions

  • Can I use fresh strawberries instead of frozen? Yes, but the texture will be less thick. You might want to add ice to achieve a similar consistency.
  • Is this smoothie vegan? Absolutely! Just use plant-based milk and skip the yogurt or choose a dairy-free alternative.
  • How can I make it more filling? Add oats or protein powder to make it a more substantial meal replacement.
  • Can I add greens? Yes! Spinach or kale can be added without overpowering the flavor.
  • What’s the best way to sweeten my smoothie? Natural sweeteners like honey, agave, or maple syrup work well, but taste before adding more.
  • How many servings does this recipe make? This recipe serves about 2 cups, or 2 small servings.
  • Can I use other fruits? Definitely! Bananas and strawberries are a classic combo, but feel free to experiment with your favorites.
  • What’s the best way to blend? Start on low speed to break down the ingredients, then increase to high until smooth.

Nutritional Benefits and Dietary Adaptations

This strawberry banana smoothie is not just delicious; it’s also a healthy choice!

  • High in Vitamins: Strawberries are an excellent source of vitamin C, which supports your immune system.
  • Rich in Fiber: Bananas provide dietary fiber, which aids digestion and keeps you feeling full longer.
  • Protein Boost: Greek yogurt adds protein, making this smoothie a great post-workout option.
  • Low-Calorie Option: Skip the sweeteners or use fruits to keep it low-calorie while still satisfying your sweet tooth.

Recommended Equipment

For the best blending experience, consider these essential tools:

  • High-Quality Blender: A powerful blender ensures a smooth texture and can handle frozen fruits easily.
  • Measuring Cups: For consistent ingredient ratios, use measuring cups for accuracy.
  • Storage Containers: Airtight containers are perfect for storing leftover smoothies or prepped smoothie packs.

Serving Suggestions

Elevate your smoothie experience with these serving ideas:

  • Garnish: Top with fresh fruit slices, a sprinkle of granola, or a few chia seeds for added crunch.
  • Pair with Snacks: Serve alongside whole-grain toast or a handful of nuts for a balanced meal.

Conclusion: Celebrate Every Sip!

Now that you have everything you need to create the perfect strawberry banana smoothie, it’s time to celebrate! Gather your ingredients, invite a friend, and blend your way to a refreshing treat that not only satisfies but also nourishes. With endless variations at your fingertips, you can make this smoothie your own, reflecting your unique tastes and preferences. So, grab a glass, share a smile, and toast to the joy of cooking and togetherness!

Strawberry Banana Smoothie

Prep Time 5 minutes
Total Time 5 minutes
Servings 2 cups
Calories 200
A delicious and nutritious smoothie combining fresh strawberries and bananas for a refreshing treat.

Ingredients

Fruits

  • 1 cup frozen strawberries
  • 1 piece ripe banana, peeled and sliced
  • 0.5 cup milk (dairy or non-dairy, almond milk recommended)
  • 0.25 cup Greek yogurt (optional)
  • 1 tablespoon honey or maple syrup (optional, to taste)
  • 0.25 teaspoon vanilla extract (optional)
  • a few ice cubes ice cubes (optional)

Optional toppings

  • fresh strawberries, banana slices, granola, chia seeds (for topping)

Instructions 

  • Combine all ingredients in a blender and blend until smooth.
  • Pour into glasses, add toppings if desired, and serve immediately.

Notes

Use frozen fruit for a colder, thicker smoothie.
Calories: 200kcal
Cost: $8
Course: Breakfast, Snack
Cuisine: American
Keyword: Fruit, Smoothie

Dive into the Sweet Symphony of a Fresh Fruit Tart with Vanilla Pastry Cream

Welcome to a delightful culinary journey where we celebrate the vibrant essence of fresh fruits, enveloped in a luxuriously creamy vanilla pastry cream. This Fresh Fruit Tart is not just a dessert; it’s an experience, a feast for the senses that brings the Mediterranean spirit right into your kitchen. Whether you’re hosting a gathering or treating yourself to a sweet indulgence, this tart promises to be the star of the show. Let’s explore why you’ll love this recipe and how to create it step-by-step!

Why You’ll Love This Fresh Fruit Tart

Here’s why this Fresh Fruit Tart with Vanilla Pastry Cream is a must-try:

  • Visual Appeal: The burst of colors from assorted fresh fruits makes it a stunning centerpiece for any table.
  • Flavor Harmony: The creamy vanilla filling perfectly balances the tartness of the fruits, creating a delightful flavor explosion.
  • Versatile Treat: Ideal for celebrations, brunches, or a simple family dessert, this tart fits any occasion.
  • Easy to Make: With straightforward steps, even novice bakers can achieve impressive results.
  • Make-Ahead Option: Prepare the components in advance for a stress-free serving on the day of your event.

Ingredients for Your Fresh Fruit Tart

Gather the following ingredients to create your luscious Fresh Fruit Tart:

  • 1 pre-baked tart shell: Use sweet pastry dough for the perfect base.
  • 2 cups whole milk: This forms the backbone of your creamy filling.
  • 4 large egg yolks: Essential for richness and color in the pastry cream.
  • 1/2 cup granulated sugar: Sweetens the cream beautifully.
  • 1/4 cup cornstarch: Helps thicken the pastry cream for a velvety texture.
  • 2 tablespoons unsalted butter: Adds a luscious finish to the cream.
  • 1 teaspoon vanilla extract: Infuses the cream with rich flavor.
  • Assorted fresh fruits: Such as strawberries, blueberries, raspberries, kiwi, mandarins, and grapes for topping.
  • Optional: Apricot glaze or melted jelly for brushing over the fruit.

Expert Tips for Success

Side view of a fresh fruit tart topped with assorted fruits and creamy filling.

To ensure your Fresh Fruit Tart turns out perfectly, keep these expert tips in mind:

  • Chill Your Equipment: Cold tools and ingredients create a smoother pastry cream.
  • Don’t Rush the Cooking: Cook the cream slowly over medium heat; rushing can lead to curdling.
  • Use Fresh Fruits: Seasonal fruits not only taste better but also look more vibrant.
  • Opt for Quality Vanilla: Pure vanilla extract elevates the flavor of your pastry cream significantly.
  • Cover the Cream: Prevent a skin from forming by covering the pastry cream with plastic wrap directly touching its surface.
  • Brush Fruit for Shine: A touch of apricot glaze gives your tart a beautiful, professional finish.
  • Experiment with Flavors: Don’t hesitate to add spices like cinnamon or nutmeg to the cream for a twist!
  • Mind the Tart Shell: Ensure your tart shell is fully pre-baked for a crisp texture that holds up to the filling and fruits.

Common Mistakes and How to Avoid Them

Even the most seasoned bakers can face challenges! Here are common pitfalls and how to navigate them:

  • Curdled Cream: If the cream curdles, it’s likely due to high heat. Always cook on medium heat and whisk constantly.
  • Soggy Tart Shell: A pre-baked tart shell is crucial. Blind baking helps keep it firm under the creamy filling.
  • Overripe Fruit: Choose firm, ripe fruit for better texture and flavor. Avoid overly soft fruits that may break down.
  • Not Chilling Long Enough: Allow the pastry cream to chill thoroughly to achieve the best consistency.

Step-by-Step Instructions to Create Your Tart

Now, let’s dive into the process of crafting your Fresh Fruit Tart from scratch!

  1. Make the Pastry Cream: In a medium saucepan, heat the milk over medium heat until it is hot but not boiling.
  2. Whisk Egg Mixture: In a medium bowl, whisk together the egg yolks, sugar, and cornstarch until smooth.
  3. Temper the Yolks: Slowly pour about half of the hot milk into the egg yolk mixture, whisking constantly to temper the yolks.
  4. Combine Mixtures: Pour the tempered mixture back into the saucepan with the remaining milk. Cook over medium heat, whisking constantly, until thickened and boiling. Boil for 1 minute, continuing to whisk.
  5. Finish the Cream: Remove from heat and whisk in the butter and vanilla extract until smooth and glossy.
  6. Chill the Cream: Pour the pastry cream into a clean bowl, cover with plastic wrap, and chill in the refrigerator for at least 2-3 hours, or until completely cold.
  7. Fill the Tart Shell: Once the cream is chilled, spoon it into the pre-baked tart shell, spreading it evenly.
  8. Decorate with Fruits: Arrange the fresh fruits decoratively over the top of the pastry cream.
  9. Glaze for Shine: If desired, gently heat apricot glaze or melted jelly and brush it over the fruit for a lovely shine.
  10. Chill Before Serving: Chill the tart for at least 30 minutes before serving to allow flavors to meld.

Delicious Variations to Try

Here are some exciting variations you can experiment with:

  • Chocolate Drizzle: Add melted chocolate drizzled over the top for a decadent twist.
  • Citrus Cream: Substitute half of the milk with fresh orange or lemon juice for a citrus-infused cream.
  • Nuts and Honey: Top the tart with a sprinkle of toasted nuts and a drizzle of honey for added texture and flavor.
  • Seasonal Swaps: Use seasonal fruits like peaches or figs in the summer, or apples and pears in the fall.

Storage and Make-Ahead Instructions

This Fresh Fruit Tart can be prepared in advance for convenience:

  • Make Ahead: Prepare the pastry cream and tart shell a day in advance. Assemble with fruits on the day of serving.
  • Storing Leftovers: Store any leftover tart in the refrigerator, covered, for up to 2 days. The fruit may lose some freshness over time.
  • Freezing: While the tart shell can be frozen, it’s best to freeze the pastry cream separately and assemble fresh fruits just before serving.

Nutritional Tips and Dietary Adaptations

This Fresh Fruit Tart can be adapted to suit various dietary preferences:

  • Dairy-Free Option: Substitute whole milk for almond or coconut milk and use a dairy-free butter alternative.
  • Gluten-Free Version: Use a gluten-free tart shell or make a crust from ground nuts and dates.
  • Lower Sugar: Reduce the sugar in the pastry cream and opt for naturally sweet fruits.

Essential Equipment Recommendations

To make the process even smoother, here’s a list of equipment you’ll need:

  • Tart Pan: A removable bottom tart pan will help you easily release the tart.
  • Medium Saucepan: Essential for making the pastry cream.
  • Whisk: For mixing the cream and ensuring a smooth texture.
  • Plastic Wrap: To cover the pastry cream while chilling.

Serving Suggestions

When it’s time to serve your masterpiece, consider these delightful ideas:

  • Pair with Coffee or Tea: This tart makes a perfect accompaniment to your afternoon coffee or tea.
  • Serve with Whipped Cream: A dollop of whipped cream on the side elevates the experience.
  • Garnish with Mint: Fresh mint leaves add a pop of color and a refreshing note to the presentation.

Frequently Asked Questions

Here are some common questions about making and serving a Fresh Fruit Tart:

  • Can I use frozen fruit?: While fresh fruit is ideal for texture and flavor, you can use thawed frozen fruit in a pinch.
  • How long does the tart last?: It’s best enjoyed within 2 days, but can last up to 3 days in the fridge.
  • Can I make the tart shell from scratch?: Absolutely! A homemade sweet pastry dough will enhance the flavor.
  • Is it necessary to chill the pastry cream?: Yes, chilling helps the cream set and enhances the flavor.
  • What’s the best way to cut the tart?: Use a sharp knife dipped in warm water for clean slices.
  • Can I make mini tarts?: Yes! Use a muffin tin to create individual servings of your tart.
  • What fruits work best?: Use a mix of berries, tropical fruits, and citrus for the best flavor and appearance.
  • Is it possible to make this tart vegan?: Yes, with substitutions for dairy and eggs, you can create a vegan version.

Creating your very own Fresh Fruit Tart with Vanilla Pastry Cream is a culinary adventure that’s as rewarding as it is delicious. With each vibrant slice, you’ll share a piece of Mediterranean joy and tradition with every bite. So gather your ingredients, embrace the art of baking, and let’s create something beautiful together!

Absolute Delight: Your Fresh Fruit Tart with Vanilla Pastry Cream

Prep Time 30 minutes
Cook Time 15 minutes
Total Time 45 minutes
Servings 8 pieces
Calories 350
Enjoy a stunning and delicious fruit tart featuring creamy vanilla pastry and fresh, colorful fruits.

Ingredients

Crust

  • 1 pre-baked tart shell pre-baked tart shell (sweet pastry dough)

Pastry Cream

  • 2 cups whole milk
  • 4 large egg yolks
  • 0.5 cup granulated sugar
  • 0.25 cup cornstarch
  • 2 tablespoons unsalted butter (cut into cubes)
  • 1 teaspoon vanilla extract

Topping & Glaze

  • Assorted fruits Assorted fresh fruits for topping (strawberries, blueberries, raspberries, kiwi, mandarins, grapes)
  • Optional optional Apricot glaze or melted jelly (for brushing fruit)

Instructions 

  • Heat milk until hot; whisk egg yolks, sugar, and cornstarch until smooth.
  • Temper egg mixture with hot milk, then return to saucepan and cook until thickened. Remove from heat, stir in butter and vanilla, then chill for 2-3 hours.
  • Spread chilled pastry cream into the tart shell.
  • Decorate with fresh fruits and brush with glaze if desired. Chill for 30 minutes before serving.

Notes

Use ripe, fresh fruits for the best appearance and flavor.
Calories: 350kcal
Cost: $15
Course: Dessert
Keyword: Cream, Fruit, pastry

Experience the Brightness of Mediterranean Flavors with Greek Yogurt Lemon Bars

Welcome to a culinary adventure that will invigorate your taste buds and brighten your gatherings! Today, we’re diving into a delightful recipe for Greek Yogurt Lemon Bars that exemplifies the vibrant spirit of Mediterranean cuisine. These bars offer a tantalizing blend of a buttery shortbread crust and a luscious, zesty lemon filling, making them perfect for any occasion. Whether you’re hosting a dinner party or simply treating yourself at home, these bars will surely bring sunshine to your plate!

Why You’ll Love This Recipe

Let’s talk about what makes these Greek Yogurt Lemon Bars absolutely irresistible. Here are five compelling reasons to whip up this delightful dessert:

  • Healthier indulgence: With Greek yogurt replacing heavy creams, these bars are a guilt-free treat that still satisfies your sweet tooth.
  • Perfectly balanced flavors: The tartness of fresh lemons harmonizes beautifully with the creamy yogurt, creating a refreshing dessert that’s never too sweet.
  • Easy to make: The straightforward steps make this recipe accessible for cooks of all skill levels, ensuring you can impress your guests without stress.
  • Make-ahead convenience: These bars chill beautifully in the fridge, making them an excellent option for prepping in advance.
  • Versatile serving: Dress them up with toppings like berries or serve them plain; they’re delightful either way!

Ingredient Breakdown: What You Need

Understanding your ingredients is key to a successful recipe. Here’s what you’ll need to create your Greek Yogurt Lemon Bars:

Shortbread Crust

  • 1 cup all-purpose flour: A staple for the base; whole wheat can be a nutritious alternative.
  • ¼ cup granulated sugar: This adds sweetness to the crust; consider coconut sugar for a lower glycemic option.
  • ¼ tsp salt: Enhances flavor; don’t skip it!
  • ½ cup unsalted butter: Melted or softened for easy mixing; you can substitute with coconut oil for a dairy-free version.

Lemon Yogurt Filling

  • 2 large eggs (room temperature): Essential for binding; ensure they’re at room temperature for better emulsification.
  • ¾ cup granulated sugar: Balances the tartness of the lemons; use less for a lower sugar option.
  • ½ cup plain Greek yogurt: Full-fat or low-fat works; Greek yogurt adds creaminess and tang.
  • ⅓ cup fresh lemon juice: Freshly squeezed is best for vibrant flavor; bottled can work in a pinch but lacks freshness.
  • Zest of 1–2 lemons: Maximizes the lemon flavor; use organic lemons to avoid pesticides.
  • 1 tsp vanilla extract: Adds depth; opt for pure vanilla for the best flavor.
  • 2 tbsp all-purpose flour: Thickens the filling; you can use almond flour for a gluten-free option.
  • ½ tsp baking powder: Helps the filling rise slightly for a fluffy texture.

Pro Tips for Perfect Lemon Bars

Greek Yogurt Lemon Bars

Want to elevate your Greek Yogurt Lemon Bars? Here are some expert insights:

  • Room temperature ingredients: Make sure your eggs and yogurt are at room temperature to achieve a smooth filling.
  • Don’t overbake: The center should be slightly jiggly when you remove them from the oven; they will firm up as they cool.
  • Chill well: Allow them to cool completely before refrigerating for at least one hour for the best texture.
  • Dust with powdered sugar: A light dusting just before serving adds an elegant touch.
  • Use a sharp knife: For clean cuts, run your knife under hot water before slicing.
  • Add toppings: Fresh berries or whipped cream can enhance the presentation and taste.
  • Experiment with flavors: Try adding herbs like mint or basil to the filling for a unique twist.
  • Store properly: Keep leftovers in an airtight container in the fridge for up to a week.

Avoiding Common Mistakes

Even the best cooks can run into issues. Here’s how to troubleshoot:

  • Overmixing the filling: This can lead to a dense texture; mix just until combined.
  • Not cooling the crust: Ensure the crust is completely cool before adding the filling to prevent it from melting.
  • Using bottled lemon juice: For the best flavor, always opt for fresh lemons.
  • Skipping the chilling step: These bars taste best when allowed to set properly in the refrigerator.

Delicious Variations to Try

Feeling adventurous? Here are some variations to customize your lemon bars:

  • Berry Bliss: Add fresh raspberries or blueberries to the filling for a fruity twist.
  • Ginger Zing: Incorporate grated fresh ginger into the filling for a spicy kick.
  • Herb-Infused: Add finely chopped fresh herbs like basil or mint to the filling for a refreshing flavor.
  • Coconut Cream: Substitute half of the Greek yogurt with coconut yogurt for a tropical flair.

Storing and Make-Ahead Instructions

These lemon bars are perfect for make-ahead occasions. Here’s how to store them:

  • Keep in an airtight container in the refrigerator for up to one week.
  • If making ahead, prepare the bars a day in advance and chill overnight for optimal flavor.
  • For longer storage, you can freeze the bars for up to three months. Just slice and wrap individually before freezing.

Frequently Asked Questions

If you’re curious about more details, here are some common questions about Greek Yogurt Lemon Bars:

  • Can I use low-fat yogurt? Yes, low-fat Greek yogurt works well but may alter the creaminess slightly.
  • What if I don’t have fresh lemons? You can use bottled lemon juice, but the flavor won’t be as vibrant.
  • Can I make these bars gluten-free? Absolutely! Substitute the all-purpose flour with a gluten-free blend.
  • How do I know when they’re done baking? The center should be set but still have a slight jiggle.
  • Can I add other flavors? Yes! Feel free to experiment with different citrus fruits like lime or orange.
  • What’s the best way to serve them? Chill and dust with powdered sugar right before serving for best results.
  • Can I use this recipe for a larger batch? You can double the recipe and use a larger baking dish, adjusting baking time as needed.
  • How should I cut the bars for serving? Use a sharp knife dipped in hot water for clean cuts.

Nutritional Insights and Dietary Adaptations

These Greek Yogurt Lemon Bars are not just delicious but can also fit into various dietary preferences:

  • Low Sugar: By reducing the sugar in the filling, you can make these bars suitable for low-sugar diets.
  • Gluten-Free: Use gluten-free flour to cater to those with gluten sensitivities.
  • Vegan Option: Substitute eggs with flaxseed meal mixed with water and use coconut yogurt instead.
  • High Protein: The Greek yogurt adds protein, making these bars a more filling dessert choice.

Essential Equipment You’ll Need

To prepare your Greek Yogurt Lemon Bars, ensure you have the following kitchen tools:

  • 8×8-inch baking pan: Perfect size for this recipe; line it with parchment for easy removal.
  • Mixing bowls: A set of various sizes for mixing crust and filling.
  • Whisk: Essential for incorporating ingredients smoothly.
  • Measuring cups and spoons: Accuracy is key for perfect results.
  • Knife: For cutting the bars into perfect squares.

Serving Suggestions

Transform your dessert presentation with these serving ideas:

  • Garnish with fresh fruit: Berries or lemon slices add a pop of color and freshness.
  • Pair with coffee or tea: The tartness of the bars pairs beautifully with a warm beverage.
  • Top with whipped cream: A dollop of cream adds richness and contrasts the tart lemon nicely.
  • Serve at gatherings: These bars are perfect for potlucks or birthday parties, bringing a touch of Mediterranean charm.

So there you have it! A comprehensive guide to making Greek Yogurt Lemon Bars that are sure to impress. With their delightful flavors and inviting presentation, these bars embody the warmth and joy of Mediterranean culinary traditions. So grab your apron, gather your ingredients, and let’s celebrate the art of cooking together!

Greek Yogurt Lemon Bars

Prep Time 15 minutes
Cook Time 40 minutes
Total Time 55 minutes
Servings 9 pieces
Calories 250
Bright and tangy lemon bars with a creamy Greek yogurt filling and buttery shortbread crust, perfect for a refreshing treat.

Ingredients

Shortbread Crust

  • 1 cup all-purpose flour
  • ¼ cup granulated sugar
  • ¼ tsp salt
  • ½ cup unsalted butter (melted or softened)

Lemon Yogurt Filling

  • 2 large eggs (room temperature)
  • ¾ cup granulated sugar
  • ½ cup plain Greek yogurt (full-fat or low-fat)
  • ⅓ cup fresh lemon juice
  • Zest of 1–2 lemons lemon zest
  • 1 tsp vanilla extract
  • 2 tbsp all-purpose flour
  • ½ tsp baking powder

For Topping

  • Powdered sugar (for dusting) powdered sugar

Instructions 

  • Preheat oven to 350°F (175°C). Line an 8x8-inch pan with parchment.
  • Mix flour, sugar, salt, and butter; press into pan. Bake 15–18 mins until golden.
  • Whisk eggs and sugar; add yogurt, lemon juice, zest, vanilla, flour, and baking powder.
  • Pour filling over crust; bake 22–26 mins until just set. Cool and refrigerate 1 hour.
  • Dust with powdered sugar before slicing and serving.

Notes

Use fresh lemons for the best flavor and ensure the filling is just set for perfect texture.
Calories: 250kcal
Cost: $15
Course: Dessert
Cuisine: Greek
Keyword: lemon

Experience Tropical Bliss with Mango Lassi

Welcome to a world where every sip transports you to sun-drenched shores and vibrant markets! Mango lassi is not just a drink; it’s a celebration of flavors that combines the sweetness of ripe mangoes with the creaminess of yogurt. This delightful beverage is perfect for any occasion, whether you’re looking to cool down on a hot day or simply indulge in a moment of tropical joy. In this comprehensive guide, we’ll explore everything you need to know about making the perfect mango lassi!

Why You’ll Love This Recipe

This mango lassi recipe is packed with benefits that will have you craving more. Here are just a few reasons why this drink is a must-try:

  • Quick and Easy: Prepare this refreshing drink in just 10 minutes, making it perfect for last-minute gatherings or a quick snack.
  • Healthy Ingredients: Packed with vitamins and probiotics, the yogurt and mangoes offer a nutritious boost to your day.
  • Customizable: You can easily adjust the sweetness and consistency to suit your personal taste or dietary preferences.
  • Versatile Pairing: Mango lassi pairs beautifully with spicy Indian dishes, grilled meats, or can be enjoyed on its own as a dessert.
  • Refreshing Delight: The combination of cold yogurt and sweet mango creates a creamy texture that’s irresistibly refreshing.

Ingredients Breakdown

Let’s dive into the ingredients that make this mango lassi so special. Here’s what you’ll need:

  • 2 ripe mangoes: Choose mangoes that are soft and fragrant for the sweetest flavor. You can also use canned mango pulp if fresh mangoes are unavailable.
  • 2 cups plain yogurt: Opt for whole milk yogurt for a creamier consistency, or use non-dairy yogurt for a vegan option.
  • 1/2 cup milk: Adjust this to use water if you prefer a thinner lassi.
  • 2 tablespoons sugar: Feel free to adjust the sweetness according to your taste. Honey or agave syrup can be used as alternatives.
  • Ice cubes: Optional, but they add a refreshing chill to your drink.

How to Make Mango Lassi: Step-by-Step

A refreshing Mango Lassi with a smooth texture, seen from the side.

Now that we have our ingredients ready, let’s get started on making this delightful beverage:

  1. Place the chopped mangoes, yogurt, milk, and sugar in a blender.
  2. Blend until smooth and creamy. Taste and adjust the sweetness if necessary.
  3. If desired, add ice cubes and blend again until frothy.
  4. Serve chilled in glasses, garnished with a sprig of mint or a sprinkle of ground cardamom.

Expert Tips for the Perfect Mango Lassi

To elevate your mango lassi game, consider these expert tips:

  • Choose the Right Mangoes: Use fully ripe mangoes for the best flavor. Varieties like Alphonso or Haden are highly recommended.
  • Chill Your Ingredients: For an extra refreshing drink, make sure all your ingredients are well chilled before blending.
  • Experiment with Spices: Add a pinch of ground cardamom or cinnamon for a unique twist.
  • Blend Thoroughly: Ensure all ingredients are well blended to achieve that silky smooth texture.
  • Adjust Consistency: If your lassi is too thick, simply add more milk or water to thin it out to your liking.
  • Use Fresh Yogurt: Fresh yogurt not only enhances flavor but also boosts the probiotic benefits.
  • Make it Vegan: Substitute yogurt and milk with plant-based alternatives, like coconut yogurt and almond milk.
  • Serve in Style: Present your mango lassi in beautiful glasses, garnished with mint leaves or mango slices.

Common Mistakes and Troubleshooting

Even the best chefs have their off days! Here are some common pitfalls and how to avoid them:

  • Mangoes Not Sweet Enough: If your mangoes are under-ripe, you may need to add more sugar or honey.
  • Too Thick: If the lassi is too thick, add more milk or water until you reach your desired consistency.
  • Unbalanced Flavor: If the flavor is off, adjust with more mangoes or yogurt until you achieve a harmonious balance.

Delicious Variations to Try

Get creative with your mango lassi! Here are some delightful variations:

  • Mint Mango Lassi: Add fresh mint leaves for a refreshing herbal twist.
  • Spicy Mango Lassi: Incorporate a pinch of cayenne pepper for a spicy kick.
  • Coconut Mango Lassi: Use coconut yogurt and add shredded coconut for a tropical flair.
  • Berry Mango Lassi: Blend in some strawberries or blueberries for a fruity explosion.

Storage and Make-Ahead Instructions

Want to prepare your mango lassi in advance? Here’s how:

  • Refrigeration: Store any leftovers in an airtight container in the fridge for up to 2 days.
  • Make-Ahead: You can prepare the mango pulp and yogurt mixture a day in advance; just blend and add ice before serving.

FAQs About Mango Lassi

Here are some frequently asked questions to help you on your mango lassi journey:

  • What is mango lassi? Mango lassi is a traditional Indian yogurt drink made with ripe mangoes, yogurt, and spices.
  • Can I use frozen mangoes? Yes! Frozen mangoes work wonderfully and can make your lassi even creamier.
  • Is mango lassi healthy? Yes! It’s packed with probiotics, vitamins, and can be made with low-sugar options.
  • Can I make mango lassi vegan? Absolutely! Use non-dairy yogurt and plant-based milk for a delicious vegan version.
  • How can I make my lassi thicker? Use more yogurt or less liquid for a thicker consistency.
  • Can I add other fruits? Yes, blending in other fruits like bananas or berries can create delightful variations.
  • How long does mango lassi last? It’s best enjoyed fresh, but can be stored in the fridge for up to 2 days.
  • What can I serve with mango lassi? It pairs beautifully with spicy dishes, grilled meats, or can be enjoyed as a dessert.

Nutritional Tips and Dietary Adaptations

Looking for a healthier twist? Here are some nutritional tips:

  • Low-Calorie Option: Use a low-fat yogurt and reduce the sugar for a lighter version.
  • Protein Boost: Add a scoop of protein powder or Greek yogurt for an extra protein kick.
  • Diabetes-Friendly: Use a sugar substitute like stevia or erythritol to keep it low glycemic.

Equipment Recommendations

To make your mango lassi-making experience seamless, here are a few recommended tools:

  • High-Powered Blender: Essential for achieving that smooth, creamy texture.
  • Measuring Cups: To ensure accurate ingredient portions.
  • Serving Glasses: Beautiful glasses enhance the presentation of your lassi.

Serving Suggestions

Ready to serve your mango lassi? Consider these ideas:

  • Chilled Glasses: Serve in chilled glasses to keep your lassi refreshing.
  • Garnish: Top with a sprinkle of ground cardamom or fresh mint leaves for added visual appeal.
  • Pairing: Serve alongside spicy Indian curries, grilled meats, or as a dessert with fruit.

Conclusion

There you have it! A complete guide to making the most delightful mango lassi that will make your taste buds dance. With its creamy texture, refreshing flavor, and endless customization options, mango lassi is not just a drink, but a joyful celebration of culture and flavors. So grab your blender, embrace the sunshine in your kitchen, and let the mango lassi transform your ordinary moments into tropical bliss!

Mango Lassi

Prep Time 10 minutes
Total Time 10 minutes
Servings 2 cups
Calories 200
A refreshing and creamy Indian beverage perfect for hot days or as a delightful snack.

Ingredients

Fruits

  • 2 pieces ripe mangoes, peeled and chopped
  • 2 cups plain yogurt
  • 0.5 cup milk (or water for thinner consistency)
  • 2 tablespoons sugar, adjust to taste
  • Ice cubes (optional) Ice cubes (optional)

Instructions 

  • Place mangoes, yogurt, milk, and sugar in a blender.
  • Blend until smooth and creamy.
  • Add ice cubes if desired and blend until frothy.
  • Serve chilled with a garnish if desired.

Notes

You can adjust the sweetness by adding more or less sugar.
Calories: 200kcal
Cost: $8
Course: beverage
Cuisine: Indian
Keyword: Mango

Welcome to a Slice of Sunshine!

There’s something magical about baking a cake that fills your home with warmth and the delightful aroma of fresh ingredients. Today, we’re diving into a recipe that embodies just that: Mary Berry’s Lemon Yoghurt Cake. This cake is not just a dessert; it’s a celebration of flavors, memories, and the joy of sharing with loved ones. Whether you’re a seasoned baker or just starting your culinary journey, this easy yogurt cake recipe will brighten up your gatherings and leave everyone asking for seconds!

Why You’ll Love This Recipe

If you’re wondering why this lemon yogurt cake has earned a special place in the hearts of many, here are five reasons that will inspire you:

  • Moist and Flavorful: Thanks to the Greek yogurt and fresh lemon juice, every slice is bursting with flavor and has a delightful moistness that will keep you coming back for more.
  • Easy to Make: With straightforward steps, this cake is perfect for both novice and experienced bakers. You can whip it up in no time!
  • Perfect for Any Occasion: Be it a family gathering, birthday party, or a cozy afternoon tea, this cake fits right in.
  • Customizable: The recipe offers variations, allowing you to experiment and make it your own. Add your twist to create a unique dessert.
  • Great for Leftovers: This cake stays fresh for days, making it ideal for meal prep or enjoying a sweet treat throughout the week.

Ingredients & Why They Matter

Let’s break down the ingredients that make this cake a true standout:

  • 300g granulated sugar: Adds sweetness and helps achieve a lovely golden crust.
  • 55g salted butter, softened: Provides richness and flavor, enhancing the cake’s overall texture.
  • 3 extra-large eggs, separated: Separating the eggs helps create a light and airy structure.
  • 225g Greek yoghurt (full-fat): The star ingredient! It keeps the cake moist and adds a delightful tang.
  • Zest of 1 lemon: Infuses fresh citrus flavor, elevating the overall taste.
  • 175g all-purpose flour: The base of the cake. Spoon and level for accuracy!
  • 2 tsp baking powder: Essential for that perfect rise.
  • ½ tsp salt: Balances the sweetness and enhances other flavors.
  • 115g confectioners’ sugar, sifted: For the glaze that adds a sweet citrusy finish.
  • 1½ tbsp fresh lemon juice: Brightens the cake with an extra punch of lemon flavor.

How to Make Mary Berry’s Lemon Yoghurt Cake

Ready to get baking? Follow these simple steps:

  1. Preheat your oven to 180°C (160°C fan). Grease and line an 8-inch round tin with parchment paper.
  2. In a mixing bowl, beat together the granulated sugar, softened butter, and egg yolks until the mixture is light and smooth.
  3. Stir in the Greek yogurt and lemon zest, mixing well to combine.
  4. Carefully sift in the all-purpose flour, baking powder, and salt. Gently fold the mixture until just combined.
  5. In a separate bowl, whisk the egg whites to soft peaks, then gently fold them into the batter. This step is crucial for achieving a light and fluffy cake.
  6. Pour the batter into your prepared tin and bake for 1 to 1¼ hours, or until a skewer inserted in the center comes out clean.
  7. Once baked, allow the cake to cool in the tin for about 10 minutes before transferring it to a wire rack to cool completely.
  8. For the glaze, mix the confectioners’ sugar with lemon juice and drizzle it over the cooled cake.

Expert Tips for the Perfect Cake

To ensure your lemon yogurt cake turns out perfectly, keep these tips in mind:

  • Use fresh ingredients: Fresh lemons and high-quality Greek yogurt make a noticeable difference in flavor.
  • Separate the eggs: This technique enhances the cake’s texture, making it light and fluffy.
  • Don’t overmix: When folding in the flour and egg whites, mix until just combined to retain airiness.
  • Check your oven: Every oven is different! Keep an eye on the cake as it bakes to avoid over-browning.
  • Cool completely: Allowing the cake to cool fully ensures the glaze sets nicely and prevents it from sliding off.

Common Mistakes & Troubleshooting

Even the best bakers encounter hiccups. Here’s how to troubleshoot common issues:

  • Dense cake: This can happen if the batter is overmixed or if too much flour is used. Always measure your flour correctly by spooning and leveling it.
  • Dry cake: Ensure you’re not overbaking! The cake should spring back when lightly pressed, and a toothpick should come out clean but not dry.
  • Glaze sliding off: If your cake is too warm, the glaze may not set. Always allow the cake to cool completely before glazing.

Delightful Variations

Feel free to get creative! Here are some fun variations to try with your lemon yogurt cake:

  • Blueberry Lemon Yogurt Cake: Fold in fresh blueberries for a burst of flavor and color.
  • Almond Lemon Yogurt Cake: Add almond extract and slivered almonds for a nutty twist.
  • Lemon Poppy Seed Yogurt Cake: Incorporate poppy seeds for added texture and visual appeal.
  • Coconut Lemon Yogurt Cake: Mix in shredded coconut for a tropical flair.

Storage & Make-Ahead Instructions

Your lemon yogurt cake can be easily stored or prepared in advance:

  • Room Temperature: Store the cake in an airtight container at room temperature for up to 3 days.
  • Refrigeration: If you prefer, you can refrigerate the cake for up to a week. Just ensure it’s covered to prevent drying out.
  • Freezing: Freeze the unglazed cake for up to 3 months. Thaw in the fridge overnight before glazing and serving.

Frequently Asked Questions

Here are some common questions about this delightful cake:

  • Can I use non-fat yogurt? Yes, but the cake might be less moist. Full-fat yogurt gives the best results.
  • Can I substitute the lemon? Absolutely! You can use orange or lime for a different flavor profile.
  • What can I serve with this cake? It pairs beautifully with whipped cream, fresh berries, or a scoop of vanilla ice cream.
  • How do I know when the cake is done? A toothpick should come out clean or with a few moist crumbs, but not wet batter.
  • Can I make this cake gluten-free? Yes! Substitute with a gluten-free flour blend for an equally delicious result.
  • What’s the best way to glaze the cake? Drizzling with a spoon or using a whisk to achieve a nice flow is ideal.
  • Can I double the recipe? Yes, just adjust baking time accordingly for larger pans.
  • How can I add more lemon flavor? Use more zest or a bit of lemon extract in the batter for an extra zing!

Nutritional Tips & Dietary Adaptations

This cake can be adapted to fit various dietary needs:

  • Reduced Sugar: Substitute with a sugar alternative for a lighter version.
  • Dairy-Free: Use almond or coconut yogurt instead of Greek yogurt.
  • Low Carb: Opt for almond flour and a low-carb sweetener for a keto-friendly treat.

Essential Equipment for Your Baking Adventure

To successfully bake your lemon yogurt cake, here’s what you’ll need:

  • Mixing Bowls: A set of various sizes for mixing and preparing ingredients.
  • 8-inch Round Cake Tin: Ideal for the perfect size and shape.
  • Electric Mixer: Makes beating the eggs and mixing a breeze.
  • Wire Rack: Essential for cooling your cake evenly.

Serving Suggestions

Once your cake is ready, it’s time to serve! Here are some delightful ideas:

  • With Fresh Berries: Serve with a side of strawberries, blueberries, or raspberries for a colorful and refreshing touch.
  • Whipped Cream: A dollop of freshly whipped cream adds a luscious creaminess that complements the citrus flavors.
  • Ice Cream: A scoop of vanilla or lemon sorbet elevates this dessert to a whole new level of indulgence!

Conclusion: Bake and Share the Joy!

Now that you have the complete guide to making Mary Berry’s Lemon Yoghurt Cake, it’s time to roll up your sleeves and get baking! This cake is more than just a recipe; it’s a chance to create beautiful memories with friends and family. So grab your ingredients, put on your favorite tunes, and let the joy of baking fill your home. Remember, every slice is a celebration of life, flavor, and togetherness. Happy baking!

Mary Berry Lemon Yoghurt Cake

Prep Time 15 minutes
Cook Time 1 hour 15 minutes
Total Time 1 hour 30 minutes
Servings 8 slices
Calories 350
A moist and tangy lemon yoghurt cake with a sweet lemon glaze, perfect for any occasion.

Ingredients

Dried ingredients

  • 300 g granulated sugar
  • 55 g salted butter, softened
  • 3 extra-large eggs, separated eggs (separated)
  • 225 g Greek yoghurt (full-fat)
  • 1 lemon zest of lemon
  • 175 g all-purpose flour
  • 2 tsp baking powder
  • ½ tsp salt
  • 115 g confectioners’ sugar, sifted
  • 1.5 tbsp fresh lemon juice

Instructions 

  • Preheat oven to 180°C (160°C fan). Grease and line an 8-inch round tin.
  • Beat sugar, butter, and egg yolks until light and smooth. Stir in yoghurt and lemon zest.
  • Sift in flour, baking powder, and salt. Fold to combine. Whisk egg whites to soft peaks and fold in gently.
  • Pour batter into tin. Bake for 1–1¼ hours until a skewer comes out clean.
  • Cool in tin for 10 mins, then remove and cool fully. Mix icing sugar and lemon juice, then pour over cooled cake.

Notes

Ensure egg whites are whipped to soft peaks for a light texture.
Calories: 350kcal
Cost: $15
Course: Dessert
Cuisine: British
Keyword: lemon