Author

rafael

Browsing

Embrace the Art of Whole Wheat Bread Baking

Welcome to a journey of warmth and flavor! Today, we’re diving into the delightful world of whole wheat bread, a recipe that not only nourishes the body but also warms the soul. The aroma of freshly baked bread wafting through your home is a memory worth cherishing, reminiscent of family gatherings and cherished moments. With a touch of honey and a sprinkle of love, this whole wheat bread recipe is perfect for any occasion, whether it’s a casual breakfast or a festive dinner. Let’s get started on crafting this wholesome, hearty bread together!

Why You’ll Love This Whole Wheat Bread Recipe

Making your own bread at home is an incredibly rewarding experience. Here are just a few reasons why you’ll fall in love with this whole wheat bread recipe:

  • Healthier Choice: Whole wheat flour retains the bran and germ of the wheat, making it richer in nutrients and fiber compared to white bread.
  • Delicious Flavor: The nutty taste of whole wheat flour gives this bread a robust flavor that pairs beautifully with both sweet and savory toppings.
  • Customizable: This recipe serves as a fantastic base for variations. You can add seeds, nuts, or even dried fruits to elevate the flavor profile.
  • Simple Ingredients: With just a handful of ingredients, you can create a wholesome loaf that’s free from preservatives and additives.
  • Perfect for Sandwiches: The texture of this bread is soft and fluffy, making it ideal for sandwiches, toast, or simply enjoyed with a pat of butter.

Ingredients Breakdown

Let’s take a closer look at the ingredients that make this whole wheat bread so special:

  • ½ cup warm water: This helps to activate the yeast. Ensure it’s warm, not hot!
  • 3 tablespoons liquid honey: Adds sweetness and helps to retain moisture in the bread.
  • 2 ¼ teaspoons instant yeast: This is the leavening agent that gives our bread its rise. You can substitute it with active dry yeast if needed.
  • ¾ cup warm milk: For a richer dough, use warm milk. You can microwave it for about 30-40 seconds.
  • 2 tablespoons canola oil: This adds moisture and enhances the bread’s texture.
  • 1 ½ teaspoons salt: Essential for flavor and to control yeast activity.
  • ¾ cup all-purpose flour: Provides structure to the bread.
  • 2-3 cups whole wheat flour: This is the star of the show, giving the bread its hearty texture and flavor.

Pro Tips for Perfect Whole Wheat Bread

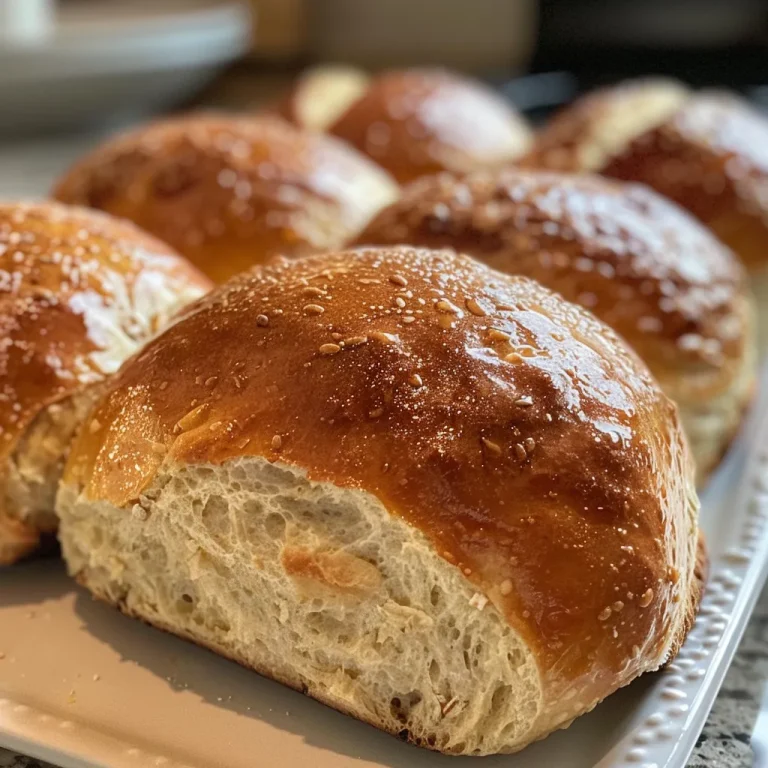
Side perspective of a loaf of whole wheat bread showcasing its golden-brown crust and wholesome appearance.

To ensure your whole wheat bread turns out perfectly every time, here are some expert insights:

  • Temperature Matters: Make sure your liquids are warm but not hot. Too much heat can kill the yeast.
  • Kneading Technique: Knead the dough until it’s smooth and elastic, about 8-10 minutes. This develops the gluten, creating the perfect texture.
  • Proofing the Dough: Allow your dough to rise in a warm, draft-free area. It should double in size, which typically takes about 1 hour.
  • Don’t Skip the Resting: After shaping the dough, let it rest a second time. This step is crucial for achieving a fluffy loaf.
  • Use Fresh Ingredients: Ensure your yeast is fresh for the best rise and flavor.
  • Be Flexible: If your dough seems too dry, add a little more warm water, one tablespoon at a time.
  • Check for Doneness: The bread is ready when it sounds hollow when tapped on the bottom.
  • Cooling is Key: Let the bread cool completely before slicing to maintain its structure.

Common Mistakes and Troubleshooting

Even experienced bakers can encounter hiccups. Here are some common mistakes and how to troubleshoot them:

  • Dough Not Rising: This could be due to inactive yeast. Check the expiration date and ensure your liquids were at the right temperature.
  • Dense Texture: Over-kneading can cause the bread to be tough. Knead until just smooth and elastic.
  • Dry Bread: If your bread is dry, you may not have used enough moisture or it was baked too long.
  • Too Crusty: A crust too hard can result from baking at too high a temperature. Consider reducing the heat slightly.

Variations on This Recipe

Once you’ve mastered the classic whole wheat bread, try these fun variations:

  • Seeded Whole Wheat Bread: Incorporate sunflower seeds, flaxseeds, or sesame seeds into the dough for added texture and flavor.
  • Honey-Oat Whole Wheat Bread: Add rolled oats and increase the honey for a sweeter, heartier loaf.
  • Herb-Infused Bread: Mix in dried herbs such as rosemary or thyme for a fragrant twist.
  • Fruit and Nut Bread: Toss in raisins, walnuts, or dried cranberries for a sweet and chewy version.

Storage and Make-Ahead Instructions

To keep your whole wheat bread fresh and delicious, follow these storage tips:

  • Room Temperature: Store the bread in a breadbox or a paper bag to maintain moisture, away from direct sunlight.
  • Freezing: For longer storage, slice the bread and freeze it in an airtight container. It can last up to 3 months.
  • Reheating: To revive frozen bread, thaw it overnight in the fridge and warm it in the oven at 350°F for about 10 minutes.

Frequently Asked Questions (FAQ)

Here are some common questions about whole wheat bread:

  • Can I use all whole wheat flour?: Yes, but the texture may be denser. Consider using a mix of whole wheat and all-purpose flour for a lighter loaf.
  • How can I make this recipe vegan?: Substitute the milk with almond or oat milk and replace honey with maple syrup.
  • What is the best way to knead dough?: Use the heel of your hand to push the dough away from you, fold it back, and rotate it. Repeat until smooth.
  • Why is my bread crumbly?: This can happen if there’s too much flour or not enough moisture. Adjust your measurements next time.
  • Can I make this in a bread machine?: Absolutely! Follow your machine’s instructions for whole grain bread settings.
  • How long does homemade bread last?: It’s best enjoyed fresh but can last 3-5 days at room temperature. Freezing extends its life.
  • What toppings go well with whole wheat bread?: Try avocado, hummus, or a classic peanut butter and jelly for delicious combinations.
  • Can I add ingredients like cheese or spices?: Yes, feel free to get creative! Just ensure not to overload the dough to maintain its structure.

Nutritional Tips and Dietary Adaptations

Whole wheat bread is already a healthier option, but here are ways to enhance its nutritional profile:

  • Boost Fiber: Add bran or chia seeds for additional fiber.
  • Lower Sugar: Reduce the amount of honey for a less sweet loaf.
  • Gluten-Free Option: Use a gluten-free flour blend and adjust the liquid quantities accordingly.
  • Protein Boost: Incorporate protein powder or seeds to enhance the bread’s nutritional content.

Equipment Recommendations

Here’s what you’ll need to bake this delicious whole wheat bread:

  • Mixing Bowl: A large bowl for mixing your ingredients.
  • Measuring Cups and Spoons: Accurate measurements are key to successful baking.
  • Wooden Spoon: For mixing your dough.
  • Kitchen Towel: To cover the dough while it rises.
  • Loaf Pan: A standard 9×5-inch loaf pan works perfectly.
  • Cooling Rack: Essential for cooling the bread after baking.

Serving Suggestions

Once your whole wheat bread is baked to golden perfection, here are some delightful ways to serve it:

  • Classic Toast: Spread with butter or your favorite jam for a breakfast treat.
  • Sandwiches: Use this hearty bread for your favorite sandwiches, from classic ham and cheese to veggie delights.
  • Bruschetta: Toast slices of the bread and top with diced tomatoes, basil, and a drizzle of olive oil for a fresh appetizer.
  • French Toast: Use this bread to make a deliciously hearty French toast, topped with fresh fruit and syrup.

In Closing

Crafting your own whole wheat bread is more than just a cooking task; it’s an opportunity to connect with family, celebrate tradition, and bring warmth into your home. Each loaf tells a story, from the moment you mix the ingredients to the first bite of that warm, crusty slice. So grab your apron, invite loved ones into your kitchen, and let’s make some memories together with this wholesome whole wheat bread recipe. Happy baking!

Whole Wheat Bread

Prep Time 15 minutes
Cook Time 30 minutes
Total Time 45 minutes
Servings 1 loaf
Calories 150
Enjoy homemade whole wheat bread with a soft texture and wholesome flavor, perfect for sandwiches or toast.

Ingredients

Liquid

  • 0.12 cups warm water (not hot)
  • 3 tablespoons liquid honey (not creamed)
  • 2.25 teaspoons Instant yeast (or active dry)
  • 0.75 cups warm milk (microwave for 30-40 seconds)
  • 2 tablespoons canola oil
  • 1.5 teaspoons salt
  • 0.75 cups all purpose flour
  • 2-3 cups whole wheat flour

Instructions 

  • Mix warm water, honey, and yeast; let sit until frothy, about 5 minutes.
  • Add warm milk, oil, and salt to the yeast mixture.
  • Gradually add all purpose flour and whole wheat flour, kneading until smooth.
  • Let the dough rise in a warm place until doubled, about 1 hour.
  • Shape into a loaf, place in a greased pan, and let rise for 30 minutes.
  • Bake at 375°F (190°C) for 30 minutes until golden brown.

Notes

For a softer crust, cover the bread with a damp towel during the first rise.
Calories: 150kcal
Cost: $8
Course: Bread
Cuisine: American
Keyword: Whole Wheat

Experience the Joy of Cucumber Avocado Rice Paper Rolls

Welcome to a culinary adventure that celebrates freshness and flavor! Today, we’re diving into the vibrant world of cucumber avocado rice paper rolls. This delightful dish is a perfect reflection of Mediterranean life, combining the crispness of fresh vegetables with the creamy richness of avocado, all wrapped in delicate rice paper. Whether you’re entertaining guests or enjoying a solo meal, these rolls are not just food—they’re a celebration of culture, family, and discovery. So, grab your apron, and let’s roll into this refreshing recipe!

Why You’ll Love This Recipe

This recipe isn’t just about making food; it’s about creating an experience that brings joy and satisfaction. Here are five reasons you’ll adore these cucumber avocado rice paper rolls:

  • Fresh and Healthy: Packed with vitamins and nutrients, these rolls are light yet fulfilling, perfect for any meal.
  • Quick and Easy: With minimal prep time, you can whip up a plate of these delicious rolls in under 30 minutes!
  • Customizable: Feel free to add or substitute ingredients to match your taste or dietary preferences.
  • Visually Stunning: The vibrant colors of the ingredients make for an eye-catching presentation that will impress your guests.
  • Perfect for Dipping: Pair these rolls with a variety of dipping sauces for an explosion of flavor in every bite.

Ingredients Breakdown

To create these delightful summer rolls, gather the following ingredients:

  • 8 sheets rice paper wrappers: Use round wrappers, about 22cm (8½ inches) in diameter for the best results.
  • 1 large English cucumber: Julienne for that perfect crunch (~150g).
  • 1 medium ripe avocado: Thinly sliced, and don’t forget to toss in lime juice to prevent browning.
  • 16–20 fresh mint leaves: For a refreshing burst of flavor.
  • 50g rice vermicelli: Optional, but adds a delightful texture (make sure it’s cooked).
  • ½ bell pepper: Thinly sliced to add color and sweetness.
  • ½ cup peanut dipping sauce: A rich complement to your rolls, but feel free to make your own!

Step-by-Step Instructions

Side view of rice paper rolls with cucumber and avocado, garnished with mint leaves.

Let’s get into the fun part! Follow these simple steps to create your cucumber avocado rice paper rolls:

  • Set up your rolling station: Lay a damp, clean kitchen towel on your workspace. Arrange a shallow dish of warm water, a plate for assembled rolls, and all pre-sliced ingredients within reach.
  • Prepare your veggies: Julienne the cucumber and bell pepper into matchstick-thin strips. Thinly slice the avocado and toss it in lime juice to prevent browning. Wash and pat dry the mint leaves.
  • Soften the rice paper: Dip one rice-paper wrapper into warm water for 8–10 seconds until the edges soften, then lay it flat on the damp towel.
  • Layer your fillings: In the lower third of the softened wrapper, layer a small handful of vermicelli (if using), 3–4 cucumber sticks, 2 avocado slices, 2–3 bell-pepper strips, and 2–3 mint leaves, leaving a 2cm border at each side.
  • Roll it up: Fold the bottom edge over the filling, then fold both sides inward and roll away from you in one smooth motion, applying gentle upward pressure.
  • Rest and slice: Place each roll seam-side down on the serving plate and let them rest for 2 minutes before slicing.

Pro Tips for Perfect Rolls

Want your rolls to come out perfectly every time? Here are some expert insights:

  • Keep it moist: Use a damp towel to prevent the rice paper from sticking to your workspace.
  • Don’t overfill: Less is more! Overstuffed rolls can burst, so be conservative with fillings.
  • Experiment with ingredients: Feel free to add proteins like shrimp or tofu for a heartier roll.
  • Practice makes perfect: Rolling takes a little finesse—don’t worry if your first few aren’t perfect!
  • Pair with diverse sauces: Try different dipping sauces like hoisin, sweet chili, or soy for varying flavor profiles.
  • Serve chilled: These rolls are best enjoyed cold, making them perfect for summer gatherings!
  • Store correctly: If making ahead, store rolls in an airtight container with parchment paper between layers to keep them from sticking.
  • Fresh herbs: Experiment with different herbs like cilantro or basil for a unique twist!

Common Mistakes and Troubleshooting

Even the best chefs make mistakes! Here’s how to troubleshoot common issues:

  • Wrapper tearing: Ensure the rice paper is properly softened. If it tears, try dipping it for a few more seconds.
  • Fillings falling out: Ensure you’re rolling tightly enough and that the edges are sealed properly.
  • Avocado browning: Always toss your avocado in lime juice to maintain its vibrant color.
  • Too soggy: If the rice paper feels too wet, lay it on a dry towel for a minute before rolling.

Variations to Try

Make these rolls your own with these exciting variations:

  • Spicy Avocado Rolls: Add sliced jalapeños for a kick!
  • Rainbow Rolls: Include colorful veggies like carrots, radishes, and purple cabbage for a stunning look.
  • Mediterranean Twist: Use feta cheese, olives, and sun-dried tomatoes for a Mediterranean flair.
  • Protein-Packed Rolls: Add grilled chicken, shrimp, or tofu for extra sustenance.

Storage and Make-Ahead Instructions

Planning for later? Here’s how to store your rolls:

  • Refrigeration: Store any leftover rolls in an airtight container for up to 2 days. Layer parchment paper between rolls to prevent sticking.
  • Make-ahead: Prepare components in advance, but roll them just before serving for optimal freshness.

Comprehensive FAQ

Got questions? We’ve got answers! Here are some common inquiries about cucumber avocado rice paper rolls:

  • Can I use other vegetables? Absolutely! Feel free to get creative with your favorite veggies.
  • Are these rolls vegan? Yes, as long as you use a vegan dipping sauce.
  • How do I keep the avocado from browning? Toss it in lime juice right after slicing.
  • Can I freeze these rolls? It’s not recommended as the texture may change once thawed.
  • What dipping sauces pair well? Peanut sauce, hoisin sauce, or a simple soy sauce work beautifully.
  • How long will these rolls last? Best consumed within 2 days when stored properly in the fridge.
  • Can I make these gluten-free? Yes! Ensure your rice paper and dipping sauces are gluten-free.
  • What’s the best way to serve them? Serve cold with a side of dipping sauce for the ultimate experience!

Nutritional Tips and Dietary Adaptations

These rolls are not just delicious but can be tailored to fit various dietary needs:

  • Low-carb: Skip the rice vermicelli for a lighter option.
  • High-protein: Add grilled chicken or tofu for a protein boost.
  • Nut-free: Use sunflower seed butter instead of peanut sauce for those with allergies.

Recommended Equipment

For an easy cooking experience, ensure you have the following:

  • Shallow dish: For soaking the rice paper.
  • Clean kitchen towel: To help with rolling and preventing sticking.
  • Sharp knife: For slicing your vegetables and finished rolls.

Serving Suggestions

Ready to serve? Here are some ideas to elevate your dining experience:

  • Garnish: Serve with fresh lime wedges and extra mint leaves for added freshness.
  • Plating: Arrange rolls on a beautiful platter, alternating directions for a stunning display.
  • Accompaniments: Pair with a variety of dipping sauces for guests to choose from, adding an element of fun to the meal.

Conclusion

Cooking is more than just a task; it’s an opportunity to share, celebrate, and enjoy life’s flavors. With these cucumber avocado rice paper rolls, you’re not just preparing a meal; you’re crafting a moment of joy. So, gather your loved ones, share stories, and enjoy every bite of these fresh, vibrant rolls. Happy cooking, and may your kitchen always be filled with laughter and delicious aromas!

Cucumber Avocado Rice-Paper Rolls

Prep Time 15 minutes
Cook Time 5 minutes
Total Time 20 minutes
Servings 4 rolls
Calories 150
Fresh and vibrant rice-paper rolls filled with crisp cucumber, creamy avocado, and herbs, perfect for a light, healthy snack or appetizer.

Ingredients

Rice Paper Wrappers

  • 8 sheets rice paper wrappers (round, 22cm/8½”)

Vegetables and Herbs

  • 1 large English cucumber (julienned (~150g))
  • 1 medium ripe avocado (thinly sliced)
  • 16-20 leaves fresh mint leaves
  • 50 g rice vermicelli (optional, cooked)
  • ½ bell pepper bell pepper (thinly sliced)
  • ½ cup peanut dipping sauce

Instructions 

  • Prepare all ingredients: julienne cucumber and bell pepper, slice avocado, wash mint leaves.
  • Dip a rice-paper wrapper in warm water for 8–10 seconds, then lay flat on a damp towel.
  • Layer vermicelli, cucumber, avocado, bell pepper, and mint near the bottom of the wrapper.
  • Fold the bottom over the filling, then fold sides inward and roll tightly away from you.
  • Place rolls seam-side down on a plate; let rest for 2 minutes before slicing and serving with peanut sauce.

Notes

Keep the rolls moist by covering with a damp cloth until serving.
Calories: 150kcal
Cost: $12
Course: Appetizer
Cuisine: Asian
Keyword: Rice Paper, Vegetables

Discover the Joy of Baking Cocoa Fudge Brownies

Welcome to a delightful journey into the rich and velvety world of the best cocoa fudge brownies! These brownies are not just a dessert; they’re a celebration of flavors, textures, and memories. Picture this: the aroma of chocolate wafting through your kitchen, a warm oven humming softly in the background, and the anticipation of indulging in a fudgy treat that melts in your mouth. In this article, we’re diving deep into my ultimate brownie recipe, which combines classic techniques with a modern twist. So, grab your apron, and let’s embark on this sweet adventure together!

Why You’ll Love This Recipe

These brownies aren’t just any ordinary dessert; they embody a perfect blend of taste and texture. Here’s why you’ll fall in love with this cocoa fudge brownie recipe:

  • Rich Chocolate Flavor: The combination of unsweetened cocoa powder and chocolate chips creates a deep, satisfying chocolate experience that every chocolate lover craves.
  • Fudgy Texture: This recipe yields brownies that are irresistibly fudgy, with a slightly crispy top and a gooey center that promises to melt in your mouth.
  • Simple Ingredients: With just a handful of pantry staples, these brownies come together quickly and easily, making them perfect for both novice bakers and seasoned pros.
  • Customizable: Whether you prefer nuts, caramel swirls, or a sprinkle of sea salt, this base recipe allows for endless variations, so you can make it uniquely yours.
  • Perfect for Any Occasion: Whether it’s a cozy family gathering or a festive celebration, these brownies are a hit with everyone, making them a go-to dessert for any occasion.

Ingredients You’ll Need

Before we dive into the directions, let’s break down the essential ingredients for these amazing cocoa fudge brownies. Each component plays a crucial role in achieving that perfect texture and flavor.

  • All-purpose flour (1 cup / 120g): Provides structure while keeping the brownies soft.
  • Baking powder (1/2 teaspoon): A small amount helps create a light texture without making them cakey.
  • Salt (1/2 teaspoon): Enhances the chocolate flavor, balancing sweetness beautifully.
  • Unsweetened cocoa powder (1/2 cup / 43g): The star ingredient that gives these brownies their rich chocolate flavor.
  • Espresso powder (1 teaspoon, optional): Intensifies the chocolate taste without adding a coffee flavor; skip if you’re not a coffee fan.
  • Unsalted butter (3/4 cup / 170g): Adds richness and helps achieve a fudgy texture.
  • Oil (2 tablespoons / 28ml): Canola, vegetable, or coconut oil can be used for added moisture.
  • Granulated sugar (1 and 1/3 cups / 265g, divided): Sweetens and contributes to the brownies’ fudgy texture.
  • Eggs (2 large) + Egg yolk (1 large): The eggs help bind the ingredients and add richness.
  • Vanilla extract (2 teaspoons, optional): Adds a lovely aroma and flavor that complements the chocolate.
  • Chocolate chips (3/4 cup / 128g): Folded into the batter for extra chocolatey goodness.

How to Make the Best Cocoa Fudge Brownies

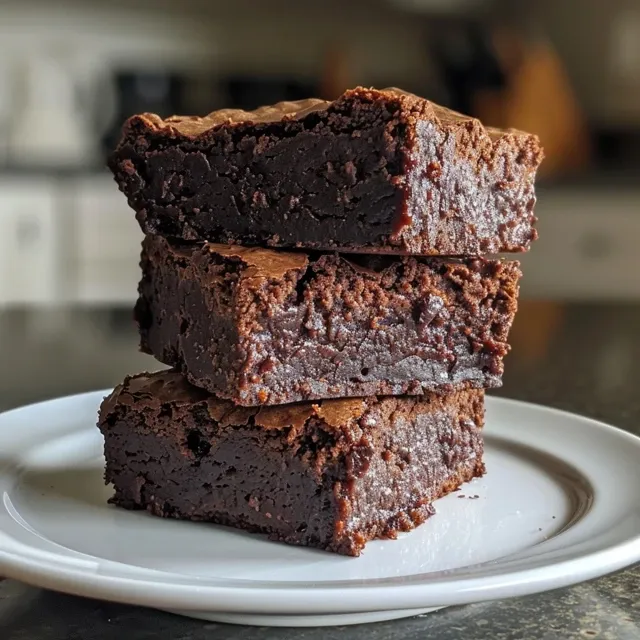
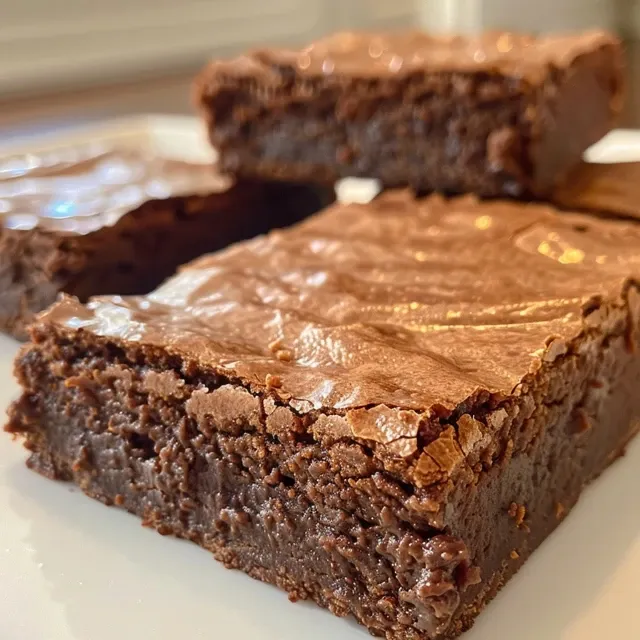
Side view of freshly baked brownies showcasing a fudgy texture and chocolate chunks.

Let’s get started with the step-by-step instructions to create these divine brownies. Follow along closely for the best results!

  • Preheat your oven to 350°F (175°C). Line a 9×9-inch baking pan with parchment paper and lightly spray it with non-stick baking spray.
  • In a large bowl, sift together the flour, baking powder, salt, cocoa powder, and espresso powder. Set this mixture aside for later.
  • In a medium saucepan, combine the butter, oil, and 1/3 cup of the sugar. Heat over medium heat, stirring frequently until the butter is completely melted. Remove from heat.
  • In a large mixing bowl, whisk together the eggs, egg yolk, and the remaining sugar until well combined, about 30 seconds.
  • Gradually pour the warm butter mixture into the egg mixture, whisking constantly until fully combined.
  • Gently fold in the dry ingredients and chocolate chips, using a rubber spatula. Be cautious not to over mix; stir until just combined.
  • Transfer the batter into the prepared pan and smooth the top with a spatula.
  • Bake for 28-30 minutes, or until the edges are firm and the top is shiny and slightly cracked.
  • Let the brownies cool completely in the pan on a cooling rack before slicing into squares.

Pro Tips for Perfect Brownies

To ensure your brownies turn out perfectly every time, keep these expert tips in mind:

  • Use quality chocolate: High-quality chocolate chips enhance the flavor of your brownies.
  • Don’t overmix: Stir until just combined to maintain that fudgy texture.
  • Let them cool: Allowing the brownies to cool completely before cutting helps achieve clean, perfect slices.
  • Experiment with flavors: Add nuts, caramel, or a sprinkle of sea salt for an extra layer of flavor.
  • Check for doneness: Use a toothpick; it should come out with a few moist crumbs, not completely clean.
  • Storage matters: Store brownies in an airtight container to keep them fresh and fudgy.
  • Make-ahead option: These brownies can be made a day in advance; they taste even better after resting!
  • Play with textures: For an extra crunchy top, bake slightly longer for a more cake-like finish.

Common Mistakes and Troubleshooting

If your brownies don’t turn out as expected, here are some common pitfalls and how to avoid them:

  • Brownies are too cakey: This often happens from overmixing or adding too much flour. Remember, just mix until the dry ingredients are incorporated.
  • Brownies are too dry: Ensure you’re measuring ingredients accurately, especially the flour. Too much flour leads to dryness.
  • Uneven baking: Rotate your pan halfway through baking for even heat distribution.
  • Sticking to the pan: Always line the pan with parchment paper and spray it with non-stick spray.
  • Too sweet: If you prefer a less sweet brownie, reduce the sugar slightly or add a pinch of salt to balance the flavors.

Delicious Variations to Try

Want to mix things up? Here are some delightful variations you can try:

  • Nutty Brownies: Add 1 cup of chopped walnuts or pecans for a satisfying crunch.
  • Peanut Butter Swirl: Dollop 1/2 cup of peanut butter on top of the batter before baking and swirl it with a knife.
  • Mint Chocolate Chip: Stir in 1/2 teaspoon of peppermint extract and 1/2 cup of mint chocolate chips for a refreshing twist.
  • Sea Salt Caramel Brownies: Drizzle caramel sauce on top before baking and sprinkle with sea salt for a sweet-salty treat.

Storage and Make-Ahead Instructions

These brownies can easily be made ahead of time and stored for later enjoyment:

  • Room Temperature: Store in an airtight container at room temperature for up to 3 days.
  • Refrigerator: Keep in the fridge for up to a week; just let them come to room temperature before serving for optimal flavor.
  • Freezing: Wrap individual squares in plastic wrap and place them in a freezer-safe bag. They can be frozen for up to 3 months. Thaw at room temperature before enjoying.

Frequently Asked Questions

Here are some common questions about cocoa fudge brownies, answered!

  • Can I use whole wheat flour instead of all-purpose flour? Yes, but it may change the texture slightly. Use a mix of whole wheat and all-purpose for best results.
  • Is cocoa powder the same as Dutch-processed cocoa? No, Dutch-processed cocoa has been treated to neutralize its acidity, giving it a different flavor. You can use either, just note the taste may vary.
  • Can I make brownies without eggs? Yes, you can substitute eggs with unsweetened applesauce or flaxseed meal mixed with water.
  • What if my brownies are underbaked? If they’re too gooey, return them to the oven for a few more minutes until set.
  • How can I add more chocolate flavor? You can increase the amount of cocoa powder or add chocolate chips to the batter.
  • Can I make these brownies gluten-free? Absolutely! Substitute the all-purpose flour with a gluten-free baking blend.
  • How do I know when my brownies are done? The edges should look firm and the top should be shiny and slightly cracked, but a toothpick should come out with a few moist crumbs.
  • What’s the best way to cut brownies? Use a sharp knife and wipe it clean between cuts for neat squares.

Nutritional Information and Dietary Adaptations

For those watching their diet, here are some nutritional insights:

  • Portion Control: Cut brownies into smaller squares to enjoy without overindulging.
  • Substitution Suggestions: Use coconut oil instead of butter for a dairy-free option.
  • Lower Sugar Option: Substitute granulated sugar with coconut sugar or a sugar substitute for a healthier version.
  • Boost Nutrients: Add a scoop of protein powder to the batter for a nutritious boost.

Essential Equipment for Perfect Brownies

Having the right tools can make all the difference in your baking experience:

  • 9×9-inch baking pan: This size is ideal for thick, fudgy brownies.
  • Parchment paper: Ensures easy removal and clean-up.
  • Mixing bowls: Use different sizes for mixing wet and dry ingredients.
  • Whisk and spatula: Essential for mixing and folding ingredients properly.
  • Cooling rack: Allows brownies to cool evenly, preventing sogginess.

Serving Suggestions

To elevate your brownie experience, try these serving ideas:

  • Serve warm: Warm brownies topped with a scoop of vanilla ice cream make a delightful dessert.
  • Drizzle with sauce: A drizzle of chocolate or caramel sauce adds an elegant touch.
  • Garnish with fruits: Fresh berries or sliced bananas enhance the flavor and presentation.
  • Pair with coffee: Enjoy brownies with a cup of strong coffee or espresso for a perfect afternoon treat.

In conclusion, baking these cocoa fudge brownies is not just about creating a delicious treat, but also about embracing the joy of cooking. Every bite is a reminder of the warmth of family gatherings and the beauty of sharing moments with loved ones. So, gather your ingredients, preheat your oven, and let the magic happen! Happy baking, and enjoy every indulgent bite!

The Best Cocoa Fudge Brownies

Prep Time 15 minutes
Cook Time 30 minutes
Total Time 45 minutes
Servings 9 pieces
Calories 250
Rich, fudgy brownies with a deep cocoa flavor, perfect for satisfying your sweet tooth.

Ingredients

Dry ingredients

  • 1 cup all-purpose flour
  • 1/2 teaspoon baking powder
  • 1/2 teaspoon salt
  • 1/2 cup unsweetened cocoa powder
  • 1 teaspoon espresso powder (optional) (Don't use if you don't like coffee)
  • 3/4 cup unsalted butter
  • 2 Tablespoons oil (canola, vegetable, or coconut)
  • 1 1/3 cups granulated sugar (divided)
  • 2 large eggs
  • 1 large egg yolk
  • 2 teaspoons vanilla extract (optional) (recommended)
  • 3/4 cup chocolate chips

Instructions 

  • Preheat oven to 350°F (175°C). Line a 9x9-inch pan with parchment and spray with non-stick spray.
  • Sift dry ingredients: flour, baking powder, salt, cocoa, and espresso powder. Set aside.
  • Melt butter with oil and 1/3 cup sugar over medium heat. Remove from heat.
  • Whisk eggs, egg yolk, vanilla, and remaining sugar until combined. Gradually add warm butter mixture, whisking constantly.
  • Stir in dry ingredients and chocolate chips until just combined. Pour into pan and smooth top.
  • Bake for 28-30 minutes until edges are firm and top is shiny. Cool completely before slicing.

Notes

Do not overmix to keep brownies fudgy.
Calories: 250kcal
Cost: $15
Course: Dessert
Cuisine: American
Keyword: brownies

Spring is a time of renewal, and what better way to celebrate the season than with a vibrant Asparagus and Goat Cheese Omelette? This dish is not just a breakfast option; it’s a culinary embrace of the fresh flavors and colors that spring brings. Imagine waking up to the aroma of sautéed asparagus, the creamy richness of goat cheese melting into fluffy eggs, and the delicate crunch of chives. This omelette is perfect for a lazy brunch or a cozy family dinner, inviting you to gather around the table and share in the joy of good food.

Why You’ll Love This Recipe

This isn’t just any omelette; it’s a celebration on a plate! Here are five reasons to love this recipe:

  • Fresh Ingredients: The combination of tender asparagus, creamy goat cheese, and bright chives not only bursts with flavor but also brings the essence of spring to your palate.
  • Quick and Easy: With simple steps and minimal prep, this omelette can be on your table in less than 30 minutes, making it perfect for busy mornings.
  • Customizable: This recipe serves as a base for endless variations—feel free to add your favorite seasonal vegetables or proteins to make it your own!
  • Healthy and Nutritious: Packed with protein from the eggs and vitamins from the veggies, this omelette is a wholesome way to start your day.
  • Impressive Presentation: The vibrant colors and elegant texture of this dish make it a showstopper at any brunch or family gathering.

Ingredient Breakdown

To create the perfect Asparagus and Goat Cheese Omelette, you’ll need the following ingredients:

  • 2-3 tablespoons good quality olive oil: Essential for sautéing and adds richness to the dish.
  • 6 large organic pasture-raised eggs: The foundation of your omelette. Fresh eggs create the best flavor.
  • Sea salt and freshly cracked black pepper: Season to taste, enhancing the natural flavors of the ingredients.
  • ½ cup soft goat cheese: Provides creaminess and a tangy flavor that pairs beautifully with the asparagus.
  • 300 grams (about 12 oz) fresh asparagus: Trimmed and sliced into 2-inch pieces for quick cooking.
  • 2 tablespoons finely minced chives: Adds a mild onion flavor and a pop of color.

If you’re looking to make substitutions, consider these:

  • Cheese: Swap goat cheese for feta or ricotta for a different flavor profile.
  • Vegetarian options: Add spinach, bell peppers, or mushrooms for added texture and taste.
  • Herbs: Fresh basil or parsley can replace chives for a different aromatic experience.

How to Make Your Omelette

Ready to whip up this delicious dish? Follow these simple steps:

  1. Warm 1 tablespoon of olive oil in a frying pan over medium heat. Add the sliced asparagus and stir-fry for 1-2 minutes. Add about 2 tablespoons of water and cook until just tender. Transfer to a plate to keep warm.
  2. In the same pan, warm another tablespoon of olive oil. Pour 1/3 of the beaten eggs over the pan, allowing it to set for a few seconds. Tilt the pan to distribute the eggs evenly.
  3. Season lightly with salt and cracked pepper, keeping in mind that goat cheese is salty. Cook on low heat until the eggs are just set.
  4. Add 1/3 of the pre-cooked asparagus, followed by the goat cheese and chives. Cover the pan and remove from heat, allowing the residual heat to melt the cheese and set the eggs.
  5. Gently dislodge the omelette and fold it if desired. Transfer to a plate and serve immediately with a fresh spring salad or toast.
  6. Repeat the process for the remaining omelettes.

Pro Tips for a Perfect Omelette

Side view of a fluffy omelette filled with asparagus and goat cheese, garnished with chives.

To elevate your omelette game, consider these expert insights:

  • Use a Non-Stick Pan: A good quality non-stick frying pan ensures that your omelette cooks evenly and slides out easily.
  • Whisk Thoroughly: Whisk the eggs until they’re fully combined for a fluffy texture.
  • Don’t Overcook: Remove the omelette from the heat as soon as the eggs are set but still slightly creamy for the best texture.
  • Experiment with Flavors: Add herbs, spices, or different cheeses to customize your omelette to your taste.
  • Freshness Matters: Use the freshest ingredients possible for the best flavor.
  • Keep It Light: Don’t overload the omelette with filling; it should be light and fluffy.
  • Practice Makes Perfect: Don’t be discouraged if your first omelette doesn’t turn out perfectly. Keep practicing!

Common Mistakes and Troubleshooting

Even the best can have mishaps in the kitchen. Here’s how to avoid common pitfalls:

  • Eggs Not Setting: If your omelette isn’t cooking through, lower the heat and cover the pan to allow it to steam.
  • Overcooked Eggs: If the eggs are dry, take them off the heat sooner next time; they should be slightly undercooked when you add fillings.
  • Sticking to the Pan: Ensure your pan is adequately heated and use enough oil.

Variations to Try

This spring asparagus goat cheese omelette is versatile! Here are a few variations to keep things exciting:

  • Italian Twist: Add sun-dried tomatoes and fresh basil for a Mediterranean flair.
  • Spicy Kick: Incorporate jalapeños or red pepper flakes for some heat.
  • Protein Boost: Include diced ham or cooked chicken for added protein.
  • Veggie Lover: Mix in a variety of seasonal vegetables like zucchini, spinach, or bell peppers.

Storage and Make-Ahead Instructions

If you want to prepare this meal in advance, consider these tips:

  • Make Ahead: You can sauté the asparagus and prepare the chives in advance. Simply store them in the refrigerator and assemble the omelette when ready to cook.
  • Storage: Cooked omelettes can be stored in an airtight container in the fridge for up to 2 days. Reheat in a non-stick pan over low heat.

Comprehensive FAQ

Here are some frequently asked questions about making the perfect omelette:

  • Can I use frozen asparagus? Yes, but fresh asparagus gives the best flavor and texture.
  • How do I know when the omelette is done? The eggs should be set but slightly creamy, and the cheese should be melted.
  • Can I add more types of cheese? Absolutely! Try adding mozzarella or cheddar for a different taste.
  • What can I serve with this omelette? A side salad, crusty bread, or roasted potatoes pair well.
  • Is this recipe suitable for meal prep? Yes, you can prepare the ingredients ahead of time for a quick meal.
  • What if I don’t have chives? You can substitute with green onions or omit them entirely.
  • How many servings does this recipe make? This recipe makes three omelettes, serving about 3 people.
  • Can I use egg substitutes? Yes, feel free to use egg substitutes or egg whites if preferred.

Nutritional Tips and Dietary Adaptations

This omelette is naturally gluten-free and can be adapted for various dietary needs:

  • Dairy-Free: Substitute goat cheese with a dairy-free cheese alternative.
  • Low-Carb: This recipe is low in carbs, making it perfect for keto diets.
  • High-Protein: Adding additional eggs or egg whites can boost the protein content significantly.

Equipment Recommendations

Here are some essential tools to make your omelette-making experience smoother:

  • Non-Stick Frying Pan: Ensures easy release and even cooking.
  • Spatula: A silicone spatula is ideal for delicate omelettes.
  • Whisk: For properly mixing the eggs before cooking.

Serving Suggestions

Serve your Asparagus and Goat Cheese Omelette with:

  • Fresh Salad: A light green salad dressed with lemon vinaigrette pairs beautifully.
  • Crusty Bread: Slices of sourdough or whole-grain bread are perfect for mopping up any leftover egg.
  • Fresh Fruit: Brighten the plate with a side of seasonal fruit for a refreshing contrast.

Now that you’re equipped with all the knowledge and tips to master the Asparagus and Goat Cheese Omelette, it’s time to get cooking! Gather your ingredients, set the mood with some lively music, and enjoy the process. Remember, cooking is not just about the food; it’s about bringing people together, sharing stories, and celebrating the flavors of life. Bon appétit!

Spring Asparagus Goat Cheese Omelette

Prep Time 10 minutes
Cook Time 10 minutes
Total Time 20 minutes
Servings 3 servings
Calories 250
A fresh and flavorful omelette featuring tender asparagus and creamy goat cheese, perfect for a spring breakfast or brunch.

Ingredients

Olive Oil

  • 2-3 tablespoons good quality olive oil

Eggs

  • 6 large organic pasture raised eggs (beaten)

Sea Salt

  • as needed Sea salt

Black Pepper

  • Lots freshly cracked black pepper

Goat Cheese

  • ½ cup soft goat cheese

Asparagus

  • 300 grams fresh asparagus, trimmed, sliced into 2 inch pieces

Chives

  • 2 tablespoons finely minced chives

Instructions 

  • Stir fry asparagus in 1 tablespoon olive oil for 1-2 minutes, add water, cook until tender, then keep warm.
  • Heat pan to medium, add remaining oil if needed, then pour 1/3 of eggs over asparagus, season with pepper and salt, cook until set.
  • Add goat cheese and chives, cover and let eggs set off heat, then fold or serve directly.

Notes

Use fresh ingredients for best flavor and texture.
Calories: 250kcal
Cost: $15
Course: Breakfast
Cuisine: Western
Keyword: Omelette

The Joy of Making Sourdough Discard Focaccia

Welcome, dear friends! Today, we’re diving into a delightful culinary experience that embodies the heart of Mediterranean cooking: Sourdough Discard Focaccia. This simple, yet profoundly delicious bread is not just a recipe; it’s a celebration of flavor and tradition, inviting you to gather around the table and share a meal with your loved ones. With its golden, crispy crust and soft, airy interior, focaccia is the perfect canvas for your creativity. Let’s explore how you can transform your sourdough discard into a loaf that sings with Mediterranean notes, filled with the irresistible aromas of olive oil and fresh rosemary.

Why You’ll Love This Recipe

Here are a few compelling reasons why this focaccia will become your new favorite:

  • Flavor Explosion: This focaccia is elevated by the natural tang of sourdough discard, which adds depth to its flavor profile.
  • Easy to Prepare: With just a few simple steps, you can create this delightful bread, perfect even for beginner bakers.
  • Versatile and Customizable: Top it with fresh herbs, olives, or even cheese to create variations that suit your taste.
  • Perfect for Sharing: Focaccia is a fantastic dish for gatherings, bringing people together over its warm, inviting aroma and texture.
  • Waste-Free Cooking: Utilize your sourdough discard, reducing food waste while creating something utterly delicious.

Ingredient Breakdown: What You’ll Need

Let’s gather our ingredients! Each component plays a vital role in achieving that perfect focaccia.

  • Sourdough Discard: 1 cup (240g) of unfed sourdough starter. If you don’t have any, you can use active sourdough starter instead.
  • All-Purpose Flour: 2 ½ cups (320g). This gives our focaccia its structure. You can substitute with whole wheat flour for a nuttier flavor.
  • Salt: 1 teaspoon. Essential for flavor, it enhances all the other ingredients.
  • Sugar or Honey: 1 teaspoon. A touch of sweetness helps balance the flavors.
  • Instant Yeast: 1 teaspoon. This helps the dough rise quickly and gives it a lovely texture.
  • Warm Water: 1 cup (240ml) at about 100°F (38°C). This activates the yeast. Remember, too hot and you’ll kill it!
  • Olive Oil: 3 tablespoons, plus extra for drizzling and greasing. This adds richness and flavor.
  • Fresh Rosemary: About 2 tablespoons. This herb infuses the focaccia with a fragrant aroma.
  • Coarse Sea Salt: For sprinkling on top, adding a delightful crunch and flavor contrast.

Step-by-Step Instructions

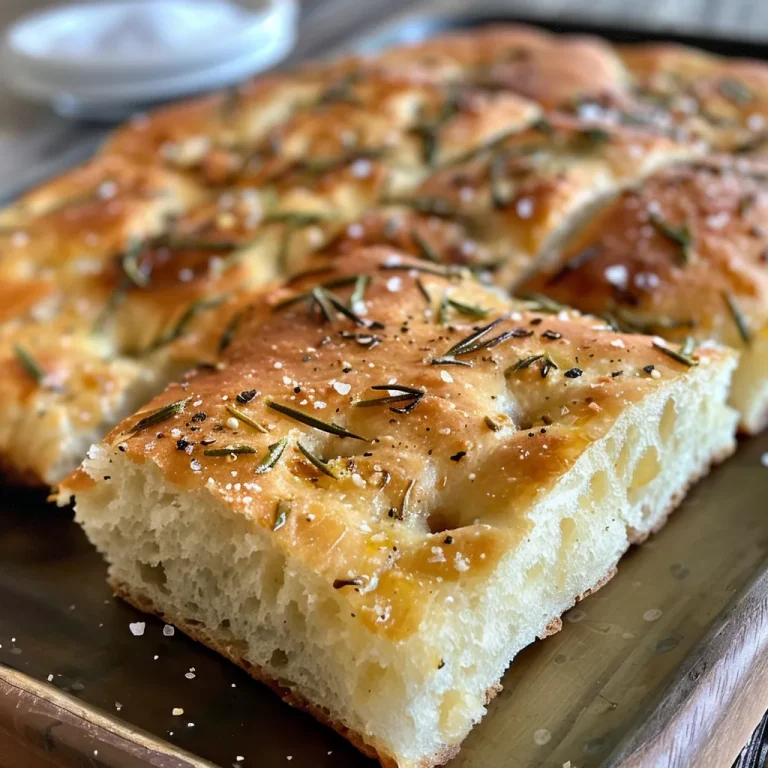
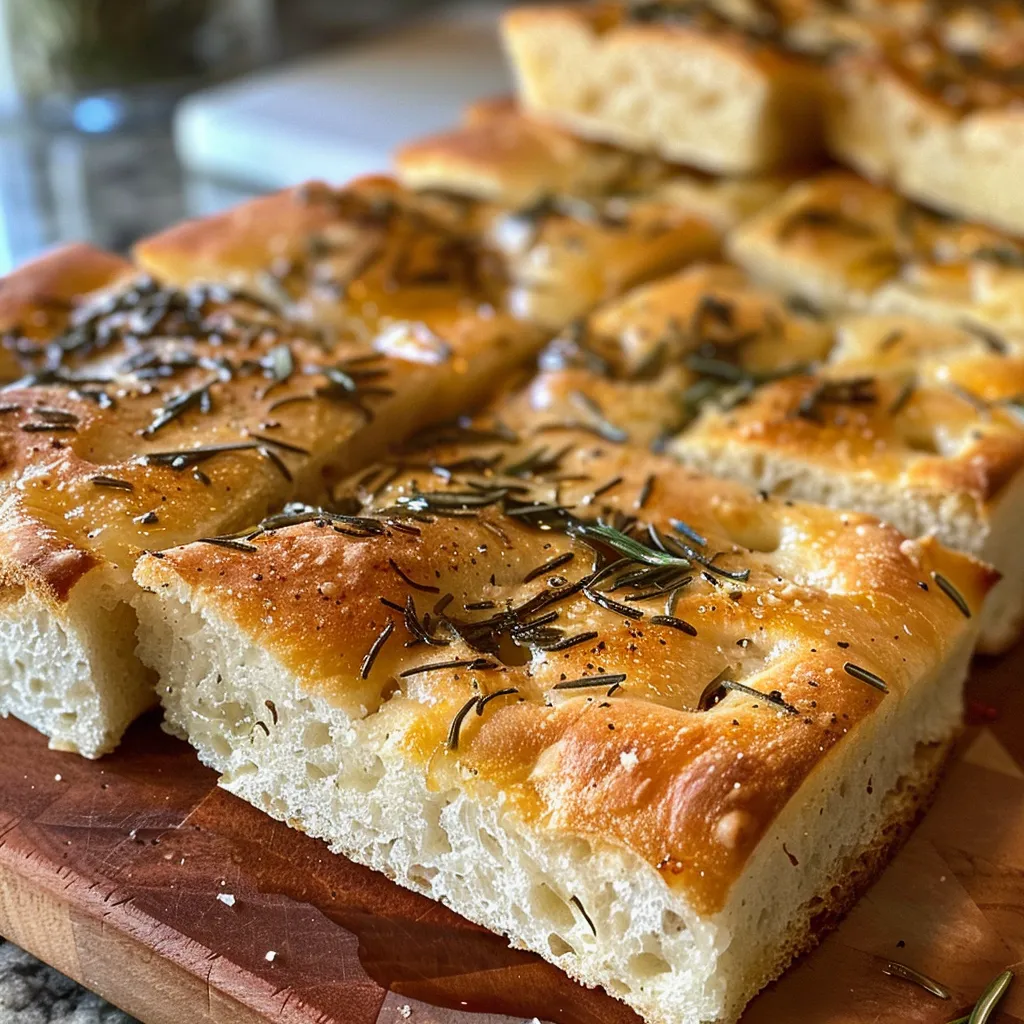
Side view of freshly baked focaccia, topped with fresh rosemary and sea salt.

Now, let’s get to the fun part! Follow these steps to create your own focaccia masterpiece:

  1. In a large mixing bowl, combine the sourdough discard, warm water, and sugar (or honey). Stir to mix well.
  2. Add the flour, salt, and instant yeast. Stir until a shaggy dough forms.
  3. Incorporate 2 tablespoons of olive oil and knead the dough on a lightly floured surface for 5-7 minutes until smooth and elastic, or fold and knead inside the bowl until stretchy.
  4. Lightly oil a clean bowl and place the dough inside. Cover with plastic wrap or a damp cloth. Let it rise at room temperature for 1 to 1 ½ hours, or until it doubles in size.
  5. Grease a 9×13-inch baking pan with olive oil.
  6. Transfer the risen dough into the pan and gently stretch it to fill the pan evenly, being careful not to press out the air bubbles.
  7. Cover the dough again and let it rise for another 30-45 minutes until puffy.
  8. Preheat your oven to 425°F (220°C).
  9. After the second rise, use your fingertips to dimple the dough by pressing down gently, creating deep indentations.
  10. Drizzle the remaining 1 tablespoon of olive oil over the top, sprinkle fresh rosemary evenly, and add a pinch of coarse sea salt.
  11. Bake for 20-25 minutes until golden brown and crispy on top.
  12. Remove from the oven and allow it to cool slightly on a wire rack.
  13. Slice and serve warm with extra olive oil or your favorite dips.

Pro Tips for Perfect Focaccia

Let’s ensure your focaccia turns out perfectly every time with these expert insights:

  • Don’t Rush the Rise: Allow your dough to rise until it has doubled in size; this affects the texture significantly.
  • Use Quality Ingredients: Fresh, high-quality olive oil and herbs make a world of difference in flavor.
  • Mind the Temperature: If your kitchen is too cold, consider a warm spot to let the dough rise effectively.
  • Experiment with Toppings: Try different herbs, cheeses, or even sun-dried tomatoes for unique flavor profiles!
  • Perfect Dimples: When dimpling, press gently to create deep indentations without deflating the dough.
  • Monitor Baking Time: Ovens can vary, so keep an eye on your focaccia to avoid over-browning.
  • Serve Immediately: Focaccia is best enjoyed fresh out of the oven, warm and fragrant.
  • Store Properly: If you have leftovers, store them in an airtight container at room temperature for up to 2 days.

Common Mistakes and Troubleshooting

Even the best bakers face challenges. Here are a few common mistakes and how to avoid them:

  • Dense Texture: This can happen if the dough isn’t allowed to rise sufficiently. Always ensure it doubles in size.
  • Underseasoned Bread: Don’t skimp on the salt! It’s essential for flavor.
  • Too Dry or Crumbly: If your dough feels dry, add a bit more water until it comes together.

Delicious Variations to Try

Focaccia is wonderfully versatile! Here are some creative variations to consider:

  • Herb-Infused Focaccia: Mix chopped fresh herbs like thyme or basil directly into the dough.
  • Cheese-Stuffed Focaccia: Add mozzarella or feta cheese to the center before sealing the dough.
  • Olive and Tomato Focaccia: Top with sliced olives and cherry tomatoes for a Mediterranean twist.
  • Sweet Focaccia: Sprinkle with sugar and cinnamon for a delightful dessert version.

Storage and Make-Ahead Instructions

Want to prepare your focaccia in advance? Here’s how:

  • Make-Ahead Dough: Prepare the dough and store it in the fridge for up to 24 hours. Just let it come to room temperature before shaping.
  • Leftovers: Store any leftover focaccia in an airtight container at room temperature for up to 2 days, or freeze for up to 3 months. To reheat, pop it in a warm oven for a few minutes.

Frequently Asked Questions

Here are some common questions about making focaccia:

  • Can I use regular yeast instead of instant yeast? Yes, but you’ll need to activate it in warm water first.
  • What can I substitute for sourdough discard? Active sourdough starter works well, or you can use a mix of yeast and water.
  • Why is my focaccia flat? It could be due to insufficient rising time or not enough gluten development.
  • Can I make focaccia gluten-free? Yes, using a gluten-free flour blend can yield good results, though the texture may vary.
  • How do I achieve a crispy crust? Preheat your baking pan and use a generous amount of olive oil.
  • Can I add toppings before baking? Absolutely! Just ensure they’re not too heavy to weigh down the dough.
  • How can I tell when my focaccia is done? It should be golden brown on top and sound hollow when tapped.
  • Is focaccia best served warm or at room temperature? While delicious at both temperatures, it’s best enjoyed warm right out of the oven!

Nutritional Tips and Dietary Adaptations

This focaccia can be easily adapted for various dietary needs:

  • Vegan: The recipe is naturally vegan, but double-check any toppings used.
  • Low-Carb: Consider using almond or coconut flour to create a low-carb version.
  • High-Protein: Add seeds or legumes to the dough or as toppings for extra protein.

Essential Equipment for Success

To make your focaccia, you’ll need a few basic tools:

  • Mixing Bowl: A large bowl for combining and kneading your dough.
  • Baking Pan: A 9×13-inch pan is ideal for this recipe.
  • Oven Thermometer: To ensure your oven is at the correct temperature for baking.
  • Wire Rack: For cooling your focaccia once it’s out of the oven.

Serving Suggestions

Serve your focaccia fresh and warm, perhaps with:

  • Extra Olive Oil: For dipping, drizzle some high-quality extra virgin olive oil.
  • Balsamic Vinegar: A splash adds a lovely tang.
  • Cheese: Pair with soft cheeses like burrata or goat cheese.
  • Olives: A side of marinated olives complements the focaccia beautifully.

Conclusion: Celebrate Through Cooking

As you embark on your focaccia-making journey, remember that each loaf is a canvas for your creativity. Cooking is a celebration of flavors, culture, and the joy of togetherness. So gather your loved ones, share stories, and enjoy the process. Your Sourdough Discard Focaccia will not only fill your stomach but also warm your heart. Happy baking, and may your kitchen be filled with love and laughter!

Sourdough Discard Focaccia with Rosemary & Olive Oil

Prep Time 20 minutes
Cook Time 25 minutes
Total Time 45 minutes
Servings 8 slices
Calories 250
A flavorful and easy focaccia bread made using sourdough discard, topped with rosemary and drizzled with olive oil.

Ingredients

Dough

  • 1 cup sourdough starter discard (unfed)
  • 2 ½ cups all-purpose flour
  • 1 tsp salt
  • 1 tsp sugar or honey
  • 1 tsp instant yeast
  • 1 cup warm water (about 100°F/38°C)
  • 3 tbsp olive oil, plus extra for drizzling and greasing
  • 2 tbsp fresh rosemary leaves
  • Coarse sea salt for sprinkling coarse sea salt

Instructions 

  • Mix sourdough discard, warm water, and sugar in a bowl. Add flour, salt, and yeast; stir until shaggy dough forms.
  • Knead in 2 tbsp olive oil until smooth, then let rise in oiled bowl covered for 1-1.5 hours.
  • Transfer dough to greased pan, stretch to fill, and let rise for 30-45 minutes.
  • Preheat oven to 425°F (220°C). Dimple the dough, drizzle with remaining olive oil, sprinkle rosemary and sea salt.
  • Bake for 20-25 minutes until golden, then cool slightly and serve.

Notes

Use fresh rosemary for best flavor and ensure proper rising times for a fluffy texture.
Calories: 250kcal
Cost: $12
Course: Bread
Cuisine: Italian
Keyword: bread, focaccia, Sourdough

Unveiling the Joy of Baked Apple Slices

Welcome to a delicious journey that will fill your kitchen with the warm, inviting aromas of cinnamon and nutmeg! Today, we’ll explore the delightful world of Baked Apple Slices—a comforting treat that not only satisfies your sweet tooth but also brings people together. Whether you’re looking for a cozy dessert to share with family or a simple recipe to enjoy on your own, these baked apple slices are a celebration of flavors and memories!

In this article, we’ll dive deep into every aspect of making the perfect baked apple slices, from choosing the best apples to creative serving suggestions. So grab your apron, and let’s embark on this culinary adventure!

Why You’ll Love This Recipe

  • Easy to Prepare: With just a handful of ingredients and simple steps, you can whip up this delightful dessert in no time!
  • Warm Aromas: Baking the apples fills your home with cozy scents that evoke memories of family gatherings and festive celebrations.
  • Customizable: This recipe is versatile! You can tweak it to suit your taste, adding nuts, dried fruits, or spices.
  • Healthy Dessert Option: Using fresh apples and minimal sugar makes this a guilt-free indulgence, perfect for any occasion.
  • Perfect for Sharing: Whether topped with ice cream or whipped cream, these baked slices are a delightful way to celebrate with loved ones.

Ingredient Breakdown

To create the heartwarming baked apple slices, you’ll need the following ingredients:

  • 4 medium apples: Choose your favorites, such as Fuji, Honeycrisp, or Granny Smith, for their perfect balance of sweetness and tartness.
  • 1 tablespoon unsalted butter: This adds richness and helps the apples caramelize beautifully.
  • 2 tablespoons light brown sugar: For that delightful hint of sweetness and depth of flavor.
  • 1 teaspoon ground cinnamon: This warm spice is essential for creating that classic baked apple flavor.
  • 1/4 teaspoon ground nutmeg: A pinch of nutmeg enhances the overall warmth and complexity of the dish.
  • 1/2 teaspoon vanilla extract: Adds a sweet fragrance and rounds out the flavors.
  • A pinch of salt: Balances the sweetness and enhances the flavors.
  • Ice cream or whipped cream (optional): For that extra indulgence when serving!

Pro Tips for Perfect Baked Apple Slices

A close-up view of warm baked apple slices with a sprinkle of cinnamon, served on a wooden table.
  • Choose the Right Apples: Select apples that are firm and crisp to ensure they hold their shape during baking.
  • Peeling or Leaving Skins On: You can peel the apples for a softer texture or leave the skins on for added fiber and a rustic look.
  • Experiment with Spices: Try adding a pinch of allspice or cardamom for a unique twist on the traditional flavor.
  • Layer for Flavor: Consider layering your apple slices with nuts or oats for added crunch and nutrition.
  • Use Parchment Paper: Lining your baking sheet with parchment paper makes for easy cleanup and prevents sticking.
  • Check for Tenderness: Keep an eye on the apples as they bake; they should be tender but not mushy.
  • Serving Temperature: Serve warm for the best experience, especially if you’re adding ice cream or whipped cream!
  • Make Ahead: You can prepare the apple slices and toss them in the mixture a few hours ahead of baking for a smoother cooking process.

Common Mistakes and Troubleshooting

Even seasoned cooks can encounter a few hiccups when making baked apple slices. Here are some common issues and how to avoid them:

  • Apples are Too Mushy: This can happen if you bake them for too long. Keep an eye on the time and check for tenderness.
  • Not Sweet Enough: If you find the slices lacking sweetness, feel free to adjust the brown sugar or add a drizzle of honey before serving.
  • Uneven Cooking: Make sure to arrange the apple slices in a single layer without overlapping for even baking.
  • Too Much Liquid: If there’s excess liquid, consider increasing the baking time slightly to help concentrate the flavors and reduce moisture.

Creative Variations on Baked Apple Slices

Once you master the basic recipe, try these delightful variations:

  • Nutty Crunch: Add 1/2 cup of chopped walnuts or pecans to the apple mixture for a delightful crunch.
  • Maple Glaze: Substitute honey for brown sugar and drizzle with maple syrup before baking for a unique flavor twist.
  • Spiced Up: Add a splash of bourbon or rum to the apple mixture for an adult version of this dish.
  • Fruit Fusion: Mix in a handful of dried cranberries or raisins for added sweetness and texture.

Storage and Make-Ahead Instructions

If you’re looking to prepare these baked apple slices ahead of time or store leftovers, here’s what to do:

  • Make Ahead: You can slice and prepare the apples up to 4 hours in advance. Toss them in the mixture and cover until you’re ready to bake.
  • Storage: Store any leftovers in an airtight container in the refrigerator for up to 3 days. Reheat in the oven for a few minutes to restore warmth.
  • Freezing: For longer storage, freeze baked apple slices in a single layer, then transfer to a freezer bag for up to 3 months. Thaw in the fridge overnight before reheating.

Frequently Asked Questions

Here are some common questions about baked apple slices:

  • Can I use different apple varieties? Yes! Mixing different varieties enhances flavor and texture.
  • What is the best way to slice apples? Aim for uniform slices (about 1/4-inch thick) to ensure even cooking.
  • How do I prevent browning of the apples? Tossing the slices in lemon juice before mixing can help keep them from browning.
  • Is it necessary to peel the apples? It’s not necessary! Peeling is a personal preference; leaving the skins on adds nutrients.
  • Can I use sugar substitutes? Yes! Feel free to use your favorite sugar substitute, but adjust to taste.
  • How can I make this recipe gluten-free? This recipe is naturally gluten-free, so enjoy without worries!
  • What are some serving suggestions? Serve with vanilla ice cream, Greek yogurt, or a sprinkling of toasted almonds.
  • Can I make baked apple slices in advance? Absolutely! Prepare ahead of time and bake when ready to serve.

Nutritional Tips and Dietary Adaptations

For those looking to make this recipe healthier or fit specific dietary needs:

  • Lower Sugar Option: Reduce the amount of brown sugar or use a sugar alternative to cut calories.
  • Dairy-Free Option: Substitute coconut oil or dairy-free butter for the unsalted butter.
  • Vegan Adaptation: Ensure all ingredients are plant-based, and consider using maple syrup instead of brown sugar.

Equipment Recommendations

Here’s what you’ll need to create your baked apple slices:

  • Baking Sheet: A standard rimmed baking sheet is perfect for catching any juices.
  • Parchment Paper: This makes cleanup a breeze and prevents sticking.
  • Mixing Bowl: A large bowl allows enough space for tossing the apple slices.
  • Sharp Knife: For easy slicing of apples.

Serving Suggestions for Baked Apple Slices

Now that your baked apple slices are ready, here are some delightful ways to serve them:

  • With Ice Cream: A scoop of vanilla or cinnamon ice cream adds a delightful creaminess.
  • With Whipped Cream: A dollop of fresh whipped cream makes for a delightful contrast.
  • Sprinkled with Nuts: Top with toasted almonds or walnuts for an added crunch.
  • As a Breakfast Treat: Serve warm over oatmeal or pancakes for a special breakfast twist.

Conclusion

With this comprehensive guide, you’re well-equipped to create the most comforting and delicious baked apple slices. Let the flavors of the Mediterranean inspire your kitchen as you embrace the warmth of family and friends around the table. Remember, cooking is not just about the food—it’s a celebration of love, culture, and togetherness. So get out there, bake those apples, and enjoy every delightful bite!

Baked Apple Slices

Prep Time 10 minutes
Cook Time 25 minutes
Total Time 35 minutes
Servings 4 servings
Calories 150
Enjoy warm, caramelized apple slices with a hint of cinnamon and nutmeg, perfect for a cozy dessert or snack.

Ingredients

Main

  • 4 medium apples, peeled, cored, and sliced into thin wedges
  • 1 tablespoon unsalted butter, melted
  • 2 tablespoons light brown sugar
  • 1 teaspoon ground cinnamon
  • 1/4 teaspoon ground nutmeg
  • 1/2 teaspoon vanilla extract
  • a pinch salt
  • ice cream for serving (optional)
  • whipped cream for serving (optional)

Instructions 

  • Preheat oven to 350°F (175°C) and line a baking sheet with parchment paper.
  • Mix apple slices, melted butter, sugar, cinnamon, nutmeg, vanilla, and salt in a large bowl.
  • Arrange apple slices on the baking sheet in a single layer.
  • Bake for 20-25 minutes until tender and caramelized.
  • Serve warm with ice cream or whipped cream if desired.

Notes

For extra flavor, sprinkle with additional cinnamon before serving.
Calories: 150kcal
Cost: $8
Course: Dessert
Cuisine: American
Keyword: apple

A Warm Welcome to Homemade Pita Bread

Ah, the tantalizing allure of warm, fluffy homemade pita bread! This delightful bread, a staple of Mediterranean cuisine, is not just food—it’s an invitation to gather around the table, share stories, and create lasting memories. Join me, Rafael, in this culinary journey as we craft the perfect pita bread that puffs up in the oven and fills your home with irresistible aromas.

In this article, we’ll explore not only how to make this beloved bread but also why you’ll fall in love with it. From the ingredients to expert tips and delicious variations, you’ll be equipped to bring a piece of the Mediterranean into your kitchen.

Why You’ll Love This Recipe

  • Quick and Easy: With just a few simple steps, you can whip up fresh pita bread in no time, perfect for any weeknight dinner.
  • Perfect for Sharing: Pita is great for wraps, dips, or simply enjoyed warm with a drizzle of olive oil—ideal for gatherings.
  • Customizable: Feel free to experiment with different flours or add herbs and spices to suit your palate.
  • Healthier Option: Homemade pita bread allows you to control the ingredients, making it a healthier alternative to store-bought versions.
  • Delicious Aroma: The smell of freshly baked pita will instantly transport you to a sun-drenched Mediterranean market.

Ingredients Breakdown

Let’s dive into what makes this pita bread a triumph! Here’s what you’ll need:

  • 1 Cup Warm Water (110F): The perfect temperature to activate the yeast without killing it.
  • 2 Teaspoons Sugar: A little sweetness to help the yeast bloom, giving your pita that beautiful rise.
  • 2 Teaspoons Active Dry Yeast: Essential for leavening; make sure it’s fresh for the best results.
  • 1 Teaspoon Salt: Balances the flavors and enhances the overall taste of your pita.
  • 2 Tablespoons Olive Oil: Adds richness and helps keep the pita soft.
  • 3/4 Cup Whole Wheat Flour: Provides a nutty flavor and adds nutrition.
  • 2 Cups All-Purpose Flour: The base flour that gives your pita the right texture.

You can also make substitutions if necessary:

  • Whole Wheat Flour: Substitute with spelt flour for a different flavor profile.
  • Olive Oil: Can be replaced with melted butter for a richer taste.
  • All-Purpose Flour: Use bread flour for a chewier texture.

Pro Tips for Perfect Pita

Soft pita bread with a light texture, showcasing its warm, inviting interior.

Mastering pita bread is all about technique! Here are some expert tips:

  • Check Your Yeast: Always make sure your yeast is active. If it doesn’t foam up in warm water, it’s time to buy a new package.
  • Don’t Overwork the Dough: Mix just until combined to achieve a soft and airy bread.
  • Let it Rise: Be patient! Allow the dough to double in size for the best puffing action in the oven.
  • Use a Pizza Stone: Preheat your pizza stone to ensure even baking and that lovely puff.
  • Keep it Covered: Cover the dough and baked pitas with a kitchen towel to keep them warm and prevent drying out.
  • Try Cast Iron: If you don’t have a pizza stone, a cast iron skillet works wonders!
  • Experiment with Thickness: Roll the dough thicker for pita that is fluffier and softer, or thinner for a crispier result.
  • Use Fresh Ingredients: Fresh flour and yeast make a world of difference in flavor and texture.

Common Mistakes and Troubleshooting

Even seasoned bakers run into hiccups! Here’s how to avoid common pitfalls:

  • Pita Doesn’t Puff: Make sure your oven is hot enough and the dough is allowed to rise properly.
  • Dough is Too Sticky: If it sticks to your hands, add a little more flour gradually until it’s manageable.
  • Flat Pitas: This could mean the dough wasn’t rolled out evenly, or it didn’t rise enough—trust the process!

Variations to Try

Once you’ve mastered the classic pita recipe, why not play around with some exciting variations?

  • Herbed Pita: Mix in dried herbs like oregano or rosemary into the dough for an aromatic twist.
  • Whole Wheat Pita: Use 100% whole wheat flour for a heartier, more nutritious option.
  • Spiced Pita: Add spices such as cumin or paprika to the dough for a flavor boost.
  • Sweet Pita: Incorporate a tablespoon of honey into the dough for a subtly sweet version perfect for breakfast.

Storage and Make-Ahead Instructions

Want to prep ahead? Here’s how to store and enjoy your pita bread:

  • Room Temperature: Store cooled pita in an airtight container for up to 3 days.
  • Freezing: Freeze baked pita bread. Just separate each piece with parchment paper and store in a zip-lock bag—thaw and reheat in the oven!
  • Make Ahead: You can prepare the dough a day in advance; just refrigerate it after the first rise and bring it back to room temperature before shaping.

Comprehensive FAQ

Here are some frequently asked questions about making homemade pita bread:

  • Can I make pita bread without a mixer? Yes! You can mix by hand, but be prepared for a little elbow grease.
  • Can I use whole wheat flour instead of all-purpose flour? Absolutely! Just keep in mind that the texture will be denser.
  • What do I do if my dough doesn’t rise? Make sure your yeast is fresh and that the water isn’t too hot or too cold.
  • How do I know when my pita bread is done baking? It should be puffed and lightly browned, typically after 3-4 minutes in a hot oven.
  • Can I add toppings to my pita bread? Yes! Before baking, sprinkle on sesame seeds or za’atar for added flavor.
  • What should I serve with pita bread? Try it with dips like baba ganoush, hummus, or as a wrap filled with grilled veggies and meats.
  • How can I make my pita bread softer? Adding a bit more olive oil to the dough can help keep the pita soft and pliable.
  • Is pita bread healthy? When made with whole grains and natural ingredients, it can be a nutritious choice!

Nutritional Tips and Dietary Adaptations

Want to keep it healthy? Here’s how:

  • Whole Grains: Opt for whole wheat flour for added fiber and nutrients.
  • Low-Calorie Option: Reduce the olive oil to one tablespoon for a lighter version.
  • Gluten-Free: Use a gluten-free flour blend, adjusting the liquid as needed for the right consistency.
  • Vegan-Friendly: This recipe is naturally vegan—simply skip any animal-based toppings or fillings!

Equipment Recommendations

A few handy tools will make your pita bread journey smoother:

  • Stand Mixer: For quick and efficient dough mixing.
  • Pizza Stone: Essential for achieving that perfect puff and even baking.
  • Rolling Pin: To roll out the dough evenly for perfectly shaped pitas.
  • Kitchen Towel: To keep the pitas warm and soft post-baking.

Serving Suggestions

Now that your homemade pita is ready, here are some delightful ways to enjoy it:

  • As a Wrap: Fill with grilled chicken, fresh veggies, and tzatziki for a satisfying meal.
  • Dip It: Serve warm pita with hummus, baba ganoush, or tzatziki for a delicious appetizer.
  • As a Pizza Base: Top with sauce, cheese, and your favorite toppings for a fun mini pizza night.
  • With Salads: Tear pieces to complement salads, adding texture and flavor.

Now, my dear culinary companions, it’s time to roll up your sleeves and bring this pita bread to life in your kitchen! Let’s create some magic and fill the air with the delightful aromas of the Mediterranean. Cooking is not just about feeding the body—it’s about nourishing the soul and celebrating life. So, grab your ingredients, let your creativity flow, and enjoy this journey together. Happy cooking!

Homemade Pita Bread

Prep Time 15 minutes
Cook Time 10 minutes
Total Time 25 minutes
Servings 8 pieces
Calories 150
Enjoy fresh, warm homemade pita bread with this simple recipe that yields soft, fluffy rounds perfect for sandwiches or dips.

Ingredients

Dough

  • 1 cup Warm Water (110F)
  • 2 teaspoons Sugar
  • 2 teaspoons Active Dry Yeast
  • 1 teaspoon Salt
  • 2 tablespoons Olive Oil
  • 3/4 cup Whole Wheat Flour
  • 2 cups All-Purpose Flour

Instructions 

  • Combine warm water, yeast, and sugar; let activate for 10 minutes until foamy.
  • Add remaining ingredients and knead until smooth, adding water if dry.
  • Let dough rise in a oiled bowl, covered, until doubled (~1 hour).
  • Preheat oven with pizza stone to 475F (245C) for 30-45 minutes.
  • Divide dough into 8 balls, roll into 6-inch rounds, and bake 2 at a time for 3-4 minutes.

Notes

Use a hot oven and preheated stone for best results.
Calories: 150kcal
Cost: $10
Course: Bread
Cuisine: Mediterranean
Keyword: bread, homemade, Pita

Welcome to the World of Oat Flour Dinner Rolls!

There’s something magical about the warmth of freshly baked bread, especially when it’s made with wholesome ingredients. Today, we’re diving into the delightful realm of Oat Flour Dinner Rolls with Greek yogurt. These rolls are not only easy to make but also a wonderful addition to any gathering, whether it’s a cozy family dinner or a festive holiday feast. With no yeast required, you can whip them up in no time, filling your kitchen with enticing aromas reminiscent of Mediterranean kitchens. Ready to create a dish that embodies love and togetherness? Let’s get started!

Why You’ll Love This Recipe

  • No Yeast Needed: Forget about rising times; these rolls come together quickly without the fuss of yeast.
  • Healthier Alternative: Made with oat flour, these rolls are gluten-free and packed with nutrients, making them a wholesome choice for everyone.
  • Rich in Flavor: The addition of Greek yogurt not only provides moisture but also adds a subtle tang that enhances the overall taste.
  • Versatile Serving Options: Perfect as a side for soups, salads, or even as a base for sliders, these rolls are incredibly adaptable.
  • Family-Friendly: Kids love them! Their soft texture and mild flavor make them a hit with even the pickiest eaters.

Ingredients & Substitutions

Let’s break down the ingredients that make these rolls so special:

  • 2-1/4 cups plain Greek yogurt (554g): This ingredient serves as the foundation of our dough, providing moisture and structure.
  • 1 tablespoon apple cider vinegar: Adds a bit of acidity, which balances the flavors perfectly.
  • 2 tablespoons honey: A natural sweetener that enhances the flavor while keeping the rolls tender.
  • 1-2/3 cups oat flour (206g): The star ingredient! Oat flour is full of fiber and gives these rolls a lovely nutty flavor.
  • 1/2 cup gluten-free flour (95g): For those needing a gluten-free option, this helps in achieving the right texture.
  • 1 tablespoon baking powder: Provides the necessary lift for our rolls.
  • 1 teaspoon baking soda: Works in tandem with the vinegar to ensure the rolls rise beautifully.
  • 1/2 teaspoon salt: Enhances all the flavors.
  • 1 egg white: Used for brushing on top for a lovely golden finish.

**Substitutions**: If you don’t have Greek yogurt, you can use plain yogurt or even cottage cheese for a different flavor profile. For a vegan version, try using a plant-based yogurt and eliminate the egg wash.

How to Make My Gluten-Free Oatmeal Dinner Rolls Recipe

Deliciously baked oat flour dinner rolls arranged on a rustic wooden surface.

Step 1: Prepare Your Oven

Preheat your oven to 375°F (190°C). Line an 8×8 inch baking pan with parchment paper or give it a light grease. This ensures that your rolls don’t stick!

Step 2: Mix the Wet Ingredients

In a large mixing bowl, add the wet ingredients: Greek yogurt, apple cider vinegar, and honey. Whisk until smooth and creamy.

Step 3: Combine the Dry Ingredients

Gradually add the dry ingredients: oat flour, gluten-free flour, baking powder, baking soda, and salt. Stir with a sturdy spatula or use a dough hook in a stand mixer until well combined. You want the dough to be tacky but not overly sticky.

Step 4: Shape the Rolls

Divide the dough into 9 equal pieces. Lightly oil your hands and roll each piece into a smooth ball. Place them in the prepared baking pan in 3 rows of 3.

Step 5: Add the Finishing Touches

Separate the egg yolk from an egg white. Brush the egg white onto the tops of the rolls with a pastry brush, and sprinkle a few oats on top for added texture and flavor.

Step 6: Bake to Perfection

Bake for 25-28 minutes, or until the tops are golden brown and firm to the touch. Allow the rolls to cool slightly before slicing.

Expert Recipe Tips

  • Room Temperature Ingredients: Ensure your Greek yogurt is at room temperature for smoother mixing.
  • Don’t Overmix: Mix just until combined to keep the rolls tender. Overmixing can lead to dense rolls.
  • Temperature Check: Use an oven thermometer to ensure your oven is at the correct temperature for even baking.
  • Storage: Keep any leftovers in an airtight container to maintain freshness. They can be stored at room temperature for up to 2 days.
  • Reheating: For best results, reheat in the oven for a few minutes to revive the texture.
  • Experiment with Add-Ins: Consider adding herbs, cheese, or spices to the dough for an exciting twist!
  • Batch Cooking: These rolls freeze beautifully. Prepare a double batch and freeze some for later!
  • Check for Doneness: A toothpick inserted in the center should come out clean — that’s your sign they’re ready!

Common Mistakes with Oat Flour Dinner Rolls

  • Too Much Flour: If you add too much flour, the rolls can become dry. Always measure your flour accurately.
  • Skipping the Acid: Don’t omit the apple cider vinegar; it’s essential for the dough’s rise.
  • Not Enough Kneading: While we don’t want to overmix, a little kneading helps bring the dough together and improve texture.
  • Not Allowing to Cool: Letting the rolls cool slightly before slicing helps maintain their structure.

Delicious Variations

  • Herb-Infused Rolls: Add a tablespoon of dried oregano or rosemary to the dough for a savory twist.
  • Cheesy Rolls: Incorporate shredded cheese into the dough for a cheesy flavor that pairs perfectly with soups.
  • Sweet Cinnamon Rolls: Add cinnamon and a dash of sugar to the dough, then swirl in a cinnamon-sugar mixture before baking.
  • Olive Oil and Garlic: Brush the tops with olive oil and sprinkle with minced garlic for a Mediterranean flair.

Storage and Make-Ahead Instructions

These rolls can be made ahead of time. Prepare the dough, shape the rolls, and place them in the baking pan. Cover and refrigerate overnight. The next day, let them sit at room temperature for about 30 minutes before baking.

For storage, keep them in an airtight container at room temperature for up to 2 days or freeze for up to 3 months. To reheat, simply pop them in a preheated oven until warmed through.

Frequently Asked Questions

  • Can I use regular flour instead of oat flour? Yes, but the texture and gluten-free aspect will change. Oat flour provides a unique taste and health benefits.
  • What can I serve with these rolls? They pair beautifully with soups, salads, or as a side dish for any meal.
  • Are these rolls suitable for a vegan diet? You can make them vegan by substituting the Greek yogurt with a plant-based yogurt and omitting the egg wash.
  • How do I know when they are done baking? The rolls should be golden brown on top, and a toothpick inserted in the center should come out clean.
  • Can I add herbs or spices? Absolutely! Feel free to experiment with flavors that you love.
  • Why did my rolls not rise? Ensure your baking powder and baking soda are fresh, and don’t skip the vinegar as it activates the leavening agents.
  • Can I make these rolls ahead of time? Yes, you can prepare the dough and shape the rolls the night before and bake them fresh in the morning.
  • What’s the best way to store leftovers? Keep them in an airtight container at room temperature or freeze them for longer storage.

Nutritional Tips and Dietary Adaptations

These rolls are a fantastic source of fiber and protein, thanks to the Greek yogurt and oat flour. If you’re looking to boost the nutritional profile further, consider adding seeds like chia or flaxseed, which can add omega-3 fatty acids. For those watching their sugar intake, you can reduce the honey or substitute it with a natural sweetener like stevia.

Equipment Recommendations

  • Mixing Bowls: A good set of mixing bowls helps in combining ingredients effortlessly.
  • Pastry Brush: Essential for brushing egg wash and achieving that golden finish.
  • Baking Pan: Use an 8×8 inch pan for perfect roll sizing.
  • Stand Mixer (Optional): If you have one, it makes mixing the dough a breeze.

Serving Suggestions

Serve these delightful rolls warm, straight out of the oven, with a side of olive oil and balsamic vinegar for dipping. They also make fantastic sliders for mini sandwiches, especially filled with roasted vegetables or meats. Pair them with a hearty soup or a fresh salad for a complete meal that celebrates the joy of sharing good food. Let every bite remind you of the love and warmth of Mediterranean gatherings!

Conclusion

Creating Oat Flour Dinner Rolls with Greek Yogurt is not just about baking; it’s about bringing people together around the table. With their delightful texture, rich flavor, and wholesome ingredients, these rolls are sure to be a favorite in your home. So gather your ingredients, put on some music, and let the joy of cooking fill your kitchen. Thank you for joining me on this culinary journey — I’m so glad you’re here, and I can’t wait for you to enjoy these rolls as much as I do!

Oat Flour Dinner Rolls with Greek Yogurt (No Yeast)

Prep Time 10 minutes
Cook Time 25 minutes
Total Time 35 minutes
Servings 9 rolls
Calories 150
These soft, gluten-free dinner rolls are quick to make using oat flour and Greek yogurt, perfect for a wholesome meal.

Ingredients

wet ingredients

  • 2-1/4 cups plain Greek yogurt (554g)
  • 1 tablespoon apple cider vinegar
  • 2 tablespoons honey

dry ingredients

  • 1-2/3 cups oat flour (206g)
  • 1/2 cup gluten-free flour (95g)
  • 1 tablespoon baking powder
  • 1 teaspoon baking soda
  • 1/2 teaspoon salt
  • 1 egg white egg white

Instructions 

  • Preheat oven to 375°F (190°C) and prepare an 8x8" pan.
  • Mix wet ingredients until smooth, then add dry ingredients and combine until tacky.
  • Divide dough into 9 balls, place in pan, and shape into rolls.
  • Brush tops with egg white and sprinkle oats.
  • Bake for 25-28 minutes until golden and firm. Cool before serving.

Notes

Use fresh oats for best texture and flavor.
Calories: 150kcal
Cost: $12
Course: Bread
Cuisine: fusion
Keyword: gluten free

Discover the Magic of Peanut Butter Chocolate Caramel Cookies

Welcome to a world where baking becomes an adventure, and the kitchen transforms into a playground of flavors! These Peanut Butter Chocolate Caramel Cookies are not just another sweet treat; they are a celebration of the rich, creamy goodness of peanut butter paired with the decadence of melted chocolate and gooey caramel. Each bite is a burst of joy that will have you and your loved ones coming back for more. Perfect for any occasion, whether it’s a cozy family gathering or a festive celebration, these cookies are bound to steal the show!

Let’s embark on this delectable journey together, exploring the ingredients, techniques, and variations that will elevate your baking game. From the moment you preheat your oven to the sweet aroma wafting through your home, you’ll understand why this recipe deserves a special place in your kitchen.

Why You’ll Love This Recipe

Here are just a few reasons why these cookies will become a favorite in your household:

  • Irresistible Flavor: The combination of peanut butter, chocolate, and caramel creates a flavor explosion that is truly unforgettable.
  • Easy to Make: With simple ingredients and straightforward steps, even novice bakers can whip up these delightful cookies effortlessly.
  • Versatile Treat: Perfect for any occasion—whether you’re hosting a party, celebrating a birthday, or just indulging yourself!
  • Make Ahead Friendly: You can prepare the dough in advance and store it in the fridge or freezer for later baking, making it a great option for busy days.
  • Customizable: Feel free to experiment with different mix-ins and toppings to create your unique version of these cookies.

Ingredient Breakdown

Understanding the ingredients is key to mastering this cookie recipe. Here’s what you’ll need:

  • 1 cup creamy peanut butter: The star ingredient that provides richness and flavor. You can substitute with crunchy peanut butter for added texture.
  • 1 cup brown sugar: Adds moisture and a hint of caramel flavor. Light brown sugar works well, but dark brown sugar can enhance the richness.
  • 1/2 cup granulated sugar: For the perfect sweetness that balances the flavors. Adjust according to your taste preferences.
  • 1 large egg: Acts as a binding agent, giving structure to the cookies. For an egg-free option, you can use 1/4 cup unsweetened applesauce.
  • 1 teaspoon vanilla extract: A splash of vanilla enhances the overall flavor profile. Consider using pure vanilla for the best taste.
  • 1/2 teaspoon baking soda: Helps the cookies rise and achieve that perfect texture. Be sure it’s fresh for optimum effectiveness.
  • 1 cup semi-sweet chocolate chips: Provides rich chocolate flavor. You can replace them with milk chocolate or dark chocolate chips based on your preference.
  • 1 cup caramel bits: The gooey surprise inside each cookie! If you can’t find caramel bits, you can use soft caramel candies, chopped into small pieces.
  • Pinch of salt: Enhances the flavors and balances the sweetness.

Pro Tips for Perfect Cookies

Side view of freshly baked peanut butter chocolate caramel cookies with melty chocolate chips.

Here are some expert insights to help you achieve cookie perfection:

  • Room Temperature Ingredients: Make sure your peanut butter and egg are at room temperature for easier mixing.
  • Don’t Overmix: Mix just until combined to prevent tough cookies. The dough should be slightly lumpy.
  • Chill the Dough: For thicker cookies, chill the dough for at least 30 minutes before baking.
  • Use Parchment Paper: Line your baking sheet with parchment paper to prevent sticking and ensure even baking.
  • Baking Time: Keep an eye on the cookies towards the end of the baking time; they should look set and slightly golden around the edges.
  • Cooling is Key: Allow cookies to cool on the baking sheet for a few minutes before transferring to a wire rack to cool completely.
  • Storage Tips: Store cookies in an airtight container at room temperature for up to a week, or freeze for longer storage.
  • Experiment with Mix-Ins: Feel free to add nuts, dried fruits, or even a sprinkle of sea salt on top for extra flavor!

Common Mistakes and Troubleshooting

Even the best bakers can run into issues. Here are some common pitfalls and how to avoid them:

  • Cookies Spread Too Much: This can happen if your butter is too soft. Make sure to use room temperature ingredients and chill the dough if necessary.
  • Cookies are Too Hard: Overbaking is usually the culprit. Keep an eye on them; they should be soft in the center when you take them out.
  • Dough is Too Sticky: If your dough is too sticky to handle, add a little extra flour until it reaches a manageable consistency.
  • Lack of Flavor: Ensure your ingredients are fresh and measure accurately. A pinch of salt can enhance sweetness, so don’t skip it!

Delicious Variations

Want to mix things up? Here are some fun variations to try:

  • Chocolate Chip Caramel Swirl: Add an extra swirl of caramel on top before baking for an even more decadent treat.
  • Nutty Delight: Fold in chopped nuts such as pecans or walnuts for added crunch and flavor.
  • Oreo Crunch: Crush some Oreo cookies and fold them into the dough for a delicious twist!
  • Spicy Peanut Butter: Add a dash of cayenne pepper or cinnamon to the dough for a unique flavor kick.

Storage and Make-Ahead Instructions

Planning ahead? Here’s how to store and prepare these cookies:

  • Storing Cookie Dough: You can refrigerate the cookie dough for up to 3 days or freeze it for up to 3 months. Just thaw in the refrigerator before using.
  • Storing Baked Cookies: Keep baked cookies in an airtight container at room temperature for up to a week, or freeze them for longer freshness.

Frequently Asked Questions

Got questions? We’ve got answers! Here are some FAQs about making these delightful cookies:

  • Can I use natural peanut butter? Yes! Just be aware that natural peanut butter can be a little runnier, so you may need to adjust the amounts.
  • What can I substitute for the egg? You can use 1/4 cup unsweetened applesauce or a flax egg (1 tablespoon ground flaxseed mixed with 2.5 tablespoons water) as a substitute.
  • How do I know when the cookies are done? The edges should be golden brown, while the centers may still look slightly soft. They will firm up as they cool.
  • Can I freeze the cookies? Absolutely! Freeze baked cookies in an airtight container for up to 3 months. Just thaw them at room temperature before enjoying.
  • How can I make these cookies gluten-free? Substitute the granulated sugar with coconut sugar and use gluten-free baking soda to ensure they stay gluten-free.
  • What can I add for extra flavor? Try adding a teaspoon of espresso powder to enhance the chocolate flavor or a splash of almond extract for a different twist!
  • Can I use different types of chocolate? Yes! Feel free to mix in milk chocolate, dark chocolate, or white chocolate chips for different flavor profiles.
  • Can I make these cookies vegan? Yes! Use a vegan egg substitute and ensure your chocolate chips are dairy-free.

Nutritional Tips and Dietary Adaptations

If you’re looking to make these cookies a bit healthier, here are some tips:

  • Reduce Sugar: You can cut down on the sugars by using a sugar substitute or reducing the amounts slightly.
  • Healthier Fats: Substitute half of the peanut butter with an avocado or use almond butter for a different flavor.
  • Add Fiber: Incorporate oats or flaxseed meal to boost the nutritional content while adding chewiness.
  • Portion Control: Make smaller cookies to help control serving size and caloric intake.

Essential Equipment for Baking

To make your baking experience smoother, here’s a list of recommended tools:

  • Mixing Bowls: A set of mixing bowls in various sizes will make combining ingredients easier.
  • Baking Sheets: Use heavy-duty baking sheets for even heat distribution while baking.
  • Parchment Paper: A must-have for easy cleanup and to prevent sticking.
  • Cookie Scoop: A cookie scoop ensures uniform cookie sizes, making for even baking.
  • Cooling Rack: Necessary for cooling cookies evenly and preventing sogginess.

Serving Suggestions for Peanut Butter Chocolate Caramel Cookies

These cookies are delightful on their own, but here are some serving ideas to take them to the next level:

  • With a Glass of Milk: Pair these cookies with a cold glass of milk, and watch them disappear!
  • Serve Warm: Enjoy them straight out of the oven for the ultimate gooey experience.
  • As a Dessert Sandwich: Sandwich a scoop of ice cream between two cookies for a decadent treat.
  • Gift Packaging: Share the love! Package these cookies beautifully in a jar tied with a ribbon for a thoughtful homemade gift.

Final Thoughts

Now that you have all the tools and knowledge at your fingertips, it’s time to dive into the world of baking these Peanut Butter Chocolate Caramel Cookies. They are more than just a dessert; they are a way to create memories, share joy, and indulge in sweet moments with family and friends. So, gather your ingredients, turn on your oven, and let the deliciousness unfold! Happy baking, and remember, every bite is a moment to cherish!

Irresistible Peanut Butter Chocolate Caramel Cookies

Prep Time 10 minutes
Cook Time 12 minutes
Total Time 22 minutes
Servings 24 cookies
Calories 150
These decadent cookies combine creamy peanut butter, chocolate chips, and caramel bits for a irresistible treat that's easy to make and perfect for any occasion.

Ingredients

Dough

  • 1 cup creamy peanut butter
  • 1 cup brown sugar
  • 1/2 cup granulated sugar
  • 1 large egg egg
  • 1 teaspoon vanilla extract
  • 1/2 teaspoon baking soda
  • 1 cup semi-sweet chocolate chips
  • 1 cup caramel bits
  • Pinch salt salt

Instructions 

  • Preheat oven to 350°F (175°C). Mix peanut butter, sugars, egg, vanilla, and baking soda until smooth.
  • Fold in chocolate chips and caramel bits gently.
  • Scoop dough onto parchment-lined baking sheet.
  • Bake for 10–12 minutes until edges are golden.
  • Cool on sheet for 5 minutes, then transfer to wire rack.

Notes

For softer cookies, slightly underbake and let cool.
Calories: 150kcal
Cost: $15
Course: Dessert
Keyword: caramel, chocolate, peanut butter

Dive into the delightful world of Cheese and Herb Muffins! This easy recipe combines the rich flavors of Cheddar and Parmesan with the freshness of herbs, perfect for any occasion. Join me in celebrating the joy of cooking and sharing warm, homemade goodness!

Why You’ll Love This Recipe

These Cheese and Herb Muffins are not just another baked good; they are a symphony of flavors and a celebration of comfort food! Here’s why you’ll adore this recipe:

  • Quick and Easy: In less than 30 minutes, you can whip up a batch that will impress friends and family.
  • Versatile Flavor Profile: The combination of cheddar and Parmesan gives these muffins a delicious depth, while fresh herbs add a vibrant touch.
  • Ideal for Any Occasion: Whether it’s brunch, a picnic, or a cozy dinner, these muffins fit right in.
  • Nutritious and Wholesome: Made with simple, nutritious ingredients, they are a guilt-free indulgence.
  • Customizable: Add your favorite ingredients like sun-dried tomatoes or olives to create unique variations!

Ingredients Breakdown

Here’s what you’ll need to create these delightful muffins:

  • 2 cups all-purpose flour: The base of our muffins, providing the perfect texture.
  • 1 tbsp baking powder: This is essential for that lovely rise.
  • 1/2 tsp salt: Enhances the flavors of the other ingredients.
  • 1/4 tsp black pepper: Adds a subtle kick.
  • 1/2 cup Cheddar Cheese (grated): For a rich, creamy flavor.
  • 1/4 cup Parmesan cheese (grated): Adds a sharp, tangy note.
  • 1 tbsp fresh herbs (thyme or chives) or parsley: Fresh herbs make all the difference!
  • 1 cup milk: Binds everything together and keeps the muffins moist.
  • 1/4 cup butter (melted): Adds richness and flavor.
  • 1 large egg: Provides structure and moisture.

Pro Tips for Muffin Perfection

Follow these expert insights to elevate your muffin game:

  • Don’t Overmix: When combining wet and dry ingredients, stir until just combined. Overmixing can lead to tough muffins.
  • Room Temperature Ingredients: Ensure your egg and milk are at room temperature for better mixing and texture.
  • Quality Cheese Matters: Use good quality cheeses for maximum flavor; freshly grated cheese is best.
  • Experiment with Herbs: Try different herbs like basil or oregano to switch up the flavor profile.
  • Use a Cookie Scoop: For even muffin sizes, use a cookie scoop to fill the muffin tin.
  • Check for Doneness: Insert a toothpick in the center; if it comes out clean, they’re ready!
  • Cool in the Pan: Let them cool in the muffin tin for about 5 minutes before transferring to a wire rack.
  • Consider a Muffin Top Pan: If you love that iconic muffin top, invest in a muffin top pan!

Common Mistakes to Avoid

Side view of freshly baked Cheese and Herb Muffins showcasing melted cheese.

Here are some pitfalls to avoid while making your muffins:

  • Using Cold Ingredients: Cold ingredients can cause the batter to not rise as well.
  • Skipping the Baking Powder: Always check that your baking powder is fresh; expired powder won’t give you the rise you need.
  • Filling Muffin Cups Too Full: Overfilling can lead to overflow and uneven baking.
  • Not Preheating the Oven: Ensure your oven is preheated to guarantee even cooking.

Delicious Variations

Feel free to get creative and adapt this basic recipe! Here are some mouthwatering variations:

  • Spinach and Feta: Add fresh spinach and crumbled feta for a Mediterranean twist.
  • Sun-Dried Tomato and Basil: Incorporate chopped sun-dried tomatoes and fresh basil for a burst of flavor.
  • Garlic and Herb: Mix in roasted garlic and additional herbs for an aromatic experience.
  • Mediterranean Delight: Add kalamata olives and feta cheese for a briny kick.

Storage and Make-Ahead Instructions

Want to enjoy these muffins later? Here’s how to store them:

  • Room Temperature: Store in an airtight container at room temperature for up to 3 days.
  • Refrigeration: Keep in the fridge for up to a week; just reheat in the oven.
  • Freezing: Freeze muffins individually wrapped in plastic wrap for up to 3 months. Thaw overnight in the fridge before enjoying.

Comprehensive FAQ

Got questions? Here are answers to some common queries:

  • Can I use whole wheat flour? Yes, but you may need to adjust the liquid slightly.
  • What can I substitute for cheese? Try nutritional yeast for a dairy-free option.
  • How do I make these muffins gluten-free? Use a gluten-free flour blend and a gluten-free baking powder.
  • Can I make mini muffins? Absolutely! Just adjust the baking time to 10-12 minutes.
  • What’s the best way to reheat? Reheat in the oven at 350°F (175°C) for about 5-7 minutes.
  • Can I add vegetables? Yes! Grated zucchini or carrots can be added for extra nutrition.
  • How do I know when they’re done? A toothpick inserted in the center should come out clean.
  • What’s the best serving suggestion? Serve warm with a pat of butter or a dollop of cream cheese!

Nutritional Tips and Dietary Adaptations

To make these muffins even healthier, consider these tips:

  • Choose Low-Fat Dairy: Use low-fat milk and butter to reduce calories.
  • Add Seeds: Incorporate chia or flax seeds for added fiber and omega-3s.
  • Fresh Herbs: Not only do they add flavor, but they also provide essential nutrients!

Equipment Recommendations

To make your muffin-baking experience seamless, here’s what you’ll need:

  • Muffin Tin: A standard 12-cup muffin tin is essential for even baking.
  • Mixing Bowls: Use one large bowl for dry ingredients and another for wet ingredients.
  • Whisk: A good whisk helps combine ingredients smoothly.
  • Silicone Spatula: Perfect for folding in ingredients without overmixing.
  • Cooling Rack: Essential for cooling your muffins evenly after baking.

Serving Suggestions

These muffins are incredibly versatile and can be served in numerous ways:

  • For Brunch: Pair them with a fresh salad and a light dressing.
  • As a Snack: Enjoy them warm with butter or cream cheese.
  • For a Picnic: Pack them along with fresh fruit and a refreshing drink.
  • With Soups: Serve alongside your favorite soup for a hearty meal.

Let the warmth and comfort of these Cheese and Herb Muffins fill your home with joy. Cooking is not just about feeding; it’s about creating memories, sharing laughter, and celebrating life. So grab a plate and join the feast!

Cheese and Herb Muffins

Prep Time 10 minutes
Cook Time 20 minutes
Total Time 30 minutes
Servings 12 muffins
Calories 180
Delight in these savory muffins packed with cheese and fresh herbs, perfect for breakfast or snacks.

Ingredients

Dry ingredients

  • 2 cups all-purpose flour
  • 1 tbsp baking powder
  • 1/2 tsp salt
  • 1/4 tsp black pepper

Cheese and herbs

  • 1/2 cup Cheddar Cheese (grated)
  • 1/4 cup parmesan cheese (grated)
  • 1 tbsp fresh herbs (thyme, or chives), such as parsley

Wet ingredients

  • 1 cup milk
  • 1/4 cup butter (melted)
  • 1 large egg

Instructions 

  • Preheat oven to 375°F (190°C).
  • Mix dry ingredients and cheeses with herbs.
  • Whisk wet ingredients together.
  • Combine wet and dry, stir until just mixed.
  • Spoon batter into greased muffin tin, 3/4 full.
  • Bake for 18-20 minutes, cool slightly before serving.

Notes

Use fresh herbs for best flavor and consider adding a sprinkle of extra cheese on top before baking.
Calories: 180kcal
Cost: $8
Course: Breakfast
Cuisine: American
Keyword: Cheese, herbs