Author

rafael

Browsing

Welcome, dear friends! Today, we’re diving into the delightful world of Greek Yogurt Rolls, a simple yet magical recipe that brings joy to every meal. These rolls are not only quick and easy to make, but they also boast a rich, tangy flavor that complements any dish. Perfect for family gatherings or a cozy dinner, you’ll find that these rolls elevate your dining experience from ordinary to extraordinary. So grab your apron, and let’s whisk up some joy together!

Why You’ll Love This Recipe

Here are just a few reasons why these Greek Yogurt Rolls deserve a spot in your kitchen:

  • Quick Preparation: With just two main ingredients, you can whip these rolls up in no time! Perfect for those busy weeknights when you need a side dish fast.
  • Versatile Pairing: These rolls pair beautifully with a wide range of dishes, from stews to salads, making them a flexible addition to any meal.
  • Healthier Option: Made with Greek yogurt, they’re packed with protein, offering a nutritious alternative to traditional bread.
  • Customizable Flavors: Add herbs, cheese, or spices to the dough to create unique flavors that cater to your taste preferences.
  • No Yeast Required: Say goodbye to the hassle of yeast and rising dough! This recipe is straightforward and yields fluffy, delicious rolls every time.

Ingredient Breakdown

Understanding your ingredients is key to mastering these Greek Yogurt Rolls. Here’s what you’ll need:

  • 1 cup Greek Yogurt: This ingredient is the star of the show. If you prefer a dairy-free option, you can substitute it with plain coconut yogurt. Just ensure it’s thick and drain it if it’s too runny.
  • 1 cup Self-Raising Flour: This flour gives the rolls their structure and rise. For gluten-free options, replace with a gluten-free flour blend, adding 1 ½ teaspoons of baking powder per cup to achieve similar results.

Step-by-Step Instructions

Ready to make these delightful rolls? Follow these easy steps:

  1. Mix the Dough: In a mixing bowl, combine the Greek yogurt and self-raising flour until a dough forms. If the dough feels sticky, add a little more flour.
  2. Knead Briefly: Turn the dough onto a floured surface and knead it gently for about 1 minute. You want the dough to be smooth but not overworked.
  3. Shape Into Rolls: Divide the dough into equal portions and shape them into round rolls. Place them on a baking sheet lined with parchment paper.
  4. Bake Until Golden: Preheat your oven to 400°F (200°C) and bake the rolls for 12-15 minutes, or until they are golden brown on top.

Pro Tips for Perfect Rolls
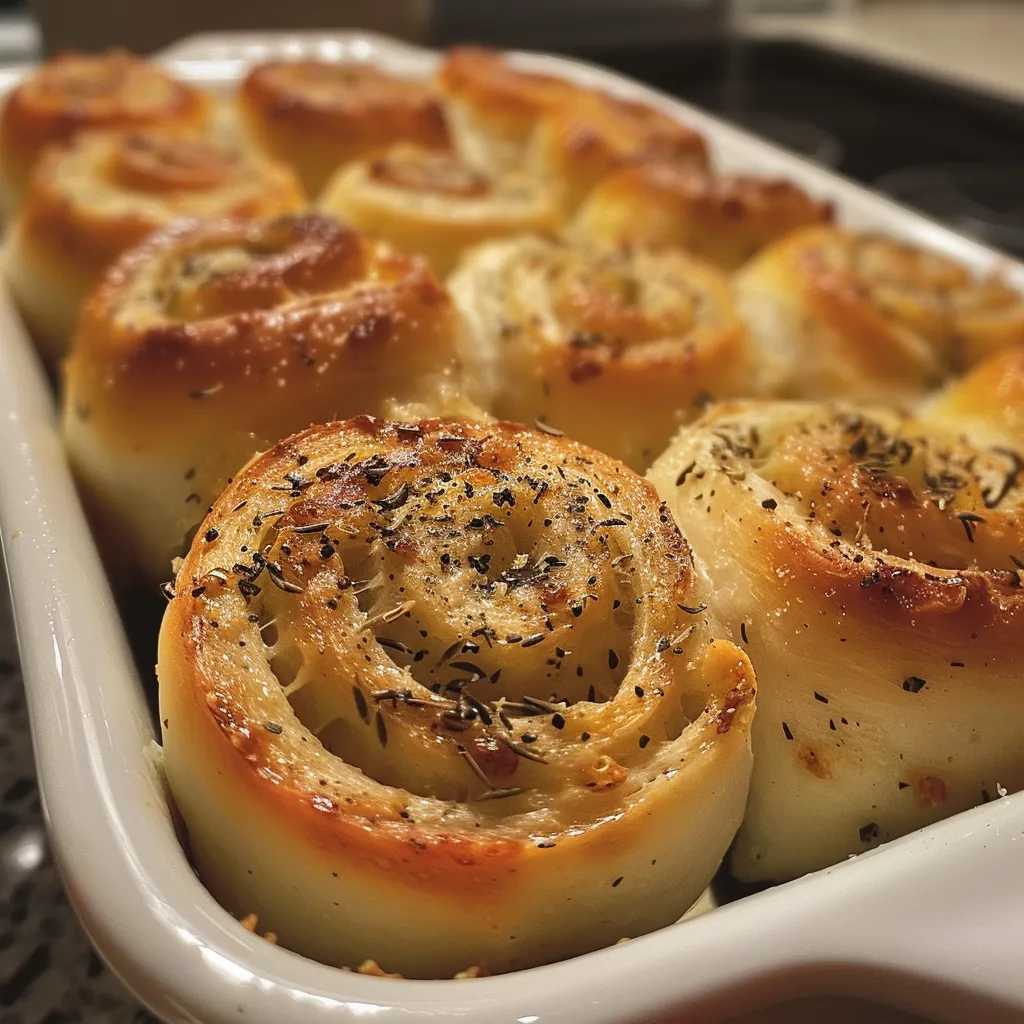
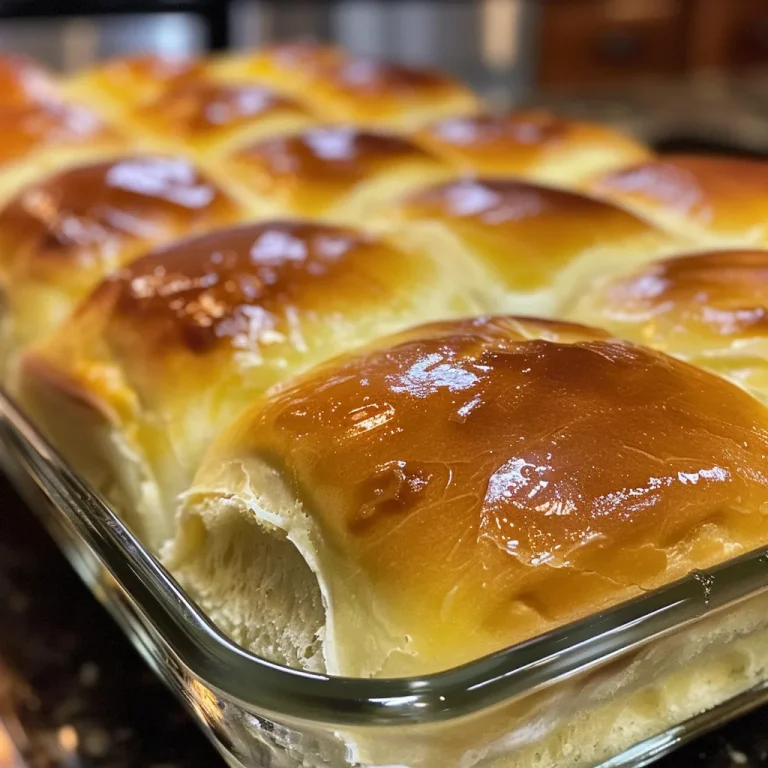
Side view of freshly baked Greek yogurt rolls, showing flaky texture.

To ensure your Greek Yogurt Rolls turn out perfectly every time, consider these expert insights:

  • Room Temperature Ingredients: Use yogurt at room temperature for easier mixing and a better texture in your rolls.
  • Don’t Overwork the Dough: Knead just until combined. Overworking can lead to tough rolls.
  • Experiment with Flavors: Add garlic powder, Parmesan cheese, or fresh herbs like rosemary or thyme to elevate the flavor profile.
  • Proper Storage: Store any leftover rolls in an airtight container at room temperature for up to 2 days, or freeze for longer storage.
  • Brush with Butter: For a richer taste, brush the tops of the rolls with melted butter immediately after baking.
  • Check for Doneness: The rolls should sound hollow when tapped on the bottom and be golden brown on top.
  • Make-Ahead Options: You can prepare the dough and shape it into rolls, then refrigerate for up to 24 hours before baking.
  • Serving Warm: These rolls are best served warm, so consider reheating them in the oven for a few minutes before serving.

Common Mistakes and Troubleshooting

Even the best cooks can face challenges in the kitchen. Here’s how to avoid common pitfalls:

  • Too Sticky Dough: If your dough is too sticky, gradually add more flour until it reaches the right consistency.
  • Dense Rolls: If your rolls turn out dense, this may be due to over-kneading. Remember to knead just until combined.
  • Flavorless Rolls: Enhance the flavor of your rolls by adding herbs, spices, or cheese to the dough mixture.
  • Burnt Bottoms: If you notice the bottoms of your rolls browning too quickly, consider using a lower rack in your oven or placing a baking sheet beneath to catch any drippings.

Variations to Try

Get creative and make these rolls your own! Here are some delicious variations:

  • Cheesy Yogurt Rolls: Add ½ cup of shredded cheese, like cheddar or feta, to the dough for a savory twist.
  • Herb-Infused Rolls: Mix in 1 tablespoon of dried herbs such as oregano or basil for an aromatic touch.
  • Sweet Rolls: Incorporate a tablespoon of honey and a pinch of cinnamon for a delightful sweet version, perfect for breakfast.
  • Spicy Rolls: Add a teaspoon of red pepper flakes for a kick of heat that pairs well with hearty soups.

Storage and Make-Ahead Instructions

Here’s how to keep your Greek Yogurt Rolls fresh:

  • Room Temperature: Store in an airtight container for up to 2 days. They taste best fresh!
  • Refrigeration: Keep in the refrigerator for up to 5 days. Reheat in the oven before serving for best results.
  • Freezing: Freeze rolls in an airtight container for up to 3 months. Thaw in the fridge and reheat when ready to enjoy.

Comprehensive FAQ

Got questions? We’ve got answers! Here are some frequently asked queries regarding Greek Yogurt Rolls:

  • Can I use regular yogurt instead of Greek yogurt? Yes, but Greek yogurt provides a thicker texture and richer flavor.
  • What if I can’t find self-raising flour? You can substitute all-purpose flour mixed with baking powder (1 cup flour + 1 ½ tsp baking powder).
  • How do I know when they are done baking? The rolls should be golden brown and sound hollow when tapped on the bottom.
  • Can I make these rolls vegan? Substitute Greek yogurt with a thick plant-based yogurt, and use a vegan-friendly flour.
  • What’s the best way to serve these rolls? Serve warm with butter or olive oil, or alongside your favorite dips and spreads.
  • Can I add other ingredients like garlic or cheese? Absolutely! Feel free to customize with your favorite flavors.
  • How do I store leftovers? Store them in an airtight container at room temperature for 2 days or refrigerate for up to 5 days.
  • Can I freeze these rolls? Yes, they freeze well! Just ensure they’re properly wrapped or in an airtight container.

Nutritional Tips and Dietary Adaptations

For those mindful of nutrition, here are some tips:

  • Protein Boost: Using Greek yogurt adds protein to your rolls, making them a satisfying addition to any meal.
  • Gluten-Free Options: Easily make these rolls gluten-free by substituting the flour, allowing everyone to enjoy them.
  • Low-Calorie Variation: Use low-fat Greek yogurt to reduce calories while still enjoying the delicious flavor.
  • Herbal Enhancements: Incorporate fresh herbs to boost flavor without adding calories.

Equipment Recommendations

To make your baking experience smooth and enjoyable, here’s what you’ll need:

  • Mixing Bowl: A large mixing bowl for combining the ingredients.
  • Baking Sheet: A flat baking sheet lined with parchment paper for easy removal of rolls.
  • Measuring Cups: Accurate measuring cups for precise ingredient quantities.
  • Silicone Spatula: For gentle mixing of the dough without overworking it.

Serving Suggestions

Enjoy your Greek Yogurt Rolls in various ways! They are fantastic served warm with:

  • Olive Oil and Balsamic Vinegar: A classic Mediterranean dip that enhances the rolls’ flavor.
  • Soups and Stews: Perfect for soaking up delicious broths and sauces.
  • Cheese and Charcuterie Boards: Add them to a platter for a delightful pairing with meats and cheeses.
  • Simple Spreads: Serve with hummus, tzatziki, or even a homemade tapenade for a flavorful appetizer.

As we wrap up this culinary journey, I hope you feel inspired to whip up a batch of these delightful Greek Yogurt Rolls. Remember, cooking is not just about feeding the body; it’s about nourishing the soul, celebrating culture, and sharing love with those around you. So, gather your loved ones and enjoy these rolls fresh from the oven. Bon appétit!

Deliciously Easy Greek Yogurt Rolls You’ll Love to Make

Prep Time 10 minutes
Cook Time 10 minutes
Total Time 20 minutes
Servings 4 rolls
Calories 150
These simple Greek yogurt rolls are quick to prepare and perfect for a healthy snack or breakfast.

Ingredients

Dough

  • 1 cup Greek Yogurt (Can substitute with plain coconut yogurt (drain if too runny))
  • 1 cup Self-Raising Flour (For gluten-free, use gluten-free flour blend with 1 ½ tsp baking powder per cup)

Instructions 

  • Mix Greek yogurt and flour until a dough forms.
  • Divide the dough into 4 equal portions and roll into logs.
  • Place rolls on a baking sheet and bake at 375°F (190°C) for 10 minutes.
  • Remove from oven and let cool slightly before serving.
Notes

Ensure the yogurt is drained if too runny for best dough consistency.
Calories: 150kcal
Cost: $5
Course: Breakfast, Snack
Cuisine: Greek
Keyword: Quick, Yogurt

Welcome to the World of Chocolate Dreams

When you think of celebrations, what comes to mind? Laughter, joy, and of course, a **decadent chocolate cake** that steals the show! Today, I’m here to guide you through the process of creating the ultimate moist chocolate cake, a recipe that not only satisfies your sweet tooth but also brings people together around the table. Join me as we dive into the secrets of baking a cake that transforms any occasion into a festive feast!

Why You’ll Love This Recipe

This cake is more than just a dessert; it’s an experience! Here’s why you’ll fall head over heels for this **moist chocolate cake**:

  • Unforgettable Richness: The combination of cocoa powder and semi-sweet chocolate creates a flavor profile that’s deeply satisfying and indulgent.
  • Ultimate Moisture: Thanks to the unique blend of ingredients (like boiling water and oil), this cake remains moist for days — if it lasts that long!
  • Simple Ingredients: With pantry staples, you can whip this cake up without a trip to the specialty store.
  • Perfect for Any Celebration: Whether it’s a birthday, anniversary, or simply a Tuesday, this cake fits the bill beautifully.
  • Creative Customization: From adding fresh berries to experimenting with different frostings, the possibilities are endless!

Ingredient Breakdown

Let’s take a closer look at what you’ll need to create this masterpiece:

  • All-Purpose Flour: Essential for structure. You can substitute with gluten-free flour for a gluten-free option.
  • Granulated Sugar: Sweetens and helps with moisture retention.
  • Cocoa Powder: Unsweetened is best for controlling the cake’s sweetness.
  • Baking Powder & Baking Soda: These are your leavening agents that help the cake rise.
  • Salt: Enhances all the flavors in the cake.
  • Eggs: Provide structure and richness. For a vegan option, consider flax eggs.
  • Whole Milk: Contributes to the moistness. You can use almond or oat milk as a substitute.
  • Vegetable Oil: Keeps the cake soft. You can also use melted coconut oil.
  • Vanilla Extract: Adds a lovely depth of flavor.
  • Boiling Water: This is a secret trick to ensure the cake is ultra-moist.
  • Heavy Cream & Semi-Sweet Chocolate: For the luscious ganache that tops this cake.

Step-by-Step Instructions

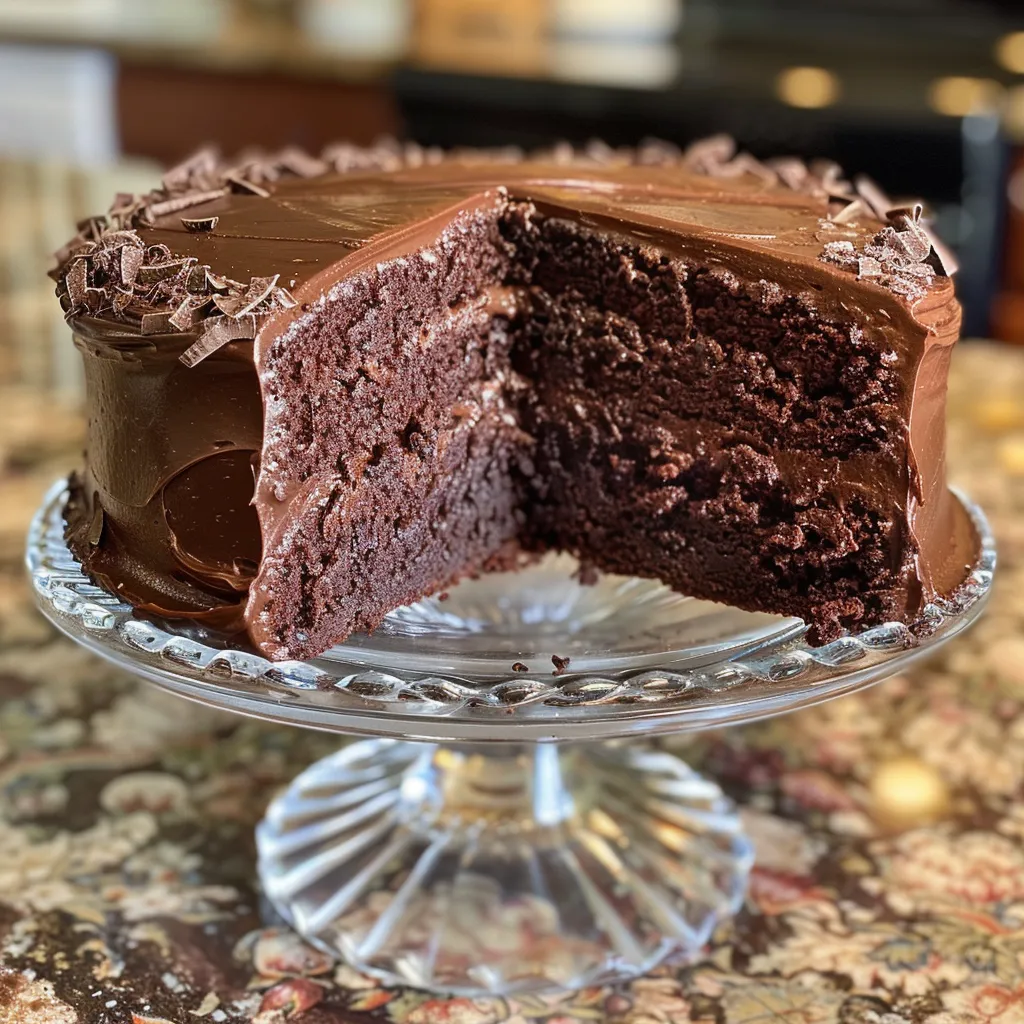
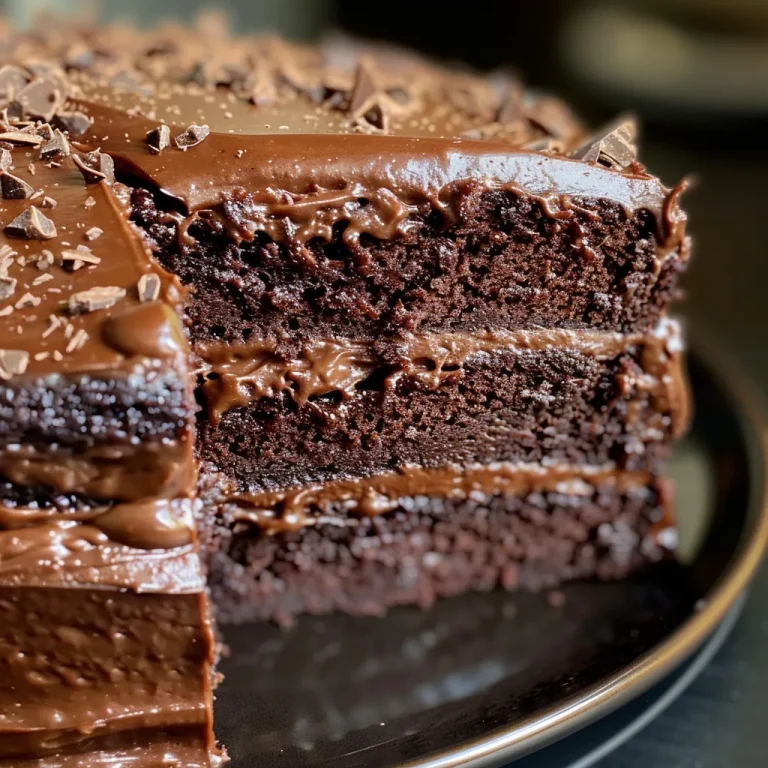
Detailed side photo of a chocolate cake, emphasizing its layers and shiny surface.

Ready to get baking? Follow these simple steps to create your **ultimate moist chocolate cake**:

  1. Preheat your oven to 350°F (175°C). Grease and flour two 9-inch round cake pans.
  2. In a large mixing bowl, whisk together the flour, sugar, cocoa powder, baking powder, baking soda, and salt until well combined.
  3. Add the eggs, milk, oil, and vanilla extract to the dry ingredients. Beat with an electric mixer on medium speed for 2 minutes. Stir in the boiling water (the batter will be thin).
  4. Pour the batter evenly into the prepared pans. Bake for 30-35 minutes, or until a toothpick inserted into the center comes out clean. Allow the cakes to cool in the pans for 10 minutes, then transfer to wire racks to cool completely.
  5. For the ganache, heat the heavy cream in a saucepan over medium heat until it begins to simmer. Pour the hot cream over the chopped chocolate and let it sit for 5 minutes. Stir until smooth and glossy.
  6. Once the cakes are completely cool, place one layer on a serving plate. Spread a layer of ganache on top, then add the second layer. Pour the remaining ganache over the top, allowing it to drizzle down the sides.
  7. Slice and serve your cake, optionally garnished with fresh berries or chocolate shavings.

Pro Tips for Baking Success

To make sure your cake turns out perfectly every time, keep these expert tips in mind:

  • Room Temperature Ingredients: Bring your eggs and milk to room temperature for better mixing and texture.
  • Don’t Overmix: Mix just until combined to avoid a dense texture.
  • Check for Doneness: Use a toothpick — if it comes out clean, your cake is ready!
  • Cool Completely: Make sure the cakes are completely cool before frosting to prevent melting the ganache.
  • Experiment with Flavors: Try adding a splash of espresso for a deeper chocolate flavor.
  • Use Quality Chocolate: The better the chocolate, the better the cake!
  • Layering Strategy: For a professional touch, level the tops of your cakes before stacking.
  • Storage Tips: Wrap slices in plastic wrap and store in an airtight container to keep them fresh.

Common Mistakes and Troubleshooting

Even the best of us can make mistakes in the kitchen. Here’s how to troubleshoot common issues:

  • Dry Cake: This can happen if you overbake. Always check your cake a few minutes before the indicated time.
  • Uneven Layers: If your cakes rise unevenly, consider using cake strips to ensure even baking.
  • Too Sweet: If your cake turns out overly sweet, balance it with a tangy frosting like cream cheese.
  • Crumbly Texture: This could be due to too much flour — ensure you measure accurately!

Variations to Try

Want to switch things up? Here are some delicious variations of this cake:

  • Fruit-Infused Chocolate Cake: Add chopped fruits like cherries or raspberries into the batter for a fruity surprise.
  • Nutty Chocolate Cake: Fold in chopped walnuts or almonds for a delightful crunch.
  • Spiced Chocolate Cake: Add cinnamon or cayenne pepper for a warm, spicy kick.
  • Vegan Chocolate Cake: Substitute eggs with flax eggs and use plant-based milk and oil.

Storage and Make-Ahead Instructions

This cake is perfect for preparing in advance. Here’s how to store it:

  • Room Temperature: Store wrapped in plastic wrap for up to 3 days.
  • Refrigerator: It can last up to a week in the fridge, just be sure it’s airtight.
  • Freezer: Freeze individual slices for up to 3 months. Just thaw them in the fridge overnight before serving!

Frequently Asked Questions

Got questions? Let’s address the most common ones:

  • Can I use cake flour instead of all-purpose flour? Yes, but the texture may be slightly different — lighter and fluffier!
  • What if I don’t have boiling water? Hot water works too, but boiling gives the best results.
  • Can I make this cake in advance? Absolutely! Just follow the storage instructions above.
  • What’s the best way to frost this cake? Allow the ganache to cool slightly before pouring to ensure a smooth finish.
  • How do I know when the cake is done? Use a toothpick — it should come out clean when inserted in the center.
  • Can I substitute the heavy cream? Yes, you can use coconut cream for a dairy-free option.
  • What is the origin of chocolate cake? Chocolate cake has roots in ancient civilizations, but modern versions began in the 18th century.
  • Can I add coffee to the batter? Yes, a little coffee enhances the chocolate flavor beautifully!

Nutrition Tips and Dietary Adaptations

For those mindful of nutrition, here are some tips:

  • Reduce Sugar: Consider using less sugar or a sugar substitute to lower the calorie count.
  • Heart-Healthy Fats: Swap vegetable oil for avocado oil for a healthier fat option.
  • Gluten-Free Option: Use a gluten-free flour blend to accommodate those with gluten sensitivities.

Equipment Recommendations

To make your baking experience seamless, here’s what you’ll need:

  • Mixing Bowls: A set of varying sizes for mixing and combining ingredients.
  • Electric Mixer: For a smooth batter, though a whisk will work too!
  • Measuring Cups & Spoons: Accurate measurements are key to success.
  • 9-inch Cake Pans: Ensure even baking with good-quality pans.
  • Cooling Rack: This allows your cakes to cool evenly and prevents sogginess.

Serving Suggestions

How you serve this cake can elevate the experience! Here are a few ideas:

  • Fresh Berries: Serve with strawberries or raspberries for a pop of color and flavor.
  • Ice Cream: A scoop of vanilla or chocolate ice cream makes for a delightful pairing.
  • Chocolate Shavings: Garnish with chocolate shavings to enhance the visual appeal.
  • Mint Sprigs: A touch of fresh mint adds a refreshing contrast to the rich chocolate.

Conclusion

Creating your own **ultimate moist chocolate cake** is not just about following a recipe; it’s about crafting memories and sharing joy with loved ones. From the first whisk of the batter to the last slice on a plate, every step is infused with the warmth of tradition and the excitement of discovery. So grab your ingredients, gather your loved ones, and let’s celebrate life—one delicious bite at a time!

Ultimate Moist Chocolate Cake

Prep Time 20 minutes
Cook Time 35 minutes
Total Time 55 minutes
Servings 12 pieces
Calories 450
Indulge in this rich, moist chocolate cake with luscious ganache, perfect for special occasions or a decadent treat.

Ingredients

Dry Ingredients

  • 2 cups all-purpose flour
  • 2 cups granulated sugar
  • 0.75 cup unsweetened cocoa powder
  • 1.5 teaspoons baking powder
  • 1.5 teaspoons baking soda
  • 1 teaspoon salt

Wet Ingredients

  • 2 large eggs
  • 1 cup whole milk
  • 0.5 cup vegetable oil
  • 2 teaspoons vanilla extract
  • 1 cup boiling water

Ganache

  • 1 cup heavy cream
  • 8 ounces semi-sweet chocolate, chopped

Instructions 

  • Preheat oven to 350°F (175°C). Grease and flour two 9-inch pans.
  • Mix dry ingredients. Add eggs, milk, oil, vanilla; beat 2 min. Stir in boiling water.
  • Pour batter into pans. Bake 30-35 min. Cool completely.
  • Heat cream, pour over chocolate; stir until smooth. Spread ganache between layers and over top.
  • Assemble cake, garnish as desired. Slice and serve.

Notes

Ensure cakes are completely cooled before applying ganache for best results.
Calories: 450kcal
Cost: $15
Course: Dessert
Cuisine: American
Keyword: chocolate

Embrace the Joy of Cooking with Mini Veggie Flatbreads

Welcome to a culinary adventure that will whisk you away to the sunlit shores of the Mediterranean! Today, we’re diving into the delightful world of mini veggie flatbreads. These bite-sized wonders are not just a treat for the taste buds; they celebrate the vibrant colors and flavors of fresh vegetables, paired perfectly with gooey cheese, all on a warm, crispy base. Ideal for gatherings or a cozy night in, this recipe is your ticket to a feast that invites everyone to the table.

Whether you’re hosting a party, looking for a quick snack, or searching for a delightful appetizer, these mini flatbreads can be your go-to. Let’s explore why you’ll love this recipe, the ingredients you’ll need, and how to make these scrumptious bites come to life!

Why You’ll Love This Recipe

  • Quick and Easy: With minimal prep time and straightforward steps, you can whip these up in less than 30 minutes, making them perfect for unexpected guests.
  • Customizable: Tailor the toppings to your liking! Swap in your favorite vegetables or cheeses to create a personal touch.
  • Healthy and Wholesome: Packed with fresh vegetables, these mini flatbreads are not only delicious but also a nutritious option for any meal.
  • Great for Sharing: These flatbreads are the perfect size for sharing, making them a hit at gatherings—everyone can grab a piece and enjoy!
  • Kid-Friendly Fun: Get the little ones involved in the kitchen! They’ll love helping to top their own flatbreads, making cooking a fun family activity.

Ingredients You’ll Need

Let’s dive into the heart of the recipe—the ingredients! Here’s what you’ll need to create your mini veggie flatbreads:

  • 4 Mini Flatbreads or Naan Bread: These will be the base for your toppings. Choose whole wheat for a healthier option!
  • 2 tablespoons Extra Virgin Olive Oil: A must for flavor. Opt for high-quality olive oil for the best taste.
  • 2 cloves Garlic, minced: Fresh garlic adds a wonderful aromatic quality.
  • 1/2 cup Marinara or Pizza Sauce: This will create a flavorful base. Use your favorite brand or homemade for a personal touch.
  • 1 1/2 cups Shredded Low-Moisture Mozzarella Cheese: The star ingredient that melts beautifully!
  • 1/2 Red Bell Pepper, finely diced: Adds a sweet crunch.
  • 1/4 Red Onion, thinly sliced: For a bit of zing!
  • 1/2 Zucchini, finely diced: A lovely, mild vegetable that complements the others.
  • 1/2 cup Cherry Tomatoes, halved: These bring a burst of sweetness.
  • 1 teaspoon Italian Seasoning: A blend of herbs that enhances the Mediterranean flavor.
  • Salt and Black Pepper, to taste: Essential for seasoning.
  • Fresh Basil or Parsley, for garnish (optional): Adds a fresh finish to your flatbreads.

Step-by-Step Instructions

Side angle of juicy Mini Veggie Flatbreads showcasing melted cheese and fresh toppings.

Follow these simple steps to craft your delicious mini veggie flatbreads.

  1. Preheat your oven to 400°F (200°C) and line a large baking sheet with parchment paper.
  2. Infuse the Olive Oil: In a small bowl, combine the extra virgin olive oil with minced garlic and let it sit for a few minutes to enhance the flavor.
  3. Prepare the Vegetables: Wash and dry all vegetables. Finely dice the red bell pepper and zucchini, slice the red onion, and halve the cherry tomatoes.
  4. Toss with Seasoning: In a mixing bowl, toss the prepared vegetables with the olive oil, Italian seasoning, and a pinch of salt and black pepper.
  5. Prepare the Flatbreads: Place the mini flatbreads on the baking sheet, brushing each with the garlic-infused oil.
  6. Toast the Flatbreads: Bake for about 3-4 minutes until lightly toasted.
  7. Add Sauce and Toppings: Spread marinara or pizza sauce on each flatbread, leaving the edges exposed. Sprinkle three-quarters of the mozzarella cheese over the sauce, and distribute the seasoned vegetables on top.
  8. Top with Cheese: Add the remaining mozzarella and bake for an additional 8-12 minutes until the cheese is melted and bubbly.
  9. Garnish and Serve: Remove from oven, let cool slightly, garnish with basil or parsley, slice, and serve immediately!

Expert Tips for the Perfect Flatbreads

To elevate your flatbread game, consider these expert tips:

  • Use Fresh Ingredients: Opt for the freshest vegetables you can find. It makes all the difference in flavor.
  • Experiment with Cheese: While mozzarella is classic, try adding feta or goat cheese for a tangy twist.
  • Room Temperature Ingredients: Ensure your ingredients are at room temperature for even cooking and melting.
  • Don’t Overload: Keep toppings balanced; too many can make the flatbread soggy.
  • Make it Dairy-Free: Substitute cheese with a plant-based alternative to cater to different dietary needs.
  • Check for Doneness: Keep an eye on the flatbreads towards the end of baking to prevent burning.
  • Serve with Dips: Pair with hummus or tzatziki for a delightful dip option.
  • Use a Pizza Stone: If you have one, a pizza stone can help achieve a crispier base.

Common Mistakes and Troubleshooting

Even the best cooks can encounter issues! Here are some common mistakes and how to avoid them:

  • Flatbreads are Soggy: Ensure not to overload with sauce and toppings. Bake until cheese is bubbly and edges are golden.
  • Vegetables Overcooked: Pre-cook veggies slightly before adding them to the flatbreads if you like them softer.
  • Cheese Not Melting: Use low-moisture mozzarella for better melting qualities.
  • Too Much Garlic: If garlic flavor is overpowering, reduce the amount or use roasted garlic for a milder taste.

Variations to Try

Get creative in the kitchen! Here are some fun variations on the classic mini veggie flatbreads:

  • Mediterranean Style: Top with olives, artichokes, and feta cheese.
  • Spicy Kick: Add jalapeños or red pepper flakes for a spicy version.
  • Breakfast Flatbreads: Top with scrambled eggs, avocado, and a sprinkle of cheese for a brunch twist.
  • Sweet Treat: For dessert, try a flatbread topped with Nutella, strawberries, and a dusting of powdered sugar.

Storage and Make-Ahead Instructions

Want to prepare in advance? Here’s how to store and make these flatbreads ahead of time:

  • Refrigerate: Store baked flatbreads in an airtight container for up to 3 days. Reheat in the oven for best results.
  • Freeze: Unbaked flatbreads can be frozen. Assemble them, wrap tightly, and freeze for up to 2 months. Bake from frozen, adding a few extra minutes to the cooking time.
  • Make Ahead: Prep the veggies and store them in the fridge up to 2 days in advance for a quick assembly.

Nutrition Tips and Dietary Adaptations

To ensure your mini veggie flatbreads are not only delicious but also healthy, consider these tips:

  • Whole Wheat Flatbreads: Opt for whole grain or whole wheat naan for added fiber.
  • Low-Fat Cheese: Use part-skim mozzarella to cut down on fat and calories.
  • Vegan Option: Use vegan cheese and skip the olive oil for a low-fat version.
  • Load Up on Veggies: Feel free to add more veggies to boost the nutritional content without adding many calories.

Equipment Recommendations

To make your cooking process smoother, consider these tools and equipment:

  • Baking Sheet: A sturdy baking sheet lined with parchment paper is essential for easy cleanup.
  • Mixing Bowls: Have a variety of sizes for mixing ingredients and tossing veggies.
  • Sharp Knife: A good-quality chef’s knife will make chopping veggies a breeze.
  • Oven Mitts: Protect your hands when removing hot flatbreads from the oven.

Serving Suggestions

When it comes time to serve, consider these delightful pairings:

  • Fresh Salad: A side salad with a light vinaigrette complements the flavors beautifully.
  • Dips: Serve with marinara, hummus, or a yogurt-based dip for added flavor.
  • Wine Pairing: A light white wine, such as Sauvignon Blanc, pairs wonderfully with the freshness of the flatbreads.
  • Herb Garnish: Fresh herbs like basil or parsley not only enhance the look but also elevate the taste.

Frequently Asked Questions (FAQs)

Let’s address some common queries about making mini veggie flatbreads:

  • Can I use gluten-free flatbreads? Yes, gluten-free flatbreads work well as a substitute.
  • How do I store leftovers? Keep any leftovers in an airtight container in the fridge for up to three days.
  • Can I prepare the flatbreads in advance? Absolutely! Assemble them and freeze for later use.
  • What other toppings can I use? Get creative! Consider spinach, mushrooms, or even cooked chicken for additional protein.
  • How can I make this recipe vegan? Simply use vegan cheese and ensure your flatbreads are dairy-free.
  • What’s the best way to reheat them? Reheat in the oven at 350°F (175°C) for about 5-10 minutes for a crispy texture.
  • Can these flatbreads be made without cheese? Yes, omit the cheese for a lighter version; they will still be delicious!
  • Is it possible to add protein to this recipe? Definitely! Consider adding grilled chicken, chickpeas, or tofu for an extra protein boost.

Conclusion

There you have it—your ultimate guide to crafting irresistible mini veggie flatbreads. With fresh ingredients, delightful flavors, and endless customization possibilities, these flatbreads are more than just a recipe; they’re an invitation to gather, celebrate, and indulge in the joy of cooking. So, roll up your sleeves, invite your loved ones into the kitchen, and let the magic unfold. Happy cooking!

Irresistible Mini Veggie Flatbreads

Prep Time 10 minutes
Cook Time 15 minutes
Total Time 25 minutes
Servings 4 pieces
Calories 250
Enjoy these colorful, cheesy veggie flatbreads that are quick to make and perfect for a flavorful snack or light meal.

Ingredients

Flatbreads

  • 4 pieces Mini Flatbreads or Naan Bread
  • 2 tablespoons Extra Virgin Olive Oil
  • 2 cloves Garlic, minced
  • 1/2 cup Marinara or Pizza Sauce
  • 1 1/2 cups Shredded Low-Moisture Mozzarella Cheese
  • 1/2 red bell pepper Red Bell Pepper, finely diced
  • 1/4 red onion Red Onion, thinly sliced
  • 1/2 zucchini Zucchini, finely diced
  • 1/2 cup Cherry Tomatoes, halved
  • 1 teaspoon Italian Seasoning
  • to taste Salt and Black Pepper Salt and Black Pepper
  • optional Fresh Basil or Parsley Fresh Basil or Parsley, for garnish

Instructions 

  • Preheat oven to 400°F (200°C). Line a baking sheet with parchment.
  • Mix olive oil with minced garlic; set aside.
  • Prepare vegetables: dice bell pepper and zucchini, slice onion, halve tomatoes.
  • Toss vegetables with garlic oil, Italian seasoning, salt, and pepper.
  • Brush flatbreads with garlic oil, bake 3-4 min, then add sauce, cheese, and vegetables. Bake 8-12 min until bubbly. Garnish, slice, and serve.

Notes

For extra flavor, sprinkle with fresh herbs before serving.
Calories: 250kcal
Cost: $12
Course: Appetizer, Snack
Cuisine: Italian
Keyword: Cheese, Vegetables

Welcome to the World of Whole Wheat Sourdough Sandwich Bread

Ah, the aroma of freshly baked bread wafting through the kitchen! There’s something magical about the way the crust crackles as it cools, and the rich, nutty scent of whole wheat mingles with a hint of sourdough tang. In this guide, you’ll not only learn how to craft the perfect loaf of whole wheat sourdough sandwich bread, but you’ll also discover why this recipe is a celebration of flavor, texture, and tradition. Whether it’s for a hearty breakfast sandwich or a delightful lunch, this bread will elevate any meal. So, roll up your sleeves, gather your ingredients, and let’s dive into the art of baking!

Why You’ll Love This Recipe

This whole wheat sourdough sandwich bread is not just any bread; it’s a labor of love that brings joy to your table. Here are five compelling reasons why you’ll adore this recipe:

  • Nutty Flavor: Whole wheat flour contributes a hearty, robust flavor that white bread simply can’t match.
  • Health Benefits: Packed with fiber and nutrients, this bread supports a healthy lifestyle while satisfying your cravings.
  • Versatile Usage: Perfect for sandwiches, toast, or simply slathered with butter and jam.
  • Low-Maintenance Sourdough: With minimal kneading and a straightforward process, you can enjoy homemade sourdough without the fuss.
  • Family Tradition: Baking together fosters connection, creating lasting memories as you share freshly baked bread with loved ones.

Ingredients for Your Sourdough Sandwich Bread

Let’s gather the essentials for this delightful sourdough sandwich bread. Here’s what you’ll need:

  • 2 ¼ cups (270 grams) whole wheat flour: The base of our bread, providing depth and nutrition.
  • 1 ¼ cups (150 grams) bread flour: This gives the loaf structure and a delightful chew.
  • 1 ¼ cups (300 grams) warm water (80-90℉): Vital for hydrating the dough and activating the ingredients.
  • ⅓ cup (80 grams) active sourdough starter: A bubbly, active starter ensures a great rise. If you don’t have one, fresh discard (less than one week old) works as well.
  • 3 tablespoons (42 grams) unsalted butter (melted and cooled): Adds richness and flavor to the bread.
  • 1 tablespoon (21 grams) honey: A hint of sweetness that balances the savoriness of whole wheat.
  • 3 ¼ teaspoons (9 grams) Diamond Crystal Kosher Salt: Essential for flavor and controlling fermentation.

Substitutions and Variations

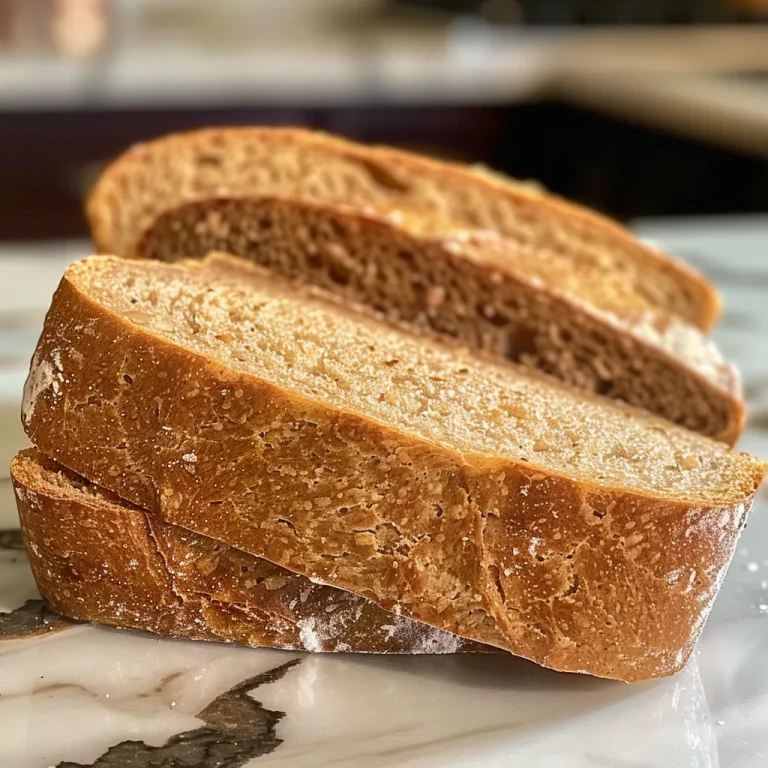
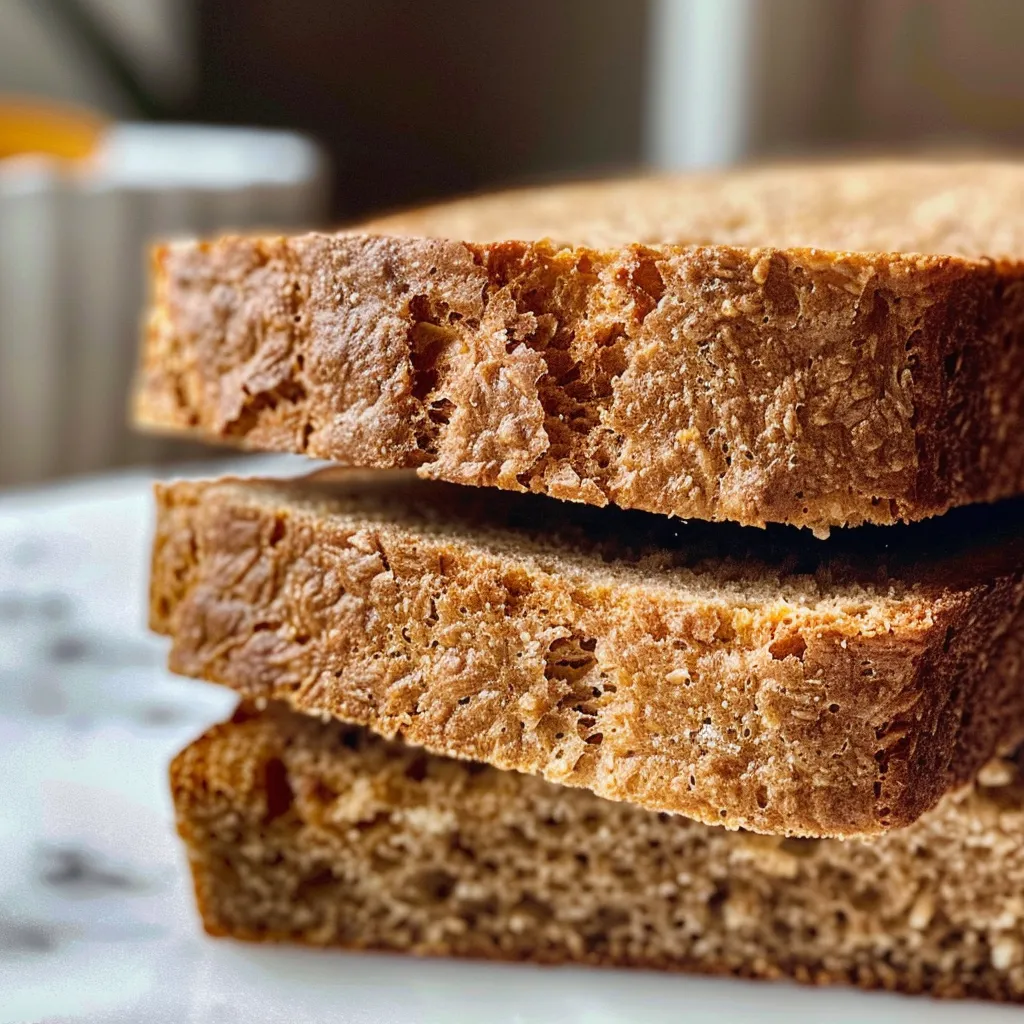
Detailed shot of crusty whole wheat sourdough bread showcasing its texture.

If you’re missing an ingredient or want to try something different, consider these substitutions:

  • Whole Wheat Flour: You can substitute with spelt flour for a lighter flavor or rye flour for a denser loaf.
  • Bread Flour: All-purpose flour will work, although the texture may be slightly less chewy.
  • Unsalted Butter: Feel free to use olive oil or coconut oil for a dairy-free option.
  • Honey: Maple syrup or agave nectar can replace honey for a vegan-friendly twist.

How to Make Whole Wheat Sourdough Sandwich Bread

Let’s get our hands doughy! Here’s a step-by-step guide to crafting your own whole wheat sourdough sandwich bread:

  1. Feed Your Sourdough Starter: About 6-12 hours before starting, feed your sourdough starter to ensure it’s bubbly and active. If your kitchen is around 75°F, this will take about 6 hours; cooler kitchens may require up to 12 hours.
  2. Mix the Dough: In a large bowl, combine the whole wheat flour, bread flour, and warm water until no dry flour remains. Cover the bowl and let the mixture rest for 1 hour. This process is called autolyse, and it enhances gluten development.
  3. Add Ingredients: After resting, add the active sourdough starter, melted butter, honey, and salt. Mix until a sticky, cohesive dough forms. Cover the bowl and let it rest for 15 minutes.
  4. Stretch and Fold: Lightly wet your hands to prevent sticking. Grab one edge of the dough, stretch it upwards, and fold it over itself. Rotate the bowl 90° and repeat. Do this for all four sides, totaling four folds. Gather the dough into a ball and place it seam side down in the bowl. Cover and let it rest for another 15 minutes.
  5. Bulk Fermentation: Repeat the stretching and folding process every 15 minutes for a total of six times. After the final fold, cover the dough and let it rise until it doubles in size, approximately 4 to 12 hours depending on the temperature of your kitchen.
  6. Shape the Dough: Once doubled in size, butter a 9″x5″ loaf pan. Turn the dough out onto a floured surface, shape it into a rectangle, and roll it tightly from one short end to the other, sealing the seam.
  7. Proofing: Place the dough seam side down in the loaf pan. Cover and let it proof at room temperature for 2-4 hours, until puffy and risen nearly to the top of the pan. For a stronger sourdough flavor, refrigerate overnight before proofing at room temperature the next morning.
  8. Preheat the Oven: About 20 minutes before baking, preheat your oven to 400°F.
  9. Bake the Bread: Once proofed, place the loaf in the oven and bake for 30-40 minutes, or until golden brown and the internal temperature is at least 190°F.
  10. Cool and Serve: Remove the bread from the oven and allow it to cool in the pan for 10 minutes. Then, transfer it to a wire rack to cool completely. For the best texture, let it cool for at least 1 hour before slicing.

Pro Tips for the Best Sourdough Bread

Here are some expert insights to elevate your baking game:

  • Use Active Starter: Ensure your starter is bubbly and active for the best rise.
  • Room Temperature Matters: Ideal fermentation happens at around 75°F; adjust your timing accordingly if your kitchen is cooler or warmer.
  • Don’t Rush the Rise: Allow the dough to rise until it has visibly doubled in size for optimal flavor and texture.
  • Perfect Your Shaping: Rolling tightly from one short end to another ensures proper structure and rise during baking.
  • Monitor Your Oven: Ovens can vary; use an instant-read thermometer to check for doneness.
  • Experiment with Flours: Mix different whole grain flours for varied flavors and textures.
  • Store Properly: Keep your bread in a paper bag or wrapped in a cloth to maintain crustiness.
  • Don’t Slice Too Soon: Waiting at least an hour to slice helps maintain the desired texture and flavor.

Common Mistakes and Troubleshooting

Even seasoned bakers face challenges. Here are common pitfalls and how to avoid them:

  • Dense Bread: This may happen if the dough didn’t rise enough. Ensure your starter is active and give it ample time to rise.
  • Flat Loaf: If your bread doesn’t rise while baking, it could be due to over-proofing or under-proofing. Keep a close eye on your dough during the proofing stage.
  • Gummy Texture: This often results from cutting the bread too soon. Allow the loaf to cool completely before slicing.
  • Crust Too Hard: If the crust is overly tough, try baking at a slightly lower temperature or covering it with foil halfway through the bake.

Variations of Your Whole Wheat Sourdough Sandwich Bread

Ready to switch things up? Here are some delicious variations to try:

  • Herbed Sourdough: Add dried herbs like rosemary or thyme to the dough for a fragrant twist.
  • Seeded Bread: Incorporate sunflower seeds or sesame seeds into the dough for added crunch and nutrition.
  • Dried Fruit: Mix in raisins or cranberries for a sweet surprise in your sandwich bread.
  • Spiced Sourdough: Introduce spices like cinnamon or nutmeg for a warm flavor profile, perfect for breakfast sandwiches.

Storage and Make-Ahead Instructions

Want to enjoy your bread over time? Here’s how to store and prepare ahead:

  • Room Temperature: Keep your bread in a paper bag at room temperature for up to 3 days for optimal freshness.
  • Freezing: Slice the bread and freeze in an airtight container for up to 3 months. Thaw slices as needed for quick sandwiches.
  • Make-Ahead: Prepare the dough up to the shaping stage, refrigerate overnight, and complete proofing in the morning.

Comprehensive FAQ

Here’s your go-to guide for all things related to whole wheat sourdough sandwich bread:

  • Can I use all-purpose flour instead of bread flour? Yes, but the texture will be softer.
  • How can I tell if my sourdough starter is active? It should double in size within 4-6 hours after feeding.
  • What if my dough is too sticky? Lightly flour your hands and the surface when working with the dough.
  • How do I know when my bread is done baking? Use an instant-read thermometer; it should register about 190°F when fully baked.
  • Can I add nuts or seeds to the dough? Absolutely! Fold them in during the mixing stage for added texture.
  • Is this bread suitable for sandwiches? Yes! Its structure and flavor make it perfect for sandwiches.
  • How can I enhance the sour flavor? Allow the dough to ferment longer during the bulk rise.
  • Can I bake in a different pan size? Yes, but adjust the baking time accordingly; smaller pans may bake faster.

Nutrition Tips and Dietary Adaptations

This whole wheat sourdough sandwich bread can fit into various dietary needs:

  • High Fiber: Whole wheat flour is naturally high in fiber, making it a filling option.
  • Gluten-Free Option: Substitute with a gluten-free flour blend and add xanthan gum for structure.
  • Low-Sugar: Omit honey if you prefer a less sweet bread.

Equipment Recommendations

Ensure you’re equipped for success with these essential tools:

  • Mixing Bowls: Large, sturdy bowls for mixing and resting the dough.
  • Measuring Cups and Scale: Accurate measurements are crucial for baking success.
  • Baking Pan: A 9″x5″ loaf pan works best for shaping and baking.
  • Instant-Read Thermometer: For checking the doneness of your bread.

Serving Suggestions

Now that you have your beautiful loaf, here are some delightful serving suggestions:

  • Classic Sandwiches: Use your bread for turkey and avocado or a classic ham and cheese.
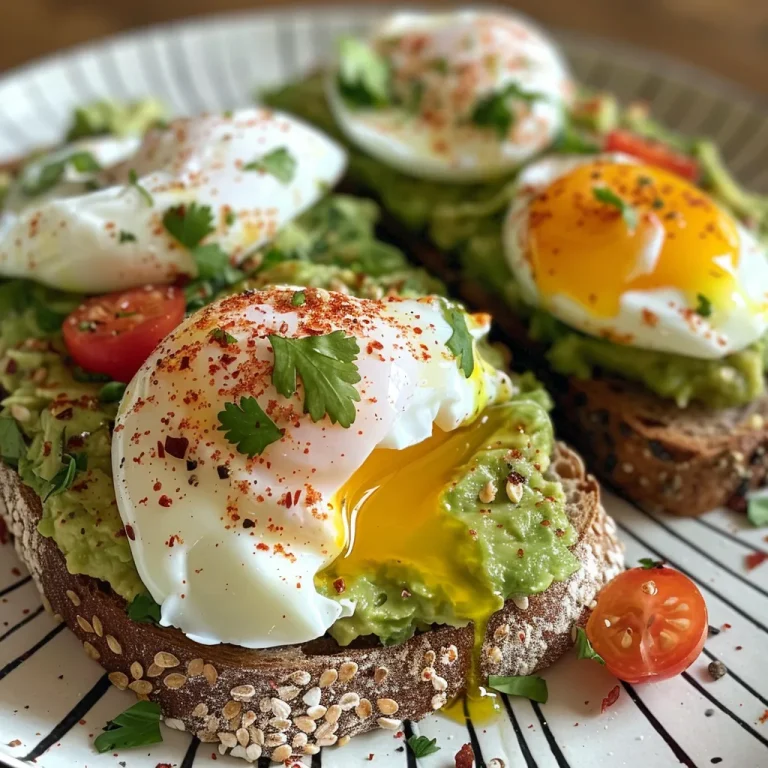
  • Toast: Toast slices and top with smashed avocado, poached eggs, or your favorite spreads.
  • French Toast: Transform stale slices into a delicious breakfast treat with eggs and cinnamon.

Conclusion

Now that you’ve mastered the art of crafting your own whole wheat sourdough sandwich bread, you’re equipped to bring warmth and joy to your kitchen. Each slice tells a story — of tradition, flavor, and the love shared around the table. So gather your friends and family, spread some butter, and enjoy the fruits of your labor. Happy baking, and may your kitchen always be filled with the delightful aroma of freshly baked bread!

Whole Wheat Sourdough Sandwich Bread

Prep Time 3 hours
Cook Time 40 minutes
Total Time 3 hours 40 minutes
Servings 1 loaf
Calories 250
This hearty whole wheat sourdough bread is perfect for sandwiches, offering a tangy flavor and wholesome texture.

Ingredients

Flours

  • 270 grams whole wheat flour
  • 150 grams bread flour

Water and Starter

  • 300 grams warm water (80-90℉) (about 1 ¼ cups)
  • 80 grams active sourdough starter (or discard less than one week old)

Add-ins and Seasonings

  • 42 grams unsalted butter (melted and cooled)
  • 21 grams honey
  • 9 grams Diamond Crystal Kosher Salt

Instructions 

  • Mix flours and water, rest for 1 hour.
  • Add starter, butter, honey, and salt; mix until cohesive. Rest for 15 minutes.
  • Perform 4 folds every 15 minutes, then let the dough rise until doubled (4-12 hours).
  • Shape the dough into a loaf, place in a buttered pan, and proof for 2-4 hours.
  • Preheat oven to 400°F, bake for 30-40 minutes until golden and internal temp reaches 190°F. Cool before slicing.

Notes

For best flavor, refrigerate the shaped dough overnight before proofing.
Calories: 250kcal
Cost: $15
Course: Bread
Cuisine: American
Keyword: Sourdough, Whole Wheat

Welcome to the world of chocolatey decadence! If you’ve ever craved a dessert that combines the richness of dark chocolate with a gooey molten center, then you’re in for a treat. This Choco Lava Cake recipe is designed to awaken your senses and bring a touch of Mediterranean warmth to your table. With its luscious, melting heart, this cake is perfect for any celebration or a cozy night in. Let’s dive into the joy of cooking this delightful dessert!

Why You’ll Love This Recipe

This Choco Lava Cake is not just a dessert; it’s an experience! Here are five reasons you’ll adore this recipe:

  • Decadent flavor: The combination of dark chocolate and espresso powder elevates the taste, creating an indulgent experience.
  • Perfect for sharing: Whether it’s a romantic dinner or a family gathering, this dessert brings people together.
  • Quick to prepare: Ready in under 30 minutes, this recipe is ideal for those last-minute cravings.
  • Customizable: With various toppings and variations, you can make it your own!
  • Memorable presentation: The molten center creates a dramatic reveal that will impress your guests.

Essential Ingredients for Choco Lava Cake

To craft your own Choco Lava Cake, gather these essential ingredients:

  • Dark chocolate (60–72% cocoa): Finely chopped for the best melting.
  • Unsalted butter: Provides richness and moisture.
  • Large eggs: Essential for structure.
  • Additional egg yolks: Enhances creaminess.
  • Granulated sugar: Balances the bitterness of dark chocolate.
  • All-purpose flour, sifted: For the cake’s body.
  • Vanilla extract: Adds depth to the flavor.
  • Kosher salt (a pinch): Enhances sweetness.
  • Espresso powder: Deepens the chocolate flavor.
  • Cocoa powder: For dusting ramekins to prevent sticking.

Step-by-Step Choco Lava Cake Recipe

Let’s get started with creating this luscious dessert! Follow these simple steps:

  • Prepare your ramekins: Butter the inside thoroughly and dust with cocoa powder instead of flour for a chocolatey touch.
  • Melt the chocolate and butter: Combine chopped dark chocolate and unsalted butter. Melt using:
    • Microwave: Heat in 20–30 sec bursts, stirring between each.
    • Double boiler: Over simmering water, stirring until smooth.
  • Cool the mixture: Let it cool slightly to avoid cooking the eggs later.
  • Mix the eggs and sugar: In a separate bowl, whisk together whole eggs, additional yolks, and granulated sugar vigorously until pale and slightly thickened.
  • Add flavors: Incorporate a pinch of kosher salt and a splash of vanilla extract.
  • Combine dry ingredients: Sift flour into the egg mixture gradually and fold gently to combine without toughening the batter.
  • Incorporate the chocolate: Slowly stream the cooled chocolate-butter mixture into the egg mixture, whisking constantly until smooth and glossy.
  • Pour into ramekins: Fill each prepared ramekin with the batter.
  • Preheat your oven: Set it to 425°F (220°C).
  • Bake the cakes: Bake for 12–14 minutes in ramekins (for muffin tins, bake slightly shorter, about 9–11 minutes). Look for firm, set edges, a matte surface, and a jiggly but not runny center.
  • Rest and serve: Let cakes rest for 1 minute in their ramekins. Invert onto plates and serve immediately for that molten effect.

Pro Tips for the Perfect Choco Lava Cake

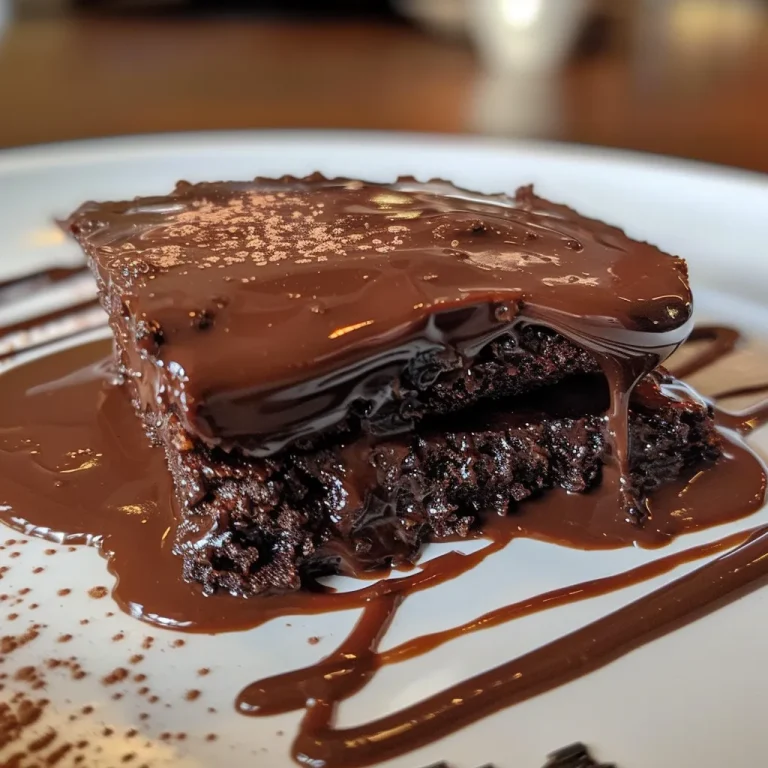
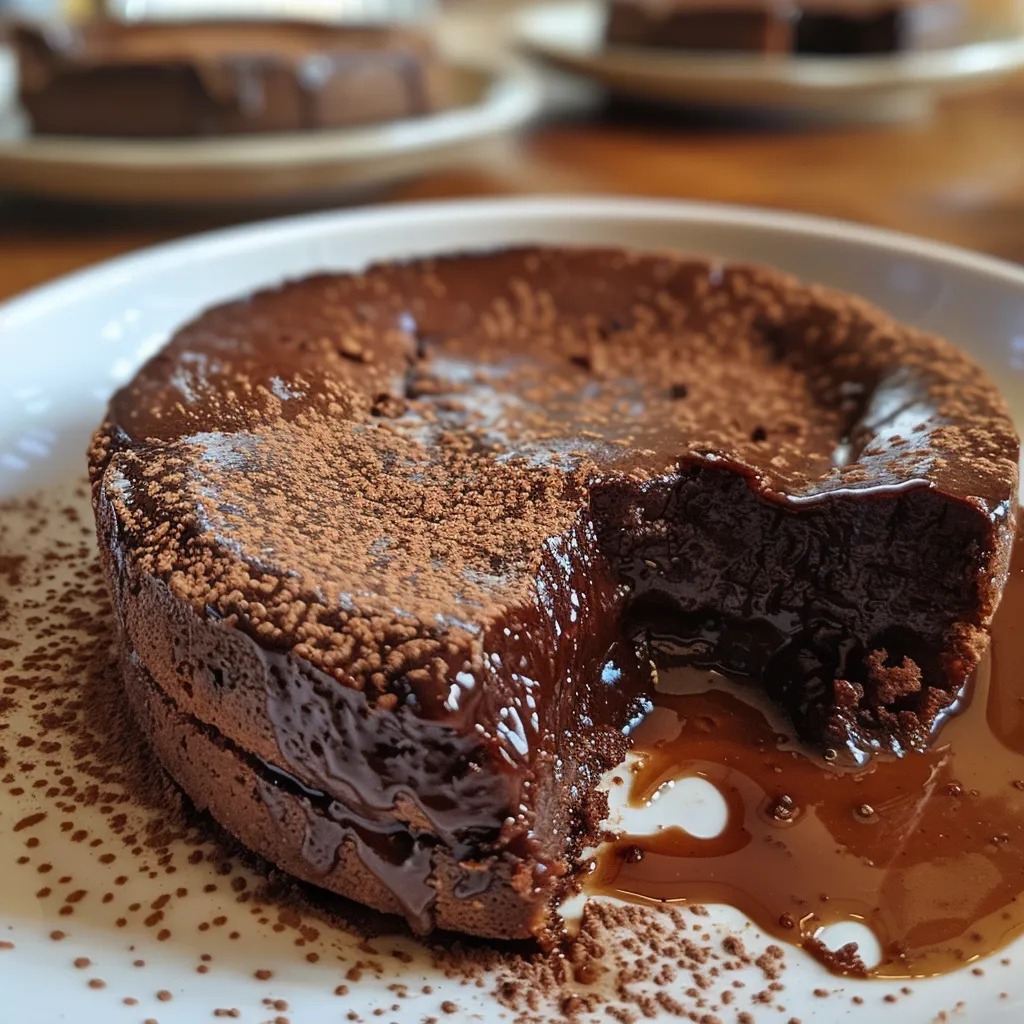
A side view of a Choco Lava cake showcasing its rich, flowing chocolate filling.

Want to elevate your baking game? Here are some expert tips to ensure your lava cake comes out perfectly:

  • Check your oven temperature: Ovens can vary; invest in an oven thermometer to ensure accuracy.
  • Use high-quality chocolate: The better the chocolate, the richer the flavor. Go for 60–72% cocoa content.
  • Don’t over-bake: Keep an eye on the timer! The center should remain jiggly for that molten texture.
  • Experiment with flavors: Try adding a splash of orange liqueur or a dash of chili powder to the batter for a unique twist.
  • Chill the batter: If you prepare ahead, chill the batter for up to 2 hours before baking for an even more molten center.
  • Use muffin tins for mini cakes: If you don’t have ramekins, muffin tins work perfectly!
  • Garnish creatively: Top with vanilla ice cream, fresh berries, or a dusting of cocoa powder for visual appeal.
  • Make it a little fancy: Add edible gold leaf for a luxurious touch at special occasions.

Common Mistakes and Troubleshooting

Even the best bakers encounter hiccups! Here’s how to avoid common mistakes:

  • Under-baking: If the center is too runny, you may need to bake a minute or two longer next time.
  • Over-mixing the batter: This can lead to tough cakes. Fold gently until just combined.
  • Using cold ingredients: Be sure your butter and eggs are at room temperature for a smoother batter.
  • Skipping the dusting: Not dusting the ramekins can lead to sticking. Always use cocoa powder or flour.

Delicious Variations of Choco Lava Cake

Feeling adventurous? Here are some delightful variations to try:

  • Nutty Lava Cake: Stir in chopped walnuts or hazelnuts into the batter for added crunch.
  • Spicy Chocolate Lava Cake: Mix in a pinch of cayenne pepper for a kick!
  • Fruit-Filled Lava Cake: Add a spoonful of raspberry or cherry jam to the center before baking.
  • Vegan Lava Cake: Substitute eggs with flaxseed meal and use plant-based chocolate and butter.

Storage and Make-Ahead Instructions

Want to prepare ahead of time? Here’s how to store and make your lava cakes in advance:

  • Refrigerate: Store unbaked batter in the fridge for up to 2 days. Just remember to bring it back to room temperature before baking.
  • Freeze: You can freeze baked cakes for up to a month. Reheat in a microwave for 30 seconds to revive the molten center.

Frequently Asked Questions (FAQs)

Here are some common questions about making Choco Lava Cake:

  • Can I use milk chocolate instead of dark chocolate? Yes, but the flavor will be sweeter and less intense.
  • What can I use instead of ramekins? Muffin tins work well for smaller portions!
  • How do I know when my lava cake is done? The edges should be set while the center remains jiggly.
  • Can I make this gluten-free? Yes! Substitute all-purpose flour with a gluten-free blend.
  • How long can I store leftovers? Best eaten fresh, but you can refrigerate them for up to 2 days.
  • Can I add flavors to the batter? Absolutely! Vanilla, almond, or orange zest can enhance the flavor.
  • Is it necessary to let the cakes rest after baking? Yes, this helps the cake hold its shape when inverted.
  • Can I prepare the batter ahead of time? Yes, you can refrigerate the batter for up to 2 days before baking.

Nutritional Tips and Dietary Adaptations

Looking for healthier options? Here are a few tips:

  • Use dark chocolate: Opt for 70% cocoa or higher for less sugar and more antioxidants.
  • Substitute sugars: Try coconut sugar or stevia for lower-calorie options.
  • Portion control: Consider making mini cakes for smaller servings.

Equipment Recommendations

To create the perfect Choco Lava Cake, here’s what you need:

  • Ramekins or Muffin Tin: Essential for baking the cakes.
  • Mixing Bowls: Use glass or stainless steel for easy mixing.
  • Whisk and Spatula: For combining ingredients smoothly.
  • Oven Thermometer: Ensures accurate baking temperatures.

Serving Suggestions

Now that your Choco Lava Cake is ready, here are some delightful ways to serve it:

  • With a scoop of vanilla ice cream: The contrast of hot and cold is irresistible!
  • Drizzled with chocolate sauce: For the ultimate chocolate lover.
  • Garnished with fresh berries: Adds a pop of color and freshness.
  • With a dusting of powdered sugar: A simple yet elegant touch.

Conclusion

Your journey into the world of Choco Lava Cake has just begun! With this comprehensive recipe, tips, and variations, you’re equipped to create a dessert that celebrates not just chocolate, but the joy of cooking and sharing. So grab your ingredients, invite your loved ones, and let the sweet aromas of your kitchen fill the air. Here’s to melting hearts and creating delicious memories together!

Choco Lava cake

Prep Time 15 minutes
Cook Time 14 minutes
Total Time 29 minutes
Servings 4 pieces
Calories 420
A decadent dessert featuring a rich, molten chocolate center with a tender cake exterior, perfect for chocolate lovers.

Ingredients

Chocolate and Butter

  • 200 grams Dark chocolate (60–72% cocoa), finely chopped
  • 113 grams Unsalted butter

Eggs and Sugar

  • 3 large Large eggs
  • 2 extra yolks Additional egg yolks
  • 150 grams Granulated sugar

Dry ingredients

  • 60 grams All-purpose flour, sifted
  • 10 grams Cocoa powder (for dusting ramekins)

Flavor Enhancers

  • 1 teaspoon Vanilla extract
  • 1 pinch Kosher salt
  • 1 teaspoon Espresso powder

Additional

  • Cocoa powder Cocoa powder (for dusting ramekins)
  • Vanilla ice cream, fresh berries, powdered sugar Garnishes and serving

Instructions 

  • Butter and dust ramekins with cocoa powder.
  • Combine chopped chocolate and butter; melt until smooth.
  • Whisk eggs, yolks, sugar, salt, and vanilla until pale.
  • Gradually fold in sifted flour and cocoa powder.
  • Stream in cooled chocolate mixture, fold gently, then pour into ramekins.
  • Bake at 220°C (425°F) for 12–14 minutes until edges are set and center is jiggly.

Notes

For a richer flavor, add a pinch of chili powder or top with nuts or caramel drizzle.
Calories: 420kcal
Cost: $15
Course: Dessert
Cuisine: French
Keyword: chocolate

Crafting the Perfect Pita Bread: A Mediterranean Journey

Welcome to a culinary adventure where we explore the art of making homemade pita bread, a staple that embodies the spirit of Mediterranean hospitality! In just a few simple steps, you can create soft, fluffy pita that captures the essence of gatherings filled with laughter, love, and delicious food. This recipe not only brings the flavors of the Mediterranean into your kitchen but also invites you to share in the joy of cooking and eating together. Let’s get started on this delightful journey!

Why You’ll Love This Recipe

  • Simple and Quick: This homemade pita bread recipe requires minimal ingredients and can be made in under two hours, perfect for a spontaneous gathering or a cozy family dinner.
  • Fluffy Texture: The combination of active dry yeast and lukewarm water creates a light and airy bread that puffs beautifully in the oven.
  • Versatile Base: Pita bread is incredibly adaptable; you can use it for wraps, dips, or even as a base for mini pizzas!
  • Healthier Option: By making it at home, you control the ingredients, ensuring no preservatives or artificial additives.
  • Celebrate Tradition: Each bite connects you to Mediterranean culture, where food is a symbol of community and celebration.

Ingredients & Substitutions for Homemade Pita Bread

To make the best pita bread, gather the following ingredients:

  • 3⅓ cups all-purpose flour: You can swap this with whole wheat flour for a healthier option or a gluten-free blend if needed.
  • 1¼ cups lukewarm water: Ensure the water is not too hot, as it will kill the yeast.
  • 2 teaspoons active dry yeast: Instant dry yeast can be used instead; just mix it directly with the flour.
  • 2 teaspoons sugar: This helps activate the yeast; you can use honey for a natural alternative.
  • 2 teaspoons salt: Adds flavor; feel free to adjust based on your taste preferences.
  • 2 tablespoons olive oil: Extra virgin olive oil adds richness; avocado oil is a great substitute.

How to Make Pita Bread: Step-by-Step

A side perspective of a freshly baked pita bread, highlighting its soft texture and round shape.

Let’s dive into the process of making this delightful bread. Follow these steps, and soon, your home will be filled with the warm, inviting aroma of freshly baked pita!

1. Measure the Ingredients

Start by measuring all your ingredients accurately. This step is crucial for the perfect dough consistency.

2. Activate the Yeast

In a small bowl, combine the lukewarm water with sugar and yeast. Let it sit for about 5-10 minutes until frothy. This indicates that the yeast is active and ready to work its magic!

3. Mix the Dough

In a large bowl, combine the flour and salt. Create a well in the center and pour in the yeast mixture along with the olive oil. Mix until a shaggy dough forms.

4. Knead the Dough

Transfer the dough to a floured surface and knead for about 8-10 minutes until smooth and elastic. If the dough is sticky, add a little more flour as needed.

5. Let It Rise

Place the dough in a lightly oiled bowl, cover it with a damp cloth, and let it rise in a warm place for about 1 hour or until it has doubled in size.

6. Shape the Pitas

Once risen, punch down the dough and divide it into 8 equal pieces. Roll each piece into a ball, then flatten it into a round disc about ¼ inch thick.

7. Preheat the Oven

Preheat your oven to 475°F (245°C) and place a baking stone or an inverted baking sheet inside to heat up.

8. Bake the Pitas

Carefully place the discs on the hot stone or baking sheet and bake for 5-7 minutes until they puff up and turn golden brown. Keep an eye on them to prevent burning!

9. Cool and Serve

Remove the pita bread from the oven and cover them with a kitchen towel to keep them warm and soft. Serve immediately or let them cool before storing.

Expert Tips for Perfect Pita Bread

  • Use Fresh Yeast: Always check the expiration date on your yeast for the best results.
  • Don’t Overknead: While kneading is important, overworking the dough can lead to tough pita.
  • Steam in the Oven: To create a steamy environment, place a pan of water at the bottom of the oven while baking; this helps the pita puff up.
  • Keep Your Dough Warm: If your kitchen is cool, place the dough in a slightly warm oven to encourage rising.
  • Experiment with Shapes: Feel free to create larger or smaller pitas, depending on your serving needs.
  • Try Different Flours: Mix in whole wheat or spelt flour for unique flavors and textures.
  • Let It Rest: If your dough is resistant to rolling out, let it rest for a few minutes before shaping.
  • Storage Techniques: Store leftover pita in a sealed bag at room temperature for up to 3 days or freeze them for longer storage.

Common Mistakes & Troubleshooting

Even the best chefs make mistakes! Here are some common pitfalls and how to avoid them:

  • Pita Doesn’t Puff: This can happen if the oven isn’t hot enough or if the dough didn’t rise properly. Make sure to use a very hot surface.
  • Dense Texture: Over-kneading or using old yeast can lead to a dense pita. Always check your yeast and knead just until smooth.
  • Dry Pita: If your pita bread comes out dry, try adding a bit more water next time or adjusting the baking time.
  • Sticking to Surfaces: Dust your work surface and rolling pin with flour to prevent sticking.

Delicious Variations of Pita Bread

Why not try something different? Here are some fun variations to spice up your pita bread experience:

  • Herb-Infused Pita: Add dried herbs like oregano or thyme to the dough for a fragrant twist.
  • Spicy Pita: Incorporate crushed red pepper flakes into the dough for a hint of heat.
  • Garlic Pita: Brush the pita with garlic-infused olive oil before baking for a rich flavor.
  • Whole Wheat Pita: Substitute half of the all-purpose flour with whole wheat flour for a heartier bread.

Storage & Make-Ahead Instructions

Homemade pita bread is best enjoyed fresh, but it can be stored for later use:

  • Room Temperature: Place any leftover pita in a plastic bag and store at room temperature for up to 3 days.
  • Freezing: For longer storage, freeze the pitas in a single layer, then transfer them to a freezer bag. They can last up to 3 months!
  • Reheating: To revive your pita, wrap it in a damp paper towel and microwave it for 10-15 seconds or warm it in the oven.

Frequently Asked Questions

  • Can I use whole wheat flour? Yes! Whole wheat flour can be used, but you may need to adjust the water slightly.
  • What can I serve with pita bread? Pita is perfect for dipping into hummus, tzatziki, or for stuffing with grilled meats, veggies, or salads.
  • How can I make gluten-free pita bread? Use a gluten-free flour blend specifically designed for bread baking.
  • Can I make pita bread without yeast? Yes, although it won’t have the same puffiness. You can use baking powder for a quick version.
  • Why did my pita bread turn out hard? This can happen if it’s overbaked or if the dough was too dry. Ensure proper measurements and baking time.
  • How do I know when the pita is done baking? The pita should be puffed and lightly golden. You can also tap the bottom; it should sound hollow.
  • Can I add flavors to the dough? Absolutely! Herbs, spices, or even cheese can be added to the dough for different flavor profiles.
  • How long does it take to make pita bread? The entire process takes about 2 hours, including rising time.

Nutritional Tips and Dietary Adaptations

Pita bread can be a healthy addition to your diet. Here are some tips:

  • Whole Grains: For added fiber, use whole wheat flour or incorporate seeds into your dough.
  • Low Sugar: Reduce sugar or use natural sweeteners to lower calories.
  • Keep It Light: Use less oil for a lighter bread or substitute with unsweetened applesauce.

Tools & Equipment Recommendations

Having the right tools can make your bread-making experience smoother:

  • Baking Stone: A pizza stone or baking stone retains heat and creates the perfect surface for puffing pitas.
  • Mixing Bowls: Use a large mixing bowl for combining ingredients and a smaller one for yeast activation.
  • Rolling Pin: A sturdy rolling pin helps in achieving even thickness for the pita.
  • Kitchen Towel: Keep your pitas warm and soft after baking by covering them with a towel.

Serving Suggestions

Now that you’ve made your pita bread, here are some delightful ways to serve it:

  • Pita Sandwiches: Fill with grilled chicken, lettuce, tomatoes, and your favorite sauce.
  • Dips Galore: Serve warm pita with a variety of dips like hummus, baba ganoush, or tzatziki.
  • Mini Pizzas: Top with tomato sauce, cheese, and your favorite toppings for a quick and easy meal.
  • Salad Wraps: Use pita as a wrap for Mediterranean-style salads, filled with fresh veggies and feta cheese.

Conclusion

Congratulations! You’ve successfully crafted the perfect pita bread that’s not only delicious but also a celebration of Mediterranean culture. Each bite reflects the warmth of family gatherings and the joy of sharing meals. So grab a plate, fill it with your favorite flavors, and invite your loved ones to join the feast. Cooking is not just about feeding our bodies, but about nourishing our connections and savoring every moment. Thank you for joining me on this delightful culinary adventure. Happy baking!

Pita Bread

Prep Time 15 minutes
Cook Time 10 minutes
Total Time 25 minutes
Servings 8 pieces
Calories 150
Soft, fluffy pita bread is perfect for sandwiches, wraps, or as a side. This easy recipe yields warm, homemade pita with a delightful pocket.

Ingredients

Dough

  • 3⅓ cups all-purpose flour
  • cups lukewarm water
  • 2 teaspoons active dry yeast
  • 2 teaspoons sugar
  • 2 teaspoons salt
  • 2 tablespoons olive oil

Instructions 

  • Mix flour, yeast, sugar, and salt in a bowl.
  • Add water and olive oil; knead until smooth.
  • Let the dough rise for 1 hour until doubled in size.
  • Divide dough into 8 balls and roll into circles.
  • Bake at 475°F (245°C) for 8-10 minutes until puffed and golden.

Notes

Ensure the dough is not too dry or sticky for best results.
Calories: 150kcal
Cost: $4
Course: Bread
Cuisine: Mediterranean
Keyword: Pita

Welcome to a delightful culinary journey where we celebrate the art of making no yeast dinner rolls. Picture this: a warm kitchen filled with the aroma of freshly baked bread, golden brown rolls just out of the oven, waiting to be slathered with butter. Whether it’s a cozy family dinner or a festive gathering with friends, these rolls are the perfect addition that brings everyone together. With just a handful of ingredients and a simple process, you’ll find that baking these rolls is not just easy, but also a joyous experience. Let’s dive into the magic of yeast-free dinner rolls!

Why You’ll Love This Recipe

This recipe for no yeast dinner rolls is truly special, and here’s why:

  • Quick and Easy: Forget about waiting for dough to rise! These rolls are ready in under an hour, making them perfect for last-minute meals.
  • Fluffy Texture: Thanks to Greek yogurt and baking powder, these rolls are incredibly fluffy and light, just like traditional dinner rolls.
  • Versatile Base: This recipe serves as a blank canvas. You can easily customize the flavor by adding herbs, spices, or cheese.
  • Healthy Twist: Using Greek yogurt not only adds moisture but also enhances the nutritional profile of your rolls, giving you protein with every bite.
  • Perfect for Any Occasion: Be it a holiday feast, a casual weeknight dinner, or a picnic, these no yeast dinner rolls fit seamlessly into any meal.

Ingredients Breakdown

Let’s explore the ingredients you’ll need to make these delightful rolls:

  • Flour: 2 cups of all-purpose flour provides the structure. You can substitute with whole wheat flour for a healthier option.
  • Baking Powder: 3 teaspoons act as the leavening agent, creating that fluffy texture we all love.
  • Sugar: 1 tablespoon adds a hint of sweetness that balances the flavors.
  • Salt: 1/2 teaspoon enhances the overall taste.
  • Greek Yogurt: 1 3/4 cups not only binds the dough but adds creaminess and a slight tang. You can use plain yogurt if Greek isn’t available.
  • Egg: 1 large egg adds richness and helps bind the rolls together.
  • Butter: 2 tablespoons melted butter gives a rich flavor. You can use olive oil for a lighter option.
  • Garlic and Parsley: Adding 1 clove of minced garlic and 1 tablespoon of chopped parsley gives a Mediterranean twist to your rolls.
  • Sea Salt: For sprinkling on top, enhancing the flavor and presentation.

Step-by-Step Instructions

Ready to bake? Follow these simple steps to create your no yeast dinner rolls:

  1. Preheat your oven to 350°F (175°C).
  2. In a medium bowl, whisk together the flour, salt, baking powder, and sugar until well combined.
  3. Add the Greek yogurt to the dry ingredients and stir with a wooden spoon. The mixture will be chunky; don’t worry about it being smooth!
  4. Transfer the dough to a floured surface. Gently knead it until it forms a ball; add flour if it’s too sticky. Shape it into a thick round disk.
  5. Cut the dough into 8 equal pieces and roll each piece into a ball. Ensure they are smooth and free from cracks.
  6. Place the rolls on a parchment-lined baking sheet, leaving some space between them.
  7. In a small bowl, whisk the egg and brush it over the tops of each roll for a beautiful golden finish.
  8. Bake in the preheated oven for about 24-28 minutes, checking at the 20-minute mark. Look for a golden brown color and a tester roll that pulls apart easily.
  9. Once baked, cool for a few minutes and prepare the garlic butter by mixing melted butter with garlic. Brush this over the warm rolls and sprinkle with flaky sea salt and chopped parsley.

Pro Tips for Perfect Rolls

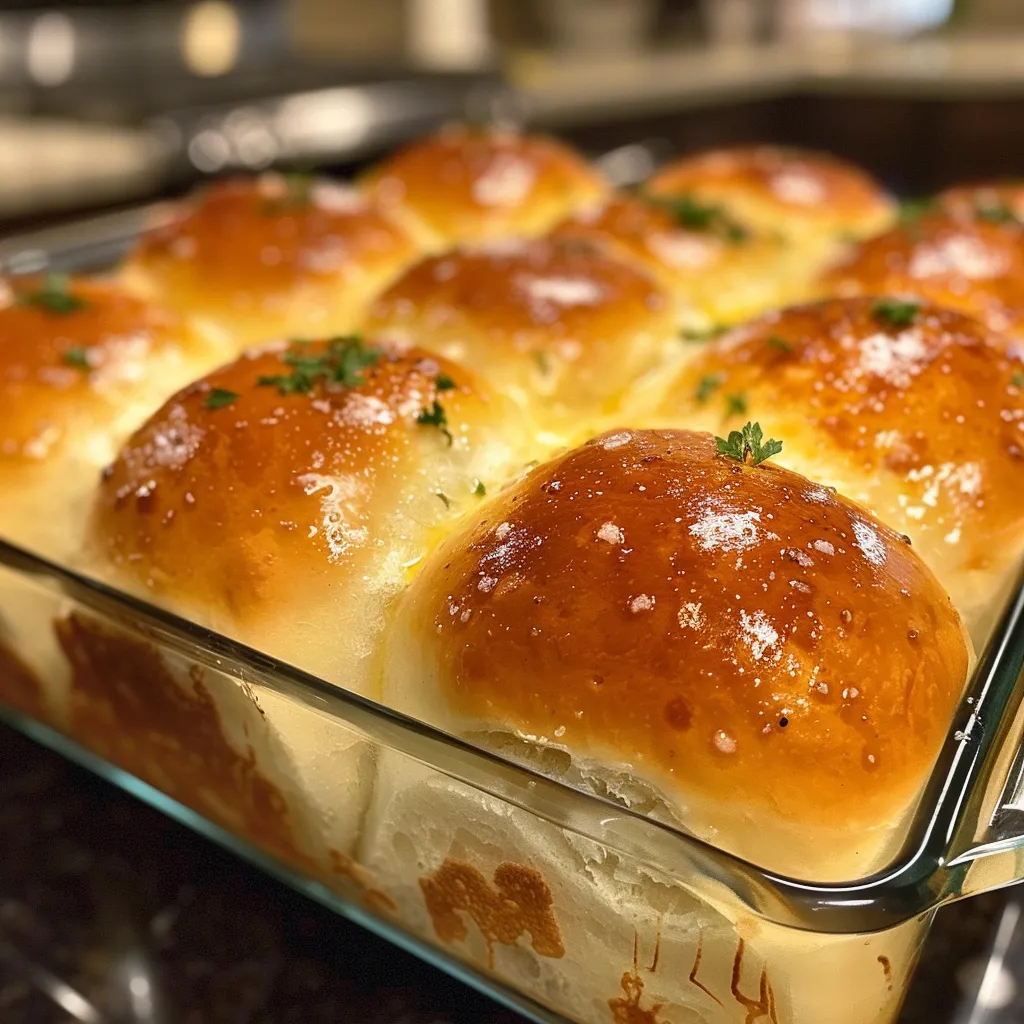
Side view of freshly baked no yeast dinner rolls with a fluffy appearance.

To enhance your baking experience, here are some expert insights:

  • Don’t Overmix: Mix the dough just until combined to ensure your rolls remain tender.
  • Room Temperature Ingredients: Ensure your yogurt and egg are at room temperature for better mixing.
  • Check Oven Temperature: Use an oven thermometer to ensure your oven is at the correct temperature for uniform baking.
  • Experiment with Flavor: Try adding herbs like rosemary or thyme for a fragrant twist.
  • Brush with Butter: For an extra layer of flavor, brush the rolls with garlic butter as soon as they come out of the oven.
  • Test for Doneness: Use a toothpick or knife to check the center of a roll; it should come out clean.
  • Don’t Skip the Sea Salt: A sprinkle of sea salt on top enhances the flavor beautifully.
  • Make Ahead: You can prepare the dough in advance, refrigerate it, and bake fresh rolls when you’re ready.

Common Mistakes and Troubleshooting

Even the best bakers make mistakes! Here are common pitfalls to avoid:

  • Dense Rolls: This often happens from overmixing or using too much flour. Be gentle with your dough!
  • Dry Rolls: Overbaking can lead to dryness. Keep an eye on them as they bake.
  • Sticky Dough: If your dough is too sticky, add flour a tablespoon at a time until manageable.

Delicious Variations

Feel free to switch things up with these fun variations:

  • Cheesy Rolls: Add 1 cup of shredded cheese (like cheddar or mozzarella) for a savory twist.
  • Herbed Rolls: Incorporate fresh herbs like basil or oregano into the dough for aromatic rolls.
  • Sweet Rolls: Replace the garlic with cinnamon and sugar, then drizzle with icing for a sweet treat.
  • Spicy Rolls: Mix in a pinch of cayenne or chili powder for a hint of heat.

Storage and Make-Ahead Instructions

Proper storage helps keep your rolls fresh:

  • Room Temperature: Store cooled rolls in an airtight container at room temperature for up to 3 days.
  • Refrigeration: For longer storage, keep them in the fridge for up to a week.
  • Freezing: Freeze baked rolls in a zip-top bag for up to 3 months. Reheat in the oven when ready to enjoy.

Frequently Asked Questions

Here are some common questions about making no yeast dinner rolls:

  • Can I use self-rising flour? Yes, if using self-rising flour, omit the baking powder and salt from the recipe.
  • What can I substitute for Greek yogurt? You can use regular yogurt, sour cream, or buttermilk.
  • How do I know when my rolls are done? They should be golden brown and sound hollow when tapped on the bottom.
  • Can I make these rolls vegan? Yes, substitute the egg with a flax egg and use plant-based yogurt and butter.
  • Can I add other flavors? Absolutely! Feel free to experiment with cheeses, herbs, or spices of your choice.
  • What’s the best way to reheat leftover rolls? Warm them in the oven at 350°F for about 10 minutes to restore their freshness.
  • How should I serve these rolls? They pair beautifully with soups, stews, or as a side with butter and jam.
  • How do I make them gluten-free? Substitute with a gluten-free flour blend and ensure other ingredients are gluten-free.

Nutritional Tips and Dietary Adaptations

These rolls can fit various dietary needs:

  • Low-Calorie Option: Use low-fat yogurt and reduce the butter for a lighter version.
  • High-Protein Option: Incorporate protein powder into the flour mix for an added boost.
  • Vegetarian-Friendly: This recipe is naturally vegetarian; simply ensure all ingredients align with your dietary choices.

Recommended Equipment

To make the process smoother, here are some essential tools:

  • Mixing Bowls: A set of mixing bowls for combining ingredients.
  • Wooden Spoon: Perfect for mixing the dough without overworking it.
  • Baking Sheet: A sturdy baking sheet lined with parchment paper for easy clean-up.
  • Whisk: Use to beat the egg and mix dry ingredients.

Serving Suggestions

These rolls are versatile and can be served in many ways:

  • With Soup: Pair them with a hearty vegetable or chicken soup for a comforting meal.
  • As a Side: Serve alongside roasted meats or pasta dishes.
  • With Spreads: Provide butter, hummus, or an herbed spread for dipping.

Conclusion

There you have it! The joy of no yeast dinner rolls, a recipe that exemplifies simplicity, flavor, and the warmth of home cooking. With this guide, you’re equipped to bake these delightful rolls anytime you wish to add a touch of homemade goodness to your table. So grab your apron, gather your ingredients, and let’s celebrate the art of baking together. Remember, cooking is not just about food; it’s about creating moments that bring us closer. Enjoy your delicious rolls and happy baking!

No Yeast Dinner Rolls

Prep Time 15 minutes
Cook Time 25 minutes
Total Time 40 minutes
Servings 8 pieces
Calories 180
Soft, fluffy dinner rolls made without yeast, perfect for a quick and delicious side.

Ingredients

Dough

  • 2 cups flour
  • 3 tsp baking powder
  • 1 T sugar
  • 1/2 tsp salt
  • 1 3/4 cups whole milk Greek yogurt
  • 1 egg egg
  • 2 T butter
  • 1 clove garlic
  • 1 T parsley
  • Sea salt Sea salt

Instructions 

  • Preheat oven to 350°F (175°C).
  • Mix flour, salt, baking powder, and sugar. Add yogurt and stir until combined. Form into a ball and divide into 8 pieces.
  • Shape each piece into a ball and place on a parchment-lined baking sheet. Brush with beaten egg.
  • Bake for 24-28 minutes until golden brown. Cool slightly.
  • Mix melted butter with garlic and parsley. Brush over warm rolls and sprinkle with sea salt and extra parsley if desired.

Notes

For extra flavor, add a sprinkle of flaky sea salt and chopped parsley on top before baking.
Calories: 180kcal
Cost: $10
Course: Side Dish
Cuisine: American
Keyword: Dinner Rolls

Celebrate Love with Soft Valentine’s Sugar Cookies

As Valentine’s Day approaches, the air fills with a sweet sense of anticipation and love. What better way to express your affection than with homemade Valentine’s sugar cookies? These delightful treats are not just visually appealing with their vibrant icing and heart shapes, but they also carry the warmth of home-cooked goodness. In this article, we’ll dive into crafting the perfect soft cut-out sugar cookies, ensuring your treats are the highlight of any celebration.

Why You’ll Love This Recipe

  • Soft and Buttery: These cookies are tender and melt-in-your-mouth delicious, making them irresistible.
  • Customizable Icing: The icing is versatile—add your favorite colors and sprinkles to create unique designs.
  • Easy to Make: With simple ingredients and straightforward steps, these cookies are perfect for bakers of all skill levels.
  • Perfect for Gifting: Decorate them beautifully; they make the ideal gift for friends, family, or that special someone.
  • Great for Any Occasion: While perfect for Valentine’s Day, these cookies are delightful for birthdays, anniversaries, or any celebration!

Ingredients: What You’ll Need

Here’s what you’ll need to create these scrumptious Valentine’s sugar cookies:

  • 2¾ cups (345 g) all-purpose flour – Essential for structure.
  • ½ tsp baking powder – Helps cookies rise and maintain their shape.
  • ½ tsp fine sea salt – Enhances flavor.
  • 1 cup (225 g) unsalted butter, softened – For that rich, buttery flavor.
  • 1 cup (200 g) granulated sugar – Sweetness and texture.
  • 1 large egg, room temperature – Binds the ingredients.
  • 2 tsp vanilla extract – Adds aromatic sweetness.
  • ½ tsp almond extract (optional) – A delightful twist for flavor.

For the icing:

  • 3 cups (360 g) powdered sugar, sifted – The base for your icing.
  • 3–4 tbsp milk (or water) – Adjust for desired consistency.
  • 1½–2 tbsp light corn syrup – Adds shine.
  • 1½ tsp vanilla extract – For flavor.
  • Pinch fine sea salt – Balances sweetness.
  • Gel food coloring (red, pink) – To create festive hues.
  • Valentine’s sprinkles – For that extra flair!

Steps to Make Your Cookies

Vibrant heart-shaped cookies with smooth icing and sprinkles, arranged artfully on a plate.
  1. In a bowl, whisk together all-purpose flour, baking powder, and salt. Set aside.
  2. In a large mixing bowl, beat the softened butter and granulated sugar together for 2–3 minutes until light and fluffy.
  3. Add the large egg, vanilla, and almond extract (if using) to the mixture and beat until combined.
  4. Gradually add the dry ingredients in two additions, mixing on low speed until the dough just comes together.
  5. Divide the dough into two disks, wrap them in plastic wrap, and chill in the refrigerator for 1–2 hours.
  6. Preheat your oven to 175°C (350°F). Line baking sheets with parchment paper.
  7. Once chilled, roll the dough on a lightly floured surface to ¼ inch (6 mm) thickness. Use heart-shaped cutters to cut out cookies and place them on the prepared baking sheets.
  8. Bake for 8–11 minutes, or until edges are barely golden. Allow to cool on the pan for 5 minutes before transferring to a wire rack to cool completely.

Making the Icing

While your cookies cool, prepare the icing:

  1. In a medium bowl, whisk the powdered sugar, 3 tablespoons of milk, corn syrup, vanilla extract, and salt until smooth. Adjust with more milk or sugar to reach your desired consistency.
  2. Divide the icing into bowls and tint each with gel food coloring.
  3. Once the cookies are completely cooled, pipe outlines on the cookies with a thicker consistency icing, then flood the centers with a slightly thinner icing.
  4. Decorate with additional icing designs and sprinkles as desired.
  5. Let the cookies dry completely for several hours or overnight before stacking or packaging.

Pro Tips for Perfect Cookies

  • Chill Your Dough: Chilling the dough is crucial for achieving clean shapes and preventing spreading during baking.
  • Room Temperature Ingredients: Ensure your butter and egg are at room temperature for a smoother batter.
  • Don’t Overmix: Mix the dough just until combined to keep your cookies tender.
  • Test for Doneness: Keep an eye on the cookies while baking; they should be just set and lightly golden at the edges.
  • Use Quality Ingredients: High-quality butter and fresh extracts make a significant difference in flavor.
  • Store Properly: Store cookies in an airtight container to maintain freshness.
  • Experiment with Flavors: Feel free to add spices like nutmeg or cinnamon for a unique twist.
  • Adjust Icing Consistency: For piping, icing should be thick; for flooding, a thinner consistency is ideal.

Common Mistakes and Troubleshooting

Even the most experienced bakers face challenges. Here are some common pitfalls and how to avoid them:

  • Dough is Too Sticky: Add a bit more flour, but be cautious not to overdo it.
  • Cookies Spread Too Much: Ensure the dough is adequately chilled before baking.
  • Overbaking: Watch the cookies closely; they can go from perfect to overdone quickly!
  • Curdled Icing: If your icing looks curdled, mix it more vigorously to smooth it out.

Variations to Try

Feeling adventurous? Here are some fun variations to add your personal touch:

  • Chocolate Sugar Cookies: Substitute part of the flour with cocoa powder for a chocolatey twist.
  • Spiced Sugar Cookies: Add cinnamon or nutmeg to the dough for a warm flavor.
  • Gluten-Free Version: Use a gluten-free flour blend for a delightful alternative.
  • Decorative Royal Icing: For a more intricate design, use royal icing instead of the simple glaze.

Storage and Make-Ahead Instructions

These cookies can be made in advance, making them perfect for busy schedules:

  • Storage: Keep cookies in an airtight container at room temperature for up to 1 week.
  • Make-Ahead: The dough can be prepared and chilled in advance, then baked when you’re ready.
  • Freezing Cookies: Baked cookies can be frozen for up to 3 months. Thaw at room temperature before decorating.
  • Freezing the Dough: Roll the chilled dough into logs, wrap tightly, and freeze for up to 3 months. Slice and bake directly from the freezer!

Frequently Asked Questions

Here are some common questions about making Valentine’s sugar cookies:

  • Can I use margarine instead of butter? Yes, but the flavor and texture may vary.
  • How can I make my cookies more colorful? Use gel food coloring for vibrant hues that won’t thin your icing.
  • What if my dough is too crumbly? Add a teaspoon of milk at a time until it comes together.
  • How do I get my icing to dry properly? Let the cookies sit out in a cool, dry place until the icing hardens.
  • Can I add other flavors to the icing? Absolutely! Extracts like lemon or orange can add a lovely touch.
  • What are some great decorations for the cookies? Use sprinkles, edible glitter, or colored sugar for finishing touches.
  • Can I use cookie cutters of different shapes? Yes! You can create a variety of shapes for different occasions.
  • How should I package these cookies for gifting? Place them in a decorative box or bag, with parchment paper to keep them fresh.

Nutritional Tips and Dietary Adaptations

Making treats that cater to various dietary needs can be simple:

  • Lower Sugar: Reduce the sugar in the dough by 25% without compromising on taste.
  • Vegan Option: Substitute butter with coconut oil and use flaxseed meal as an egg replacement.
  • Healthier Icing: Use Greek yogurt mixed with powdered sugar for a protein boost.
  • Portion Control: Consider making mini cookies to help manage serving sizes.

Equipment Recommendations

Having the right tools can simplify your baking experience:

  • Mixing Bowls: A set of various sizes for mixing and holding ingredients is essential.
  • Stand Mixer or Hand Mixer: For effortlessly beating butter and sugar.
  • Cookie Cutters: Heart shapes are great, but consider other fun shapes for different occasions.
  • Baking Sheets: Use heavy-duty, non-stick sheets for even baking.
  • Parchment Paper: To line your baking sheets and prevent sticking.

Serving Suggestions

These cookies shine in various settings:

  • With Coffee or Tea: Enjoy them alongside your favorite warm beverages.
  • At Parties: Serve on a colorful platter to impress your guests.
  • Gift Giving: Wrap them in cellophane bags tied with a ribbon for a charming gift.
  • As Party Favors: Use them as unique favors for weddings or baby showers.

Wrap Up Your Valentine’s Day with Love

As you embark on your journey to bake these delightful Valentine’s sugar cookies, remember that the essence of this recipe lies not just in the ingredients but in the love and joy you share while making them. So grab your apron, invite a friend or family member into the kitchen, and celebrate the spirit of togetherness. Happy baking!

Valentine’s Sugar Cookies (Soft Cut-Out Hearts with Icing)

Prep Time 30 minutes
Cook Time 10 minutes
Total Time 40 minutes
Servings 24 cookies
Calories 150
Celebrate love with these soft, buttery sugar cookies decorated with colorful icing and sprinkles, perfect for Valentine’s Day.

Ingredients

Cookies

  • cups all-purpose flour
  • ½ tsp baking powder
  • ½ tsp fine sea salt
  • 1 cup unsalted butter, softened
  • 1 cup granulated sugar
  • 1 large egg, room temperature
  • 2 tsp vanilla extract
  • ½ tsp almond extract (optional)

Icing

  • 3 cups powdered sugar, sifted
  • 3–4 tbsp milk (or water), plus more as needed
  • 1½–2 tbsp light corn syrup
  • tsp vanilla extract (or 1 tsp vanilla + ½ tsp almond extract)

Decorations

Instructions 

  • Whisk flour, baking powder, and salt. Beat butter and sugar until light. Mix in egg and extracts. Add dry ingredients in parts, then chill dough 1–2 hours.
  • Preheat oven to 175°C / 350°F. Roll out dough, cut into hearts, and place on baking sheets.
  • Bake 8–11 minutes until edges are golden. Cool completely.
  • Mix powdered sugar, milk, corn syrup, vanilla, and salt for icing. Tint with gel colors. Pipe outlines and flood centers. Decorate with sprinkles.
  • Let cookies dry several hours or overnight before stacking.

Notes

Chill dough well for easier cutting and shaping.
Calories: 150kcal
Cost: $15
Course: Dessert
Cuisine: American
Keyword: sugar cookies

Whisking Up Joy: The Ultimate Cheese and Herb Muffins Recipe

Welcome to a delightful culinary adventure where we transform simple ingredients into irresistible Cheese and Herb Muffins! These fluffy, cheesy bites are not just a snack; they’re a celebration of flavor and togetherness, perfect for brunch or cozy evenings. As we whisk together ingredients, the aroma of fresh herbs and sharp cheddar fills the air, invoking memories of family gatherings in sunny Spain. Join me as we dive into the magic of these muffins and discover why they should be a staple in your kitchen!

Why You’ll Love This Recipe

These Cheese and Herb Muffins are more than just a treat; they’re a culinary hug that brings people together. Here are five reasons to fall in love with them:

  • Quick and Easy: With just a few simple steps, you can whip up a batch in under 30 minutes, perfect for those busy mornings.
  • Versatile Delight: Serve them warm as a side dish, or enjoy them as a standalone snack. They pair beautifully with soups, salads, or simply a cup of coffee.
  • Flavor-Packed: The combination of sharp cheddar and fresh herbs creates a savory explosion that tantalizes your taste buds with every bite.
  • Customizable: Feel free to experiment with different cheeses or herbs, making it easy to adapt this recipe to your personal preferences.
  • Freezer-Friendly: Make a large batch and store them in the freezer for a quick breakfast option or emergency snack!

Essential Ingredients

Let’s gather the stars of our show! Here’s what you’ll need:

  • 2 cups all-purpose flour: The base for fluffy muffins. Substitute with whole wheat flour for a healthier option.
  • 1 tbsp baking powder: This is essential for that perfect rise. Ensure it’s fresh for the best results.
  • 1 tsp salt: Enhances the flavors of the other ingredients.
  • 1 cup shredded sharp cheddar cheese: The star of the show! Feel free to use your favorite cheese or a blend for varied flavor.
  • 2 tbsp fresh thyme, chopped: Adds a delightful aromatic touch. You can also use dried thyme as a substitute.
  • 2 tbsp fresh parsley, chopped: Brightens up the flavor palette. Swap it for chives or basil for a different twist.
  • 1 cup whole milk: Keeps the muffins moist. Plant-based milk alternatives work wonderfully too!
  • 2 large eggs: Binds the ingredients together. For a vegan option, use flax eggs.
  • 1/2 cup unsalted butter, melted: Adds richness. You can replace it with olive oil for a Mediterranean flair.

Let’s Make it Together!

Side view of freshly baked Cheese and Herb Muffins with melted cheese and herbs peeking out.

Now that we have our ingredients ready, it’s time to bring them together!

  • Step 1: Preheat your oven to 375°F (190°C) and prepare a muffin tin with liners or grease it well.
  • Step 2: In a large mixing bowl, whisk together the flour, baking powder, salt, cheese, thyme, and parsley until well combined.
  • Step 3: In another bowl, mix the melted butter, milk, and eggs until smooth and creamy.
  • Step 4: Gently combine the wet ingredients with the dry ingredients using a spatula. Mix until just incorporated; avoid over-mixing!
  • Step 5: Spoon the batter into the muffin tin, filling each cup about three-quarters full.
  • Step 6: Bake for 20-25 minutes, or until golden brown and a toothpick inserted in the center comes out clean.
  • Step 7: Let the muffins cool in the tin for about 5 minutes before transferring them to a wire rack to cool completely.

Perfecting the Cooking Process

To ensure your muffins are nothing short of perfection, here are some pro tips:

  • Measure Flour Correctly: Spoon and level your flour for accurate measurements. Too much flour can lead to dense muffins.
  • Room Temperature Ingredients: Using eggs and milk at room temperature helps them combine better and ensures even baking.
  • Mix Gently: Over-mixing can lead to tough muffins. Stir until just combined for a lighter texture.
  • Check for Doneness: The muffins should be golden brown. A toothpick should come out clean from the center when they’re done.
  • Cool Properly: Letting them cool in the tin for a few minutes helps them set before transferring to a wire rack.
  • Flavor Boost: Consider adding a pinch of garlic powder or crushed red pepper flakes for an extra kick.
  • Cheese Variations: Experiment with different cheeses like feta, mozzarella, or even a spicy pepper jack!
  • Herb Alternatives: Try using fresh rosemary, dill, or even a mix of Mediterranean herbs for unique flavors.

Common Mistakes and Troubleshooting

If your muffins don’t turn out as expected, here’s what you can troubleshoot:

  • Dense Muffins: Over-mixing or using too much flour can lead to dense results. Always measure accurately and mix gently.
  • Too Dry: Ensure you’re not baking for too long. An oven thermometer can help ensure your oven’s temperature is accurate.
  • Sticking to the Tin: If your muffins stick, ensure your tin is well-greased or lined with paper liners.
  • Not Rising: Check that your baking powder is fresh. Old leavening agents can lead to flat muffins.

Variations on Cheese and Herb Muffins

Feeling adventurous? Here are some delightful variations to try:

  • Spinach and Feta: Add a cup of chopped spinach and swap cheddar for crumbled feta for a Mediterranean twist.
  • Bacon and Cheddar: Mix in crispy, crumbled bacon along with the cheddar for a savory kick.
  • Sun-Dried Tomato and Basil: Incorporate chopped sun-dried tomatoes and fresh basil for a vibrant flavor profile.
  • Sweet Corn and Jalapeño: Add fresh corn kernels and diced jalapeños for a sweet-spicy combination.

Storing & Reheating

To keep your muffins fresh and delicious:

  • Room Temperature: Store in an airtight container at room temperature for up to 3 days.
  • Refrigerator: For longer storage, keep in the fridge for up to a week.
  • Freezer: Freeze muffins in a zip-top bag for up to 3 months. Thaw at room temperature or microwave for a quick snack.
  • Reheating: Warm in the oven at 350°F (175°C) for about 5-10 minutes or microwave for 15-20 seconds.

Comprehensive FAQ

Here are some common questions about Cheese and Herb Muffins:

  • Can I use gluten-free flour? Yes, substitute with a gluten-free all-purpose flour blend, adjusting liquid as necessary.
  • What if I don’t have fresh herbs? You can use dried herbs; just remember to use less since dried herbs are more concentrated.
  • Can I make these muffins vegan? Absolutely! Use flax eggs and plant-based milk and butter alternatives.
  • How do I know when the muffins are done? A toothpick inserted in the center should come out clean; they should be golden brown on top.
  • Can I add other ingredients? Yes! Feel free to incorporate vegetables like zucchini or bell peppers for added nutrition.
  • How many muffins does this recipe make? This recipe typically yields about 12 standard-sized muffins.
  • Can I double the recipe? Yes, simply double the ingredients and use multiple muffin tins if needed.
  • How should I serve these muffins? They are delicious warm, served with butter, or alongside soups and salads.

Nutritional Tips and Dietary Adaptations

To make your Cheese and Herb Muffins even healthier:

  • Whole Wheat Flour: Substitute half or all of the all-purpose flour with whole wheat for added fiber.
  • Low-Fat Dairy: Use low-fat milk and cheese to reduce calories without sacrificing flavor.
  • Add Vegetables: Incorporating finely chopped vegetables increases the nutritional value.
  • Portion Control: Consider making mini muffins for smaller portion sizes, great for appetizers!

Equipment Recommendations

For the best baking experience, I recommend having the following tools:

  • Muffin Tin: Opt for a non-stick or silicone muffin tin for easy removal.
  • Mixing Bowls: A set of various sizes for mixing wet and dry ingredients efficiently.
  • Whisk: Essential for combining ingredients smoothly without lumps.
  • Spatula: Great for folding in ingredients gently without over-mixing.
  • Cooling Rack: Helps to cool muffins evenly and prevents sogginess.

Serving Suggestions

Serve your Cheese and Herb Muffins with:

  • Olive Oil and Balsamic Vinegar: A simple dip that complements the muffins beautifully.
  • Soup or Salad: Pair with a hearty soup or fresh salad for a complete meal.
  • Cheese Platter: Include these muffins on a cheese board with assorted cheeses and olives for a delightful spread.
  • Jam or Honey: For a sweet twist, try serving them with honey or fig jam for an unexpected pairing.

With these Cheese and Herb Muffins, you’re not just baking; you’re creating memories and connections at the table. So grab your apron and let the joy of cooking fill your kitchen. Happy baking!

Cheese and Herb Muffins

Prep Time 10 minutes
Cook Time 20 minutes
Total Time 30 minutes
Servings 12 muffins
Calories 180
Delight in these savory muffins packed with cheese and fresh herbs, perfect for breakfast or snacks.

Ingredients

Dry ingredients

  • 2 cups all-purpose flour
  • 1 tbsp baking powder
  • 1 tsp salt

Wet ingredients

  • 1 cup whole milk ((or plant-based milk))
  • 2 large eggs
  • 1/2 cup unsalted butter (melted)

Additional ingredients

  • 1 cup shredded sharp cheddar cheese
  • 2 tbsp fresh thyme, chopped
  • 2 tbsp fresh parsley, chopped

Instructions 

  • Preheat oven to 375°F (190°C) and prepare a muffin tin.
  • Mix dry ingredients with cheese and herbs in a large bowl.
  • Whisk wet ingredients in another bowl until smooth.
  • Combine wet and dry mixtures gently until just combined.
  • Spoon batter into muffin tin and bake for 20-25 minutes.
  • Cool for 5 minutes before serving.

Notes

Use fresh herbs for best flavor and avoid over-mixing the batter.
Calories: 180kcal
Cost: $12
Course: Breakfast
Cuisine: American
Keyword: Cheese, herbs

Welcome to a Mediterranean Culinary Adventure!

Let’s dive into a delightful breakfast experience that transforms the classic avocado toast into a Mediterranean masterpiece. This dish, featuring a perfectly poached egg atop creamy mashed avocado, is not just a meal; it’s a celebration of flavors, textures, and the joy of cooking. The combination of ripe avocados, zesty lemon, and a hint of olive oil will awaken your taste buds and bring a taste of sunny Mediterranean mornings to your table. Join me, Rafael, in creating a dish that is as beautiful as it is delicious, perfect for sharing with family and friends!

Why You’ll Love This Recipe

  • Flavor Explosion: The rich creaminess of avocado meets the soft, runny yolk of the poached egg, creating a delightful burst of flavor in every bite.
  • Simple & Quick: With just a few fresh ingredients and minimal cooking time, you can whip up this delicious breakfast in under 15 minutes!
  • Health Benefits: Packed with healthy fats from avocados and protein from eggs, this dish supports heart health and keeps you energized throughout the morning.
  • Customizable: Whether you prefer it spicy, savory, or topped with your favorite herbs, this recipe can easily be adapted to suit your taste.
  • Perfect for All Occasions: Great for a casual brunch, a quick weekday breakfast, or an elegant dinner appetizer, this dish fits any meal!

Ingredient Breakdown

Let’s look at the ingredients that come together to make this Mediterranean avocado toast with poached egg:

  • Avocados: 2 ripe avocados are essential for that creamy base. Choose avocados that yield slightly when pressed for the best results.
  • Eggs: 2 large eggs are needed for poaching. Fresh eggs work best for achieving that delicate poached texture.
  • Bread Slices: 2 thick-cut slices of sourdough or whole grain bread give a hearty foundation for your toppings.
  • Lemon Juice: 1 teaspoon of fresh lemon juice not only adds brightness but also helps prevent the avocado from browning.
  • Salt: ½ teaspoon of salt enhances all the flavors and is critical for seasoning the avocado mash.
  • Black Pepper: ¼ teaspoon of freshly cracked black pepper for a touch of spice.
  • White Vinegar: 1 tablespoon added to the poaching water to help keep the egg whites together.
  • Olive Oil: 1 teaspoon (optional) for drizzling, adding richness and a touch of Mediterranean flair.

Ingredient Substitutions

Side view of thick sourdough avocado toast garnished with a runny poached egg.

Don’t have all the ingredients? No worries! Here are some substitutions you can consider:

  • Avocados: If avocados are unavailable, try using hummus or a bean spread for a different yet creamy base.
  • Eggs: For a vegan alternative, consider using tofu scramble or chickpea flour to create a similar texture.
  • Bread: Gluten-free bread or even crispbread can be used for a gluten-free version.
  • Lemon Juice: Lime juice can work as a substitute, offering a slightly different but refreshing flavor.

Chef’s Pro Tips for Perfect Results

Let’s make sure your avocado toast with poached egg turns out perfectly every time:

  • Choose the Right Avocado: Select avocados that are ripe but not overly soft; they should yield gently to pressure.
  • Poach with Care: Swirl the water gently before adding the eggs to create a whirlpool effect that helps the whites wrap around the yolk.
  • Don’t Overcook: Aim for 3-4 minutes of poaching for a runny yolk; adjust timing for firmer yolks if preferred.
  • Toast it Right: Toast your bread until it’s golden and crispy, ensuring it can support the weight of the toppings.
  • Mix Avocado Well: Mash the avocado thoroughly with lemon juice and seasonings for a smooth and flavorful spread.
  • Experiment with Toppings: Add crumbled feta, chili flakes, or fresh herbs like basil or parsley for an extra layer of flavor.
  • Use Quality Olive Oil: A drizzle of high-quality extra virgin olive oil enhances the dish’s richness and adds depth.
  • Serve Fresh: Enjoy your toast immediately after preparing to savor the flavors at their best.

Common Mistakes and Troubleshooting

Even the best chefs can make mistakes! Here are some common pitfalls and how to avoid them:

  • Overcooked Eggs: If your eggs are too firm, reduce the poaching time by a minute and keep an eye on them.
  • Browning Avocado: To prevent browning, use lemon juice immediately after mashing and cover tightly if not serving right away.
  • Too Much Salt: Always start with less salt; you can add more later but it’s hard to fix if you overdo it.

Delicious Variations

Make this dish your own with these delightful variations:

  • Spicy Avocado Toast: Add a pinch of cayenne pepper or a drizzle of sriracha for a kick!
  • Guacamole Twist: Mix in diced tomatoes, onions, and cilantro for a guacamole-inspired spread.
  • Herbed Delight: Blend in fresh herbs like dill or chives into the avocado for a fresh twist.
  • Sweet & Savory: Top with sliced strawberries and a sprinkle of balsamic glaze for a unique flavor combination.

Storage and Make-Ahead Instructions

This dish is best enjoyed fresh, but here are some tips for storage and preparation:

  • Avocado Prep: If you need to prepare in advance, mash the avocados but add lemon juice to prevent browning. Store in an airtight container.
  • Egg Preparation: Poached eggs can be made ahead of time; cool them in a bowl of cold water and reheat in hot water when ready to serve.

Frequently Asked Questions

Here are some common questions about preparing this delightful dish:

  • Can I use frozen avocados? Yes, frozen avocado can be thawed and used, but it may be less creamy.
  • Can I poach more than two eggs at once? Yes, just ensure your pot is large enough and the water remains at a gentle simmer.
  • What if I don’t have vinegar? You can poach without vinegar; just be cautious of the egg whites spreading.
  • How do I know when the egg is done? For a perfectly poached egg, the white should be set while the yolk remains soft.
  • Can I use an egg cooker? Yes, an egg cooker can help achieve consistent results for poached eggs.
  • What bread works best? Sourdough or whole grain bread enhances the dish’s texture and flavor.
  • Can I make this vegan? Yes, substitute eggs with a tofu scramble or chickpea flour mix for a similar experience.
  • How do I serve this dish? Pair with fresh fruit, a side salad, or even a glass of freshly squeezed juice for a complete meal.

Nutrition Tips and Dietary Adaptations

This avocado toast is not only delicious but also packed with nutrients. Here’s how you can make it even healthier:

  • Add Greens: Top your toast with spinach or arugula for an extra boost of vitamins and minerals.
  • Use Whole Grains: Opt for whole grain or sprouted bread for added fiber and nutrients.
  • Mind Your Portions: If watching calories, adjust the quantity of avocado and eggs as needed.

Equipment Recommendations

To make your cooking experience smoother, here are some equipment suggestions:

  • Non-stick saucepan: Ideal for poaching eggs without sticking.
  • Slotted spoon: Perfect for gently removing poached eggs from the water.
  • Mixing bowl: Use for mashing avocados and mixing with seasonings.
  • Toaster or oven: For perfectly crispy toast.

Serving Suggestions

When it comes to serving, presentation can elevate your dish. Consider these ideas:

  • Garnish: Sprinkle fresh herbs, chili flakes, or even a drizzle of balsamic glaze on top for an appealing finish.
  • Accompaniments: Serve alongside grilled tomatoes, olives, or a side of mixed greens for a balanced meal.
  • Drinks: Pair with a refreshing mint tea or a frothy cappuccino for a delightful breakfast experience.

Conclusion: Celebrate Every Bite!

Avocado toast with poached egg is more than just a trendy breakfast; it’s a wonderful way to embrace the Mediterranean way of life—simple, fresh, and bursting with flavor. Whether you’re enjoying it alone or sharing it with loved ones, each bite is a reminder of the joy of cooking and the beauty of good food. So grab your ingredients, let your kitchen come alive, and celebrate the flavors of the Mediterranean in your own home. Bon appétit!

Avocado Toast with Poached Egg

Prep Time 5 minutes
Cook Time 10 minutes
Total Time 15 minutes
Servings 2 servings
Calories 350
A quick and nutritious breakfast featuring creamy avocado, perfectly poached eggs, and toasted bread.

Ingredients

Main Ingredients

  • 2 pieces ripe avocados
  • 2 pieces eggs
  • 2 slices thick-cut bread (such as sourdough or whole grain)
  • 1 teaspoon lemon juice
  • 0.5 teaspoon salt
  • 0.25 teaspoon black pepper
  • 1 tablespoon white vinegar
  • 1 teaspoon olive oil (optional)

Instructions 

  • Simmer water with vinegar in a saucepan.
  • Mash avocados with lemon juice, salt, and pepper.
  • Poach eggs in simmering water for 3–4 minutes.
  • Toast bread and spread mashed avocado on each slice.
  • Remove eggs with a slotted spoon and place on toast.
  • Season with pepper and serve warm.

Notes

For extra flavor, add toppings like herbs or hot sauce.
Calories: 350kcal
Cost: $10
Course: Breakfast
Cuisine: American
Keyword: Avocado, Egg, Toast