Author

rafael

Browsing

Welcome to the Joy of Baking Savory Cheese Muffins!

There’s something magical about the aroma of freshly baked muffins wafting through your kitchen. Today, we’re diving into the delightful world of savory cheese muffins, a beloved treat that marries the robust flavors of sharp cheddar with the freshness of herbs. These muffins are perfect for any occasion, be it a cozy brunch, a picnic in the park, or a comforting snack at home. Let’s explore why these muffins are not just a recipe, but a celebration of flavor, culture, and togetherness.

Why You’ll Love This Recipe

  • Endless Versatility: Customize with your choice of cheese or herbs. They can be a sweet addition to breakfast or serve as a hearty side dish for dinner.
  • Quick and Easy: Perfect for beginners! This straightforward recipe takes just under 30 minutes from prep to table.
  • Flavor-Packed: Each muffin is bursting with the rich taste of cheddar and the aromatic notes of garlic and herbs, making them irresistible.
  • Make-Ahead Friendly: Bake a batch ahead of time, freeze, and enjoy them warm whenever you crave a savory treat.
  • Perfect for Sharing: These muffins are a crowd-pleaser at gatherings, potlucks, and bake sales, ensuring everyone leaves with a smile.

Ingredients Breakdown

Let’s take a closer look at the ingredients that make these savory cheese muffins so delightful. You’ll find that many of these ingredients can be substituted based on your pantry and preferences.

Main Ingredients

  • 2 ½ cups all-purpose flour: The foundation for our muffins. For a healthier option, consider using whole wheat flour or a gluten-free blend.
  • 1 tablespoon baking powder: This ensures a fluffy rise. Baking soda can be used if you add an acidic ingredient like buttermilk.
  • ½ teaspoon salt: Enhances flavor. Adjust according to taste, especially if using salted butter.
  • ½ teaspoon garlic powder: Adds depth. Fresh minced garlic can be substituted for a stronger flavor.
  • ¼ teaspoon black pepper: Adds a hint of spice. Feel free to adjust based on your heat preference.
  • 1 ½ cups shredded sharp cheddar cheese: The star of the show! You can also experiment with other cheeses like mozzarella or feta.
  • ¼ cup chopped fresh herbs: A great way to elevate flavor. Chives, parsley, or dill work beautifully.
  • 1 cup whole milk: Provides moisture. Alternatives like almond or oat milk can also work.
  • ½ cup unsalted butter, melted and cooled: Adds richness. Coconut oil or olive oil can be healthier substitutes.

How to Make Savory Cheese Muffins

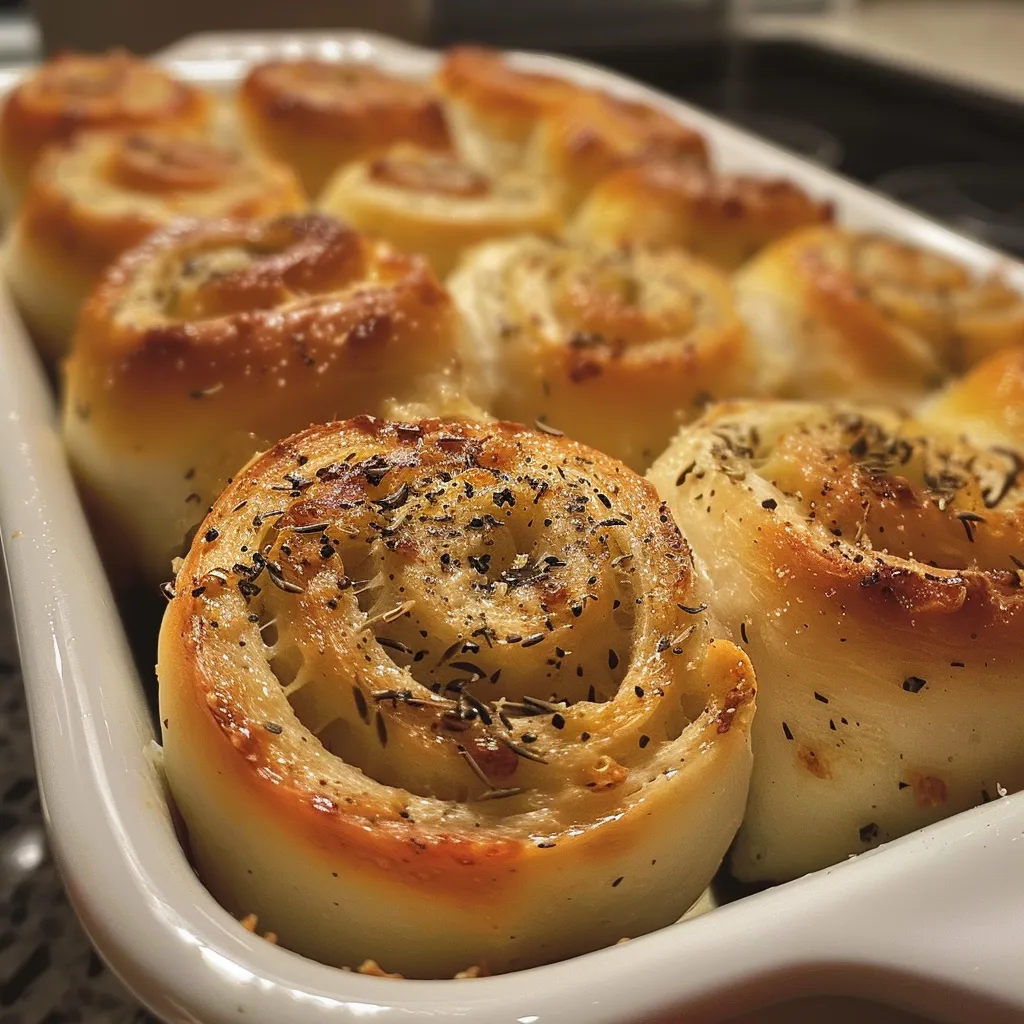
Juicy savory cheese muffins with melted cheese peeking through, captured from the side.

Creating these cheese muffins is as easy as pie! Follow these simple steps for success.

  1. Preheat your oven to 400°F (200°C). Grease a 12-cup muffin tin with butter or line it with muffin liners.
  2. In a large bowl, whisk together the flour, baking powder, salt, garlic powder, and black pepper until well combined.
  3. Add the shredded cheddar cheese and chopped herbs to the dry ingredients, tossing gently to coat them evenly.
  4. In a separate bowl, whisk together the milk, melted butter, and eggs until smooth and well combined.
  5. Slowly pour the wet ingredients into the dry ingredients and stir gently with a rubber spatula until just combined. Be careful not to overmix the batter.
  6. Divide the batter evenly among the muffin cups, filling each one about 2/3 full.
  7. Bake for 18-20 minutes, or until the tops are golden brown and a toothpick inserted into the center comes out clean.
  8. Allow the muffins to cool for 5 minutes in the tin before transferring them to a wire rack. Serve warm with a pat of butter or a drizzle of honey.

Pro Tips for Perfect Muffins

  • Don’t Overmix: Stir until just combined. Overmixing can lead to tough muffins.
  • Use Fresh Ingredients: Fresh herbs and high-quality cheese make a noticeable difference in flavor.
  • Check for Doneness: Use a toothpick to test; it should come out clean or with a few crumbs.
  • Cool Before Serving: Letting them cool allows flavors to settle and enhances texture.
  • Experiment with Mix-ins: Add cooked bacon, olives, or sun-dried tomatoes for extra flavor.
  • Store Properly: Keep in an airtight container at room temperature for up to 3 days or freeze for up to a month.
  • Try Different Cheese: Mixing cheeses can elevate flavor profiles—experiment with a mix of cheddar and gouda!
  • Make Mini Muffins: Perfect for snacks or appetizers, just reduce baking time to 10-12 minutes.

Common Mistakes and Troubleshooting

Even the best bakers can run into issues! Here are some common mistakes to avoid:

  • Dense Muffins: This often happens from overmixing the batter. Remember, less is more!
  • Dry Texture: Ensure you measure flour correctly; spoon it into the measuring cup and level it off.
  • Sticking to Pan: Make sure to grease your muffin tin well or use liners to prevent sticking.
  • Uneven Baking: Rotate the muffin tin halfway through baking for even cooking.

Flavor Variations

Why stop at just one flavor? Here are some delightful twists to keep your taste buds dancing:

  • Spinach and Feta: Add chopped spinach and crumbled feta for a Mediterranean flair.
  • Sun-Dried Tomato and Basil: Incorporate chopped sun-dried tomatoes and fresh basil for a burst of Italian flavor.
  • Mexican Style: Mix in jalapeños and cheddar, with a sprinkle of taco seasoning for a spicy kick.
  • Caramelized Onion and Gruyere: Sweet onions paired with nutty gruyere create a gourmet experience.

Storage and Make-Ahead Instructions

These muffins are incredibly versatile when it comes to storage:

  • Room Temperature: Store in an airtight container for up to 3 days.
  • Refrigeration: Keep in the fridge for up to a week, but reheat before serving for optimal taste.
  • Freezing: Freeze muffins in a single layer on a baking sheet, then transfer to a zip-top bag for up to a month. Reheat from frozen in the oven for best results.

Frequently Asked Questions (FAQ)

  • Can I use different types of cheese? Absolutely! Experiment with your favorites like mozzarella or feta.
  • Are these muffins suitable for freezing? Yes, they freeze beautifully! Just reheat in the oven when you’re ready to enjoy.
  • Can I make these muffins gluten-free? Yes, substitute with a gluten-free flour blend.
  • How can I make these muffins dairy-free? Use plant-based milk and a dairy-free cheese alternative.
  • What can I serve with these muffins? They pair wonderfully with soups, salads, or as part of a brunch spread.
  • How do I know when they are done baking? A toothpick inserted into the center should come out clean or with a few crumbs.
  • Can I add vegetables to the batter? Certainly! Just chop them finely and ensure they’re cooked if needed.
  • What’s the best way to reheat muffins? The oven is best for maintaining texture; warm them at 350°F (175°C) for 5-10 minutes.

Nutritional Tips and Dietary Adaptations

These muffins can be adapted to fit various dietary needs:

  • Lower Calorie: Use less cheese or substitute with a lower-fat variety.
  • Increase Fiber: Add ground flaxseed or chia seeds to the batter.
  • Vegetarian-Friendly: This recipe is already vegetarian! Just ensure your cheese choice aligns.
  • Nut-Free: All ingredients used are nut-free, making it safe for those with allergies.

Essential Equipment

To whip up these savory cheese muffins, you’ll need:

  • Muffin Tin: A standard 12-cup muffin tin is essential for even baking.
  • Mixing Bowls: A large bowl for dry ingredients and a medium bowl for wet ones.
  • Whisk and Spatula: For combining ingredients smoothly without overmixing.
  • Measuring Cups and Spoons: Accurate measurements are key to success!

Serving Suggestions

Serve your savory cheese muffins warm, perhaps with a pat of butter or a drizzle of honey. Pair them with:

  • Hearty Soups: They make a great accompaniment to tomato or vegetable soups.
  • Salads: Serve alongside a fresh garden salad for a complete meal.
  • Charcuterie Boards: These muffins add a delicious touch to any cheese and meat platter.

Conclusion

As we wrap up our savory cheese muffin adventure, I hope you feel inspired to bring these delightful treats into your kitchen and share them with loved ones. Remember, cooking is not just about the ingredients but the joy of togetherness and celebration. So gather around the table, enjoy the colorful flavors, and let every bite remind you of the warmth that comes from sharing a meal. Happy baking!

Savory Cheese Muffins

Prep Time 10 minutes
Cook Time 20 minutes
Total Time 30 minutes
Servings 12 muffins
Calories 210
These savory cheese muffins are perfect for breakfast, brunch, or a snack, packed with sharp cheddar and fresh herbs for a flavorful bite.

Ingredients

Dry ingredients

  • 2.5 cups all-purpose flour
  • 1 tablespoon baking powder
  • 0.5 teaspoon salt
  • 0.5 teaspoon garlic powder
  • 0.25 teaspoon black pepper

Cheese and herbs

  • 1.5 cups shredded sharp cheddar cheese
  • 0.25 cup chopped fresh herbs

Wet ingredients

  • 1 cup whole milk
  • 0.5 cup unsalted butter, melted and cooled

Instructions 

  • Preheat oven to 400°F (200°C). Grease muffin tin.
  • Mix dry ingredients in a bowl.
  • Stir in cheese and herbs.
  • Whisk wet ingredients separately.
  • Combine wet and dry, fill muffin cups 2/3 full, and bake 18-20 mins.
Notes

For extra flavor, sprinkle with additional herbs before baking.
Calories: 210kcal
Cost: $12
Course: Breakfast, Snack
Cuisine: American
Keyword: Cheese, herbs

Welcome to Your New Favorite Bread Recipe!

Are you ready to elevate your culinary skills and amaze your family with a delightful treat? Today, we’re diving into the world of Greek Yogurt Flour Garlic Bread. This easy-to-follow recipe blends creamy Greek yogurt with aromatic garlic, resulting in a soft, flavorful bread that’s perfect for any occasion—from cozy dinners to festive gatherings. Let’s embark on this Mediterranean journey together!

Why You’ll Love This Greek Yogurt Flour Garlic Bread

This recipe isn’t just another bread; it’s a celebration of flavors and textures that will leave you wanting more. Here are just a few reasons to love it:

  • Quick and Easy: With minimal ingredients and no yeast required, you can whip up this bread in under 30 minutes, making it a perfect last-minute addition to any meal.
  • Healthier Option: Using Greek yogurt adds protein and moisture, creating a tender crumb while keeping the bread lighter than traditional recipes.
  • Flavor Explosion: The combination of garlic and optional herbs infuses the bread with a rich, savory flavor that pairs beautifully with dips, soups, or as a side.
  • Versatility: This bread can be easily customized with your favorite toppings, cheeses, or herbs, ensuring there’s always a new twist to try!
  • Perfect for Sharing: Whether it’s a family dinner or a gathering with friends, this bread invites everyone to partake in the joy of sharing a meal together.

Ingredients for Greek Yogurt Flour Garlic Bread

Gather these simple ingredients to create your masterpiece:

  • 1 cup (120g) all-purpose flour (or self-rising flour)
  • 1 cup (240g) plain Greek yogurt (preferably full-fat for best results)
  • 2 teaspoons baking powder (omit if using self-rising flour)
  • ½ teaspoon salt
  • 2 cloves garlic (minced or roasted for a sweeter flavor)
  • 2 tablespoons melted butter (for brushing on top)
  • 1 teaspoon dried herbs (optional: choose oregano, parsley, or an Italian blend)

Step-by-Step Instructions to Make Greek Yogurt Flour Garlic Bread

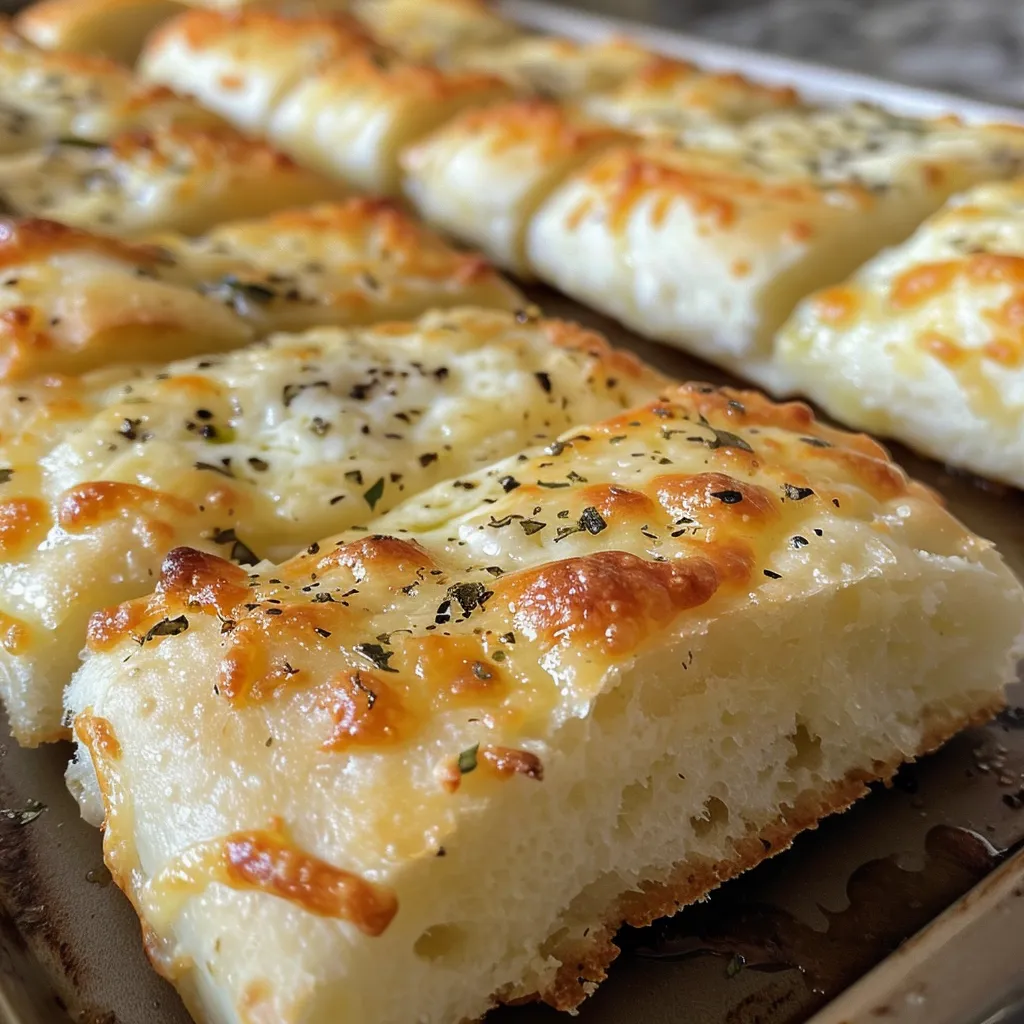
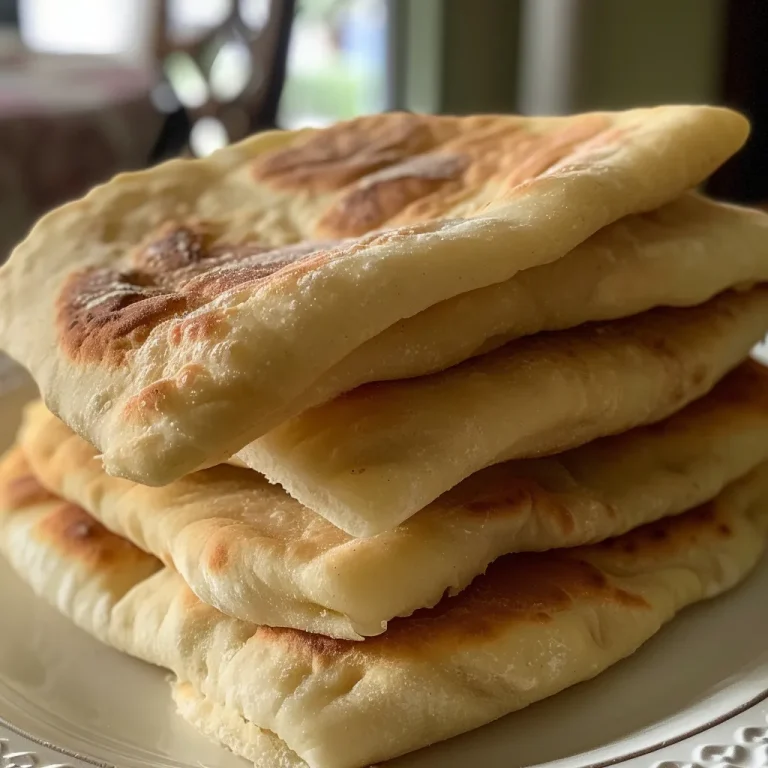
Side angle of soft, fluffy garlic bread made with Greek yogurt, showcasing texture.

Follow these easy steps to bake your delicious bread:

  • Step 1: Preheat Your Oven – Preheat your oven to 375°F (190°C). Line a baking sheet with parchment paper or lightly grease it to prevent sticking.
  • Step 2: Mix the Dough – In a large mixing bowl, combine the flour, baking powder (if using), and salt. Gradually stir in the Greek yogurt until a soft dough forms.
  • Step 3: Add the Garlic – Fold in the minced or roasted garlic. For an extra punch of flavor, feel free to add another clove!
  • Step 4: Shape the Bread – Dust your hands with flour, then shape the dough into a round or oval loaf. Place it on the prepared baking sheet and score the top lightly with a knife.
  • Step 5: Butter and Bake – Brush the top of the loaf with melted butter and sprinkle dried herbs if desired. Bake for 20–25 minutes, or until the bread is golden brown and cooked through.
  • Step 6: Rest and Serve – Allow the bread to cool for 5–10 minutes before slicing and serving warm. Enjoy the delightful aroma and flavors!

Rafael’s Tips for the Perfect Greek Yogurt Flour Garlic Bread

Enhance your cooking experience with these pro tips:

  • Use Full-Fat Yogurt: Opt for full-fat Greek yogurt for a richer flavor and softer texture.
  • Experiment with Garlic: Try using roasted garlic for a milder, sweeter flavor that contrasts beautifully with the tanginess of the yogurt.
  • Add a Touch of Sea Salt: A sprinkle of sea salt on top before baking can enhance the overall flavor profile.
  • Cheese Lover’s Delight: Incorporate shredded cheese into the dough for an extra layer of flavor and creaminess.
  • Herb Infusion: Customize the bread by adding fresh or dried herbs right into the dough. Rosemary and thyme work exceptionally well!
  • Don’t Overmix: Mix just until combined to keep the bread light and fluffy—overmixing can result in a dense texture.
  • Check for Doneness: Tap the bottom of the loaf; it should sound hollow when fully baked.
  • Serve Fresh: Enjoy the bread warm for the best taste and texture. It pairs wonderfully with olive oil or a rich balsamic vinegar dip.

Common Mistakes and Troubleshooting

Even the best chefs make mistakes! Here’s how to avoid them:

  • Too Dense: Ensure you measure your flour correctly. Too much flour can lead to a dense loaf. Use the spoon and level method for accuracy.
  • Dry Bread: If your bread turns out dry, it may have been overbaked. Keep an eye on it toward the end of the baking time.
  • Flavorless Bread: Don’t skip the garlic or herbs! They are crucial for creating that aromatic flavor.
  • Dough Too Sticky: If the dough is too sticky, add a little more flour, one tablespoon at a time, until it’s manageable.

Delicious Variations of Greek Yogurt Flour Garlic Bread

Get creative and try these fun variations:

  • Cheesy Garlic Bread: Mix in shredded mozzarella or parmesan cheese into the dough for a cheesy twist.
  • Herbed Garlic Bread: Add finely chopped fresh herbs like basil or chives into the dough for a fresh flavor.
  • Spicy Garlic Bread: Incorporate red pepper flakes or a dash of cayenne pepper for a kick of heat.
  • Sweet Garlic Bread: For a unique dessert twist, add a tablespoon of honey and cinnamon to the dough!

Storage and Make-Ahead Instructions

Want to prepare ahead of time? Here’s how to store your bread:

  • Storing Leftovers: Keep any leftover bread in an airtight container at room temperature for up to 2 days.
  • Refrigeration: For longer storage, wrap in foil and refrigerate for up to a week.
  • Freezing: You can freeze the bread! Wrap it tightly in plastic wrap and then in foil. It lasts up to 3 months. Thaw overnight in the fridge or warm in the oven.

Nutritional Tips and Dietary Adaptations

Let’s talk about making this bread fit your dietary needs:

  • Gluten-Free: Substitute with a gluten-free flour blend and check that your baking powder is gluten-free.
  • Low-Calorie Option: Use non-fat Greek yogurt and skip the butter on top to reduce calories.
  • Vegan Version: Substitute Greek yogurt with a plant-based yogurt and use olive oil instead of butter.

Equipment Recommendations

Here’s what you’ll need to make this recipe:

  • Mixing Bowl: A large bowl for combining your ingredients.
  • Baking Sheet: Choose a sturdy sheet to ensure even baking.
  • Parchment Paper: For easy cleanup and preventing sticking.
  • Measuring Cups and Spoons: Accurate measurements are key to success!

Serving Suggestions

This bread shines in various settings. Here are some ideas:

  • As a Dip Companion: Serve with hummus, tzatziki, or your favorite dipping oil.
  • With Soup or Salad: Pair it with a hearty soup or fresh salad for a complete meal.
  • Breakfast Treat: Toast slices with a spread of butter and jam for a delightful breakfast option.

Frequently Asked Questions

Wondering about more details? Here are some common questions:

  • Can I use low-fat yogurt? Yes, low-fat yogurt will work, but full-fat provides the best texture and flavor.
  • How do I know when the bread is done? The bread should be golden brown, and tapping the bottom should sound hollow.
  • Can I make the dough ahead of time? It’s best to bake the dough fresh, but you can prepare and store the dough in the fridge for a few hours before baking.
  • What if I don’t have Greek yogurt? You can substitute it with sour cream, but the taste will differ slightly.
  • Can I add other flavors? Absolutely! Feel free to experiment with spices and herbs to suit your taste.
  • How do I reheat leftover bread? Warm in the oven at 350°F (175°C) for about 10 minutes or until heated through.
  • Is this bread suitable for freezing? Yes! Wrap it tightly and freeze for up to 3 months.
  • What’s the best way to serve this bread? It’s delicious on its own or served with dips, soups, or salads.

Now that you have all the tools and information at your fingertips, it’s time to embrace the joy of baking. Gather your ingredients, invite a friend or family member to join, and let the aroma of Greek Yogurt Flour Garlic Bread fill your kitchen. Happy baking, and bon appétit!

Greek Yogurt Flour Garlic Bread

Prep Time 10 minutes
Cook Time 20 minutes
Total Time 30 minutes
Servings 4 pieces
Calories 250
This quick and easy garlic bread uses Greek yogurt and flour for a soft, flavorful loaf perfect for any meal.

Ingredients

Dough

  • 1 cup all-purpose flour (or self-rising flour)
  • 1 cup plain Greek yogurt (preferably full-fat)
  • 2 teaspoons baking powder (omit if using self-rising flour)
  • ½ teaspoon salt
  • 2 cloves garlic (minced or roasted)
  • 2 tablespoons melted butter (for brushing)
  • 1 teaspoon dried herbs (optional: oregano, parsley, or Italian blend)

Instructions 

  • Preheat oven to 375°F (190°C). Line a baking sheet with parchment or lightly grease it.
  • Mix flour, baking powder, and salt. Stir in Greek yogurt to form a soft dough.
  • Fold in garlic. Shape dough into a loaf, place on baking sheet, and score lightly.
  • Brush with melted butter and sprinkle herbs. Bake for 20–25 minutes until golden.
  • Let cool 5–10 minutes before serving warm.

Notes

For extra flavor, add more garlic or herbs as desired.
Calories: 250kcal
Cost: $8
Course: Side Dish
Cuisine: Greek
Keyword: Garlic Bread

There’s something magical about waking up to the smell of freshly cooked French toast wafting through the house. This French toast recipe is not just a dish; it’s an experience that brings warmth and joy to your mornings. With thick slices of challah or brioche, soaked in a rich custard mixture, you’ll discover how simple ingredients can create a delightful breakfast feast. So, grab a plate and join me in celebrating the joy of cooking and the flavors that bring us together!

Why You’ll Love This Recipe

Here are five irresistible reasons to try this French toast recipe:

  • Decadent Texture: The combination of custard-soaked bread and a crispy golden crust creates a perfect balance of textures.
  • Rich Flavor: The addition of vanilla and cinnamon elevates the taste, making every bite a delight.
  • Quick and Easy: This recipe comes together in no time, perfect for busy mornings or leisurely brunches.
  • Customizable: You can easily adapt this recipe with your favorite toppings or variations.
  • Impress Your Guests: Serve this delightful dish to family or friends, and watch their faces light up with joy!

Ingredients You’ll Need

Before we dive into the cooking process, let’s gather our ingredients. Here’s what you’ll need:

  • 1 loaf Challah or Brioche Bread: Cut into thick slices, preferably day-old for the best texture.
  • 2 cups Half-n-Half or Heavy Cream: This adds a rich and creamy base to your custard.
  • 4 large Eggs: Essential for binding the mixture together and achieving that classic French toast texture.
  • 1/4 cup Sugar: For a touch of sweetness that balances the dish.
  • 2 teaspoons Vanilla Extract: Adds a warm, comforting flavor to the custard.
  • 1/2 teaspoon Cinnamon: A hint of spice that elevates the overall taste.
  • Salted Butter: For frying, ensuring that golden crust and flavor.

How to Make the Best French Toast Recipe

Let’s get cooking! Follow these simple steps for the ultimate French toast experience:

Step 1: Prepare the Bread

Begin by slicing the challah or brioche bread into thick slices, about 3/4 to 1 inch thick. Using day-old bread is preferred, as it holds up better and soaks the custard mixture evenly without falling apart.

Step 2: Mix the Custard

In a large mixing bowl, whisk together the half-n-half or heavy cream, eggs, sugar, vanilla extract, and cinnamon until fully combined. For a smoother custard, consider using an immersion blender to ensure the cinnamon is evenly distributed.

Step 3: Soak the Bread

Dip each slice of bread into the custard mixture, ensuring both sides are fully submerged. Let the bread soak for about 20 seconds per side, allowing it to absorb enough custard to be rich but not soggy. Lift the bread out and let excess custard drip off.

Step 4: Cook Low and Slow

Heat a skillet or frying pan over medium-low heat and add a generous amount of salted butter. Allow the butter to melt completely, creating the perfect golden crust. Place the soaked bread slices in the skillet and cook each side for 3 to 5 minutes, adjusting the heat to low if the exterior browns too quickly.

Step 5: Serve and Enjoy

Once golden brown, remove the French toast from the skillet and serve immediately. Garnish with a sprinkle of powdered sugar, additional salted butter if desired, and a generous drizzle of real maple syrup to elevate every bite!

Pro Tips for Perfect French Toast

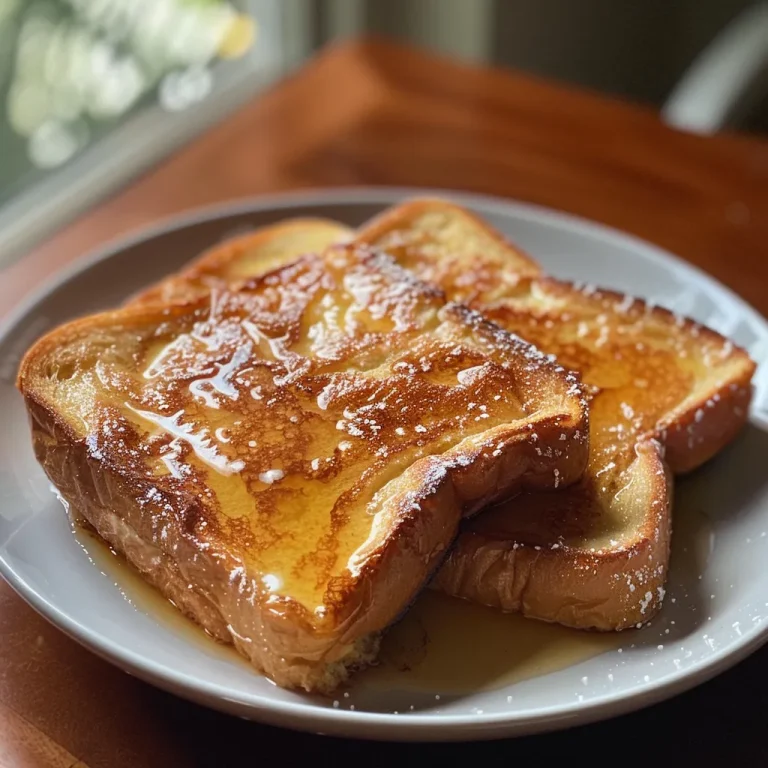
Side angle of golden brown French toast on a plate, garnished with powdered sugar.

To ensure your French toast turns out perfectly every time, consider these expert insights:

  • Use Stale Bread: Day-old bread is key for achieving that perfect texture; fresh bread may become too soggy.
  • Blend the Custard: Blending helps to combine all ingredients smoothly, ensuring an even flavor.
  • Low Heat is Key: Cooking on low heat allows the custard to cook through without burning the outside.
  • Don’t Rush the Soak: Letting the bread soak adequately ensures it absorbs enough custard for flavor and texture.
  • Experiment with Flavors: Feel free to add spices like nutmeg or flavors like orange zest for a unique twist!
  • Keep it Warm: If you’re making a large batch, keep finished French toast warm in a 200°F (93°C) oven until ready to serve.
  • Try Different Breads: While challah and brioche are classic choices, experimenting with sourdough or even croissants can yield delicious results.
  • Use Quality Maple Syrup: Opt for real maple syrup rather than imitation for the best flavor.

Common Mistakes and Troubleshooting

Even the best chefs can make mistakes. Here are common pitfalls to avoid:

  • Soggy Toast: If your toast is soggy, try reducing the soaking time or using firmer bread.
  • Burnt Edges: If the edges of your toast burn, lower the cooking temperature and try cooking longer for a more even result.
  • Under-seasoned Custard: Always taste your custard mixture before soaking the bread to ensure it’s flavorful enough.

Delicious Variations on French Toast

Want to get creative? Here are some delicious variations to try:

  • Stuffed French Toast: Stuff slices with cream cheese, fruit preserves, or Nutella for an indulgent twist.
  • French Toast Casserole: Prepare a large batch in a baking dish for easy serving at brunch.
  • Savory French Toast: Skip the sugar and add herbs and cheese for a delightful savory option.
  • Fruit Topped French Toast: Top with fresh berries, bananas, or sautéed apples for a fruity delight.

Storage and Make-Ahead Instructions

If you’d like to prepare your French toast in advance, here’s how:

  • Make Ahead: You can prepare the custard mixture the night before and store it in the fridge. Simply soak the bread in the morning and cook.
  • Storing Leftovers: Store any leftover French toast in an airtight container in the fridge for up to 3 days. Reheat in a toaster or skillet.
  • Freezing: You can freeze cooked French toast slices between layers of parchment paper for up to 2 months. Reheat in the toaster or oven.

FAQs About French Toast

Here are some frequently asked questions to enhance your French toast knowledge:

  • Can I use gluten-free bread? Absolutely! Gluten-free bread works well in this recipe; just make sure it’s sturdy.
  • What’s the best way to reheat French toast? The toaster or oven works best to maintain that crispy texture when reheating.
  • Can I add alcohol to the custard? A splash of rum or bourbon can add a delightful depth of flavor.
  • How can I make this dairy-free? Substitute the half-n-half with almond milk or coconut milk and use dairy-free butter for frying.
  • What toppings can I use? Consider fresh fruit, whipped cream, or even a drizzle of chocolate sauce!
  • How do I know when the French toast is done? The toast should be golden brown on the outside and cooked through on the inside.
  • Is this recipe suitable for kids? Yes! Kids love French toast, especially with fun toppings and flavors!
  • Can I make this recipe vegan? You can substitute eggs with flaxseed meal and use plant-based milk and butter.

Nutrition Tips and Dietary Adaptations

This French toast recipe can be adapted to meet various dietary needs:

  • Lower Sugar: Reduce the sugar in the custard for a healthier option.
  • Whole Grain Options: Use whole grain bread for added fiber and nutrients.
  • Protein Boost: Add protein powder to the custard for a more filling breakfast.

Equipment Recommendations

Here’s what you’ll need to make the best French toast:

  • Skillet or Griddle: A non-stick skillet or griddle is ideal for cooking French toast evenly.
  • Whisk or Blender: For mixing the custard ingredients thoroughly.
  • Spatula: A flexible spatula helps flip the toast without breaking it.

Serving Suggestions

For the ultimate presentation, consider these serving suggestions:

  • Garnish with Fresh Mint: A sprig of mint adds a pop of color and freshness.
  • Serve with a Fruit Compote: A warm fruit compote can enhance the dish beautifully.
  • Pair with Coffee or Tea: A cup of coffee or tea complements the flavors perfectly.

In conclusion, this best French toast recipe is sure to become a staple in your breakfast repertoire. With its delightful flavors, rich textures, and endless customization options, you’ll find yourself making it again and again. Let’s celebrate the joy of cooking and the love of sharing meals with those we cherish. So gather your ingredients, follow the steps, and take a moment to enjoy the cozy atmosphere of a homemade breakfast. Bon appétit!

Best French Toast Recipe

Prep Time 10 minutes
Cook Time 15 minutes
Total Time 25 minutes
Servings 4 servings
Calories 350
This classic French toast recipe delivers perfectly golden, custardy slices with minimal effort. Ideal for a cozy breakfast or brunch.

Ingredients

Bread

  • 2 cups Half-n-Half or Heavy Cream
  • 4 large Eggs
  • 1/4 cup Sugar
  • 2 teaspoons Vanilla Extract
  • 1/2 teaspoon Cinnamon
  • enough for skillet Salted Butter (for cooking)

Bread

  • 1 loaf Challah or Brioche Bread (cut into thick slices, preferably day-old)

Instructions 

  • Slice bread into 3/4 to 1 inch thick slices and prepare custard mixture.
  • Whisk together cream, eggs, sugar, vanilla, and cinnamon until smooth.
  • Dip bread slices into custard, soak for 20 seconds per side, then drain excess.
  • Melt butter in skillet over medium-low heat. Cook soaked bread 3-5 minutes per side until golden.
  • Serve immediately with powdered sugar, butter, and maple syrup.

Notes

Use day-old bread for best texture and absorption.
Calories: 350kcal
Cost: $15
Course: Breakfast
Cuisine: French
Keyword: French Toast

Welcome to the delightful world of Greek Yogurt Rolls! If you’ve ever yearned for a quick, easy, and delicious bread recipe that requires just two ingredients, you’re in for a treat. These rolls are soft, fluffy, and perfect for any occasion—from family dinners to casual gatherings with friends. In this culinary adventure, we’ll explore the joy of making these Mediterranean-inspired rolls that will not only impress your guests but also fill your kitchen with the warm aromas of baking bliss. So, grab your apron and let’s dive in!

Why You’ll Love This Recipe

This recipe isn’t just about convenience; it’s about creating something special. Here are five specific reasons to fall in love with these Greek yogurt rolls:

  • Quick Preparation: With just two main ingredients, these rolls come together in a matter of minutes, making them perfect for busy weeknights or last-minute gatherings.
  • No Yeast Hassles: Forget about waiting for dough to rise! These rolls eliminate the need for yeast, making the process straightforward and stress-free.
  • Healthier Choice: Made with Greek yogurt, these rolls are a healthier alternative to traditional bread. The yogurt adds protein and moisture without excess fat.
  • Versatile Flavor: Whether you want to serve them plain, add herbs, or sprinkle sesame seeds, these rolls can be customized to suit your taste.
  • Perfect for Any Meal: Serve them warm alongside soups, stews, or as a base for sandwiches—these rolls are as versatile as they are delicious!

Ingredient Breakdown

Let’s take a closer look at the ingredients that make these delightful rolls. Understanding each component allows for better substitutions and creativity in your cooking.

  • 1 cup thick plain Greek yogurt: This acts as the primary binding agent. You can also use coconut yogurt for a dairy-free version; just ensure it’s thick enough.
  • 1 cup self-raising flour: This flour already contains baking powder and salt, providing lift without the need for yeast. If you don’t have self-raising flour, you can make your own by combining 1 cup all-purpose flour with 1.5 teaspoons baking powder and a pinch of salt.
  • 1 beaten egg (optional): Brushing the rolls with a beaten egg before baking gives them a beautiful golden color and adds richness.
  • Sesame seeds or preferred toppings (optional): Customize your rolls with toppings like poppy seeds, herbs, or even cheese to elevate their flavor.

Pro Tips for Perfect Rolls

Want to elevate your Greek yogurt rolls? Here are some expert insights:

  • Don’t over-knead: When mixing the dough, knead just until combined to ensure the rolls remain soft and fluffy.
  • Use room temperature yogurt: For better mixing and a smoother dough, let your yogurt sit out for a bit before using.
  • Preheat your oven: Make sure your oven is fully preheated before placing the rolls inside. This ensures they rise properly and develop a lovely crust.
  • Experiment with flavors: Try adding spices like garlic powder or dried herbs to the dough for an extra flavor kick.
  • Shape with care: Shape the rolls gently to retain air pockets, which contribute to their fluffiness.
  • Store properly: Keep any leftover rolls in an airtight container at room temperature for up to 2 days.
  • Freezing tips: If you make a batch ahead, freeze them in a single layer on a baking sheet, then transfer to a zip-top bag. Reheat directly from frozen!
  • Use parchment paper: Line your baking sheet with parchment for easy cleanup and to prevent sticking.

Common Mistakes and Troubleshooting

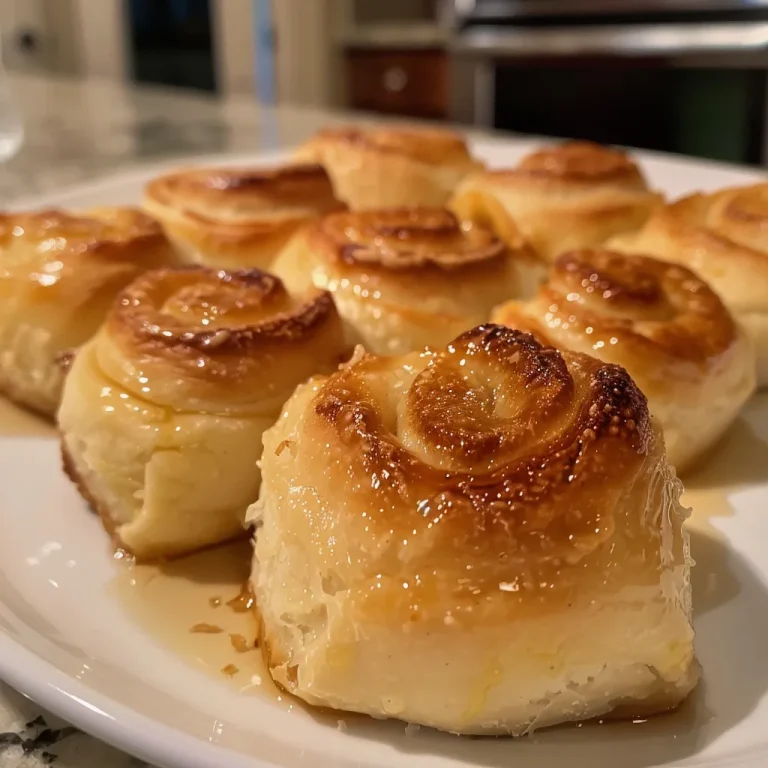
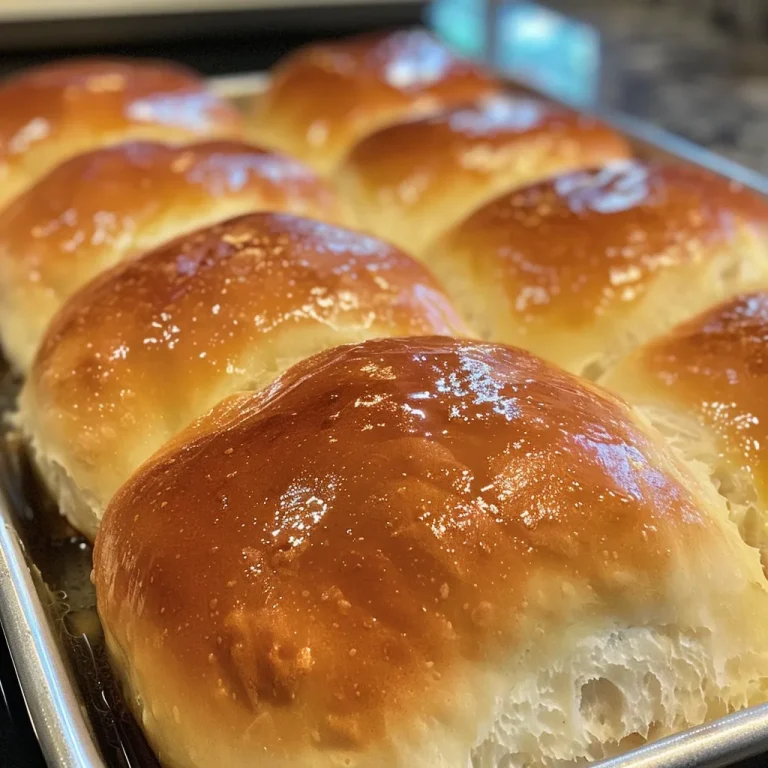
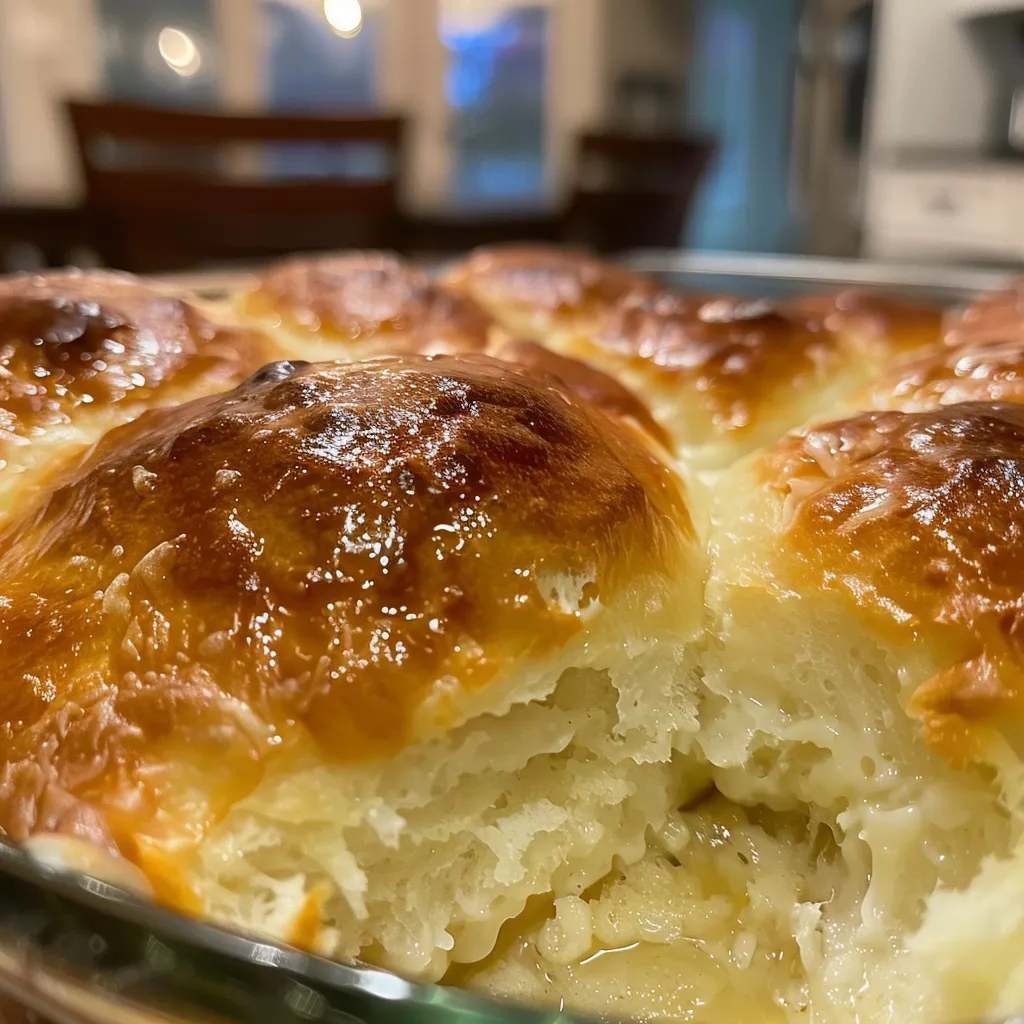
Side view of freshly baked Greek yogurt rolls with a fluffy texture.

Even the best cooks can run into hiccups. Here are some common pitfalls and how to avoid them:

  • Dough too sticky: If the dough is too sticky, gradually add more flour until it reaches a workable consistency. Aim for a soft but not overly wet dough.
  • Dough too dry: If the dough feels crumbly or dry, add a spoonful of yogurt or water to bring it together.
  • Rolls not rising: Ensure your self-raising flour is fresh and that your oven is preheated to the correct temperature before baking.
  • Burnt bottoms: If you’re getting burnt bottoms, try moving your baking sheet to a higher rack in the oven for more even cooking.

Delicious Variations

Feel free to get creative! Here are some variations to try with your Greek yogurt rolls:

  • Herb-Infused Rolls: Mix in finely chopped fresh herbs like rosemary or thyme for a fragrant twist.
  • Cheese-Stuffed Rolls: Add a teaspoon of your favorite cheese (like feta or mozzarella) in the center before baking for a cheesy surprise.
  • Garlic Butter Topping: Brush the rolls with melted garlic butter right after baking for a rich, savory flavor.
  • Sweet Cinnamon Rolls: Add a sprinkle of cinnamon and sugar to the dough for a sweet breakfast treat!

Storage and Make-Ahead Instructions

Planning ahead is key to stress-free cooking. Here’s how to manage your Greek yogurt rolls:

  • Make ahead: Prepare the dough and shape the rolls, then refrigerate them for up to 24 hours before baking.
  • Storage: Keep baked rolls in an airtight container at room temperature for 2 days, or freeze for up to 3 months.
  • Reheating: To reheat, pop them in a warm oven (350°F/175°C) for about 10-15 minutes, or microwave for a few seconds until warm.

Frequently Asked Questions

Let’s address some common questions about making Greek yogurt rolls:

  • Can I use regular yogurt instead of Greek yogurt? Yes, but the texture may be a bit different. Greek yogurt is thicker and gives a better result.
  • What if I don’t have self-raising flour? Mix all-purpose flour with baking powder and a pinch of salt to create your own self-raising flour.
  • Can I add ingredients like nuts or seeds? Absolutely! Just make sure to adjust the flour slightly if you add heavier ingredients.
  • Are these rolls gluten-free? You can make them gluten-free by using a gluten-free all-purpose flour blend.
  • What’s the best way to serve these rolls? Serve warm with butter, garlic spread, or alongside your favorite soups and salads.
  • How do I know when they’re done baking? They should be golden brown on top and sound hollow when tapped on the bottom.
  • Can I double the recipe? Yes, just ensure you have enough space on your baking sheet and adjust your baking time as needed.
  • Can I make these rolls dairy-free? Yes, use coconut yogurt instead of Greek yogurt.

Nutrition Tips and Dietary Adaptations

These Greek yogurt rolls can fit into various dietary preferences:

  • Low-carb option: Substitute with almond flour for a lower-carb version, adjusting the liquid as needed.
  • Dairy-free: As mentioned, use coconut yogurt to make these rolls suitable for a dairy-free diet.
  • Protein boost: Add a scoop of protein powder to the dough for a nutritious twist.

Essential Equipment Recommendations

For the best results, consider having these tools on hand:

  • Mixing bowl: A large bowl for mixing your ingredients.
  • Baking sheet: A sturdy baking sheet to ensure even baking.
  • Parchment paper: For easy cleanup and to prevent sticking.
  • Measuring cups and spoons: Accurate measurements are key to success.

Serving Suggestions

Now that you’ve made these delightful Greek yogurt rolls, here are a few ways to enjoy them:

  • As a side: Pair them with a hearty soup or stew for a comforting meal.
  • For breakfast: Slather with butter and jam or serve with eggs for a delightful breakfast.
  • As a base: Use them for sandwiches or sliders, adding your favorite fillings for a quick lunch.

So there you have it—the definitive guide to mastering Greek yogurt rolls! With their simplicity and incredible flavor, these rolls will surely become a staple in your kitchen. So gather your ingredients, get your hands doughy, and let the magic unfold in your kitchen. Happy cooking!

Quick & Easy 2 Ingredient Greek Yogurt Rolls (No Yeast)

Prep Time 10 minutes
Cook Time 10 minutes
Total Time 20 minutes
Servings 4 rolls
Calories 150
These simple and delicious Greek yogurt rolls require just two ingredients and are perfect for a quick snack or breakfast.

Ingredients

Main

  • 1 cup thick plain greek yogurt
  • 1 cup self-raising flour
  • 1 beaten egg beaten egg (optional)
  • optional Sesame seeds or preferred toppings

Instructions 

  • Mix Greek yogurt and self-raising flour until a dough forms.
  • Divide dough into 4 equal portions and shape into rolls.
  • Optional: Brush with beaten egg and sprinkle sesame seeds or toppings.
  • Bake at 375°F (190°C) for 10 minutes until golden.

Notes

Use fresh ingredients for best flavor and texture.
Calories: 150kcal
Cost: $5
Course: Breakfast, Snack
Cuisine: Greek
Keyword: Quick, Yogurt

Discover the Joy of Homemade Pita Bread

Welcome to your culinary adventure where we transform simple ingredients into a warm, fluffy delight that’s perfect for sharing, dipping, or stuffing! This pita bread recipe is not just about the final product; it’s a celebration of Mediterranean flavors, a nod to family traditions, and an invitation to gather around the table. Let’s dive into the delightful world of **homemade pita bread**, where each bite brings you closer to the heart of Mediterranean cuisine.

Why You’ll Love This Recipe

This pita bread recipe is a true gem for many reasons. Here are just a few:

  • Easy to Make: With just a handful of **simple ingredients**, this recipe is perfect for both novice and seasoned cooks.
  • Fluffy Texture: The secret lies in the right rising technique, creating that perfect puff that makes pita bread so beloved.
  • Versatile Uses: Whether for **morning breakfast** with eggs, a savory lunch with dips, or a cozy dinner with fillings, homemade pita is endlessly adaptable.
  • Budget Friendly: Making your own pita bread saves money, allowing you to enjoy fresh, healthy bread without the premium price tag.
  • Family Fun: Involve your loved ones in the cooking process! Making pita is a wonderful way to bond and create lasting memories.

Ingredients You’ll Need

Here’s what you’ll need to whip up this delightful pita bread:

  • 2 tablespoons granulated sugar: This helps activate the yeast and adds a touch of sweetness.
  • 1 tablespoon active dry yeast: The heart of that fluffy, airy texture.
  • 1 cup warm water: Not too hot! Just warm enough to wake the yeast.
  • 2 teaspoons salt: A crucial element that enhances flavor.
  • 1.5 tablespoons olive oil: Adds richness and moisture to the dough.
  • 3 cups all-purpose flour: For the perfect structure of your pita.

How to Make Pita Bread: Step-by-Step

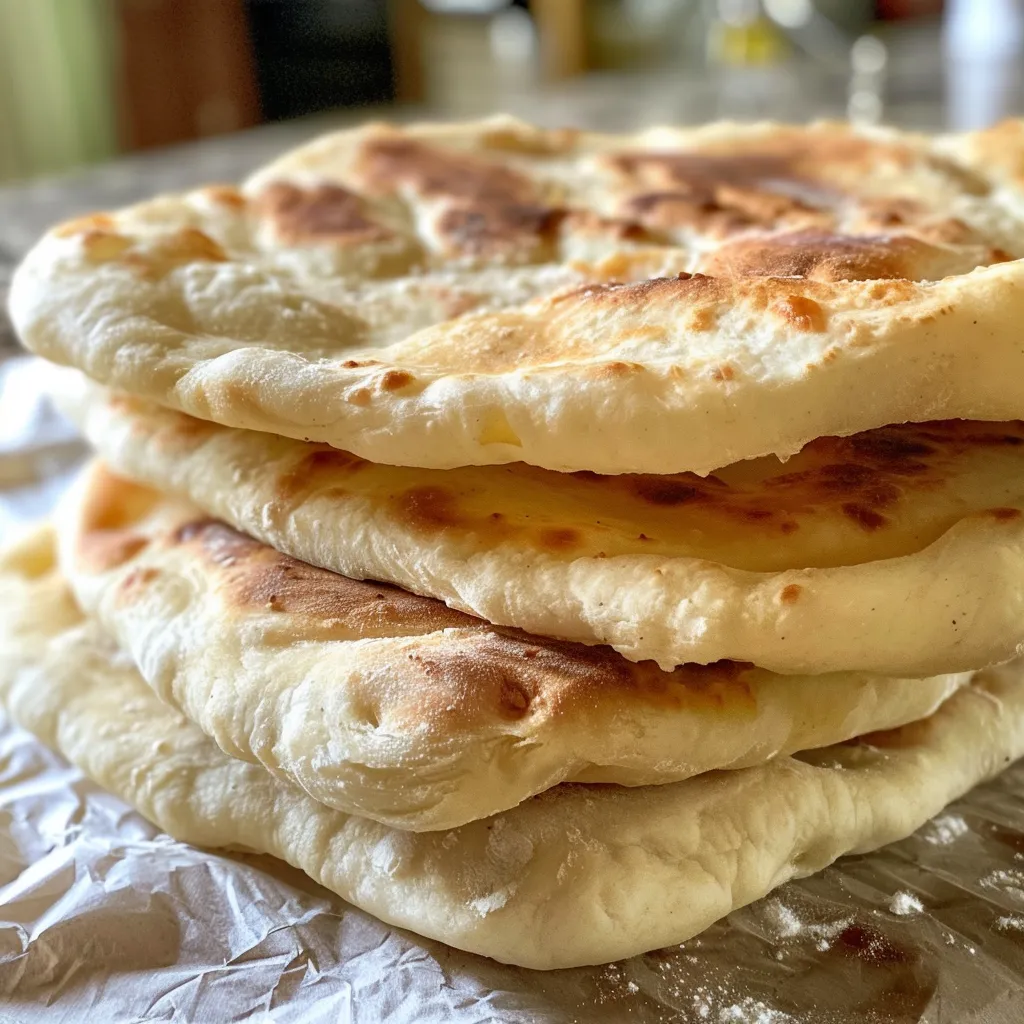
Side view of a freshly baked pita bread displaying its pocket.

Let’s get our hands doughy! Follow these steps for a perfect homemade pita bread:

  1. Activate the Yeast: Whisk together the sugar and yeast in a large bowl. Stir in the warm water and let it sit for about 5 minutes until frothy.
  2. Mix the Dough: Add salt and olive oil to the yeast mixture. Gradually stir in 2.5 cups of flour until the dough pulls away from the bowl.
  3. Knead Until Smooth: Transfer the dough to a floured surface and knead for about 15 minutes until smooth and stretchy.
  4. First Rise: Place the dough in an oiled bowl, cover it, and let it rise for 1 hour until it’s doubled in size.
  5. Portion and Rest: Divide the dough into 10 pieces, shape them into balls, cover, and rest for 20 minutes.
  6. Roll Out: Roll each ball into a 6-inch, 1/4-inch thick disk.
  7. Cook and Puff: Cook each pita in a lightly oiled skillet over medium heat, flipping them until puffed and golden brown.

Pro Tips for Perfect Pita

To help you on your journey to pita perfection, here are some expert insights:

  • Temperature Matters: Ensure your water is warm but not hot; too hot can kill the yeast.
  • Resting Time: Don’t rush the resting period; it’s essential for developing flavor and texture.
  • Use a Cast Iron Skillet: For even heat distribution, a cast iron skillet works wonders.
  • Watch for Puffing: Once you see the pita puff up, flip it to cook the other side; this creates that airy pocket.
  • Experiment with Flour: For a nuttier flavor, try using whole wheat flour in place of some of the all-purpose flour.
  • Keep Pitas Warm: Place cooked pitas in a towel-lined basket to keep them warm and soft.
  • Make-ahead Dough: You can prepare the dough in advance and refrigerate it for up to 2 days before baking.
  • Perfect for Meal Prep: Make a batch and store them for quick meals throughout the week.

Common Mistakes and Troubleshooting

Even the best cooks encounter hurdles. Here are some common mistakes and how to fix them:

  • Pita Doesn’t Puff: Ensure the oven or skillet is hot enough and that the dough has risen correctly.
  • Dough is Sticky: Add a little more flour during kneading until it’s manageable.
  • Pita is Tough: Knead gently and don’t overwork the dough; it should be soft and elastic.
  • Flavors Are Bland: Don’t skip the salt, as it enhances all other flavors.

Delicious Variations of Pita Bread

Feel free to get creative! Here are some delightful variations:

  • Herbed Pita: Incorporate dried herbs like oregano or thyme into the dough for added flavor.
  • Garlic Pita: Brush the freshly cooked pita with garlic-infused olive oil for a fragrant twist.
  • Whole Wheat Pita: Substitute half of the all-purpose flour with whole wheat flour for a healthier option.
  • Cheese-Stuffed Pita: Before sealing the dough, add a sprinkle of feta or mozzarella for a cheesy surprise.

Storage and Make-Ahead Instructions

To enjoy your homemade pita bread longer:

  • Room Temperature: Store in a sealed bag for up to 3 days.
  • Refrigeration: For longer storage, keep in the fridge for up to a week.
  • Freezing: Freeze pitas flat in a zip-top bag for up to 3 months. Reheat directly from frozen.

Comprehensive FAQ

Here are some frequently asked questions to guide you on your pita-making journey:

  • Can I use instant yeast instead of active dry yeast? Yes, you can use instant yeast; just mix it directly with the dry ingredients.
  • How can I make gluten-free pita? Substitute the flour with a gluten-free all-purpose blend and add a little xanthan gum for elasticity.
  • What if my pita bread is too thick? Roll the dough thinner next time and ensure even cooking temperature.
  • Can I bake the pita instead of frying? Absolutely! Bake in a preheated oven at 475°F until puffed.
  • What can I serve with pita bread? Serve with hummus, tzatziki, or stuffed with falafel or grilled vegetables.
  • How do I know when the dough is ready to rise? It should double in size and feel light and airy.
  • Can I flavor the water? Infusing the water with herbs can add a subtle flavor to your pita.
  • What’s the best way to reheat pita? Warm them in a skillet or wrap them in foil and place in the oven for a few minutes.

Nutritional Tips and Dietary Adaptations

This pita bread can be adapted for various dietary needs:

  • Vegan Option: This recipe is naturally vegan, making it perfect for plant-based diets.
  • Low-Carb Alternative: Try using almond or coconut flour for a keto-friendly version.
  • High-Protein Additions: Mix in protein powder to the dough for a protein boost.

Recommended Equipment

Here’s what you’ll need to get started:

  • Large Mixing Bowl: For combining and rising the dough.
  • Rolling Pin: Essential for rolling out your pita dough.
  • Skillet or Baking Stone: For cooking the pitas evenly.
  • Flour Sifter: To ensure your flour is lump-free.

Serving Suggestions

Now that your homemade pita bread is ready, here are some delightful ways to serve it:

  • Dipping Delight: Serve with a variety of dips such as hummus, baba ganoush, or tzatziki.
  • Stuffed Pitas: Fill with grilled meats, fresh vegetables, or falafel for a hearty meal.
  • Breakfast Pita: Stuff with scrambled eggs, spinach, and feta for a nutritious morning boost.
  • Salad Wrap: Use as a wrap to hold your favorite salad ingredients for a fresh lunch option.

In conclusion, making homemade pita bread is not just about the food; it’s about the experience, the flavors, and the memories we create around the table. So gather your loved ones, roll up your sleeves, and let’s celebrate the joy of cooking together. Enjoy your culinary journey, and may every bite be filled with warmth and happiness!

Pita Bread Recipe

Prep Time 15 minutes
Cook Time 10 minutes
Total Time 25 minutes
Servings 10 pieces
Calories 150
Enjoy homemade pita bread with this simple and quick recipe, perfect for wraps or dipping.

Ingredients

Dough

  • 2 tablespoons granulated sugar
  • 1 tablespoon active dry yeast
  • 1 cup warm water
  • 2 teaspoons salt
  • 1.5 tablespoons olive oil
  • 3 cups all-purpose flour, divided

Instructions 

  • Mix sugar and yeast in a bowl, add warm water, and let sit until frothy.
  • Add salt, olive oil, and 2.5 cups flour; knead until smooth, then rest for 1 hour.
  • Divide dough into 10 balls, rest for 20 minutes.
  • Roll each into 6-inch disks and cook in a skillet until puffed and cooked through.

Notes

Ensure the dough is kneaded well for soft pita.
Calories: 150kcal
Cost: $5
Course: Bread
Cuisine: Mediterranean
Keyword: Pita

Indulge in a Morning Delight: The Ultimate French Toast Experience

Welcome, fellow food enthusiasts! Today, we embark on a delicious journey to create the most exquisite French Toast that will make your taste buds dance with joy. Imagine waking up to the aroma of rich, buttery bread sizzling on the griddle, infused with hints of cinnamon and vanilla. This is not just breakfast; it’s a celebration of flavors and a moment to cherish with loved ones. So, grab your favorite plate, and let’s dive into crafting the best French Toast that will elevate your mornings to new heights!

Why You’ll Love This Recipe

  • Golden Perfection: Every slice is cooked to a golden brown, achieving that perfect balance of crisp edges and a soft, custardy center.
  • Rich Flavor Profile: Infused with vanilla and cinnamon, this recipe introduces a delightful sweetness that dances on your palate.
  • Versatile Toppings: Enjoy it with an array of toppings—maple syrup, fresh fruit, whipped cream, or even a dusting of powdered sugar to suit your mood!
  • Simple Ingredients: Made with just a few pantry staples, this recipe is both budget-friendly and easy to whip up on any weekday or special occasion.
  • Make Ahead Friendly: Prepare the custard in advance and assemble the night before for a quick, stress-free breakfast the next day!

Ingredients Breakdown

Let’s gather our ingredients to create this morning masterpiece! Here’s what you’ll need:

  • 1 loaf Challah or Brioche Bread: The star of the show! Day-old bread works best for optimal soaking.
  • 2 cups Half-n-Half or Heavy Cream: For a rich custard that delivers creaminess in every bite.
  • 4 large Eggs: These provide structure and richness to your French Toast.
  • 1/4 cup Sugar: A touch of sweetness to elevate the flavors.
  • 2 teaspoons Vanilla Extract: Adds aromatic depth and richness.
  • 1/2 teaspoon Cinnamon: The quintessential spice that brings warmth to your dish.
  • Salted Butter: For frying, ensuring that golden crust.

How to Make the Best French Toast

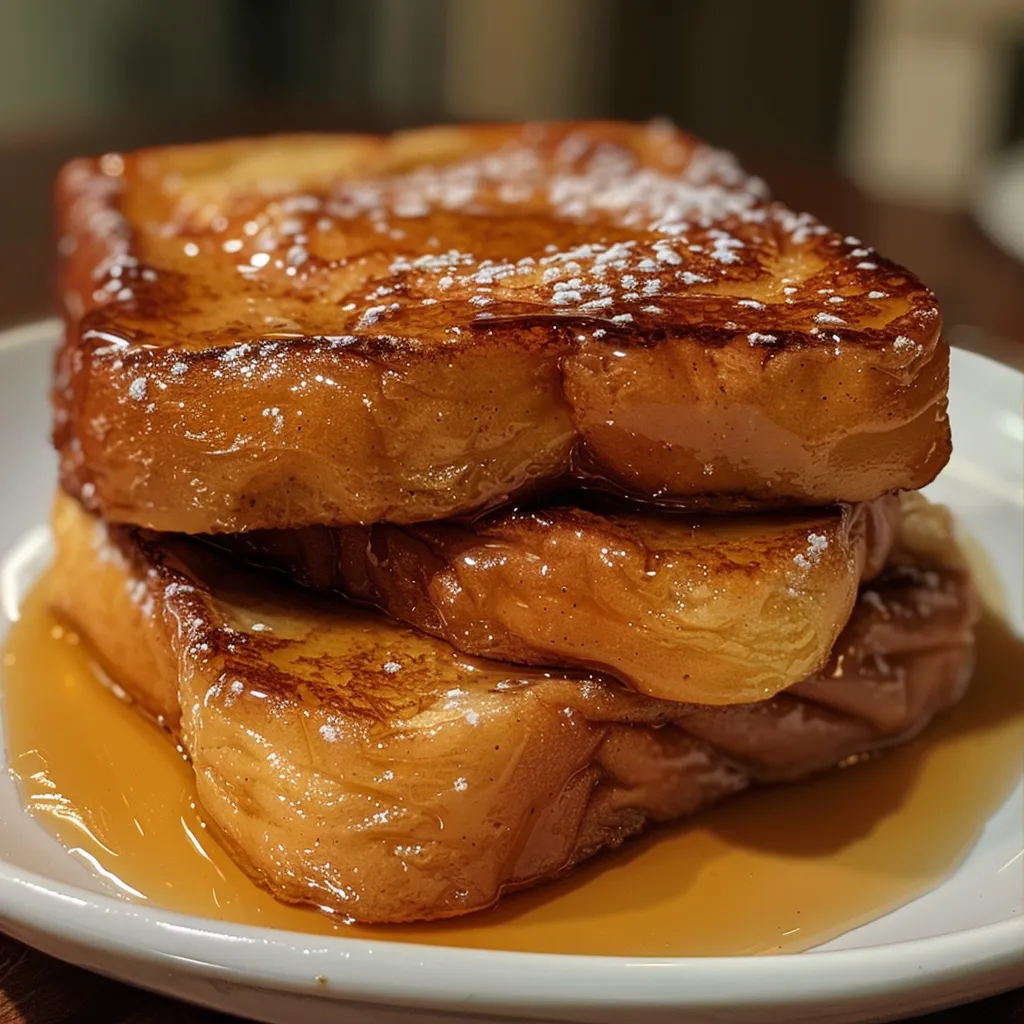
Side view of fluffy French toast slices arranged on a plate.

Now that we have our ingredients ready, let’s get cooking! Follow these simple steps to achieve French Toast perfection:

  1. Slice the Challah or Brioche bread into thick slices (about 1 inch). For best results, use day-old bread as it absorbs the custard without falling apart.
  2. In a shallow dish, whisk together the Half-n-Half or Heavy Cream, eggs, sugar, vanilla extract, and cinnamon until combined. For a smoother custard, blend the mixture.
  3. Dip each slice of bread into the custard, soaking both sides for about 20 seconds. Let any excess custard drain off before cooking.
  4. Heat a large skillet or griddle over medium-low heat and add a generous amount of butter.
  5. Cook each slice of French Toast for about 3-5 minutes per side, until they are golden brown and cooked through. Adjust the heat as necessary to prevent burning.
  6. Serve immediately with a sprinkle of powdered sugar, a pat of salted butter, and a drizzle of maple syrup.

Pro Tips for French Toast Mastery

  • Use Day-Old Bread: Fresh bread can become too soggy. Day-old bread holds up better during soaking.
  • Don’t Rush the Cooking: Cooking on medium-low heat allows the custard to set without burning the outside.
  • Experiment with Flavors: Add a splash of orange zest or a dash of nutmeg for a unique twist.
  • Keep Them Warm: If making multiple batches, keep cooked French Toast warm in a low oven (200°F or 93°C).
  • Get Creative with Toppings: Try yogurt, honey, or even chocolate spread for an added layer of flavor!
  • Make It Savory: Add cheese and herbs for a savory version or serve with eggs and bacon for a complete brunch.
  • Use a Non-Stick Pan: This helps avoid sticking and makes flipping easier.
  • Thicker Slices Are Better: They hold more custard and provide a better texture.

Common Mistakes and Troubleshooting

Even the best chefs can run into a few hiccups! Here are some common issues and how to fix them:

  • Problem: Soggy French Toast: Likely caused by using fresh bread or soaking too long. Use day-old bread and limit soaking time.
  • Problem: Uneven Cooking: Ensure your heat is at the right temperature; too high can burn the outside while leaving the inside uncooked.
  • Problem: Sticking to the Pan: This can happen if the pan isn’t hot enough or not enough butter is used. Ensure the pan is properly heated and generously greased.
  • Problem: Bland Flavor: Make sure to season the custard well with sugar and spices. A pinch of salt can also enhance sweetness.

Delicious Variations to Try

Now that you’ve mastered the classic recipe, why not switch things up? Here are some delightful variations to explore:

  • Stuffed French Toast: Fill your slices with cream cheese, berries, or Nutella for an indulgent twist.
  • Banana Bread French Toast: Use banana bread instead of Challah or Brioche for a fruity flavor.
  • Chocolate Chip French Toast: Sprinkle chocolate chips on the custard-soaked bread before cooking for a sweet surprise.
  • Savory French Toast: Add herbs and cheese to the custard for a savory delight, perfect for brunch!

Storage and Make-Ahead Instructions

If you want to enjoy this French Toast at a later date, here’s how to store it properly:

  • Storing Leftovers: Place any leftover French Toast in an airtight container in the refrigerator for up to 3 days.
  • Reheating: To reheat, place in a toaster or air fryer until warmed through, or use an oven set to 350°F (175°C) for about 10-15 minutes.
  • Make-Ahead Option: Prepare the custard mixture the night before and store it in the fridge. Assemble everything in the morning for a quick breakfast!

Frequently Asked Questions

Let’s tackle some common questions about French Toast:

  • Can I use any type of bread?: Absolutely! While Challah and Brioche are preferred for their texture, any thick bread will work well.
  • What’s the best way to make French Toast crispy?: Cooking on medium-low heat allows the custard to set while creating a crispy exterior. Don’t skip the butter!
  • Can I make this gluten-free?: Yes! Substitute the bread with a gluten-free variety, and ensure the other ingredients are gluten-free as well.
  • How do I add flavors to the custard?: Experiment with different extracts like almond or maple, or add spices like nutmeg or cardamom.
  • Is French Toast healthier without sugar?: You can reduce sugar or use natural sweeteners like honey or maple syrup for a healthier option.
  • Can I freeze French Toast?: Yes! Freeze individual slices between layers of parchment paper for easy reheating later.
  • What toppings do you recommend?: Fresh fruits, whipped cream, or even a dollop of yogurt make great additions!
  • How do I prevent soggy French Toast?: Use day-old bread and don’t soak for too long to achieve the right texture.

Nutritional Tips and Dietary Adaptations

Looking to make your French Toast a bit healthier or more inclusive? Here are some tips:

  • Low-Fat Option: Use low-fat milk or almond milk and reduce the sugar for a lighter version.
  • Vegan Variation: Substitute eggs with flaxseed meal and use plant-based milk and butter.
  • Protein Boost: Add protein powder to the custard mixture for a nutritional kick!

Essential Equipment Recommendations

To ensure your French Toast comes out perfect every time, here are some handy kitchen tools:

  • Non-Stick Skillet or Griddle: Essential for preventing sticking and achieving even cooking.
  • Shallow Dish or Baking Pan: Ideal for soaking the bread evenly in the custard.
  • Whisk: For mixing the custard smoothly without lumps.
  • Spatula: A sturdy spatula helps flip the French Toast without breaking it apart.

Serving Suggestions

Finally, let’s talk about how to serve this delightful dish:

  • Plating: Stack the French Toast high and garnish with fresh berries and a dusting of powdered sugar for a beautiful presentation.
  • Pairing Drinks: Serve with freshly brewed coffee, hot chocolate, or a refreshing mimosa for a complete brunch experience.
  • Sharing is Caring: French Toast is best enjoyed with family and friends, so don’t forget to share this delicious dish!

Conclusion: Celebrate Every Bite

And there you have it, my dear friends! A comprehensive guide to crafting the ultimate French Toast experience. From choosing the right bread to mastering the custard, you now have all the tools to create a breakfast that celebrates flavor, tradition, and the joy of togetherness. So gather your loved ones, whip up a batch, and let the wonderful aromas fill your kitchen. Remember, every bite is a celebration of life’s simple pleasures. Happy cooking!

The Best French Toast Recipe: Achieving Golden Perfection! 🍞🍳

Prep Time 10 minutes
Cook Time 10 minutes
Total Time 20 minutes
Servings 4 servings
Calories 350
Enjoy perfectly golden French toast with a rich custard and crispy edges, ideal for a delightful breakfast.

Ingredients

Bread

  • 2 cups Half-n-Half or Heavy Cream
  • 4 large Eggs
  • 1/4 cup Sugar
  • 2 teaspoons Vanilla Extract
  • 1/2 teaspoon Cinnamon
  • Salted Butter Salted Butter

Instructions 

  • Slice bread into 1-inch thick slices; use day-old bread for best results.
  • Whisk together cream, eggs, sugar, vanilla, and cinnamon until smooth.
  • Dip bread slices into custard, soaking both sides, then drain excess.
  • Heat skillet with butter over medium-low heat.
  • Cook slices 3-5 minutes per side until golden brown.
  • Serve with powdered sugar, butter, and maple syrup.

Notes

Use slightly stale bread for better absorption of the custard.
Calories: 350kcal
Cost: $15
Course: Breakfast
Cuisine: French
Keyword: French Toast

Welcome to the World of Savory Cheese Muffins

Ah, the magic of baking! If you’ve never experienced the delight of freshly baked savory cheese muffins, you’re in for a treat. These muffins are more than just a snack; they embody warmth, comfort, and a touch of culinary creativity. Picture this: a golden muffin, bursting with the rich flavors of sharp cheddar and aromatic herbs, perfect for brunch or as a cozy evening treat. Join me, Rafael, as we embark on this flavorful journey and learn to whip up these marvelous muffins that celebrate our Mediterranean roots.

Why You’ll Love This Recipe

These savory cheese muffins aren’t just delicious; they also bring a myriad of benefits to your kitchen. Here’s why you’ll adore them:

  • Versatile Delight: Perfect for breakfast, lunch, or as an evening snack, these muffins can be enjoyed any time of the day.
  • Quick and Easy: With simple ingredients and easy-to-follow steps, you can whip up a batch in no time.
  • Flavorful Combinations: The combination of sharp cheddar and fresh herbs creates a flavor explosion that will leave your taste buds dancing.
  • Make Ahead Friendly: Prepare the batter in advance or freeze the muffins for quick snacks later.
  • Family-Friendly: Kids and adults alike will love these muffins, making them a hit at gatherings.

Ingredient Breakdown: What You Need

Before we dive into the baking process, let’s explore the ingredients that make these muffins a culinary masterpiece. Here’s what you’ll need:

  • 2 ½ cups all-purpose flour: The base for a light and fluffy texture.
  • 1 tablespoon baking powder: Essential for that perfect rise.
  • ½ teaspoon salt: Enhances the overall flavor.
  • ½ teaspoon garlic powder: Adds a savory depth to the muffins.
  • ¼ teaspoon black pepper: A subtle kick to enliven the flavors.
  • 1 ½ cups shredded sharp cheddar cheese: The star of the show, making every bite cheesy and delicious.
  • ¼ cup chopped fresh herbs: Choose from chives, parsley, or dill for freshness.
  • 1 cup whole milk: Keeps the muffins moist and tender.
  • ½ cup unsalted butter: A must for that rich, buttery flavor.

Step-by-Step Instructions

Side view of freshly baked savory cheese muffins, showcasing melted cheese and herb bits.

Ready to bring these muffins to life? Follow these simple steps to create your savory masterpiece:

  1. Preheat your oven to 400°F (200°C). Grease a 12-cup muffin tin with butter or line it with muffin liners.
  2. In a large bowl, whisk together the flour, baking powder, salt, garlic powder, and black pepper until well combined.
  3. Add the shredded cheddar cheese and chopped herbs to the dry ingredients, tossing gently to coat them evenly.
  4. In a separate bowl, whisk together the milk, melted butter, and eggs until smooth and well combined.
  5. Slowly pour the wet ingredients into the dry ingredients and stir gently with a rubber spatula until just combined. Be careful not to overmix the batter.
  6. Divide the batter evenly among the muffin cups, filling each one about 2/3 full.
  7. Bake for 18-20 minutes, or until the tops are golden brown and a toothpick inserted into the center comes out clean.
  8. Allow the muffins to cool for 5 minutes in the tin before transferring them to a wire rack. Serve warm with a pat of butter or a drizzle of honey.

Expert Tips for Perfect Savory Cheese Muffins

To ensure your muffins turn out perfectly every time, here are some expert tips:

  • Don’t Overmix: Mixing too much can lead to dense muffins. Stir until just combined.
  • Fresh Ingredients: Use fresh herbs for maximum flavor; dried herbs can be substituted but will offer a different taste.
  • Room Temperature Ingredients: For the best texture, ensure your milk and eggs are at room temperature.
  • Check for Doneness: Ovens can vary; keep an eye on your muffins to prevent overbaking.
  • Experiment with Cheese: Try different cheese varieties like feta or mozzarella for unique flavors.
  • Adding Extras: Consider adding cooked bacon or sun-dried tomatoes for an extra layer of flavor.
  • Muffin Liners: Using liners makes cleanup easier and helps the muffins retain their shape.
  • Cool Completely: Allow muffins to cool on a wire rack to prevent sogginess.

Common Mistakes and Troubleshooting

Even the most seasoned bakers can make mistakes. Here’s how to avoid common pitfalls:

  • Dense Muffins: This often occurs from overmixing the batter. Mix gently!
  • Flat Muffins: Ensure your baking powder is fresh; expired leavening agents can ruin the rise.
  • Dry Muffins: If your muffins are dry, check your oven temperature and avoid overbaking.
  • Flavorless Muffins: Don’t skimp on seasoning; a little salt and pepper elevate the flavors.

Delicious Variations to Try

Feeling adventurous? Here are some delightful variations to customize your savory cheese muffins:

  • Spicy Jalapeño Cheese Muffins: Add diced jalapeños for a kick!
  • Herbed Goat Cheese Muffins: Swap out the cheddar for creamy goat cheese and add fresh herbs.
  • Spinach and Feta Muffins: Incorporate fresh spinach and crumbled feta for a Mediterranean twist.
  • Smoked Salmon and Dill Muffins: Perfect for brunch, add smoked salmon and dill for a luxurious muffin experience.

Storage and Make-Ahead Instructions

Planning ahead? Here’s how to store and prepare these muffins:

  • Room Temperature: Store leftover muffins in an airtight container at room temperature for up to 2 days.
  • Refrigeration: For longer storage, keep them in the fridge for up to a week.
  • Freezing: Freeze muffins in an airtight container for up to 3 months. Reheat in the oven for fresh taste.
  • Make-Ahead Batter: Prepare the batter a day in advance and store it in the fridge. Bake fresh muffins whenever you like!

FAQ: Your Questions Answered

Let’s tackle some common questions about savory cheese muffins:

  • Can I use gluten-free flour? Yes, but the texture may vary. Experiment with a gluten-free blend.
  • How can I make them dairy-free? Substitute milk with almond or oat milk and use dairy-free cheese.
  • What herbs work best? Fresh chives, parsley, and dill are excellent choices. Feel free to mix and match!
  • Can I use frozen cheese? Yes, just ensure it’s thawed and well-drained before adding.
  • What should I serve with these muffins? Enjoy them with a side salad, soup, or as an accompaniment to a charcuterie board.
  • How do I know when they are done? Insert a toothpick; it should come out clean when they are fully baked.
  • Can I add vegetables? Absolutely! Finely chopped bell peppers or zucchini can be a great addition.
  • Is it possible to double the recipe? Yes, just make sure to adjust your baking time accordingly.

Nutritional Tips and Dietary Adaptations

For those watching their dietary intake, here are some tips:

  • Whole Wheat Flour: Substitute half of the all-purpose flour with whole wheat for added fiber.
  • Reduced Fat Cheese: Opt for low-fat cheddar to cut down on calories.
  • Egg Replacement: Use flax eggs or applesauce for a vegan twist.
  • Portion Control: Enjoy smaller muffins by using a mini muffin tin.

Equipment Recommendations

To make your baking experience smooth, here’s a list of essential tools:

  • Muffin Tin: A non-stick or silicone muffin tin works best for easy release.
  • Mixing Bowls: Have a set of various sizes for mixing dry and wet ingredients.
  • Whisk: A sturdy whisk is essential for blending ingredients smoothly.
  • Rubber Spatula: Perfect for folding ingredients without overmixing.
  • Cooling Rack: Allows muffins to cool evenly, preventing sogginess.

Serving Suggestions

These savory cheese muffins are delightful on their own, but here are some serving ideas to elevate your experience:

  • With a Spread: Try them warm with butter, cream cheese, or even a drizzle of honey.
  • Pair with Soup: Serve alongside a comforting bowl of tomato or pumpkin soup.
  • Brunch Platter: Incorporate them into a brunch spread with fresh fruits and pastries.
  • Picnic Treat: Perfect for picnics, pack them with some fresh salads and dips.

Conclusion: Celebrate Flavor and Togetherness

There you have it! A modern twist on a classic recipe that reflects the vibrant colors and tastes of Mediterranean cuisine. These savory cheese muffins are not just a treat for the palate, but a celebration of togetherness and joy. Whether you’re baking for yourself or sharing with loved ones, each muffin carries the warmth of a home-cooked meal. So grab your apron, preheat that oven, and let’s create some kitchen magic together. Happy baking!

Savory Cheese Muffins

Prep Time 10 minutes
Cook Time 20 minutes
Total Time 30 minutes
Servings 12 muffins
Calories 210
These savory cheese muffins are perfect for breakfast, brunch, or a snack, packed with sharp cheddar and fresh herbs for a flavorful bite.

Ingredients

Dry ingredients

  • 2 ½ cups all-purpose flour
  • 1 tablespoon baking powder
  • ½ teaspoon salt
  • ½ teaspoon garlic powder
  • ¼ teaspoon black pepper

Cheese and herbs

  • 1 ½ cups shredded sharp cheddar cheese
  • ¼ cup chopped fresh herbs (such as chives, parsley, or dill)

Wet ingredients

  • 1 cup whole milk
  • ½ cup unsalted butter, melted and cooled

Instructions 

  • Preheat oven to 400°F (200°C). Grease muffin tin.
  • Mix dry ingredients; add cheese and herbs.
  • Whisk wet ingredients; combine with dry until just mixed.
  • Divide batter into muffin cups, filling 2/3 full.
  • Bake 18-20 minutes until golden; cool slightly before serving.

Notes

For extra flavor, sprinkle with additional herbs before baking.
Calories: 210kcal
Cost: $12
Course: Breakfast, Snack
Cuisine: American
Keyword: Cheese, herbs

Discover the Joy of Quick Greek Yogurt Rolls

There’s something undeniably magical about the aroma of freshly baked bread wafting through your kitchen. Greek yogurt rolls embody that magic while offering a quick and easy solution for those moments when you crave homemade bread without the hassle of yeast. In just a few simple steps, you can create fluffy, delicious rolls that are perfect for any meal. These rolls are made with thick Greek yogurt and self-rising flour, making them an ideal choice for busy weeknights or last-minute gatherings.

Let’s explore why you’ll fall in love with this recipe, how to make it, and some unique variations to suit your taste!

Why You’ll Love This Recipe

  • Quick and Easy: With no yeast involved, these rolls can be prepared and baked in under 30 minutes, making them perfect for spontaneous meals.
  • High Protein: Made with Greek yogurt, these rolls are not only delicious but also packed with protein, adding nutritional value to your dinner table.
  • Versatile: These rolls can be served alongside soups, salads, or as a delightful base for sandwiches, showcasing their adaptability.
  • Customizable: Enjoy the freedom to experiment with various flavors and ingredients, from herbs to spices, making each batch uniquely yours.
  • Healthier Alternative: With no added sugars and made from wholesome ingredients, these rolls are a guilt-free indulgence.

Ingredients Breakdown

To create your Greek yogurt rolls, you’ll need just three primary ingredients. Here’s a detailed breakdown:

  • 1 cup Greek Yogurt: Thick plain yogurt is essential for moisture and a subtle tang. Opt for full-fat for richer flavor, or low-fat if you prefer a lighter option.
  • 1 cup Self-Rising Flour: This is your magic ingredient that provides lift and structure. If you’re looking for a gluten-free option, mix a gluten-free flour blend with 1½ teaspoons of baking powder per cup.
  • 1 Beaten Egg: Adding an egg provides richness and aids in binding the dough. For a vegan alternative, substitute with 3 tablespoons of aquafaba or ¼ cup of unsweetened applesauce.

Step-by-Step Instructions for Greek Yogurt Rolls

Side view of freshly baked no-yeast Greek yogurt rolls, showcasing their soft texture.

Now, let’s roll up our sleeves and dive into the process of creating these delightful rolls. Follow these simple steps:

  1. Preheat the Oven: Set your oven to 400°F (200°C) so it’s nice and hot by the time your rolls are ready.
  2. Mix the Dry Ingredients: In a large bowl, combine the self-rising flour with a pinch of salt to enhance flavor.
  3. Add Greek Yogurt: Incorporate the Greek yogurt into the flour mixture, stirring until a shaggy dough forms.
  4. Incorporate Egg: Add the beaten egg, mixing until well combined. The dough should be slightly sticky but manageable.
  5. Knead Gently: Turn the dough out onto a floured surface and gently knead for about 1 minute, just until it comes together.
  6. Shape the Rolls: Divide the dough into 8 equal portions and shape them into balls. Place them on a baking sheet lined with parchment paper.
  7. Bake: Bake for 15-20 minutes or until the rolls are golden brown on top. You can brush them with melted butter or garlic oil for an extra touch!
  8. Cool and Serve: Allow the rolls to cool slightly before serving warm with your favorite dishes.

Pro Tips for Perfect Greek Yogurt Rolls

  • Use Cold Ingredients: For a fluffier texture, ensure your Greek yogurt and eggs are chilled before mixing.
  • Don’t Overmix: Mix just until combined; overworking the dough can lead to tough rolls.
  • Experiment with Flavors: Add herbs like rosemary or thyme to the dough for an aromatic twist.
  • Serve Warm: Freshly baked rolls are best served warm; they can be reheated for a few minutes in the oven.
  • Brush with Butter: For a golden finish, brush the tops of the rolls with melted butter just before baking.
  • Check for Doneness: Ensure they are fully cooked by tapping the bottom; it should sound hollow.
  • Store Properly: Keep any leftovers in an airtight container to maintain freshness.

Common Mistakes and Troubleshooting

Even the best cooks encounter hiccups. Here are some common mistakes to avoid when making your Greek yogurt rolls:

  • Too Sticky Dough: If your dough is excessively sticky, add a bit more self-rising flour, one tablespoon at a time, until manageable.
  • Dense Rolls: Ensure you’re using fresh, self-rising flour; old flour may not provide the necessary lift.
  • Overbaking: Keep an eye on the rolls in the oven; they can go from perfectly golden to overdone in minutes.
  • Not Enough Flavor: Don’t shy away from seasoning; a pinch of salt or herbs can elevate the taste significantly.

Variations of Greek Yogurt Rolls

Feeling adventurous? Here are some delicious variations to try:

  • Garlic Herb Rolls: Mix minced garlic and chopped fresh herbs into the dough for a fragrant twist.
  • Cheesy Delight: Fold in shredded cheese like cheddar or feta for a cheesy experience.
  • Sweet Cinnamon Rolls: Add a tablespoon of sugar and a teaspoon of cinnamon for a sweet breakfast treat.
  • Spicy Jalapeño Rolls: Incorporate finely chopped jalapeños and cheddar for a spicy kick.

Storage and Make-Ahead Instructions

These rolls can be stored and even made ahead of time:

  • Storage: Keep leftover rolls in an airtight container at room temperature for up to 3 days, or in the refrigerator for up to a week.
  • Freezing: To freeze, wrap each roll in plastic wrap and store in a freezer bag for up to 2 months. Reheat directly from the freezer in the oven.
  • Make Ahead: You can prepare the dough up to a day in advance and store it in the refrigerator. Bring it to room temperature before baking.

Comprehensive FAQ

  • Can I use regular yogurt instead of Greek yogurt? It’s best to use thick Greek yogurt for the right texture, but you can substitute with regular yogurt in a pinch.
  • What can I serve with Greek yogurt rolls? These rolls pair wonderfully with soups, salads, or as a base for sandwiches.
  • How do I make these rolls gluten-free? Use a gluten-free flour blend, ensuring it contains a leavening agent.
  • Can the rolls be made vegan? Yes! Replace the egg with aquafaba or applesauce for a vegan version.
  • Why are my rolls dense? Ensure your ingredients are fresh and avoid overmixing the dough.
  • Can I add ingredients to the dough? Absolutely! Feel free to add herbs, spices, or cheese to customize your rolls.
  • How do I reheat leftover rolls? Reheat in the oven at 350°F (175°C) for about 5-10 minutes until warm.
  • What’s the best way to serve Greek yogurt rolls? Serve warm with a spread of your choice, or alongside your favorite dip or soup.

Nutritional Tips and Dietary Adaptations

These Greek yogurt rolls are not only a delightful addition to any meal but also provide a healthier alternative to traditional bread. Here are some tips for making them even more nutritious:

  • Add Whole Grains: Substitute half of the self-rising flour with whole wheat flour for added fiber.
  • Incorporate Seeds: Mix in chia seeds or flaxseeds for a boost of omega-3 fatty acids.
  • Limit Added Sugar: Keep it healthy by avoiding or reducing any added sugars, especially in savory versions.

Essential Equipment for Making Greek Yogurt Rolls

Before you get started, ensure you have the following kitchen essentials:

  • Mixing Bowls: A large bowl for mixing your dough.
  • Baking Sheet: A sturdy baking sheet lined with parchment paper for easy cleanup.
  • Measuring Cups: Accurate measurements ensure the best results.
  • Silicone Spatula: For mixing and folding ingredients without damaging your dough.
  • Oven Mitts: Don’t forget protection when handling hot pans!

Serving Suggestions for Greek Yogurt Rolls

These rolls are incredibly versatile and can enhance any meal. Here are some serving suggestions:

  • As a Side: Serve warm alongside a hearty soup or salad.
  • For Breakfast: Enjoy with butter and jam, or as a base for eggs and avocado.
  • As a Snack: Pair with hummus, tzatziki, or your favorite dip for a delightful snack.
  • For Sandwiches: Use them as a bun for sliders or sandwiches, filled with your favorite ingredients.

In conclusion, these quick Greek yogurt rolls are not just a recipe; they are a canvas for your culinary creativity. Remember the joy of cooking and sharing meals with loved ones, and let these rolls be a part of your journey. Happy baking!

Fluffy Greek Yogurt Rolls That Are Quick and No-Yeast

Prep Time 10 minutes
Cook Time 15 minutes
Total Time 25 minutes
Servings 4 rolls
Calories 210
Enjoy these soft, fluffy rolls made with Greek yogurt and self-rising flour, perfect for a quick and easy snack or breakfast.

Ingredients

Dough

  • 1 cup Greek Yogurt (Thick plain yogurt)
  • 1 cup Self-Rising Flour (For gluten-free, use a gluten-free blend with baking powder)
  • 1 beaten egg Beaten Egg (For a vegan option, use 3 tablespoons of aquafaba or ¼ cup of unsweetened applesauce)

Instructions 

  • Mix Greek yogurt, self-rising flour, and beaten egg until a smooth dough forms.
  • Divide the dough into 4 equal portions and shape into rolls.
  • Place rolls on a baking sheet lined with parchment paper.
  • Bake at 375°F (190°C) for 15 minutes until golden brown.
  • Remove from oven and let cool slightly before serving.

Notes

For extra flavor, brush with garlic butter or sprinkle with herbs before baking.
Calories: 210kcal
Cost: $8
Course: Breakfast, Snack
Cuisine: Greek
Keyword: No-Yeast, Yogurt

Welcome to the Heart of Autumn: Cinnamon Maple Baked Apples

As the leaves turn golden and the air becomes brisk, there’s nothing quite like the cozy aroma of baked apples wafting through the kitchen. Cinnamon Maple Baked Apples are not just a dessert; they are a celebration of the season, bringing warmth and sweetness to your table. This delightful dish combines the juicy goodness of fresh apples with the rich flavors of cinnamon, nutmeg, and maple syrup, all baked to perfection. Whether you’re preparing for a family gathering or simply treating yourself, this recipe is a sure way to evoke fond memories and create new ones. Let’s dive into this irresistible charm!

Why You’ll Love This Recipe

These baked apples are not only a feast for the senses but also incredibly easy to prepare. Here are just a few reasons to fall in love with this dish:

  • Simple Ingredients: Made with just a handful of pantry staples, these baked apples come together effortlessly, making them perfect for any occasion.
  • Comforting Flavors: The warm hug of cinnamon, nutmeg, and maple syrup creates a cozy atmosphere, reminiscent of family gatherings and autumn festivities.
  • Customizable: Tailor the filling to your taste! Whether you prefer nuts, raisins, or a touch of chocolate, the options are endless.
  • Healthier Dessert Option: Compared to many desserts, this dish is relatively low in sugar and can be made vegan-friendly, offering a wholesome treat.
  • Perfect for Sharing: Serve these baked apples warm with a scoop of vanilla ice cream, and watch them disappear as friends and family gather around.

Ingredients You’ll Need

Gathering fresh, high-quality ingredients is essential for achieving the best flavor in your baked apples. Here’s what you’ll need:

  • 4 large apples: Choose firm varieties like Honeycrisp or Fuji that hold their shape well while baking.
  • 1/4 cup chopped walnuts: These add a delightful crunch; feel free to swap with pecans or omit for nut-free options.
  • 1/4 cup rolled oats: Provides a chewy texture that complements the softness of the apples.
  • 2 tablespoons unsalted butter: Ensure it’s softened (not melted) for the perfect filling consistency.
  • 2 tablespoons brown sugar: You can substitute coconut sugar for a healthier alternative.
  • 2 tablespoons maple syrup: This is the star sweetener of the dish, enhancing the overall flavor profile.
  • 1/2 teaspoon ground cinnamon: A must-have spice that evokes warmth and comfort.
  • 1/4 teaspoon ground nutmeg: Adds depth to the flavor; a little goes a long way!
  • Pinch of salt: Enhances the sweetness of the filling.
  • Vanilla ice cream or whipped cream (optional): For serving, this adds a creamy richness that balances the warm spices beautifully.

How to Make Cinnamon Maple Baked Apples

Side view of Cinnamon Maple Baked Apples with caramelized topping.

Now that you have your ingredients ready, let’s get baking! Follow these simple steps to create your delicious dessert:

  • 1. Preheat the Oven: Start by preheating your oven to 350°F (175°C).
  • 2. Core the Apples: Using an apple corer or a paring knife, carefully remove the core, creating a cavity for the filling.
  • 3. Prepare the Filling: In a mixing bowl, combine the chopped walnuts, rolled oats, softened butter, brown sugar, maple syrup, cinnamon, nutmeg, and salt until well blended.
  • 4. Stuff the Apples: Generously fill each apple with the prepared filling, pressing gently to pack it in.
  • 5. Bake: Place the stuffed apples in a baking dish. Add a splash of water to the bottom of the dish to help steam the apples. Bake for 25-30 minutes, or until the apples are tender.
  • 6. Serve: Let the apples cool slightly before serving. Top them with vanilla ice cream or whipped cream for an indulgent treat.

Pro Tips for Perfect Baked Apples

To ensure your baked apples turn out perfectly every time, consider these expert insights:

  • Choose the Right Apples: Firm varieties like Honeycrisp or Fuji hold their shape well during baking, ensuring a delightful texture.
  • Don’t Overfill: While it’s tempting to pack the filling tightly, leaving a little space allows the apples to expand as they bake.
  • Use Room Temperature Ingredients: This helps create a smooth filling that blends easily, enhancing the overall texture.
  • Check for Doneness: Apples should be tender but not mushy. A fork should easily pierce the flesh but still hold its shape.
  • Experiment with Spices: Feel free to add ginger, cloves, or even a splash of vanilla extract for a unique twist on flavor.
  • Serve Warm: Baked apples are best enjoyed fresh out of the oven, so time your preparation accordingly.
  • Make Ahead: You can prepare the filling in advance and stuff the apples just before baking for a quick dessert option.
  • Storage: If you have leftovers, store them in an airtight container in the fridge for up to three days.

Common Mistakes and Troubleshooting

Even the best recipes can have hiccups. Here are some common mistakes and how to avoid them:

  • Apples are Too Soft: If your apples fall apart, they may have been too ripe. Always choose firm apples for baking.
  • Filling is Dry: If the filling seems dry after baking, try adding a bit more maple syrup or butter next time.
  • Not Enough Spice: If you find your apples lack flavor, consider increasing the amount of cinnamon and nutmeg in the filling.

Variations to Try

Get creative with your baked apples! Here are some variations to consider:

  • Chocolate Chip Delight: Add a handful of dark chocolate chips to the filling for a sweet surprise.
  • Spiced Cranberry: Mix dried cranberries into the filling for a tart contrast to the sweet apples.
  • Nut-Free Option: Omit the nuts and replace with additional oats or crushed graham crackers for crunch.
  • Caramel Drizzle: Drizzle with caramel sauce before serving for an extra layer of decadence.

Storage and Make-Ahead Instructions

Planning ahead can make your life easier. Here’s how to store and prepare your baked apples:

  • Storing Leftovers: Keep any leftover baked apples in an airtight container in the fridge for up to three days. Reheat in the oven or microwave.
  • Make Ahead: Prepare the filling up to 24 hours in advance and store it in the refrigerator. Stuff the apples just before baking for the best texture.

Frequently Asked Questions

Got questions? Here are some common inquiries about baked apples:

  • Can I use other fruits? Yes, pears and peaches work wonderfully as alternatives to apples in this recipe.
  • How can I make this recipe vegan? Substitute butter with coconut oil or vegan butter and use maple syrup instead of brown sugar.
  • What’s the best way to serve baked apples? Warm baked apples topped with vanilla ice cream or whipped cream make for a comforting dessert.
  • Can I freeze baked apples? Yes, you can freeze them before or after baking. Just make sure to cool them completely before placing them in a freezer-safe container.
  • What spices can I add for more flavor? Consider adding ginger, cloves, or even a pinch of cayenne for a bit of heat!
  • How do I know when the apples are done? The apples should be tender but still hold their shape. A fork should easily pierce through.
  • What if I don’t have walnuts? You can substitute with pecans or omit nuts entirely for a nut-free version.
  • Are these baked apples healthy? They can be! Using less sugar and opting for whole ingredients makes them a healthier dessert choice.

Nutrition Tips and Dietary Adaptations

Cooking for different dietary needs? Here are some adaptations to consider:

  • Gluten-Free: Use certified gluten-free oats to make this recipe suitable for gluten-intolerant individuals.
  • Lower Sugar: Reduce the brown sugar or maple syrup for a healthier alternative.
  • Boost Nutrients: Add chia seeds or flaxseeds to the filling for an extra nutritional punch.

Essential Equipment Recommendations

To make your cooking experience seamless, here are some must-have kitchen tools:

  • Apple Corer: A handy tool to easily remove the core without damaging the fruit.
  • Baking Dish: A medium-sized baking dish works best to ensure even cooking.
  • Mixing Bowl: For combining the filling ingredients efficiently.

Serving Suggestions

Here are some delightful ways to serve your baked apples:

  • With Ice Cream: A scoop of vanilla or cinnamon ice cream adds a delightful creaminess.
  • Drizzled with Caramel: A warm caramel drizzle elevates the dish to a new level of indulgence.
  • With Nuts and Dried Fruits: Sprinkle some toasted nuts or dried fruits on top for added texture and flavor.

Conclusion: Celebrate with Cinnamon Maple Baked Apples

As you savor the last bites of these delightful Cinnamon Maple Baked Apples, remember that cooking is more than just preparing food; it’s about sharing moments and creating memories. This recipe encapsulates the spirit of autumn and invites your loved ones to gather around the table. So, grab those apples, embrace the warmth of your kitchen, and let the enchanting aromas fill the air. Happy cooking, and may your home always be filled with the joy of good food!

Cinnamon Maple Baked Apples

Prep Time 10 minutes
Cook Time 30 minutes
Total Time 40 minutes
Servings 4 servings
Calories 250
Enjoy warm, tender baked apples infused with cinnamon and maple syrup, topped with crunchy walnuts and oats for a cozy treat.

Ingredients

Walnuts and oats

  • 1/4 cup chopped walnuts
  • 1/4 cup rolled oats
  • 2 tablespoons unsalted butter, softened (Ensure butter is softened, not melted)
  • 2 tablespoons brown sugar (Make sure it's vegan-friendly if needed)
  • 2 tablespoons maple syrup
  • 1/2 teaspoon ground cinnamon
  • 1/4 teaspoon ground nutmeg
  • Pinch salt
  • 4 large apples (Choose firm apples that hold their shape well)
  • Vanilla ice cream or whipped cream for serving optional (For an indulgent treat)

Instructions 

  • Core the apples and place them in a baking dish.
  • Mix walnuts, oats, softened butter, brown sugar, cinnamon, nutmeg, and salt in a bowl.
  • Stuff the mixture into the cored apples and drizzle with maple syrup.
  • Bake at 375°F (190°C) for 30 minutes until apples are tender.
  • Serve warm with vanilla ice cream or whipped cream if desired.

Notes

Use firm apples like Honeycrisp or Fuji for best results.
Calories: 250kcal
Cost: $15
Course: Dessert
Cuisine: American
Keyword: Apples

Discover the Joy of Mini Veggie Pizza Bites

Welcome to a culinary adventure that brings the vibrant flavors of the Mediterranean right to your table! These Mini Veggie Pizza Bites are not just a delightful treat; they embody the spirit of sharing and celebration. Whether you’re hosting a gathering, preparing a family meal, or simply looking for a quick snack, these little bites are incredibly versatile and bursting with flavor. Imagine a flaky, golden crust topped with zesty sauce, melty cheese, and a colorful array of fresh veggies. In this guide, you’ll learn everything about making these mini masterpieces, from ingredients to serving suggestions, ensuring they become a staple in your kitchen!

Why You’ll Love This Recipe

These mini veggie pizza bites are more than just delicious; they offer a variety of benefits that make them a perfect choice for any occasion:

  • Quick and Easy: With simple ingredients and straightforward steps, these pizza bites come together in no time, making them an ideal choice for busy weekdays or last-minute gatherings.
  • Kid-Friendly: These mini delights are perfect for little hands and picky eaters, allowing kids to engage in cooking while enjoying a healthy snack.
  • Healthy Twist: Packed with fresh vegetables, these bites are a great way to sneak in some extra nutrients without sacrificing taste.
  • Customizable: Use whatever veggies you have on hand or prefer; this recipe is incredibly versatile and can be tailored to suit your taste.
  • Perfect for Any Occasion: Whether it’s a game day snack, party appetizer, or a simple family dinner, these bites will impress your guests and satisfy your cravings!

Ingredient Breakdown

To create your Mini Veggie Pizza Bites, gather the following ingredients. Each item is essential for achieving the perfect flavor and texture:

  • 1 (13.8 oz) can Refrigerated Pizza Dough: This convenient base allows for easy assembly. Opt for classic or thin crust depending on your preference.
  • ½ cup Pizza Sauce: A good quality store-bought or homemade sauce provides a flavorful foundation. Look for one with depth to enhance the overall taste.
  • 1 ½ cups Shredded Mozzarella Cheese: Low-moisture, part-skim mozzarella is ideal for that classic pizza pull. Feel free to experiment with a pizza blend for added flavor.
  • ¼ cup Finely Diced Red Bell Pepper: Adds sweetness and vibrant color to your pizza bites.
  • ¼ cup Finely Diced Green Bell Pepper: Offers a slightly vegetal flavor while contributing to the colorful presentation.
  • ¼ cup Finely Diced Red Onion: Provides a mild sharpness that enhances the overall flavor profile.
  • ¼ cup Sliced Black Olives: Adds a salty, briny kick characteristic of pizza.
  • ¼ cup Sliced Mushrooms (optional): Thinly sliced or finely chopped, mushrooms add an earthy depth to your bites.
  • 1 tablespoon Olive Oil: For brushing the dough, this helps create a golden crust while adding flavor.
  • 1 teaspoon Italian Seasoning: This blend of herbs provides quintessential pizza flavor, making each bite irresistible.
  • Salt and Black Pepper to taste: Essential for enhancing all the flavors of your ingredients.
  • Optional: Grated Parmesan Cheese: For an extra salty, nutty flavor boost, sprinkle on top before or after baking.
  • Optional: Cornmeal: Dust the baking sheet to prevent sticking and add a slight crunch to the bottom crust.

Step-by-Step Instructions

Side view of juicy Mini Veggie Pizza Bites on a plate.

Ready to dive into the cooking process? Follow these detailed steps to create your Mini Veggie Pizza Bites:

  • Preheat Oven and Prepare Baking Sheet: Preheat your oven to 400°F (200°C). Lightly grease a large baking sheet or line it with parchment paper. For added texture, sprinkle a thin layer of cornmeal over the parchment.
  • Prepare the Vegetables: Wash, dry, and finely dice your chosen vegetables. Having them prepped in small bowls speeds up assembly and ensures even cooking.
  • Prepare the Pizza Dough: Open the refrigerated pizza dough and unroll it onto a lightly floured surface. If the dough is thick, gently roll it slightly thinner, aiming for about ¼ inch.
  • Cut the Pizza Bites: Using a round cookie cutter (2.5 to 3 inches in diameter), cut out circles from the dough. You can re-roll scraps gently for more circles, but avoid overworking the dough.
  • Arrange on Baking Sheet: Carefully transfer the dough circles onto the prepared baking sheet, leaving space between each.
  • Brush with Olive Oil: Lightly brush the tops of each dough circle with olive oil for a golden finish and added flavor.
  • Add the Sauce: Spoon about ½ to 1 teaspoon of pizza sauce onto the center of each dough circle, leaving a small border around the edge.
  • Sprinkle with Seasoning: Lightly sprinkle Italian seasoning, salt, and pepper over the sauce on each bite.
  • Add the Cheese: Generously sprinkle shredded mozzarella cheese over the sauce.
  • Top with Veggies: Distribute the finely diced vegetables evenly over the cheese, avoiding overloading to prevent sogginess.
  • Optional Parmesan: If desired, sprinkle a little grated Parmesan cheese over the top.
  • Bake: Place the baking sheet in the oven and bake for 10-15 minutes, or until the crust is golden and the cheese is melted and bubbly.
  • Cool Slightly: Carefully remove the baking sheet from the oven. Let the bites cool for a few minutes before transferring them to a wire rack or serving platter.

Pro Tips for Perfect Pizza Bites

To elevate your mini veggie pizza bites to the next level, consider these expert insights:

  • Use Fresh Ingredients: Fresh veggies not only taste better but also bring vibrant colors to your bites.
  • Experiment with Cheese: Mix different cheeses like provolone or cheddar for a unique flavor profile.
  • Don’t Overload: Less is more! Overloading the toppings can lead to soggy bites.
  • Try Different Sauces: Branch out with pesto or a white sauce for a different twist.
  • Check for Doneness: Keep an eye on the bites as they bake; ovens can vary in temperature.
  • Use a Pizza Stone: If available, using a pizza stone can enhance the crust’s crispiness.
  • Engage the Kids: Make this a fun family activity by allowing kids to customize their own toppings.
  • Serve with Dipping Sauce: Pair your bites with ranch, marinara, or garlic sauce for extra flavor.

Common Mistakes and Troubleshooting

Even the best chefs can face hiccups in the kitchen. Here are some common mistakes to avoid:

  • Thick Dough: If your dough is too thick, your bites will be chewy rather than crispy. Roll it out to about ¼ inch for the best texture.
  • Soggy Bites: To prevent sogginess, don’t overload your toppings. Stick to a few well-chosen ingredients.
  • Burned Edges: If your oven runs hot, keep an eye on your bites and consider reducing the baking time.
  • Unmelted Cheese: If your cheese isn’t melting well, use a low-moisture mozzarella for better results.
  • Undercooked Dough: Ensure your bites are golden brown before removing them from the oven for a fully cooked crust.

Delicious Variations to Try

Want to get creative? Here are some tasty variations of your Mini Veggie Pizza Bites:

  • Italian Style: Add slices of pepperoni or Italian sausage for a meaty twist.
  • Greek-Inspired: Use feta cheese, olives, and spinach for a Mediterranean touch.
  • Spicy Jalapeño: Toss in some diced jalapeños for a spicy kick!
  • Caprese Bites: Use fresh mozzarella, basil, and tomatoes for a classic Italian flavor.

Storage and Make-Ahead Instructions

These mini veggie pizza bites are perfect for meal prep! Here’s how to store and prepare them in advance:

  • Make Ahead: Prepare the veggie mixture and cut the dough circles in advance. Store them in airtight containers in the fridge for up to a day.
  • Freezing: Assemble the bites without baking them. Place them on a baking sheet, freeze until solid, then transfer to a freezer bag. They can be frozen for up to 3 months.
  • Reheating: Bake frozen bites directly from the freezer for an additional 5-10 minutes until heated through.

Comprehensive FAQ

Got questions? We’ve got answers! Here are some common inquiries about the Mini Veggie Pizza Bites:

  • Can I use homemade pizza sauce? Absolutely! Homemade sauce can add a personal touch and unique flavor.
  • What type of pizza dough is best? Refrigerated dough is convenient, but you can also use homemade dough if you have the time!
  • How do I know when they are done baking? Look for a golden-brown crust and melted cheese as indicators of doneness.
  • Can I add meat to these bites? Yes! Feel free to add cooked meats like chicken, sausage, or pepperoni.
  • What other veggies can I use? Zucchini, spinach, or even artichokes would work wonderfully!
  • How do I make them gluten-free? Substitute the pizza dough with a gluten-free version, ensuring all other ingredients are gluten-free.
  • Can I serve these at room temperature? Yes, they are delicious even when cooled, making them great for parties!
  • What do I serve with them? They pair well with salads, dips, or even as a side to pasta dishes.

Nutritional Tips and Dietary Adaptations

For those watching their diet, here are some tips to adapt your Mini Veggie Pizza Bites:

  • Lower-Calorie Option: Use part-skim mozzarella and load up on vegetables for a lighter bite.
  • Vegan Version: Substitute cheese with a vegan cheese alternative and ensure the pizza dough is dairy-free.
  • Low-Carb Option: Use cauliflower crust instead of traditional dough for a keto-friendly alternative.

Essential Equipment Recommendations

To create these delightful bites, you’ll need some basic kitchen tools:

  • Round Cookie Cutter: For cutting out the dough circles easily.
  • Baking Sheet: A large, flat surface for baking your bites.
  • Parchment Paper: To prevent sticking and for easy cleanup.
  • Mixing Bowls: For prepping your veggie toppings.
  • Brush: For applying olive oil to your dough for that golden finish.

Serving Suggestions

When it comes to serving your Mini Veggie Pizza Bites, consider the following:

  • Garnish: Fresh basil or parsley sprinkled on top adds a lovely touch.
  • Dip: Serve with a side of marinara, ranch, or garlic sauce for an extra burst of flavor.
  • Platter Display: Arrange on a colorful platter to make them visually appealing for your guests.

In conclusion, these Mini Veggie Pizza Bites are more than just a recipe; they are an experience—one that brings people together over good food and joyful moments. So roll up your sleeves, gather your loved ones, and let’s create some delicious memories together!

Mini Veggie Pizza Bites

Prep Time 15 minutes
Cook Time 15 minutes
Total Time 30 minutes
Servings 12 pieces
Calories 150
These adorable mini veggie pizza bites are perfect for a quick snack or party appetizer, packed with colorful vegetables and melty cheese on a crispy crust.

Ingredients

Dough

  • 1 can Refrigerated Pizza Dough (13.8 oz, choose classic or thin crust)
  • 0.5 cup Pizza Sauce (store-bought or homemade)
  • 1.5 cups Shredded Mozzarella Cheese (low-moisture, part-skim)
  • 0.25 cup Finely Diced Red Bell Pepper (adds sweetness and color)
  • 0.25 cup Finely Diced Green Bell Pepper (vegetal flavor and color)
  • 0.25 cup Finely Diced Red Onion (mild sharpness)
  • 0.25 cup Sliced Black Olives (salty, briny kick)
  • 0.25 cup Sliced Mushrooms (optional, earthy depth)
  • 1 tablespoon Olive Oil (for brushing dough)
  • 1 teaspoon Italian Seasoning (dried herbs blend)
  • to taste none Salt and Black Pepper (for seasoning)
  • optional none Grated Parmesan Cheese (for topping)
  • optional none Cornmeal (for dusting)

Instructions 

  • Preheat oven to 400°F (200°C), prepare baking sheet with parchment or lightly greased, dust with cornmeal if desired.
  • Unroll and optionally thin the pizza dough, then cut out circles with a 2.5-3 inch diameter cutter. Re-roll scraps if needed.
  • Transfer dough circles to the baking sheet, brush tops with olive oil, and add a small spoonful of sauce, then sprinkle with Italian seasoning, salt, and pepper.
  • Top each with shredded cheese and evenly distribute diced vegetables and optional Parmesan.
  • Bake for 10-15 minutes until golden and bubbly, then cool slightly before serving.

Notes

For best results, avoid overloading toppings to prevent sogginess.
Calories: 150kcal
Cost: $15
Course: Appetizer
Cuisine: Italian-inspired
Keyword: pizza, Snack, Vegetables