Author

rafael

Browsing

Unleashing the Flavor of Aromatic Sourdough Discard Focaccia

Welcome to a culinary journey where the heart of Mediterranean cuisine meets the art of baking! Today, we’re diving into the delightful world of sourdough discard focaccia, a bread that’s not only easy to make but also bursting with flavor. Imagine the aroma of fresh rosemary mingling with the rich scent of olive oil as it wafts through your kitchen. This recipe is perfect for gatherings, cozy nights in, or even as a delightful snack during your afternoon siesta. Let’s get started!

Why You’ll Love This Recipe

Here are five reasons why this focaccia will win your heart:

  • Simple Ingredients: With just a handful of pantry staples, you can create a mouthwatering focaccia that impresses. No need for complicated processes!
  • Versatile Flavor Options: Customize the recipe with your favorite herbs, spices, and toppings. From garlic to sun-dried tomatoes, the options are endless!
  • Perfect for Sharing: This focaccia is great for gatherings, making it easy to slice and serve as an appetizer or side dish.
  • Health Benefits: Made with whole ingredients, this focaccia can be a healthier alternative to store-bought breads.
  • Celebration of Culture: By baking this focaccia, you’re not just making bread; you’re embracing a Mediterranean tradition that celebrates family and togetherness.

Ingredients Breakdown

Let’s take a closer look at the ingredients you’ll need for this mouthwatering focaccia. Each component plays a vital role in achieving that perfect texture and flavor.

  • 1 cup (240g) sourdough starter discard (unfed): This is the star of the show! It adds flavor and helps the dough rise. If you don’t have a sourdough starter, you can create one or use instant yeast as an alternative.
  • 2 cups (260g) all-purpose flour: This provides the structure for your focaccia. You can also experiment with whole wheat flour for a nuttier flavor.
  • 3/4 cup (180ml) warm water (about 80°F/27°C): Water is crucial for activating the yeast and hydrating the flour.
  • 2 tbsp olive oil, plus extra for drizzling: Olive oil adds richness and flavor. Drizzling it on top before baking creates a beautiful golden crust.
  • 1 tsp salt: Enhances all the flavors in your focaccia. Don’t skip this step!
  • 1 tsp sugar or honey (optional): This can help with browning and add a hint of sweetness.
  • 1 tsp instant yeast (optional): If you want a quicker rise, adding instant yeast is a great option.
  • 2 tbsp fresh rosemary leaves, roughly chopped: Rosemary adds a fragrant, earthy flavor that pairs beautifully with olive oil.
  • Coarse sea salt for sprinkling: This is the finishing touch that elevates the flavor of the focaccia.

Pro Tips for Perfect Focaccia
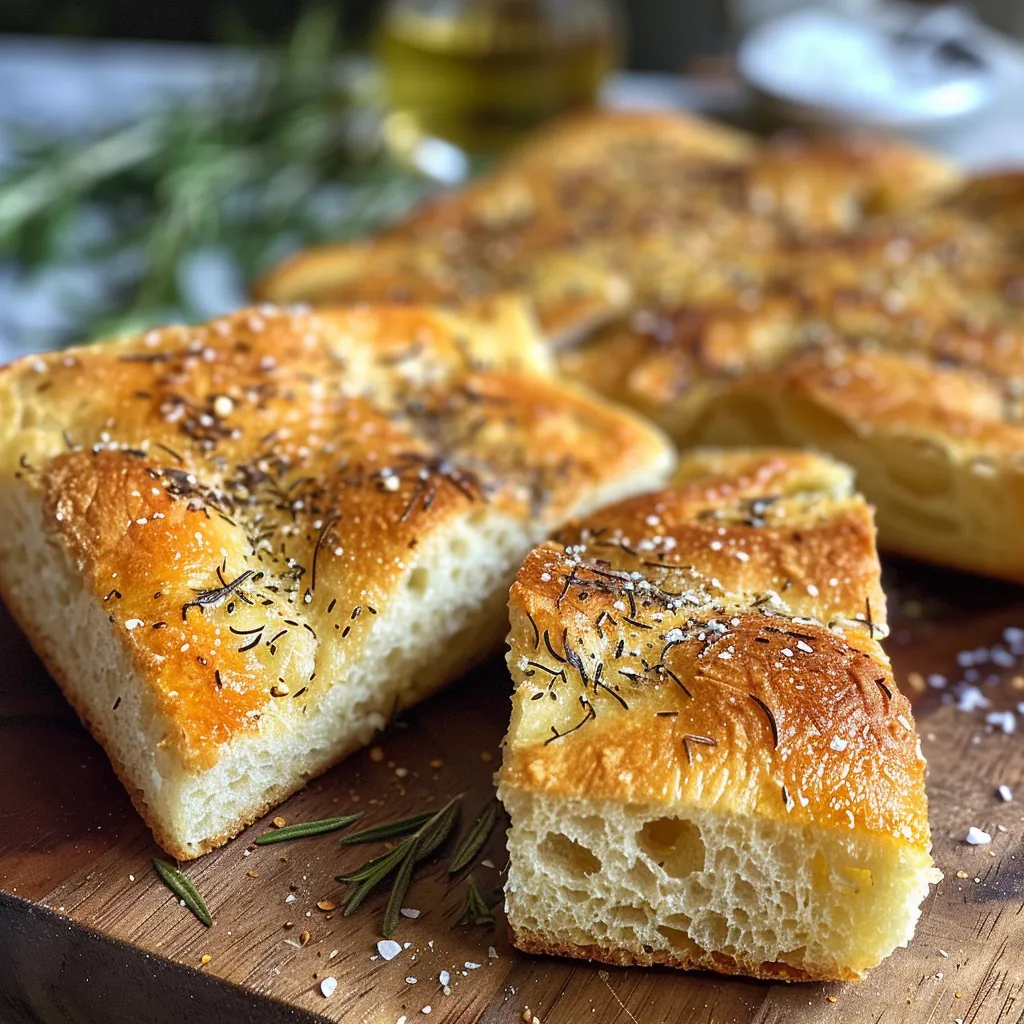
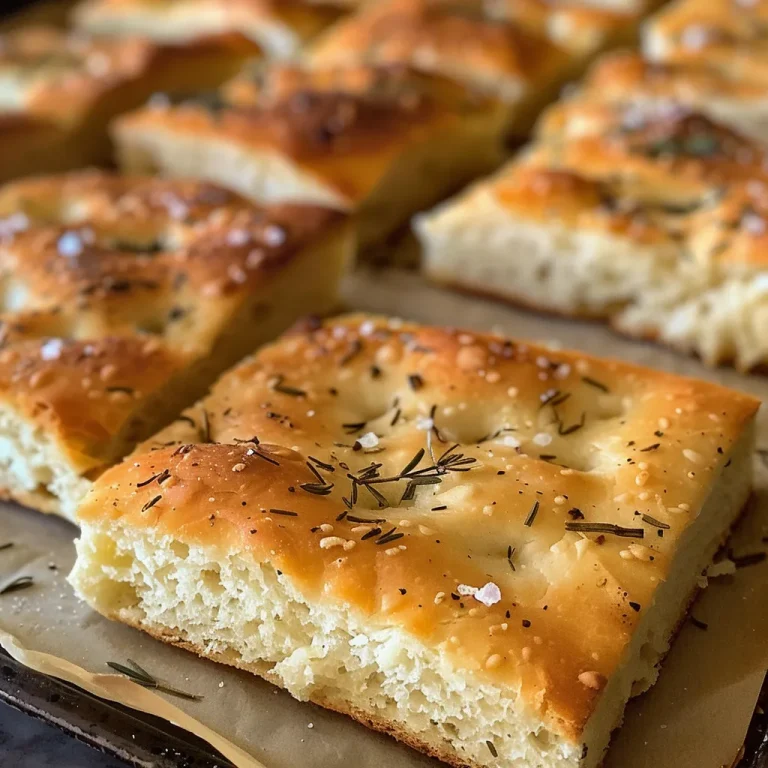
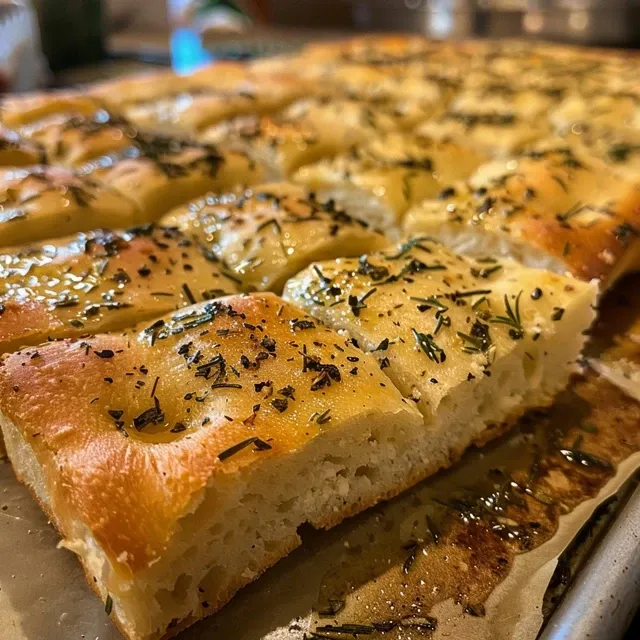
Side view of a moist sourdough focaccia with a crispy crust and sprinkle of sea salt.

To ensure your focaccia turns out perfectly every time, consider these expert tips:

  • Hydration is Key: A wetter dough produces a lighter focaccia. Don’t be afraid of stickiness; it’s a good sign!
  • Stretch and Fold Technique: This technique helps develop gluten without kneading. Every 30 minutes, gently stretch the dough and fold it over itself.
  • Let It Rise: Allow your dough to rise until it’s doubled in size. This can take anywhere from 2 to 3 hours depending on the temperature.
  • Dimples for Texture: When pressing the dough into the pan, create dimples with your fingers. This helps the olive oil pool and adds texture.
  • Preheat Your Oven: Ensure your oven is at the right temperature before baking to achieve that golden crust.
  • Olive Oil Drizzle: Don’t skimp on the olive oil! A good drizzle before baking creates a beautifully crisp crust.
  • Allow to Cool: Let the focaccia cool slightly on a wire rack to prevent sogginess.
  • Experiment with Flavors: Try adding garlic, olives, or even cheese to the dough for added depth.

Common Mistakes and Troubleshooting

Even the most seasoned bakers can encounter challenges. Here are common mistakes and how to fix them:

  • Dough is Too Sticky: If your dough is excessively sticky, it may need more flour. Add a little at a time until it’s manageable.
  • Focaccia is Dense: This can happen if the dough didn’t rise enough. Ensure you give it adequate time to proof.
  • Crust is Too Hard: This can occur from overbaking. Keep an eye on the focaccia and check for a golden-brown color.
  • Not Enough Flavor: Ensure you’re using fresh herbs and a good quality olive oil for the best taste. Seasoning the top with coarse sea salt is essential!

Variations You Can Try

Your focaccia can be as versatile as your imagination allows! Here are some delicious variations:

  • Garlic Herb Focaccia: Add minced garlic and your favorite herbs to the dough for an aromatic twist.
  • Cheesy Focaccia: Incorporate shredded cheese into the dough or sprinkle it on top before baking.
  • Olive and Sun-Dried Tomato Focaccia: Add chopped olives and sun-dried tomatoes to the dough for a Mediterranean flair.
  • Sweet Focaccia: Drizzle with honey and sprinkle with cinnamon and sugar before baking for a sweet treat.

Storage and Make-Ahead Instructions

Focaccia is best enjoyed fresh, but here’s how to store it:

  • Room Temperature: Store in an airtight container at room temperature for up to 3 days.
  • Refrigeration: If you want to keep it longer, you can store it in the fridge for up to a week, though this may affect the texture.
  • Freezing: Wrap tightly in plastic wrap and then foil before freezing. It can last up to 3 months. Thaw at room temperature before reheating.
  • Make Ahead: You can prepare the dough in advance and keep it in the fridge for up to 24 hours before baking.

Comprehensive FAQ

Got questions? Here are some common inquiries about making focaccia:

  • Can I use all-purpose flour instead of bread flour? Yes! All-purpose flour works wonderfully for focaccia.
  • What if my sourdough starter isn’t bubbly? Ensure your starter is active and bubbly. Feed it regularly before using.
  • How can I tell when the focaccia is done? It should be golden brown on top and sound hollow when tapped.
  • Can I make this recipe gluten-free? Yes, but adjust the flour type and add a binder like xanthan gum.
  • What else can I top my focaccia with? You can use anything from caramelized onions to fresh vegetables or even balsamic glaze.
  • How do I know if my dough is over-proofed? It will lose its shape and may collapse. Keep an eye on it during rising!
  • What’s the best way to reheat focaccia? Warm it in the oven at 350°F (175°C) for about 10 minutes to revive its texture.
  • Can I use a different herb? Absolutely! Thyme, oregano, or basil can also add delightful flavors.

Nutritional Tips and Dietary Adaptations

Making your focaccia not only delicious but also nutritious is easy.

  • Whole Grain Options: Use whole wheat flour or a mix of whole and all-purpose flour for added fiber.
  • Low Sodium: Reduce or omit the salt for a lower sodium version, keeping in mind that it may alter the flavor.
  • Vegan Adaptation: This recipe is already vegan-friendly, just ensure your toppings align!
  • Low Carb Version: Consider using almond flour or a low-carb flour substitute for a keto-friendly option.

Essential Equipment Recommendations

Having the right tools can make a world of difference when baking focaccia:

  • Mixing Bowl: A large bowl for mixing your dough comfortably.
  • 9×13 Inch Baking Pan: This size is perfect for creating a thick, fluffy focaccia.
  • Kitchen Scale: For precise measurements, especially if you’re serious about baking.
  • Bench Scraper: This handy tool helps in managing sticky dough without making a mess.
  • Wire Rack: Essential for cooling your focaccia to maintain its texture.

Serving Suggestions

Now that your focaccia is baked to perfection, here are some delightful ways to serve it:

  • As an Appetizer: Slice it and serve with an olive oil and balsamic vinegar dip.
  • With Meals: Pair it with soups, salads, or grilled dishes for a hearty accompaniment.
  • For Breakfast: Enjoy it toasted with a spread of ricotta or cream cheese and fresh fruit.
  • Snack Time: Perfect for sandwiches or as a standalone snack with cheese and charcuterie.

Conclusion: A Celebration of Flavor and Tradition

There you have it! Your journey to making the perfect sourdough discard focaccia is complete. This recipe is not just about baking; it’s about embracing the flavors of the Mediterranean and the joy of sharing food with loved ones. So, gather around your table, slice up that golden focaccia, and let the flavors spark conversations and laughter. Happy baking!

Sourdough Discard Focaccia with Rosemary & Olive Oil

Prep Time 15 minutes
Cook Time 25 minutes
Total Time 40 minutes
Servings 8 slices
Calories 250
A flavorful and easy focaccia recipe using sourdough discard, topped with rosemary and olive oil for a delicious treat.

Ingredients

Dough

  • 1 cup sourdough starter discard (unfed)
  • 2 cups all-purpose flour
  • 3/4 cup warm water (about 80°F/27°C)
  • 2 tbsp olive oil, plus extra for drizzling
  • 1 tsp salt
  • 1 tsp sugar or honey (optional)
  • 1 tsp instant yeast (optional)
  • 2 tbsp fresh rosemary leaves, roughly chopped

Coarse sea salt for sprinkling

Instructions 

  • Mix sourdough discard, warm water, and olive oil. Add flour, salt, sugar, and yeast; stir into a sticky dough.
  • Let the dough rest covered for 30 minutes.
  • Stretch and fold the dough every 30 minutes for 2 hours.
  • Allow the dough to double in size at room temperature for 2-3 hours.
  • Press dough into oiled pan, create dimples, then let rise for 45-60 minutes.
  • Preheat oven to 450°F (230°C), drizzle with olive oil, sprinkle rosemary and sea salt, then bake for 20-25 minutes.


Notes

Use fresh rosemary for best flavor and ensure the dough is well-oiled to prevent sticking.
Calories: 250kcal
Cost: $15
Course: Appetizer, Snack
Cuisine: Italian
Keyword: focaccia, Rosemary, Sourdough

Welcome to the World of Red Velvet Cupcakes!

Ah, the rich allure of red velvet cupcakes! A treat that not only tantalizes your taste buds but also captivates the eyes with its vibrant hue. These delightful morsels are perfect for any celebration, bringing a touch of elegance and a wave of nostalgia to every occasion. In this article, we will embark on a culinary journey to create the most mouthwatering red velvet cupcakes, topped with a luscious cream cheese frosting that will leave everyone reaching for seconds. Whether you’re a baking novice or a seasoned pro, this guide will ensure your cupcakes are a hit!

Why You’ll Love This Recipe

  • Moist & Flavorful: The combination of buttermilk and oil ensures these cupcakes are irresistibly moist, while a hint of cocoa powder adds a subtle depth of flavor.
  • Beautifully Vibrant: The striking red color makes these cupcakes a showstopper at any gathering, perfect for birthdays, weddings, or festive occasions.
  • Simple Ingredients: Most ingredients are pantry staples, making it easy for you to whip up a batch whenever the craving strikes!
  • Customizable: You can easily adapt this recipe to suit your tastes, whether you want to make mini cupcakes, layer cakes, or even red velvet brownies.
  • Delicious Cream Cheese Frosting: The pairing of the rich, tangy cream cheese frosting with the sweet cupcake creates a flavor harmony that’s simply divine.

Ingredients Breakdown

Let’s dive into the heart of this recipe: the ingredients! Here’s what you’ll need to create those perfect red velvet cupcakes:

  • 2½ cups (300 grams) cake flour: For a soft texture, cake flour works best, but you can substitute with all-purpose flour if needed.
  • 1 teaspoon baking soda: This helps the cupcakes rise, giving them that perfect lightness.
  • 2 tablespoons unsweetened cocoa powder: Just a touch of cocoa adds complexity without overpowering the signature red velvet flavor.
  • 1 teaspoon salt: Enhances the sweetness and rounds out the flavors.
  • ½ cup (1 stick, 113 g) unsalted butter: Softened to room temperature for easy creaming.
  • 1½ cups (300 g) granulated white sugar: Sweetness is key for these indulgent treats.
  • 2 large eggs: Room temperature eggs help create a smooth batter.
  • ½ cup (120 mL) canola oil: Keeps the cupcakes moist and soft.
  • 2 tablespoons (1 oz.) liquid red food coloring: This gives the cupcakes their iconic color. You can use natural alternatives like beet juice if you prefer.
  • 1 teaspoon vanilla extract: Adds warmth and depth of flavor.
  • 1 cup (240 mL) buttermilk: The acidity helps tenderize the cake and adds a rich flavor.
  • 1 teaspoon distilled white vinegar: Helps react with the baking soda for a perfect rise.

Steps to Create Irresistible Red Velvet Cupcakes

Juicy Red Velvet Cupcake with a smooth cream cheese frosting and red velvet texture.

Follow these steps to bake your way to cupcake perfection!

  1. Prep pans and preheat: Preheat your oven to 350° F (180° C) and line cupcake pans with paper liners.
  2. Combine dry ingredients: In a mixing bowl, whisk together the cake flour, baking soda, cocoa powder, and salt. Set aside.
  3. Cream butter and sugar: In another bowl, cream the softened butter and sugar until light and fluffy (about 2-3 minutes). Add the eggs, vanilla, oil, and red food coloring, mixing until well combined.
  4. Alternate adding flour and buttermilk: Stir vinegar into the buttermilk, then gradually add the flour mixture and buttermilk to the butter mixture, alternating between the two. Mix until just combined; be careful not to overmix!
  5. Bake: Fill each cupcake liner about 2/3 full with batter. Bake for about 18 minutes, or until a toothpick inserted into the center comes out clean. Allow cupcakes to cool for 5 minutes in the pan before transferring them to a cooling rack.
  6. Make the frosting: In a mixing bowl, combine cream cheese and butter. Beat until smooth, then mix in vanilla. Gradually add the confectioners’ sugar and a pinch of salt, beating until creamy. Frost cooled cupcakes as desired.

Expert Tips for Baking Success

Here are some professional insights to elevate your baking game:

  • Room Temperature Ingredients: Ensure all your refrigerated ingredients (butter, eggs, buttermilk) are at room temperature for a smooth batter.
  • Don’t Overmix: Gently fold the ingredients together to avoid dense cupcakes. Overmixing can lead to a tough texture.
  • Use Gel Food Coloring: For a deeper color and more vibrant cupcakes, use gel food coloring instead of liquid.
  • Test for Doneness: Every oven is different, so start checking your cupcakes a couple of minutes before the recommended time.
  • Cool Completely Before Frosting: Ensure your cupcakes are completely cooled to prevent the frosting from melting off.
  • Double the Batch: These cupcakes are so delightful, you might want to bake a double batch to share with friends and family!
  • Chill Your Frosting: If your frosting is too soft, refrigerate it for a bit before piping to achieve the perfect texture.
  • Try Different Toppings: Experiment with toppings like crushed nuts, chocolate shavings, or sprinkles for added texture and flavor.

Common Mistakes and Troubleshooting

Even the best bakers can run into issues. Here are some common mistakes and how to avoid them:

  • Cupcakes Too Dense: This often occurs due to overmixing the batter. Remember, mix until just combined!
  • Not Enough Red Color: If your cupcakes turn out more brown than red, you may need to increase the food coloring or use a higher-quality brand.
  • Frosting Too Runny: If your cream cheese frosting is too runny, add more powdered sugar gradually until you achieve the desired consistency.
  • Dry Cupcakes: Overbaking is usually the culprit. Keep an eye on your cupcakes during the last few minutes of baking.

Delicious Variations

Here’s how you can mix it up with your red velvet cupcakes:

  • Red Velvet Layer Cake: Use the same batter to create a stunning layer cake, stacking the cupcakes and frosting between layers.
  • Red Velvet Brownies: Transform the batter into decadent brownies for a chewy alternative.
  • Mini Red Velvet Cupcakes: Perfect for bite-sized treats, these can be made using a mini muffin tin.
  • Chocolate Chip Red Velvet Cupcakes: Add semi-sweet chocolate chips to the batter for an extra chocolatey delight!

Storage and Make-Ahead Instructions

Want to prepare your delightful red velvet cupcakes in advance? Here’s how:

  • Storing Cupcakes: Store cooled cupcakes in an airtight container at room temperature for up to 3 days, or refrigerate for up to a week.
  • Freezing Cupcakes: Freeze unfrosted cupcakes in a single layer in an airtight container for up to 3 months. Thaw at room temperature before frosting.
  • Make Ahead Frosting: You can prepare the cream cheese frosting up to 3 days in advance. Store it in the refrigerator and rewhip before using.

Frequently Asked Questions

Here are some common questions about red velvet cupcakes that might help you:

  • Can I use all-purpose flour instead of cake flour? Yes, but the texture may be slightly denser. Cake flour is recommended for the best results.
  • What can I substitute for buttermilk? You can make a quick substitute by mixing 1 cup of milk with 1 tablespoon of vinegar or lemon juice and letting it sit for 5-10 minutes.
  • How do I achieve a deeper red color? Use gel food coloring instead of liquid, or increase the amount of liquid food coloring for a more vibrant hue.
  • Can I make these cupcakes gluten-free? Yes, you can substitute the cake flour with a gluten-free flour blend, ensuring it’s a 1:1 substitute for best results.
  • What is the best way to frost the cupcakes? Use a piping bag with a decorative tip for a beautiful presentation, or simply spread with a knife for a rustic look.
  • Can I add nuts to the batter? Absolutely! Chopped walnuts or pecans can add a delightful crunch to your cupcakes.
  • What’s the difference between red velvet cake and chocolate cake? While both contain cocoa powder, red velvet cake is known for its vibrant color and cream cheese frosting, while chocolate cake is typically richer in chocolate flavor.
  • How can I make these cupcakes dairy-free? Substitute the buttermilk with a plant-based alternative and use dairy-free cream cheese for the frosting.

Nutrition Tips and Dietary Adaptations

If you’re watching your nutrition but still want to enjoy these delightful treats, consider these options:

  • Reduce Sugar: You can cut down on the sugar in both the cupcakes and frosting slightly without compromising flavor.
  • Use Whole Wheat Flour: For a healthier twist, substitute half the cake flour with whole wheat flour for added fiber.
  • Low-Fat Cream Cheese: Opt for low-fat or reduced-calorie cream cheese for a lighter frosting option.

Equipment Recommendations

Here’s a quick list of essential tools to make your baking experience smoother:

  • Mixing Bowls: A set of various-sized mixing bowls will help with ingredient preparation.
  • Electric Mixer: A hand or stand mixer is essential for achieving that perfectly whipped cream cheese frosting.
  • Measuring Cups and Spoons: Accurate measurements are key to baking success.
  • Cupcake Pans: Standard or mini cupcake pans will be necessary for creating your delightful treats.

Serving Suggestions

When it comes to serving these beautiful red velvet cupcakes, consider the following:

  • Garnish: Top with fresh berries, edible flowers, or chocolate shavings for an extra touch of elegance.
  • Pair with Beverages: Serve alongside a glass of milk, a cup of coffee, or even a fruity iced tea for a delightful treat.
  • Presentation: Arrange on a decorative platter or tiered cake stand for an eye-catching display.

Conclusion

And there you have it! A comprehensive guide to baking the most delicious red velvet cupcakes that will surely impress your guests and bring joy to your gatherings. With their moist texture, beautiful color, and rich cream cheese frosting, these cupcakes embody the spirit of celebration. So, roll up your sleeves, grab your ingredients, and let’s create some cupcake magic together. Happy baking!

Red Velvet Cupcakes

Prep Time 20 minutes
Cook Time 18 minutes
Total Time 38 minutes
Servings 12 cupcakes
Calories 250
Delight in these moist and vibrant red velvet cupcakes topped with creamy frosting, perfect for any celebration.

Ingredients

Dry Ingredients

  • 2.5 cups cake flour (spooned and leveled)
  • 1 teaspoon baking soda
  • 2 tablespoons unsweetened cocoa powder
  • 1 teaspoon salt

Wet Ingredients

  • 0.5 cup unsalted butter (softened to room temperature)
  • 1.5 cups granulated white sugar
  • 2 large eggs (room temperature)
  • 0.5 cup canola oil
  • 2 tablespoons liquid red food coloring
  • 1 teaspoon vanilla extract

Buttermilk Mixture

  • 1 cup buttermilk
  • 1 teaspoon white vinegar

Frosting

  • 8 oz cream cheese (room temperature)
  • 8 tbsp unsalted butter (at room temperature)
  • 2 tsp vanilla extract
  • pinch salt
  • 4 cups confectioners’ sugar

Instructions 

  • Preheat oven to 350°F (180°C) and line cupcake pans with paper liners.
  • Whisk dry ingredients (flour, baking soda, cocoa powder, salt) and set aside.
  • Cream butter and sugar until light and fluffy. Add eggs, vanilla, oil, and food coloring; beat well.
  • Alternate adding flour mixture and buttermilk (with vinegar) to wet ingredients, mixing just until combined. Divide batter into liners and bake for 18 minutes.
  • Cool cupcakes completely. Prepare frosting by beating cream cheese and butter, then add vanilla, salt, and powdered sugar until smooth. Frost cupcakes as desired.

Notes

Ensure not to overmix the batter to keep cupcakes light and fluffy.
Calories: 250kcal
Cost: $15
Course: Dessert
Cuisine: American
Keyword: red velvet

Welcome to the Heart of Mediterranean Cooking: Rosemary Focaccia

Ah, the aroma of freshly baked bread wafting through the kitchen, a scent that invites everyone to gather and share. Today, we’re diving into a delightful recipe for Rosemary Focaccia, a bread that’s not just a side dish but a centerpiece of joy and warmth. With its golden crust, fluffy interior, and fragrant rosemary, this focaccia is perfect for any occasion, whether you’re hosting a dinner party or enjoying a quiet evening at home. Let’s journey through the art of making this magical bread, infused with love and Mediterranean spirit.

Why You’ll Love This Recipe

Making your own focaccia is a rewarding experience, and this recipe brings with it numerous benefits:

  • Aromatic Delight: The infusion of fresh rosemary and olive oil creates an irresistible aroma that fills your kitchen with warmth.
  • Easy to Make: With just a handful of ingredients and simple steps, you’ll find that baking focaccia is accessible for everyone, even beginners.
  • Versatile Uses: This focaccia serves as a perfect accompaniment to soups, salads, or as a base for delicious sandwiches.
  • Customizable: Feel free to experiment with toppings like olives, sun-dried tomatoes, or even a sprinkle of cheese for a unique twist.
  • Perfect for Sharing: Focaccia is best enjoyed fresh and warm, making it an ideal bread to share with family and friends around the table.

Ingredients You’ll Need

Gather these simple ingredients to create your Rosemary Focaccia:

  • 1 ½ cups warm water (between 110 to 115 degrees F)
  • 2 teaspoons granulated sugar (to activate the yeast)
  • 1 (0.25 ounce) package active-dry yeast (to give the bread its rise)
  • 4 ¼ cups all-purpose flour (plus more, as needed for kneading)
  • ⅓ cup extra virgin olive oil (plus more for greasing and drizzling)
  • 2 teaspoons Kosher salt (for flavor)
  • 2 sprigs fresh rosemary (coarsely chopped for that aromatic touch)
  • ½ teaspoon coarse sea salt (for topping)

Feel free to substitute ingredients as needed. For example, using whole wheat flour can add a nutty flavor and extra nutrients. If you’re looking for a gluten-free option, try a gluten-free all-purpose blend!

How to Make Rosemary Focaccia

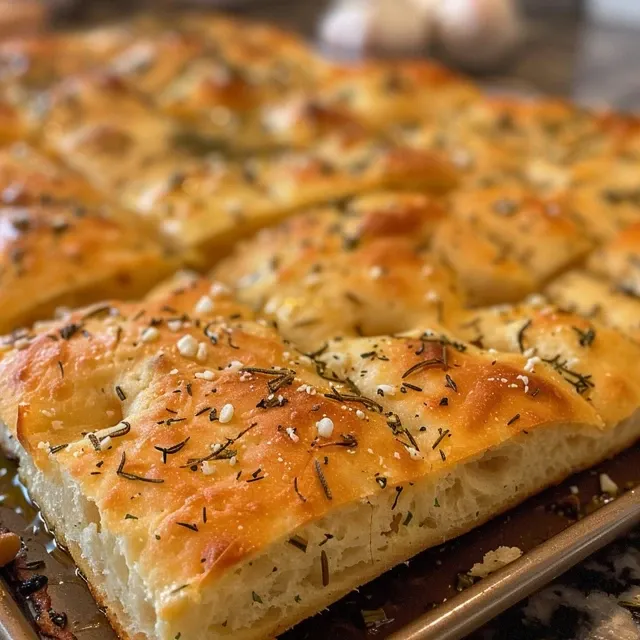
Side profile of a golden-brown focaccia topped with coarse sea salt and rosemary.

Ready to bring the magic of focaccia to life? Follow these detailed steps:

  1. In a bowl of a stand mixer with the dough hook attachment, combine warm water, yeast, and sugar. Stir gently and let it sit for 10 minutes until foamy.
  2. Add 4 cups of flour, Kosher salt, olive oil, and mix/knead at low speed. Increase to medium speed and knead until the dough is smooth and elastic, about 6-8 minutes. If the dough is too sticky, add the remaining ¼ cup flour.
  3. Shape the dough into a ball, coat a large bowl with olive oil, and place the dough inside, turning to coat. Cover with plastic wrap and let it rise in a warm place for 1 to 1.5 hours or until doubled in size.
  4. Once the dough has risen, oil a 15×10 inch sheet pan with about 2 tablespoons of olive oil. Dump the dough onto the prepared pan and stretch it into a rectangle, making sure to coat both sides with oil.
  5. Using your fingers, press down on the dough almost to the bottom of the pan, creating dimples without tearing it.
  6. Cover the dough with plastic wrap and let it rise again for 1 hour in a warm, draft-free space.
  7. Preheat your oven to 425 degrees F.
  8. Remove the plastic wrap and drizzle more olive oil (about 2-3 tablespoons) over the dough. Sprinkle evenly with chopped rosemary and ½ teaspoon flaked sea salt.
  9. Bake until golden brown, about 20 minutes. Once baked, brush with more olive oil and let cool for 10-15 minutes before serving. Enjoy!

Pro Tips for Perfect Focaccia

To elevate your focaccia game, consider these expert tips:

  • Temperature Matters: Ensure your water is at the right temperature (110°F-115°F) for activating the yeast effectively.
  • Don’t Skimp on Oil: Generously oil your pan and the dough for a rich flavor and texture.
  • Experiment with Flavors: Try adding garlic, olives, or cheese to the dough for a delightful twist.
  • Use Fresh Ingredients: Fresh rosemary and good quality olive oil make a noticeable difference in flavor.
  • Let It Rise: Be patient with the rising time; it’s crucial for achieving that airy texture.
  • Check Your Oven: Every oven behaves differently; keep an eye on the focaccia to avoid over-baking.
  • Cool Before Slicing: Allow the bread to cool a bit before slicing to retain its structure.
  • Storing Leftovers: Store any leftover focaccia in an airtight container at room temperature for up to three days.

Common Mistakes and Troubleshooting

Even the best bakers can face challenges. Here’s how to troubleshoot common issues:

  • Dough Not Rising: Ensure your yeast is fresh and the water temperature is correct. Also, place the dough in a warm area.
  • Too Dense: This can happen if the dough is over-kneaded or not enough flour was added. Always adjust flour gradually.
  • Burnt Bottom: If your focaccia burns on the bottom, consider using a baking sheet to elevate it or line the pan with parchment paper.

Delicious Variations to Try

Mix things up by experimenting with these exciting variations:

  • Garlic and Herb Focaccia: Add minced garlic and a variety of herbs for extra flavor.
  • Olive Focaccia: Incorporate sliced olives into the dough or on top before baking.
  • Cheesy Focaccia: Sprinkle shredded cheese on top before the final rise for a cheesy crust.
  • Sun-Dried Tomato Focaccia: Fold in chopped sun-dried tomatoes and basil for a Mediterranean twist.

Storage and Make-Ahead Instructions

Focaccia is best enjoyed fresh, but you can certainly prepare it ahead of time:

  • Make Ahead: You can prepare the dough a day in advance. After the first rise, punch it down, cover it tightly in plastic wrap, and store it in the fridge. Bring it back to room temperature before shaping.
  • Freezing: Baked focaccia can be frozen for up to 3 months. Wrap it tightly in plastic and then in foil. Thaw at room temperature and reheat in the oven to restore its texture.

Frequently Asked Questions

  • Can I use instant yeast instead of active dry yeast? Yes, you can use instant yeast; there’s no need to proof it in water.
  • What can I do if my focaccia is too salty? Use less salt in the dough or topping next time, and try to balance flavors with dips.
  • Can I make focaccia without gluten? Absolutely! Use a gluten-free flour blend and make sure the other ingredients are gluten-free.
  • How do I know when my focaccia is done? It should be golden brown on top and sound hollow when tapped on the bottom.
  • What’s the best way to serve focaccia? Serve it warm, drizzled with olive oil and balsamic vinegar for dipping.
  • Can I add cheese to the dough? Yes, shredded cheese can be folded into the dough for added flavor.
  • How long can I store focaccia? It can be stored at room temperature for up to three days in an airtight container.
  • Can I use dried rosemary instead of fresh? Yes, but use about 1/3 of the amount, as dried herbs are more concentrated.

Nutritional Tips and Dietary Adaptations

Focaccia is a delicious treat, but if you’re mindful of nutrition, consider these tips:

  • Whole Grain Option: Substitute whole wheat flour for a boost in fiber and nutrients.
  • Lower Fat: Reduce the amount of olive oil slightly, though keep in mind it adds flavor and texture.
  • Dairy-Free: This recipe is naturally dairy-free, making it suitable for vegan diets as well.

Essential Equipment for Success

Before you begin, here’s a list of handy tools to have on hand:

  • Stand Mixer: Makes kneading a breeze, but you can also knead by hand if preferred.
  • Baking Sheet: A large 15×10 inch pan is ideal for this recipe.
  • Dough Scraper: Helpful for handling sticky dough and for transferring it to your baking sheet.
  • Kitchen Thermometer: Ensures your water is at the right temperature for yeast activation.

Serving Suggestions

Now that you’ve crafted the perfect focaccia, here are some delightful ways to enjoy it:

  • As an Appetizer: Serve warm slices with a side of olive oil and balsamic vinegar for dipping.
  • In Sandwiches: Use it as a base for hearty sandwiches, layering with your favorite meats and cheeses.
  • With Soups and Salads: Pair it with a bowl of soup or a fresh salad for a complete meal.
  • At Brunch: Enjoy focaccia as part of a brunch spread with cheeses, fruits, and spreads.

Final Thoughts: The Joy of Baking Together

As you embark on this delicious journey of making Rosemary Focaccia, remember that cooking is more than just a task; it’s an experience to share. Gather your loved ones, roll up your sleeves, and indulge in the joy of creating something beautiful together. The warmth of freshly baked bread is best enjoyed with laughter, stories, and the love of family and friends. So, let’s get baking and celebrate the flavors of life!

Rosemary Focaccia

Prep Time 20 minutes
Cook Time 20 minutes
Total Time 40 minutes
Servings 8 slices
Calories 250
A flavorful and airy Italian bread topped with fresh rosemary and sea salt, perfect for sharing or as a snack.

Ingredients

Dough

  • 1.5 cups warm water (between 110 to 115°F)
  • 2 teaspoons granulated sugar
  • 0.25 ounce active-dry yeast
  • 4.25 cups all-purpose flour (plus more as needed)
  • 0.33 cup extra virgin olive oil (plus more for pan and drizzling)
  • 2 teaspoons Kosher salt
  • 2 sprigs fresh rosemary (coarsely chopped)
  • 0.5 teaspoon coarse sea salt (for topping)

Instructions 

  • Combine warm water, yeast, and sugar; let sit 10 minutes until foamy.
  • Add 4 cups flour, salt, olive oil; mix until smooth, adding remaining flour if sticky.
  • Shape dough into a ball, oil a bowl, and let rise 1-1.5 hours until doubled.
  • Preheat oven to 425°F, oil a sheet pan, stretch dough to fit, and let rise 1 hour.
  • Drizzle with olive oil, sprinkle rosemary and sea salt, then bake 20 minutes until golden.

Notes

For extra flavor, let the dough rise slowly in the refrigerator overnight.
Calories: 250kcal
Cost: $15
Course: Bread
Cuisine: Italian
Keyword: Rosemary

Unlock the Deliciousness of Your Morning: A Savory Spinach & Cheese Omelet Wrap

Welcome to a delightful culinary journey where mornings are transformed into celebrations of flavor! This Spinach & Cheese Omelet Wrap is not just a breakfast; it’s an experience that combines the earthy notes of fresh spinach with gooey cheddar cheese, all wrapped in a soft tortilla. Perfect for those busy days or leisurely brunches, this recipe is your new go-to for cozy mornings. Let’s dive into why this wrap is the best choice for your breakfast routine!

Why You’ll Love This Recipe

This omelet wrap is more than just eggs in a tortilla; it’s a meal that encapsulates comfort, nutrition, and flavor. Here’s why you’ll fall in love with this recipe:

  • Quick and Easy: Ready in under 15 minutes, this wrap is perfect for busy mornings when you need to rush out the door.
  • Nutritious Ingredients: Packed with fresh spinach, this dish provides essential vitamins and minerals, making it a healthy start to your day.
  • Customizable: Feel free to experiment with different cheeses or add extra veggies according to your preferences!
  • Great for Meal Prep: Make a batch ahead of time and store them in foil for quick breakfasts throughout the week.
  • Kid-Friendly: This wrap is not only delicious but also appealing to children, making it a great option for family meals.

Ingredients Breakdown

Let’s take a closer look at the ingredients that make this wrap so special:

  • 2 large eggs: The star of this dish, providing protein and a fluffy texture.
  • 1/2 cup fresh spinach, chopped: Adds color, nutrients, and a mild earthy flavor.
  • 1/4 cup shredded cheddar cheese: For that melty goodness that ties everything together.
  • 1 pinch salt: Enhances the flavors of the eggs and spinach.
  • 1 dash black pepper: A touch of spice to elevate the overall taste.
  • 1 teaspoon olive oil or butter: For cooking the eggs and adding richness.
  • 1 large tortilla (8–10 inch): The perfect wrap to hold all the scrumptious fillings.

Ingredient Substitutions

Side perspective of a juicy Spinach & Cheese Omelet Wrap on a plate.

If you find yourself short on some ingredients or want to make it your own, here are some substitutions:

  • Eggs: Use egg whites for a lighter version or a vegan egg substitute if you’re looking for plant-based options.
  • Cheese: Swap cheddar for feta or mozzarella for a different flavor profile.
  • Spinach: Kale or swiss chard can be great alternatives, adding their unique flavors.
  • Tortilla: Whole wheat or gluten-free tortillas work perfectly if you have dietary restrictions.

Chef’s Pro Tips for Perfect Results

To ensure that your spinach & cheese omelet wrap turns out perfect every time, keep these expert tips in mind:

  • Preheat your skillet: Ensuring your skillet is hot before adding the eggs helps them cook evenly and prevents sticking.
  • Cook the eggs gently: Use medium-low heat to create soft, creamy curds. High heat can lead to rubbery eggs!
  • Don’t overfill: It’s tempting to add more ingredients, but too much filling makes rolling difficult and messy.
  • Wrap it right: Fold the sides in first, then roll tightly to seal in all the deliciousness.
  • Sear for texture: After rolling, return to the skillet seam-side down to get a crispy exterior — it’s a game-changer!
  • Let it rest: Allow your wrap to sit for a minute after cooking. This lets the cheese melt fully and makes cutting easier.
  • Experiment with seasonings: Add herbs like basil or oregano for an extra layer of flavor.
  • Use fresh ingredients: The fresher your produce, the better the flavor. Visit your local market for the best spinach!

Common Mistakes and Troubleshooting

Even seasoned cooks can run into challenges. Here are some common pitfalls and how to avoid them:

  • Eggs sticking to the pan: Ensure your skillet is well-oiled and hot before adding the eggs.
  • Wrap falling apart: Be sure not to overfill and roll tightly. Use a toothpick to secure if necessary.
  • Overcooked spinach: Add it at the end of the egg cooking process to maintain its vibrant color and delicate texture.
  • Uneven cheese melting: Grate your cheese finely for quicker and more even melting.

Variations to Try

Feeling adventurous? Here are some fun variations to elevate your omelet wrap experience:

  • Mexican Twist: Add diced tomatoes, jalapeños, and a sprinkle of taco seasoning for a zesty kick.
  • Italian Style: Incorporate sun-dried tomatoes, basil, and mozzarella cheese for a Mediterranean flair.
  • Protein-Packed: Include diced ham or cooked chicken for a heartier version.
  • Vegan Delight: Substitute eggs with tofu and nutritional yeast for a delicious plant-based option.

Storage and Make-Ahead Instructions

This wrap is great for meal prepping! Here’s how to store it:

  • Refrigeration: Wrap in foil or place in an airtight container. It lasts for up to 3 days in the fridge.
  • Freezing: Wrap tightly in plastic wrap and foil. Freeze for up to 2 months. Reheat in the microwave or skillet.
  • Make-Ahead: Prepare the filling in advance and store it in the fridge. Assemble and cook the morning of serving for the best flavor.

Nutrition Tips and Dietary Adaptations

This Spinach & Cheese Omelet Wrap can be adapted to fit various dietary needs:

  • Low-Carb: Use a low-carb tortilla or skip the wrap altogether and serve the filling in a bowl.
  • Gluten-Free: Opt for gluten-free tortillas to make this wrap suitable for those with gluten sensitivities.
  • High-Protein: Add additional eggs or a side of Greek yogurt for extra protein.
  • Low-Calorie: Minimize cheese and use cooking spray instead of oil to cut down on calories.

Equipment Recommendations

To create the perfect omelet wrap, having the right tools can make a world of difference:

  • Nonstick skillet: Essential for easy cooking and cleanup.
  • Spatula: A good spatula helps you flip and fold the omelet without tearing it.
  • Whisk: For beating the eggs to a fluffier consistency.
  • Measuring cups and spoons: Ensure accurate ingredient portions for consistent results.

Serving Suggestions

To enhance your dining experience, consider these serving suggestions:

  • Fresh Salsa: A dollop of fresh salsa adds a burst of flavor and color.
  • Avocado Slices: Creamy avocado complements the wrap beautifully.
  • Side Salad: Pair with a light salad for a complete meal.
  • Herb Garnish: A sprinkle of fresh herbs like cilantro or parsley adds a final touch of freshness.

Frequently Asked Questions

Here are some common queries regarding the Spinach & Cheese Omelet Wrap:

  • Can I make this wrap ahead of time? Yes! Pre-cook the filling and assemble it right before serving.
  • How can I reheat the wrap? Microwave or place it in a skillet over low heat until heated through.
  • Is this recipe suitable for meal prep? Absolutely! It’s a great option for meal prepping and can be stored in the fridge or freezer.
  • Can I use other vegetables? Yes! Feel free to add bell peppers, mushrooms, or any of your favorite veggies.
  • What’s the best way to store leftovers? Wrap in foil or place in an airtight container in the fridge for up to 3 days.
  • Is it gluten-free? To make it gluten-free, just use gluten-free tortillas.
  • Can I make it dairy-free? Yes! Substitute cheese with a vegan alternative or nutritional yeast.
  • How do I know when the eggs are cooked? They should be soft and slightly runny but not liquid. They will continue to cook after removing from heat.

Now that you’re equipped with all the knowledge you need, it’s time to bring this Savory Spinach & Cheese Omelet Wrap to life in your kitchen. Whether for breakfast, brunch, or a cozy dinner, this wrap will surely become a cherished part of your culinary repertoire. So, grab your ingredients, turn up the music, and enjoy the joyous experience of cooking and sharing a meal that celebrates the flavors of the Mediterranean!

Spinach & Cheese Omelet Wrap

Prep Time 5 minutes
Cook Time 5 minutes
Total Time 10 minutes
Servings 1 serving
Calories 250
A quick and delicious breakfast wrap combining fluffy eggs, fresh spinach, and melted cheese, perfect for on-the-go mornings.

Ingredients

Eggs

  • 2 large eggs
  • 1/2 cup fresh spinach, chopped
  • 1/4 cup shredded cheddar cheese
  • 1 pinch salt
  • 1 dash black pepper
  • 1 teaspoon olive oil or butter
  • 1 large tortilla (8–10 inch)

Instructions 

  • Warm the tortilla briefly, then set aside.
  • Whisk eggs with salt and pepper.
  • Cook eggs in a skillet with oil or butter until softly set, then add spinach and cook until wilted.
  • Sprinkle cheese over eggs and let melt, then remove from heat.
  • Place eggs on tortilla, fold, and roll tightly.
  • Sear the wrap seam-side down for 1–2 minutes until golden, then slice and serve.

Notes

For extra flavor, add a dash of hot sauce or herbs.
Calories: 250kcal
Cost: $5
Course: Breakfast
Cuisine: American
Keyword: Cheese, Eggs, Spinach

The Velvet Slice: A Journey into the Heart of Vanilla Pound Cake

Welcome, dear friends! Today, we’re embarking on a delightful culinary adventure into the world of vanilla pound cake. This cake is not just a dessert; it’s a celebration of love, tradition, and the simple pleasures of life. With its rich buttery flavor and soft texture, this classic cake is perfect for any occasion — from festive gatherings to quiet evenings at home with a cup of tea. So, let’s roll up our sleeves and get ready to create a masterpiece that will fill your kitchen with warmth and joy!

Why You’ll Love This Recipe

  • Easy to Make: With just a handful of simple ingredients, you can whip up this delicious cake in no time.
  • Versatile Delight: This vanilla pound cake pairs beautifully with various toppings — from fresh fruit to whipped cream, it can transform into whatever you desire.
  • Perfect for Celebrations: Whether it’s a birthday, anniversary, or a cozy family gathering, this cake fits right in.
  • Rich Flavor: Infused with the beauty of vanilla, every slice delivers a taste that’s both comforting and indulgent.
  • Make Ahead Option: This cake keeps well, making it a great option to prepare ahead of time for busy days.

All About the Ingredients

To truly master this vanilla pound cake recipe, let’s take a closer look at the ingredients you’ll need:

  • Butter: 3 sticks of softened butter create that rich, moist texture. For a twist, use unsalted butter to control the salt levels.
  • Sugar: 3 cups of granulated sugar adds sweetness and contributes to the cake’s lovely crumb.
  • Eggs: 6 large eggs provide structure and lift, creating a tender crumb.
  • Vanilla Extract: 2 tablespoons of pure vanilla extract enhances the flavor, making every bite a delight.
  • Flour: 3 cups of all-purpose flour ensures a sturdy base for our cake.
  • Evaporated Milk: 1 cup of evaporated milk adds creaminess and moisture.

Step-by-Step Instructions for Vanilla Pound Cake

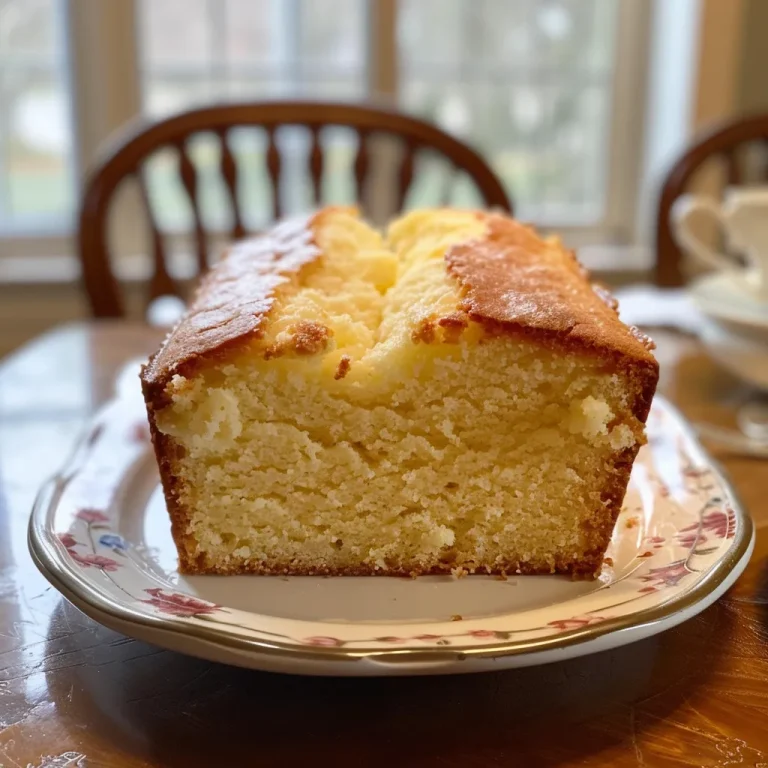
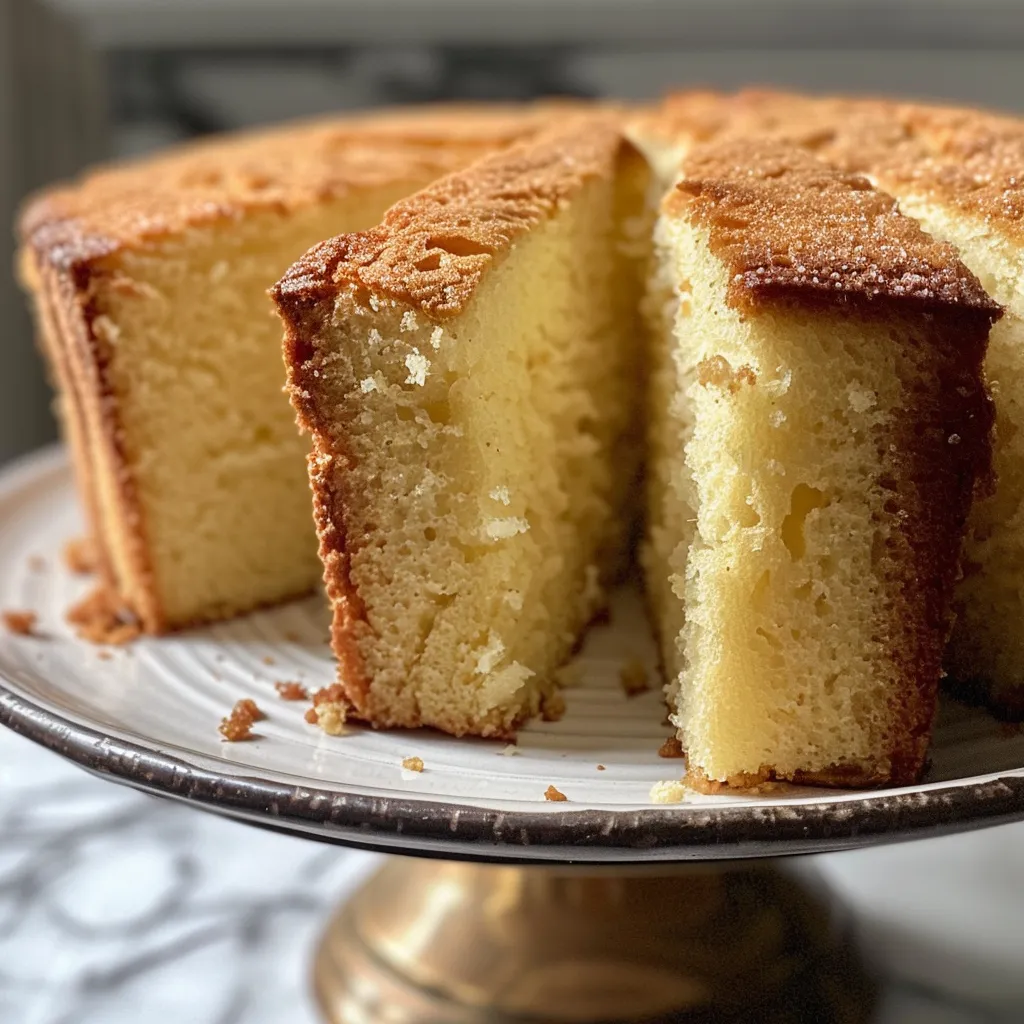
Close-up of a delicious vanilla pound cake, highlighting the soft and dense interior with a rich buttery color.

Now that we have our ingredients ready, let’s dive into the baking process!

  1. Preheat your oven to 325℉ (160℃).
  2. Spray a tube pan with baking spray and set aside to prepare for our cake.
  3. In a large bowl, cream together the softened butter and sugar with an electric mixer until light and fluffy — this is key for a lovely texture!
  4. Add the eggs two at a time, mixing well between each addition to ensure even incorporation.
  5. Mix in the vanilla extract, letting its warm aroma fill the air.
  6. Alternate adding the flour and evaporated milk, mixing well after each addition until the batter is smooth and creamy.
  7. Pour the batter into the prepared tube pan, spreading it evenly.
  8. Bake in the preheated oven for about 1 hour and 15 minutes, or until the cake is golden in color and a toothpick inserted into the center comes out clean.
  9. Remove the cake from the oven and let it cool in the pan for 10 minutes before transferring it to a wire rack to cool completely.

Pro Tips for the Perfect Pound Cake

To elevate your baking game, here are some expert insights:

  • Room Temperature Ingredients: Ensure your butter and eggs are at room temperature for better mixing and texture.
  • Don’t Overmix: Mix just until combined to avoid a dense cake; overmixing can lead to toughness.
  • Check Your Oven: Ovens can vary, so keep an eye on your cake during the last 10 minutes of baking.
  • Cool Gradually: Letting your cake cool gradually in the pan helps maintain moisture.
  • Use Fresh Ingredients: The quality of your vanilla extract and butter makes a significant difference in flavor.
  • Add a Pinch of Salt: A little salt balances sweetness and enhances the flavors beautifully.
  • Try Different Extracts: Experiment with almond or citrus extracts for a delightful twist.
  • Mix-Ins: Consider adding nuts, chocolate chips, or dried fruits for added texture and flavor.

Common Mistakes and Troubleshooting

Even the best bakers can run into issues. Here are common mistakes and how to avoid them:

  • Dense Texture: This can happen from overmixing; gently fold the ingredients together instead.
  • Dry Cake: If your cake turns out dry, check your oven temperature and make sure not to overbake.
  • Cracked Top: A cracked top can result from baking at too high a temperature; ensure your oven is calibrated correctly.
  • Sticking to the Pan: Always grease your pan well to ensure easy removal.

Delicious Variations to Try

Ready to explore beyond the classic? Here are some delightful variations to make this vanilla pound cake your own:

  • Citrus Zest: Add the zest of lemons or oranges for a fresh, vibrant flavor.
  • Chocolate Chip: Fold in semi-sweet chocolate chips for a decadent twist.
  • Almond Flavor: Substitute part of the vanilla extract with almond extract for a nutty aroma.
  • Spiced Version: Incorporate cinnamon or nutmeg for a warm, spiced cake perfect for the holidays.

Storage and Make-Ahead Instructions

Want to prepare this cake ahead of time? Here’s how:

  • At Room Temperature: Store your cooled cake in an airtight container for up to 3 days.
  • In the Refrigerator: Wrap the cake tightly in plastic wrap and refrigerate for up to 1 week.
  • Freezing: Freeze slices wrapped in foil for up to 2 months. Thaw at room temperature when ready to serve.

Frequently Asked Questions

Here are some common questions about making vanilla pound cake:

  • Can I use margarine instead of butter? While margarine can work, butter provides the best flavor and texture.
  • Is it necessary to use evaporated milk? Yes, it adds moisture; however, you can substitute with whole milk or buttermilk if needed.
  • Can I bake this in a regular cake pan? Absolutely! Just adjust the baking time accordingly.
  • How can I tell when my cake is done? A toothpick inserted in the center should come out clean or with a few moist crumbs.
  • Can I double the recipe? Yes, this recipe scales well. Just ensure your mixing bowl is large enough.
  • What’s the best way to serve vanilla pound cake? It’s delightful on its own or served with fresh fruit, whipped cream, or a drizzle of chocolate.
  • How can I enhance the vanilla flavor? Using vanilla bean paste instead of extract will intensify the vanilla flavor.
  • Can this cake be made gluten-free? Yes, you can substitute all-purpose flour with a gluten-free blend, but be sure to check the ratios.

Nutritional Tips and Dietary Adaptations

For those with dietary considerations, here are some tips:

  • Low-Sugar Option: Substitute part of the sugar with a natural sweetener like erythritol.
  • Dairy-Free Version: Use coconut oil and almond milk to make it dairy-free.
  • Whole Wheat Flour: Swap in whole wheat flour for added fiber and nutrients.

Essential Equipment Recommendations

To make your baking experience smooth, here’s what you’ll need:

  • Tube Pan: A sturdy tube pan helps this cake bake evenly.
  • Electric Mixer: For effortlessly creaming butter and sugar.
  • Measuring Cups and Spoons: Precision is key in baking, so use proper measuring tools.
  • Cooling Rack: Ensures your cake cools evenly to prevent sogginess.

Serving Suggestions

Now that your cake is beautifully baked, let’s talk about serving:

  • Traditional Serve: Serve plain with a dusting of powdered sugar for a classic touch.
  • Fruit Topping: Pair with a berry compote or caramelized peaches for a fresh twist.
  • Ice Cream Addition: A scoop of vanilla or chocolate ice cream brings a delightful contrast.
  • Tea Pairing: Enjoy with a cup of your favorite tea for a cozy afternoon treat.

Conclusion

And there you have it! Your very own vanilla pound cake that’s sure to impress family and friends alike. With its rich flavor and tender crumb, this cake is not just a dessert but a heartfelt celebration of life’s little moments. So gather your loved ones, share a slice, and let the joy of cooking bring you closer together. Happy baking, my friends!

Vanilla Pound Cake

Prep Time 15 minutes
Cook Time 1 hour 15 minutes
Total Time 1 hour 30 minutes
Servings 8 slices
Calories 480
A rich and moist vanilla pound cake perfect for any occasion. Simple to make with classic ingredients and a deliciously buttery flavor.

Ingredients

Butter

  • 3 sticks butter (softened) (see note below)

Sugar

  • 3 cups granulated sugar

Eggs

  • 6 eggs eggs

Vanilla Extract

  • 2 tbsp vanilla extract

Flour

  • 3 cups all-purpose flour

Evaporated Milk

  • 1 cup evaporated milk

Instructions 

  • Preheat oven to 325℉ (160℃). Grease a tube pan.
  • Cream butter and sugar until light and fluffy. Add eggs one at a time, then vanilla.
  • Alternate adding flour and evaporated milk, mixing well after each addition.
  • Pour batter into prepared pan and bake for 75 minutes until golden and a toothpick comes out clean.
  • Cool in pan for 10 minutes, then transfer to wire rack to cool completely.

Notes

Ensure butter is softened for easier creaming.
Calories: 480kcal
Cost: $15
Course: Dessert
Cuisine: American
Keyword: vanilla

Discover the Heartwarming Charm of Garlic Rosemary Focaccia

Welcome to a culinary journey that celebrates the rich aromas and flavors of the Mediterranean! Today, we’re diving into the delightful world of Garlic Rosemary Focaccia. This homemade bread not only fills your kitchen with the heavenly scent of baking but also transforms any meal into a joyous occasion. Let’s roll up our sleeves and create a focaccia that’s crispy on the outside, fluffy on the inside, and bursting with the vibrant flavors of garlic and rosemary.

Why You’ll Love This Recipe

There’s something truly special about baking garlic rosemary focaccia. Here are five reasons why this recipe will become a staple in your kitchen:

  • Easy to Make: Even if you’re a novice in the kitchen, this recipe is straightforward and forgiving, making it virtually foolproof!
  • Versatile Delight: Perfect as an appetizer, a side for soups, or a base for sandwiches, this focaccia pairs beautifully with any meal.
  • Fresh Ingredients: Using high-quality ingredients like extra virgin olive oil and fresh rosemary elevates the flavor, making each bite a celebration of Mediterranean goodness.
  • Customizable: Feel free to experiment with toppings! From sun-dried tomatoes to olives, you can create your own signature focaccia.
  • Heavenly Aroma: The scent of baking garlic and rosemary wafting through your home will create an inviting atmosphere that beckons everyone to the table.

Gathering Your Ingredients

Let’s take a closer look at what you’ll need for this delicious focaccia:

  • All-Purpose Flour: 3 1/2 cups for a light and airy texture.
  • Active Dry Yeast: 2 1/4 tsp to help the dough rise beautifully.
  • Warm Water: 1 1/4 cups (100-110°F) to activate the yeast.
  • Extra Virgin Olive Oil: 1/4 cup plus more for drizzling, bringing richness and flavor.
  • Sea Salt: 1 1/2 tsp to enhance all the flavors.
  • Garlic: 4 cloves, minced or roasted for a sweet and aromatic base.
  • Fresh Rosemary: 2 tbsp, chopped to infuse the bread with its distinctive fragrance.

Step-by-Step Instructions

Side view of freshly baked Garlic Rosemary Herb Focaccia with herbs visible on top.

Now, let’s get that dough rising! Follow these easy steps to create your garlic rosemary focaccia:

  1. In a large bowl, combine warm water and yeast. Let it sit for about 5 minutes until it becomes bubbly and frothy.
  2. Add the flour, olive oil, and salt. Stir until a sticky dough forms.
  3. Cover the bowl with a towel and let the dough rise in a warm area for 1-2 hours, or until it has doubled in size.
  4. Preheat your oven to 425°F (218°C). Generously oil a sheet pan or cast iron skillet to prevent sticking.
  5. Transfer the dough to the prepared pan. Use your oiled fingers to stretch and dimple the dough gently.
  6. Sprinkle the minced garlic and chopped rosemary over the top. Drizzle with additional olive oil and sprinkle with sea salt.
  7. Bake for 22-25 minutes, or until the focaccia is golden and crisp on the edges.
  8. Let it cool slightly before slicing and serving. Enjoy warm!

Pro Tips for Perfect Focaccia

Here are some expert insights to elevate your focaccia-making game:

  • Temperature Matters: Ensure your water is warm enough (100-110°F) to activate the yeast without killing it.
  • Mind the Knead: You don’t need to knead extensively; just enough to combine the ingredients will do.
  • Use Quality Olive Oil: A good quality extra virgin olive oil will enhance the flavor of your focaccia.
  • Experiment with Flavors: Add toppings like olives, sundried tomatoes, or even cheese for an added burst of flavor.
  • Don’t Rush the Rise: Allowing the dough to rise properly is crucial for achieving that airy texture.
  • Dimples Matter: The dimples not only create texture but also hold the olive oil and toppings beautifully.
  • Storage Tips: Keep leftover focaccia in an airtight container to maintain freshness.
  • Reheat with Care: Warm it up in the oven for the best texture, rather than in the microwave.

Common Mistakes and Troubleshooting

Even the best cooks can run into hiccups. Here are some common mistakes and how to avoid them:

  • Too Dense? If your focaccia turns out dense, it might be due to overworking the dough or not allowing it to rise sufficiently.
  • Not Rising? Ensure your yeast is fresh and that the water temperature is right. If it’s too hot, it can kill the yeast.
  • Burnt Bottom? If the bottom is too dark, try using a lower rack in the oven or reducing the temperature slightly next time.
  • Flavorless? Don’t skimp on the salt and olive oil, as they are key to enhancing the bread’s flavor.

Delicious Variations to Try

Once you’ve mastered the classic garlic rosemary focaccia, why not try some exciting variations? Here are four ideas:

  • Herb Infusion: Mix in fresh basil or thyme for a different herb profile.
  • Cheesy Delight: Add shredded mozzarella or parmesan on top before baking for a cheesy crust.
  • Savory Additions: Incorporate sun-dried tomatoes or roasted bell peppers for a Mediterranean twist.
  • Sweet Touch: For a dessert version, top with cinnamon and sugar before baking!

Make-Ahead and Storage Instructions

You can prepare your garlic rosemary focaccia ahead of time. Here’s how:

  • Make Ahead: Prepare the dough and let it rise, then refrigerate it for up to 24 hours. Bring it back to room temperature before baking.
  • Storage: Store leftover focaccia in an airtight container at room temperature for up to 3 days or freeze it for up to a month.

Frequently Asked Questions

Here are some common questions about garlic rosemary focaccia:

  • Can I use whole wheat flour? Yes, but it may result in a denser texture. You can mix it with all-purpose flour for a lighter result.
  • What can I serve with focaccia? It pairs well with soups, salads, or as a base for sandwiches.
  • Can I freeze the dough? Absolutely! Freeze the dough after the first rise and let it thaw in the fridge overnight before the second rise.
  • How do I know when it’s done? The focaccia should be golden brown and sound hollow when tapped on the bottom.
  • What if my dough doesn’t rise? Ensure your yeast is fresh and try warming your kitchen slightly if it’s too cool.
  • Can I add other toppings? Yes! Feel free to add olives, sundried tomatoes, or even a sprinkle of cheese.
  • How long does it take to bake? Typically 22-25 minutes, but keep an eye on it to prevent burning.
  • What’s the best way to serve it? Warm is best! Drizzle with extra olive oil and sprinkle with sea salt for added flavor.

Nutritional Tips and Dietary Adaptations

For those mindful of their nutrition, here are some tips:

  • Low-Carb Option: Consider using almond flour for a low-carb version, though it may require adjustments in liquid.
  • Gluten-Free: Use a gluten-free flour blend to accommodate dietary restrictions.
  • Healthier Fats: Substitute part of the olive oil with unsweetened applesauce for a lower-fat version.

Essential Equipment for Perfect Focaccia

Having the right tools can make a world of difference. Here’s what you’ll need:

  • Mixing Bowl: A large bowl for combining ingredients and letting the dough rise.
  • Oven Thermometer: Ensures your oven is at the correct temperature for baking.
  • Sheet Pan or Cast Iron Skillet: Ideal for achieving that perfect crust.
  • Spatula: Helpful for transferring and shaping the dough.
  • Towel: For covering the dough while it rises, keeping it warm.

Serving Suggestions

Serve your beautiful focaccia warm, perhaps alongside a bowl of olive oil for dipping. It also shines as a side to roasted vegetables, a fresh salad, or even as a base for bruschetta. Don’t forget to garnish with a sprinkle of sea salt and a drizzle of high-quality olive oil for that extra touch of Mediterranean flair!

So, gather your ingredients, put on some lively music, and let’s create a garlic rosemary focaccia that will not only nourish but also bring joy to your table. Happy baking!

Garlic Rosemary Herb Focaccia

Prep Time 15 minutes
Cook Time 25 minutes
Total Time 40 minutes
Servings 8 slices
Calories 250
A flavorful and aromatic focaccia bread infused with garlic and fresh rosemary, perfect for sharing.

Ingredients

For the dough

  • 3 1/2 cups All-purpose flour
  • 2 1/4 tsp Active dry yeast
  • 1 1/4 cups Warm water
  • 1/4 cup Extra virgin olive oil (plus more for drizzling)
  • 1 1/2 tsp Sea salt
  • 4 cloves Garlic (minced or roasted)
  • 2 tbsp Fresh rosemary (chopped)

Instructions 

  • Mix warm water and yeast; let sit 5 minutes until bubbly.
  • Add flour, olive oil, and salt; stir into sticky dough.
  • Let dough rise in a warm area for 1-2 hours until doubled.
  • Preheat oven to 425°F (218°C); oil a pan and transfer dough, stretching it out.
  • Top with garlic, rosemary, drizzle olive oil, and sprinkle sea salt; bake 22-25 mins.
  • Cool slightly, then slice and serve.

Notes

For extra flavor, roast garlic before adding.
Calories: 250kcal
Cost: $15
Course: Bread
Cuisine: Italian
Keyword: focaccia

Welcome, dear friends! Today, we’re diving into the rich, velvety world of homemade brownies. Imagine a dessert that’s not just about satisfying your sweet tooth but also about creating memories with each bite. Whether it’s a cozy family gathering or a casual evening with friends, these brownies will undoubtedly steal the show. Join me as we explore the secrets behind the best brownie recipe that promises to be both rich and fudgy, with a chocolate flavor that will leave you craving more.

Why You’ll Love This Recipe

This brownie recipe is not just another dessert; it’s a celebration of flavors and textures! Here are five reasons why you’ll adore these homemade brownies:

  • Irresistible Texture: Experience the perfect balance between fudgy and chewy with a delightful crackly top, making every bite a joy.
  • Rich Chocolate Flavor: Using high-quality cocoa powder and chocolate ensures these brownies are packed with deep, rich chocolate goodness.
  • Simple Ingredients: With just a handful of pantry staples, you can whip up these brownies in no time, making them a go-to recipe for any occasion.
  • Customizable: Add your favorite mix-ins like nuts, chocolate chips, or caramel for a unique twist that suits your taste.
  • Perfect for Sharing: These brownies are great for parties, potlucks, or just an indulgent night at home. Everyone will want a piece!

Ingredient Breakdown

Let’s gather our ingredients! Here’s what you’ll need to create these decadent brownies:

  • 0.5 cup butter: Adds richness and moisture. You can substitute with coconut oil or unsweetened applesauce for a dairy-free version.
  • 1 cup white sugar: Sweetens the brownies perfectly. Brown sugar can be used for a deeper flavor.
  • 2 eggs: Essential for structure. For a vegan option, replace with flax eggs (1 tbsp flaxseed meal + 2.5 tbsp water per egg).
  • 1 teaspoon vanilla extract: Enhances flavor. Use pure vanilla for the best results.
  • 1/3 cup unsweetened cocoa powder: The heart of chocolate flavor! Dutch-processed cocoa can add a smoother taste.
  • 0.5 cup all-purpose flour: Provides structure. Almond flour is a great gluten-free alternative.
  • 1/4 teaspoon salt: Balances sweetness. You can use sea salt for added flavor.
  • 1/4 teaspoon baking powder: Helps the brownies rise slightly, contributing to their texture.
  • 3 tablespoons butter, softened: For frosting—adds creaminess. Vegan butter can be used as a substitute.
  • 3 tablespoons unsweetened cocoa powder: For frosting—adds chocolatey richness.
  • 1 tablespoon honey: Natural sweetener for frosting. Maple syrup works well too.
  • 1 teaspoon vanilla extract: For frosting—just like in the brownies, it enhances flavor.
  • 1 cup confectioners’ sugar: Sweetens and thickens the frosting. For a lower sugar option, use a sugar substitute.

How to Make Brownies from Scratch

Ready to bring these ingredients together? Follow these simple steps for baking success!

  • Preheat your oven: Set your oven to 350°F (175°C). Grease and flour an 8-inch square baking pan.
  • Melt the butter: In a large saucepan over low heat, melt 1/2 cup of butter. Remove from heat.
  • Add sugar and eggs: Stir in the sugar, eggs, and 1 teaspoon of vanilla extract. Mix until combined.
  • Combine dry ingredients: Gradually stir in 1/3 cup cocoa powder, flour, salt, and baking powder. Mix until smooth.
  • Spread into the pan: Pour the batter into the prepared pan, spreading it evenly.
  • Bake to perfection: Bake for 25 to 30 minutes, until the top is dry and edges pull away slightly. A toothpick should come out with moist crumbs, not wet batter.
  • Let cool: Allow the brownies to cool in the pan before frosting.
  • Make the frosting: In a bowl, combine softened butter, confectioners’ sugar, 3 tablespoons cocoa, honey, and 1 teaspoon vanilla extract. Stir until smooth and creamy.
  • Frost the brownies: While the brownies are still warm, spread the frosting evenly over the top for a melty finish.

Pro Tips for the Best Brownies

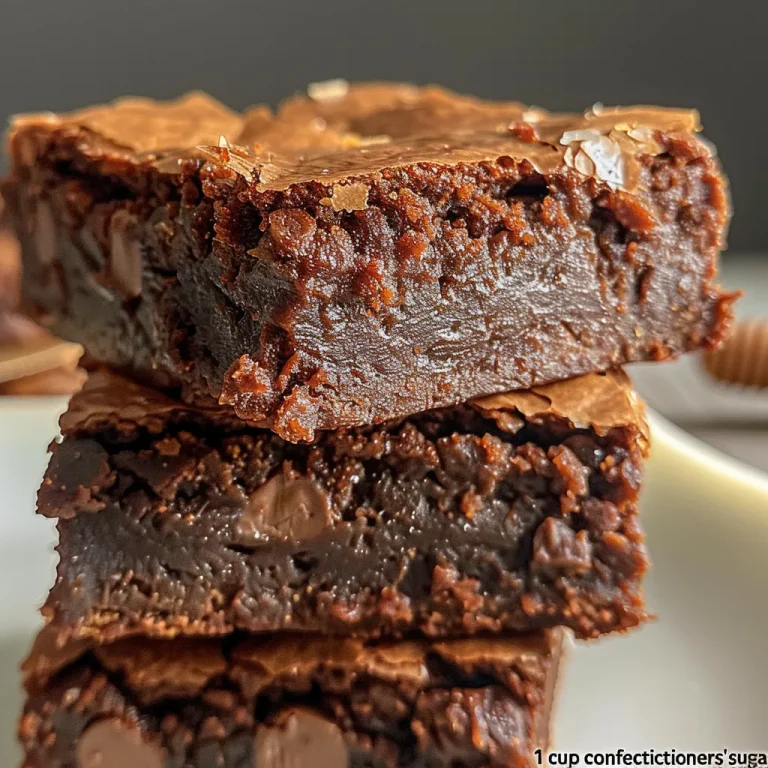
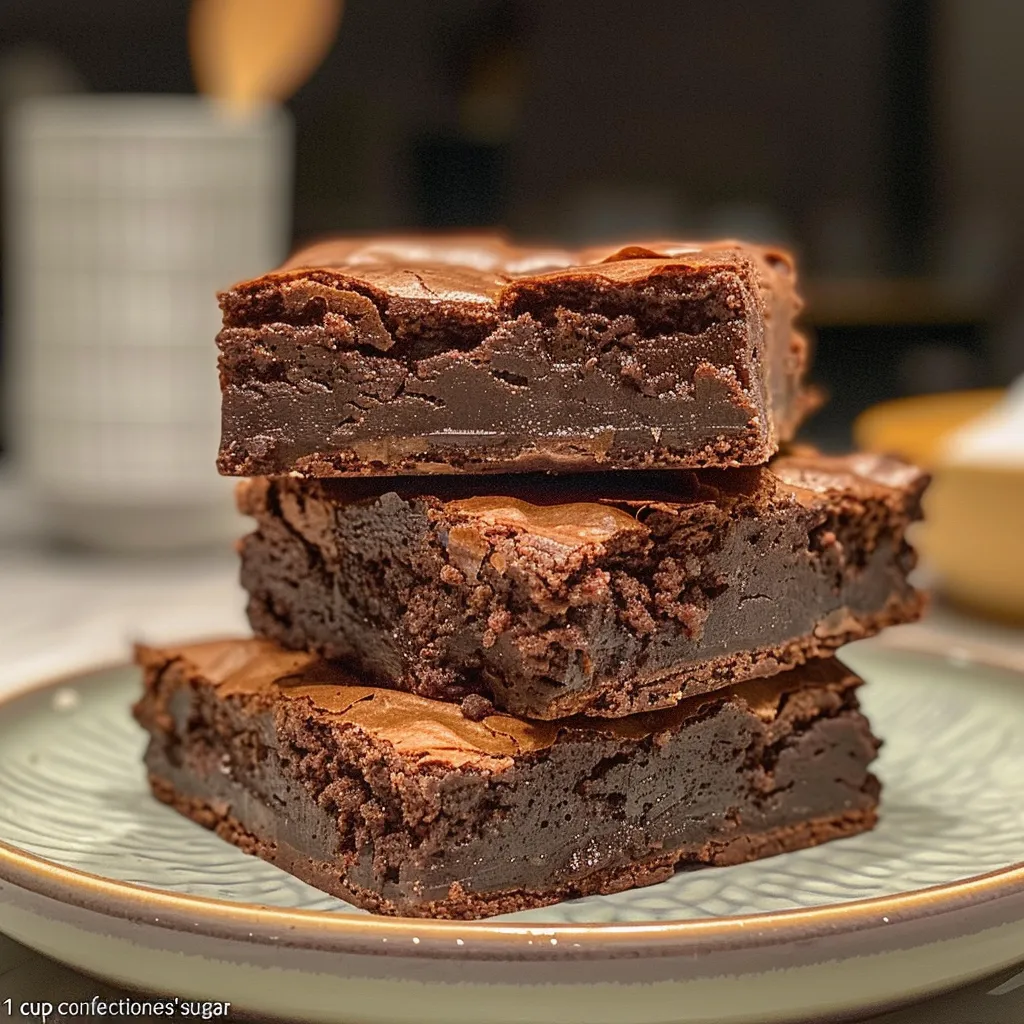
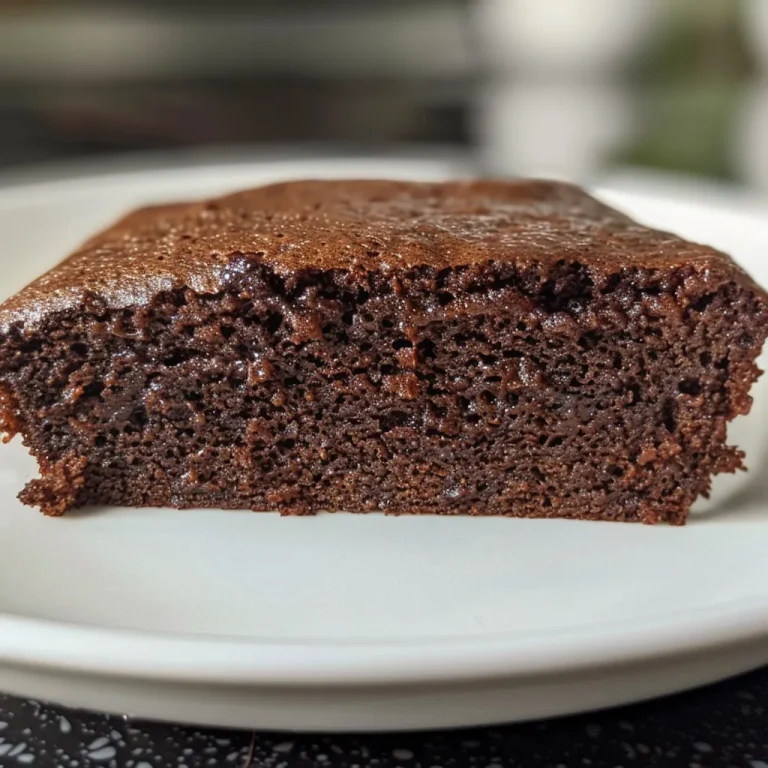
Juicy brownies displayed on a plate, highlighting their chocolatey layers and soft edges.

Want to elevate your brownie game? Here are some expert tips to ensure your brownies are always a hit:

  • Use quality chocolate: Invest in high-quality chocolate and cocoa powder for a richer flavor.
  • Don’t overmix: Mix just until combined to keep your brownies fudgy and tender.
  • Check for doneness: Remember, underbaking slightly will keep them fudgy; overbaking results in a dry texture.
  • Cool before cutting: Let them cool completely for cleaner cuts; warm brownies are delicious but may crumble.
  • Experiment with mix-ins: Try adding nuts, chocolate chips, or even swirls of peanut butter for a unique take.
  • Use parchment paper: Line your baking pan with parchment paper for easy removal and clean-up.
  • Store properly: Keep them in an airtight container to maintain freshness.
  • Try different frostings: Experiment with different frostings or toppings like whipped cream or fresh fruit.

Common Mistakes and Troubleshooting

Even the best bakers make mistakes! Here are some common pitfalls and how to avoid them:

  • Dry brownies: Overbaking is the main culprit. Keep an eye on the baking time and check for doneness early.
  • Too dense: This can happen if you overmix the batter. Mix gently just until combined.
  • Crumbly edges: Ensure you grease your pan well or use parchment paper for easy removal without breaking.
  • Not enough chocolate flavor: Be sure to use quality cocoa powder and consider adding chocolate chips for extra richness.

Variations to Try

Feeling adventurous? Here are some delicious variations to make this brownie recipe your own:

  • Peanut Butter Swirl: Add dollops of peanut butter to the batter before baking and use a knife to swirl it through.
  • Salted Caramel Brownies: Drizzle caramel sauce over the brownies before baking, then sprinkle sea salt on top after frosting for a sweet and salty combo.
  • Mint Chocolate Brownies: Add a few drops of mint extract to the batter for a refreshing twist.
  • Nutty Brownies: Fold in chopped walnuts or pecans for added crunch and flavor.

Storage and Make-Ahead Instructions

Want to enjoy these brownies later? Here’s how to store and prepare them in advance:

  • Room Temperature: Store in an airtight container at room temperature for up to 3 days.
  • Refrigeration: For longer storage, keep them in the fridge for up to a week. Just allow them to come to room temperature before serving.
  • Freezing: Slice brownies and wrap them individually in plastic wrap, then place them in a freezer-safe container. They’ll last up to 3 months.
  • Make-Ahead: You can prepare the batter a day in advance and store it in the fridge. Just bake when you’re ready!

FAQs About Brownies

Got questions? I’ve got answers! Here are some frequently asked questions about brownies:

  • Can I substitute the eggs? Yes! You can use flax eggs or applesauce as a substitute for eggs in this recipe.
  • What’s the best way to cut brownies? For clean cuts, use a sharp knife dipped in hot water and wipe it dry between cuts.
  • How can I make brownies chewier? Try using more brown sugar instead of white sugar or adding an extra egg yolk.
  • Can I use cocoa powder instead of chocolate? Absolutely! Just ensure the cocoa powder is unsweetened for the best results.
  • What pan should I use? An 8-inch square pan is ideal, but you can also use a 9×13-inch pan for thinner brownies.
  • Do I need to let brownies cool before frosting? Yes, allowing them to cool slightly helps the frosting adhere better.
  • Can I add fruit to the brownies? Yes! Chopped cherries or raspberries can add a delightful fruity twist.
  • What’s the best way to serve brownies? Brownies are delicious served warm with a scoop of vanilla ice cream or fresh whipped cream on top!

Nutrition Tips and Dietary Adaptations

Want to indulge without guilt? Here are some tips for making your brownies a bit healthier:

  • Use whole wheat flour: Swap all-purpose flour for whole wheat to increase fiber content.
  • Reduce sugar: Cut the sugar by a third and add a ripe banana or unsweetened applesauce for natural sweetness.
  • Dark chocolate: Opt for dark chocolate, which has less sugar and more antioxidants.
  • Nut butter: Replace some butter with almond or cashew butter for added protein and healthy fats.

Equipment Recommendations

Having the right tools can make your brownie-making experience smoother. Here’s what I recommend:

  • Mixing bowls: A set of mixing bowls in various sizes is essential for combining ingredients.
  • Measuring cups and spoons: Accurate measurements are key to baking success.
  • Spatula: A rubber spatula helps scrape down the sides of the bowl and spread the batter evenly.
  • 8-inch square baking pan: The perfect size for thick, chewy brownies.
  • Parchment paper: Use this for easy removal of brownies from the pan.

Serving Suggestions

Ready to serve your delectable brownies? Here are some delightful ideas:

  • À la mode: Serve warm brownies with a scoop of vanilla ice cream and a drizzle of chocolate sauce.
  • Fresh fruit: Pair with berries or sliced bananas for a fresh contrast to the rich chocolate.
  • Whipped cream: Top with a generous dollop of homemade whipped cream for added indulgence.
  • Chocolate drizzle: Drizzle melted chocolate over the top for an elegant finish.

Conclusion: Celebrate the Joy of Baking

As we wrap up this chocolate journey, I hope you’re inspired to gather your ingredients and create a batch of these heavenly brownies. Each time you bake, you’re not just making a dessert; you’re crafting moments filled with joy, laughter, and love. So, preheat that oven, and let the magic of baking bring your kitchen alive. Happy baking, amigos!

Best Brownies

Prep Time 15 minutes
Cook Time 30 minutes
Total Time 45 minutes
Servings 12 pieces
Calories 250
Indulge in rich, fudgy brownies with a luscious chocolate frosting, perfect for any occasion.

Ingredients

Main ingredients

  • 0.5 cup butter
  • 1 cup white sugar
  • 2 eggs eggs
  • 1 teaspoon vanilla extract
  • 0.33333334326744 cup unsweetened cocoa powder
  • 0.5 cup all-purpose flour
  • 0.25 teaspoon salt
  • 0.25 teaspoon baking powder
  • 3 tablespoons butter, softened
  • 3 tablespoons unsweetened cocoa powder
  • 1 tablespoon honey
  • 1 teaspoon vanilla extract
  • 1 cup confectioners' sugar

Instructions 

  • Preheat oven to 350°F (175°C). Grease a baking pan.
  • Melt butter, mix with sugar, eggs, and vanilla. Add cocoa, flour, salt, baking powder. Spread in pan.
  • Bake for 25-30 minutes. Cool before frosting.
  • Mix softened butter, confectioners' sugar, cocoa, honey, vanilla. Frost warm brownies.

Notes

For extra richness, use high-quality cocoa powder.
Calories: 250kcal
Cost: $12
Course: Dessert
Cuisine: American
Keyword: brownies

Welcome to the Heart of Mediterranean Baking

There’s something magical about the aroma of freshly baked bread wafting through your home. It’s a delightful experience that’s reminiscent of sunlit markets and bustling kitchens in Seville and beyond. Today, I’m thrilled to share with you my treasured recipe for Honey Whole Wheat Sandwich Bread. This isn’t just any bread; it’s a warm hug of wholesome goodness, perfect for sandwiches, toast, or simply enjoyed on its own with a smear of butter. Let’s dive into the world of baking this delicious bread, celebrating the rich flavors and vibrant textures that make every slice a joy.

Why You’ll Love This Recipe

As you embark on this baking adventure, here are five reasons you’ll adore this Honey Whole Wheat Sandwich Bread:

  • Wholesome Ingredients: Made with whole wheat flour, this bread is packed with nutrients and fiber, making it a healthier choice for your family.
  • Natural Sweetness: The addition of honey not only gives a slight sweetness but also enhances the bread’s overall flavor profile.
  • Easy to Make: Even if you’re a beginner in the kitchen, this recipe is straightforward and requires minimal equipment.
  • Versatile Uses: Perfect for sandwiches, toast, or as a side to your favorite soups and salads, this bread will quickly become a staple in your home.
  • Delicious Aroma: The smell of baking bread will fill your kitchen, creating an inviting atmosphere that draws everyone in.

Ingredients Breakdown

Let’s gather our ingredients! Here’s what you’ll need to create this beautiful loaf:

  • 1 cup water: Ensure it’s at room temperature to activate the yeast effectively.
  • 1/2 cup milk of your choice: Whole, almond, or oat milk works beautifully here.
  • 1/4 cup honey: This is your natural sweetener, adding flavor and moisture.
  • 2 tablespoons extra-virgin oil: Feel free to substitute with any neutral vegetable oil.
  • 2½ teaspoons active dry yeast: This is key for that lovely rise.
  • 2 1/3 cups unbleached bread or all-purpose flour: This enhances the bread’s structure.
  • 1¼ cups whole wheat flour: The star of our recipe, adding flavor and nutrition.
  • 2 teaspoons kosher or fine sea salt: Balances the sweetness of the honey.
  • Butter (or non-stick spray): For greasing the pan to ensure a lovely release.

Step-by-Step Instructions

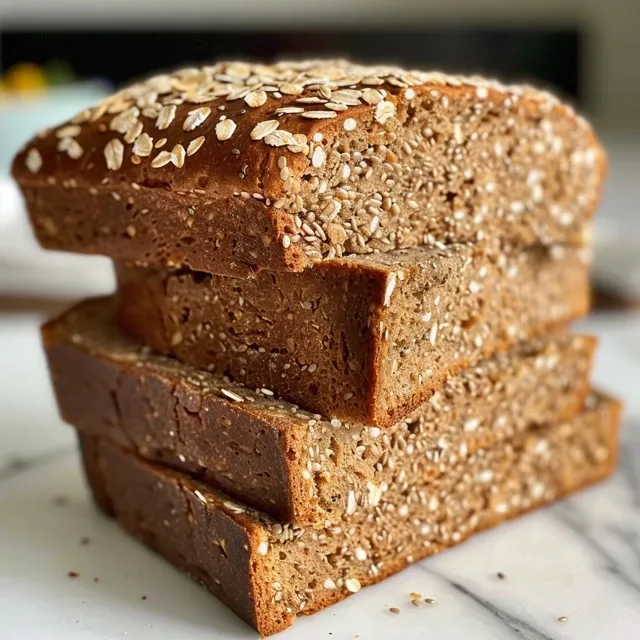
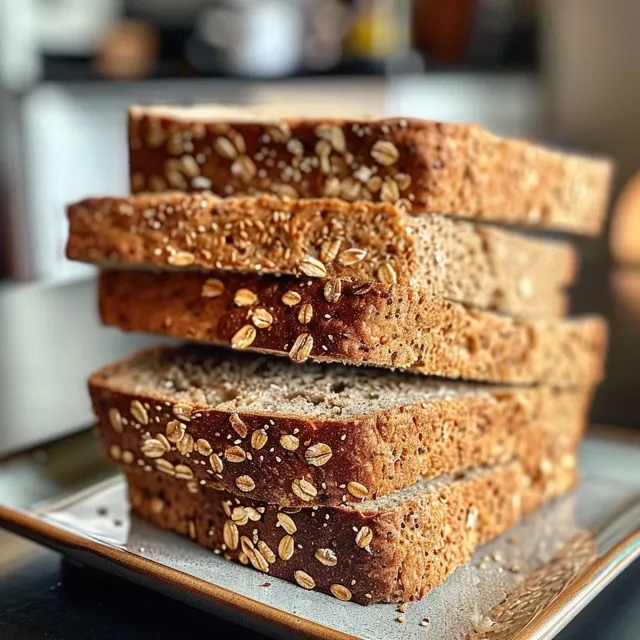
Side view of Honey Whole Wheat Sandwich Bread, highlighting its airy crumb and rich honey glaze.

Now let’s roll up our sleeves and get baking! Follow these steps to create your Honey Whole Wheat Sandwich Bread:

  1. Mix the wet ingredients: In a bowl, whisk together honey, milk, oil, and water until the honey is fully dissolved. Sprinkle the active dry yeast on top and let it sit for about 10-15 minutes to activate.
  2. Combine dry ingredients: In a large mixing bowl, whisk together both flours and salt. Allow this mixture to rest for 10 minutes, letting the flavors meld.
  3. Combine wet and dry: Pour your activated yeast mixture into the flour mixture. Stir until fully combined. Cover the bowl with a clean cloth and let it rise until doubled in volume, about 1 hour. Note: If you’re not baking right away, you can place the bowl in the refrigerator for up to a week.
  4. Shape the dough: Once risen, butter a loaf pan. Gently pull the dough out onto a floured surface, being careful not to deflate it completely. Shape it into a loaf by folding in the edges and placing it seam-side down in the prepared pan.
  5. Final rise: Let the shaped loaf rise uncovered for about 1 hour, or until it rises at least half an inch above the edges of the pan.
  6. Bake the bread: Preheat your oven to 350ºF (180ºC). Bake the bread for 40-45 minutes, until it’s a rich golden-brown and sounds hollow when tapped. Transfer to a wire rack to cool for at least 1 hour before slicing.

Pro Tips for Perfect Bread

Here are some expert insights to ensure your bread turns out perfectly every time:

  • Temperature matters: Make sure your water is warm, but not hot. This helps the yeast activate without killing it.
  • Humidity is key: If your dough seems dry, add a tablespoon of water at a time until it feels right; it should be sticky, not dry.
  • Patience is a virtue: Allow the dough to rise fully; this is essential for achieving a light and airy texture.
  • Oven thermometer: Check that your oven’s temperature is accurate with a thermometer, as inconsistent temperatures can affect the baking.
  • Cool completely: Let the bread cool before slicing to prevent it from becoming gummy.
  • Experiment with flours: Try substituting some of the all-purpose flour with spelt or rye for a different flavor profile.
  • Use a sharp knife: For the best slices, use a serrated bread knife.
  • Store properly: Keep your bread wrapped in a cloth to maintain its freshness.

Avoiding Common Mistakes

Here are some common pitfalls and how to avoid them:

  • Too dense?: This could be due to over-mixing or not allowing enough time for the dough to rise.
  • Dry bread?: Ensure your dough is adequately hydrated during mixing; add water as needed.
  • Burnt crust?: If the crust is browning too quickly, cover it loosely with foil during the last 15 minutes of baking.
  • Flavorless bread?: Use fresh, high-quality honey and salt to enhance the flavor significantly.

Variations to Try

If you want to switch things up, here are some delightful variations of this bread:

  • Herbed Whole Wheat Bread: Add dried herbs like rosemary or thyme to the dough for an aromatic twist.
  • Nuts and Seeds: Incorporate chopped walnuts or sunflower seeds for added texture and nutrition.
  • Fruit and Nut Bread: Mix in dried cranberries or apricots for a sweet and tangy flavor.
  • Spiced Honey Bread: Add cinnamon or nutmeg to the dry ingredients for a warm, spiced flavor.

Storage and Make-Ahead Instructions

Want to prepare ahead? Here’s how to store your Honey Whole Wheat Sandwich Bread:

  • Room temperature: Store in a cool, dry place wrapped in a cloth or in a breadbox for up to 3 days.
  • Refrigeration: For longer storage, wrap tightly and refrigerate for up to a week.
  • Freezing: Slice and freeze your bread in an airtight bag for up to 3 months. Thaw at room temperature or toast directly from the freezer.

Frequently Asked Questions

Here are some common questions and answers to help you with your baking journey:

  • Can I use whole wheat flour instead of all-purpose flour? Yes, but it may affect the texture; consider using a mix of both for best results.
  • What can I substitute for honey? Maple syrup or agave nectar works well as a substitute.
  • Why is my bread not rising? Ensure your yeast is fresh and your environment is warm enough for rising.
  • Can I bake this bread in a bread machine? Yes, follow your machine’s instructions for whole wheat settings.
  • How can I add flavor to my bread? Experiment with different herbs, spices, or seeds to enhance the flavor.
  • Can I use whole milk instead of water? Yes, using milk will add richness to your bread.
  • What’s the best way to slice homemade bread? Use a serrated knife and slice while the bread is completely cool.
  • Can I double the recipe? Yes, just ensure you have a large enough bowl for mixing and a larger loaf pan.

Nutritional Tips and Dietary Adaptations

Here’s how you can make this recipe fit specific dietary needs:

  • Gluten-Free Option: Substitute with a gluten-free all-purpose flour blend and check your yeast for gluten-free certification.
  • Lower Sugar: Reduce the honey by half for a less sweet bread, or use a sugar substitute.
  • Vegan Adaptation: Replace honey with maple syrup and use plant-based milk and oil.
  • Higher Protein: Add protein-rich seeds like chia or flaxseed to the dough before rising.

Essential Equipment Recommendations

Here’s what you’ll need to make this recipe a success:

  • Mixing Bowls: A large bowl for mixing ingredients and a smaller one for yeast activation.
  • Loaf Pan: A standard 9×5 inch loaf pan works perfectly.
  • Dough Scraper: Helpful for transferring and shaping your dough.
  • Kitchen Scale: For precision in measuring ingredients, especially for baking.
  • Oven Thermometer: To ensure accurate baking temperatures.

Serving Suggestions

Finally, let’s talk about how to enjoy your Honey Whole Wheat Sandwich Bread:

  • Classic Sandwiches: Load it up with your favorite deli meats, veggies, and spreads for a delicious lunch.
  • Breakfast Toast: Top with avocado and poached eggs or peanut butter and banana for a hearty breakfast.
  • Grilled Cheese: This bread makes a fantastic base for a melty grilled cheese sandwich.
  • Soup Companion: Serve alongside your favorite soups for a comforting meal.

Join the Baking Adventure!

Now that you have the keys to baking your own Honey Whole Wheat Sandwich Bread, it’s time to preheat that oven and get started! Remember, baking is about love and creativity, so don’t hesitate to make it your own. I hope this recipe brings as much joy to your kitchen as it has to mine. Grab a plate and let’s celebrate the art of baking together!

Honey Whole Wheat Sandwich Bread

Prep Time 20 minutes
Cook Time 45 minutes
Total Time 1 hour 5 minutes
Servings 1 loaf
Calories 180
This homemade honey whole wheat bread is soft, flavorful, and perfect for sandwiches. Easy to make with wholesome ingredients.

Ingredients

Wet ingredients

  • 1 cup water (room temperature)
  • 1/2 cup milk of your choice (room temperature)
  • 1/4 cup honey
  • 2 tablespoons extra-virgin oil (sub any neutral vegetable oil)
  • teaspoons active dry yeast

Dry ingredients

  • 2 1/3 cups unbleached bread or all-purpose flour
  • cups whole wheat flour
  • 2 teaspoons kosher or fine sea salt

Additional

  • Butter (or non-stick spray for coating the pan)

Instructions 

  • Mix honey, milk, oil, and water; add yeast and let sit 10-15 min.
  • Combine flours and salt; let sit 10 min.
  • Add yeast mixture to dry ingredients; let rise until doubled (~1 hr). Refrigerate if not baking immediately.
  • Shape dough into a loaf, place in buttered pan, and let rise 1 hr until ½ inch above pan edges.
  • Preheat oven to 350ºF (180ºC); bake 40-45 min until golden and hollow-sounding. Cool 1 hr before slicing.

Notes

Store bread in a cool, airtight container for freshness.
Calories: 180kcal
Cost: $10
Course: Bread
Keyword: Honey, Whole Wheat

Discover the Joy of Lemon Basil Hummus

Welcome to a culinary adventure where flavors dance and aromas entice! Today, we’re diving into the refreshing world of lemon basil hummus. This vibrant dip combines the creaminess of chickpeas, the freshness of basil, and the zing of zesty lemon, creating a taste that transports you to sun-kissed Mediterranean shores. Perfect for gatherings or a cozy night in, it’s more than just a snack—it’s a celebration of flavor and culture!

Let’s roll up our sleeves and get ready to whip up a batch of this delightful basil hummus that is not only easy to make but also bursting with nutrition. Ready to impress your friends and family? Let’s go!

Why You’ll Love This Recipe

  • Quick & Easy: Ready in just 10 minutes, making it a perfect last-minute appetizer!
  • Fresh Ingredients: Uses simple pantry staples and fresh herbs for a vibrant flavor.
  • Nutritious: Packed with protein and healthy fats, this hummus is a guilt-free indulgence.
  • Versatile: Enjoy it as a dip, spread, or a flavorful addition to salads and wraps.
  • Customizable: Easy to tweak with additional spices or ingredients based on your taste!

Ingredients You’ll Need

To create this delicious lemon basil hummus, you’ll need the following ingredients:

  • 1 can (15 oz) chickpeas: Rinsed and drained, they provide a creamy base.
  • 1 big cup fresh basil leaves: Adds a bright, herbal freshness that’s essential for this recipe.
  • 1/4 cup tahini: A nutty paste made from sesame seeds that gives depth and creaminess.
  • 1/4 cup lemon juice: Freshly squeezed lemon juice brightens and balances the flavors.
  • 1 big garlic clove: Minced, it infuses a subtle pungency that rounds out the hummus beautifully.
  • 2 tbsp extra virgin olive oil: For richness and to enhance the creamy texture.
  • 1/2 tsp salt: To taste, bringing all the flavors together.

Step-by-Step Instructions

Side view of a vibrant yellow-green hummus with lemon slices and basil on top, set against a simple background.

Let’s get cooking! Follow these easy steps to create your lemon basil hummus:

  1. Combine the Main Ingredients: In a food processor, throw in the chickpeas, tahini, fresh basil, lemon juice, garlic, and salt. Don’t add the olive oil or chickpea water yet!
  2. Blend Until Smooth: Secure the lid and pulse a few times. Then, turn the processor on low and slowly pour in the olive oil while it runs. Add a couple spoonfuls of the chickpea water and blend until it’s smooth.
  3. Taste and Adjust: Sample your hummus right from the processor. If it needs more flavor, add more salt or lemon juice to suit your taste.
  4. Serve and Garnish: Scoop the hummus into a bowl. Make a swirl on top and drizzle with a little more olive oil.

Pro Tips for the Best Hummus

  • Chickpea Water: If your hummus is too thick, add a splash of the reserved chickpea water until you reach the desired consistency.
  • Flavor Development: Letting your hummus sit for a few hours in the fridge can enhance its flavor significantly.
  • Switch It Up: Feel free to experiment with different herbs like parsley or cilantro for a unique twist.
  • Spice It Up: For a little heat, consider adding a pinch of cayenne pepper or red pepper flakes.
  • Storage: Store leftovers in an airtight container in the fridge for up to a week.
  • Serving Suggestions: Pair with pita bread, fresh veggies, or use as a spread in wraps and sandwiches.
  • Presentation: To elevate the dish, consider topping with roasted pine nuts or a sprinkle of paprika.
  • Dietary Needs: This hummus is vegan and gluten-free, making it suitable for various diets!

Common Mistakes and Troubleshooting

Even the best of us can make mistakes in the kitchen. Here are some common pitfalls to avoid:

  • Too Thick: If your hummus is too thick, remember that adding a little more chickpea water can help achieve the perfect consistency.
  • Over-blending: Be careful not to over-blend your hummus. You want it smooth but still with a little texture.
  • Too Salty: If it turns out too salty, balance it by adding a dash of lemon juice or a spoonful of tahini.
  • Flavor Imbalance: Always taste as you go! Adjust lemon, garlic, or salt levels to achieve your perfect balance.

Variations of Lemon Basil Hummus

Want to mix things up? Here are some creative variations to try:

  • Roasted Garlic Hummus: Roast a bulb of garlic and blend it in for a sweeter, richer flavor.
  • Spicy Hummus: Add a diced jalapeño or a few dashes of hot sauce for a kick.
  • Beet Hummus: Blend in roasted beets for a vibrant color and earthy flavor.
  • Avocado Hummus: For a creamier texture, add half an avocado to the mix.

Storage and Make-Ahead Instructions

This lemon basil hummus can be made ahead of time, making it a fantastic option for meal prep:

  • Refrigeration: Store in an airtight container in the refrigerator for up to 5-7 days.
  • Freezing: Freeze portions in airtight containers for up to 3 months. Thaw in the refrigerator overnight before serving.
  • Make Ahead: Prepare your hummus a day before a gathering to allow the flavors to meld beautifully.

Frequently Asked Questions

  • Can I make hummus without tahini? Yes, you can substitute tahini with more olive oil or yogurt for a creamy texture.
  • How do I serve lemon basil hummus? Serve it with pita chips, fresh veg, or use it as a spread in sandwiches.
  • Is hummus healthy? Absolutely! Hummus is packed with protein, healthy fats, and fiber.
  • Can I use dried chickpeas? Yes, just soak and cook them before using in the recipe.
  • What can I do if my hummus is bitter? It might be due to over-processing the tahini. Add a little more lemon juice to balance the flavors.
  • How can I enhance the flavor? Consider adding spices like cumin or smoked paprika for extra depth.
  • Is this recipe gluten-free? Yes, all ingredients are gluten-free!
  • Can I add more lemon? Absolutely! Adjust the lemon juice to suit your taste preferences.

Nutritional Tips and Dietary Adaptations

This lemon basil hummus is not only delicious but also packed with nutrients:

  • High in Protein: Chickpeas are an excellent source of plant-based protein.
  • Healthy Fats: Olive oil provides monounsaturated fats, which are heart-healthy.
  • Rich in Vitamins: Basil adds vitamins A and K, and lemon juice provides vitamin C.
  • Low Calorie: This hummus is a great low-calorie snack option compared to many store-bought dips.

Equipment Recommendations

To create your hummus, here’s what you’ll need:

  • Food Processor: Essential for blending your ingredients smoothly.
  • Measuring Cups: To accurately measure your ingredients.
  • Spatula: For scraping down the sides of the processor.
  • Storage Containers: Airtight containers for storing your hummus.

Serving Suggestions

Here’s how to present your hummus for maximum enjoyment:

  • Garnish: A drizzle of olive oil and a sprinkle of fresh basil on top can elevate your dish.
  • Pairings: Serve with an array of colorful vegetables, pita chips, or crackers.
  • Platter: Create a beautiful appetizer platter with assorted dips and spreads.
  • Wraps: Use it as a spread in wraps or sandwiches for added flavor and nutrition.

Embrace the vibrant flavors of the Mediterranean with this lemon basil hummus. It’s not just a dish; it’s an experience, a moment to share with family and friends. So, grab a plate, gather your loved ones, and celebrate the joy of cooking together!

Lemon Basil Hummus

Prep Time 10 minutes
Total Time 10 minutes
Servings 4 servings
Calories 180
A fresh and flavorful hummus made with basil and lemon, perfect for snacking or as a spread.

Ingredients

Main

  • 1 can chickpeas, rinsed (save the liquid)
  • 1 big cup fresh basil leaves
  • 0.25 cup tahini
  • 0.25 cup lemon juice
  • 1 big garlic clove garlic
  • 2 tbsp extra virgin olive oil
  • 0.5 tsp salt

Instructions 

  • Combine chickpeas, basil, tahini, lemon juice, garlic, and salt in a food processor. Don't add olive oil or chickpea water yet.
  • Pulse a few times, then turn on low and slowly pour in olive oil while blending. Add chickpea water and blend until smooth.
  • Taste and adjust salt or lemon if needed. Transfer to a bowl and drizzle with extra olive oil.

Notes

For a creamier texture, blend longer or add a little more chickpea water.
Calories: 180kcal
Cost: $8
Course: Appetizer
Cuisine: Mediterranean
Keyword: Hummus

Indulging in the Joy of Baking: The Ultimate Guide to Blender Chocolate Cake

Welcome to a delightful culinary adventure where simplicity meets decadence! In this article, we’ll explore the magic of the Blender Chocolate Cake, a luscious dessert that transforms simple ingredients into a moist, rich cake perfect for any occasion. Whether you’re baking for a family gathering, a festive celebration, or simply to satisfy your sweet tooth, this cake promises to be a hit. Let’s dive into the heart of this recipe and discover why it deserves a special place in your kitchen!

Why You’ll Love This Recipe

This chocolate cake is not just another dessert; it’s an experience! Here are five reasons why you’ll fall head over heels for this recipe:

  • Quick and Easy Preparation: With just a few steps in the blender, you can create a delicious cake without the hassle of multiple bowls and tools.
  • Moist and Rich Texture: The combination of ingredients ensures that the cake is incredibly moist, making every bite a heavenly experience.
  • Customizable Flavors: This recipe serves as a base for various flavors. Feel free to add chocolate chips, nuts, or even a splash of espresso for an extra kick!
  • Perfect for Any Occasion: Whether it’s a birthday, holiday, or just a Tuesday, this cake can be dressed up or down to fit the occasion.
  • Budget-Friendly: Using pantry staples, this cake is not only delicious but also kind to your wallet!

Ingredients You’ll Need

To create this delightful Blender Chocolate Cake, gather the following ingredients:

  • 2 cups of wheat flour: A wholesome base for your cake.
  • 3 eggs: These will provide structure and moisture.
  • 1 cup of chocolate powder: For that rich chocolate flavor.
  • 1 cup of sugar: To balance out the bitterness of the cocoa.
  • 1 cup of milk: Adds creaminess and helps combine the ingredients.
  • 1/2 cup of oil: Keeps the cake moist and adds richness.
  • 1 tablespoon of baking powder: Essential for leavening, giving the cake its lovely height.

Don’t have all the ingredients? Here are some substitutions you can use:

  • Flour: Use whole wheat flour for a healthier option or gluten-free flour if you’re gluten-sensitive.
  • Milk: Almond milk, soy milk, or any other plant-based milk works well.
  • Sugar: Replace with honey or maple syrup for a more natural sweetener.

Step-by-Step Instructions

Side view of a decadent chocolate cake with rich frosting and a soft texture.

Ready to bake? Here’s how to make your Blender Chocolate Cake:

  1. Preheat your oven to 180°C (350°F) and grease a 9-inch round pan with butter and flour.
  2. Blend the wet ingredients: In your blender, combine the eggs, sugar, and oil. Blend until smooth and creamy.
  3. Add the flavor: Pour in the milk and chocolate powder, blending until everything is well mixed.
  4. Mix the dry ingredients: In a large bowl, sift together the wheat flour and baking powder.
  5. Combine: Pour the blended mixture over the dry ingredients and gently mix with a spatula until just combined.
  6. Pour and bake: Transfer the batter into the greased pan and bake for 40 to 45 minutes, or until a toothpick inserted into the center comes out clean.
  7. Cool and serve: Allow the cake to cool for a few minutes before unmolding. Serve as is or dress it up with your favorite frosting!

Pro Tips for the Perfect Cake

Here are some expert insights to elevate your baking game:

  • Room Temperature Ingredients: Ensure your eggs and milk are at room temperature for better emulsification.
  • Don’t Overmix: Mix until just combined to avoid a dense texture.
  • Use Quality Cocoa: The flavor of the cocoa powder significantly impacts the taste of the cake, so choose a good-quality brand.
  • Check for Doneness: Ovens can vary. Start checking your cake a few minutes before the recommended baking time.
  • Let It Cool: Allow the cake to cool in the pan for a bit before transferring to a wire rack to cool completely.
  • Frosting Fun: If you want to add frosting, consider a simple chocolate ganache or whipped cream for a delightful finish.

Common Mistakes and Troubleshooting

Even the best bakers face challenges. Here’s how to troubleshoot common issues:

  • Flat Cake: If your cake doesn’t rise, ensure your baking powder is fresh and properly measured.
  • Dry Texture: This can happen if you overbake. Keep an eye on the time and do the toothpick test.
  • Sticking Pan: If the cake sticks, make sure to grease your pan thoroughly and allow the cake to cool before unmolding.

Variations to Try

Why not mix things up? Here are some delicious variations:

  • Chocolate Chip Delight: Add a cup of chocolate chips to the batter for bursts of melted chocolate in every bite.
  • Nutty Addition: Fold in chopped walnuts or pecans for added crunch and flavor.
  • Espresso Infusion: Stir in a tablespoon of espresso powder for a mocha-inspired twist.
  • Fruit Flavors: Mix in some mashed bananas or applesauce for a fruity kick and extra moisture.

How to Store Your Cake

To keep your Blender Chocolate Cake fresh:

  • At Room Temperature: Store covered in an airtight container for up to 3 days.
  • In the Refrigerator: Keep in the fridge for up to a week, but bring to room temperature before serving for the best taste.
  • Freezing: Wrap slices or the whole cake in plastic wrap and foil to freeze for up to 3 months. Thaw in the fridge overnight before serving.

Frequently Asked Questions

Let’s address some common inquiries about this fabulous cake:

  • Can I use a different type of flour? Yes! Feel free to use almond flour or gluten-free flour for different dietary needs.
  • What if I don’t have a blender? You can mix the ingredients by hand, just ensure to beat the eggs and sugar well for a smoother batter.
  • Can I make this cake ahead of time? Absolutely! This cake stores well, and making it a day ahead enhances the flavors.
  • Is this cake suitable for vegans? You can substitute eggs with flax eggs and use plant-based milk and oil for a vegan-friendly version.
  • How can I make it more chocolatey? Add more cocoa powder or chocolate chips for an extra chocolatey experience!
  • What can I serve with the cake? This cake pairs beautifully with ice cream, whipped cream, or fresh berries.
  • Can I add frosting? Yes! A simple chocolate ganache or cream cheese frosting works wonderfully.
  • How do I know when the cake is done? A toothpick inserted in the center should come out clean or with a few moist crumbs.

Nutritional Insights and Dietary Adaptations

This Blender Chocolate Cake can be adapted to fit various dietary preferences:

  • Lower Sugar Option: Reduce the sugar by half without compromising taste.
  • Gluten-Free: Use a gluten-free flour blend for a delightful gluten-free dessert.
  • Vegan-Friendly: Substitute eggs and milk with plant-based alternatives.

Essential Equipment

Here’s what you’ll need to whip up this cake:

  • Blender: A high-speed blender will give you the smoothest batter.
  • 9-inch Round Cake Pan: Essential for the perfect cake shape.
  • Spatula: For gentle mixing and scraping the blender clean.
  • Measuring Cups and Spoons: Accurate measurements are key to baking success!

Serving Suggestions

Serve your Blender Chocolate Cake in style:

  • With Ice Cream: A scoop of vanilla or chocolate ice cream on the side is a classic pairing.
  • Garnished with Fresh Berries: Add a pop of color and freshness with strawberries or raspberries.
  • Dust with Powdered Sugar: A light dusting adds a touch of elegance and sweetness.

Now, grab your apron and let the baking begin! With this Blender Chocolate Cake, you’re not just making a dessert; you’re creating memories, celebrating flavors, and indulging in the joy of cooking. Happy baking!

Blender Chocolate Cake

Prep Time 15 minutes
Cook Time 45 minutes
Total Time 1 hour
Servings 8 pieces
Calories 350
A rich and moist chocolate cake made effortlessly in the blender, perfect for any occasion.

Ingredients

Dry ingredients

  • 2 cups wheat flour
  • 1 cup chocolate powder
  • 1 cup sugar
  • 1 tablespoon baking powder

Wet ingredients

  • 3 eggs eggs
  • 1 cup milk
  • 1/2 cup oil

Instructions 

  • Preheat oven to 180°C and grease a pan.
  • In a blender, blend eggs, sugar, and oil until smooth.
  • Add milk and chocolate powder; blend until combined.
  • Mix dry ingredients in a bowl, then pour in blended mixture and fold gently.
  • Pour batter into pan and bake for 40-45 minutes.
  • Cool briefly, then serve and enjoy!

Notes

Use high-quality cocoa powder for best flavor.
Calories: 350kcal
Cost: $12
Course: Dessert
Cuisine: International
Keyword: chocolate