Author

rafael

Browsing

Welcome to the delightful world of Mediterranean cooking, where every dish tells a story and every ingredient brings a celebration to your table! Today, we’re creating a stunning holiday focaccia wreath adorned with Kalamata olives and fragrant rosemary. This centerpiece is not just food; it’s an experience, a feast for the eyes and the palate. Picture the warm bread, the aromatic herbs, the laughter of family and friends — it’s the essence of what it means to gather around and share a meal. So, let’s dive into the art of crafting this beautiful focaccia wreath that will fill your home with warmth and joy this holiday season.

Why You’ll Love This Recipe

This holiday focaccia wreath isn’t just a pretty face; it’s packed with flavor and benefits that make it a must-try. Here are five reasons to fall in love:

  • Visual Appeal: The wreath shape is festive and eye-catching, making it a perfect centerpiece for your holiday table.
  • Flavor Explosion: The combination of olives and rosemary creates a savory depth that dances on your palate, complemented by the fruity richness of olive oil.
  • Shareability: This bread is designed for sharing. Tear off a piece, dip it in olive oil, and enjoy the communal experience of breaking bread together.
  • Versatile Base: This focaccia dough can be adapted with various toppings, allowing for creativity and personal flair.
  • Easy to Make: With straightforward steps and minimal ingredients, this recipe is accessible even for novice bakers.

Ingredient Breakdown

Let’s explore the essential ingredients that come together to create this delicious focaccia wreath. Each component plays a vital role in flavor and texture.

  • Bread Flour: The foundation of your focaccia, bread flour has a higher protein content, resulting in a chewy, satisfying texture.
  • Active Dry Yeast: This magical ingredient helps the dough rise, giving it the fluffy texture we crave in bread.
  • Extra Virgin Olive Oil: A staple in Mediterranean cooking, this oil enhances flavor and creates a rich aroma as the bread bakes.
  • Fresh Rosemary: This fragrant herb adds an earthy, pine-like flavor that elevates the dish.
  • Kalamata Olives: These olives bring a briny depth that pairs beautifully with the bread and rosemary.
  • Coarse Sea Salt: Enhances all the flavors, providing a delightful contrast to the sweetness of the bread.

Substitutions and Variations

Don’t hesitate to make this recipe your own! Here are some substitutions and variations to consider:

  • Flour Alternatives: You can use all-purpose flour or a gluten-free flour blend if needed.
  • Herb Variations: Experiment with other herbs like thyme, oregano, or basil for a different flavor profile.
  • Cheese Additions: Incorporate feta or mozzarella for a cheesy twist that complements the olives.
  • Seasonal Toppings: Add sun-dried tomatoes, roasted garlic, or caramelized onions for extra flavor and texture.

Pro Tips for Making the Perfect Holiday Focaccia Wreath
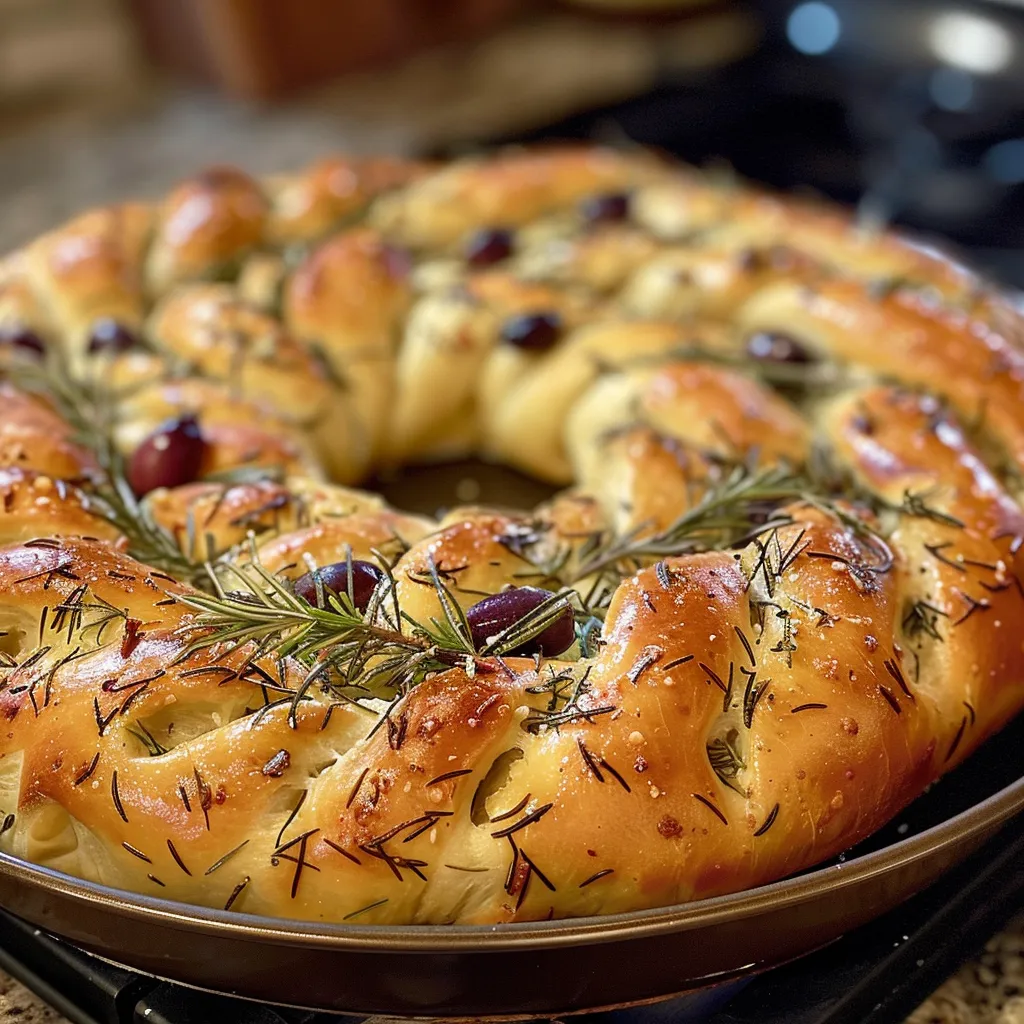
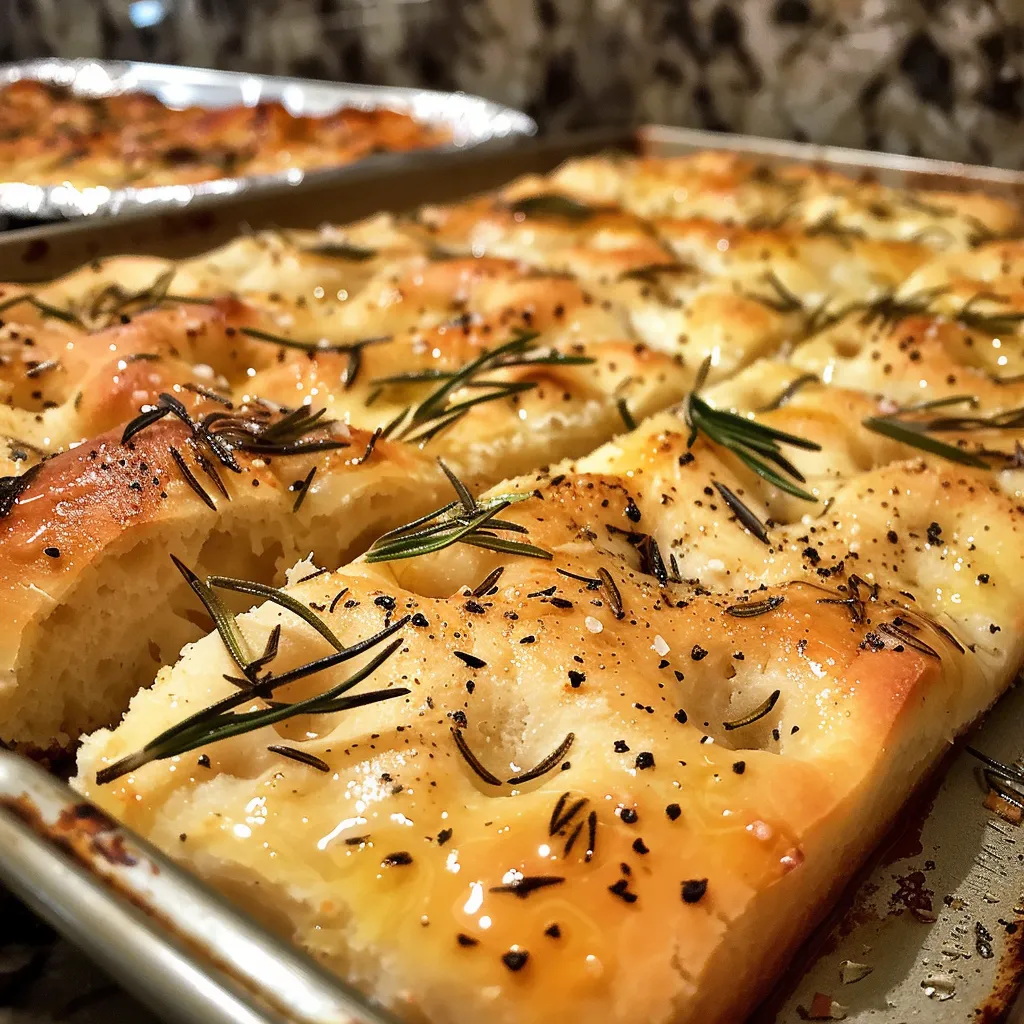
Side view of a beautifully baked Holiday Focaccia Wreath, featuring Kalamata olives and fresh rosemary.

To ensure that your holiday focaccia wreath turns out perfectly every time, keep these expert tips in mind:

  • Room Temperature Ingredients: Ensure your ingredients, especially the water and yeast, are at room temperature to activate the yeast effectively.
  • Kneading Technique: Knead the dough until it’s smooth and elastic. This helps develop the gluten, giving your focaccia its signature texture.
  • Resting Time: Allow the dough to rise in a warm place, covered with a damp cloth, for optimal fluffiness.
  • Oil the Pan: Generously oil the baking sheet to prevent sticking and enhance the crust’s flavor.
  • Dimples for Flavor: Use your fingers to create dimples in the dough before baking; this allows the olive oil and toppings to seep into the bread.
  • Watch Your Oven: Every oven is different, so start checking for doneness a few minutes before the recommended baking time.
  • Let It Cool: Allow the focaccia to cool slightly before serving; this helps set the texture and makes it easier to slice.
  • Serve Warm: Focaccia is best enjoyed fresh and warm, so serve it straight from the oven for maximum flavor.

Common Mistakes and Troubleshooting

Even the best chefs make mistakes! Here are some common pitfalls and how to avoid them:

  • Flat Bread: If your focaccia doesn’t rise enough, ensure your yeast is fresh and that the dough was allowed to rise properly.
  • Dry Texture: Be careful not to overbake; check your focaccia a few minutes early to avoid a dry loaf.
  • Too Salty: If the focaccia is too salty, you may have added too much coarse sea salt; adjust the amount to taste.
  • Sticky Dough: If the dough is too sticky, gradually add a little more flour until it’s manageable, but be careful not to overdo it.

Storage and Make-Ahead Instructions

Planning ahead? Here’s how to store your focaccia and make it in advance:

  • Storing Leftovers: Wrap leftover focaccia tightly in plastic wrap or store it in an airtight container at room temperature for up to 2 days.
  • Freezing: For longer storage, freeze your focaccia. Wrap it well in plastic wrap and then in foil; it can last up to 3 months in the freezer.
  • Reheating: To enjoy day-old focaccia, reheat it in the oven at 350°F (175°C) for about 10 minutes to regain its crispness.
  • Make-Ahead Dough: You can prepare the dough ahead of time and refrigerate it overnight. Just let it come to room temperature before shaping and baking.

Comprehensive FAQ

Got questions? We’ve got answers! Here are some frequently asked questions about making focaccia:

  • Can I use a different type of flour? Absolutely! All-purpose flour will work, but bread flour gives a better texture.
  • How do I know my yeast is active? Mix yeast with warm water and a pinch of sugar; it should bubble within 5-10 minutes if active.
  • Can I make this focaccia vegan? Yes! Substitute the olive oil for a plant-based oil and omit any cheese toppings.
  • What can I serve with focaccia? Focaccia pairs wonderfully with dips like olive oil, balsamic vinegar, or hummus, and it can also be served alongside soups and salads.
  • How can I make my focaccia more flavorful? Incorporate herbs, garlic, or cheese directly into the dough or add toppings before baking for extra flavor.
  • Is this recipe suitable for beginners? Yes! This focaccia recipe is designed to be simple and approachable for all skill levels.
  • How long does it take to make? Including rising time, expect about 2-3 hours from start to finish, but the hands-on time is minimal!
  • Can I use dried herbs instead of fresh? Yes, but use about one-third of the amount, as dried herbs are more concentrated in flavor.

Nutrition Tips and Dietary Adaptations

For those mindful of dietary preferences, here are some tips to make this recipe work for you:

  • Low-Carb Option: Consider using almond flour or coconut flour as a base for a low-carb version.
  • Whole Wheat Flour: Substitute half of the white flour with whole wheat flour for added fiber and nutrients.
  • Gluten-Free: Use a gluten-free flour blend to accommodate gluten sensitivities.
  • Reduced Sodium: Use low-sodium olives and reduce the salt to make it heart-healthier.

Equipment Recommendations

Preparing your focaccia wreath is easier with the right tools. Here’s what you’ll need:

  • Mixing Bowl: A large bowl for mixing and kneading the dough.
  • Baking Sheet: A rimmed baking sheet allows the focaccia to rise and bake evenly.
  • Kitchen Towel: To cover the dough while it rises, keeping it warm and moist.
  • Measuring Cups and Spoons: Accurate measurements are key for baking success.
  • Stand Mixer (optional): For effortless mixing and kneading, a stand mixer with a dough hook can save time.

Serving Suggestions

This focaccia wreath is not just a dish; it’s a celebration! Here are some serving ideas to elevate your meal:

  • As a Centerpiece: Place your focaccia in the center of your table, surrounded by small bowls of olive oil and balsamic vinegar for dipping.
  • With Charcuterie: Pair with cured meats, cheeses, and olives for a Mediterranean-inspired platter.
  • As a Sandwich Base: Use slices of focaccia to create delicious sandwiches filled with fresh ingredients.
  • For Breakfast: Enjoy it warm with a spread of butter or jam for a delightful morning treat.

By now, your kitchen should be filled with the warm aroma of baking bread, and your heart should be bursting with the joy of creating something beautiful. This holiday focaccia wreath is more than just a recipe; it’s an invitation to gather, to celebrate, and to share in the joy of food. So grab a plate, invite your loved ones, and enjoy each tasty bite. Happy baking and happy feasting, amigos!

Holiday Focaccia Wreath with Olives and Rosemary

Prep Time 20 minutes
Cook Time 25 minutes
Total Time 45 minutes
Servings 8 pieces
Calories 250
Celebrate the holidays with this beautiful focaccia wreath topped with olives and fragrant rosemary, perfect for sharing.

Ingredients

Dough

  • 3 cups Bread flour
  • 1 packet Active dry yeast
  • 0.5 cup Extra virgin olive oil
  • 1 cup Warm water (about 110°F / 43°C)

Toppings

  • 0.5 cup Kalamata olives (pitted and sliced)
  • 2 tablespoons Fresh rosemary (chopped)
  • 1 teaspoon Coarse sea salt

Instructions 

  • Mix warm water, yeast, and a pinch of sugar; let sit until frothy, about 5 minutes.
  • Combine flour, salt, olive oil, and the yeast mixture; knead until smooth and elastic, about 10 minutes.
  • Place dough in a greased bowl, cover, and let rise until doubled, about 30 minutes.
  • Preheat oven to 400°F (200°C). Punch down the dough and shape into a wreath on a baking sheet.
  • Press olives and rosemary into the dough, sprinkle with sea salt, and let rest for 10 minutes.
  • Bake for 20-25 minutes until golden brown. Serve warm or at room temperature.
Notes

For extra flavor, brush the wreath with olive oil before baking.
Calories: 250kcal
Cost: $15
Course: Appetizer
Cuisine: Italian
Keyword: focaccia

Embracing the Art of Classic French Toast

Ah, classic French toast! This delightful dish transforms the simplest ingredients into a breakfast feast that warms the heart and satisfies the soul. Whether you’re gathering around the table with family or treating yourself to a cozy morning alone, this dish is an invitation to indulge in flavor and tradition. Let’s dive into the wonderful world of classic French toast, where every bite is a journey through sweet memories and delicious aromas.

Why You’ll Love This Recipe

This classic French toast recipe isn’t just about taste; it’s about experience. Here’s why you’ll absolutely adore it:

  • Comforting flavors: The rich taste of egg-soaked bread, enhanced with vanilla and cinnamon, creates a warm, inviting atmosphere.
  • Quick and easy: With just a few simple steps, you can whip up this dish in less than 30 minutes, making it perfect for busy mornings.
  • Versatile toppings: From maple syrup to fresh berries, the topping options are endless, allowing you to customize your feast.
  • Family-friendly: Kids and adults alike will love this breakfast treat, making it an ideal choice for family gatherings.
  • Meal prep potential: You can prepare the mixture ahead of time for a seamless morning, giving you more time to enjoy your meal!

Ingredient Breakdown

To craft the perfect classic French toast, you’ll need the following ingredients:

  • 4 slices of thick bread (brioche or challah works best): Choose hearty bread for a satisfying texture and flavor.
  • 2 large eggs: These provide richness and help bind the mixture together.
  • 1/2 cup of milk (or your choice of milk alternative): Any milk alternative can be used, including almond, soy, or oat milk.
  • 1 teaspoon vanilla extract: This adds a lovely depth of flavor you won’t want to skip.
  • 1 teaspoon cinnamon (optional): A sprinkle of cinnamon enhances the warmth of the dish and adds a comforting aroma.
  • A pinch of salt: This balances the sweetness and enhances the overall flavor.
  • Butter or oil for cooking: Use for greasing your pan to achieve that golden-brown crust.

Step-by-Step Instructions

Now that we have our ingredients ready, let’s get cooking! Follow these simple steps to make your classic French toast:

  1. In a mixing bowl, whisk together the eggs, milk, vanilla extract, cinnamon (if using), and salt until well combined.
  2. Heat a non-stick skillet or griddle over medium heat and add a pat of butter or a drizzle of oil.
  3. Dip each slice of thick bread into the egg mixture, ensuring both sides are coated but not overly soggy.
  4. Place the bread on the skillet and cook for 2-3 minutes on each side, or until golden brown and cooked through.
  5. Remove from the skillet and keep warm in a low oven while you repeat with the remaining slices.

Perfecting Your French Toast: Pro Tips

Want to elevate your classic French toast game? Here are some expert tips:

  • Choice of bread: Opt for stale or day-old bread, as it absorbs the egg mixture better, resulting in a more flavorful toast.
  • Temperature control: Keep the heat on medium-low to prevent burning while allowing the inside to cook thoroughly.
  • Experiment with spices: Add nutmeg or cardamom for a unique twist on the classic flavor.
  • Preheat your skillet: Ensuring it’s hot before adding the bread helps create that perfect crust.
  • Don’t overcrowd the pan: Give each slice space to cook evenly, ensuring a beautiful golden-brown color.
  • Make it a family affair: Get the kids involved! They can help dip the bread and choose toppings.
  • Resting time: Allow the French toast to rest for a minute after cooking; this helps the flavors meld beautifully.
  • Make-ahead option: Prepare the egg mixture the night before and store it in the fridge for a quick breakfast.

Common Mistakes to Avoid

Even the best chefs encounter bumps in the road. Here are some common pitfalls to watch out for:

  • Using fresh bread: Fresh bread can become too soggy; always use bread that’s slightly stale.
  • Over-soaking: Don’t let the bread soak too long in the egg mixture, or it may fall apart while cooking.
  • Not preheating the pan: A cold skillet can lead to uneven cooking and a lack of that golden crust.
  • Forgetting the salt: A pinch of salt is crucial for balancing sweetness and enhancing flavors.

Delicious Variations to Try

Feeling adventurous? Here are some delightful variations to spice up your classic French toast:

  • Stuffed French Toast: Add a layer of cream cheese and berries for a decadent twist.
  • Banana Bread French Toast: Use banana bread instead of regular bread for a fruity flavor.
  • Savory French Toast: Swap the vanilla and sugar for herbs and cheese for a savory option.
  • Chocolate Chip French Toast: Sprinkle chocolate chips on the bread before cooking for a sweet surprise.

Storing and Make-Ahead Instructions

If you want to enjoy your French toast later, here’s how to store it:

  • Refrigerator: Store leftovers in an airtight container in the fridge for up to 3 days.
  • Freezer: Freeze cooked French toast slices between layers of parchment paper for up to 1 month.
  • Reheating: Reheat in the toaster, oven, or skillet until warmed through.
  • Make-Ahead: Prepare the egg mixture the night before and store it in the fridge to save time in the morning.

Nutrition Tips and Dietary Adaptations

Need to accommodate dietary preferences? Here are a few adjustments you can make:

  • Dairy-free: Use almond milk, coconut milk, or any plant-based milk alternative.
  • Gluten-free: Substitute regular bread with gluten-free bread to enjoy this dish without worry.
  • Lower sugar: Reduce the sugar in the egg mixture or sweeten with a natural alternative like honey or agave.

Equipment Recommendations

To make your cooking experience smooth and enjoyable, here’s a quick list of essential equipment:

  • Non-stick skillet or griddle: Ensures easy cooking and cleanup.
  • Whisk: For properly mixing your egg mixture.
  • Spatula: To flip the French toast without breaking it.
  • Measuring cups and spoons: Ensures accurate ingredient proportions for the best results.

Serving Suggestions

Finally, let’s talk about serving! Here are some scrumptious ideas to elevate your classic French toast:

  • Maple syrup: A classic pairing that adds sweetness and richness.
  • Fresh fruit: Top with strawberries, blueberries, or bananas for a refreshing touch.
  • Whipped cream: A dollop of whipped cream makes every bite feel like a special occasion.
  • Nuts: Sprinkle toasted almonds or walnuts for added crunch and nutrition.

Frequently Asked Questions

Here are some common questions about crafting the perfect classic French toast:

  • Can I use any bread for French toast? Yes, but thick, hearty bread like brioche or challah works best for texture and flavor.
  • How do I make French toast crispy? Ensure your skillet is preheated and cook on medium heat to achieve a crispy exterior.
  • Can I make French toast without eggs? Yes, you can use a mixture of mashed bananas or a flaxseed mixture as a substitute.
  • Is French toast healthy? It can be nutritious when made with whole-grain bread and topped with fresh fruit.
  • How long does French toast last in the fridge? Store it in an airtight container for up to 3 days.
  • Can I freeze French toast? Absolutely! Freeze cooked slices between parchment paper for up to a month.
  • What can I use instead of milk? Any milk alternative works well, including almond, soy, or oat milk.
  • How do I keep French toast warm while cooking? Place cooked slices in a low oven (around 200°F) to keep them warm until serving.

Now that you have all the tools and tips you need, it’s time to embrace the art of creating classic French toast. Gather your loved ones, fill your kitchen with the comforting aroma of cinnamon and vanilla, and celebrate the joy of sharing a meal together. So, are you ready to cook? Grab your apron, and let’s make breakfast a celebration!

Classic French Toast

Prep Time 5 minutes
Cook Time 10 minutes
Total Time 15 minutes
Servings 4 slices
Calories 250
Enjoy a delicious and hearty breakfast with this classic French toast recipe, perfect for a cozy morning.

Ingredients

Bread

  • 4 slices thick bread (brioche or challah) (Choose thick, hearty bread for best results.)

Eggs

  • 2 large eggs (Use large eggs for a richer flavor.)

Milk

  • 0.5 cup milk (or your choice of milk alternative) (Any milk alternative can be used.)

Vanilla Extract

  • 1 teaspoon vanilla extract (Adds flavor to the egg mixture.)

Cinnamon

  • 1 teaspoon cinnamon (optional) (Enhances the warmth of the dish.)

Salt

  • a pinch salt (Balances sweetness.)

Butter or Oil for cooking

  • as needed butter or oil for cooking (Use for greasing the cooking surface.)

Instructions 

  • Whisk eggs, milk, vanilla, cinnamon, and salt in a shallow dish.
  • Dip bread slices into the mixture, coating both sides.
  • Heat butter or oil in a skillet over medium heat.
  • Cook bread slices until golden brown on both sides, about 2-3 minutes per side.
  • Serve warm with toppings of your choice.

Notes

For extra flavor, top with fresh berries or syrup.
Calories: 250kcal
Cost: $8
Course: Breakfast
Cuisine: French
Keyword: French Toast

Embrace the Mediterranean: Focaccia Rosemary Bread Awaits

Welcome to a culinary adventure that celebrates the heartwarming traditions of the Mediterranean! Today, we’re diving into the delightful world of Focaccia Rosemary Bread, a recipe that not only fills your kitchen with the warm aromas of freshly baked bread but also invites you to savor every bite. This simple yet extraordinary recipe is perfect for sharing with family and friends, turning any meal into a joyous celebration. So, roll up your sleeves and let’s embark on this flavorful journey!

Why You’ll Love This Recipe

Focaccia Rosemary Bread is a culinary masterpiece that brings together simplicity and flavor. Here are just a few reasons why you’ll fall in love with this recipe:

  • Incredible aroma: Baking this bread fills your home with the inviting scent of rosemary and olive oil, making it impossible to resist.
  • Versatile delight: Whether served as a side dish, a base for sandwiches, or simply enjoyed with olive oil and balsamic vinegar, this focaccia is a true crowd-pleaser.
  • Easy to make: With just a few simple ingredients and straightforward steps, even novice bakers can achieve delicious results.
  • Customizable: Feel free to play with toppings like olives, sun-dried tomatoes, or different herbs to make it your own.
  • Perfect for gatherings: This bread is ideal for sharing, making it a great addition to gatherings, picnics, or family dinners.

Ingredient Breakdown

Let’s take a closer look at the ingredients that make this focaccia so special. Here’s what you’ll need, along with some handy substitutions:

  • All-purpose flour: 2 cups. You can substitute with whole wheat flour for a heartier texture.
  • Warm water: 1 cup (around 110°F). This helps activate the yeast. You can also use milk for a richer flavor.
  • Olive oil: 2 tablespoons. A high-quality extra virgin olive oil adds depth; you can use melted butter as an alternative.
  • Salt: 1 teaspoon. Sea salt enhances flavor; kosher salt works too.
  • Sugar: 1 teaspoon. This helps activate the yeast; honey is a great alternative.
  • Active dry yeast: 1 packet (2 1/4 teaspoons). Rapid-rise yeast can be used for quicker results.
  • Fresh rosemary: 2 tablespoons, chopped. Dried rosemary can be used in a pinch, but fresh is best.
  • Sea salt for sprinkling: A finishing touch that adds flavor and texture.

Step-by-Step Instructions

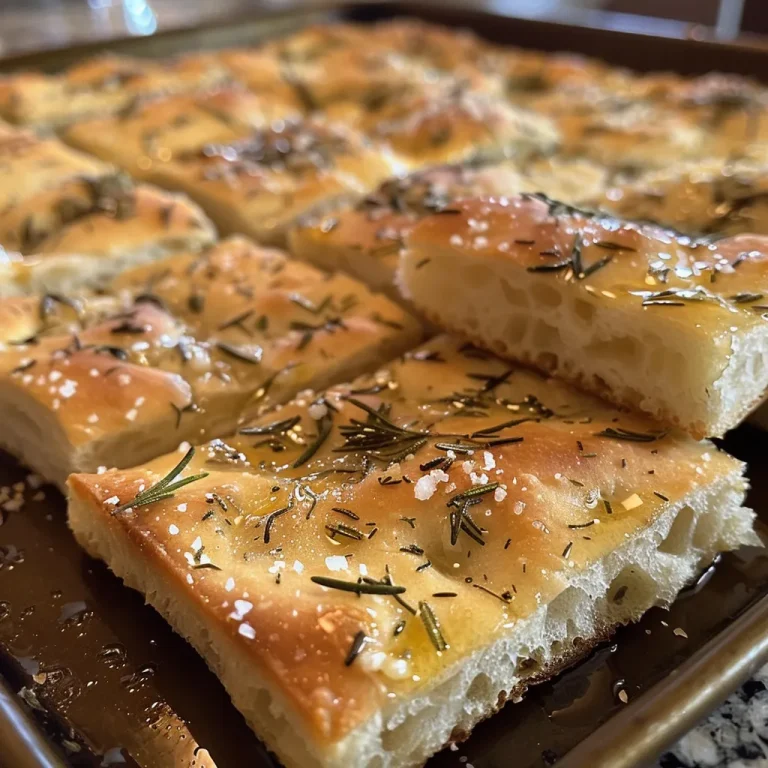
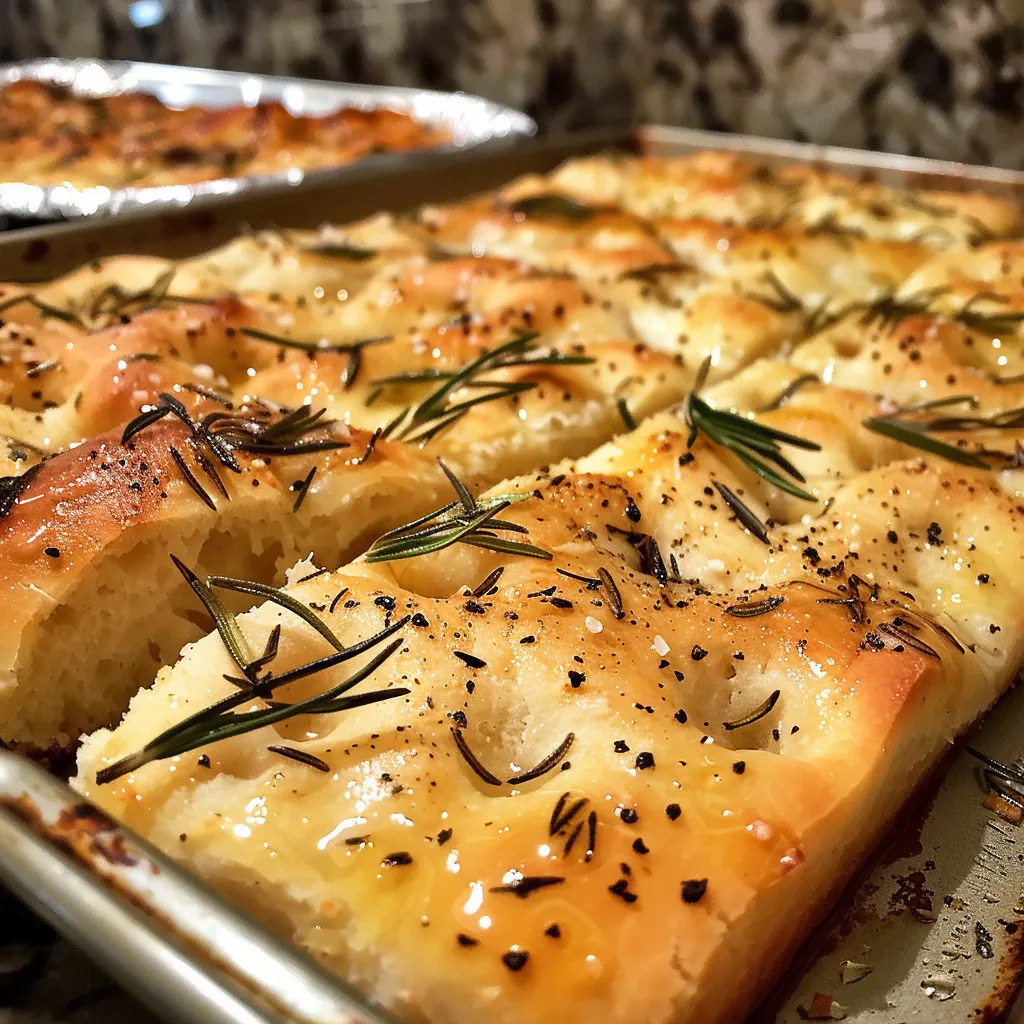
Side view of a luscious Focaccia topped with rosemary, showcasing its airy texture.

Now that we have our ingredients ready, let’s get baking! Follow these easy steps to create your own Focaccia Rosemary Bread:

  1. In a small bowl, combine warm water, sugar, and yeast. Let it sit for about 5 minutes until foamy, signaling that your yeast is active.

  2. In a large bowl, mix together flour and salt. Add the yeast mixture and olive oil. Stir until a dough forms.

  3. Knead the dough on a floured surface for about 5 minutes until smooth and elastic. This step is crucial for a perfect texture!

  4. Place the dough in a greased bowl, cover with a damp cloth, and let rise in a warm place for 1 hour, or until doubled in size.

  5. Punch down the dough gently to release the air, then spread it onto a greased baking sheet. Use your fingers to dimple the surface, sprinkle with rosemary and sea salt, and let rise for another 20 minutes.

  6. Bake in a preheated oven at 400°F (200°C) for 20-25 minutes or until golden brown. Your kitchen will smell divine!

  7. Allow the bread to cool slightly before slicing. Enjoy warm or at room temperature with your favorite dipping oil.

Pro Tips for the Best Focaccia

Want to take your Focaccia Rosemary Bread to the next level? Here are some expert tips:

  • Use warm water: Ensure the water is warm but not hot, as too high a temperature can kill the yeast.
  • Knead thoroughly: Proper kneading develops gluten, giving the bread its structure and chewy texture.
  • Experiment with toppings: Try adding garlic, olives, or even cheese to the dough before baking for added flavor.
  • Let it rise: Patience is key! Allowing the dough to rise properly results in a light, airy bread.
  • Use a baking stone: For an extra crispy crust, consider using a baking stone or preheated baking sheet.
  • Brush with olive oil: Before baking, brushing the dough with olive oil enhances flavor and gives a beautiful finish.
  • Keep it covered: While the dough is rising, ensure it’s covered to prevent it from drying out.
  • Store properly: If you have leftovers, store them in an airtight container to maintain freshness.

Avoiding Common Mistakes

Here are some common pitfalls to watch out for when making focaccia:

  • Not enough kneading: This can result in dense bread, so ensure you knead until smooth.
  • Using cold water: Cold water will not activate the yeast effectively, leading to poor rising.
  • Skipping the second rise: This step is crucial for achieving the perfect texture, so don’t skip it!
  • Not dimpling enough: Dimples allow for even baking and give the focaccia its signature texture.

Delicious Variations to Try

Focaccia is versatile! Here are some creative variations to excite your palate:

  • Garlic Herb Focaccia: Add minced garlic and Italian herbs to the dough for a flavorful twist.
  • Cheesy Focaccia: Sprinkle shredded cheese on top before baking for a gooey, cheesy delight.
  • Olive and Sun-Dried Tomato Focaccia: Incorporate chopped olives and sun-dried tomatoes into the dough for a Mediterranean flair.
  • Spiced Focaccia: Experiment with spices like za’atar or cumin for an exotic flavor profile.

Storage and Make-Ahead Instructions

Want to prepare your focaccia in advance? Here’s how to store it:

  • Room temperature: Store the focaccia in an airtight container at room temperature for up to 2 days.
  • Refrigerator: For longer storage, wrap it tightly in plastic wrap and keep it in the fridge for up to a week.
  • Freezing: To freeze, slice the focaccia and wrap it in foil or freezer bags. It can last for up to 3 months!
  • Reheating: To revive your focaccia, simply warm it in the oven at 350°F (175°C) for about 10 minutes.

Frequently Asked Questions

Here are some common questions about making Focaccia Rosemary Bread:

  • Can I use whole wheat flour? Yes, but it may result in a denser bread. Mixing with all-purpose flour can help.
  • What if my dough doesn’t rise? Ensure your yeast is fresh and the water was warm enough. If not, you can try again!
  • How can I make it gluten-free? Use a gluten-free flour blend designed for baking.
  • Can I add toppings after baking? Yes! You can sprinkle fresh herbs or cheese on top after baking for added flavor.
  • Is it necessary to dimple the dough? Yes, dimpling helps create the characteristic texture and allows toppings to adhere.
  • How do I know when the focaccia is done? It should be golden brown and sound hollow when tapped on the bottom.
  • Can I make this recipe vegan? Absolutely! Just substitute olive oil for a plant-based alternative and skip any dairy toppings.
  • What can I serve with focaccia? It pairs beautifully with soups, salads, or as a base for sandwiches.

Nutritional Tips and Dietary Adaptations

Focaccia Rosemary Bread can be a part of a balanced diet. Here are some tips:

  • Portion control: Enjoy in moderation to balance your carbohydrate intake.
  • Pair with protein: Serve with a protein-rich side like grilled chicken or legumes to create a well-rounded meal.
  • Opt for whole grains: Using whole wheat flour increases fiber content, making it more filling.

Equipment Recommendations

To make the process easier, here are some kitchen tools that can help:

  • Mixing bowls: A set of mixing bowls in various sizes will be handy for combining ingredients.
  • Measuring cups and spoons: Accurate measurements ensure your focaccia turns out just right.
  • Baking sheet: A sturdy baking sheet will provide the right surface for baking.
  • Kitchen towel: Use a clean towel to cover the dough while it rises.
  • Stand mixer (optional): For those who prefer an easier kneading process, a stand mixer with a dough hook can save time.

Serving Suggestions

Focaccia Rosemary Bread shines in many settings. Here are a few serving ideas:

  • As an appetizer: Serve warm focaccia with a dish of olive oil and balsamic vinegar for dipping.
  • In sandwiches: Use slices to create hearty sandwiches filled with your choice of meats, cheeses, and veggies.
  • Alongside soups: Pair it with a warm bowl of soup for a comforting meal.

Conclusion: Your Focaccia Journey Begins!

Now that you have the keys to creating a delightful Focaccia Rosemary Bread, it’s time for you to make it and share it with those you love. Remember, cooking is not just about the food, but about the memories created around the table. So, gather your friends and family, and let the celebration of flavors and togetherness begin. Happy baking!

Focaccia Rosemary Bread

Prep Time 15 minutes
Cook Time 20 minutes
Total Time 35 minutes
Servings 8 slices
Calories 250
A flavorful homemade focaccia bread infused with fresh rosemary and topped with sea salt, perfect for sharing.

Ingredients

Dough

  • 2 cups all-purpose flour
  • 1 cup warm water
  • 2 tablespoons olive oil
  • 1 teaspoon salt
  • 1 teaspoon sugar
  • 1 packet (2 1/4 teaspoons) active dry yeast active dry yeast
  • 2 tablespoons fresh rosemary, chopped

Topping

  • Sea salt for sprinkling

Instructions 

  • Mix warm water, sugar, and yeast; let sit 5 min until foamy.
  • Combine flour and salt; add yeast mixture and olive oil. Knead until smooth.
  • Let dough rise in a warm place for 1 hour.
  • Press dough onto a greased baking sheet, dimple surface, sprinkle rosemary and sea salt, then rise 20 min.
  • Bake at 400°F (200°C) for 20-25 min until golden.

Notes

Use fresh rosemary for best flavor and sprinkle sea salt just before baking.
Calories: 250kcal
Cost: $12
Course: Bread
Cuisine: Italian
Keyword: focaccia, Rosemary

Whipping Up Joy: Your Ultimate Guide to Spinach and Egg Wraps

Welcome, fellow food lovers! Today, we’re diving into the delightful world of spinach and egg wraps—a quick, nutritious solution that’s perfect for busy mornings. These wraps are not just meals; they’re an invitation to celebrate the vibrant flavors of the Mediterranean, reminiscent of sun-drenched markets and family gatherings in Spain. Packed with protein, fresh vegetables, and customizable flavors, this recipe is a delicious way to fuel your day and make cooking a joyful experience. Let’s embark on this culinary journey together!

Why You’ll Love This Recipe

Here are five compelling reasons to add spinach and egg wraps to your breakfast repertoire:

  • Quick and Easy: With just a few ingredients and minimal preparation time, you can whip up these wraps in under 30 minutes, making them a perfect option for busy mornings.
  • Nutritious Powerhouse: Spinach and eggs are both nutrient-rich ingredients, providing essential vitamins, minerals, and protein to kickstart your day.
  • Customizable Flavors: Whether you prefer a touch of spice with paprika or a creamy finish with feta, these wraps can be tailored to suit your taste preferences.
  • Portable Meal: Ideal for on-the-go breakfasts, these wraps are easy to pack and enjoy anywhere—from your kitchen to the office.
  • Family-Friendly: Kids and adults alike will love these wraps, making them a great addition to family breakfasts or brunch gatherings.

Ingredient Breakdown: The Essentials and Substitutions

Each ingredient in our spinach and egg wrap plays a vital role in flavor and nutrition. Here’s a detailed look at what you’ll need, along with some substitution ideas:

  • Wraps: 4 large whole wheat or spinach wraps. Whole wheat wraps add fiber, while spinach wraps boost the spinach content. Substitutions: Gluten-free wraps or lettuce leaves for a low-carb option.
  • Eggs: 6 large eggs provide protein and richness. Substitutions: Egg whites for a lower-calorie option, or silken tofu for a vegan alternative.
  • Fresh Spinach: 5 ounces, baby spinach is recommended for its tender texture. Substitutions: 1 cup of frozen spinach (thawed and drained) if fresh isn’t available.
  • Onion: ½ medium onion, finely chopped for savory depth. Substitutions: Shallots or leeks for a milder flavor.
  • Garlic: 2 cloves, minced for aromatic flavor. Substitutions: Garlic powder if fresh isn’t available.
  • Cheese: ½ cup shredded cheese (cheddar, mozzarella, or feta). Substitutions: Nutritional yeast for a dairy-free option.
  • Olive Oil: 1 tablespoon for sautéing. Substitutions: Avocado oil or coconut oil.
  • Seasonings: Salt and pepper to taste, plus optional spices like paprika or cumin for added flavor.

Pro Tips for the Perfect Spinach and Egg Wrap

Juicy spinach and scrambled eggs wrapped in a soft tortilla, viewed from the side.

Ready to elevate your cooking game? Here are some expert insights to ensure your spinach and egg wraps turn out perfectly every time:

  • Prep Ahead: Chop your vegetables and whisk the eggs the night before to save time in the morning.
  • Don’t Rush the Sauté: Allow your onions to caramelize slightly for enhanced flavor before adding garlic and spinach.
  • Season the Eggs: Whisking in salt and spices before cooking ensures the flavors are evenly distributed throughout the eggs.
  • Watch the Heat: Cook the eggs on low-medium heat to prevent them from drying out, keeping them fluffy and moist.
  • Warm the Wraps: Warming your wraps makes them more pliable and less likely to tear when filled.
  • Perfect Folding Technique: Fold in the sides of the wrap before rolling it up to prevent spills.
  • Optional Grilling: For extra crispiness, grill your assembled wraps for a minute or two on each side.
  • Serve Immediately: Enjoy your wraps hot, while the cheese is melty and the flavors are vibrant!

Avoiding Common Mistakes

Even the best chefs can make a misstep! Here are some common mistakes to watch out for:

  • Overcooking the Spinach: Spinach wilts quickly, so keep an eye on it to avoid a mushy texture.
  • Ignoring Seasoning: Don’t skip the salt and pepper; they are essential for enhancing the dish’s overall flavor.
  • Filling Too Much: Overfilling your wraps can make them difficult to fold and eat. Less is often more!
  • Skipping the Warm-Up: Not warming the wraps can lead to tearing, so don’t skip this step!

Delicious Variations to Try

Feeling adventurous? Here are some fun variations to spice up your spinach and egg wraps:

  • Mexican Twist: Add black beans, jalapeños, and salsa for a zesty kick.
  • Italian Flare: Incorporate sun-dried tomatoes, basil, and mozzarella for a Mediterranean delight.
  • Breakfast Supreme: Add diced bell peppers, cooked bacon, or sausage for a heartier option.
  • Vegan Delight: Use chickpea flour to make a chickpea omelet, and add nutritional yeast for a cheesy flavor.

Storage and Make-Ahead Instructions

Planning to make these wraps ahead of time? Here’s how to store them:

  • Refrigerate: Store assembled wraps in an airtight container in the fridge for up to 3 days. Reheat in a skillet or microwave before serving.
  • Freeze: You can also freeze the cooked filling for up to 2 months. Just thaw and reheat when you’re ready to enjoy!
  • Make-Ahead Filling: Prepare the spinach and egg mixture ahead of time and store it in the fridge. Just reheat and assemble when you’re ready to eat!

Frequently Asked Questions

Here are some common questions about spinach and egg wraps:

  • Can I use frozen spinach? Yes, just make sure to thaw and squeeze out excess water before cooking.
  • How long do these wraps last in the fridge? They can be stored in an airtight container for up to 3 days.
  • Can I make these wraps vegan? Absolutely! Substitute eggs with chickpea flour or silken tofu.
  • What kind of cheese is best? It depends on your preference; cheddar, feta, or mozzarella all work well.
  • Can I add meat to this wrap? Yes, cooked bacon, ham, or sausage can be added for extra protein.
  • Are these wraps healthy? Yes! They are full of protein, fiber, and nutrients.
  • Can I make this wrap spicy? Definitely! Add jalapeños or a dash of hot sauce for a spicy kick!
  • What’s the best way to serve them? Serve warm, with a side of salsa or avocado for dipping.

Nutritional Tips and Dietary Adaptations

If you’re looking to adapt this recipe for specific dietary needs, consider these tips:

  • Low-Calorie Option: Use egg whites, whole wheat wraps, and skip the cheese or use a low-fat version.
  • High-Protein Boost: Add cooked chicken or turkey for an extra protein punch.
  • Dairy-Free Version: Opt for dairy-free cheese or omit it entirely.
  • Gluten-Free: Use gluten-free wraps or collard greens for a low-carb option.

Recommended Equipment

To make your cooking experience smooth and enjoyable, here’s a quick list of recommended kitchen tools:

  • Non-Stick Skillet: Essential for sautéing vegetables and cooking eggs without sticking.
  • Whisk: For beating eggs to a fluffy consistency.
  • Sharp Knife: For easy chopping of vegetables.
  • Cutting Board: A must-have for safe and efficient prep work.
  • Spatula: To gently stir and fold your delicious filling.

Serving Suggestions

Now that you’ve made these delicious spinach and egg wraps, here are some tasty ways to serve them:

  • With Salsa: A fresh salsa on the side enhances the wrap’s flavor.
  • Avocado Slices: Creamy avocado slices add richness and healthy fats.
  • Fresh Herbs: Sprinkle fresh herbs like cilantro or parsley for a burst of freshness.
  • Fruit Salad: Serve with a side of mixed fruit for a refreshing contrast.

Conclusion: A Wrap to Remember

And there you have it, my friends! A comprehensive guide to crafting the ultimate spinach and egg wrap that’s not only satisfying but also a joy to make. Whether you keep it simple or get creative with flavors, these wraps are sure to become a staple in your kitchen. So, gather your ingredients, invite a friend, and celebrate the joy of cooking. Bon appétit!

Spinach and Egg Wrap

Prep Time 10 minutes
Cook Time 15 minutes
Total Time 25 minutes
Servings 4 wraps
Calories 350
A nutritious and delicious breakfast or lunch option, these spinach and egg wraps are easy to prepare and packed with flavor and nutrients.

Ingredients

Wraps

  • 6 large Eggs (The protein source)
  • 5 ounces Fresh Spinach (Baby spinach recommended)
  • ½ medium Onion (Finely chopped)
  • 2 cloves Garlic (Minced)
  • ½ cup Cheese (Shredded, your choice)
  • 1 tablespoon Olive Oil (For sautéing)
  • ½ teaspoon Salt (To taste)
  • ¼ teaspoon Black Pepper (Freshly ground)
  • Pinch Optional Spices (Paprika, cumin, or oregano)

Instructions 

  • Chop onion, mince garlic, and wash spinach. Sauté onion in olive oil until translucent, then add garlic and cook briefly. Add spinach and cook until wilted. Whisk eggs with salt, pepper, and spices. Pour eggs into skillet, scramble with spinach until just set. Warm wraps, fill with egg mixture and cheese, then fold and serve.

Notes

Warming the wraps before filling makes them more pliable and easier to roll.
Calories: 350kcal
Cost: $15
Course: Breakfast, Lunch
Cuisine: American
Keyword: Egg, Spinach, Wrap

Embrace the joy of cooking with these delightful 2 Ingredient Banana Pancakes, a recipe that captures the essence of Mediterranean flavors and the warmth of family gatherings. With just a banana and two eggs, you can create fluffy pancakes that transform breakfast into a jubilant feast. Let’s dive into the magic of these pancakes, where simplicity meets deliciousness, perfect for any occasion!

Why You’ll Love This Recipe

There’s something special about a recipe that combines ease and flavor. Here’s why you’ll adore making these banana pancakes:

  • Quick and Easy: With just two ingredients, these pancakes are incredibly simple to whip up, making them perfect for busy mornings.
  • Healthier Alternative: Free from flour and refined sugars, they are a wholesome choice for a nutritious breakfast.
  • Versatile and Customizable: You can easily adapt the recipe by adding spices, fruits, or toppings to suit your taste.
  • Kid-Friendly: Kids love these pancakes, and they can even help mash the banana and mix the batter, making it a fun family activity!
  • Perfect for Meal Prep: You can make a batch ahead of time and freeze them for a quick, satisfying breakfast later.

Ingredients Breakdown

To create the perfect flourless banana pancakes, you’ll need:

  • 1 ripe banana: Choose a banana that is slightly brown for the best sweetness and flavor.
  • 2 eggs: Fresh eggs will help create a fluffy texture. You can substitute with egg whites for a lighter version.

For variations, consider:

  • Nut butter: Add a tablespoon of almond or peanut butter for a nutty flavor.
  • Cinnamon: A sprinkle of cinnamon can enhance the sweetness and add warmth.
  • Vanilla extract: A splash of vanilla can elevate the flavor profile.
  • Chia seeds: For added nutrition, mix in a tablespoon of chia seeds.

How to Make These Pancakes

Follow these simple steps to create your 2 ingredient banana pancakes:

  1. In a bowl, mash the ripe banana until smooth. Combine it with the eggs and mix well until you achieve a smooth batter. Alternatively, blend everything in a food processor for a super smooth consistency.
  2. Heat a nonstick skillet over medium heat, lightly greased with oil or butter. Once hot, pour a scoop of the pancake batter into the pan.
  3. Cook until the underside is golden brown and bubbles form on the surface, then flip with a spatula and cook until both sides are golden.

Pro Tips for Perfect Pancakes

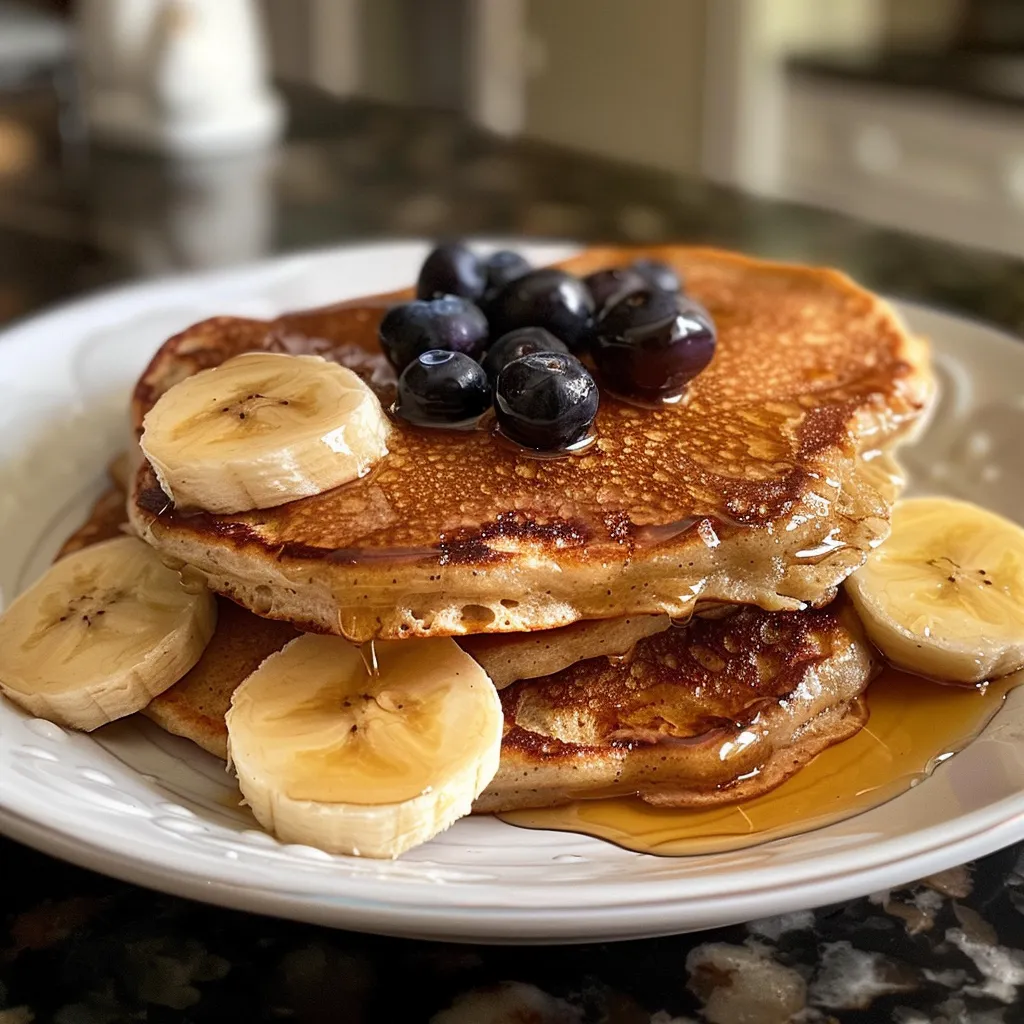
Side view of freshly made banana pancakes with a smooth, fluffy texture, garnished with banana pieces.

To ensure your pancakes turn out perfectly every time, consider these expert insights:

  • Use ripe bananas: The riper the banana, the sweeter and more flavorful your pancakes will be.
  • Don’t overmix: Gently mix the batter to keep the pancakes fluffy; overmixing can lead to dense pancakes.
  • Control the heat: Medium heat is key; too hot, and the pancakes will burn before cooking through.
  • Rest the batter: Letting the batter rest for a few minutes allows the flavors to meld and improves texture.
  • Experiment with toppings: Fresh fruits, yogurt, or a drizzle of honey can elevate your pancake experience.
  • Use a nonstick skillet: This helps prevent sticking and ensures easy flipping.
  • Try a pancake ring: For perfectly shaped pancakes, use a ring mold to contain the batter.
  • Make mini pancakes: Smaller pancakes cook faster and are perfect for little hands!

Common Mistakes and Troubleshooting

Even the best chefs encounter hiccups! Here’s how to avoid some common pitfalls:

  • Pancakes are too dense: Ensure your banana is well-mashed and eggs are well-beaten for a light texture.
  • Pancakes fall apart: Allow them to cook thoroughly before flipping; they need time to set.
  • Overcooked pancakes: Watch for bubbling; once they start to bubble, they’re ready to flip!

Delicious Variations

Want to mix things up? Here are four tasty variations of the basic recipe:

  • Chocolate Chip Banana Pancakes: Add a handful of dark chocolate chips to the batter for a sweet twist.
  • Blueberry Banana Pancakes: Fold in fresh or frozen blueberries for a burst of flavor.
  • Spiced Banana Pancakes: Incorporate pumpkin spice or nutmeg for a seasonal flair.
  • Savory Banana Pancakes: Add shredded cheese and herbs for a unique, savory breakfast option.

Storage and Make-Ahead Instructions

These pancakes can be made in advance and stored for later enjoyment:

  • Refrigerator: Store leftovers in an airtight container in the fridge for up to 3 days.
  • Freezer: Place pancakes in a single layer on a baking sheet, freeze until solid, then transfer to a freezer bag for up to 2 months.
  • Reheating: Warm them in a skillet or microwave until heated through before serving.

Comprehensive FAQ

Here are answers to some common questions about making 2 ingredient banana pancakes:

  • Can I make these pancakes without eggs? Yes! You can use flax eggs or applesauce as a substitute.
  • What if I don’t like bananas? Try using applesauce or pureed pumpkin for a different flavor.
  • Can I add protein powder? Absolutely! Just be mindful of the extra liquid you may need to add.
  • How do I know when to flip the pancakes? Look for bubbles forming on the surface and a golden edge.
  • What toppings go well with these pancakes? Fresh fruit, yogurt, maple syrup, or nut butter all complement the pancakes beautifully.
  • Can I use frozen bananas? Yes! Thaw and mash frozen bananas for your batter.
  • Is this recipe suitable for a vegan diet? Not as is, but you can substitute eggs with flaxseed meal or other vegan alternatives.
  • How can I make these pancakes fluffier? Whip the egg whites separately and fold them into the batter for added airiness.

Nutritional Tips and Dietary Adaptations

For those watching their diet, here are some nutritional insights:

  • Low-Carb Option: Use almond flour or coconut flour instead of whole bananas to reduce the carb content.
  • Protein Boost: Add a scoop of protein powder to increase the protein content of your pancakes.
  • Gluten-Free: This recipe is naturally gluten-free, making it suitable for those with gluten intolerances.
  • Dairy-Free: Keep it dairy-free by using plant-based oils or milk alternatives for cooking.

Equipment Recommendations

To make your pancake experience even better, here’s what you might need:

  • Nonstick skillet: Essential for easy flipping and preventing sticking.
  • Mixing bowl: A large bowl for mixing your ingredients smoothly.
  • Spatula: A good spatula helps flip the pancakes without breaking them.
  • Measuring cups: Ensure precise measurements for a consistent batter.

Serving Suggestions

Make your pancake breakfast a feast with these serving ideas:

  • Fruit Medley: Serve your pancakes with a variety of fresh fruits for color and flavor.
  • Yogurt Parfait: Layer pancakes with yogurt and granola for a delightful parfait.
  • Maple Syrup Drizzle: A light drizzle of maple syrup adds sweetness without overwhelming the flavor.
  • Nut Butter Spread: Spread almond or peanut butter on top for added protein and richness.

Conclusion: A Celebration of Flavors

With their simple ingredients and delightful taste, 2 Ingredient Banana Pancakes are more than just a breakfast option; they are a celebration of flavor and family. So, gather your loved ones, whip up a batch, and enjoy the joy of cooking together. Remember, cooking is about exploration and sharing moments that create memories. Bon appétit!

2 Ingredient Banana Pancakes (No Flour)

Prep Time 5 minutes
Cook Time 5 minutes
Total Time 10 minutes
Servings 2 pancakes
Calories 150
Enjoy quick and healthy banana pancakes made with just two simple ingredients. Perfect for a nutritious breakfast or snack.

Ingredients

Main

  • 1 piece banana
  • 2 pieces eggs

Instructions 

  • In a bowl, mash the banana and mix with eggs until smooth.
  • Heat a lightly oiled nonstick skillet over medium heat.
  • Pour batter into the skillet and cook until golden on both sides.

Notes

For extra flavor, add a dash of cinnamon or vanilla extract.
Calories: 150kcal
Cost: $3
Course: Breakfast
Cuisine: American
Keyword: Banana

Welcome to the heart of Mediterranean cooking! Today, we’re diving into a delightful recipe for Whole Grain Seeded Bread. This bread is not just a loaf; it’s a celebration of texture, flavor, and the love of home-cooked goodness. With its combination of seeds, whole grains, and a hint of sweetness, this recipe is perfect for sharing with family and friends. Let’s embark on this culinary journey that brings the aromas of Seville right to your kitchen!

Why You’ll Love This Recipe

This whole grain seeded bread is packed with benefits that make it a must-try:

  • Nutritious Ingredients: The blend of whole wheat flour, oats, and seeds ensures you get a wholesome loaf rich in nutrients.
  • Versatile Use: Perfect for sandwiches, toast, or even as a side to your favorite soups and salads.
  • Easy to Make: With straightforward steps and minimal fuss, this recipe is beginner-friendly!
  • Freezer-Friendly: Make a double batch and freeze one loaf for later; it’s perfect for busy days.
  • Family Tradition: Baking this bread can become a cherished family ritual, creating memories that last a lifetime.

Ingredients & Substitutions

Let’s gather our ingredients! Here’s what you’ll need to create this delicious bread:

  • 1 cup seed mix: I recommend using a combination of pumpkin seeds, flaxseeds, sunflower seeds, and quinoa for a delightful crunch.
  • 2 ½ cups water: Divided into two portions, one for soaking the seeds and one for the dough.
  • 3 cups all-purpose flour: For a light and airy texture.
  • 2 cups whole wheat flour: Adds depth and nutrition.
  • ¼ cup honey: This gives a subtle sweetness and enhances browning.
  • ¼ cup unsalted butter (melted): For richness and flavor.
  • 2 ¼ teaspoons instant yeast: About one packet to help the bread rise beautifully.
  • 1 tablespoon kosher salt: Essential for flavor and controlling yeast activity.
  • ½ cup old-fashioned rolled oats: For added texture and nutrition.
  • 1 egg white (beaten well): For egg wash, giving the crust a shiny finish.

**Substitutions**: You can swap honey for maple syrup for a vegan option, or use whole grain flour instead of all-purpose flour for a denser loaf.

How to Make Whole Grain Seeded Bread

Follow these simple steps, and you’ll have a loaf of freshly baked bread that fills your home with warmth and joy!

Step-by-Step Instructions

  1. In a small bowl, combine your desired seeds for the seed mix. Set aside half for topping later.
  2. Add ½ cup of water to the seed mixture, stir, cover, and let it sit at room temperature for at least 30 minutes (or up to overnight for deeper flavor).
  3. In the bowl of a stand mixer, mix the all-purpose flour, whole wheat flour, instant yeast, honey, melted butter, remaining 2 cups of warm water (110-115°F), oats, and salt until well combined.
  4. Knead on medium speed for 6-8 minutes until a smooth, elastic dough forms.
  5. Reduce the speed and incorporate the soaked seed mixture. Mix until the seeds are evenly distributed.
  6. Cover the bowl with plastic wrap and let the dough rise for 1 to 1 ¼ hours, until doubled in size.
  7. Prepare two 9-by-5-inch loaf pans by spraying with cooking spray. Divide the dough in half and preshape each half into a round boule.
  8. Let them rest for 10 minutes, then shape each into a loaf and place in the prepared pans.
  9. Brush the tops with the beaten egg white and roll in the reserved seed mix.
  10. Cover with lightly greased plastic wrap and let rise for 45 minutes to 1 hour.
  11. Preheat your oven to 375°F. Bake for 35-40 minutes until golden brown and an instant-read thermometer reads 185°F in the center.
  12. Cool for 5 minutes in the pans, then transfer to a cooling rack. Allow to cool completely before slicing.

Professional Tips for Making Whole Grain Seeded Bread

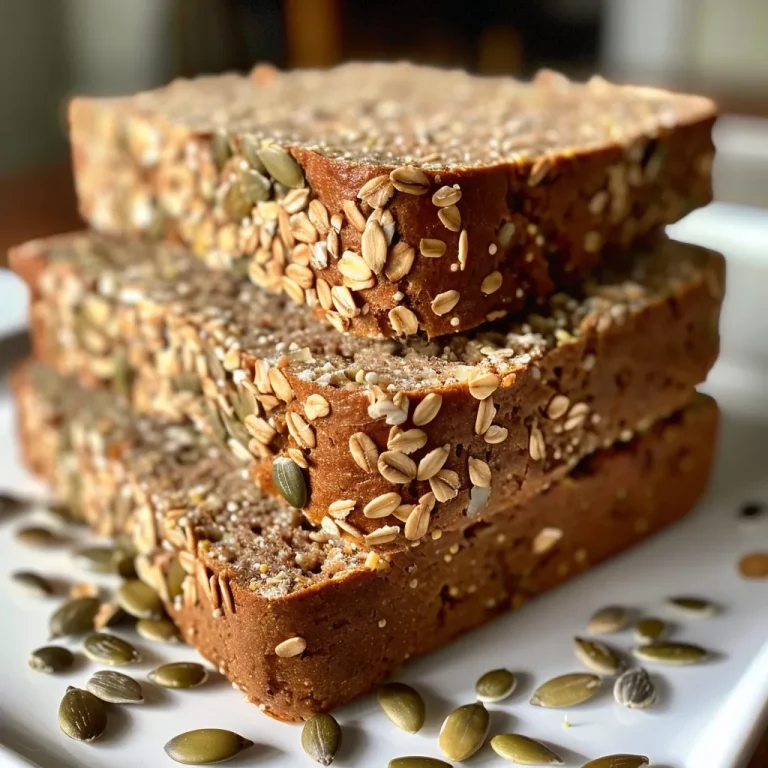
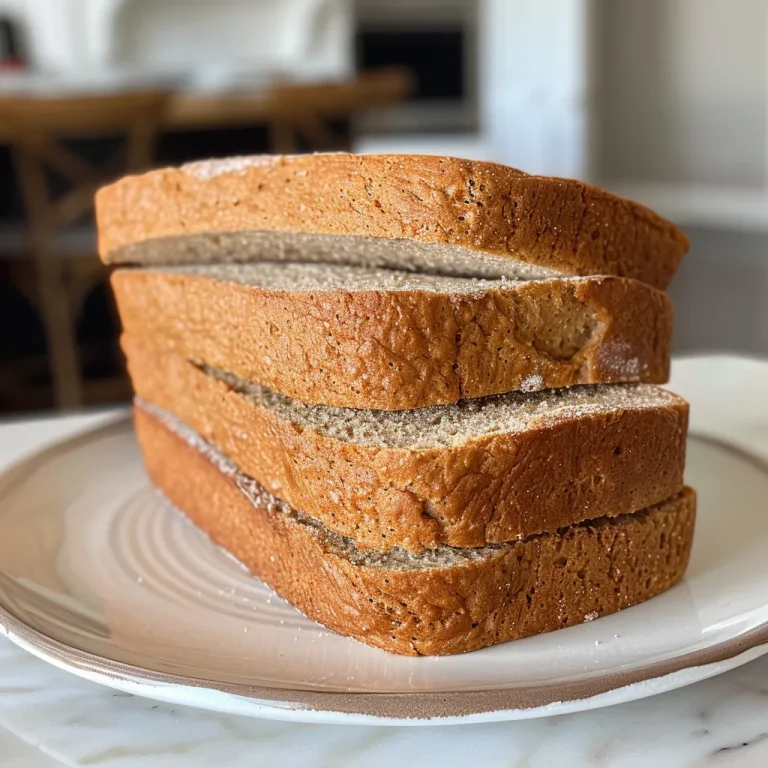
Side view of a freshly baked whole grain seeded bread showcasing its texture and seeds.

Here are some expert insights to ensure your bread turns out perfectly:

  • Use Room Temperature Ingredients: This helps the dough rise more effectively, so make sure your butter and water are not too cold.
  • Mix Well: Ensure all ingredients are fully combined before kneading to avoid dry pockets in your dough.
  • Don’t Rush the Rise: Allow the dough to rise until it has doubled; this is key for texture.
  • Check the Oven Temperature: Use an oven thermometer to ensure your baking environment is accurate.
  • Tap for Doneness: Tap the bottom of the loaf; it should sound hollow when it’s done.
  • Store Properly: Wrap your bread in plastic wrap or a bread bag to keep it fresh longer.
  • Experiment with Seed Mixes: Feel free to customize your seed mixture to suit your taste!
  • Freeze for Freshness: If you have leftovers, slice the bread and freeze it for quick access later.

Common Mistakes and Troubleshooting

Even experienced bakers can run into issues. Here are some common mistakes and how to troubleshoot them:

  • Dense Bread: This could be due to using old yeast or not allowing the dough enough time to rise. Always check yeast freshness!
  • Dry Texture: Ensure you measure your flour correctly. Too much flour can lead to dryness; consider weighing it for accuracy.
  • Too Crumbly: If your dough is too dry, add a little more water, one tablespoon at a time, until it comes together.
  • Uneven Baking: Rotate your bread halfway through baking to ensure even heat distribution.

Variations of Whole Grain Seeded Bread

Get creative with these fun variations!

  • Herbed Bread: Add dried herbs like rosemary or thyme for a fragrant twist.
  • Cheese and Seed Bread: Mix in shredded cheese for a savory flavor.
  • Sweet Cinnamon Bread: Incorporate cinnamon and raisins for a sweet breakfast option.
  • Gluten-Free Option: Substitute the flours with a gluten-free blend and a little xanthan gum to help with structure.

Storage and Make-Ahead Instructions

This bread is best enjoyed fresh, but here’s how to store it:

  • Room Temperature: Store in a bread bag or wrapped in plastic wrap for up to 3 days.
  • Freezer: Slice the bread and wrap it tightly in plastic wrap, then place in a freezer bag. It will last up to 3 months.
  • Thawing: To enjoy, simply take out a slice and toast it directly from the freezer, or let it thaw at room temperature.

Comprehensive FAQ

Here are some frequently asked questions about making whole grain seeded bread:

  • Can I use different seeds? Absolutely! Feel free to mix and match your favorite seeds.
  • What if my dough doesn’t rise? Ensure your yeast is fresh and your dough is kept in a warm environment.
  • Is it necessary to soak the seeds? Soaking adds flavor and aids in digestion, but it’s not strictly necessary.
  • How can I tell when the bread is done? An instant-read thermometer should read 185°F in the center.
  • Can I make this bread without a stand mixer? Yes, you can knead by hand; it just requires a bit more elbow grease!
  • How should I slice the bread? Use a serrated knife for clean slices without squishing the loaf.
  • Can I use bread flour instead of all-purpose? Yes, bread flour will give a chewier texture.
  • What meals pair well with this bread? It’s fantastic with soups, salads, or as part of a charcuterie board!

Nutritional Tips and Dietary Adaptations

This bread is not just tasty; it’s packed with nutrients! Here are some tips to enhance its health benefits:

  • Add More Seeds: Incorporate chia seeds or hemp seeds for added omega-3 fatty acids.
  • Reduce Sugar: If you prefer a less sweet bread, reduce the honey to 2 tablespoons.
  • Make it Vegan: Replace honey with agave syrup and the egg white with a flax egg (1 tablespoon ground flaxseed mixed with 2.5 tablespoons water).

Equipment Recommendations

Having the right tools makes all the difference. Here are my top picks:

  • Stand Mixer: A must for kneading; it saves time and effort.
  • Baking Pans: Use durable, non-stick loaf pans for even baking.
  • Instant-Read Thermometer: Ensures your bread is perfectly baked.
  • Kitchen Scale: For precise measurements, especially with flour.

Serving Suggestions

Now that your bread is baked, how can you enjoy it? Here are some of my favorite serving ideas:

  • Classic Sandwich: Layer your favorite deli meats, cheeses, and fresh veggies for a hearty lunch.
  • Toast: Spread with avocado, a sprinkle of salt, and a dash of lemon juice for a delicious breakfast.
  • With Soups: Serve alongside a warm bowl of your favorite soup to soak up all the flavors.
  • Charcuterie Board: Slice the bread into cubes and pair with cheeses, olives, and cured meats.

In conclusion, making Whole Grain Seeded Bread is a joyful experience that connects us to our roots and brings us together around the table. Whether you’re enjoying a slice fresh from the oven or making sandwiches for a picnic, this bread is a true celebration of Mediterranean life. So gather your ingredients, invite your loved ones into the kitchen, and let the aroma of freshly baked bread fill your home. Happy baking!

Whole Grain Seeded Bread

Prep Time 45 minutes
Cook Time 40 minutes
Total Time 1 hour 25 minutes
Servings 2 loaves
Calories 250
A hearty, nutritious bread packed with seeds and whole grains, perfect for wholesome sandwiches or toast.

Ingredients

Seed Mix

  • 1 cup seed mix (pumpkin seeds, flaxseeds, sunflower seeds, quinoa) (soaked for 2 hours)
  • 2 ½ cups water (divided) (for soaking and dough)
  • 3 cups all-purpose flour
  • 2 cups whole wheat flour
  • ¼ cup honey
  • ¼ cup unsalted butter (melted)
  • 2 ¼ teaspoons instant yeast (1 packet)
  • 1 tablespoon kosher salt
  • ½ cup old-fashioned rolled oats
  • ½ cup seed mix (pumpkin seeds, flaxseeds, sesame seeds & oats) (for topping)
  • 1 egg white beaten well

Instructions 

  • Combine seed mix for topping and soak ½ cup water with the seed mixture for the bread; let sit 30 minutes to overnight.
  • Mix flours, yeast, honey, melted butter, oats, and salt in a stand mixer; knead 6-8 minutes until elastic.
  • Add the soaked seed mixture and water; mix until seeds are incorporated. Let dough rise 1-1.15 hours until doubled.
  • Preshape, shape into loaves, and let rest 10 minutes. Final shape into logs, coat with beaten egg white, then roll in seed topping.
  • Place in loaf pans, let rise 45-60 minutes, then bake at 375°F (190°C) for 35-40 minutes until golden and internal temp reaches 185°F (85°C). Cool before slicing.

Notes

Ensure the dough is elastic and passes the windowpane test for proper gluten development.
Calories: 250kcal
Cost: $15
Course: Bread
Cuisine: American
Keyword: Seeds, Whole Grain

Welcome to the Joy of Baking Whole Wheat Sandwich Bread

Baking your own bread is not just a culinary task; it’s an experience filled with warmth, comfort, and nostalgia. Today, I invite you into my kitchen to explore the delightful world of Whole Wheat Sandwich Bread. This recipe is not only easy to follow but also rewards you with a loaf that is soft, subtly sweet, and bursting with wholesome flavors. Imagine the aroma wafting through your home as the bread bakes, evoking memories of family gatherings and shared meals. Ready your aprons, and let’s embark on this delicious journey together!

Why You’ll Love This Recipe

Here are just a few reasons why this wheat sandwich bread recipe will become a staple in your home:

  • Health Benefits: Whole wheat flour is rich in fiber, vitamins, and minerals, making each slice a nutritious choice for you and your family.
  • Versatile Uses: Perfect for sandwiches, toast, or simply enjoying with butter, this bread adapts to all your meals.
  • Homemade Goodness: There’s nothing like the satisfaction of creating something from scratch, knowing exactly what goes into your food.
  • Cost-Effective: Baking at home saves money compared to store-bought options, especially for quality bread.
  • Customizable: This recipe serves as a great base for experimenting with flavors and add-ins, such as seeds, nuts, or dried fruits.

Ingredients Breakdown

Gathering fresh ingredients is the first step towards creating your delicious whole wheat sandwich bread. Here’s what you’ll need, along with some handy substitutions:

  • 3 cups whole wheat flour: Hearty texture and fiber content. You can substitute with white whole wheat flour for a lighter loaf.
  • 2 tbsp honey: Adds subtle sweetness and helps activate the yeast. Maple syrup or agave nectar can work as alternatives.
  • 1 packet active dry yeast (2¼ tsp): This is essential for making the dough rise. Instant yeast is a great substitute if you have it on hand.
  • 1¼ cups warm water (110°F): Ensures proper yeast activation. If it’s too hot, it can kill the yeast; too cold, and it won’t activate.
  • 2 tbsp olive oil: Adds softness and moisture to the bread. You can use melted butter or coconut oil if preferred.
  • 1 tsp salt: Enhances flavor and controls yeast activity. This is crucial for balanced taste.
  • 2 tbsp vital wheat gluten (optional): For a lighter, airier texture. If you don’t have it, don’t worry; the bread will still be delicious!

Step-by-Step Instructions

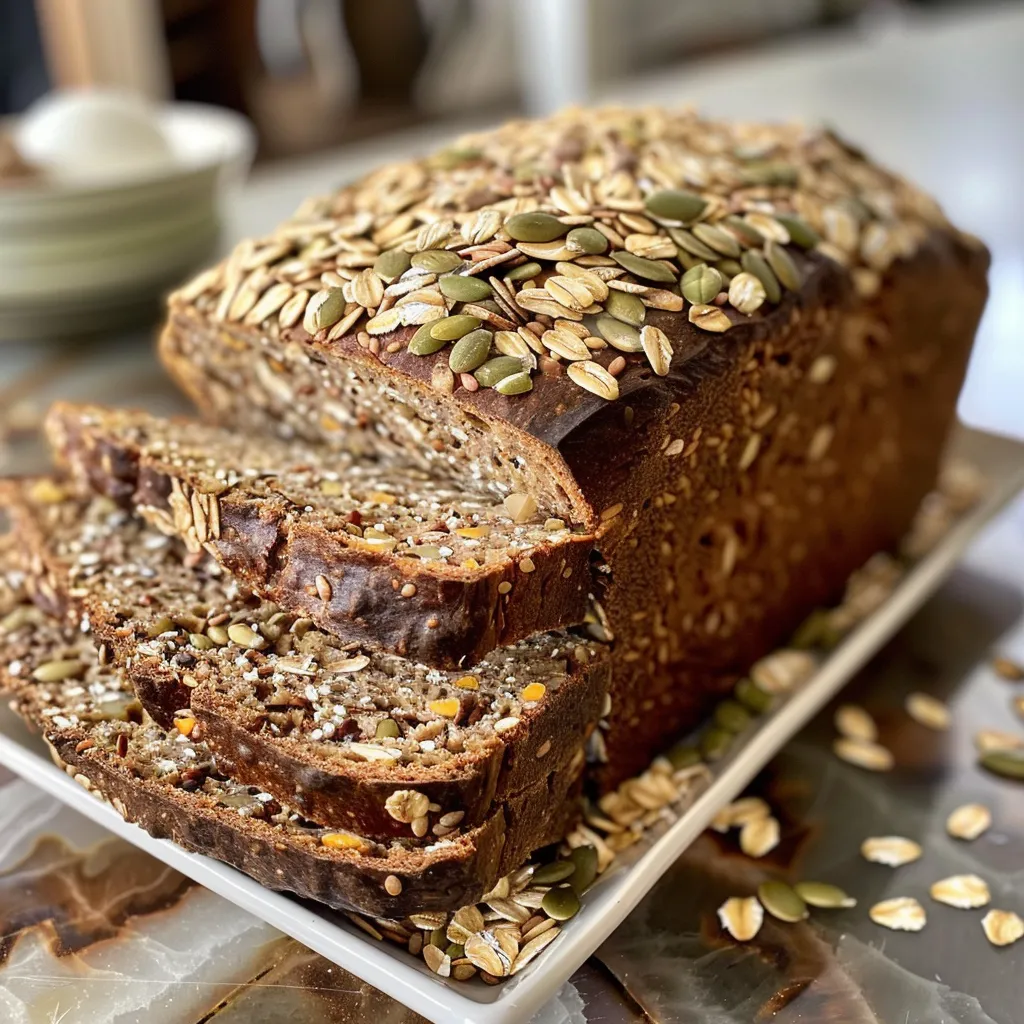
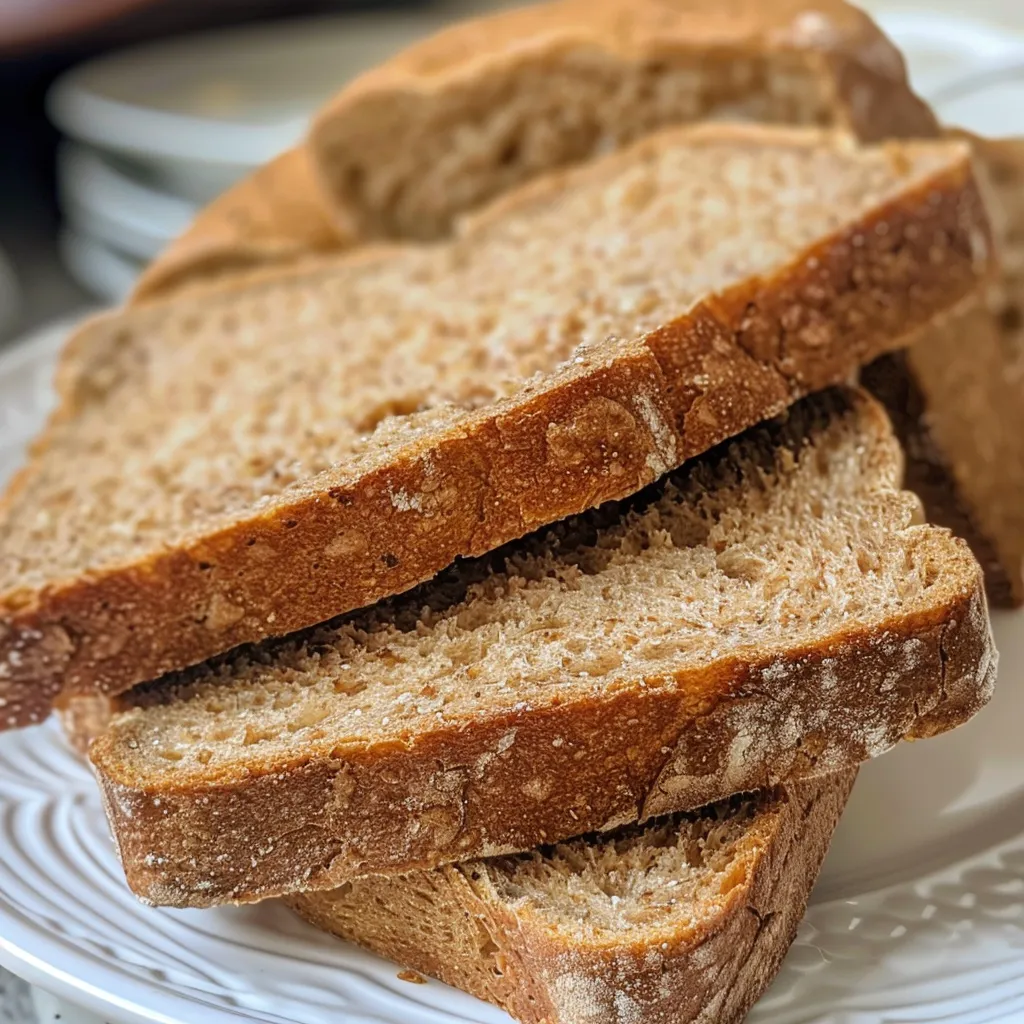
Sliced whole wheat sandwich bread displaying a fluffy, textured interior and crust.

Let’s dive into the heart of the process. Follow these steps to create your own masterpiece:

  1. Activate yeast: In a small bowl, mix warm water and honey. Sprinkle the yeast on top and let it sit for about 5-10 minutes until frothy.
  2. Mix dough: In a large bowl, combine the whole wheat flour and salt. Pour in the yeast mixture and olive oil, stirring until a dough forms.
  3. Knead until elastic: Transfer the dough onto a floured surface and knead for about 10 minutes until it becomes smooth and elastic.
  4. First rise: Place the dough in a greased bowl, cover it with a damp cloth, and let it rise in a warm place for about 1 hour or until doubled in size.
  5. Shape loaf: Punch down the dough and turn it onto a floured surface. Shape it into a loaf and place it in a greased loaf pan.
  6. Second rise: Cover the loaf with a damp cloth again and let it rise for another 30-45 minutes until puffy.
  7. Bake until golden: Preheat your oven to 350°F (175°C). Bake the loaf for 30-35 minutes or until golden brown and sounds hollow when tapped on the bottom.
  8. Cool on rack: Once baked, remove the loaf from the pan and let it cool on a wire rack before slicing.

Pro Tips for Perfect Bread

To ensure your whole wheat sandwich bread turns out perfectly every time, consider these expert insights:

  • Temperature matters: Use a kitchen thermometer to ensure your water is at 110°F; this is the ideal temperature for activating yeast.
  • Don’t skip kneading: Kneading develops gluten, which gives the bread its structure. Aim for a smooth, elastic dough.
  • Watch your rises: If your dough isn’t rising well, check the temperature of your environment—yeast thrives in warmth!
  • Use vital wheat gluten: If you want a lighter texture, adding vital wheat gluten can make a noticeable difference.
  • Store properly: Once cooled, store your bread in an airtight container at room temperature to keep it fresh.
  • Experiment with flavors: Add herbs, seeds, or nuts to the dough for an exciting twist on this classic recipe.
  • Slice with care: Use a serrated knife for clean, even slices.
  • Enjoy fresh: This bread is best enjoyed fresh, but it freezes beautifully for future use.

Common Mistakes and Troubleshooting

Even seasoned bakers can encounter hiccups. Here are some common mistakes and how to avoid them:

  • Dense bread: This often occurs from insufficient kneading or not allowing the dough to rise long enough. Ensure both steps are completed thoroughly.
  • Dry texture: If your bread turns out dry, try adding a bit more liquid next time, or use a little more olive oil in the dough.
  • Flat loaf: If your loaf doesn’t rise, check the freshness of your yeast. If it’s old, it may not activate properly.
  • Burnt crust: If the top of your loaf burns before the inside is cooked, place a piece of foil over it halfway through baking.

Delicious Variations to Try

Once you’ve mastered the basic recipe, you can explore these fun variations:

  • Honey Oat Bread: Add 1 cup of rolled oats to the dough for a heartier texture and flavor.
  • Seeded Whole Wheat Bread: Incorporate sunflower seeds, sesame seeds, or flaxseeds into the dough for added crunch and nutrition.
  • Cinnamon Raisin Bread: Mix in 1 cup of raisins and 1 teaspoon of cinnamon for a sweet twist, perfect for breakfast.
  • Herb-Infused Bread: Add dried herbs like rosemary or thyme into the mix for a fragrant, savory loaf.

Storage and Make-Ahead Tips

To make your baking experience as enjoyable as possible, here are some storage tips:

  • Room temperature: Store your bread in a cool, dry place in an airtight container for up to 4 days.
  • Freezing: For longer storage, slice the bread and wrap it tightly in plastic wrap, then place it in a freezer bag. It can last for up to 3 months.
  • Making ahead: Prepare the dough and let it rise. You can refrigerate it overnight to bake fresh bread in the morning.

FAQs About Whole Wheat Sandwich Bread

Here are answers to some common questions you might have:

  • Can I substitute all-purpose flour for whole wheat flour? Yes, but the texture and flavor will change. You may need to adjust the liquid.
  • How do I know when my bread is done baking? The bread should be golden brown and sound hollow when tapped on the bottom.
  • Can I use a bread machine for this recipe? Absolutely! Follow your machine’s manual for whole wheat settings.
  • What if my dough is too sticky? Add small amounts of flour until it reaches the right consistency, but avoid adding too much.
  • Is this bread suitable for sandwiches? Yes! It holds up well for sandwiches, toast, and more.
  • How can I enhance the flavor? Consider adding spices, herbs, or even cheese to the dough before baking.
  • Can I double the recipe? Yes, you can double the ingredients and bake two loaves; just ensure your mixing bowl is large enough!
  • What’s the best way to slice the bread? Use a serrated knife for the best results without squishing the loaf.

Nutritional Tips and Dietary Adaptations

This wheat sandwich bread is a great option for many dietary needs:

  • High fiber: Whole wheat flour is higher in fiber than white flour, aiding digestion.
  • Adjusting sweetness: If you’re watching your sugar intake, reduce the amount of honey or substitute with a sugar alternative.
  • Gluten-free option: For gluten-sensitive individuals, consider using a gluten-free flour blend, though it will require additional adjustments to the recipe.

Equipment Recommendations

Having the right tools can make a significant difference in your bread-making journey:

  • Mixing bowl: A large, sturdy bowl is essential for mixing and kneading.
  • Loaf pan: A standard 9×5 inch loaf pan works best for this recipe.
  • Kitchen thermometer: Useful for checking water temperature for yeast activation.
  • Wire rack: To cool your bread evenly after baking.
  • Serrated knife: Ideal for slicing your bread without squishing it.

Serving Suggestions

Now that you’ve baked this delicious whole wheat sandwich bread, here are a few ideas on how to serve it:

  • Classic sandwiches: Layer with your favorite deli meats, cheeses, and veggies.
  • Breakfast toast: Spread with butter, jam, or avocado for a delightful breakfast treat.
  • Grilled cheese: Use this hearty bread for the ultimate grilled cheese experience.
  • French toast: Make a breakfast classic by dipping slices in an egg mixture and frying until golden.

With this guide, you’re well on your way to mastering the art of baking Whole Wheat Sandwich Bread. Remember, cooking is about exploration and joy, so don’t hesitate to make this recipe your own. Enjoy the process, and happy baking!

Whole Wheat Sandwich Bread Recipe

Prep Time 20 minutes
Cook Time 30 minutes
Total Time 50 minutes
Servings 12 slices
Calories 150
This wholesome whole wheat bread is perfect for sandwiches, offering a hearty texture and rich fiber content. Easy to make at home with simple ingredients.

Ingredients

Dough

  • 3 cups whole wheat flour (Hearty texture and fiber content)
  • 2 tbsp honey (Adds subtle sweetness, helps yeast activate)
  • 1 pkt active dry yeast (2¼ tsp, makes the dough rise and creates fluffy texture)
  • 1 1/4 cups warm water (110°F (not too hot, not too cold))
  • 2 tbsp olive oil (Adds softness and moisture)
  • 1 tsp salt (Enhances flavor and controls yeast activity)
  • 2 tbsp vital wheat gluten (Optional, for a lighter, airier texture)

Instructions 

  • Activate yeast in warm water with honey until frothy.
  • Mix in flour, salt, vital wheat gluten, and olive oil to form dough.
  • Knead until elastic, then let rise until doubled in size.
  • Shape into a loaf, let rise again, then bake at 375°F (190°C) until golden.
  • Cool on a rack before slicing and serving.

Notes

For best results, ensure water is at the right temperature and do not over-knead the dough.
Calories: 150kcal
Cost: $15
Course: Bread
Cuisine: Homemade
Keyword: Whole Wheat

Indulge in the Joy of Baking: Your Guide to the Perfect Moist Chocolate Cake

Welcome, fellow culinary adventurer! Today, we are diving into the delightful world of baking with a recipe that transcends mere food. This moist chocolate cake isn’t just a dessert; it’s a celebration of flavors that brings family and friends together. From its rich cocoa flavor to its tender and moist texture, every bite of this cake is a symphony of sweetness and warmth. So, grab your aprons, and let’s embark on this delicious journey!

Why You’ll Love This Recipe

This moist chocolate cake is designed to impress, and here’s why:

  • Rich Chocolate Flavor: Infused with high-quality cocoa powder and brewed coffee, this cake delivers a depth of cocoa flavor that will have chocolate lovers swooning.
  • Incredibly Moist: Thanks to the buttermilk and hot liquid, the cake remains remarkably moist and tender, ensuring it stays delicious for days.
  • Simple Ingredients: This recipe relies on pantry staples, making it accessible to everyone, whether you’re an experienced baker or a kitchen novice.
  • Versatile for Any Occasion: Perfect for birthdays, celebrations, or just a cozy afternoon treat, this cake fits any gathering.
  • Deliciously Frosted: Topped with a rich chocolate frosting, this cake is a feast for the eyes and the palate, making it a showstopper at any table.

Ingredient Breakdown

Let’s take a closer look at the ingredients that make this cake sing. Here’s what you will need:

  • All-Purpose Flour (1¾ cups): Provides structure and softness to the cake.
  • Granulated Sugar (2 cups): Sweetens and keeps the cake moist.
  • Cocoa Powder (¾ cup): Adds rich chocolate depth. Consider using Dutch-processed for a smoother flavor.
  • Baking Powder (1½ teaspoons): Helps the cake rise evenly, giving it that perfect lift.
  • Baking Soda (1½ teaspoons): Reacts with buttermilk for lightness and a tender crumb.
  • Salt (1 teaspoon): Enhances the flavor balance, bringing out the sweetness.
  • Eggs (2 large): Bind ingredients and add richness to the cake.
  • Buttermilk (1 cup): Creates tender texture and moisture.
  • Vegetable Oil (½ cup): Keeps the cake soft and moist.
  • Vanilla Extract (2 teaspoons): Adds warmth and depth to the flavor profile.
  • Hot Water or Brewed Coffee (1 cup): Blooms cocoa for intensified flavor.

For the frosting, you will need:

  • Unsalted Butter (¾ cup, softened): Base for a creamy frosting.
  • Powdered Sugar (2½ cups): Sweetens and thickens the frosting.
  • Cocoa Powder (½ cup): For rich, chocolatey frosting.
  • Heavy Cream (3–4 tablespoons): Smooths frosting for easy spreading.
  • Vanilla Extract (1 teaspoon): Balances sweetness in the frosting.

If you need substitutions, consider these options:

  • Flour: Whole wheat flour can be used for a denser texture.
  • Sugar: Coconut sugar or maple syrup can provide a unique flavor twist.
  • Buttermilk: Make a quick substitute by mixing milk with a tablespoon of vinegar or lemon juice.
  • Vegetable Oil: Substitute with melted coconut oil for a hint of tropical flair.

Step-by-Step Instructions

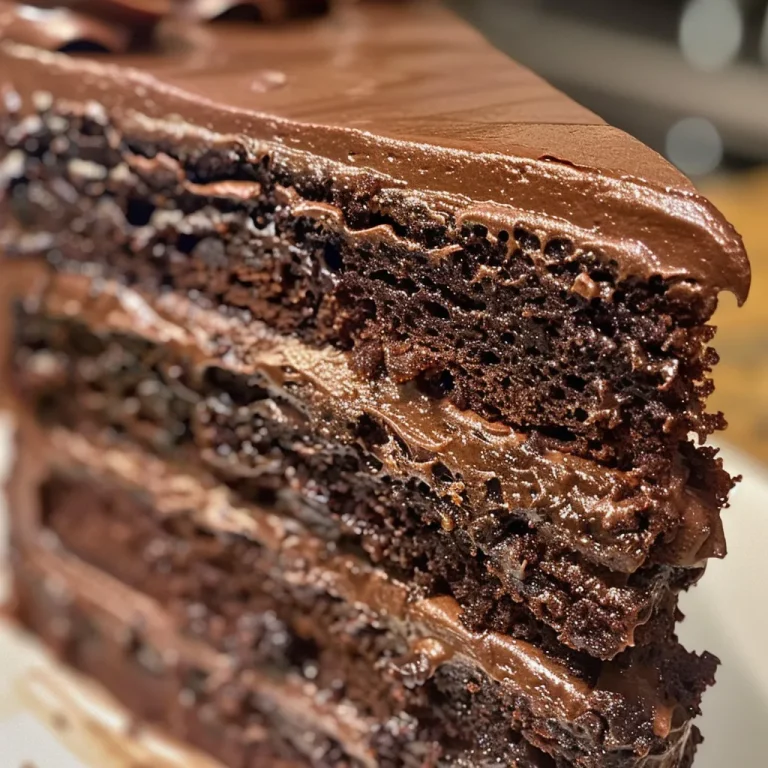
Close-up of a slice of decadent chocolate cake showcasing its moist layers.

Now that we have our ingredients ready, let’s create this masterpiece together!

  1. Preheat the oven: Set it to 350°F (175°C). Grease and flour two 9-inch round cake pans or line with parchment paper for easy release.
  2. Mix the dry ingredients: In a large bowl, whisk together the flour, sugar, cocoa powder, baking powder, baking soda, and salt.
  3. Add the wet ingredients: Add the eggs, buttermilk, vegetable oil, and vanilla extract. Mix until smooth.
  4. Incorporate hot liquid: Pour in hot water or brewed coffee and whisk until fully combined.
  5. Prepare the pans: Divide the batter evenly between the prepared pans and tap lightly to release any air bubbles.
  6. Bake: Place in the oven and bake for 30–35 minutes or until a toothpick inserted comes out with moist crumbs.
  7. Cool: Allow the cakes to cool in the pans for 10 minutes before transferring them to wire racks to cool completely.
  8. Make the frosting: Beat the softened butter until creamy. Gradually add powdered sugar, cocoa powder, and vanilla, mixing well. Add heavy cream until the frosting reaches your desired consistency.
  9. Frost the cake: Once the cakes are completely cool, frost between the layers and on top and sides of the cake. Slice generously and serve.

Pro Tips for Baking Success

To ensure your cake comes out perfectly moist and delicious, consider these expert insights:

  • Use room temperature ingredients: This helps create a smooth, consistent batter.
  • Don’t overmix: Mix just until combined to avoid a dense cake.
  • Check your oven temperature: Use an oven thermometer to ensure accurate baking conditions.
  • Tap the pans: Tapping the pans helps remove air bubbles that can lead to uneven baking.
  • Cool completely: Always allow your cake to cool completely before frosting to prevent melting.
  • Experiment with add-ins: Consider adding chocolate chips, nuts, or even a hint of orange zest for a flavor twist.
  • Make ahead: This cake can be baked a day in advance; just wrap it tightly in plastic wrap.

Common Mistakes and Troubleshooting

Even the best bakers face challenges. Here are some common mistakes and how to avoid them:

  • Dry cake: Ensure you measure flour correctly and don’t overbake.
  • Frosting too runny: If your frosting is too thin, add more powdered sugar to thicken.
  • Uneven layers: Use a kitchen scale to weigh your batter before pouring into pans for even baking.
  • Overly sweet frosting: Balance sweetness by adding a pinch of salt or increasing the cocoa powder.

Delicious Variations

This moist chocolate cake is versatile! Here are some delightful variations to try:

  • Chocolate Mint Cake: Add peppermint extract to the batter for a refreshing twist.
  • Mocha Cake: Replace the hot water with brewed espresso for a coffee-infused delight.
  • Layered Cake: Create a multi-layered cake by adding more layers and different fillings like raspberry jam or whipped cream.
  • Gluten-Free Option: Substitute all-purpose flour with a gluten-free blend for a deliciously inclusive dessert.

Storage and Make-Ahead Instructions

This cake is perfect for making ahead of time! Here’s how to store it:

  • Room Temperature: Store covered at room temperature for up to 3 days.
  • Refrigerator: If you have leftovers, keep it covered in the fridge for up to a week.
  • Freezer: Wrap tightly in plastic wrap and freeze for up to 3 months. Thaw in the refrigerator before serving.

FAQs About Moist Chocolate Cake

Here are some frequently asked questions to help you master this recipe:

  • Can I use dark cocoa powder? Absolutely! Dark cocoa powder can enhance the chocolate flavor even more.
  • What if I don’t have buttermilk? You can make a quick substitute with milk and vinegar.
  • How do I know when the cake is done? Insert a toothpick in the center—if it comes out with moist crumbs, it’s ready!
  • Can I make mini cakes with this recipe? Yes, simply adjust the baking time for smaller pans.
  • What’s the best way to frost the cake? Use a spatula to spread the frosting evenly; a cake turntable can also help!
  • Can I add fruit to the batter? Yes! Chopped fruit can add a lovely texture and flavor.
  • Is this cake suitable for freezing? Yes, it freezes beautifully—just wrap it well!
  • What can I serve with this cake? A scoop of vanilla ice cream or a dollop of whipped cream pairs wonderfully!

Nutritional Tips and Dietary Adaptations

This cake can be adapted for various dietary needs:

  • Lower Sugar: Consider using a sugar substitute to reduce calories.
  • Vegan Option: Replace eggs with flax eggs and use plant-based milk and oil.
  • Lower Fat: Substitute applesauce for some of the oil for a lighter cake.

Essential Equipment Recommendations

For success in baking this chocolate cake, here are a few essential tools:

  • Mixing Bowls: A set of various sizes for ingredient prep.
  • Measuring Cups and Spoons: Accurate measurements are crucial for baking.
  • Whisk: A sturdy whisk will help combine dry and wet ingredients effectively.
  • Cake Pans: Invest in good quality, non-stick 9-inch round pans for even baking.
  • Spatula: A silicone spatula is perfect for folding and scraping batter.

Serving Suggestions

When it comes to serving this cake, the possibilities are endless:

  • Ice Cream: A scoop of vanilla or chocolate ice cream is a classic pairing.
  • Fresh Berries: Raspberries or strawberries add a refreshing contrast.
  • Whipped Cream: Lightly sweetened whipped cream complements the richness of the cake.
  • Chocolate Sauce: Drizzle warm chocolate sauce for an indulgent touch.

Conclusion: A Celebration of Flavor and Togetherness

And there you have it—your ultimate guide to creating a moist chocolate cake that will delight everyone at your table! Remember, baking is not just about following a recipe; it’s about creating memories and celebrating the joy of cooking. So, gather your loved ones, share this cake, and let every bite remind you of the sweetness of life. Happy baking, and until next time, keep exploring the wonderful world of flavors!

Moist Chocolate Cake

Prep Time 20 minutes
Cook Time 35 minutes
Total Time 55 minutes
Servings 12 pieces
Calories 450
A rich and moist chocolate cake perfect for any celebration or indulgence.

Ingredients

Cake Batter

  • 1.75 cups All-Purpose Flour (Provides structure and softness to the cake.)
  • 2 cups Granulated Sugar (Sweetens and keeps the cake moist.)
  • 0.75 cup Cocoa Powder (unsweetened) (Adds rich chocolate depth.)
  • 1.5 teaspoons Baking Powder (Helps the cake rise evenly.)
  • 1.5 teaspoons Baking Soda (Reacts with buttermilk for lightness.)
  • 1 teaspoon Salt (Enhances flavor balance.)
  • 2 large Eggs (Bind ingredients and add richness.)
  • 1 cup Buttermilk (Creates tender texture and moisture.)
  • 0.5 cup Vegetable Oil (Keeps the cake soft and moist.)
  • 2 teaspoons Vanilla Extract (Adds warmth and depth.)
  • 1 cup Hot Water or Brewed Coffee (Blooms cocoa for intensified flavor.)

Frosting

  • 0.75 cup Unsalted Butter (softened) (Base for creamy frosting.)
  • 2.5 cups Powdered Sugar (Sweetens and thickens frosting.)
  • 0.5 cup Cocoa Powder (For rich, chocolatey frosting.)
  • 3-4 tablespoons Heavy Cream (Smooths frosting for easy spreading.)
  • 1 teaspoon Vanilla Extract (Balances sweetness in frosting.)

Instructions 

  • Preheat oven to 350°F (175°C). Grease and flour two 9-inch pans or line with parchment.
  • Mix dry ingredients, add eggs, buttermilk, oil, vanilla, then stir in hot water or coffee until smooth.
  • Divide batter into pans, tap to remove air, and bake for 30–35 minutes.
  • Cool cakes 10 minutes, then transfer to wire racks. Prepare frosting and spread on cooled cakes.

Notes

Ensure cakes are completely cooled before frosting for best results.
Calories: 450kcal
Cost: $15
Course: Dessert
Cuisine: American
Keyword: chocolate

Welcome to a Mediterranean Delight: Your Ultimate Guide to Homemade Pita Bread

Ah, the aroma of freshly baked pita bread wafting through the kitchen! This easy recipe is not just a method; it’s an experience that brings the warmth of the Mediterranean right to your table. With a few simple ingredients and a bit of love, you can create soft, fluffy pita that’s perfect for dipping, stuffing, or simply enjoying warm with olive oil. Whether you’re a seasoned cook or a kitchen novice, this step-by-step guide will have you mastering homemade Greek flatbreads in no time.

Why You’ll Love This Recipe

This isn’t just any pita bread recipe; it’s a celebration of flavor and tradition! Here are five reasons why you’ll adore making your own:

  • Freshness Guaranteed: Nothing compares to the taste of warm, homemade pita bread straight from the skillet.
  • Customizable: Adjust the thickness and size of your pita to suit your preferences, making it ideal for every meal.
  • Healthier Choice: Control the ingredients for a healthier, preservative-free option that’s perfect for your dietary needs.
  • Perfect for Sharing: Pita is not just food; it’s a way to bring people together. Serve it with dips and fillings for a communal feast!
  • Simple Techniques: Even if you’re new to baking, the straightforward steps ensure success every time.

The Essentials: Ingredients Breakdown

Let’s dive into the ingredients you’ll need for this delightful pita bread. Each one plays a crucial role in achieving that perfect puff!

  • 1 cup warm water (100–110°F): The magic ingredient to activate the yeast. Too hot, and it will kill the yeast; too cold, and it won’t rise.
  • 2 1/4 tsp active dry yeast: This is the leavening agent that gives the pita its airy texture.
  • 1 tsp sugar: A little sweetness to feed the yeast and aid in activation.
  • 2 1/2 cups all-purpose flour: The base of your dough, providing structure and chewiness.
  • 1 tsp salt: Enhances flavor and strengthens the dough.
  • 1 tbsp olive oil: Adds richness and helps keep the pita soft.

Pro Tips for Perfect Pita Bread

Side view of golden-brown pita bread resting beside ingredients.

Before you get started, here are some expert insights to ensure your pita bread turns out fantastic every time:

  • Yeast Activation: Always use water that’s warm, not hot. If you can comfortably hold your finger in it, it’s perfect!
  • Kneading Matters: Make sure to knead the dough until it’s smooth and elastic; this is crucial for achieving that lovely puff.
  • Rest Time: Don’t rush the rising process. Allow the dough to double in size for the best results.
  • Heat Control: Preheat your skillet adequately to ensure that the pitas puff up properly. A medium-high setting is usually best.
  • Keep Them Warm: Wrap cooked pitas in a clean towel to retain warmth and moisture.
  • Experiment with Flavors: Feel free to add herbs or spices to the dough for a twist on the traditional flavor.
  • Storage Tips: Let pitas cool completely before storing them in an airtight container to keep them soft.
  • Perfect Pita Size: Aim for a thickness of about 1/4 inch for optimal puffing.

Common Mistakes and Troubleshooting

Even seasoned bakers can encounter hiccups along the way. Here’s how to avoid some common pitfalls:

  • Flat Pitas: If your pitas don’t puff, check your yeast. It should be fresh and active. Also, ensure the skillet is hot enough.
  • Dry Texture: This can happen if you knead too much or don’t measure flour correctly. Always spoon flour into your measuring cup and level it off.
  • Not Enough Rise: If your dough isn’t rising, the water may have been too hot, killing the yeast. Make sure to use warm water!

Variations to Elevate Your Pita Game

Once you’ve mastered the basic pita bread recipe, try these fun variations:

  • Whole Wheat Pita: Substitute half of the all-purpose flour with whole wheat flour for a nuttier flavor and added nutrition.
  • Herbed Pita: Add dried herbs like oregano, thyme, or rosemary to the dough for an aromatic twist.
  • Spicy Pita: Incorporate a pinch of cayenne or paprika into the dough for a subtle kick.
  • Garlic Pita: Mix minced garlic into the dough for a delightful savory flavor.

Storage and Make-Ahead Instructions

Want to enjoy your homemade pita bread later? Here’s how to store and prepare it in advance:

  • Storing: Place cooled pitas in an airtight container in the fridge for up to a week or freeze for up to three months.
  • Freezing: Wrap pitas in plastic wrap and then place them in a zip-top bag before freezing. To reheat, simply thaw and warm on a skillet.
  • Make-Ahead Option: You can prepare the dough up to the first rise, then refrigerate it. Just allow it to come to room temperature before proceeding.

Comprehensive FAQs

Here’s a collection of questions to help you navigate your pita bread journey:

  • Can I use gluten-free flour? Yes, you can! Look for a gluten-free all-purpose blend that contains xanthan gum for better structure.
  • What if my dough is too sticky? If the dough is sticky, sprinkle in a little more flour during kneading until it comes together smoothly.
  • How do I know when the pitas are done cooking? They should be puffed and lightly golden. Adjust your cooking time if necessary.
  • Can I make pita bread without yeast? While traditional recipes rely on yeast for puffiness, you can try using baking powder instead, though results may vary.
  • What dishes pair well with pita bread? Pita is fantastic with dips like hummus, tzatziki, or baba ganoush, and it’s perfect for stuffed meals like gyros or falafel.
  • Can I reheat pita bread? Yes! Just warm them in a skillet or wrap them in foil and place them in the oven for a few minutes.
  • How can I make my pita bread even softer? Adding a bit more olive oil to the dough can enhance the softness of the final product.
  • Is it possible to make pita bread in the oven? Absolutely! You can bake them in a preheated oven at 475°F for about 5-7 minutes.

Nutritional Tips and Dietary Adaptations

Cooking is all about enjoying good food while considering health. Here are some tips:

  • Low-Calorie Version: Use less olive oil or substitute with a non-fat yogurt for added moisture without the calories.
  • High-Fiber Option: Incorporate seeds like flax or chia into the dough for added fiber and nutrients.
  • Vegan-Friendly: This recipe is already vegan, but pair it with plant-based dips to enhance your meal.

Essential Equipment for Your Pita Journey

To make your pita bread experience even more enjoyable, here’s a list of must-have tools:

  • Mixing Bowls: A set of large and medium bowls for mixing and rising dough.
  • Rolling Pin: Essential for rolling out your dough to the perfect thickness.
  • Skillet or Griddle: A non-stick skillet is ideal for cooking your pitas evenly.
  • Kitchen Towel: To keep your cooked pitas warm and soft.

Delightful Serving Suggestions

Your homemade pita bread is incredibly versatile. Here are some ideas to inspire your meal:

  • Dip Delight: Serve with a trio of dips such as classic hummus, roasted red pepper hummus, and tzatziki.
  • Stuffed Goodness: Fill with grilled chicken, veggies, and a drizzle of tahini for a satisfying wrap.
  • Breakfast Pita: Scramble eggs with spinach and feta, then stuff into warm pita for a nutritious start to your day.
  • Salad Side: Use pita as a side to a refreshing Mediterranean salad, perfect for soaking up the dressing!

Conclusion: Your Mediterranean Adventure Awaits!

There you have it, my friends! A comprehensive guide to creating your own homemade pita bread that will not only delight your taste buds but also bring a little Mediterranean magic into your kitchen. So, roll up your sleeves, gather your ingredients, and let’s make some memories around the table. Remember, cooking is about sharing joy and flavors, so invite loved ones to join you in this delicious adventure. Happy cooking!

Easy Pita Bread Recipe: Homemade Greek Flatbread Step-by-Step

Prep Time 15 minutes
Cook Time 10 minutes
Total Time 25 minutes
Servings 6 pitas
Calories 150
Learn how to make soft, fluffy pita bread at home with this simple step-by-step recipe. Perfect for wraps, dips, and sandwiches.

Ingredients

Dough

  • 1 cup warm water (100–110°F)
  • 2 1/4 tsp active dry yeast
  • 1 tsp sugar
  • 2 1/2 cups all-purpose flour
  • 1 tsp salt
  • 1 tbsp olive oil

Instructions 

  • Mix warm water, sugar, and yeast; let sit 5–10 minutes until frothy.
  • Combine flour and salt; add yeast mixture and olive oil, then stir into a shaggy dough.
  • Knead on a floured surface for 8–10 minutes until smooth.
  • Let dough rise in an oiled bowl, covered, for 1–1.5 hours until doubled.
  • Punch down, divide into 6–8 balls, roll into 1/4-inch discs, and rest 5 minutes.
  • Cook each pita in a hot skillet 1–2 minutes per side until puffed and golden.

Notes

Ensure the dough is not too sticky for easy rolling.
Calories: 150kcal
Cost: $10
Course: Bread
Cuisine: Greek
Keyword: Pita

Welcome, dear friends! Today, we embark on a culinary journey through the sun-kissed landscapes of the Mediterranean, where the warmth of fresh bread brings people together. Our focus? A delightful Focaccia Rosemary Bread that transforms any meal into a joyous feast. With its golden crust, fragrant rosemary, and a drizzle of high-quality olive oil, this bread is a celebration of flavors that beckons you to gather around the table. Let’s dive into the details of making this traditional yet modern marvel!

Why You’ll Love This Recipe

This focaccia recipe is more than just a way to fill your belly; it’s a way to connect with family and friends, to create memories, and to savor the moment. Here are five reasons why this recipe will become a staple in your kitchen:

  • Deliciously Aromatic: The combination of rosemary and olive oil creates a fragrant aroma that fills your home, inviting everyone to gather around.
  • Simple Ingredients: Made with just a handful of pantry staples, you can whip this up anytime inspiration strikes.
  • Perfect Texture: This recipe yields a focaccia that is crispy on the outside and delightfully soft on the inside, making it ideal for dipping or enjoying on its own.
  • Versatile Delight: Whether served alongside a hearty soup, salad, or as a base for sandwiches, this bread adapts to any meal beautifully.
  • Fun to Make: The process of kneading and shaping the dough is therapeutic and enjoyable, making it a great experience for all ages.

Ingredient Breakdown

Let’s gather our ingredients! Here’s what you’ll need to create this Mediterranean masterpiece:

  • 4 cups all-purpose flour: This forms the base of our focaccia. You can substitute with whole wheat flour for a heartier texture.
  • 1 tablespoon instant yeast: This will give your focaccia its wonderful rise. If using active dry yeast, dissolve it in water first.
  • 2 teaspoons salt: Essential for flavor; don’t skip it!
  • 1 1/2 cups warm water: Helping to activate the yeast, ensure it’s around 110°F (43°C).
  • 1/4 cup olive oil, plus more for drizzling: High-quality olive oil enhances flavor and texture.
  • 2 tablespoons fresh rosemary, chopped: The star of the show! Fresh rosemary brings a vibrant, herbal note.
  • Coarse sea salt for topping: A sprinkle of this adds a delightful crunch and extra flavor.

How to Make Focaccia Bread

Now that we have our ingredients, let’s roll up our sleeves and get to work. Follow these steps to create your own focaccia masterpiece:

  1. In a large bowl, combine the flour, instant yeast, and salt. Add warm water and 1/4 cup olive oil. Stir until a sticky dough forms.

  2. Transfer the dough to a floured surface and knead for about 5 minutes until smooth and elastic. Form the dough into a ball.

  3. Place the dough in a greased bowl, cover with a damp cloth, and let rise in a warm place for about 1 hour, or until doubled in size.

  4. Preheat the oven to 425°F (220°C). Once the dough has risen, punch it down and transfer it to a greased baking sheet. Press it out to fit the sheet.

  5. Drizzle the top with olive oil, sprinkle with chopped rosemary and coarse sea salt. Use your fingers to create dimples all over the surface.

  6. Cover and let it rise for another 20 minutes.

  7. Bake in the preheated oven for 20-25 minutes, or until golden brown. Remove from the oven and cool slightly before serving.

Pro Tips for the Best Focaccia

Side view of a fluffy focaccia loaf drizzled with olive oil, showcasing its soft texture and herbs.

To ensure your focaccia is nothing short of spectacular, keep these expert tips in mind:

  • Use Fresh Ingredients: Fresh rosemary and high-quality olive oil can elevate your focaccia’s flavor immensely.
  • Don’t Rush the Dough: Allow the dough to rise fully for the best texture; patience is key!
  • Experiment with Toppings: Try adding garlic, sundried tomatoes, or olives to the dough for a personal twist.
  • Keep the Oven Hot: A preheated oven ensures that your focaccia bakes evenly and develops a crispy crust.
  • Dimples Matter: Creating dimples in the dough not only looks beautiful but also helps hold the olive oil and toppings.
  • Let it Cool: Allowing the focaccia to cool slightly before slicing helps maintain its structure.
  • Try Different Flours: Mixing in some whole wheat or semolina flour can add a unique flavor and texture.
  • Don’t Skip the Sea Salt: That sprinkle of coarse sea salt on top is what gives each bite a delicious burst of flavor.

Common Mistakes and Troubleshooting

Even the best chefs can have off days. Here’s how to troubleshoot common issues:

  • Dough Won’t Rise: Ensure your yeast is fresh and that the water is warm, not hot. If it’s too hot, it can kill the yeast.
  • Focaccia Too Dense: This might be due to over-kneading. Knead just until smooth and elastic.
  • Burned Bottom: If this happens, place your baking sheet on a higher rack to avoid direct contact with the heating element.
  • Dry Focaccia: If your focaccia turns out dry, consider adding an extra tablespoon of olive oil to the dough or serving it with a dipping oil.

Variations to Try

Focaccia is wonderfully versatile! Here are some variations to inspire your creativity:

  • Garlic Herb Focaccia: Add minced garlic and a mix of herbs such as thyme and oregano to the dough for an aromatic twist.
  • Cheese-Stuffed Focaccia: Layer mozzarella or feta cheese in the middle of the dough before baking for a gooey surprise.
  • Olive and Sun-Dried Tomato Focaccia: Add chopped olives and sun-dried tomatoes to the dough for a Mediterranean flair.
  • Sweet Focaccia: Drizzle with honey and top with fresh fruits and nuts for a unique dessert option.

Storage and Make-Ahead Instructions

Want to prepare ahead of time? Here’s how to store and reheat your focaccia:

  • Room Temperature: Store in an airtight container for up to 2 days.
  • Refrigeration: For longer storage, refrigerate for up to a week. Reheat in the oven for 5-10 minutes at 350°F (175°C).
  • Freezing: Wrap slices in foil and freeze for up to 3 months. Thaw in the fridge overnight before reheating.

Frequently Asked Questions

Here are some common questions regarding focaccia:

  • Can I use whole wheat flour? Yes! Whole wheat flour will give a denser texture, so you may want to mix it with all-purpose flour.
  • How do I know when the focaccia is done? It should be golden brown and sound hollow when tapped on the bottom.
  • What can I serve with focaccia? It pairs wonderfully with soups, salads, or as a sandwich base.
  • Can I make focaccia without yeast? You can use baking powder as a leavening agent, but the texture will differ.
  • How thick should I roll out the dough? Aim for about 1 inch thick for fluffy focaccia.
  • What are some toppings I can use? Try caramelized onions, cherry tomatoes, or fresh herbs for different flavors.
  • Is focaccia healthy? While delicious, it should be enjoyed in moderation due to its carbohydrate content.
  • Can I make focaccia gluten-free? Absolutely! Use a gluten-free flour blend and check the yeast for gluten-free certification.

Nutritional Tips and Dietary Adaptations

If you’re concerned about health while enjoying this indulgent bread, here are some tips:

  • Low-Sodium Option: Reduce the amount of salt in the dough and on top to cater to low-sodium diets.
  • Using Whole Grains: Incorporate whole wheat flour for added fiber and nutrients.
  • Healthy Toppings: Load it up with vegetables or serve it with a side of fresh salad to balance the meal.

Equipment Recommendations

To make your focaccia-making experience seamless, here’s what you’ll need:

  • Mixing Bowl: A large bowl for mixing your dough.
  • Baking Sheet: A rimmed sheet works best for shaping the dough.
  • Kitchen Towel: To cover the dough while it rises.
  • Measuring Cups and Spoons: Accurate measurements are key to great bread.
  • Dough Scraper: Helpful for transferring and shaping the dough.

Serving Suggestions

Once your focaccia is baked to perfection, here’s how to serve it:

  • Dipping Oils: Serve with a mix of olive oil, balsamic vinegar, and herbs for a delightful dipping experience.
  • Cheese Pairings: Fresh mozzarella or aged parmesan complement focaccia beautifully.
  • Accompaniment Ideas: Pair with a hearty soup, fresh salad, or grilled meats for a complete meal.
  • Sandwich Base: Use slices of focaccia to create delicious sandwiches filled with your favorite ingredients.

In conclusion, this Focaccia Rosemary Bread is not just a recipe; it’s an invitation to gather, celebrate, and indulge in the flavors of the Mediterranean. With its irresistible aroma and texture, it’s bound to become a cherished part of your culinary repertoire. So, roll up your sleeves, invite your loved ones into the kitchen, and let the magic of baking bring you closer together. Happy baking!

Focaccia Rosemary Bread Oil

Prep Time 20 minutes
Cook Time 25 minutes
Total Time 45 minutes
Servings 8 pieces
Calories 250
A flavorful Italian-style focaccia topped with fresh rosemary, sea salt, and drizzled with olive oil, perfect for sharing.

Ingredients

Dough

  • 4 cups all-purpose flour
  • 1 tablespoon instant yeast
  • 2 teaspoons salt
  • 1.5 cups warm water
  • 0.25 cup olive oil, plus more for drizzling
  • 2 tablespoons fresh rosemary, chopped

Topping

  • Coarse sea salt for topping coarse sea salt

Instructions 

  • Mix flour, yeast, and salt. Add water and olive oil; stir into a sticky dough.
  • Knead dough until smooth, then let rise in a greased bowl for 1 hour.
  • Preheat oven to 425°F (220°C). Punch down dough, spread on a greased sheet, and press out.
  • Drizzle with olive oil, sprinkle rosemary and sea salt, then create dimples with fingers.
  • Let rise for 20 minutes, then bake for 20-25 minutes until golden brown.

Notes

Use fresh rosemary for the best flavor and drizzle with extra olive oil before serving.
Calories: 250kcal
Cost: $15
Course: Bread
Cuisine: Italian
Keyword: focaccia