Author

rafael

Browsing

Embark on a Baking Journey with Moist Vanilla Pound Cake

Welcome to a delightful culinary adventure where the aroma of baking fills your kitchen, and the warmth of family memories embraces you. This Moist Vanilla Pound Cake is not just a dessert; it’s a celebration of tradition, love, and the simple joys of life. With each slice, you’ll experience the buttery richness and comforting sweetness that make this cake a cherished favorite, perfect for any occasion.

Whether you’re hosting a gathering or simply enjoying a quiet afternoon with a cup of tea, this pound cake whispers sweet comfort and invites you to share it with those you love. So grab your apron and let’s dive into the world of baking!

Why You’ll Love This Recipe

  • Comforting Flavor: The warm notes of vanilla combined with a tender crumb create a dessert that feels like a hug from the inside.
  • Versatile Delight: This cake is perfect on its own, but its flavor profile allows for endless variations – dress it up with fruits, frostings, or enjoy it plain!
  • Easy to Make: With straightforward steps, this recipe is beginner-friendly, making it accessible for anyone eager to dive into baking.
  • Perfect for Sharing: The generous size of this pound cake makes it ideal for gatherings, ensuring there’s enough sweetness to go around.
  • Timeless Tradition: Rooted in classic baking, this recipe brings a nostalgic touch that connects generations through shared experiences.

Essential Ingredients for Moist Vanilla Pound Cake

Let’s explore the ingredients that will transform simple components into a joyful treat. Here’s what you’ll need:

  • 225 g (1 3/4 cups) all-purpose flour: The backbone of your cake, providing structure and texture.
  • 2 teaspoons baking powder: This helps the cake rise, ensuring a light and airy texture.
  • 1/4 teaspoon salt: A pinch of salt enhances all the flavors and balances the sweetness.
  • 175 g (3/4 cup) softened butter: The key to a rich, buttery flavor and moist crumb.
  • 150 g (3/4 cup) sugar: Sweetness that complements the vanilla and butter, creating a harmonious flavor.
  • 150 ml (2/3 cup) milk: Adds moisture, contributing to the cake’s tenderness.
  • 2 large eggs (lightly beaten): Eggs provide richness and stability to the batter.
  • 1.5 teaspoons vanilla extract: The star player that infuses the cake with a warm, inviting aroma.

Ingredient Substitutions
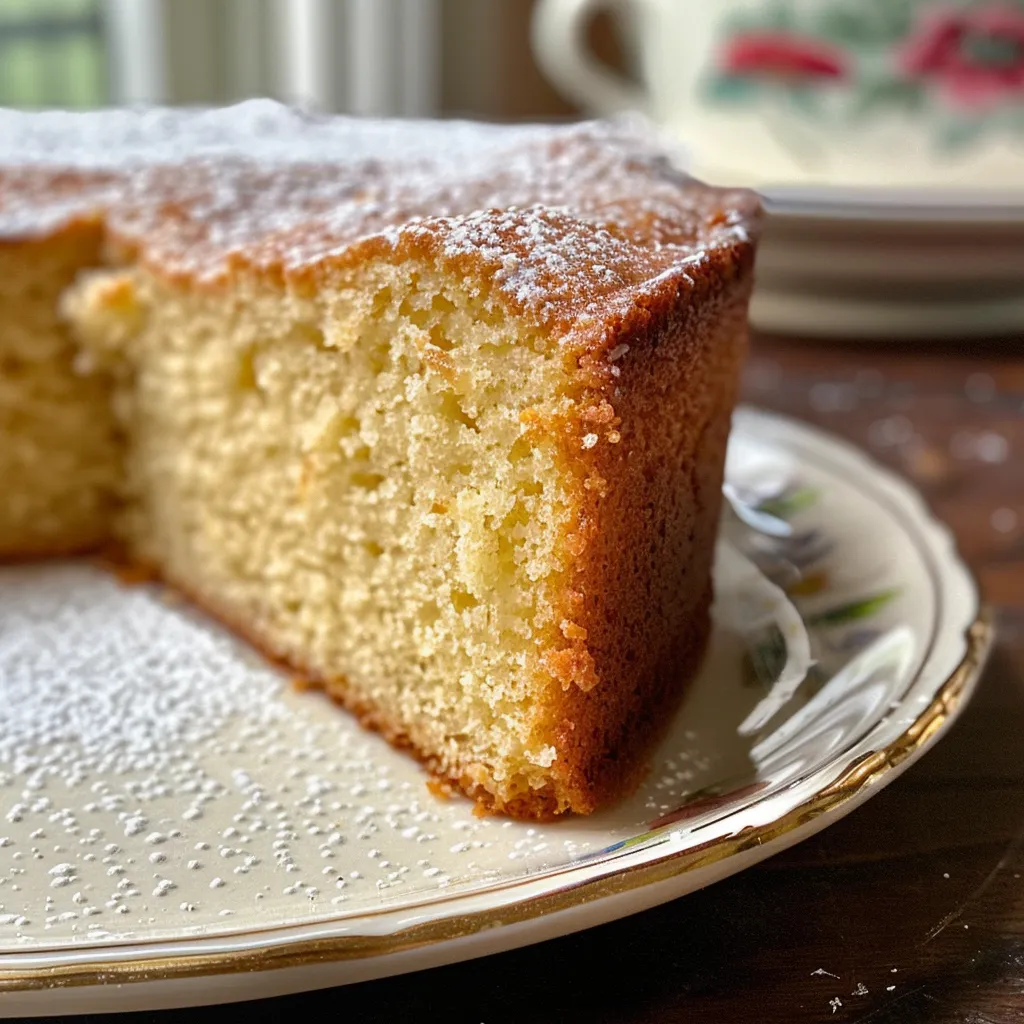
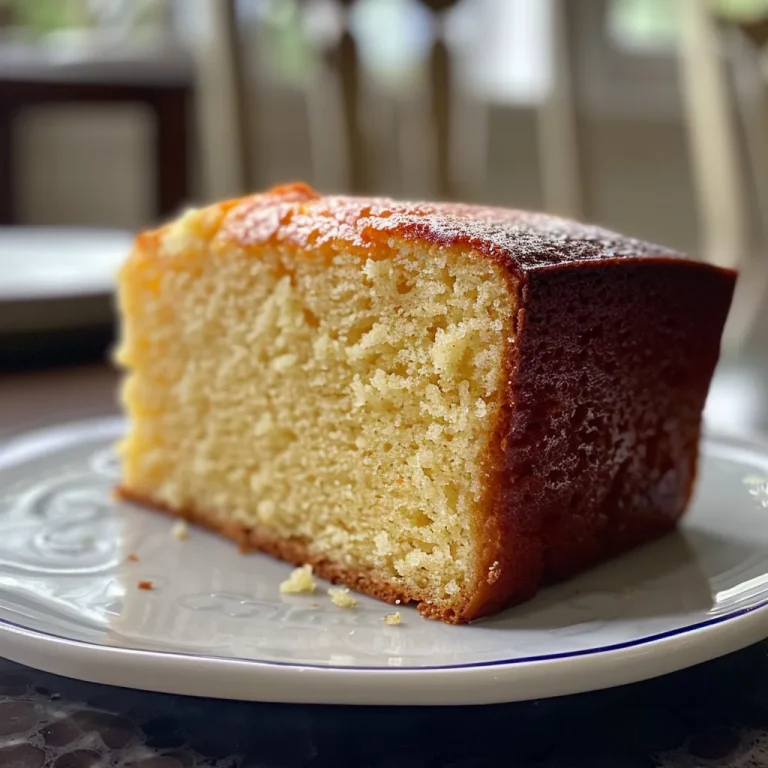
Juicy slice of vanilla pound cake with a golden crust and soft interior.

Feel free to experiment with these substitutions for dietary preferences or to add a twist:

  • Dairy-free option: Substitute butter with vegan butter and use almond or oat milk.
  • Gluten-free option: Replace all-purpose flour with a gluten-free blend, ensuring it contains xanthan gum.
  • Lower sugar option: Use coconut sugar or a sugar substitute like stevia.
  • Flavor variations: Add citrus zest (like lemon or orange) for a refreshing twist or almond extract for a different flavor profile.

Pro Tips for Perfecting Your Cake

Here are some expert insights to elevate your baking game:

  • Room temperature ingredients: Ensure butter, eggs, and milk are at room temperature for a smooth batter.
  • Sift your dry ingredients: Sifting flour and baking powder prevents lumps and ensures even distribution in the batter.
  • Don’t overmix: Mix just until combined to maintain the cake’s tender crumb.
  • Check oven temperature: Use an oven thermometer to ensure your oven is at the right temperature for baking.
  • Test for doneness: Insert a skewer into the center of the cake; it should come out clean when the cake is ready.
  • Let it cool: Allow the cake to cool in the pan for a few minutes before transferring it to a wire rack.
  • Experiment with add-ins: Consider adding chocolate chips, nuts, or dried fruits for added texture and flavor.
  • Use quality vanilla extract: The quality of your vanilla makes a significant difference in flavor.

Common Mistakes and Troubleshooting

Here are some common pitfalls to avoid and how to fix them:

  • Dense cake: This can occur from overmixing. Ensure to mix until just combined.
  • Dry cake: Make sure you’re measuring flour correctly; fluff it up with a fork before scooping.
  • Curdled batter: If your batter looks curdled after adding eggs, add a spoonful of flour to help it come together.
  • Uneven baking: Rotate the cake halfway through baking to ensure even cooking.

Delicious Variations of Vanilla Pound Cake

Take your moist vanilla pound cake to the next level with these delightful variations:

  • Citrus Zest Pound Cake: Add the zest of a lemon or orange for a refreshing citrus twist.
  • Almond Vanilla Pound Cake: Substitute a teaspoon of vanilla extract with almond extract for a nutty flavor.
  • Chocolate Chip Pound Cake: Fold in a cup of chocolate chips for a decadent treat.
  • Spiced Pound Cake: Incorporate ground cinnamon or nutmeg for a warm, cozy flavor perfect for fall.

Storage and Make-Ahead Instructions

This cake is great for making ahead of time!

  • Room temperature storage: Keep the cake in an airtight container at room temperature for up to 4 days.
  • Refrigerator storage: For longer freshness, store it in the fridge for up to a week.
  • Freezing: Wrap the cooled cake tightly in plastic wrap and foil; freeze for up to 3 months. Thaw at room temperature before serving.

Serving Suggestions

Enhance your pound cake experience with these serving ideas:

  • With Fresh Berries: Serve slices topped with a mix of seasonal berries for a fresh burst of flavor.
  • With Whipped Cream: A dollop of freshly whipped cream adds a luxurious touch.
  • With Glaze: Drizzle a simple icing made of powdered sugar and milk over the cooled cake for added sweetness.
  • As French Toast: Transform day-old cake into a decadent breakfast by dipping slices in egg mixture and pan-frying.

Frequently Asked Questions

Here are some common questions about making the perfect vanilla pound cake:

  • Can I use salted butter instead of unsalted? Yes, but reduce the added salt to 1/8 teaspoon.
  • How do I know when my cake is done? A toothpick inserted into the center should come out clean or with a few crumbs.
  • Can I make this in a different pan? Yes, you can use a bundt or mini loaf pans, adjusting the baking time accordingly.
  • What can I do if my cake sinks? This usually happens from underbaking or opening the oven door too soon. Ensure proper baking time and avoid peeking!
  • Can I double this recipe? Yes, just ensure your mixing bowl is large enough to accommodate the increased volume.
  • How should I serve this cake? It’s delightful on its own or with toppings like fruit, whipped cream, or a glaze.
  • Is this cake suitable for freezing? Absolutely! Wrap it well and freeze for later enjoyment.
  • How do I add flavor to the batter? You can incorporate spices, extracts, or citrus zest for a flavor boost.

Nutritional Tips and Dietary Adaptations

If you’re looking to adapt this recipe for dietary needs, consider the following:

  • Low-sugar option: Reduce sugar or use sugar substitutes for a healthier cake.
  • Whole grain option: Substitute half the all-purpose flour with whole wheat flour for added fiber.
  • Nut-free option: Ensure no nut-based products are used in substitutes.
  • Vegan option: Replace eggs with flax eggs (1 tablespoon flaxseed meal + 2.5 tablespoons water per egg) and use plant-based milk and butter.

Equipment Recommendations

Here’s what you’ll need to create this masterpiece:

  • Loaf tin: A standard 9×5 inch loaf tin is recommended for even baking.
  • Mixing bowls: A large bowl for mixing and a medium bowl for dry ingredients.
  • Measuring cups and spoons: Accurate measurements are key to baking success.
  • Electric mixer: A stand or hand mixer will make creaming butter and sugar effortless.
  • Wire rack: For cooling the cake properly without moisture buildup.

Conclusion: Join the Celebration

As you slice into this Moist Vanilla Pound Cake, let the flavors transport you to a sun-kissed Mediterranean kitchen, where every bite is a celebration of life and love. So gather your ingredients, invite friends over, and create lasting memories together. Baking is not just about the end product; it’s about the joy, the laughter, and the stories shared around the table. Enjoy every moment and happy baking!

Moist Vanilla Pound

Prep Time 15 minutes
Cook Time 1 hour 5 minutes
Total Time 1 hour 20 minutes
Servings 8 slices
Calories 350
A rich and moist vanilla pound cake that's perfect for any occasion.

Ingredients

Dry ingredients

  • 225 g all-purpose flour
  • 2 teaspoons baking powder
  • 0.25 teaspoon salt

Wet ingredients

  • 175 g softened butter
  • 150 g sugar
  • 150 ml milk
  • 2 large eggs eggs (lightly beaten)
  • 1.5 teaspoons vanilla extract

Instructions 

  • Preheat oven to 170°C (325°F). Grease and line a loaf tin.
  • Sift flour, baking powder, and salt. Cream butter and sugar until fluffy.
  • Add eggs gradually; if curdling, add a spoonful of flour.
  • Mix in half the milk and flour, then repeat with remaining milk and flour. Pour into tin.
  • Bake for 60-65 minutes until a skewer comes out clean. Cool before serving.
Notes

Ensure not to overmix the batter for a tender crumb.
Calories: 350kcal
Cost: $12
Course: Dessert
Cuisine: American
Keyword: vanilla

Discover the Joy of Whipped Feta Dip with Roasted Olives

Welcome to a culinary adventure that will transport your taste buds straight to the sun-kissed shores of the Mediterranean! This Whipped Feta Dip with Roasted Olives is not just a recipe; it’s a celebration of flavor, culture, and togetherness. Imagine creamy feta blended with rich Greek yogurt, drizzled with fragrant olive oil, and topped with a delightful medley of roasted olives and sun-dried tomatoes. Whether you’re hosting a gathering or simply indulging in a cozy night in, this dip promises to elevate your meal experience. Let’s dive into the vibrant world of flavors and textures that await you!

Why You’ll Love This Recipe

This whipped feta dip is more than just a delicious appetizer; it comes with a multitude of benefits that will make you reach for it time and time again:

  • Incredible Flavor Fusion: The combination of creamy feta, tangy yogurt, and aromatic olives creates a taste explosion that will delight your palate.
  • Quick and Easy Preparation: With just a few simple steps, you can whip up this dip in under 30 minutes, making it perfect for last-minute gatherings.
  • Versatile Serving Options: Serve it with fresh veggies, crispy crackers, or even as a spread on sandwiches for a Mediterranean twist!
  • Healthful Ingredients: Packed with protein from the feta and yogurt, this dip is a wholesome choice that doesn’t skimp on flavor.
  • Customizable Variations: With a few substitutions or additions, you can easily adapt this recipe to suit your taste preferences or dietary needs.

Ingredients You’ll Need

Let’s gather the essentials for our feta dip. Here’s what you’ll need to create this creamy, tangy delight:

  • 1 cup mixed olives: Quarter any large olives to ensure every bite is bursting with flavor.
  • ⅓ cup sun-dried tomatoes: Choose those packed in oil for extra moisture and richness.
  • 3 tablespoons extra-virgin olive oil: This will enhance the dip’s luscious texture.
  • 2 teaspoons fresh lemon or orange zest: Adds a refreshing brightness to the dish.
  • 1 garlic clove, minced: Infuses the dip with a warm, aromatic flavor.
  • 2 sprigs fresh rosemary: Use this for roasting and garnish.
  • 8 ounces feta cheese: Opt for a block packed in water for the best texture.
  • ¾ cup plain whole milk Greek yogurt: This will make your dip creamy and rich.
  • 1 tablespoon milk of choice: Optional, to adjust the dip’s consistency.
  • Cracked black pepper: For seasoning.
  • Fresh veggies and crackers: For serving and dipping.

How to Make Whipped Feta Dip with Roasted Olives

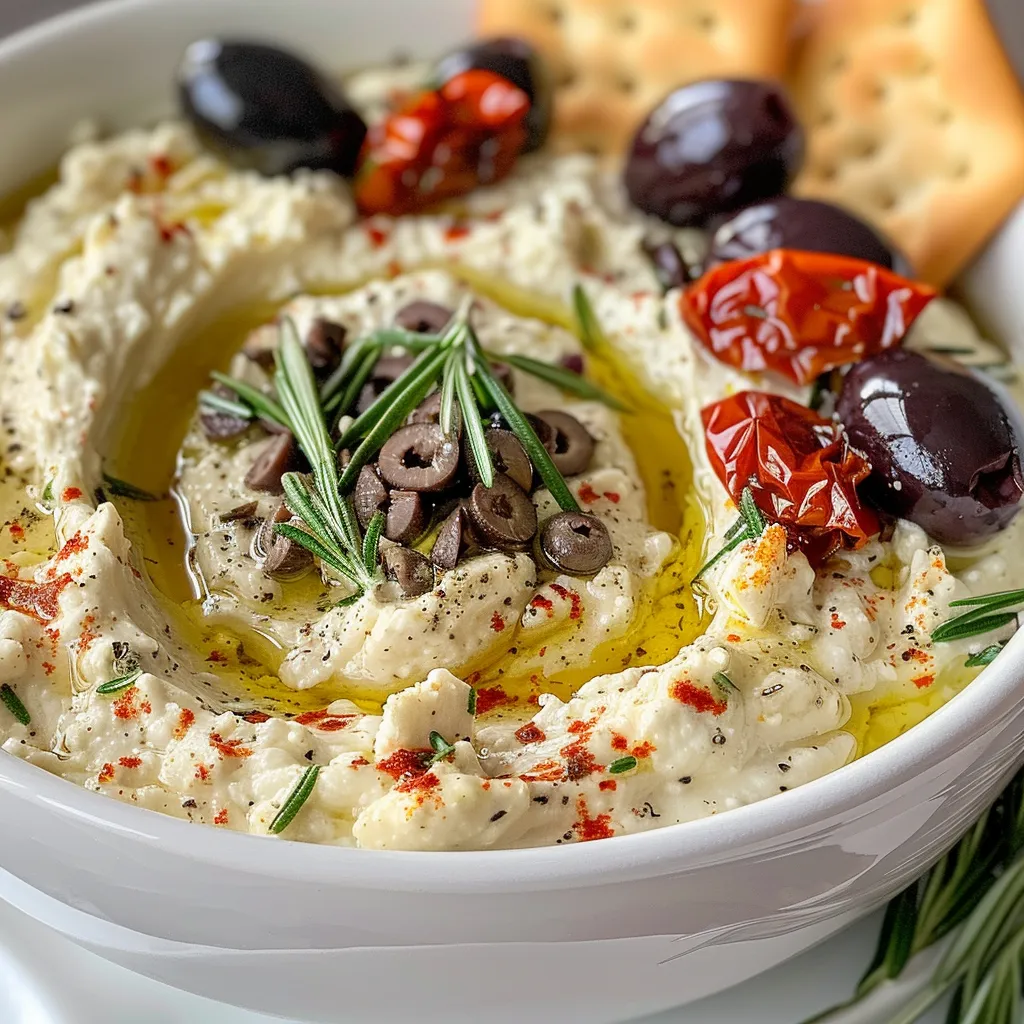
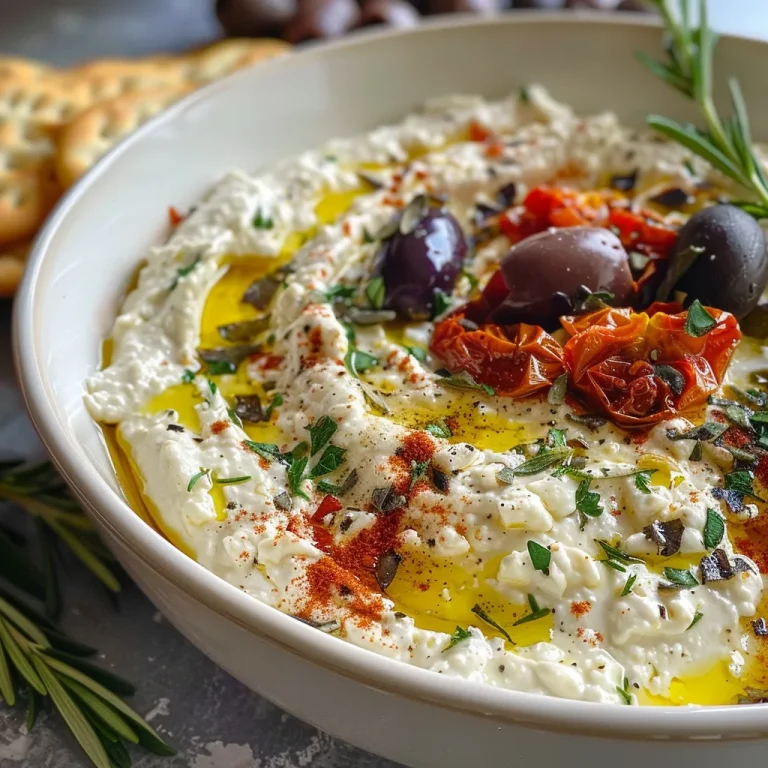
Side view of a bowl filled with whipped feta dip, topped with olives and sprigs of rosemary.

Now that we have our ingredients ready, let’s dive into the preparation!

Step 1: Roast the Olives and Tomatoes

Preheat your oven to 400℉. In a small oven-safe dish, combine the mixed olives, sun-dried tomatoes, 3 tablespoons of olive oil, lemon or orange zest, and minced garlic. Stir everything well to mix the flavors. Nestle the fresh rosemary sprigs among the mixture.

Step 2: Roast Away!

Place the dish in the preheated oven and let it roast for about 12 minutes, or until everything is heated through and fragrant. Your kitchen will soon be filled with a warm, inviting aroma!

Step 3: Whip the Feta

While the olives are roasting, add the drained feta cheese and Greek yogurt to a food processor. Secure the lid and start blending, slowly adding in the extra-virgin olive oil through the chute. Stop occasionally to scrape down the sides to ensure a smooth, creamy texture.

Step 4: Broil the Dip

Once the feta mixture is creamy, spread it into a shallow oven-safe dish. Switch your oven to broil and place the dip on the middle rack. Broil for 3-4 minutes until the dip is warmed and slightly bubbling at the edges.

Step 5: Assemble and Serve

Remove the dip from the oven and spoon the warm roasted olive mixture over the top. Garnish with minced rosemary, cracked black pepper, and a few extra rosemary sprigs. Serve immediately with fresh veggies, crackers, or crisps for dipping!

Expert Tips for the Perfect Whipped Feta Dip

To ensure your dip turns out perfectly every time, consider these expert tips:

  • Choose high-quality feta: The flavor of your dip hinges on the quality of the feta. Opt for a rich, creamy variety for the best results.
  • Adjust the consistency: If the dip is too thick, blend in a bit of milk until you reach your desired creaminess.
  • Experiment with flavors: Feel free to add herbs like thyme or spices such as smoked paprika for an extra kick!
  • Don’t skip the roasting: Roasting amplifies the flavors of the olives and tomatoes, making your dip even more delicious.
  • Let it chill: For even more flavor, let the whipped feta dip chill in the fridge for an hour before serving.
  • Garnish creatively: Top with additional herbs, nuts, or even a drizzle of balsamic reduction for a gourmet touch.

Common Mistakes and Troubleshooting

Even the best cooks can run into issues. Here are some common mistakes and how to avoid them:

  • Too salty: If your dip is overly salty, add a little more Greek yogurt or a drizzle of honey to balance the flavors.
  • Grainy texture: Make sure to blend the feta and yogurt thoroughly. If needed, blend longer or add a splash of milk to smooth it out.
  • Under-seasoned: Taste as you go! Adjust with salt, pepper, or additional herbs to suit your preference.

Delicious Variations

Looking to switch things up? Here are some inspired variations you can try:

  • Spicy Kick: Add a pinch of red pepper flakes or diced jalapeños to the olive mixture for a zesty twist.
  • Herbed Delight: Incorporate fresh herbs like dill or parsley into the whipped feta for a refreshing flavor.
  • Sun-Dried Tomato Twist: Mix in chopped sun-dried tomatoes directly into the feta for added depth.
  • Nutty Flavor: Top the dip with toasted pine nuts or walnuts for a crunchy texture contrast.

Storage and Make-Ahead Instructions

This dip is perfect for making ahead of time. Here’s how to store it:

  • Refrigeration: Store any leftovers in an airtight container in the refrigerator for up to 3 days.
  • Make-ahead: Prepare the whipped feta in advance and store it separately from the roasted olives. Combine just before serving.

FAQs About Whipped Feta Dip

Curious about whipped feta dip? Here are some common questions:

  • Can I use crumbled feta instead of a block? Yes, but the texture might be less creamy. A block is preferred for the best results.
  • What can I serve with this dip? Fresh veggies, crackers, pita chips, or even grilled bread are excellent choices.
  • Is it gluten-free? Yes, this dip is naturally gluten-free. Just ensure your dippers are gluten-free as well.
  • Can I freeze whipped feta dip? It’s not recommended, as the texture may change once thawed.
  • How do I make it vegan? Substitute the feta with a vegan cheese alternative and the yogurt with a plant-based yogurt.
  • What’s the best way to reheat it? Gently warm it in the oven at a low temperature to prevent it from drying out.
  • Can I add other toppings? Absolutely! Feel free to add roasted garlic, nuts, or seeds for a different flavor profile.
  • How long will it last in the fridge? The dip will stay fresh for up to 3 days when stored properly.

Nutritional Tips and Dietary Adaptations

This whipped feta dip is not only delicious but can also be a healthy option. Here are some tips:

  • Low-Fat Version: Use low-fat Greek yogurt and reduced-fat feta to lighten it up.
  • Increase Fiber: Serve with an array of colorful vegetables for added nutrients and fiber.
  • Protein Boost: Pair this dip with protein-rich dippers like chickpea crackers or edamame for a wholesome snack.

Recommended Equipment

To create your perfect whipped feta dip, here’s what you’ll need:

  • Oven-safe dish: For roasting the olives and tomatoes.
  • Food processor: Essential for achieving that creamy whipped feta texture.
  • Measuring cups and spoons: For precise ingredient measurements.
  • Spatula: To help scoop out every last bit of that delicious dip!

Serving Suggestions

Now that you’ve made your dip, here are some creative serving ideas:

  • As a party centerpiece: Serve the dip in the center of a large platter surrounded by dippers for a stunning presentation.
  • In a wrap or sandwich: Spread it on wraps or sandwiches for an extra layer of flavor.
  • With charcuterie: Pair it with cured meats, cheeses, and olives for a delightful Mediterranean charcuterie board.

Join the Celebration!

There you have it! A definitive guide to creating the ultimate Whipped Feta Dip with Roasted Olives. With its rich flavors and creamy texture, this dip is sure to become a staple at your gatherings. So grab your ingredients, invite some friends over, and celebrate the joy of cooking and sharing meals together. Bon appétit!

Whipped Feta Dip With Roasted Olives Recipe

Prep Time 10 minutes
Cook Time 12 minutes
Total Time 22 minutes
Servings 4 servings
Calories 350
A creamy feta dip topped with warm roasted olives, perfect for sharing with fresh veggies, crackers, or crisps.

Ingredients

Olive and Tomato Mixture

  • 1 cup mixed olives, quartered if large
  • cup sun-dried tomatoes packed in oil, drained and roughly chopped
  • 3 tablespoons extra-virgin olive oil
  • 2 teaspoons fresh lemon zest or orange zest
  • 1 clove garlic, minced
  • 2 sprigs fresh rosemary (plus more for topping)
  • 8 ounces feta cheese block packed in water, drained
  • ¾ cup plain whole milk Greek yogurt
  • 2 tablespoons extra-virgin olive oil
  • 1 tablespoon milk of choice (optional, to thin mixture)

Garnish

  • to taste Minced fresh rosemary
  • to taste Cracked black pepper
  • to taste Additional lemon zest or orange zest

Serving accompaniments

  • as needed Fresh veggies, Crackers and crisps

Instructions 

  • Preheat oven to 400℉ (200℃). Combine olives, sun-dried tomatoes, olive oil, zest, and garlic in an oven-safe dish. Roast for 12 minutes.
  • Meanwhile, blend feta and Greek yogurt in a food processor, streaming in olive oil until smooth. Thin with milk if needed.
  • Spread the whipped feta in a dish, broil for 3-4 minutes until bubbling, then top with roasted olives and garnish with rosemary, pepper, and zest.
  • Serve immediately with fresh vegetables, crackers, or crisps for dipping.

Notes

For a milder flavor, adjust the amount of garlic and rosemary to taste.
Calories: 350kcal
Cost: $15
Course: Appetizer
Cuisine: Mediterranean
Keyword: Feta, Olives

Start Your Day Right with Avocado Toast and Poached Eggs

Ah, the humble avocado toast! It’s not just a meal; it’s a celebration of flavors, colors, and textures that brings joy to your breakfast table. When topped with a perfectly poached egg, this dish becomes a vibrant morning ritual that dances on your taste buds. Today, we’re diving deep into how to create an avocado toast with poached egg that is not just delicious, but also a feast for the eyes and a boost for your health. Let’s explore the magic of this Mediterranean-inspired dish that elevates your breakfast game!

Why You’ll Love This Recipe

There are countless reasons to embrace this delightful dish. Here are just a few:

  • Health-Packed Breakfast: Rich in healthy fats, protein, and essential nutrients, this meal keeps you energized throughout the day.
  • Quick and Easy: In just 15 minutes, you can whip up a gourmet breakfast that impresses.
  • Customizable: Tweak the toppings to suit your taste or dietary needs, from spicy chili flakes to fresh herbs.
  • Visually Stunning: The vibrant green of the avocado paired with the golden yolk of the egg creates a feast for the eyes.
  • Perfect for Any Meal: Enjoy it for breakfast, brunch, or even a light lunch or dinner — the possibilities are endless!

Ingredients Breakdown

To craft your avocado toast with poached egg, you’ll need the following ingredients:

  • Whole-grain or multigrain bread: 2 slices — opt for dense bread to hold up under the toppings.
  • Avocado: 1 ripe — choose one that yields slightly to pressure for the best creaminess.
  • Large eggs: 2 — fresher eggs yield better flavor and texture.
  • Lemon juice: 1 teaspoon — for a zesty lift and to prevent browning of the avocado.
  • Salt and pepper: To taste — essential for enhancing flavors.
  • Optional toppings: chili flakes, chopped parsley, cherry tomatoes, microgreens — these add extra flavor and nutrition.

Step-by-Step Instructions

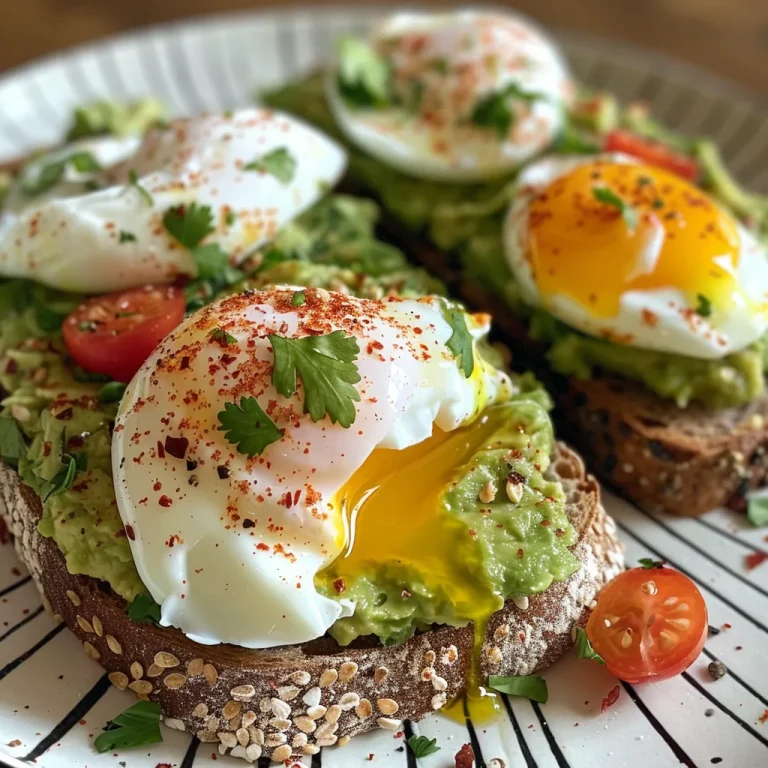
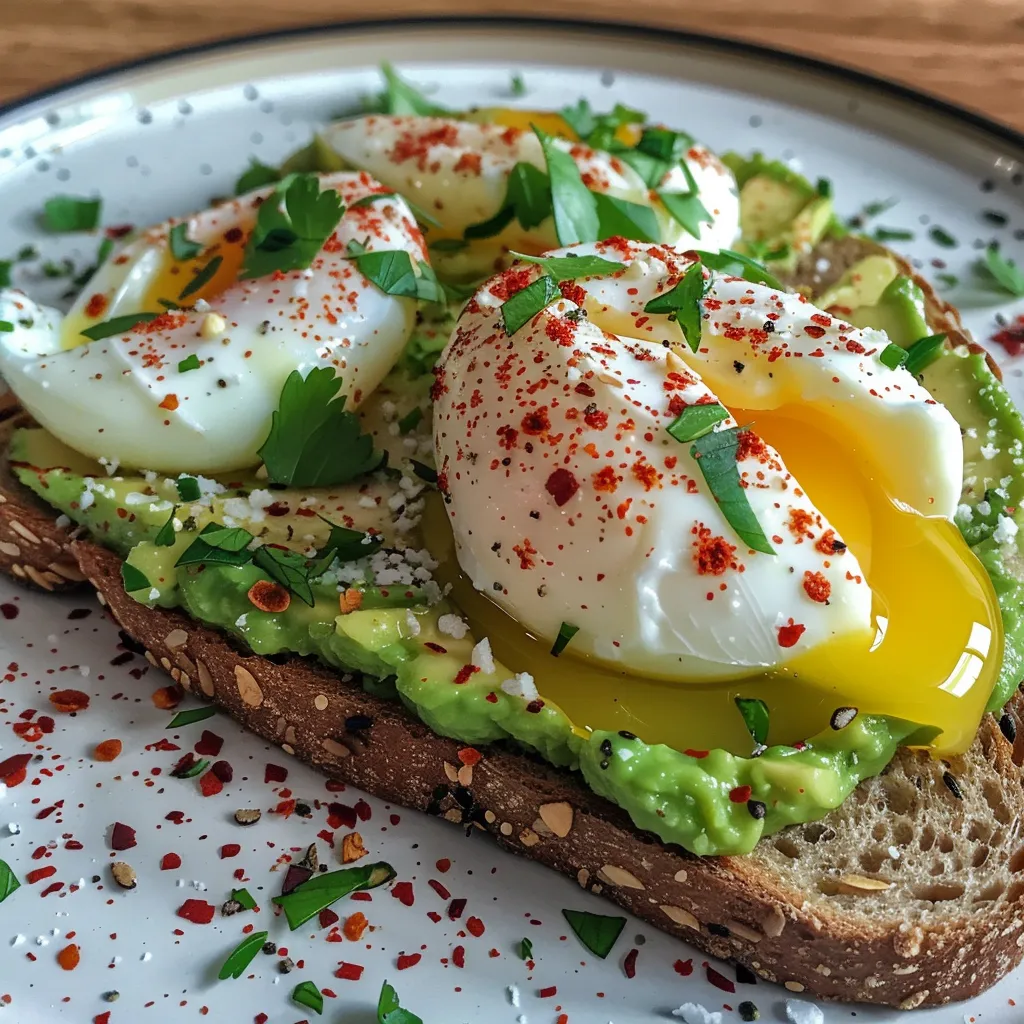
Side view of whole-grain avocado toast with a runny poached egg and chili flakes.

Now, let’s get cooking! Follow these simple steps to create a delicious plate of avocado toast with a perfectly poached egg:

  1. Prepare the Avocado: Cut the avocado in half, remove the pit, and scoop the flesh into a bowl. Mash it with a fork until smooth or slightly chunky. Add the lemon juice, salt, and pepper to taste.
  2. Toast the Bread: Toast the bread slices until they are golden and crisp, creating a sturdy base for your toppings.
  3. Poach the Eggs: Bring a saucepan of water to a gentle simmer. Add a splash of vinegar (this helps the egg whites hold together). Crack one egg into a small bowl, create a gentle whirlpool in the water, and carefully slide the egg into the center. Cook for 3–4 minutes for a runny yolk, or longer for a firmer yolk. Remove with a slotted spoon and drain on a paper towel.
  4. Assemble: Spread the mashed avocado evenly on the toasted bread. Place the poached egg on top and sprinkle with salt, pepper, and any optional toppings like chili flakes or cherry tomatoes.
  5. Enjoy! Indulge in your nutritious, high-protein breakfast or snack! For an extra touch, drizzle with olive oil or balsamic glaze, or add a slice of smoked salmon or feta cheese.

Pro Tips for the Perfect Avocado Toast

To ensure your avocado toast is nothing short of perfect, check out these expert tips:

  • Choose the Right Avocado: A ripe avocado is crucial for that creamy texture. Look for avocados that are firm but have a slight give when pressed.
  • Control the Poach: Use fresh eggs for the best results — they hold their shape better in the water.
  • Experiment with Flavors: Don’t hesitate to add spices or herbs to your avocado mix for a flavor explosion.
  • Perfect Your Poaching Technique: If you’re new to poaching, practice makes perfect! Consider using a poaching pod for easier results.
  • Make it Ahead: You can prepare the avocado mash in advance; just add lemon juice to keep it fresh!
  • Elevate Your Presentation: Use a ring mold for the avocado to create a visually appealing stack on the toast.
  • Garnish Smartly: A sprinkle of microgreens or edible flowers can take your dish from simple to stunning.
  • Adjust for Dietary Needs: If you’re vegan, swap the egg for tofu scramble or a chickpea spread.

Common Mistakes & Troubleshooting

Even the best chefs make mistakes! Here are some common pitfalls and how to avoid them:

  • Overcooked Eggs: Keep an eye on your poached eggs; they can go from perfect to hard quickly. Aim for a gentle simmer, not a rolling boil.
  • Browning Avocado: If you prepare the avocado ahead of time, make sure to keep it covered and add lemon juice to prevent browning.
  • Stale Bread: Fresh bread makes all the difference! Ensure your bread is fresh for optimal taste and texture.
  • Too Much Salt: Always start with a little salt and adjust to taste to avoid overpowering the dish.

Flavor Variations

Want to switch things up? Here are some delightful variations to try:

  • Spicy Avocado Toast: Add a sprinkle of cayenne pepper or a drizzle of sriracha on top of your egg.
  • Caprese Style: Top your avocado toast with slices of fresh mozzarella, basil, and a drizzle of balsamic glaze.
  • Smoked Salmon Delight: Layer smoked salmon on top of the avocado before adding the poached egg.
  • Mediterranean Twist: Incorporate feta cheese, olives, and diced tomatoes into your avocado for a flavorful Mediterranean experience.

Storage and Make-Ahead Instructions

This dish is best enjoyed fresh, but you can prepare some elements in advance:

  • Avocado Mash: Store in an airtight container with a splash of lemon juice to keep it fresh for up to 24 hours.
  • Poached Eggs: You can poach eggs in advance and gently reheat them in hot water right before serving.
  • Toasted Bread: Toast your bread fresh for the best texture, but you can pre-slice it for quick assembly.

Frequently Asked Questions

Here are some common questions about our beloved avocado toast with poached egg:

  • Can I use other types of bread? Absolutely! Sourdough, rye, or gluten-free bread all work beautifully.
  • Is this meal suitable for meal prep? Yes, you can prepare components ahead of time, but assemble right before eating for the best experience.
  • How can I make this dish vegan? Substitute the poached egg with tofu or chickpea spread, and enjoy the same creamy texture.
  • What if I don’t like poached eggs? Scrambled or fried eggs are great alternatives that still pair wonderfully with avocado.
  • Can I freeze avocados? It’s not ideal, but you can freeze mashed avocado; just be prepared for a change in texture upon thawing.
  • What toppings pair well with avocado toast? Consider seeds, nuts, or fresh herbs, which add both flavor and nutrition.
  • How do I know when my avocado is ripe? A ripe avocado should feel slightly soft when gently pressed but not mushy.
  • Can I add cheese to this dish? Yes, cheese like feta or goat cheese can add a delightful tang to your toast.

Nutrition Tips & Dietary Adaptations

This dish is not only delicious but also a nutritional powerhouse. Here are some tips:

  • High in Healthy Fats: The avocado provides monounsaturated fats that are beneficial for heart health.
  • Protein Boost: Eggs are an excellent source of protein; consider adding more protein-rich toppings like seeds or nuts.
  • Vitamins and Minerals: Incorporate a variety of colorful toppings to maximize nutrient intake and health benefits.
  • Gluten-Free Option: Use gluten-free bread to accommodate dietary restrictions without sacrificing flavor.

Essential Equipment Recommendations

To make the most of this recipe, consider having the following kitchen tools on hand:

  • Non-stick Pan: Ideal for toasting bread and frying eggs evenly.
  • Slotted Spoon: Essential for safely removing poached eggs from the water.
  • Mixing Bowl: For mashing the avocado and mixing in flavorful ingredients.
  • Knife and Cutting Board: To slice your avocado and bread with ease.

Serving Suggestions

Finally, here are a few creative serving ideas to enhance your avocado toast experience:

  • Pair with Fresh Fruit: A side of seasonal fruit adds a refreshing touch to your meal.
  • Serve with a Smoothie: A vibrant smoothie complements the toast beautifully, making for a balanced breakfast.
  • Add a Side Salad: A light arugula salad dressed with lemon vinaigrette can elevate your meal further.
  • Beverage Pairings: Enjoy with freshly brewed coffee, herbal tea, or a refreshing juice.

In conclusion, this avocado toast with poached egg is not just a recipe; it’s an experience that encapsulates the joy of cooking and sharing meals. Embrace the flavors, get creative with toppings, and enjoy the process of making something delicious. So, gather your ingredients, invite a friend to join you, and let’s make breakfast a celebration!

Avocado Toast with Poached Egg

Prep Time 5 minutes
Cook Time 10 minutes
Total Time 15 minutes
Servings 2 servings
Calories 350
A delicious and nutritious breakfast featuring creamy avocado on toasted bread topped with a perfectly poached egg.

Ingredients

Bread

  • 2 slices whole-grain or multigrain bread

Avocado

  • 1 ripe avocado

Eggs

  • 2 large large eggs

Lemon Juice

  • 1 teaspoon lemon juice

Salt and Pepper

  • to taste Salt and pepper

Optional Toppings

  • chili flakes, chopped parsley, cherry tomatoes, microgreens Optional toppings

Instructions 

  • Mash the avocado with lemon juice, salt, and pepper.
  • Toast the bread slices until golden.
  • Poach the eggs in simmering water for 3–4 minutes.
  • Spread mashed avocado on toast, top with poached eggs, and add optional toppings.
  • Enjoy immediately with optional drizzles or extras.

Notes

For extra flavor, drizzle with olive oil or balsamic glaze, or add smoked salmon or feta for a richer taste.
Calories: 350kcal
Cost: $10
Course: Breakfast
Cuisine: American
Keyword: Avocado, Egg, Toast

Start Your Day with a Cozy Treat

Nothing says “good morning” quite like the aroma of freshly made hot chocolate pancakes wafting through your kitchen. Imagine starting your day with fluffy pancakes infused with rich cocoa, topped with a generous dollop of whipped cream and perhaps a sprinkling of mini chocolate chips. This recipe for hot chocolate pancakes not only offers a delightful twist on your traditional breakfast but also wraps you in the warm embrace of indulgence and joy. With every bite, you’ll feel as if you’re savoring a cup of rich hot chocolate, making these pancakes the perfect comfort food for any day of the week.

Why You’ll Love This Recipe

  • Rich Chocolate Flavor: These pancakes deliver a decadent chocolate experience that satisfies your sweet tooth while remaining a breakfast staple.
  • Quick & Easy: With just a few simple steps, you can whip up these pancakes in less than 30 minutes, making them perfect for busy mornings.
  • Family-Friendly Fun: Kids will love helping out in the kitchen, whether they’re mixing the batter or adding extra chocolate chips as toppings.
  • Versatile Toppings: Customize your pancakes with various toppings, from fresh fruits to flavored syrups, ensuring everyone enjoys their perfect plate.
  • Filling & Satisfying: The combination of flour, cocoa, and sour cream creates a hearty pancake that keeps you full, making it an excellent choice for breakfast or brunch.

Gathering Your Ingredients

Here’s what you’ll need to create these delicious hot chocolate pancakes:

  • 1 cup all-purpose flour: The base of your pancake, providing structure and fluffiness.
  • 1/3 cup unsweetened cocoa powder: Adds that rich chocolatey flavor we all crave.
  • 2 tbsp granulated sugar: Just the right amount of sweetness to balance the cocoa.
  • 1 tsp baking powder: A leavening agent that helps your pancakes rise.
  • 1/2 tsp baking soda: Works alongside the baking powder for extra fluffiness.
  • 1/4 tsp salt: Enhances the overall flavor profile.
  • 3/4 cup whole milk: Adds moisture and richness.
  • 1/4 cup sour cream: Gives your pancakes a tender texture and a slight tang.
  • 1 large egg: Binds the ingredients together and adds richness.
  • 2 tbsp unsalted butter, melted: For that buttery taste and richness.
  • 1 tsp vanilla extract: A hint of vanilla complements the chocolate beautifully.
  • 1/3 cup mini chocolate chips: These little gems take your pancakes to the next level!
  • Whipped cream, for serving: The perfect finishing touch.
  • Butter or oil, for greasing the pan: To prevent sticking.

Let’s Make Hot Chocolate Pancakes

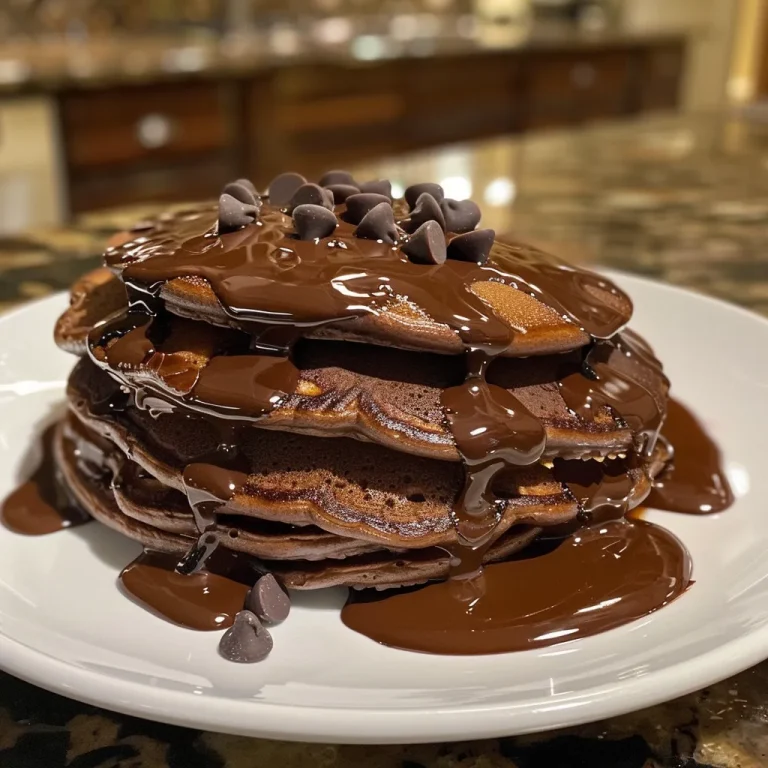
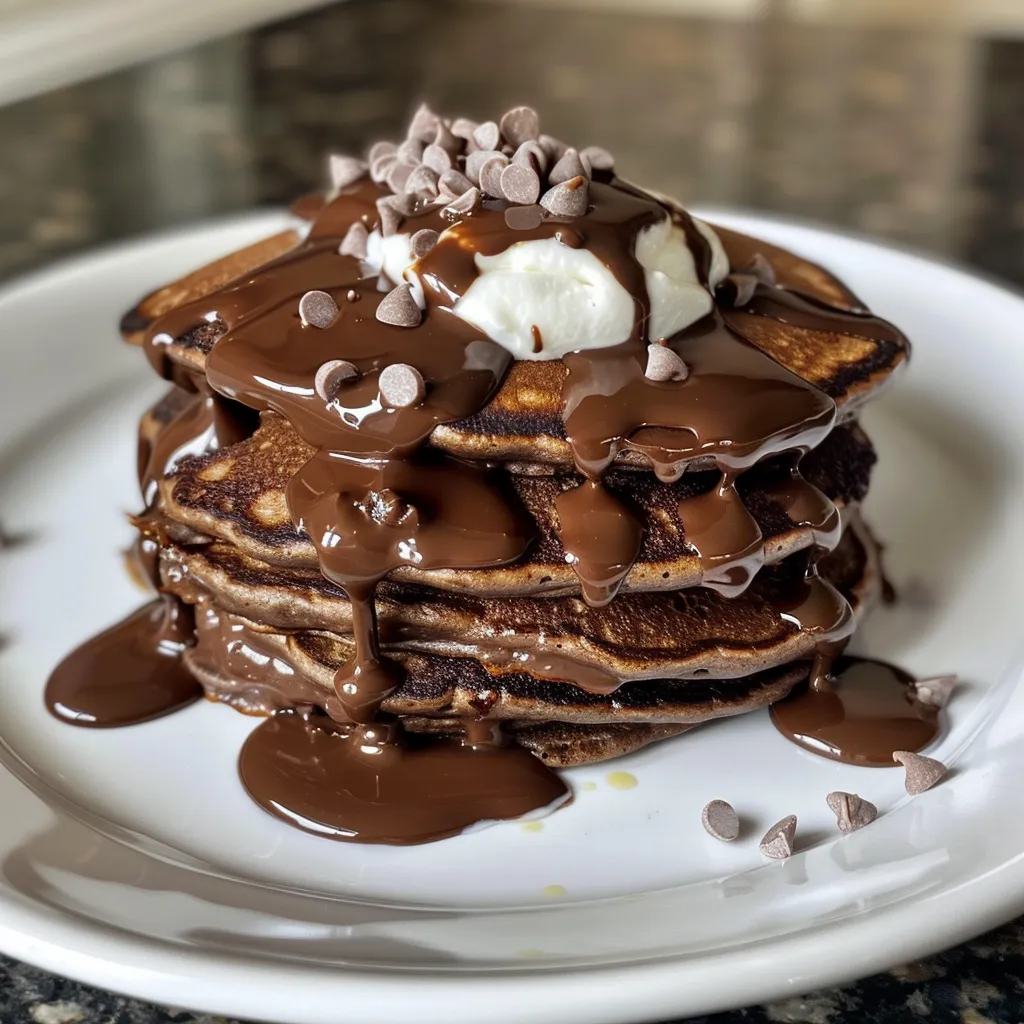
Side view of fluffy hot chocolate pancakes drizzled with creamy whipped cream and sprinkled with mini chocolate chips.

Follow these simple steps to create your delicious pancakes:

  1. In a large mixing bowl, whisk together the flour, cocoa powder, sugar, baking powder, baking soda, and salt.
  2. Add the milk, sour cream, egg, melted butter, and vanilla extract to the dry ingredients. Whisk until just combined — be careful not to overmix!
  3. Gently fold in the mini chocolate chips with a spatula, allowing them to distribute evenly through the batter.
  4. Heat a nonstick skillet or griddle over medium heat and add a little butter or oil to coat the surface.
  5. Scoop about 1/4 cup of batter for each pancake onto the hot surface. Cook for 2–3 minutes until bubbles form on the surface, then flip and cook for another 1–2 minutes until golden brown.
  6. Stack the pancakes on a plate and top with whipped cream, extra mini chocolate chips, and a dusting of cocoa powder if desired.

Pro Tips for Perfect Pancakes

  • Room Temperature Ingredients: Using ingredients at room temperature helps create a smoother batter and fluffier pancakes.
  • Don’t Overmix: A few lumps in your batter are perfectly fine! Overmixing can lead to tough pancakes.
  • Test the Heat: Before cooking, sprinkle a few drops of water on the skillet. If they sizzle and evaporate, it’s ready.
  • Keep Warm: Place cooked pancakes in a warm oven (200°F) to keep them warm while you prepare the rest.
  • Experiment with Flavors: Add spices like cinnamon or nutmeg for a unique twist!
  • Grease Between Batches: Reapply a little butter or oil between batches to prevent sticking.
  • Use a Measuring Cup: For uniform pancakes, use a measuring cup to portion the batter.
  • Make it a Family Affair: Let kids customize their pancakes with toppings; it’s a fun way to get them involved!

Common Mistakes and Troubleshooting

  • Pancakes Are Flat: Ensure your baking powder and baking soda are fresh. They’re crucial for lift!
  • Pancakes Stick to the Pan: Make sure your pan is properly greased and preheated before adding the batter.
  • Uneven Cooking: Keep the heat on medium. Too high can burn the outside while leaving the inside raw.
  • Too Sweet or Not Sweet Enough: Adjust the sugar to your preference, and remember that toppings can add sweetness too!

Delicious Variations

Looking to switch things up? Here are some tasty variations to try:

  • Mint Chocolate Pancakes: Add a few drops of peppermint extract to the batter for a refreshing twist.
  • Nutty Chocolate Pancakes: Stir in chopped nuts like walnuts or hazelnuts for added crunch.
  • Banana Chocolate Pancakes: Mash one ripe banana into the batter for a fruity flavor and natural sweetness.
  • Gluten-Free Option: Substitute all-purpose flour with a 1:1 gluten-free blend for a delicious gluten-free version.

Storage and Make-Ahead Instructions

Want to enjoy your pancakes later? Here’s how to store and reheat them:

  • Storing Leftovers: Allow pancakes to cool completely, then stack them with parchment paper between each pancake. Store in an airtight container in the refrigerator for up to 3 days.
  • Freezing: For longer storage, freeze pancakes in a single layer on a baking sheet, then transfer to a freezer bag. They’ll keep for up to 2 months.
  • Reheating: To reheat, pop them in the toaster, microwave, or oven until warmed through. Add fresh toppings before serving!

FAQs about Hot Chocolate Pancakes

  • Can I use chocolate chips instead of cocoa powder? No, chocolate chips will alter the texture and flavor. Stick to cocoa powder for the best results!
  • Are these pancakes dairy free? You can easily make them dairy-free by using plant-based milk and dairy-free yogurt instead of sour cream.
  • How can I make these pancakes gluten free? Substitute the all-purpose flour with a gluten-free flour mix, and ensure all other ingredients are gluten-free.
  • Can I add fruit to the batter? Absolutely! Berries or sliced bananas can be folded into the batter for added flavor.
  • What’s the best way to serve these pancakes? Serve them warm with whipped cream, fresh fruit, syrup, or even a sprinkle of powdered sugar.
  • How do I know when the pancakes are done? Look for bubbles forming on the surface and a firm edge. They should be golden brown when flipped.
  • Do I need to let the batter rest? It’s not necessary, but letting it rest for 5-10 minutes can help produce fluffier pancakes.
  • Can I double the recipe? Yes! Just ensure you have a large enough mixing bowl and cooking surface to accommodate the extra batter.

Nutritional Information

Here’s a quick overview of the nutritional benefits of these delightful pancakes:

  • Calories: Approximately 200 per serving (2 pancakes)
  • Protein: 6g
  • Fat: 8g (can be reduced with lighter toppings)
  • Carbohydrates: 30g
  • Fiber: 2g

Equipment Recommendations

To make your cooking experience even smoother, consider having the following tools on hand:

  • Nonstick Skillet or Griddle: Ensures easy flipping and even cooking.
  • Whisk: For mixing your batter thoroughly.
  • Measuring Cups and Spoons: Precision is key to great pancakes!
  • Spatula: A wide spatula makes flipping pancakes a breeze.

Serving Suggestions

Feeling creative? Here are some delightful ways to serve your hot chocolate pancakes:

  • Chocolate Lovers Delight: Serve with a drizzle of chocolate syrup and a scoop of chocolate ice cream on the side.
  • Fruity Explosion: Top with fresh berries, banana slices, and a sprinkle of powdered sugar.
  • Nutty Indulgence: Add crushed nuts and a dollop of peanut butter for a protein-packed breakfast.
  • Classic Style: Simply top with whipped cream and a sprinkle of cocoa powder for a classic presentation.

Conclusion

There you have it! A delicious recipe for hot chocolate pancakes that will not only warm your heart but also fill your home with delightful aromas. Whether it’s a cozy weekend morning or a special breakfast celebration, these pancakes are sure to impress. So grab your ingredients, invite your loved ones to join in the fun, and let the pancake flipping begin! Enjoy every bite, and remember: cooking is about more than just food; it’s about creating memories and sharing joy around the table.

Hot Chocolate Pancakes with Whipped Cream

Prep Time 10 minutes
Cook Time 10 minutes
Total Time 20 minutes
Servings 4 pieces
Calories 350
Indulge in rich, chocolatey pancakes topped with fluffy whipped cream for a delightful breakfast treat.

Ingredients

Dry ingredients

  • 1 cup all-purpose flour
  • 1/3 cup unsweetened cocoa powder
  • 2 tbsp granulated sugar
  • 1 tsp baking powder
  • 1/2 tsp baking soda
  • 1/4 tsp salt

Wet ingredients

  • 3/4 cup whole milk
  • 1/4 cup sour cream
  • 1 large egg
  • 2 tbsp unsalted butter, melted
  • 1 tsp vanilla extract
  • 1/3 cup mini chocolate chips (plus extra for topping)

For serving

  • Whipped cream (for topping)
  • Butter or oil (for greasing the pan)

Instructions 

  • Mix dry ingredients in a bowl.
  • Add wet ingredients and whisk until just combined.
  • Gently fold in mini chocolate chips.
  • Cook pancakes on a greased skillet for 2-3 minutes per side.
  • Stack pancakes, top with whipped cream and extra chocolate chips.

Notes

Use a nonstick skillet for best results and serve immediately for maximum fluffiness.
Calories: 350kcal
Cost: $12
Course: Breakfast
Cuisine: American
Keyword: chocolate

Discover the Delight of Fresh Vietnamese Spring Rolls

Welcome to the vibrant world of Fresh Vietnamese Spring Rolls! These delightful rolls are a celebration of texture and flavor, bursting with colorful veggies, succulent shrimp or tofu, and fragrant herbs. Not only are they a feast for the eyes, but they also bring the rich culinary tradition of Vietnam right to your table. Perfect for gatherings, light meals, or a healthy snack, these spring rolls are more than just food; they’re an experience!

Why You’ll Love This Recipe

Here are just a few reasons to dive into the world of Vietnamese spring rolls:

  • Fresh and Healthy: Packed with vegetables and lean protein, these rolls are a nutritious option that won’t weigh you down.
  • Customizable: You can easily swap out ingredients based on your preferences or what’s in season, making this recipe versatile.
  • Quick to Prepare: With minimal cooking involved, you can whip these up in under 30 minutes, perfect for a busy weeknight.
  • Beautiful Presentation: The vibrant colors of the fresh ingredients create a stunning visual appeal that impresses guests.
  • Fun to Make: Rolling your own spring rolls is an interactive cooking experience that’s great for family gatherings or dinner parties.

Ingredients Breakdown and Substitutions

This recipe serves as a blank canvas where you can combine flavors and textures. Here’s what you’ll need:

  • 10-12 spring roll wrappers (8 1/2 inch in diameter): Look for rice paper at Asian grocery stores or online.
  • 12 oz shrimp (cooked, peeled): For a vegetarian option, substitute with baked tofu cut into strips.
  • 4 ounces vermicelli noodles: Cook according to package directions; you can use whole wheat noodles for a healthier twist.
  • 1-2 Turkish cucumbers: Slice into strips; you can also use regular cucumbers.
  • 1 daikon radish: Cut into strips, or use red radishes for a peppery flavor.
  • 1 bell pepper: Choose any color you like, cut into strips for crunch.
  • 1 cup purple cabbage or matchstick carrots: Adds color and crunch.
  • 1 avocado: Sliced for creaminess.
  • 1/4 cup mint leaves: Fresh herbs elevate the flavor.
  • 1/4 cup Thai basil leaves: A must for authentic flavor.
  • Other crunchy veggie options: Matchstick carrots, jicama, grated beets, or kohlrabi.

Pro Tips for Perfect Spring Rolls

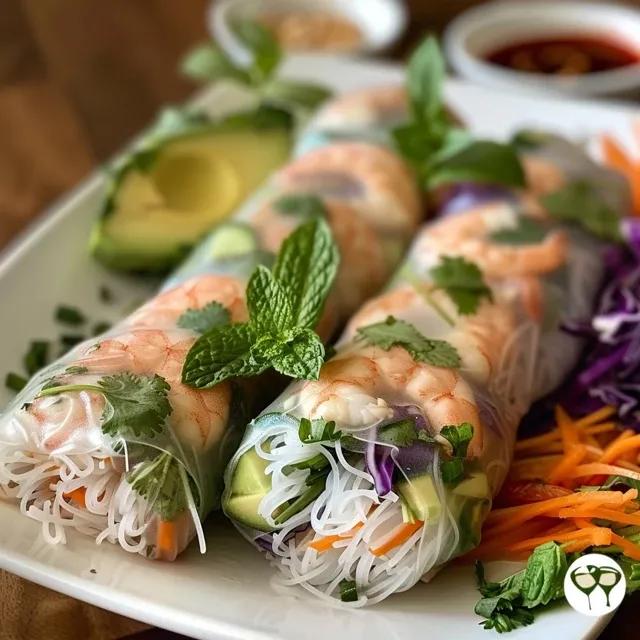
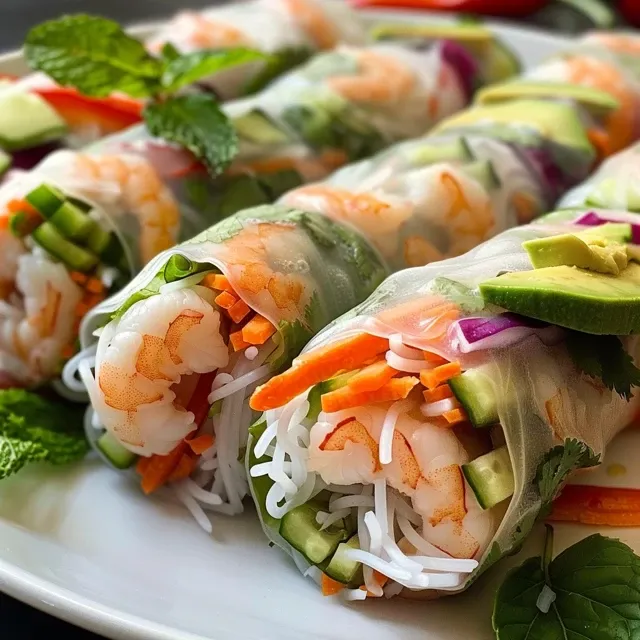
Side view of juicy Vietnamese spring rolls showcasing shrimp, avocado, and vibrant veggies.

To ensure your spring rolls are a success, consider these expert insights:

  • Use warm water: Soak your rice paper in warm water for about 10 seconds until it’s tender but not too mushy.
  • Don’t overfill: Less is more! Overfilling can make rolling difficult. Aim for a well-balanced amount of ingredients.
  • Keep it damp: Lay your rolled spring rolls seam-side down on a damp paper towel to prevent sticking.
  • Experiment with flavors: Don’t hesitate to try different herbs and spices for a unique twist.
  • Practice makes perfect: If your first roll doesn’t come out perfect, don’t worry—keep rolling!
  • Serve with a dipping sauce: A peanut sauce or nuoc cham brings everything together beautifully.
  • Make it a family affair: Invite friends or family to join in the rolling process for a fun and interactive meal.
  • Prep ahead: You can prepare all your filling ingredients in advance and roll them just before serving.

Avoiding Common Mistakes

Here are some common pitfalls to watch out for:

  • Too much water: Using overly wet rice paper can lead to tears; aim for just enough moisture.
  • Using stale ingredients: Freshness matters! Use crisp vegetables for the best texture.
  • Poor rolling technique: Start rolling tightly from the filling side, ensuring no ingredients spill out.
  • Not pairing with a good sauce: The right dip enhances the experience—don’t skip this step!

Delicious Variations to Try

Feel free to mix and match ingredients for delightful new flavors:

  • Spicy Shrimp Rolls: Add sliced jalapeños or a dash of sriracha for a kick.
  • Vegan Delight: Fill with grilled vegetables and a drizzle of tahini for a creamy finish.
  • Fruit Summer Rolls: Swap veggies for fruits like mango, strawberries, or kiwi for a sweet twist.
  • Herbed Chicken Rolls: Substitute shrimp with grilled chicken marinated in lime and garlic.

Storage and Make-Ahead Tips

To keep your spring rolls fresh:

  • Store in the fridge: Keep them covered with damp paper towels and plastic wrap to maintain moisture.
  • Make ahead: Roll them a few hours before your meal and refrigerate. They can last up to 2 days if stored properly.
  • Freezing: For longer storage, freeze unfilled wrappers. Just soak them in warm water when you’re ready to roll.

Frequently Asked Questions

Here are some common questions about making Vietnamese spring rolls:

  • Can I use frozen shrimp? Yes, just ensure they are fully thawed and cooked before using.
  • How do I know when rice paper is ready? It should be pliable but not overly soft; a quick soak in warm water does the trick.
  • What can I serve with spring rolls? They pair wonderfully with peanut sauce, nuoc cham, or even a light soy sauce.
  • Can I make them gluten-free? Absolutely! Just ensure your dipping sauces and any noodles are gluten-free.
  • How do I prevent them from sticking together? Place parchment paper between layers if stacking them before serving.
  • What can I use instead of rice paper? You can try using thin tortillas or lettuce leaves for a low-carb option.
  • Are these suitable for meal prep? Yes! Just roll and store properly to enjoy throughout the week.
  • How long do they last in the fridge? They are best eaten within 1-2 days but can last up to 3 days if stored correctly.

Nutrition Tips and Dietary Adaptations

These spring rolls can fit into various dietary preferences:

  • Low-carb option: Use lettuce wraps instead of rice paper.
  • High-protein twist: Add more shrimp or tofu for an extra protein boost.
  • Vegan-friendly: Ensure all sauces are plant-based and substitute ingredients as needed.

Essential Equipment for Making Spring Rolls

To make your cooking experience smooth, gather the following tools:

  • Large bowl: For soaking rice paper.
  • Damp kitchen towel: To keep the rolls moist.
  • Sharp knife: For cutting veggies and rolling ingredients.
  • Cutting board: A clean workspace for prep.

Serving Suggestions

Spring rolls are incredibly versatile and can be served in numerous ways:

  • As an appetizer: Serve with a selection of dipping sauces for a starter at parties.
  • As a light lunch: Pair with a refreshing salad for a complete meal.
  • On a buffet table: They make a colorful addition to any gathering.

Wrap It Up

Now that you’re armed with all the knowledge and tips to create stunning Fresh Vietnamese Spring Rolls, it’s time to gather your ingredients and roll up your sleeves! Whether you’re celebrating with family or just treating yourself to a light meal, these rolls are sure to bring joy and flavor to your table. So grab a plate, invite some friends, and let’s feast together on this delightful culinary adventure!

Fresh Vietnamese Spring Roll Recipe

Prep Time 20 minutes
Cook Time 10 minutes
Total Time 30 minutes
Servings 4 servings
Calories 250
Enjoy these fresh and healthy Vietnamese spring rolls filled with vibrant vegetables, shrimp or tofu, and herbs, served with a tangy dipping sauce.

Ingredients

Wrapper

  • 10-12 pieces spring roll wrappers (8 1/2 inch in diameter)

Protein

  • 12 oz shrimp (cooked, peeled) or baked tofu (cut into 1/2 inch strips)

Noodles

  • 4 ounces vermicelli noodles (cooked according to directions)

Vegetables

  • 1-2 pieces Turkish cucumber (cut into strips)
  • 1 piece daikon radish (cut into strips (or use red radishes))
  • 1 piece bell pepper (cut into strips)
  • 1 cup purple cabbage or matchstick carrots

Herbs and Others

  • 1 avocado sliced avocado
  • 1/4 cup mint leaves
  • 1/4 cup thai basil leaves

Dipping Sauce

  • 3 tbsp water
  • 1 tbsp sugar
  • 1 tbsp fresh lime or lemon juice
  • 1 tbsp fish sauce or vegan fish sauce (slices of bird’s eye / Thai chilies)

Instructions 

  • Prepare all filling ingredients and have them ready to roll.
  • Fill a large bowl with lukewarm water. Submerge one rice paper until tender, about 10 seconds.
  • Place the softened rice paper on a damp towel, add veggies, noodles, shrimp or tofu, and herbs. Roll tightly and set seam side down. Repeat with remaining rice papers.
  • Serve with Sweet chili Sauce or Vietnamese Nuoc Cham.
  • To make Nuoc Cham, stir all sauce ingredients in a small bowl.

Notes

Keep the rolls moist by covering with a damp cloth until serving.
Calories: 250kcal
Cost: $15
Course: Appetizer
Cuisine: Vietnamese
Keyword: Spring Rolls

Start Your Day Right with Fluffy Oatmeal Pancakes

Welcome to a culinary journey that transforms ordinary mornings into extraordinary celebrations! Today, I’m thrilled to share my recipe for Fluffy Oatmeal Pancakes, a delightful breakfast treat that’s not only delicious but also a nourishing way to kickstart your day. Made without flour or bananas, these pancakes are a perfect fit for those looking for a healthy twist on a breakfast classic. With simple ingredients and easy instructions, let’s dive into the world of flavors that will tantalize your taste buds and fill your home with warmth and joy!

Why You’ll Love This Recipe

  • Health-conscious choice: These pancakes are made with wholesome oats and yogurt, making them a great source of fiber and protein.
  • Quick and easy: Whip them up in under 30 minutes for a hassle-free breakfast that doesn’t compromise on taste.
  • Versatile base: You can customize them with your favorite toppings or mix-ins, from fresh fruits to nuts.
  • Kid-friendly: A hit with children and adults alike, these pancakes make breakfast fun and enjoyable for the whole family.
  • Gluten-free option: With the right oats, this recipe can easily be made gluten-free, accommodating various dietary needs.

Key Ingredients for Oatmeal Pancakes

Let’s break down the essential ingredients you’ll need to create these fluffy delights:

  • 1 cup oats: Use rolled oats for the best texture. They provide a hearty base that’s also gluten-free if you choose certified oats.
  • 1/3 cup plain yogurt: This ingredient adds moisture and a slight tang, enriching the flavor of the pancakes. You can substitute with Greek yogurt for added protein.
  • 2 large eggs: Eggs act as a binding agent, ensuring your pancakes hold together beautifully.
  • 2 tablespoons maple syrup: Sweeten your batter with pure maple syrup or honey for a natural touch.
  • 2 teaspoons vanilla extract: This adds depth and warmth to the flavor profile.
  • 2 teaspoons baking powder: Essential for fluffiness, this ingredient helps the pancakes rise perfectly.

Instructions: How to Make Fluffy Oatmeal Pancakes

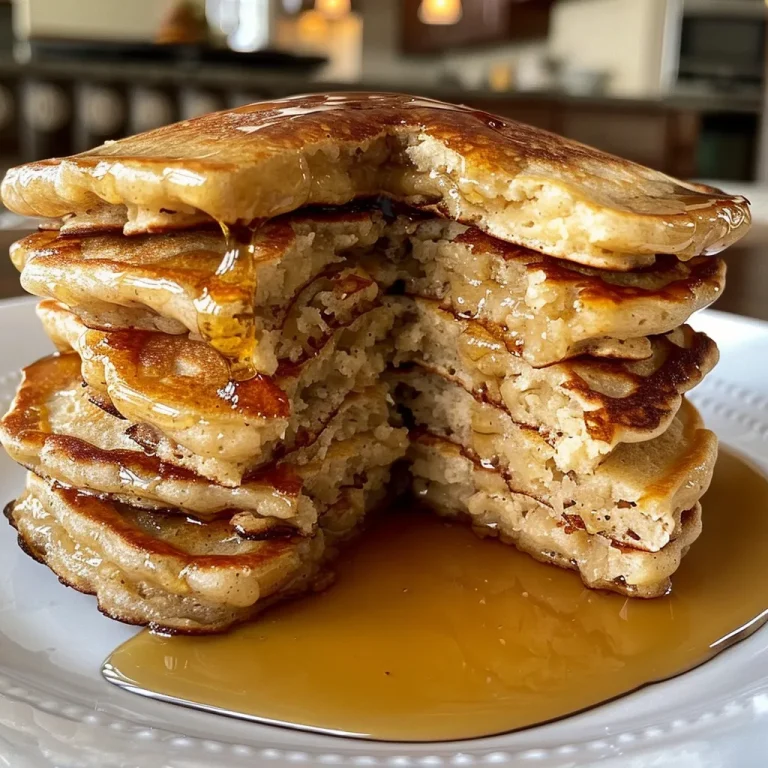
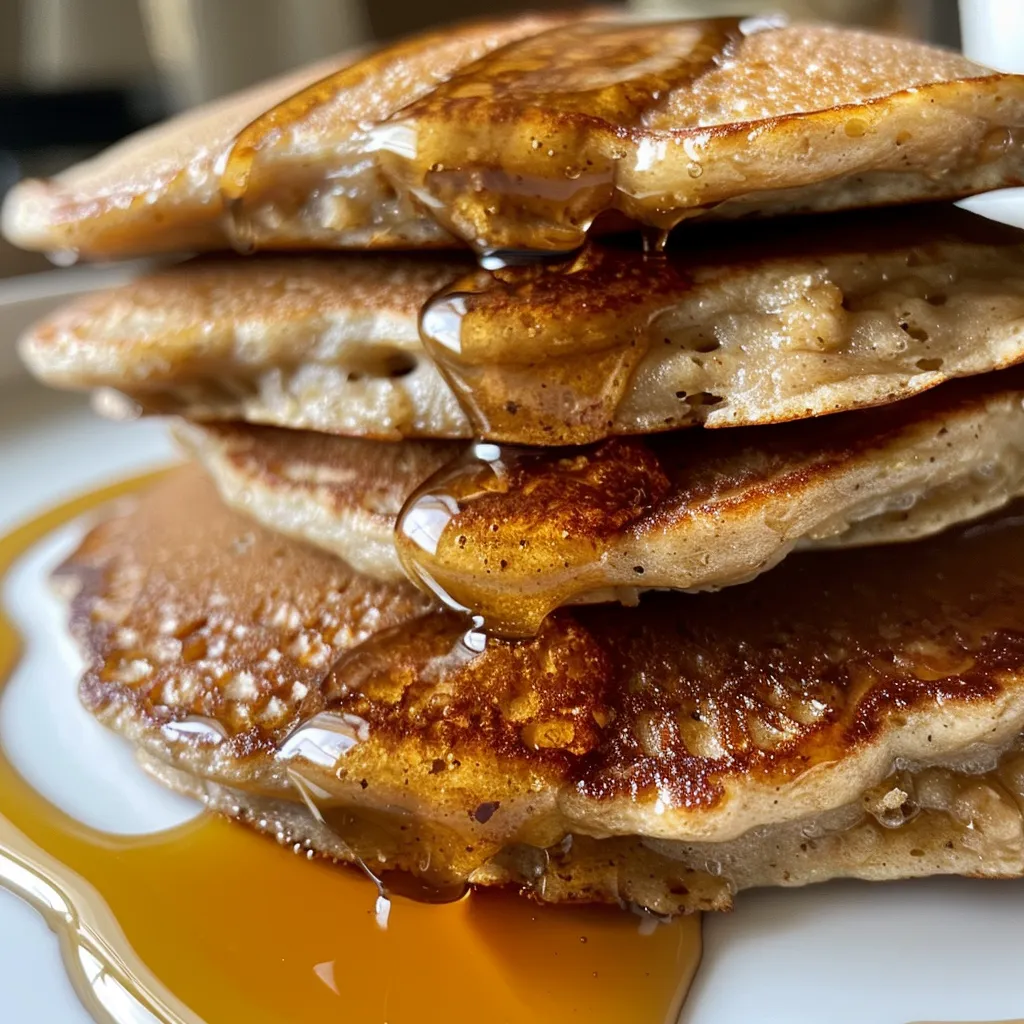
Close-up view of golden-brown oatmeal pancakes garnished with syrup and yogurt.

Follow these simple steps to bring your pancake dreams to life:

  1. In a blender, combine the oats, plain yogurt, eggs, maple syrup, vanilla extract, and baking powder. Blend for 20-25 seconds until the batter is smooth. If the batter is too thick, you can add a splash of milk or water to reach your desired consistency.
  2. Preheat a greased skillet over medium heat. Pour ⅓ cup of batter onto the skillet for each pancake. Cook for about 2 minutes, or until you see bubbles forming on the surface and the edges look dry.
  3. Flip the pancake carefully and cook for another 1-2 minutes until golden brown. Repeat with the remaining batter.
  4. Serve immediately with your favorite toppings such as fresh fruits, whipped cream, or a drizzle of more maple syrup!

Pro Tips for Perfect Pancakes

  • Don’t overblend: Blend just until smooth to avoid a gummy texture.
  • Keep it warm: If making multiple pancakes, keep them warm in a low oven while you finish the batch.
  • Experiment with flavors: Add spices like cinnamon or nutmeg to the batter for a flavor boost.
  • Rest the batter: Letting the batter sit for a few minutes can enhance the texture.
  • Use a non-stick skillet: This helps prevent sticking and makes flipping easier.
  • Make mini pancakes: For bite-sized treats, use a smaller amount of batter to create mini pancakes.
  • Try different toppings: From yogurt and berries to nut butter and chocolate chips, the possibilities are endless!

Common Mistakes and Troubleshooting

Even the best chefs can run into issues. Here’s how to avoid common pitfalls:

  • Too thick or thin batter: Adjust the consistency by adding milk if it’s thick or oats if it’s too runny.
  • Pancakes burn easily: Ensure your skillet is at medium heat; too high can lead to burnt outsides and raw insides.
  • Pancakes fall apart: Make sure to blend the ingredients well and let them cook long enough before flipping.
  • Flavor feels flat: Don’t skip the vanilla or sweetener! These enhance the overall taste.

Variations to Spice Up Your Pancakes

Feel free to get creative with these delicious variations:

  • Chocolate Chip Oatmeal Pancakes: Fold in a handful of chocolate chips for a sweet twist.
  • Banana Oatmeal Pancakes: Mash half a banana into the batter for natural sweetness and additional moisture.
  • Blueberry Oatmeal Pancakes: Stir in fresh or frozen blueberries for a burst of flavor.
  • Nuts and Seeds: Add chopped walnuts or flaxseeds for extra crunch and nutrients.

How to Store Leftover Oatmeal Pancakes

If you have leftovers, store them properly to maintain freshness:

  • Refrigerator: Place pancakes in an airtight container and refrigerate for up to 3 days.
  • Freezer: For longer storage, freeze pancakes separated by parchment paper in a freezer-safe bag for up to 2 months.
  • Reheating: To reheat, pop them in the toaster, microwave, or oven until warmed through.

Frequently Asked Questions

Here are some common questions about oatmeal pancakes:

  • Can I make these pancakes vegan? Yes! Substitute eggs with flax eggs and yogurt with a plant-based alternative.
  • What can I use instead of yogurt? You can use applesauce or a dairy-free yogurt for similar moisture.
  • How do I know when the pancakes are done? Look for bubbles on the surface and edges that appear set—this indicates it’s time to flip!
  • Can I add protein powder? Absolutely! Replace a portion of oats with protein powder for an added boost.
  • Are these pancakes gluten-free? Yes, as long as you use certified gluten-free oats.
  • What’s the best way to serve them? Top with seasonal fruits, a dollop of yogurt, and a drizzle of maple syrup for a delightful experience!
  • Can I use quick oats? While rolled oats are preferred for texture, quick oats can work in a pinch, just be aware they may yield a softer pancake.
  • How do I make them fluffier? Ensure your baking powder is fresh, as this is key to achieving the perfect rise.

Nutritional Tips and Dietary Adaptations

Here’s how to adapt this recipe to various dietary needs:

  • Low-sugar option: Reduce or eliminate the maple syrup for a low-sugar version.
  • High-protein option: Incorporate protein powder into the batter for an energy boost.
  • Dairy-free option: Use plant-based yogurt and milk alternatives to suit dairy-free diets.
  • Nut-free option: If allergies are a concern, avoid adding nuts or choose nut-free toppings.

Equipment Recommendations

Here’s a quick list of tools that will make your cooking experience smooth:

  • Blender: Essential for creating a smooth batter with minimal effort.
  • Non-stick skillet: Ensures easy flipping and perfect browning without sticking.
  • Measuring cups and spoons: Accurate measurements are key to consistent results.
  • Spatula: A flexible spatula helps in flipping the pancakes effortlessly.

Serving Suggestions for a Complete Breakfast

Enhance your pancake experience with these delightful serving ideas:

  • Fresh fruit: Top with berries, sliced bananas, or peaches for a refreshing touch.
  • Nut butters: Spread almond or peanut butter for added creaminess and flavor.
  • Chia seed jam: A healthy alternative to syrup, packed with nutrients.
  • Whipped cream: For a special occasion, a dollop of whipped cream takes it to the next level!

In conclusion, my friends, these Fluffy Oatmeal Pancakes are more than just a meal; they are a celebration of flavors, textures, and memories waiting to be created. I invite you to try out this recipe, enjoy the process, and find joy in each bite. Remember, cooking is not merely about feeding ourselves; it’s about cherishing moments with loved ones. So grab your ingredients and let’s make breakfast a delightful affair!

Fluffy Oatmeal Pancakes Without Banana (Flourless)

Prep Time 5 minutes
Cook Time 10 minutes
Total Time 15 minutes
Servings 4 pancakes
Calories 180
Enjoy these light and fluffy oatmeal pancakes that are easy to make and perfect for a healthy breakfast.

Ingredients

Dry ingredients

  • 1 cup oats
  • 2 tablespoons baking powder

Wet ingredients

  • 1/3 cup plain yogurt
  • 2 large eggs
  • 2 tablespoons maple syrup (or honey)
  • 2 teaspoons vanilla extract

Instructions 

  • Add oats, yogurt, eggs, maple syrup, vanilla, and baking powder to a blender. Blend until smooth.
  • Preheat a greased skillet over medium heat. Pour ⅓ cup batter for each pancake.
  • Cook for 2 minutes until edges are dry and bubbles form. Flip and cook another 1-2 minutes until golden.
  • Serve immediately with your favorite toppings.

Notes

For extra fluffiness, let the batter rest for a few minutes before cooking.
Calories: 180kcal
Cost: $10
Course: Breakfast
Cuisine: American
Keyword: Oats

Welcome to the Joy of Baking Cheesy Herb Muffins

Ah, the smell of freshly baked muffins wafting through the kitchen, inviting everyone to gather around the table! Today, we’re diving into a delightful recipe for cheesy herb muffins that not only bring comfort but also create a sense of connection with family and friends. These muffins are a celebration of flavor, combining savory cheeses and fresh herbs into a tender, golden treat. Whether you’re hosting a cozy brunch or simply looking for a warm snack, these muffins will surely steal the show!

Why You’ll Love This Recipe

These cheesy herb muffins are not just delicious; they’re packed with benefits that make them a delightful addition to any meal. Here are five reasons why you’ll adore this recipe:

  • Quick and Easy Preparation: With just a handful of ingredients and minimal prep time, you can whip up these muffins in under 30 minutes!
  • Versatile Flavor Combinations: Customize the recipe with your favorite cheeses or herbs, allowing for endless variations and personal touches.
  • Perfect for Any Meal: Enjoy these muffins as a savory breakfast, an afternoon snack, or a delightful side at dinner.
  • Healthier than Store-Bought Options: Made with wholesome ingredients, these muffins are a healthier alternative to processed snacks.
  • Great for Sharing: Bake a batch to share with friends and family, creating moments of joy and connection around the table.

Essential Ingredients for Cheesy Herb Muffins

Let’s explore the key ingredients that make these muffins so scrumptious. For the full experience, you might want to have these on hand:

  • All-Purpose Flour: The base of your muffins, providing structure and fluffiness. You can substitute with whole wheat flour for a healthier option.
  • Baking Powder: This leavening agent helps the muffins rise, giving them that light texture. Ensure it’s fresh for best results.
  • Salt: A pinch enhances the flavors, making every bite more delicious.
  • Black Pepper: Adds a subtle kick; adjust according to your taste!
  • Garlic Powder: Infuses a lovely aroma and depth of flavor.
  • Cheddar Cheese: Shredded for easy melting, it brings a rich, cheesy flavor.
  • Parmesan Cheese: Grated for that salty, nutty finish, enhancing the overall taste.
  • Fresh Herbs: Chopped chives, parsley, or thyme provide freshness and vibrancy. Feel free to experiment with your favorites!
  • Egg: Binds the ingredients together, contributing to the muffins’ moist texture.
  • Milk: Adds moisture; you can use almond or oat milk for a dairy-free option.
  • Vegetable Oil: Ensures the muffins are tender and moist. Olive oil can also be a delightful substitute!

How to Make Cheesy Herb Muffins

Side view of freshly baked muffins with herbs and cheese peeking through.

Ready to bake? Let’s walk through the steps for creating these delightful muffins together!

  • Step 1: Preheat the Oven: Set your oven to 375°F (190°C) and line a muffin tin with paper liners or grease it lightly.
  • Step 2: Mix Dry Ingredients: In a large mixing bowl, whisk together the all-purpose flour, baking powder, salt, black pepper, and garlic powder until well combined.
  • Step 3: Incorporate Cheeses and Herbs: Fold in the shredded cheddar cheese, grated Parmesan cheese, and chopped herbs to infuse the batter with flavor.
  • Step 4: Combine Wet Ingredients: In a separate bowl, beat the egg, then add the milk and vegetable oil, mixing until smooth.
  • Step 5: Combine Wet and Dry Mixtures: Pour the wet ingredients into the dry ingredients and stir gently until just combined. Remember, a few lumps are okay; do not overmix!
  • Step 6: Fill the Muffin Tin: Spoon the batter evenly into the prepared muffin tin, filling each cup about 2/3 full for the perfect rise.
  • Step 7: Bake the Muffins: Place in the oven and bake for 18-20 minutes until golden brown. A toothpick inserted into the center should come out clean!
  • Step 8: Cooling Time: Allow the muffins to cool in the tin for about 5 minutes before transferring them to a wire rack to cool completely.

Expert Tips for Perfect Muffins

To elevate your cheesy herb muffins to the next level, consider these pro tips:

  • Check Your Baking Powder: Ensure it’s fresh to get the muffins to rise beautifully. Old baking powder can lead to dense muffins.
  • Mix Gently: When combining wet and dry ingredients, stir just until combined. Overmixing can result in tough muffins.
  • Experiment with Cheese: Try using different types of cheese, such as feta or goat cheese, for unique flavor profiles.
  • Add a Dash of Spice: For a kick, consider adding crushed red pepper flakes or a dash of cayenne pepper to the dry ingredients.
  • Herb Variations: Fresh basil, dill, or oregano can be delightful additions to the herb mix, adding a new twist!
  • Use Room Temperature Ingredients: For the best texture, let your egg and milk sit out for about 30 minutes before using.
  • Don’t Skip Cooling: Allowing the muffins to cool in the tin helps them set properly and enhances their flavor.
  • Store Properly: If you have leftovers, store them in an airtight container to keep them fresh!

Common Mistakes and Troubleshooting

Even the best bakers make mistakes! Here are some common pitfalls and how to avoid them:

  • Dense Muffins: This can happen from overmixing the batter. Remember, mix just until you see the dry ingredients disappear.
  • Burnt Tops: If your muffins are browning too quickly, lower the oven temperature slightly and check for doneness earlier.
  • Uneven Baking: Ensure your oven is preheated properly and rotate the muffin tin halfway through baking for even results.
  • Dry Muffins: If your muffins turn out dry, it’s likely due to overbaking or too much flour. Scoop flour instead of packing it.

Delicious Variations on Cheesy Herb Muffins

Feeling adventurous? Here are some delightful variations to try:

  • Spinach and Feta: Add chopped fresh spinach and crumbled feta cheese for a Mediterranean twist!
  • Sundried Tomato and Basil: Incorporate sundried tomatoes and fresh basil for a burst of flavor.
  • Cheddar and Jalapeño: For a spicier kick, mix in diced jalapeños and extra sharp cheddar cheese.
  • Sweet and Savory: Combine shredded zucchini with a hint of cinnamon for a unique muffin that blends sweet and savory notes.

Storage and Make-Ahead Instructions

Want to make these muffins ahead of time? Here’s how to store and reheat them:

  • Room Temperature: Store cooled muffins in an airtight container at room temperature for up to 2 days.
  • Refrigerator: Keep them in the fridge for up to a week. Reheat in the oven or microwave before serving.
  • Freezing: Freeze muffins in a zip-top bag for up to 3 months. Thaw overnight in the fridge or at room temperature.

Frequently Asked Questions

Let’s address some common queries regarding cheesy herb muffins:

  • Can I use whole wheat flour?: Absolutely! Whole wheat flour will give a nuttier flavor and heartier texture.
  • What herbs work best?: Fresh herbs like chives, parsley, and thyme are fantastic, but feel free to experiment with your favorites!
  • How do I know when they’re done baking?: Muffins are done when they are golden brown and a toothpick inserted comes out clean.
  • Can I double the recipe?: Yes, simply double the ingredients and use two muffin tins if needed!
  • Are these muffins suitable for freezing?: Yes! They freeze well and make for a quick snack or breakfast option later.
  • Can I add vegetables?: Certainly! Diced bell peppers or zucchini can add nutrition and flavor.
  • What’s the best way to reheat them?: For the best texture, reheat in the oven at 350°F for about 10 minutes.
  • Can I replace milk with a dairy-free alternative?: Yes, almond milk or oat milk works wonderfully in this recipe!

Nutritional Tips and Dietary Adaptations

For those mindful of dietary needs, here are some adaptations:

  • Gluten-Free Option: Substitute all-purpose flour with a gluten-free blend.
  • Dairy-Free Version: Use dairy-free cheese alternatives and plant-based milk.
  • Low-Calorie Adjustments: Reduce the amount of cheese or use low-fat alternatives.

Kitchen Equipment Recommendations

To ensure your baking experience is smooth and enjoyable, here are some essential tools:

  • Muffin Tin: A standard 12-cup muffin tin is perfect for this recipe.
  • Mixing Bowls: A set of mixing bowls in various sizes will help with ingredient prep.
  • Whisk: For combining dry ingredients and mixing wet ingredients effectively.
  • Silicone Spatula: Great for folding ingredients without overmixing.
  • Cooling Rack: Essential for letting your muffins cool properly after baking.

Serving Suggestions for Cheesy Herb Muffins

Serve these muffins warm with a pat of butter, or pair them with a side salad for a complete meal. They’re also fantastic alongside soups or stews for a comforting dinner. And don’t forget to share them with those you love; the joy of baking is best when enjoyed together!

So, there you have it! A comprehensive guide to creating the best cheesy herb muffins that not only taste incredible but also bring people together. Now it’s time to roll up your sleeves and get baking. Enjoy every moment in the kitchen, and remember: cooking is about celebrating flavor and sharing joy. Happy baking!

Cheesy Herb Muffins

Prep Time 10 minutes
Cook Time 20 minutes
Total Time 30 minutes
Servings 12 muffins
Calories 180
Delight in these savory muffins packed with cheese and fresh herbs, perfect for breakfast or snacks.

Ingredients

Dry ingredients

  • 1 cup all-purpose flour
  • 1 tablespoon baking powder
  • 1/2 teaspoon salt
  • 1/4 teaspoon black pepper
  • 1/2 teaspoon garlic powder

Wet ingredients

  • 1/4 cup vegetable oil
  • 3/4 cup milk
  • 1 large egg

Cheese and herbs

  • 1/2 cup shredded cheddar cheese
  • 1/4 cup grated Parmesan cheese
  • 1/4 cup chopped fresh herbs (such as chives, parsley, or thyme)

Instructions 

  • Preheat oven to 375°F (190°C) and prepare muffin tin.
  • Mix dry ingredients in a bowl.
  • Stir in cheeses and herbs.
  • Whisk egg, milk, and oil; combine with dry ingredients.
  • Fill muffin cups 2/3 full and bake 18-20 minutes.

Notes

Use fresh herbs for best flavor.
Calories: 180kcal
Cost: $10
Course: Breakfast
Cuisine: American
Keyword: Cheese, herbs

Unleashing the Magic of Mediterranean Flavors with Whipped Herb Feta

Welcome, dear friends, to a culinary adventure that celebrates the vibrant and comforting tastes of the Mediterranean! Today, we’re diving deep into the world of whipped feta, a luscious dip that elevates any gathering into a feast of flavors and joy. With creamy feta, roasted pistachios, and a splash of lemon zest, this recipe is perfect for sharing with loved ones, whether it’s a casual get-together or a festive holiday celebration. Let’s embark on this flavorful journey together!

Why You’ll Love This Recipe

Before we get our hands dirty in the kitchen, here are a few reasons why this whipped herb feta dip will become a staple in your repertoire:

  • Quick and Easy: Whipping up this dip takes less than 15 minutes, making it a breeze for any occasion.
  • Versatile Delight: Perfect for dipping fresh veggies, slathering on pita or bread, or even as a topping for grilled meats.
  • Nutty Crunch: The addition of pistachios adds a delightful crunch that balances the creaminess of the feta.
  • Fresh and Flavorful: Bright herbs and zesty lemon elevate the feta, bringing a burst of freshness to every bite.
  • Make-Ahead Friendly: This dip can be prepared in advance, allowing the flavors to meld beautifully!

Ingredient Breakdown

Let’s gather our ingredients and get ready to create this delicious whip!

  • 8 oz feta block: Use a high-quality feta for the best flavor; you can also use Greek feta for a creamier texture.
  • 1/2 cup roasted pistachios: These beauties add a nutty flavor and crunchy texture; reserve some for garnishing!
  • 1 lemon zest: A splash of citrus brightens the dip and enhances the overall flavor. You’ll want to zest it just before using for maximum freshness.
  • 1/3 cup cilantro: Fresh herbs are essential; cilantro brings a lovely earthiness to the mix.
  • 1/4 cup scallions: These add a mild onion flavor that complements the feta perfectly.
  • Olive oil for topping: A drizzle of high-quality olive oil not only enhances the flavor but also adds a luxurious touch.
  • 1/2 tsp honey: A hint of sweetness balances the salty feta and bright lemon.

How to Make Whipped Herb Feta

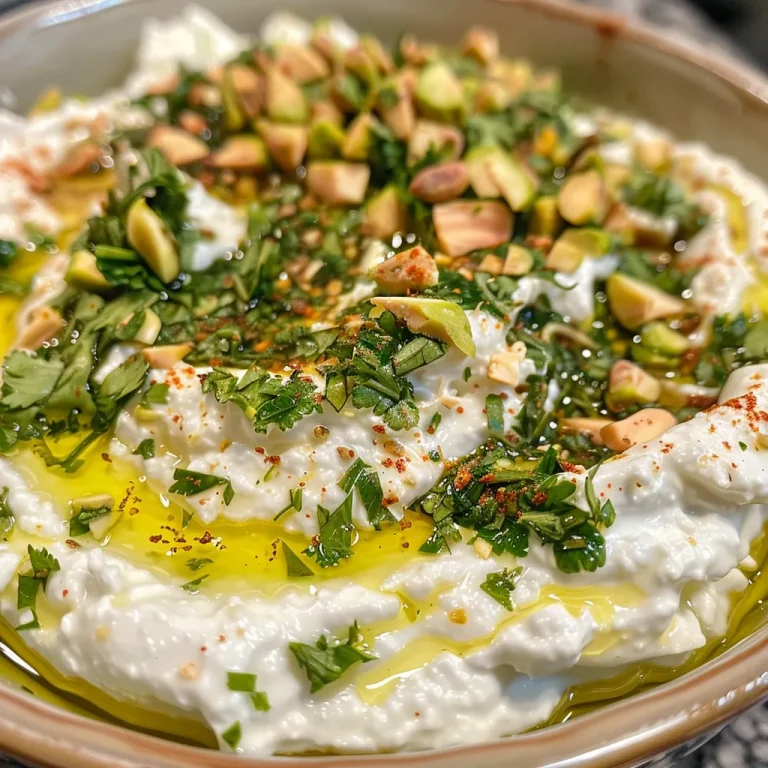
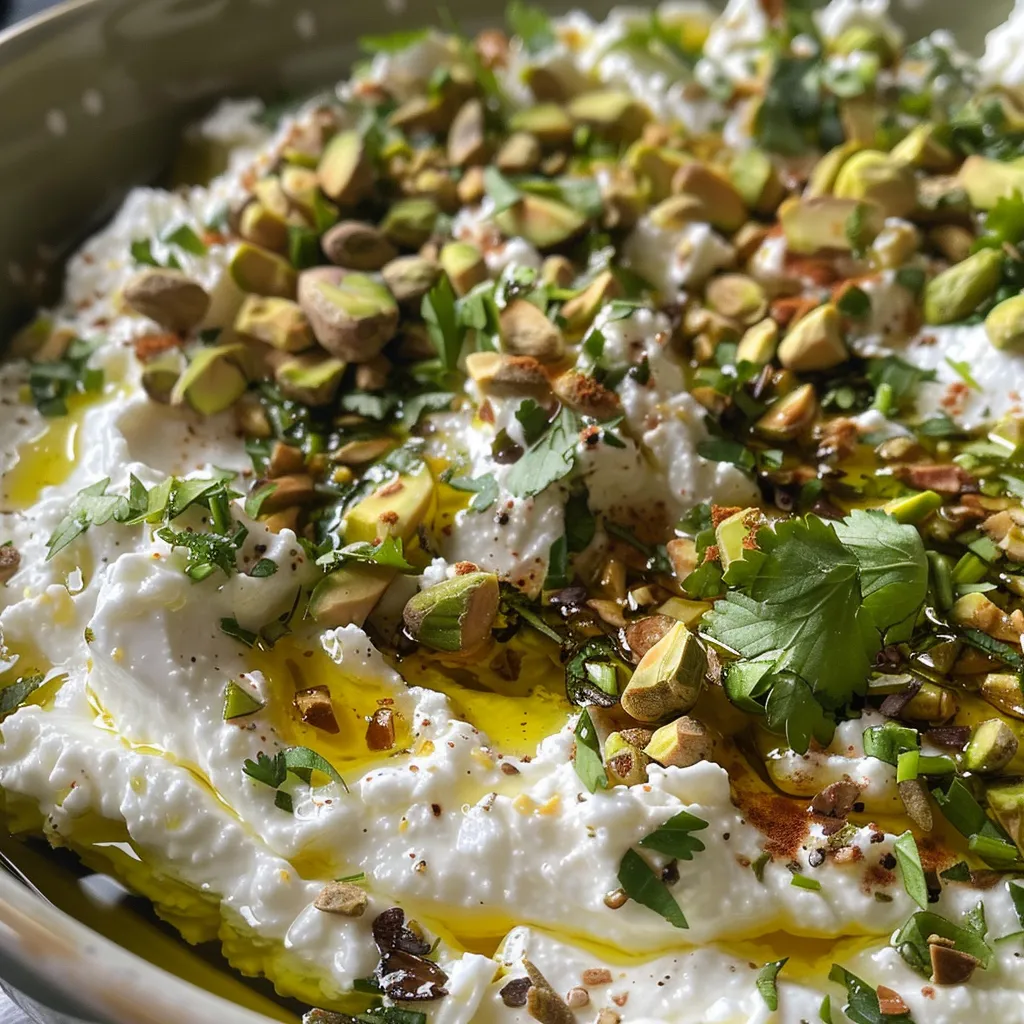
A side photo of blended feta cheese with green herbs and pistachios, served in a bowl.

Now that we have everything ready, let’s bring it all together!

  1. Process the Pistachios: Start by adding the pistachios to a food processor. Pulse them for about 5-8 seconds until they are coarsely chopped.
  2. Add the Feta and Herbs: Next, add the feta cheese, cilantro, scallions, honey, and half of the lemon zest to the food processor.
  3. Blend to Desired Texture: Process until the mixture is smooth yet still slightly chunky, allowing for delightful texture.
  4. Garnish: Serve the whipped feta in a bowl, creating a small well in the center. Drizzle with olive oil, sprinkle with reserved pistachios, and add the remaining lemon zest.
  5. Enjoy: Pair this dip with warm pita bread, fresh vegetable sticks, or even as a spread on sandwiches!

Pro Tips for the Perfect Whipped Feta

Let me share some expert insights to ensure your whipped feta is nothing short of amazing:

  • Room Temperature Feta: For a smoother consistency, use feta that’s been at room temperature for about 30 minutes before blending.
  • Experiment with Herbs: Don’t hesitate to try different herbs like parsley, dill, or mint for a unique twist on flavor.
  • Adjust the Creaminess: If you prefer a creamier dip, consider adding a splash of Greek yogurt or cream cheese to the mix.
  • Flavor Depth: For an extra layer of taste, try adding a pinch of smoked paprika or crushed red pepper flakes.
  • Storage: Store leftovers in an airtight container in the fridge for up to a week. The flavors will continue to develop.
  • Serving Temperature: This dip is best enjoyed at room temperature, so let it sit out for about 15-20 minutes before serving.
  • Garnish Creativity: Feel free to sprinkle fresh herbs or even pomegranate seeds on top for a pop of color and flavor.
  • Make-Ahead: Whipped feta can be made a day in advance, allowing the flavors to meld beautifully.

Common Mistakes and Troubleshooting

If you’re new to making dips, here are some common pitfalls to avoid:

  • Over-blending: Blend just until combined; you want some texture, not a completely smooth paste.
  • Using Dry Feta: If your feta is too dry, it won’t blend well. Make sure to choose a creamy, brined feta.
  • Skipping the Olive Oil: A drizzle of olive oil adds richness and flavor; don’t skip this step!
  • Not Tasting: Always taste and adjust seasoning; every feta can be different in saltiness.

Variations to Try

Get creative with these delightful variations of whipped feta!

  • Spicy Whipped Feta: Add a teaspoon of harissa or sriracha for a spicy kick!
  • Citrus Infused: Swap the lemon zest for orange or grapefruit zest for a different citrus profile.
  • Herbed Feta Spread: Blend in a handful of fresh dill or basil for a refreshing herbal note.
  • Whipped Feta with Honey: Drizzle honey on top for a sweet contrast to the savory feta.

Storage and Make-Ahead Instructions

This whipped herb feta is not only delicious but also convenient!

  • Refrigeration: Store in an airtight container in the fridge for up to one week.
  • Freezing: While I recommend consuming it fresh, you can freeze it for up to three months. Just thaw in the fridge before serving.
  • Make-Ahead: Prepare this dip a day in advance and let the flavors mingle for an even richer taste.

Frequently Asked Questions

Here are some common questions about whipped feta:

  • Can I use crumbled feta instead of a block? Yes, but block feta will blend smoother.
  • What can I serve with whipped feta? Fresh veggies, pita chips, or as a spread on sandwiches are all great options.
  • How do I make it vegan? Substitute feta with a plant-based alternative and use maple syrup instead of honey.
  • Can I add roasted garlic? Absolutely! Roasted garlic adds a lovely depth of flavor.
  • How long does whipped feta last? It can be stored in the fridge for up to a week.
  • Is it possible to make it without nuts? Yes! Simply omit the pistachios for a nut-free version.
  • Can I use different herbs? Definitely! Feel free to experiment with your favorite herbs.
  • What’s the best way to serve it? Serve at room temperature with a drizzle of olive oil on top!

Nutritional Tips and Dietary Adaptations

This whipped herb feta can fit into various dietary needs:

  • Low-Carb: Pair with sliced cucumbers or bell peppers for a low-carb option.
  • Gluten-Free: Enjoy with gluten-free crackers or veggies.
  • Protein Boost: Add Greek yogurt for a higher protein content.
  • Vegan Option: Use a plant-based feta and maple syrup instead of honey.

Equipment Recommendations

Here’s what you’ll need to whip up this amazing spread:

  • Food Processor: Essential for achieving the right texture.
  • Measuring Cups: For accurate ingredient amounts.
  • Spatula: To scrape down the sides of the processor.
  • Serving Bowl: A beautiful bowl to present your whipped feta!

Serving Suggestions

How you serve this delightful whipped feta can add to the experience:

  • Cheese Board: Include it on a cheese board alongside cured meats and olives.
  • Appetizer Spread: Serve with assorted dipping items like pita chips, veggie sticks, and crackers.
  • Sandwich Spread: Use it as a creamy layer in wraps and sandwiches.
  • Brunch Delight: Pair it with eggs or on toast for a delicious brunch treat!

In conclusion, this whipped herb feta dip is not just a recipe; it’s a gateway to celebrating togetherness and Mediterranean flavors. So gather your friends, grab a plate, and let’s make some beautiful memories around the table. Enjoy every bite, and until next time, happy cooking!

Whipped Herb Feta

Prep Time 10 minutes
Total Time 10 minutes
Servings 4 servings
Calories 180
A creamy, herb-infused feta dip topped with pistachios and olive oil, perfect for sharing.

Ingredients

Dairy

  • 8 oz feta block
  • 1/2 cup roasted pistachios (separate a few for topping)
  • 1 lemon lemon zest
  • 1/3 cup cilantro
  • 1/4 cup scallions
  • Olive oil for topping
  • 1/2 tsp Honey

Instructions 

  • Add pistachios to a food processor and process for 5-8 seconds.
  • Add feta, cilantro, scallions, honey, and lemon zest; process until smooth but chunky.
  • Serve with a well in the center, topped with olive oil, pistachios, and lemon zest.
  • Garnish with reserved pistachios and enjoy with pita.

Notes

For extra flavor, let the dip chill for 30 minutes before serving.
Calories: 180kcal
Cost: $12
Course: Appetizer
Cuisine: Mediterranean
Keyword: Feta

Welcome to a delightful journey of baking where we turn simple ingredients into heartwarming treats! In this article, we’ll explore the art of crafting Heart Shaped Jam Cookies that not only look delightful but taste heavenly. Whether you’re celebrating love, friendship, or simply indulging in a cozy day at home, these cookies are the perfect sweet companions. Join me, Rafael, as we blend tradition with modern flair in every bite!

Why You’ll Love This Recipe

These Heart Shaped Jam Cookies are not just any cookies; they are a celebration of flavors and love. Here are five reasons to get excited:

  • Buttery Bliss: The rich buttery flavor melts in your mouth, making each cookie a delightful experience.
  • Customizable Filling: Use your favorite jam—strawberry, raspberry, or even lemon curd—to create a unique taste every time.
  • Perfect for Gifting: These cookies are not only delicious but also visually appealing, making them a heartfelt gift for any occasion.
  • Easy to Make: With just a few simple steps, you’ll have a batch of cookies that look like they came from a bakery!
  • Fun for All Ages: Baking these cookies is a wonderful activity to share with friends and family, especially kids.

Ingredient Breakdown

Now, let’s gather our ingredients! Here’s what you’ll need to create these scrumptious cookies, along with some substitution tips:

  • 1 cup unsalted butter: Softened for easy mixing. You can substitute with coconut oil for a dairy-free version.
  • 2/3 cup granulated sugar: For sweetness. You can use brown sugar for a richer flavor.
  • 1 large egg: Binds the ingredients. Replace with a flax egg (1 tbsp ground flaxseed + 2.5 tbsp water) for vegan cookies.
  • 1 1/2 teaspoons vanilla extract: Adds depth. Consider using almond extract for a different twist.
  • 2 1/4 cups all-purpose flour: The base of the dough. For a gluten-free version, use almond flour or a gluten-free blend.
  • 1/4 teaspoon salt: Enhances flavor. Go for sea salt for a more complex taste.
  • 1/2 cup jam: Your choice of flavor. Try homemade jam for an extra special touch!

How to Make Heart Shaped Jam Cookies

Let’s get our hands dirty! Follow these steps to whip up your Heart Shaped Jam Cookies:

  1. Preheat the oven to 350°F (175°C). Line a baking sheet with parchment paper.
  2. In a large bowl, cream together the softened butter and sugar until light and fluffy.
  3. Beat in the egg and vanilla extract until well combined.
  4. In a separate bowl, whisk together the flour and salt.
  5. Gradually add the dry ingredients to the wet ingredients, mixing until a dough forms.
  6. Roll out the dough on a floured surface to about 1/4-inch thickness.
  7. Cut out heart-shaped cookies using a cookie cutter. For half the cookies, cut out a smaller heart shape in the center.
  8. Place the solid cookies on the baking sheet, spread a small amount of jam on each, then top with a cookie with the cut-out center.
  9. Bake for 12-15 minutes or until the edges are lightly golden.
  10. Remove from the oven and allow cookies to cool on the baking sheet for a few minutes before transferring to a wire rack to cool completely.

Pro Tips for Perfect Cookies

Delicious heart-shaped cookies filled with vibrant jam, viewed from the side.

Want to elevate your cookie game? Here are some expert insights:

  • Chill the Dough: If the dough feels soft, refrigerate it for 30 minutes. This helps maintain shape during baking.
  • Use Quality Jam: The flavor of your jam makes a huge difference. Opt for high-quality, fruit-forward preserves.
  • Watch the Baking Time: Keep an eye on the cookies; they can go from golden to burnt quickly!
  • Experiment with Shapes: Don’t limit yourself to hearts; use other cookie cutters to create fun shapes!
  • Store Properly: Keep your cookies in an airtight container to maintain their freshness for up to a week.
  • Let Kids Help: Involve children in cutting out shapes and filling the cookies for a fun family activity.
  • Try Different Flours: Experiment with whole wheat flour for a nuttier flavor and added health benefits.
  • Decorate with Icing: Add a personal touch by drizzling some icing on top of your cooled cookies.

Common Mistakes and Troubleshooting

Even the best bakers make mistakes! Here are some common issues and how to solve them:

  • Dough Too Sticky: If your dough is too sticky, add a little more flour, a tablespoon at a time, until it’s manageable.
  • Cookies Spread Too Much: Ensure you chill the dough before cutting and baking to prevent spreading.
  • Jam Leaks Out: Don’t overfill the cookies with jam; a small spoonful is enough to keep it contained.
  • Cookies Too Hard: If your cookies turn out hard, consider reducing the baking time slightly or checking your oven temperature.

Delicious Variations

Feeling adventurous? Here are some fun variations to try:

  • Chocolate Hazelnut Delight: Substitute the jam with chocolate hazelnut spread for a rich twist.
  • Citrus Burst: Add citrus zest (like lemon or orange) to the dough for a refreshing flavor.
  • Nutty Love: Incorporate finely chopped nuts into the dough for added texture and flavor.
  • Spiced Up: Add a pinch of cinnamon or nutmeg to the dough for a warm, spiced flavor.

Storage and Make-Ahead Instructions

Want to enjoy your cookies later? Here’s how to store them:

  • Room Temperature: Keep cookies in an airtight container for up to 1 week at room temperature.
  • Freezing: Freeze unbaked dough for up to 3 months. Thaw in the fridge before rolling and baking.
  • For Baked Cookies: Freeze baked cookies for up to 2 months. Thaw at room temperature before serving.

FAQs About Heart Shaped Jam Cookies

Got questions? Here are some frequently asked ones:

  • Can I use any type of jam for the filling? Absolutely! Feel free to get creative with your favorite flavors.
  • Can I make the buttery cookie dough ahead of time? Yes, you can prepare the dough a day in advance and refrigerate it.
  • Can I customize the flavor of the buttery sugar cookies? Definitely! Add extracts or spices to create your unique flavor profile.
  • Can I make different shapes other than hearts? Yes! Use any cookie cutter shape you like for different occasions.
  • How do I get the perfect heart shape in my Valentine’s Day thumbprint cookies? Ensure your dough is chilled and use a clean cutter for even shapes.
  • What’s the best way to store the cookies? Keep them in an airtight container to maintain freshness.
  • Can I make these cookies gluten-free? Yes, substitute all-purpose flour with a gluten-free flour blend.
  • How can I add more flavor to the cookies? Consider adding extracts or zests to enhance the overall taste.

Nutrition Tips and Dietary Adaptations

Eating well doesn’t mean you have to miss out! Here are some nutrition tips:

  • Portion Control: Enjoy these cookies in moderation to keep your treats balanced.
  • Healthier Fats: Substitute butter with avocado or coconut oil for a healthier fat option.
  • Reduced Sugar: Cut down on sugar by using naturally sweetened jams or reducing sugar in the dough.
  • Whole Grains: Use whole wheat flour for added fiber and nutrients.

Equipment Recommendations

To make your baking experience smooth, here are some essential tools:

  • Mixing Bowls: A set of mixing bowls for combining ingredients.
  • Cookie Cutters: Heart-shaped and various sizes for creative shapes.
  • Baking Sheet: A non-stick baking sheet or lined with parchment paper.
  • Cooling Rack: Essential for cooling cookies evenly after baking.

Serving Suggestions

Ready to enjoy your cookies? Here are some delightful serving ideas:

  • With Tea/Coffee: Pair your cookies with a warm cup of tea or coffee for a cozy treat.
  • On a Dessert Platter: Serve on a beautifully arranged dessert platter for parties.
  • Gift Packaging: Place cookies in a decorative box tied with a ribbon for a thoughtful gift.

In conclusion, baking Heart Shaped Jam Cookies is not just about the end product; it’s about the joy of creating something special. So, roll up your sleeves and gather your loved ones, because in the kitchen, every moment is a celebration! Happy baking, and may your cookies bring warmth and happiness to every heart they touch!

Heart Shaped Jam Cookies Recipe

Prep Time 20 minutes
Cook Time 15 minutes
Total Time 35 minutes
Servings 24 cookies
Calories 150
Delight in these charming heart-shaped cookies filled with jam, perfect for special occasions or a sweet treat.

Ingredients

Dough

  • 1 cup unsalted butter, softened
  • 2/3 cup granulated sugar
  • 1 large egg
  • 1 1/2 teaspoons vanilla extract
  • 2 1/4 cups all-purpose flour
  • 1/4 teaspoon salt
  • 1/2 cup jam (any flavor)

Instructions 

  • Preheat oven to 350°F (175°C) and line a baking sheet with parchment.
  • Cream butter and sugar until fluffy, then mix in egg and vanilla.
  • Whisk flour and salt, then combine with wet ingredients to form dough.
  • Roll out dough, cut heart shapes, and cut smaller hearts in half.
  • Assemble cookies with jam, bake for 12-15 minutes, then cool.

Notes

Chill the dough for easier handling if needed.
Calories: 150kcal
Cost: $15
Course: Dessert
Cuisine: American
Keyword: cookies

Welcome to a Mediterranean Feast!

Cooking is more than just a means to an end; it’s a celebration of flavors, culture, and togetherness! With these vibrant mini veggie flatbreads, you can transport your taste buds straight to the sun-drenched shores of the Mediterranean in no time. Loaded with fresh vegetables, fragrant herbs, and a delightful cheese topping, this recipe is perfect for family gatherings or a cozy night in. Let’s dive into the world of delicious Mediterranean cooking!

Why You’ll Adore This Recipe

These mini veggie flatbreads are not just a meal; they are a canvas for creativity, flavor, and health. Here are five reasons to love this recipe:

  • Quick & Easy: With pre-made flatbreads, this recipe comes together in a matter of minutes, making it perfect for busy weeknights.
  • Flavor Explosion: The combination of garlic, fresh vegetables, and melted cheese creates a symphony of flavors that will delight your palate.
  • Health-Conscious: Packed with nutritious veggies, this dish is a wholesome option for a satisfying meal.
  • Customizable: You can easily modify toppings based on seasonal produce or personal preferences, ensuring each batch is uniquely yours.
  • Family-Friendly: Kids love getting involved in the kitchen, and these flatbreads are fun to assemble together!

Ingredient Breakdown

Let’s explore the key ingredients for our mini veggie flatbreads, along with some tasty substitutions to suit your taste or dietary needs:

  • Mini Flatbreads or Naan Bread (4 pieces): The foundation of our recipe. Using pre-made mini flatbreads, naan, or pita makes this meal quick and effortless. Look for ones about 5-6 inches in diameter. Substitution: Use whole-wheat for extra fiber!
  • Extra Virgin Olive Oil (2 tablespoons): A high-quality olive oil helps achieve a crispy, golden-brown crust and infuses the garlic flavor. Substitution: Avocado oil for a milder taste.
  • Garlic (2 cloves, minced): This aromatic ingredient elevates the flatbreads with its rich flavor. Substitution: Garlic powder works in a pinch, but fresh is best.
  • Marinara or Pizza Sauce (1/2 cup): Adds moisture and acidity, enhancing the flavor profile. Substitution: Homemade tomato sauce for a fresher taste.
  • Shredded Low-Moisture Mozzarella Cheese (1 1/2 cups): Melts beautifully without making the flatbreads soggy. Substitution: Vegan cheese for a plant-based alternative.
  • Red Bell Pepper (1/2, finely diced): Brings sweetness and color. Substitution: Yellow or orange bell pepper for a different flavor.
  • Red Onion (1/4, thinly sliced): Sweetens when cooked, adding depth. Substitution: Green onions for a milder taste.
  • Zucchini (1/2, finely diced): Mild and tender, it complements the other veggies. Substitution: Eggplant for a different texture.
  • Cherry Tomatoes (1/2 cup, halved): Bursts with juicy flavor when roasted. Substitution: Sun-dried tomatoes for a concentrated flavor.
  • Italian Seasoning (1 teaspoon): A blend of herbs adding a savory touch. Substitution: Individual herbs like basil and oregano can be used.
  • Salt and Black Pepper (to taste): Essential for enhancing flavors.
  • Fresh Basil or Parsley (for garnish, optional): Adds freshness and color to your dish.

Step-by-Step Instructions

Side view of small, delicious flatbreads topped with fresh vegetables.

Follow these detailed, step-by-step instructions to ensure your mini veggie flatbreads turn out perfectly crispy, cheesy, and delicious every single time:

  • Preheat the oven: Preheat your oven to 400°F (200°C). A hot oven ensures the flatbreads cook quickly and develop a crispy crust.
  • Prepare a baking sheet: Line a large baking sheet with parchment paper for easy cleanup and to prevent sticking.
  • Infuse the oil: In a small bowl, combine 2 tablespoons of extra virgin olive oil with 2 minced garlic cloves. Let sit to infuse the oil with garlic flavor.
  • Prep the vegetables: Wash and dry all vegetables. Finely dice the red bell pepper and zucchini, thinly slice the red onion, and halve the cherry tomatoes. Combine in a medium bowl.
  • Season the veggies: Drizzle the vegetables with olive oil, Italian seasoning, salt, and black pepper. Toss until evenly coated.
  • Brush the flatbreads: Place the mini flatbreads on the baking sheet. Brush each with garlic-infused oil, covering the edges to prevent sogginess.
  • Pre-bake the flatbreads: Bake for 3-4 minutes to create a slight seal on the crust.
  • Assemble the flatbreads: Spread marinara sauce evenly over each flatbread, then sprinkle with three-quarters of the mozzarella cheese. Distribute the seasoned vegetables evenly, followed by the remaining cheese.
  • Bake until golden: Return to the oven and bake for an additional 8-12 minutes, until cheese is melted and bubbly.
  • Garnish and serve: Allow to cool slightly, garnish with fresh herbs, slice, and serve immediately!

Expert Tips for Success

Here are some expert tips to ensure your mini veggie flatbreads come out perfectly every time:

  • Use room temperature ingredients: This helps ensure even cooking and better flavor.
  • Don’t overload the toppings: A single layer keeps the flatbreads crispy and toppings cooked.
  • Experiment with flavors: Try different herbs or sauces to personalize the flavor profile.
  • Let the cheese cool slightly: This helps it set, making the flatbreads easier to handle.
  • Store leftovers properly: Place in an airtight container in the fridge to maintain freshness.
  • Make a double batch: These freeze beautifully! Just reheat in the oven for a quick meal.
  • Consider a cheese blend: Mixing mozzarella with provolone or fontina can add depth to the flavor.
  • Garnish creatively: Fresh herbs, a drizzle of balsamic glaze, or a sprinkle of chili flakes can elevate the dish.

Common Mistakes and Troubleshooting

Every cook makes mistakes, so let’s troubleshoot some common issues that may arise:

  • Soggy flatbreads: Ensure the flatbreads are pre-baked and avoid overloading them with toppings.
  • Burnt edges: Keep an eye on them during the last baking stage; every oven is different!
  • Cheese not melting properly: Use low-moisture mozzarella for the best melting results.
  • Veggies undercooked: Dice vegetables small enough to ensure they cook through in the baking time.

Delicious Variations

Feel free to get creative with these variations of mini veggie flatbreads:

  • Caprese Delight: Add sliced fresh mozzarella, tomatoes, and basil for a classic Caprese twist.
  • Spicy Mediterranean: Top with diced jalapeños or crushed red pepper flakes for a kick.
  • Mediterranean Hummus: Spread hummus instead of sauce for a creamy, flavorful base.
  • Meat Lover’s Flatbread: Add cooked Italian sausage or prosciutto for a heartier option.

Storage and Make-Ahead Instructions

These mini veggie flatbreads are perfect for meal prep! Here’s how to store and prepare them in advance:

  • Refrigeration: Store leftovers in an airtight container in the refrigerator for up to 3 days.
  • Freezing: To freeze, wrap individual flatbreads in plastic wrap and then foil. They can last up to 2 months in the freezer.
  • Make-ahead tips: Prepare the toppings in advance and assemble flatbreads just before baking for fresh meals any night of the week.

Nutrition Tips and Dietary Adaptations

For those looking to enhance health benefits, consider these nutrition tips:

  • Whole grain options: Opt for whole-grain flatbreads for added fiber and nutrients.
  • Low-fat cheese: Use low-fat cheese to reduce calories without sacrificing flavor.
  • Vegan adaptations: Choose plant-based cheese and skip the animal products for a vegan-friendly dish.
  • Add more veggies: Feel free to load up on any seasonal vegetables for a nutrient boost!

Essential Equipment Recommendations

Here’s what you need to create your mini veggie flatbreads:

  • Baking Sheet: A large baking sheet lined with parchment paper for easy cleanup.
  • Mixing Bowls: A couple of medium-sized mixing bowls for prepping the vegetables and sauces.
  • Pastry Brush: For evenly spreading the garlic-infused oil on the flatbreads.
  • Sharp Knife: For finely dicing and slicing the vegetables.

Serving Suggestions

Serve your mini veggie flatbreads with these delightful sides:

  • Mixed Greens Salad: A refreshing salad with a light vinaigrette complements the richness of the flatbreads.
  • Roasted Vegetables: Roasted veggies like asparagus or Brussels sprouts make a great side.
  • Olive Tapenade: A savory tapenade provides a delicious dip for the flatbreads.

Frequently Asked Questions

Here are some common questions about making mini veggie flatbreads:

  • Can I use whole-wheat flatbreads? Absolutely! Whole-wheat flatbreads add fiber and nutrients.
  • How do I prevent soggy flatbreads? Pre-bake them and avoid overloading toppings.
  • Can I make these vegetarian? Yes, simply use plant-based cheese and avoid any meat toppings.
  • How long to bake? Bake for a total of 11-16 minutes, checking for golden cheese.
  • Can I freeze leftovers? Yes, wrap them tightly and freeze for up to 2 months.
  • What vegetables work best? Almost any veggie works! Use your favorites or what’s in season.
  • Can I make the dough from scratch? Yes, but using pre-made flatbreads makes this recipe quick and easy.
  • How can I spice it up? Add jalapeños or your favorite hot sauce for a spicy kick!

In conclusion, these mini veggie flatbreads are a celebration of Mediterranean flavors, perfect for any occasion. Whether you enjoy them as a light meal or as a delightful appetizer, they’re sure to bring joy to your table. So grab your ingredients, invite over some friends or family, and let’s create delicious memories together. Happy cooking!

Mini Veggie Flatbreads Recipe

Prep Time 10 minutes
Cook Time 15 minutes
Total Time 25 minutes
Servings 4 pieces
Calories 350
A quick and flavorful vegetarian dish featuring crispy flatbreads topped with fresh vegetables, cheese, and herbs, perfect for a satisfying snack or light meal.

Ingredients

Base

  • 4 pieces Mini Flatbreads or Naan Bread (About 5-6 inches in diameter)
  • 2 tablespoons Extra Virgin Olive Oil (For brushing and infusing with garlic)
  • 2 cloves Garlic (Minced)
  • 0.5 cup Marinara or Pizza Sauce (Store-bought or homemade)
  • 1.5 cups Shredded Low-Moisture Mozzarella Cheese (Divided for topping)
  • 0.5 red Red Bell Pepper (Finely diced)
  • 0.25 red Red Onion (Thinly sliced)
  • 0.5 zucchini Zucchini (Finely diced)
  • 0.5 cup Cherry Tomatoes (Halved)
  • 1 teaspoon Italian Seasoning
  • to taste Salt and Black Pepper (Seasoning for vegetables)

Garnish

  • optional Fresh Basil or Parsley (For garnish)

Instructions 

  • Preheat oven to 400°F (200°C) and line a baking sheet with parchment paper.
  • Mix olive oil and minced garlic; let sit for a few minutes. Toss diced vegetables with seasoning, salt, and pepper.
  • Brush flatbreads with garlic-infused oil and bake for 3-4 minutes to crisp the crust.
  • Spread sauce on flatbreads, sprinkle with 1/2 of cheese, add vegetables, then top with remaining cheese.
  • Bake for 8-12 minutes until cheese is bubbly and golden. Garnish with herbs, slice, and serve.

Notes

Ensure vegetables are evenly distributed for balanced flavor and texture.
Calories: 350kcal
Cost: $15
Course: Main Course, Snack
Cuisine: Italian
Keyword: Flatbread, Vegetables