Author

rafael

Browsing

Start Your Day with a Taste of Paradise

Welcome to the delightful world of Coconut Cream Pancakes! These fluffy, creamy treats are not just breakfast; they’re a culinary hug for your soul, infused with the sweet essence of coconut and the warmth of sunshine. Imagine biting into a stack of pancakes that are light and fluffy, perfectly paired with the tropical flavor of coconut milk. Whether you’re serving them at a family brunch or savoring them solo on a quiet morning, these pancakes are bound to brighten your day. Let’s dive into the magic of this recipe and discover how you can bring a slice of paradise to your breakfast table!

Why You’ll Love This Recipe

  • Fluffy Texture: The combination of coconut milk and baking powder creates pancakes that are irresistibly light and fluffy.
  • Tropical Flavor: Each bite bursts with the rich and sweet flavor of coconut, reminding you of sun-kissed beaches.
  • Quick and Easy: With simple ingredients and straightforward steps, you can whip up these pancakes in under 30 minutes!
  • Customizable: This recipe serves as a fantastic base for various toppings and mix-ins, allowing you to express your creativity.
  • Healthier Option: Using coconut oil and milk elevates these pancakes, giving them a nutritious twist while still being indulgent.

Ingredient Breakdown

Let’s explore the star ingredients that make these pancakes a must-try:

  • All-Purpose Flour: Provides the structure for the pancakes. You can use whole wheat flour for a healthier option.
  • Baking Powder: This is what makes the pancakes rise and become fluffy. Make sure it’s fresh for the best results.
  • Salt: Just a pinch enhances all the flavors and balances the sweetness.
  • Sugar: Adds a subtle sweetness; feel free to adjust the amount to your taste.
  • Coconut Milk: The essence of this recipe! Full-fat coconut milk offers the richest flavor, but you can use light coconut milk for a lighter version.
  • Egg: Acts as a binder, helping the pancakes hold their shape. For a vegan option, consider using a flax egg (1 tablespoon ground flaxseed mixed with 2.5 tablespoons water).
  • Coconut Oil: Adds moisture and a hint of coconut flavor. You can also use butter or another oil if preferred.
  • Vanilla Extract: A splash of vanilla elevates the flavor profile beautifully.
  • Shredded Coconut (optional): For an extra coconut kick, you can fold in shredded coconut into the batter.

Pro Tips for Coconut Cream Pancakes
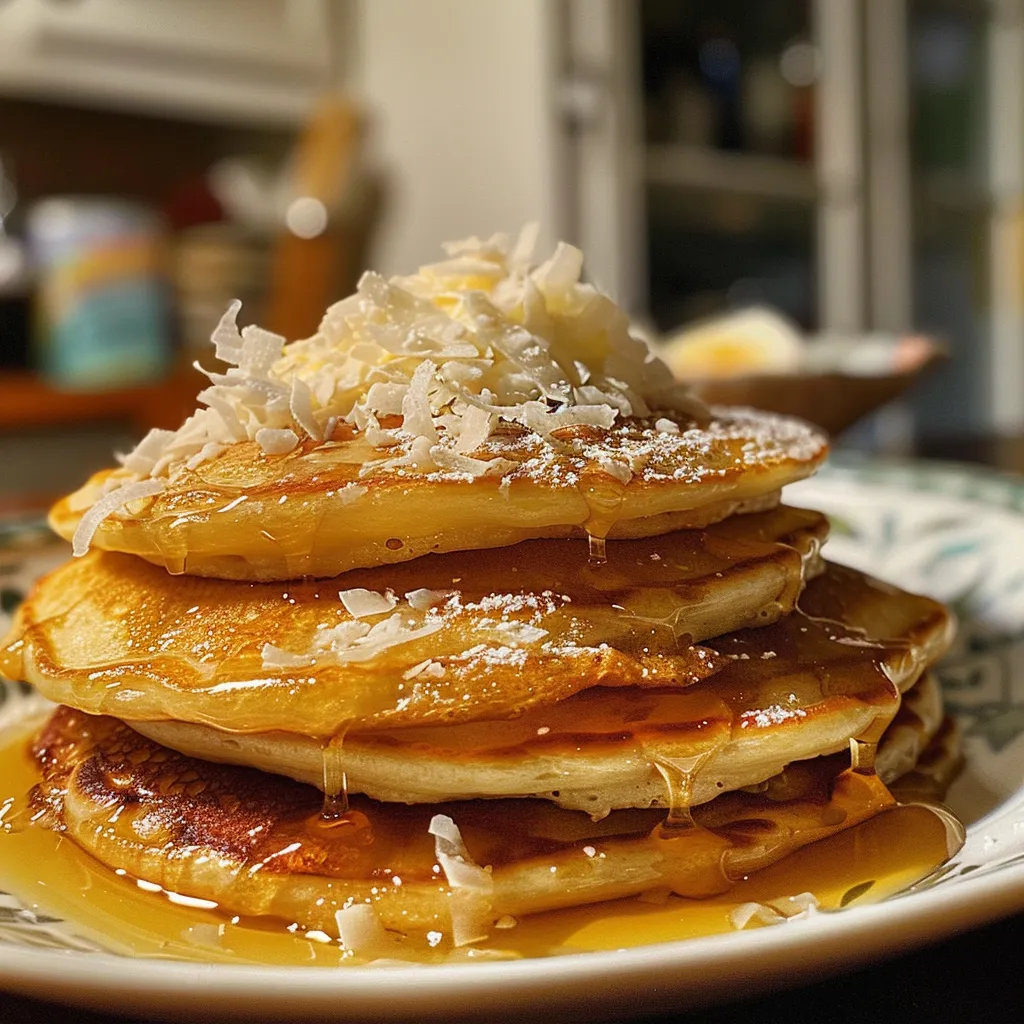
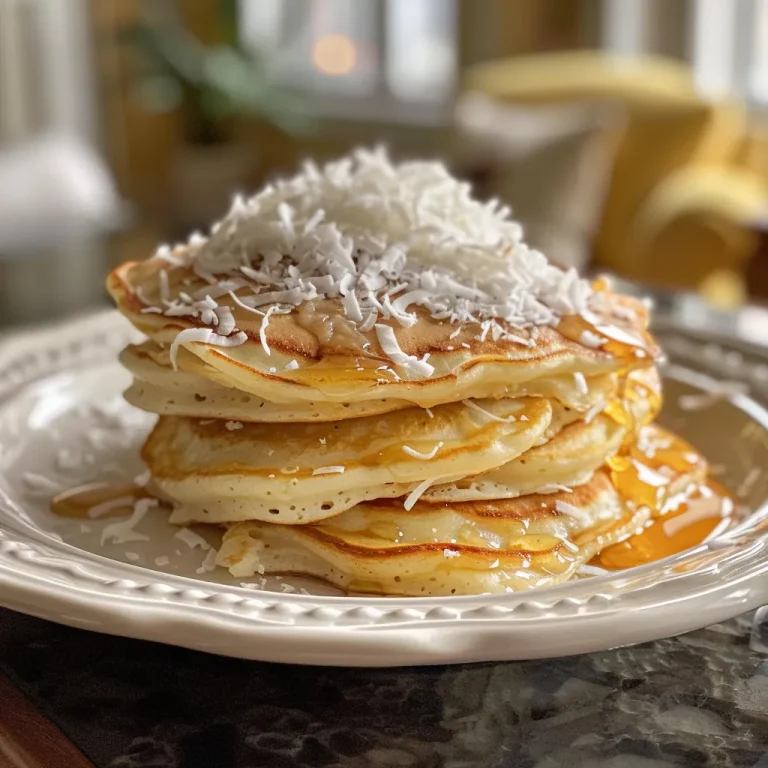
Juicy coconut cream pancakes topped with shredded coconut and drizzled with syrup.
  • Don’t Overmix: When combining wet and dry ingredients, stir just until combined to keep your pancakes fluffy. A few lumps are okay!
  • Preheat Your Skillet: Make sure the skillet is hot enough before pouring in the batter to achieve that perfect golden-brown color.
  • Use Fresh Ingredients: Always check the freshness of your baking powder and coconut milk to ensure the best results.
  • Experiment with Toppings: Try pairing with fresh fruits like bananas or berries, a drizzle of maple syrup, or even a dollop of whipped cream for a decadent touch.
  • Keep Warm: If making multiple batches, keep the cooked pancakes warm in a low oven (around 200°F) until serving.
  • Perfect Serving Size: A 1/4 cup of batter per pancake is ideal for achieving the perfect thickness.
  • Flavor Enhancements: Consider adding spices like cinnamon or nutmeg to the batter for an extra depth of flavor.
  • Rest the Batter: Letting the batter rest for about 10 minutes can help improve the texture.
  • Storage: Leftovers can be stored in an airtight container in the fridge for up to three days, perfect for quick breakfast reheating!

Common Mistakes and Troubleshooting

Here are some common pitfalls to avoid when making your coconut cream pancakes:

  • Pancakes are Flat: Make sure your baking powder is fresh and that you’re not overmixing the batter.
  • Pancakes are Tough: Overmixing can lead to dense and chewy pancakes; mix just until combined.
  • Burnt Pancakes: Ensure your skillet is at medium heat; adjust as needed to prevent burning.
  • Too Sweet or Not Sweet Enough: Adjust the sugar to suit your taste preferences; remember that toppings will also add sweetness.

Delicious Variations

Feeling adventurous? Here are some tasty variations to give your coconut cream pancakes a twist:

  • Vegan Coconut Cream Pancakes: Substitute the egg with a flax egg and use plant-based coconut milk for a completely vegan-friendly dish.
  • Chocolate Coconut Pancakes: Fold in mini chocolate chips or cocoa powder into the batter for a decadent treat.
  • Tropical Fruit Pancakes: Add diced pineapple or mango to the batter for a refreshing twist.
  • Nutty Coconut Pancakes: Mix in chopped nuts like walnuts or pecans for added crunch and flavor.

Storage and Make-Ahead Instructions

Want to enjoy these pancakes even when you’re busy? Here’s how you can prep ahead:

  • Make Ahead: Prepare the batter the night before and store it in the fridge. Just give it a good stir before cooking.
  • Freezing: Cooked pancakes can be frozen. Lay them flat in a single layer on a baking sheet, freeze until solid, then transfer to a zip-top bag. Reheat in the toaster or microwave.
  • Storing: Keep leftover pancakes in an airtight container in the refrigerator for up to three days. Reheat gently on the stove or in the microwave.

Nutritional Information & Dietary Adaptations

These pancakes not only taste good but can also fit into various dietary needs:

  • Gluten-Free: Use a gluten-free flour blend to make this recipe suitable for those with gluten sensitivities.
  • Lower Sugar: Reduce the sugar or opt for a natural sweetener like honey or maple syrup.
  • Healthy Fats: Coconut oil is a great source of healthy fats. You can substitute it with avocado oil for a different flavor profile.

Equipment Recommendations

To ensure your pancake-making experience is smooth, here’s what you’ll need:

  • Mixing Bowls: A set of mixing bowls in various sizes will help you keep your ingredients organized.
  • Whisk: A good whisk is essential for blending your wet and dry ingredients smoothly.
  • Skillet or Griddle: A non-stick skillet or griddle is ideal for evenly cooking your pancakes without sticking.
  • Measuring Cups and Spoons: Accurate measurements are key to achieving the perfect batter consistency.

Serving Suggestions

How to serve your coconut cream pancakes? Consider these delightful ideas:

  • Fresh Fruit: Top with sliced bananas, strawberries, or kiwi for a refreshing contrast.
  • Maple Syrup: A drizzle of pure maple syrup adds sweetness that complements the coconut flavor perfectly.
  • Whipped Cream: A dollop of whipped cream makes for an indulgent touch that elevates the dish.
  • Coconut Flakes: Sprinkle toasted coconut flakes on top for extra flavor and texture.

Frequently Asked Questions

Here are some common questions about coconut cream pancakes:

  • Can I make this recipe gluten-free? Yes! Use a gluten-free flour blend for a delicious alternative.
  • What can I substitute for coconut milk? Almond milk or oat milk can work, but they will alter the flavor slightly.
  • How do I prevent sticking? Use a well-seasoned non-stick skillet and add a little coconut oil for cooking.
  • Can I add spices to the batter? Absolutely! Cinnamon, nutmeg, or cardamom can add a lovely warmth to your pancakes.
  • What’s the best way to reheat leftover pancakes? Reheat in a skillet over low heat or in the microwave for a few seconds until warm.
  • Can I double this recipe? Yes! Simply double the ingredients and cook them in batches.
  • How long do leftovers last? Stored in an airtight container in the refrigerator, they can last up to three days.
  • Can I freeze these pancakes? Yes! Cooked pancakes freeze well and can be reheated directly from the freezer.

Now that you have the ultimate guide to Coconut Cream Pancakes, it’s time to get cooking! Gather your ingredients, invite a friend over, and share the joy of creating something delicious together. Remember, cooking is a celebration of life, culture, and creativity. Enjoy every moment and every bite! Happy cooking!

Coconut Cream Pancakes

Prep Time 10 minutes
Cook Time 10 minutes
Total Time 20 minutes
Servings 4 pancakes
Calories 250
Fluffy pancakes infused with coconut flavor, perfect for a tropical breakfast treat.

Ingredients

Dry ingredients

  • 1 cup all-purpose flour
  • 1 tablespoon baking powder
  • 1/2 teaspoon salt
  • 2 tablespoons sugar

Wet ingredients

  • 1 cup coconut milk
  • 1 large egg egg
  • 2 tablespoons melted coconut oil (plus more for cooking)
  • 1 teaspoon vanilla extract

Optional

  • 1/2 cup shredded coconut (optional)

Instructions 

  • Mix dry ingredients in a bowl.
  • Whisk wet ingredients in a separate bowl.
  • Combine wet and dry, fold in coconut if using.
  • Heat skillet with coconut oil, pour batter, cook until bubbles form, then flip.
  • Cook until golden, serve warm.

Notes

For extra flavor, top with toasted coconut or fresh fruit.
Calories: 250kcal
Cost: $10
Course: Breakfast
Cuisine: Tropical
Keyword: coconut

Welcome to a Culinary Adventure: The Joy of Baking Rosemary Garlic Focaccia

Ah, the delightful aroma of freshly baked bread wafting through the kitchen! Join me, Rafael, as we explore the wonderful world of homemade rosemary garlic focaccia. This Italian classic is not just bread; it’s a celebration of flavors, a canvas for creativity, and a perfect dish for sharing with loved ones. In this guide, you’ll discover how to create a golden, crusty focaccia that’s bursting with the fragrant essence of rosemary and garlic. Let’s dive into this culinary journey together!

Why You’ll Fall in Love with This Recipe

There’s something magical about creating bread from scratch, and this rosemary garlic focaccia is no exception. Here are just a few reasons to embrace this recipe:

  • Simple Ingredients: Uses basic pantry staples like flour, water, and yeast – no fancy equipment needed!
  • Foolproof Recipe: Even if you’re a beginner, this recipe is virtually error-free, ensuring delicious results every time.
  • Versatile Dish: Perfect as an appetizer, side dish, or even a sandwich base – the possibilities are endless!
  • Impressive Presentation: The dimples filled with olive oil and garlic create a stunning visual appeal that’s sure to impress guests.
  • Perfect for Sharing: This recipe yields a generous loaf, making it ideal for gatherings and family meals.

Gather Your Ingredients: A Detailed Breakdown

Before we start baking, let’s gather all the necessary ingredients for our rosemary garlic focaccia:

  • 4 cups (480 g) all-purpose flour: For a chewier texture, feel free to substitute with bread flour.
  • 1 ½ cups (360 ml) warm water: The perfect temperature is about 105°F (40°C) to activate the yeast.
  • 2 ¼ teaspoons (7 g) instant yeast: A single packet will do the trick!
  • 2 teaspoons sugar: This will feed the yeast and add a hint of sweetness to the bread.
  • 2 teaspoons kosher salt: Essential for flavor – don’t skip this!
  • ¼ cup (60 ml) extra-virgin olive oil: Plus more for greasing the pan and drizzling on top.
  • 3–4 cloves garlic: Thinly sliced or roasted whole, depending on your preference.
  • 2 tablespoons fresh rosemary: Chopped, with additional sprigs for garnishing.
  • 2–3 tablespoons extra-virgin olive oil: To drizzle before baking.
  • 1 teaspoon flaky sea salt: Such as Maldon, for that perfect finishing touch.

Step-by-Step Instructions: Making Your Focaccia

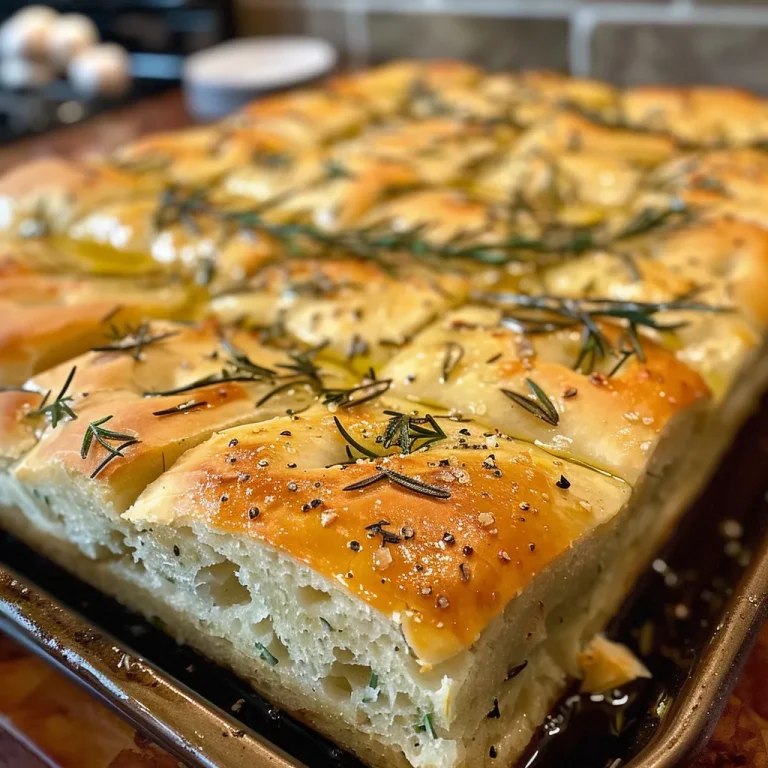
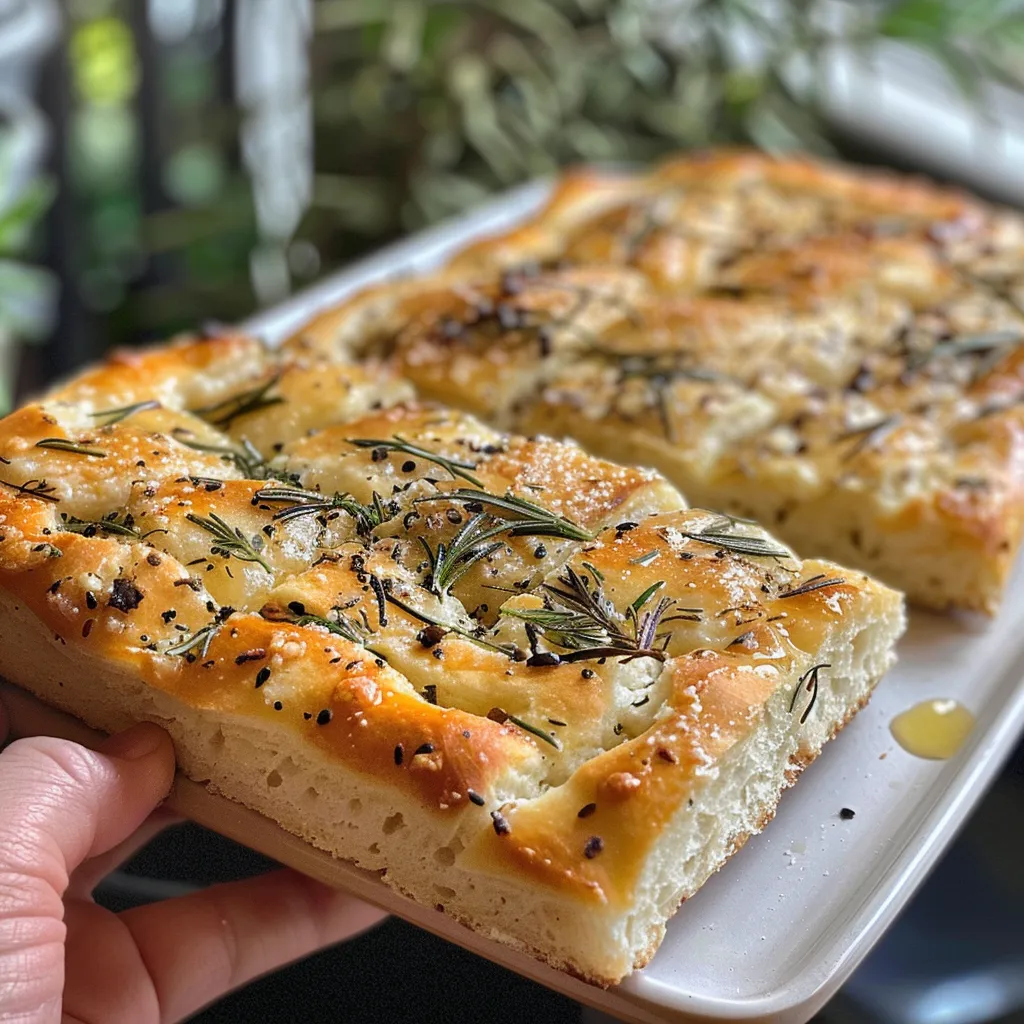
Side perspective of fluffy rosemary garlic focaccia topped with herbs and garlic slices.

Now that we have all the ingredients, let’s roll up our sleeves and get baking!

  1. Activate Your Yeast: In a large mixing bowl, combine the warm water, sugar, and yeast. Let it sit for 5–10 minutes until it becomes frothy.
  2. Mix the Dough: Add the flour, salt, and olive oil to the yeast mixture. Stir until a shaggy dough forms, then transfer it to a lightly floured surface. Knead for 8–10 minutes until the dough is smooth and elastic.
  3. First Rise: Lightly oil a large bowl, place the dough inside, and cover it with plastic wrap or a damp towel. Let it rise in a warm spot for 1–2 hours, or until doubled in size.
  4. Prepare the Baking Pan: Generously oil a 9×13-inch baking pan or a large cast-iron skillet. Punch down the risen dough and stretch it to fit the pan.
  5. Second Rise: Cover the dough and let it rest for another 30–40 minutes until it puffs up again. Preheat your oven to 425°F (220°C).
  6. Dimpling and Topping: With oiled fingers, press deep dimples all over the surface of the dough. Drizzle with olive oil, scatter rosemary and garlic evenly, and sprinkle with flaky sea salt.
  7. Bake to Perfection: Place the pan in the preheated oven and bake for 20–25 minutes, until the focaccia is golden brown on top and crisp at the edges. Remove from the oven and allow to cool slightly before slicing.

Expert Pro Tips for Perfect Focaccia

Before you get baking, here are some expert tips to ensure your focaccia turns out perfectly:

  • Use Fresh Ingredients: Always use fresh flour and yeast to guarantee the best rising action.
  • Kneading Technique: Knead until the dough is smooth; it should spring back when poked.
  • Warm Environment: If your kitchen is cool, consider preheating your oven briefly and turning it off before rising the dough.
  • Don’t Rush the Rises: Allow the dough to rise fully; this enhances the flavor and texture.
  • Experiment with Herbs: Feel free to mix in other herbs like thyme or oregano for a twist on flavor.
  • Perfect Dimpling: Press deeply but not all the way through the dough to create pockets for the olive oil.
  • Watch the Bake Time: Ovens vary, so keep an eye on your focaccia to prevent over-baking.
  • Let it Rest: Allow the focaccia to cool slightly in the pan before transferring it to a wire rack.

Common Mistakes and Troubleshooting

Even the best bakers can run into issues. Here’s how to troubleshoot common problems:

  • Dough Not Rising: Make sure your yeast is fresh. If the water was too hot, it could kill the yeast.
  • Dense Bread: Kneading insufficiently can lead to dense bread. Ensure you knead until smooth and elastic.
  • Too Oily or Dry: Adjust the olive oil based on your preference; however, some oil is needed for flavor and texture.
  • Burnt Bottom: If your focaccia is browning too quickly, consider placing it on a higher rack in the oven.

Delicious Variations to Try

Feeling adventurous? Here are some fun variations to customize your focaccia:

  • Sun-Dried Tomato and Basil: Add chopped sun-dried tomatoes and fresh basil for a Mediterranean twist.
  • Olive Tapenade: Spread a layer of olive tapenade over the dough before baking for a burst of flavor.
  • Caramelized Onion Focaccia: Top with caramelized onions and a sprinkle of goat cheese for a gourmet touch.
  • Cheesy Focaccia: Incorporate shredded mozzarella or parmesan cheese into the dough for extra richness.

Storage and Make-Ahead Instructions

Want to enjoy your focaccia later? Here’s how to store it:

  • Room Temperature: Store in an airtight container at room temperature for up to 3 days.
  • Freezing: To freeze, wrap the cooled focaccia tightly in plastic wrap and place it in a freezer bag. It can be frozen for up to 3 months.
  • Reheating: To reheat, thaw in the refrigerator overnight, then warm in the oven at 350°F (175°C) for 10–15 minutes.

Frequently Asked Questions

Let’s address some common questions about making focaccia:

  • Can I use whole wheat flour? Yes, but combine it with all-purpose flour for the best texture.
  • What can I use instead of rosemary? Thyme, oregano, or sage are wonderful alternatives.
  • Is focaccia gluten-free? You can use a gluten-free flour blend, but results may vary.
  • How do I know when it’s done? The focaccia should be golden brown and sound hollow when tapped on the bottom.
  • Can I make it without garlic? Absolutely! You can omit the garlic for a simple herb focaccia.
  • Why is my focaccia too flat? It may not have risen enough; ensure you allow adequate rising time.
  • Can I add cheese to the dough? Yes, shredded cheese can be added for a cheesy focaccia.
  • How do I serve focaccia? It’s delicious on its own, with dips, or as a base for sandwiches.

Nutritional Tips and Dietary Adaptations

This focaccia can be tailored to fit various dietary preferences:

  • Vegan Option: This recipe is naturally vegan, just ensure your toppings are also plant-based.
  • Low-Sodium Variations: Reduce or omit the salt for a lower sodium version.
  • Whole Grain Substitution: Experiment with spelt or whole wheat flour for added fiber.

Essential Equipment Recommendations

Here’s what you’ll need to create your focaccia:

  • Mixing Bowl: A large bowl to mix and rise your dough.
  • Baking Pan: A 9×13-inch pan or cast-iron skillet works best.
  • Kitchen Towel: For covering the dough during rising.
  • Measuring Cups and Spoons: Accurate measurements are key to perfect bread.
  • Oven Mitts: Protect your hands when removing the hot focaccia.

Serving Suggestions for Your Focaccia

How you serve your focaccia can elevate the experience:

  • With Dips: Pair with balsamic vinegar, olive oil, or pesto for dipping.
  • As a Side: Serve alongside soups, salads, or pasta dishes.
  • For Sandwiches: Use slices for delicious sandwiches filled with your favorite ingredients.

In conclusion, making your own rosemary garlic focaccia is not just about baking bread; it’s about creating a delicious experience to share with family and friends. So gather your ingredients, embrace the process, and enjoy the joy of baking. Bon appétit!

Homemade Rosemary Garlic Focaccia

Prep Time 20 minutes
Cook Time 25 minutes
Total Time 45 minutes
Servings 8 slices
Calories 250
Enjoy this flavorful homemade focaccia infused with garlic and rosemary, perfect as a snack or side dish.

Ingredients

Dough

  • 4 cups all-purpose flour (or bread flour for chewier texture)
  • 1.5 cups warm water (about 105°F / 40°C)
  • 2.25 teaspoons instant yeast (1 packet)
  • 2 teaspoons sugar (to feed the yeast)
  • 2 teaspoons kosher salt
  • 0.25 cup extra-virgin olive oil (plus more for greasing and topping)
  • 3-4 cloves garlic, thinly sliced or roasted whole
  • 2 tablespoons fresh rosemary, chopped (plus sprigs for garnish)
  • 2-3 tablespoons extra-virgin olive oil
  • 1 teaspoon flaky sea salt (Maldon or similar)

Instructions 

  • Mix warm water, sugar, and yeast; let sit 5–10 minutes until frothy.
  • Add flour, salt, and olive oil; knead until smooth. Let rise 1–2 hours until doubled.
  • Transfer dough to oiled pan, stretch to fit, and let rest 30–40 minutes. Preheat oven to 425°F (220°C).
  • Deeply dimple the dough, drizzle with olive oil, scatter garlic and rosemary, then sprinkle sea salt.
  • Bake 20–25 minutes until golden and crisp. Cool slightly before slicing.

Notes

For extra flavor, roast garlic before adding.
Calories: 250kcal
Cost: $15
Course: Side Dish
Cuisine: Italian
Keyword: focaccia

Welcome to Your New Breakfast Favorite!

Are you ready to start your day with a burst of flavor and nutrition? Our Egg and Spinach Breakfast Wrap is not just a meal; it’s a celebration of health, freshness, and Mediterranean flair. Packed with vibrant ingredients and colorful veggies, this wrap offers a delightful way to enjoy your mornings. Whether you’re rushing out the door or taking a leisurely breakfast, this recipe is designed to cater to every lifestyle. In under 30 minutes, you’ll be savoring the taste of fresh spinach, succulent eggs, and a medley of flavors that will make your taste buds dance. Let’s dive into the details of crafting this delightful wrap!

Why You’ll Love This Recipe

  • Quick and Easy: In just 15 minutes, you can create a delicious breakfast wrap that’s perfect for busy mornings.
  • Nutritious Ingredients: This wrap is loaded with protein from eggs and vitamins from spinach, making it a healthy choice.
  • Customizable: Add your favorite ingredients such as cheese, avocado, or other veggies to make it your own.
  • Meal Prep Friendly: Prepare the filling ahead of time for a quick grab-and-go breakfast during the week.
  • Deliciously Satisfying: The combination of fresh ingredients creates a flavor explosion that you’ll want to repeat every morning!

Ingredients Breakdown

Let’s take a closer look at the ingredients you’ll need for this scrumptious wrap. Each component not only enhances the flavor but also adds nutritional value.

  • 2 large eggs: The star of the show! Eggs are rich in protein and essential vitamins.
  • 1/4 cup fresh spinach leaves: A powerhouse of nutrients, spinach adds a vibrant green color and a fresh taste.
  • 1 whole-wheat tortilla: A healthy base that provides fiber and keeps you feeling full.
  • 2 tbsp diced tomatoes: Juicy tomatoes add moisture and a slight tang to the wrap.
  • 2 tbsp diced red bell pepper: Sweet and crunchy, bell peppers provide a pop of color and flavor.
  • 1 tbsp diced red onion: Adds a sharp, savory element that complements the eggs beautifully.
  • Salt and pepper to taste: Essential for enhancing the overall flavors.
  • 1/4 cup shredded cheddar cheese (optional): For those who love a cheesy twist, this is the perfect addition.
  • Cooking spray or a small amount of olive oil: Used to prevent sticking while cooking.

Pro Tips for a Perfect Wrap

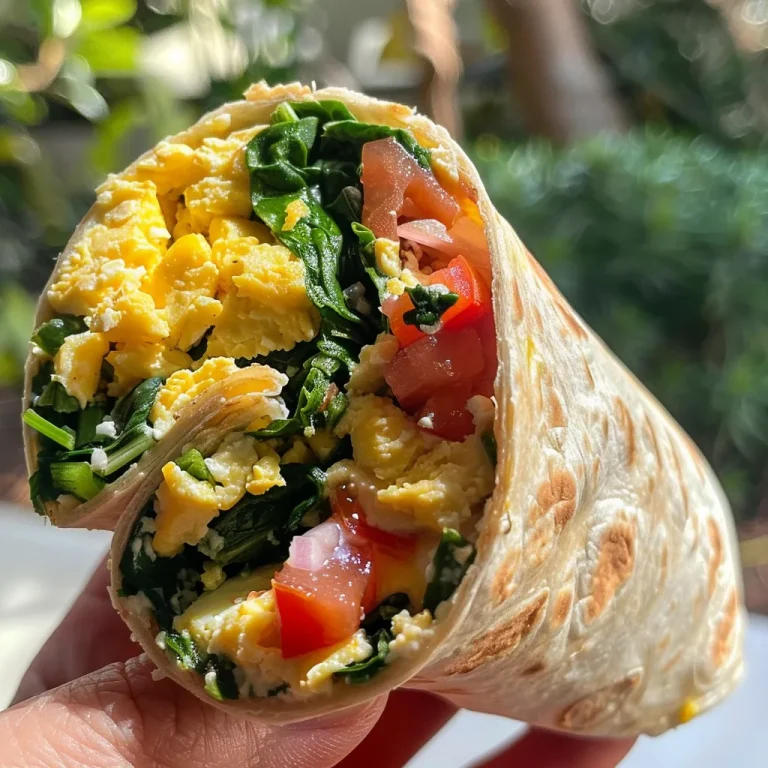
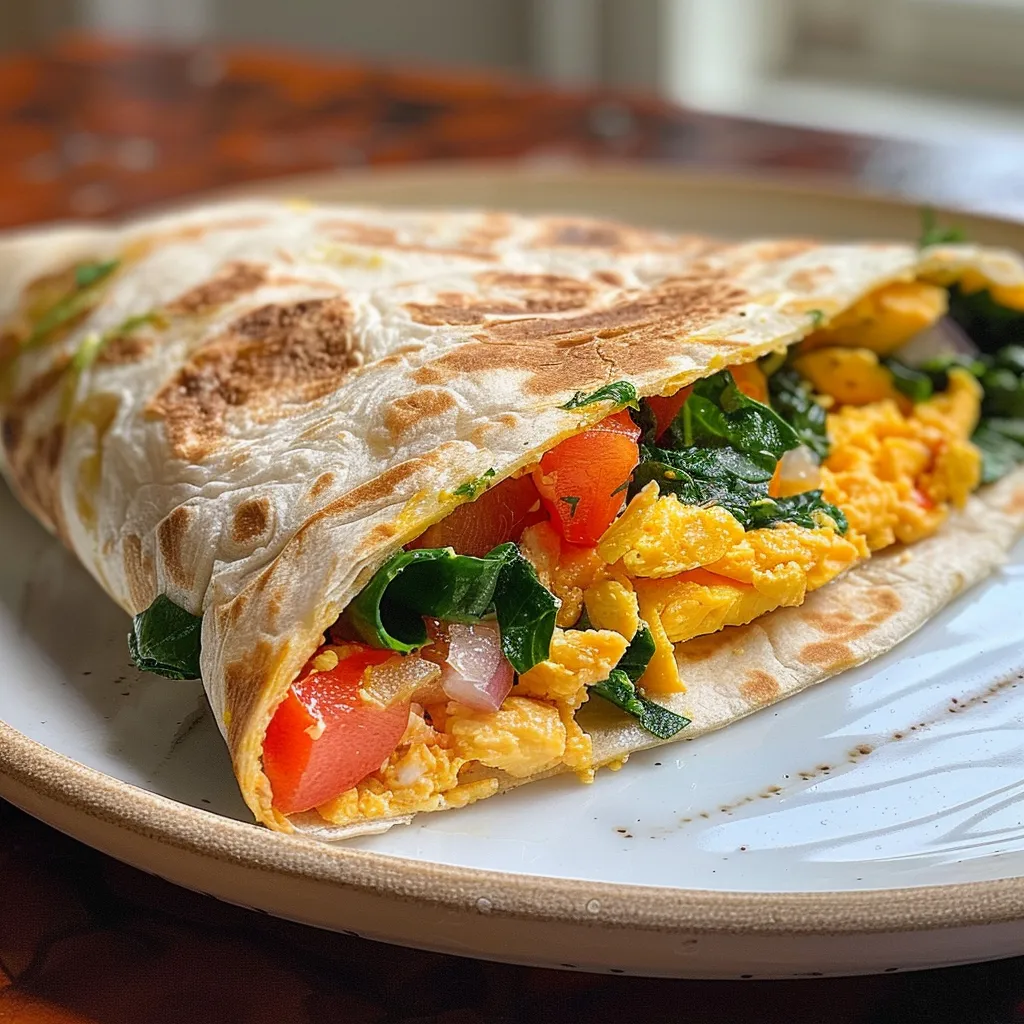
Juicy egg and spinach breakfast wrap presented on a plate, showing fresh ingredients.

To ensure your Egg and Spinach Breakfast Wrap turns out perfectly every time, keep these expert tips in mind:

  • Fresh ingredients: Always use fresh spinach and veggies for the best flavor and texture.
  • Whisk the eggs well: Ensure that your eggs are well-beaten for a light and fluffy texture.
  • Don’t overcook: Cook the eggs until just set to avoid a rubbery texture.
  • Experiment with spices: Add a pinch of paprika, cumin, or your favorite herbs for an extra flavor kick.
  • Wrap tightly: When rolling the tortilla, fold in the sides to secure the filling and prevent spills.
  • Serve immediately: These wraps are best enjoyed fresh and hot!
  • Pair with a dip: A side of salsa or avocado dip can elevate your breakfast experience.
  • Make it a meal: Serve with a side of fresh fruit or yogurt for a complete breakfast!

Common Mistakes and Troubleshooting

Even the best cooks can run into a few snags. Here’s how to avoid common pitfalls:

  • Eggs sticking to the pan: Ensure your skillet is well-oiled and heated before adding the eggs.
  • Overcooked vegetables: Sauté just until softened; they should retain some crunch.
  • Tortilla tearing: Warm your tortilla slightly before wrapping to make it more pliable.
  • Filling spills out: Roll tightly and securely to keep everything inside.

Delicious Variations to Try

Want to switch things up? Here are some fun variations to explore:

  • Mexican Twist: Add black beans, corn, and avocado for a southwestern flair.
  • Italian Style: Incorporate diced sun-dried tomatoes, basil, and mozzarella for an Italian-inspired wrap.
  • Heartier Option: Include cooked quinoa or brown rice for added texture and nutrition.
  • Herb Infusion: Mix in fresh herbs like cilantro, parsley, or dill to enhance the flavor profile.

Storage and Make-Ahead Instructions

If you’re planning to make these wraps in advance, here’s how to store them:

  • Refrigeration: Store the filling in an airtight container in the fridge for up to 3 days.
  • Freezing: Wrap individual portions in foil or plastic wrap and freeze for up to a month. Reheat in the microwave or skillet.
  • Make-ahead wraps: Assemble the wraps, but don’t cook them until ready to eat. This keeps the tortilla fresh.

Frequently Asked Questions

Got questions? Here are some answers to common queries about the Egg and Spinach Breakfast Wrap:

  • Can I use egg whites instead of whole eggs? Yes, you can substitute egg whites for a healthier option.
  • What if I don’t have spinach? Kale or arugula are great alternatives that work well in this recipe.
  • Can I make this vegan? Absolutely! Substitute eggs with tofu scramble and use a vegan tortilla.
  • How do I make this gluten-free? Use a gluten-free tortilla to accommodate dietary needs.
  • Can I add meat? Yes, cooked chicken, turkey, or bacon can be delicious additions.
  • What’s the best way to reheat leftovers? The microwave works well, but reheating in a skillet will keep the wrap crispy.
  • Is this recipe suitable for meal prep? Definitely! The filling keeps well and can be assembled quickly during the week.
  • How can I add more veggies? Feel free to mix in zucchini, mushrooms, or any of your favorite vegetables!

Nutrition Tips and Dietary Adaptations

This wrap is not only delicious but also nutritious! Here are some tips to enhance its health benefits:

  • Boost fiber: Opt for a high-fiber tortilla for added health benefits.
  • Limit cheese: If you’re watching your calories, skip the cheese or use a low-fat alternative.
  • Increase protein: Add more eggs or include a protein like turkey or chicken for an energizing breakfast.

Essential Equipment Recommendations

To make your cooking experience smooth and enjoyable, here’s what you’ll need:

  • Non-stick skillet: Essential for cooking the eggs and veggies without sticking.
  • Whisk: For perfectly beaten eggs that blend well with your fillings.
  • Cutting board and knife: Useful for chopping veggies quickly and efficiently.
  • Measuring cups and spoons: For accurate ingredient measurements.

Serving Suggestions

Serve your Egg and Spinach Breakfast Wrap with a variety of accompaniments to elevate your meal:

  • Fresh fruit: A side of berries or sliced oranges adds a refreshing touch.
  • Yogurt: Greek yogurt pairs beautifully for a creamy, tangy contrast.
  • Herbal tea or coffee: A warm drink completes the breakfast experience.

Final Thoughts

As you explore the delightful world of the Egg and Spinach Breakfast Wrap, remember that cooking is not just about nourishment—it’s a way to connect with flavors, cultures, and loved ones. This wrap is a canvas for your creativity, allowing you to experiment and personalize it to your heart’s content. So, gather your ingredients, put on your favorite music, and let’s make breakfast a joyous occasion. Enjoy each bite and the wonderful journey it brings to your table!

Wholesome Egg and Spinach Breakfast Wrap

Prep Time 5 minutes
Cook Time 10 minutes
Total Time 15 minutes
Servings 1 serving
Calories 350
A quick and nutritious breakfast wrap filled with eggs, fresh vegetables, and optional cheese, perfect for on-the-go mornings.

Ingredients

Eggs

  • 2 large eggs

Vegetables

  • 1/4 cup fresh spinach leaves

Wrap

  • 1 whole-wheat tortilla whole-wheat tortilla

Toppings

  • 2 tbsp diced tomatoes
  • 2 tbsp diced red bell pepper
  • 1 tbsp diced red onion
  • Salt and pepper to taste Salt and pepper
  • 1/4 cup shredded cheddar cheese (optional)

Cooking fat

  • a small amount cooking spray or olive oil

Instructions 

  • Whisk eggs, season, and sauté diced vegetables in a skillet.
  • Pour eggs over vegetables and cook until set.
  • Add spinach and cheese, then fold eggs.
  • Transfer mixture onto the tortilla, roll up, and serve.

Notes

You can customize with your favorite vegetables or cheese.
Calories: 350kcal
Cost: $5
Course: Breakfast
Keyword: Egg, Spinach, Wrap

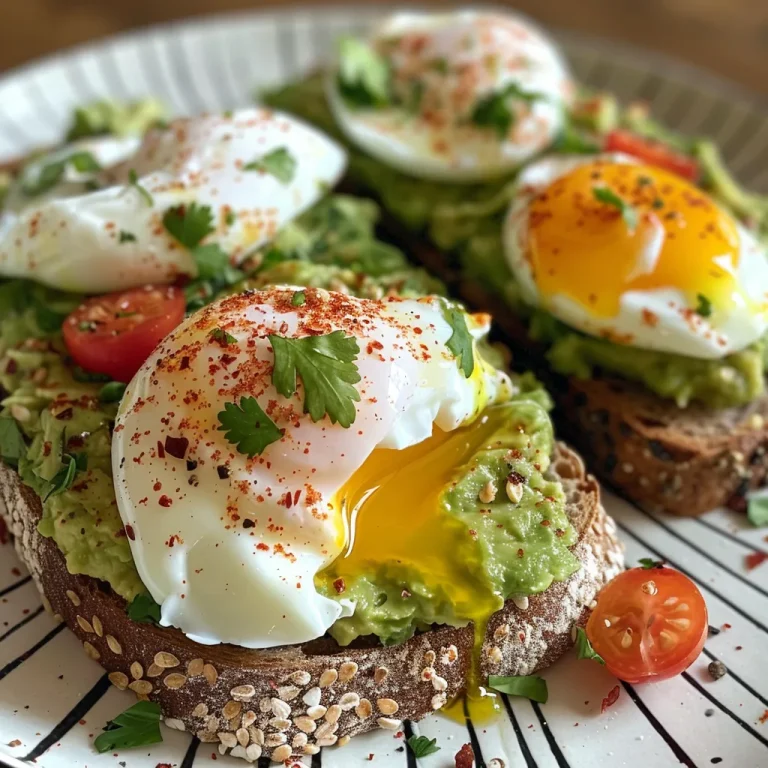
Welcome to Your New Favorite Breakfast: Avocado Toast with Poached Egg

Imagine starting your day with a plate that bursts with flavor and color, a dish that embodies the vibrancy of Mediterranean mornings. This isn’t just any breakfast; it’s a celebration in your kitchen! Today, we’re diving into the world of Avocado Toast with Poached Egg, a dish that combines creamy textures and savory goodness in just five minutes. Perfect for busy mornings or leisurely brunches, this recipe is simple yet sophisticated. Let’s embark on this culinary adventure together!

Why You’ll Love This Recipe

Here are just a few reasons why this avocado toast with poached egg will become a staple in your breakfast repertoire:

  • Quick and Easy: Ready in just five minutes, perfect for busy mornings.
  • Healthy and Nutritious: Packed with healthy fats from the avocado and protein from the egg.
  • Versatile: Enjoy it as a breakfast, lunch, or even a light dinner.
  • Customizable: Add your favorite toppings like herbs, spices, or even a drizzle of olive oil.
  • Deliciously Satisfying: The creamy avocado pairs perfectly with the rich, runny yolk, making each bite a delight!

Ingredient Breakdown

Let’s gather our ingredients to create this masterpiece:

  • 1 slice whole-grain bread: For a hearty base that adds texture. You can substitute with gluten-free bread for a gluten-free option.
  • 1/2 ripe avocado: The star of the show! Choose one that yields slightly to pressure for perfect creaminess.
  • 1 large egg: Fresh is best! You can use free-range or organic eggs for added flavor and nutrition.
  • 1 teaspoon vinegar (for poaching): This helps the egg white stay together.
  • Salt and black pepper to taste: Essential for enhancing the flavors.
  • Pinch of red pepper flakes (optional): For a little kick!

Step-by-Step Guide to Making Avocado Toast with Poached Egg

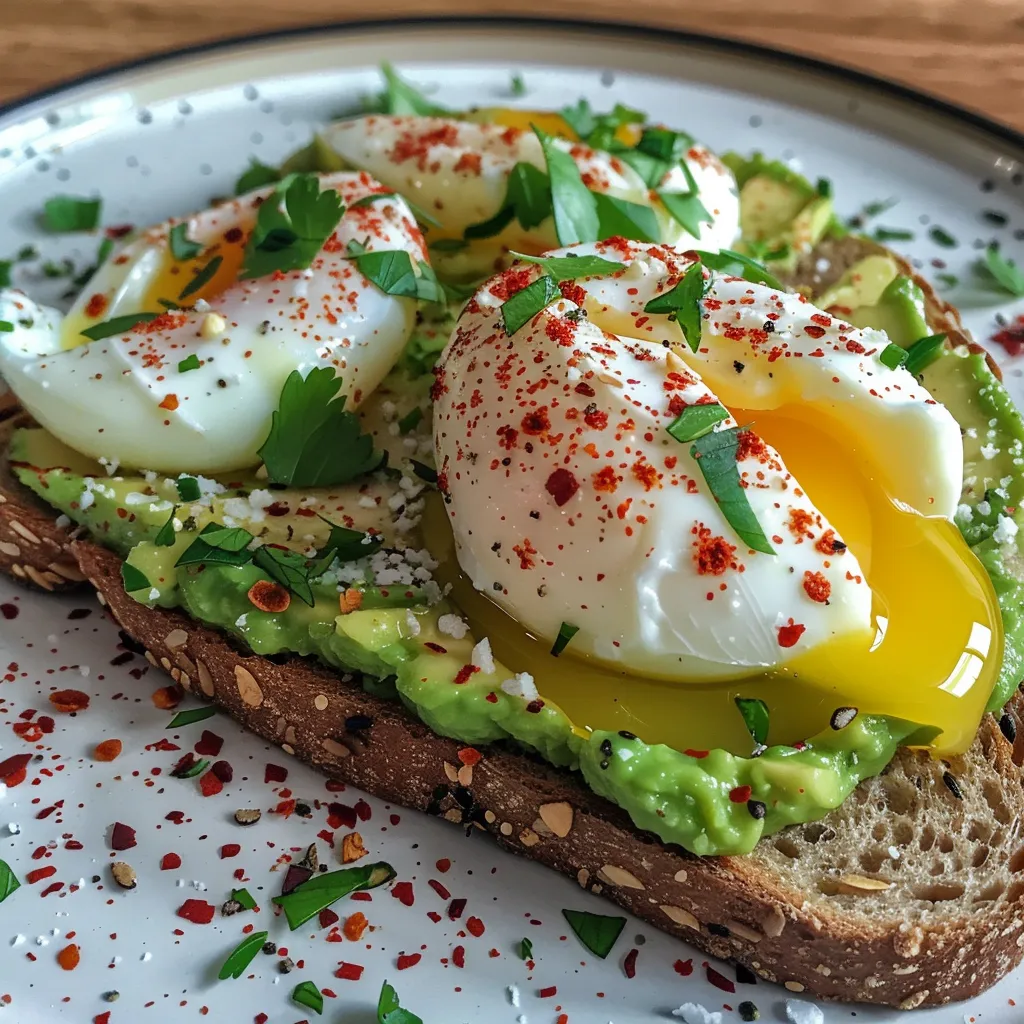
Side view of a slice of whole-grain bread with smashed avocado and a perfectly poached egg.

Now that we have everything ready, let’s get cooking! Follow these simple steps:

  1. Toast the bread: Start by toasting the slice of whole-grain bread until it’s golden brown.
  2. Prepare the poached egg: Fill a small saucepan with about 3 inches of water and bring it to a gentle simmer. Add the teaspoon of vinegar to the water.
  3. Create a whirlpool: Crack the egg into a small bowl first. Then, stir the simmering water to create a gentle swirl.
  4. Add the egg: Carefully slide the egg into the center of the whirlpool. Cook for 3 to 4 minutes for a deliciously runny yolk.
  5. Remove the egg: Carefully lift the poached egg with a slotted spoon and let it drain excess water.
  6. Prepare the avocado: Mash the avocado directly onto the toasted bread and season with salt and pepper.
  7. Assemble: Place the poached egg on top of the mashed avocado, and sprinkle with a pinch of red pepper flakes, if desired.
  8. Serve immediately: Enjoy your delicious creation right away for the best taste!

Pro Tips for Success

To elevate your avocado toast experience, consider these expert tips:

  • Use fresh ingredients: Fresh avocados, eggs, and bread make all the difference in flavor.
  • Practice poaching: If you’re new to poaching eggs, don’t be discouraged—practice makes perfect!
  • Experiment with toppings: Try adding sliced radishes, cherry tomatoes, or microgreens for added flavor and nutrition.
  • Adjust seasoning: Don’t shy away from seasoning your avocado with lemon juice, garlic powder, or even a dash of smoked paprika.
  • Use the right bread: Sourdough or rye bread can add a delightful tangy flavor to your toast.
  • Watch your cooking time: For a soft yolk, ensure you don’t overcook the egg—3 to 4 minutes is ideal!
  • Try a flavor twist: Add feta cheese or a drizzle of balsamic glaze for a gourmet touch.
  • Make it a meal: Pair your toast with a side of fruit or a smoothie for a complete breakfast.

Common Mistakes and Troubleshooting

Even the best chefs have mishaps! Here are some common mistakes and how to avoid them:

  • Eggs spreading out: If your egg spreads in the water, the water may be too hot. Adjust to a gentle simmer.
  • Overcooked yolk: Keep an eye on your timing; 3-4 minutes gives the perfect runny yolk.
  • Avocado browning: To keep your avocado fresh, add a little lemon juice before mashing.
  • Toast not crispy: Ensure your bread is toasted to a nice golden brown for the best texture.

Variations to Try

Mix things up with these delicious variations of avocado toast:

  • Italian Style: Add a sprinkle of Parmesan cheese and fresh basil for an Italian twist.
  • Spicy Avocado Toast: Top with sliced jalapeños and a drizzle of hot sauce.
  • Mediterranean Delight: Incorporate diced tomatoes, olives, and crumbled feta cheese.
  • Breakfast Burrito: Add black beans, salsa, and a sprinkle of cilantro for a Southwestern flair.

Storage and Make-Ahead Instructions

This avocado toast is best enjoyed fresh; however, you can prepare some components ahead of time:

  • Avocado: Mash and store in an airtight container with a bit of lemon juice to prevent browning. Use within 1-2 days.
  • Eggs: Poach eggs ahead of time and store them in cold water in the refrigerator. Reheat gently in warm water before serving.
  • Toast Bread: Pre-toast your bread and store it in an airtight container. Reheat in a toaster for a quick crunch.

Frequently Asked Questions

Here are some common questions about making avocado toast with poached egg:

  • Can I use frozen avocado? Frozen avocado can be used, but it may have a different texture when thawed.
  • What type of bread is best for avocado toast? Whole-grain, sourdough, or rye bread works beautifully.
  • How do I know when my egg is perfectly poached? A perfectly poached egg has a firm white and a runny yolk. Check at the 3-minute mark.
  • Can I make this recipe vegan? Yes! Substitute the poached egg with tofu scramble or chickpea mash for a vegan version.
  • How can I make my avocado toast more filling? Add proteins like smoked salmon, turkey slices, or a sprinkle of nuts and seeds.
  • What if my avocado isn’t ripe? If your avocado is firm, you can ripen it by placing it in a paper bag at room temperature for a day or two.
  • Can I make it ahead of time? Yes, you can prepare the components in advance, but it’s best served fresh.
  • What drinks pair well with avocado toast? Freshly squeezed orange juice, herbal teas, or a light smoothie complement avocado toast beautifully.

Nutritional Tips and Dietary Adaptations

For a nutritious boost, consider these tips:

  • Add greens: Top your toast with spinach or arugula for extra vitamins.
  • Protein power: Include a protein source, such as grilled chicken or chickpeas, for a heartier meal.
  • Watch the salt: Use low-sodium options if you’re monitoring your salt intake.
  • Fiber boost: Choose whole-grain bread for additional fiber and nutrients.

Essential Equipment Recommendations

To make your avocado toast with poached egg, ensure you have the following tools:

  • Toaster or toaster oven: For perfectly crispy bread.
  • Small saucepan: Ideal for poaching eggs.
  • Slotted spoon: For easy removal of poached eggs.
  • Mixing bowl: For mashing the avocado comfortably.

Serving Suggestions

Complete your meal with these delightful pairings:

  • Fresh fruit: A side of berries or sliced oranges enhances the meal.
  • Yogurt parfait: Layered yogurt with granola and honey for a sweet finish.
  • Herbal tea: A calming chamomile or mint tea complements the flavors beautifully.

As we wrap up this delightful exploration of Avocado Toast with Poached Egg, remember that cooking is not just about nourishment—it’s about creating moments of joy and connection. So gather your loved ones, prepare this delicious dish, and enjoy the flavors of the Mediterranean in your own home. Happy cooking!

5 Minute Avocado Toast with Poached Egg Magic

Prep Time 2 minutes
Cook Time 5 minutes
Total Time 7 minutes
Servings 1 serving
Calories 290
A quick and delicious breakfast featuring creamy avocado and a perfectly poached egg on toasted whole-grain bread.

Ingredients

Bread

  • 1 slice whole-grain bread

Avocado

  • 0.5 ripe avocado ripe avocado

Egg

  • 1 large egg large egg

Vinegar

  • 1 teaspoon vinegar (for poaching)

Salt

  • to taste Salt to taste

Black Pepper

  • to taste Black pepper to taste

Red Pepper Flakes

  • a pinch optional Pinch of red pepper flakes (optional)

Instructions 

  • Toast the bread until golden brown.
  • Simmer water with vinegar, crack egg into bowl, swirl water, then slide egg in. Cook 3-4 min, then remove.
  • Mash avocado onto toast, season with salt and pepper.
  • Place poached egg on top of avocado.
  • Sprinkle with red pepper flakes if desired. Serve immediately.

Notes

Use fresh eggs for best poaching results.
Calories: 290kcal
Cost: $5
Course: Breakfast
Cuisine: American
Keyword: Avocado, Egg, Toast

Discover the Sweetness of Valentine’s Day Heart Cookies

As the season of love approaches, it’s time to bring out your baking skills with a delightful treat that speaks from the heart. Valentine’s Day Heart Cookies are not just cookies; they’re tokens of affection, sweet surprises that can brighten anyone’s day. This recipe combines the classic appeal of sugar cookies with a burst of vibrant red color, ensuring that each bite is as festive as it is delicious. Whether you’re celebrating with a partner, friends, or family, these cookies are perfect for sharing the love!

Why You’ll Love This Recipe

This isn’t just any cookie recipe; it’s your gateway to creating memorable moments. Here’s why you’ll adore these Valentine’s Day Heart Cookies:

  • Simple Ingredients: Made with pantry staples, you don’t need to hunt for exotic items to whip these up.
  • Vibrant Presentation: The addition of red food coloring makes these cookies visually stunning, perfect for the occasion.
  • Customizable Shapes: Use any cookie cutter to create a variety of shapes for different celebrations.
  • Perfect for Gifting: These cookies make charming gifts when packaged in a decorative box or jar.
  • Fun for All Ages: Get the kids involved in decorating and creating unique designs!

Ingredients You’ll Need

Let’s gather the stars of our baking show! Here’s what you’ll need to create these delectable cookies:

  • 2 1/4 cups all-purpose flour: The foundation of your cookies, providing structure.
  • 1/2 teaspoon baking powder: This helps the cookies rise and become fluffy.
  • 1/4 teaspoon salt: A little salt enhances the flavors beautifully.
  • 3/4 cup unsalted butter, softened: Adds richness and a tender texture.
  • 3/4 cup granulated sugar: Sweetness is key, and sugar also helps with texture.
  • 1 large egg: Binds the mixture and adds moisture.
  • 1 teaspoon vanilla extract: A must for that classic cookie flavor.
  • 1/2 cup red food coloring: To create those festive heart-shaped cookies!

Step-by-Step Instructions

Side view of Valentine's Day cookies decorated with red icing.

Now that we have everything ready, let’s get baking! Follow these simple steps to create your heart cookies:

  1. Preheat your oven to 350°F (175°C).
  2. In a medium bowl, whisk together the flour, baking powder, and salt until well combined.
  3. In a large bowl, beat the softened butter and sugar together until light and fluffy, about 3-4 minutes.
  4. Add the egg and vanilla extract to the butter mixture and mix well until combined.
  5. Gradually add the dry ingredients to the wet ingredients, mixing until just combined.
  6. If desired, add the red food coloring and mix until the dough is evenly colored.
  7. Roll out the dough on a floured surface to about 1/4 inch thickness.
  8. Use a heart-shaped cookie cutter to cut out cookies and place them on a baking sheet lined with parchment paper.
  9. Bake for 12-15 minutes or until the edges are slightly golden.
  10. Allow cookies to cool on the baking sheet for 5 minutes before transferring to a wire rack to cool completely.

Expert Tips for Perfect Heart Cookies

To ensure your heart cookies turn out perfectly every time, keep these expert tips in mind!

  • Chill the Dough: If the dough feels too sticky, chill it in the fridge for about 30 minutes to make it easier to handle.
  • Even Thickness: Roll the dough to an even thickness for uniform baking.
  • Don’t Overbake: Keep an eye on the cookies; they should be slightly golden around the edges but soft in the center.
  • Decorate with Royal Icing: For a polished look, use royal icing to decorate your cookies once they are cool.
  • Experiment with Flavors: Add almond extract or lemon zest for a twist on the classic flavor.
  • Use Quality Ingredients: Fresh, high-quality ingredients make all the difference in flavor.
  • Make Ahead: You can prepare the dough ahead of time and freeze it. Just thaw and roll when you’re ready to bake.
  • Storage: Keep cookies in an airtight container to maintain freshness.

Common Mistakes to Avoid

Every baker has their off days! Here are some common mistakes to avoid when making heart cookies:

  • Skipping the Chilling Step: Not chilling the dough can lead to spreading cookies.
  • Not Measuring Ingredients Accurately: Use measuring cups and spoons for precision.
  • Overmixing the Dough: Mix just until combined to keep cookies tender.
  • Ignoring Oven Temperature: Always preheat your oven for consistent baking results.

Delicious Variations to Try

Get creative with your heart cookies by trying these fun variations:

  • Chocolate Heart Cookies: Incorporate cocoa powder into the dough for a chocolatey twist.
  • Sprinkle Surprise: Add colorful sprinkles to the dough or on top of the icing for a festive touch.
  • Nutty Flavor: Add finely chopped nuts like almonds or hazelnuts for added crunch.
  • Fruit Flavored Cookies: Use fruit extracts or zests to create unique flavors like raspberry or lemon.

Storage & Make-Ahead Instructions

These heart cookies can last up to a week when stored properly. Here’s how:

  • Room Temperature: Store cookies in an airtight container at room temperature for up to 5 days.
  • Freezing: Freeze unbaked dough discs for up to 3 months. Thaw in the fridge before rolling out.
  • Baked Cookies: Freeze baked cookies for up to 3 months in an airtight container. Thaw at room temperature before serving.

Nutrition Tips & Dietary Adaptations

If you’re looking to make these cookies a bit healthier or cater to dietary needs, consider these tips:

  • Gluten-Free Option: Substitute all-purpose flour with a gluten-free flour blend.
  • Lower Sugar: Reduce sugar by 25% without compromising texture.
  • Dairy-Free Version: Use coconut oil or a vegan butter alternative instead of unsalted butter.

Essential Equipment for Baking

To make your baking experience smooth and enjoyable, here are some essential tools:

  • Baking Sheets: Use heavy-duty baking sheets for even baking.
  • Parchment Paper: Line your baking sheets for easy cookie removal.
  • Mixing Bowls: Have a set of various sizes for mixing ingredients.
  • Cookie Cutters: Invest in a good set of cookie cutters for different shapes.
  • Cooling Racks: Allow cookies to cool evenly after baking.

Frequently Asked Questions (FAQs)

Here are some common questions about making heart cookies:

  • How can I prevent my cookies from spreading too much during baking?
    Chill the dough before baking and ensure your butter is softened but not melted.
  • Can I make these cookies ahead of time?
    Absolutely! Prepare the dough or baked cookies ahead of time and store them as mentioned.
  • What can I use instead of red food coloring?
    Natural colorings like beet juice or matcha can be used for a unique color.
  • How do I store leftover cookies?
    Keep them in an airtight container at room temperature or freeze them for later.
  • Can I use whole wheat flour?
    Yes, whole wheat flour can be used, but it may change the texture slightly.
  • How thick should I roll out the dough?
    Roll the dough to about 1/4 inch thickness for the best results.
  • What type of icing is best for decorating?
    Royal icing is ideal for detailed decorations as it dries hard and smooth.
  • How long do the cookies last?
    They can last up to a week when stored properly in an airtight container.

Final Thoughts: Spread Love with Every Bite

Baking these Valentine’s Day Heart Cookies is more than just an activity; it’s an expression of love and creativity. With every bite, you’re not just tasting sweetness — you’re celebrating connections, memories, and the joy of sharing food with those who matter most. So gather your loved ones, roll up your sleeves, and create a batch of these delightful cookies to bring warmth and happiness to your Valentine’s Day celebrations!

Valentine's Day Heart Cookies

Prep Time 20 minutes
Cook Time 15 minutes
Total Time 35 minutes
Servings 24 cookies
Calories 150
Celebrate love with these adorable heart-shaped cookies perfect for Valentine's Day. Easy to make and delightfully festive!

Ingredients

Dough

  • 2 1/4 cups all-purpose flour
  • 1/2 teaspoon baking powder
  • 1/4 teaspoon salt
  • 3/4 cup unsalted butter, softened
  • 3/4 cup granulated sugar
  • 1 large egg
  • 1 teaspoon vanilla extract
  • 1/2 cup red food coloring

Instructions 

  • Preheat oven to 350°F (175°C).
  • Mix dry ingredients; beat butter and sugar until fluffy.
  • Add egg and vanilla; combine well.
  • Add food coloring; mix until evenly colored. Roll out dough and cut into hearts.
  • Bake 12-15 minutes; cool before serving.

Notes

Chill dough for easier handling and prevent spreading.
Calories: 150kcal
Cost: $15
Course: Dessert
Cuisine: American
Keyword: cookies

Whimsical Mini Flatbread Pizzas: Your New Favorite Bite-Sized Celebration

Welcome to a delightful journey through flavors that celebrate the Mediterranean lifestyle! Today, we’re diving into the world of mini flatbread pizzas, a dish that not only tantalizes your taste buds but also invites you to explore the joy of cooking. Nestled between the warmth of fresh pita bread and topped with an array of vibrant ingredients, these pizzas are the perfect balance of health and happiness, all while staying under 150 calories!

Cooking is more than just a routine; it’s an art form, and these mini masterpieces are all about creativity. Let’s explore how to make your own mini pizzas that are as fun to prepare as they are to eat. Get ready to experience a wave of flavors, colors, and aromas that will transport you to the sun-kissed shores of Spain!

Why You’ll Love This Recipe

These whimsical mini flatbread pizzas aren’t just a dish; they’re a celebration! Here are five reasons why you’ll adore making them:

  • Quick and Easy: Ready in under 30 minutes, these mini pizzas are perfect for a last-minute meal or a light snack.
  • Customizable: You can mix and match toppings based on your preferences or what’s in your fridge, making each pizza a unique creation.
  • Healthy Indulgence: With under 150 calories per serving, they satisfy your pizza cravings without the guilt!
  • Family-Friendly: Kids love to get involved! Let them choose their favorite toppings, turning dinner into a fun family activity.
  • Visually Stunning: The vibrant colors of fresh ingredients make these pizzas not only delicious but also a feast for the eyes.

Ingredients for Mini Flatbread Pizzas

Creating these delightful mini pizzas is simple, and the ingredients are easy to find! Here’s what you’ll need:

  • 2 tablespoons pizza sauce
  • 2 (1-ounce or 30 grams) mini reduced-calorie pita breads
  • 2 tablespoons fresh basil, thinly sliced
  • 2 tablespoons part-skim ricotta cheese
  • 2 tablespoons shredded part-skim mozzarella cheese
  • 6 grape tomatoes, halved (2 ounces or 30 grams)
  • 1/2 small yellow bell pepper, thinly sliced
  • 2 tablespoons thinly sliced red onion
  • Garnish: 4 small sprigs or 8 small leaves fresh basil

If you’re looking for substitutions:

  • Pita breads: You can use store-bought flatbreads or whole wheat tortillas for a different twist.
  • Cheese: Swap ricotta for goat cheese or feta for a tangier flavor.
  • Vegetables: Feel free to use any seasonal veggies you have on hand, like zucchini or mushrooms.
  • Sauces: Experiment with pesto or a spicy arrabbiata sauce for a kick!

How to Craft Your Mini Flatbread Pizzas

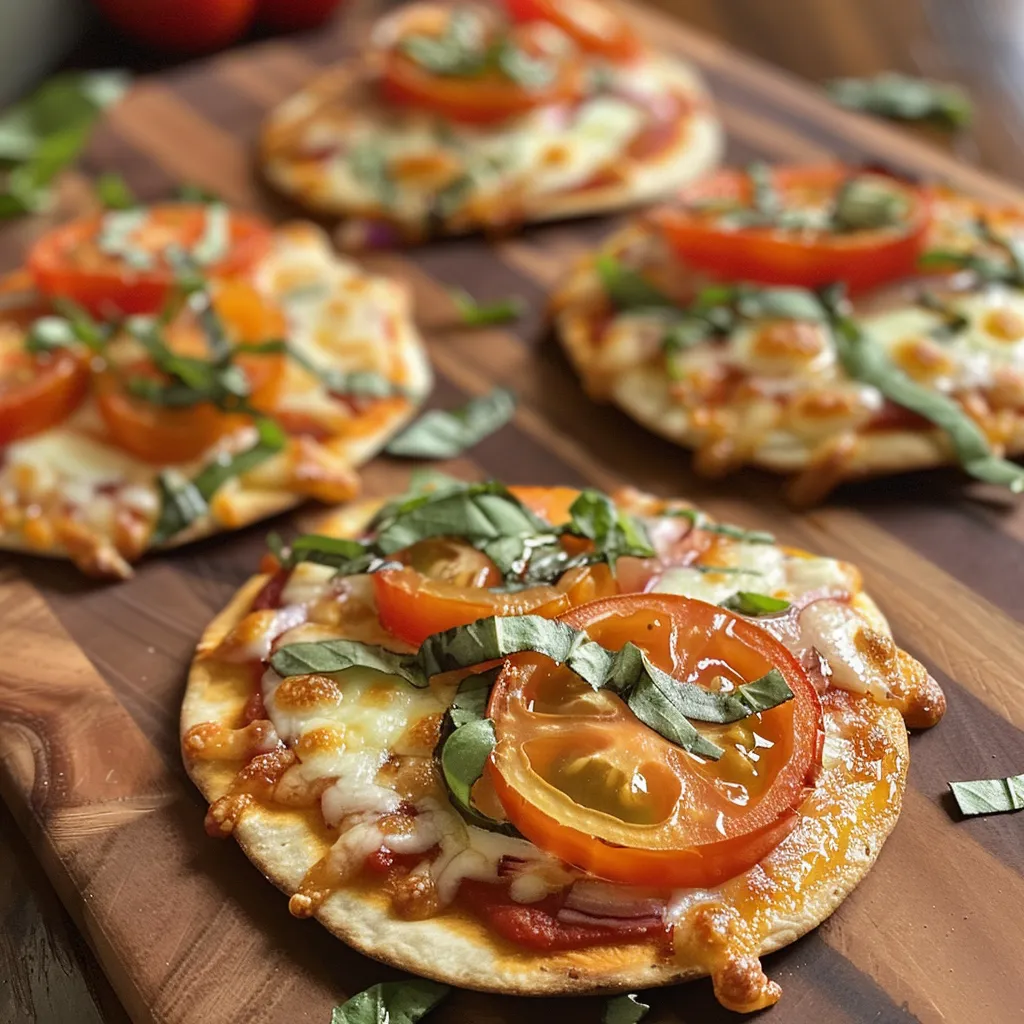
Side view of two mini flatbread pizzas with fresh basil and vibrant toppings.

Ready to bring your culinary creativity to life? Here’s a step-by-step guide to crafting your mini flatbread pizzas:

  1. Preheat your oven or toaster oven to 400°F (200°C).
  2. Spread 1 tablespoon of pizza sauce on each mini pita bread.
  3. Evenly distribute the ricotta cheese on top of the sauce.
  4. Sprinkle shredded mozzarella cheese over the ricotta.
  5. Garnish with halved grape tomatoes, yellow bell pepper slices, and red onion.
  6. Bake in the oven for about 10-12 minutes, or until the cheese is bubbly and golden.
  7. Remove from the oven, garnish with fresh basil, and serve warm.

Pro Tips for Perfect Mini Flatbread Pizzas

To ensure your pizzas turn out perfectly every time, consider these expert tips:

  • Watch the oven: Keep an eye on your pizzas as they bake, as ovens can vary in temperature. You want the cheese to melt but not burn!
  • Layer wisely: Start with sauce, then cheese, and finish with veggies to keep the crust crispy.
  • Experiment: Don’t be afraid to try unconventional toppings like fruit or nuts for a gourmet twist.
  • Presentation counts: Arrange your pizzas on a colorful platter for an eye-catching presentation.
  • Leftover sauce: If you have extra pizza sauce, store it in the refrigerator for your next pizza night!

Common Mistakes and Troubleshooting

Even the best cooks make mistakes! Here are some common pitfalls and how to avoid them:

  • Too soggy crust: Ensure your oven is hot enough and that you’re not overloading the toppings.
  • Burnt edges: If your pizzas are browning too quickly, place them on a lower rack in the oven.
  • Cheese not melting: Use fresh mozzarella or pre-shredded cheese for the best melting results.

Delicious Variations to Try

Why stick to one flavor when you can have a variety? Here are four tempting variations to spice up your mini flatbread pizzas:

  • Classic Margherita: Top with fresh mozzarella, tomatoes, and basil for a traditional taste.
  • Spicy Pepperoni: Add slices of pepperoni and crushed red pepper flakes for a kick.
  • Veggie Delight: Load up on roasted vegetables like zucchini, bell peppers, and spinach.
  • Sweet & Savory: Try figs, prosciutto, and a drizzle of balsamic glaze for a unique flavor combination.

Storage and Make-Ahead Instructions

Want to prepare ahead of time? These mini pizzas can be made in advance. Here’s how:

  • Storing: Keep leftover mini pizzas in an airtight container in the refrigerator for up to 3 days.
  • Reheating: Reheat in the oven at 350°F (175°C) for 5-7 minutes until warmed through.
  • Make-Ahead: Assemble the pizzas without baking and store in the fridge for up to 24 hours. Bake just before serving!

Frequently Asked Questions

Got questions? We’ve got answers!

  • What are mini flatbread pizzas? They’re small pizzas made using flatbreads or pita breads as the base, topped with various ingredients.
  • Can I use store-bought flatbreads for mini flatbread pizzas? Absolutely! Store-bought flatbreads or naan are great alternatives.
  • How do you make mini flatbread pizzas? Simply spread sauce on the flatbread, add cheese and toppings, and bake in the oven.
  • Can I freeze mini flatbread pizzas? Yes! Assemble them and wrap tightly in plastic wrap, then freeze for up to 2 months.
  • What toppings work best? Fresh vegetables, cheeses like mozzarella and ricotta, and various sauces can all work beautifully.
  • How can I make them gluten-free? Use gluten-free pita bread or flatbreads as a substitute.
  • Are these pizzas kid-friendly? Yes! Kids love personalizing their own mini pizzas.
  • What’s a good dipping sauce? Marinara, pesto, or a garlic herb dip pairs wonderfully!

Nutritional Insights and Dietary Adaptations

These mini flatbread pizzas are not only delicious but can easily fit into various dietary needs:

  • Low-Calorie Option: At under 150 calories each, they make for a guilt-free snack.
  • High-Protein Variations: Add grilled chicken or turkey pepperoni for a protein boost.
  • Vegetarian-Friendly: Loaded with vegetables and cheeses, they cater to vegetarian diets.
  • Gluten-Free Adaptations: Simply use gluten-free flatbreads to accommodate gluten sensitivities.

Essential Equipment Recommendations

To create your mini flatbread pizzas, you’ll need a few essential kitchen tools:

  • Baking Sheet: A good quality baking sheet will ensure even cooking.
  • Oven or Toaster Oven: For the best results, a conventional oven is recommended, but a toaster oven works too!
  • Pizza Cutter: A pizza cutter makes slicing your mini pizzas a breeze.
  • Measuring Cups and Spoons: Accurate measurements help keep your ingredients consistent.

Serving Suggestions

These mini pizzas are perfect for any occasion! Here are some ideas on how to serve them:

  • Appetizer: Serve them as a fun appetizer at your next gathering, paired with a selection of dips.
  • Party Food: They’re great finger foods for parties or picnics, easy to grab and enjoy!
  • Family Dinner: Make it a family pizza night where everyone creates their own masterpiece.

In Conclusion

Well, there you have it! A comprehensive guide to crafting your own whimsical mini flatbread pizzas. Bursting with fresh flavors and vibrant colors, these little bites are perfect for any occasion. Whether you’re cooking for yourself, hosting a party, or just looking to enjoy some quality time with family, these mini pizzas are sure to bring joy to your table. So grab your ingredients, roll up your sleeves, and let’s celebrate the art of cooking together!

Mini Flatbread Pizzas Under 150 Calories

Prep Time 10 minutes
Cook Time 5 minutes
Total Time 15 minutes
Servings 2 servings
Calories 140
Enjoy these light and flavorful mini flatbread pizzas, perfect for a quick, healthy snack or light meal under 150 calories.

Ingredients

Sauces and spreads

  • 2 tablespoons pizza sauce

Bread

  • 2 mini pita breads mini reduced-calorie pita breads

Herbs

  • 2 tablespoons fresh basil, thinly sliced

Cheese

  • 2 tablespoons part-skim ricotta cheese
  • 2 tablespoons shredded part-skim mozzarella cheese

Vegetables

  • 6 grape tomatoes grape tomatoes, halved
  • 0.5 small yellow bell pepper, thinly sliced
  • 2 tablespoons thinly sliced red onion

Garnish

  • 4 small sprigs fresh basil (or 8 small leaves)

Instructions 

  • Spread pizza sauce evenly over each pita bread.
  • Top with ricotta, mozzarella, basil, tomatoes, bell pepper, and red onion.
  • Place flatbreads on a baking sheet and bake at 375°F (190°C) for 5 minutes until cheese melts.
  • Garnish with additional basil leaves before serving.

Notes

Use reduced-calorie ingredients to keep the calorie count low.
Calories: 140kcal
Cost: $8
Course: Appetizer, Snack
Cuisine: American
Keyword: healthy, mini, pizza

Transforming Breakfast: The Joy of French Toast

Welcome to a delightful journey through the art of creating the best French toast ever! This dish isn’t just breakfast; it’s a celebration of flavor, comfort, and togetherness. Imagine sinking your teeth into thick, buttery slices of brioche, kissed by warm spices and a hint of vanilla, transforming your mornings into cherished moments of joy. Whether you’re hosting a weekend brunch or savoring a cozy morning at home, this French toast recipe will surely elevate your breakfast routine.

Why You’ll Love This Recipe

This isn’t just any French toast; here are five compelling reasons why this recipe is a must-try:

  • Heavenly Flavor: The combination of rich brioche, aromatic cinnamon, and fragrant vanilla creates a symphony of tastes that dance on your palate.
  • Simple Yet Impressive: With just a handful of ingredients, you can whip up a dish that looks and tastes gourmet, making it perfect for any occasion.
  • Customizable: This recipe serves as a blank canvas. Feel free to add your favorite toppings, from fresh fruits to decadent syrups.
  • Family-Friendly: Kids and adults alike will adore this breakfast treat, making it a perfect family favorite.
  • Quick to Prepare: In less than 30 minutes, you can prepare, cook, and serve a delightful breakfast that will impress everyone at the table.

Ingredients: Your Path to Perfection

To create the best French toast, you will need the following ingredients. Here’s a detailed breakdown along with possible substitutions:

  • 4 slices of brioche or challah bread: These breads provide a rich, buttery flavor. You can also use sourdough or whole grain for a healthier twist.
  • 2 large eggs: Essential for the egg mixture, they create the custardy texture. For a vegan option, substitute with flaxseed meal or silken tofu.
  • 1/2 cup milk: Use whole milk for creaminess, or opt for almond, soy, or oat milk for dairy-free alternatives.
  • 1 tsp vanilla extract: This adds a lovely aroma. Consider using almond extract for a unique flavor.
  • 1/2 tsp ground cinnamon: A warm spice that enhances sweetness. You can also experiment with nutmeg or cardamom.
  • Butter or oil for cooking: Choose unsalted butter for richness; coconut oil adds a hint of tropical flavor.

Step-by-Step Instructions

Side view of thick brioche French toast, juicy and garnished with cinnamon.

Ready to make your French toast? Follow these simple steps for perfection:

  1. In a shallow dish, whisk together the eggs, milk, vanilla extract, and ground cinnamon until well combined.
  2. Dip each slice of bread into the egg mixture, ensuring both sides are well-coated. Let it soak for a few seconds for extra flavor.
  3. Heat a skillet or griddle over medium heat, then melt butter or heat oil until hot and shimmering.
  4. Cook the bread slices for 2-3 minutes on each side until they are golden brown and crispy.
  5. Serve hot with your favorite toppings such as maple syrup, fresh fruits, or a dusting of powdered sugar.

Expert Tips for Success

To achieve unparalleled French toast, consider these expert tips:

  • Use stale bread: Slightly stale bread absorbs the egg mixture better, resulting in a custardy center.
  • Don’t rush the cooking: Cooking over medium heat ensures your French toast is cooked through without burning.
  • Experiment with spices: Try adding a pinch of nutmeg or a splash of orange zest to your egg mixture for a flavor twist.
  • Let it rest: Allowing your dipped bread to sit for a minute before cooking helps it absorb the egg mixture thoroughly.
  • Keep it warm: If making multiple batches, keep cooked French toast warm in a low oven while you finish cooking.
  • Don’t overcrowd the pan: Give each slice space to cook evenly and develop that beautiful golden crust.
  • Try a cast-iron skillet: This retains heat beautifully and gives your French toast a perfect sear.
  • Add a pinch of salt: A small amount enhances all the flavors and balances sweetness.

Common Mistakes and Troubleshooting

Even the best chefs make mistakes! Here’s how to troubleshoot common issues:

  • Too soggy? Make sure to dip the bread quickly and not let it sit too long in the egg mixture.
  • Burnt outside, raw inside? Lower the heat to ensure the toast cooks through without burning.
  • Not flavorful enough? Ensure you’re using quality bread and adding enough spices to the egg mixture.
  • Sticking to the pan? Make sure the pan is properly greased and hot before adding the bread.

Delicious Variations to Try

Feeling adventurous? Here are some tasty variations to elevate your French toast:

  • Stuffed French Toast: Add a layer of cream cheese or Nutella between two slices for a decadent twist.
  • Berry-Infused: Top with a mix of fresh berries and a drizzle of honey for a fruity explosion.
  • Cinnamon Roll French Toast: Use cinnamon roll dough instead of bread for a sweet indulgence.
  • Savory French Toast: Swap out vanilla for herbs and serve with avocado and poached eggs for a brunch delight.

Storage and Make-Ahead Instructions

Planning ahead? Here’s how to store and prepare your French toast:

  • Make-Ahead: Prepare the egg mixture in advance and store it in the fridge for up to 24 hours.
  • Leftovers: Store cooked French toast in an airtight container in the fridge for up to 3 days. Reheat in a toaster or skillet.
  • Freezing: Freeze cooked slices in a single layer and transfer to a freezer bag. Reheat directly from frozen in a toaster or oven.

Comprehensive FAQ

Have questions? Here are some frequently asked ones:

  • Can I use gluten-free bread? Absolutely! Gluten-free bread works perfectly in this recipe.
  • How do I make it dairy-free? Substitute milk with almond or oat milk and use dairy-free butter.
  • What other toppings can I use? Try Greek yogurt, caramel sauce, or whipped cream for a delicious change.
  • Can I add chocolate? Yes! Sprinkle chocolate chips on top while cooking for a sweet treat.
  • How can I make it spicier? Add cayenne pepper or chili flakes to your egg mixture for a unique kick.
  • Is French toast healthy? It can be! Use whole grain bread and control the amount of sugar in toppings.
  • Can I use eggs from pasture-raised chickens? Definitely! They often have richer flavor and color.
  • What’s the best way to serve French toast? Serve immediately while hot, with toppings on the side for guests to customize.

Nutritional Tips and Dietary Adaptations

Want to make your French toast even healthier? Check out these tips:

  • Whole grain bread: Opt for whole grain or sprouted bread for added fiber.
  • Reduce sugar: Limit syrup or sugar and top with fresh fruits instead.
  • Protein boost: Add Greek yogurt or nut butter for a protein-rich topping.

Equipment Recommendations

To achieve the best results, here’s what you need in your kitchen:

  • Non-stick skillet or griddle: Perfect for cooking French toast evenly without sticking.
  • Shallow dish: Ideal for whisking and soaking your bread in the egg mixture.
  • Whisk: Essential for combining ingredients smoothly.

Serving Suggestions

Make your French toast a feast! Here are some serving ideas:

  • Classic toppings: Maple syrup, powdered sugar, and fresh berries.
  • Gourmet options: Drizzle with chocolate sauce or top with caramelized bananas.
  • Savory pairings: Serve alongside crispy bacon or sausage for a hearty meal.

Conclusion: A Celebration of Flavor

Now that you have the ultimate guide to the best French toast, it’s time to gather your loved ones and indulge in this delightful breakfast treat. Remember, cooking is not just about nourishment; it’s about creating memories and celebrating the flavors of life. Enjoy each bite, and let your kitchen be filled with laughter and joy as you savor every moment of this culinary adventure. Bon appétit!

Best French Toast Ever

Prep Time 5 minutes
Cook Time 10 minutes
Total Time 15 minutes
Servings 4 slices
Calories 250
This classic French toast recipe delivers crispy, golden slices with a rich, flavorful custard. Perfect for a cozy breakfast or brunch treat.

Ingredients

Bread

  • 4 slices brioche or challah bread

Eggs

  • 2 pieces eggs

Milk

  • 0.5 cup milk (or dairy-free alternative)

Flavorings

  • 1 tsp vanilla extract
  • 0.5 tsp ground cinnamon

Cooking fat

  • Butter or oil for cooking

Instructions 

  • Whisk eggs, milk, vanilla, and cinnamon in a shallow dish.
  • Dip bread slices into the mixture, coating both sides.
  • Heat skillet with butter or oil over medium heat.
  • Cook slices 2-3 minutes per side until golden brown.
  • Serve hot with toppings like syrup or fruits.

Notes

Use day-old bread for best results.
Calories: 250kcal
Cost: $10
Course: Breakfast
Cuisine: French
Keyword: French Toast

Mini Veggie Flatbreads: A Colorful Culinary Delight

Welcome to the vibrant world of mini veggie flatbreads, where every bite is a celebration of fresh ingredients and Mediterranean flavors! These delectable flatbreads are not just a meal; they are an experience, perfect for gatherings or a cozy night in. Imagine the aroma of roasted vegetables mingling with the rich scent of olive oil, all atop a crispy, golden crust. This recipe is designed to spark joy at every bite, inviting you to explore your creativity in the kitchen.

As a proud Spaniard living in Barcelona, I have always cherished the colorful palette of Mediterranean cuisine. These mini veggie flatbreads pay homage to my roots while inviting a modern twist that makes them irresistibly delicious. Join me as we embark on this culinary adventure!

Why You’ll Love This Recipe

These mini veggie flatbreads are not just about taste; they offer a multitude of benefits:

  • Quick and Easy: Perfect for a busy weeknight or last-minute gatherings, the preparation is straightforward and hassle-free.
  • Customizable: Use whatever vegetables you have on hand, making it a versatile option that reduces food waste.
  • Healthy and Wholesome: Packed with colorful vegetables, these flatbreads are a great way to sneak in more nutrition without sacrificing flavor.
  • Kid-Friendly: Get the little ones involved in assembling their own flatbreads, turning dinner into a fun activity.
  • Perfect for Sharing: Serve them as appetizers or main dishes that cater to various tastes and dietary preferences.

Ingredients Breakdown

Let’s dive into the ingredients required for our mini veggie flatbreads. Each component plays a crucial role in creating the perfect bite. Here’s what you’ll need:

  • 4 Mini Naan Breads or 2 Large Pita Breads (halved): These serve as the perfect vessel. Naan is wonderfully soft, while pita offers a firmer base. You can also use pre-made mini pizza crusts for a different texture.
  • 2 tablespoons Extra Virgin Olive Oil: Essential for brushing the base to achieve a crispy crust and for tossing the veggies to enhance their flavor.
  • ½ cup Marinara or Pizza Sauce: A quality tomato-based sauce provides a tangy foundation. Feel free to experiment with basil pesto for a unique twist.
  • 1 ½ cups Shredded Low-Moisture Mozzarella Cheese: The classic cheese choice. Low-moisture mozzarella prevents sogginess and ensures that glorious cheese pull.
  • Vegetable Toppings:
    • ½ Red Bell Pepper, thinly sliced: Adds sweet crunch and vibrant color.
    • ½ Green Bell Pepper, thinly sliced: Offers a slightly savory flavor.
    • ¼ cup Red Onion, thinly sliced: Brings sharpness that mellows during baking.
    • ½ cup Zucchini, thinly sliced into half-moons: Adds a tender, slightly sweet texture.
    • ½ cup Cherry Tomatoes, halved: Bursting with juicy flavor, they add moisture and sweetness.
  • Seasoning and Garnish:
    • 1 teaspoon Dried Oregano: Imparts that classic Italian flavor.
    • ½ teaspoon Garlic Powder: Adds savory depth without the risk of burning fresh garlic.
    • Salt and Freshly Ground Black Pepper, to taste: Essential for elevating flavors.
    • Fresh Basil or Parsley, chopped (for garnish): Provides an aromatic finish and a pop of color.

Step-by-Step Instructions

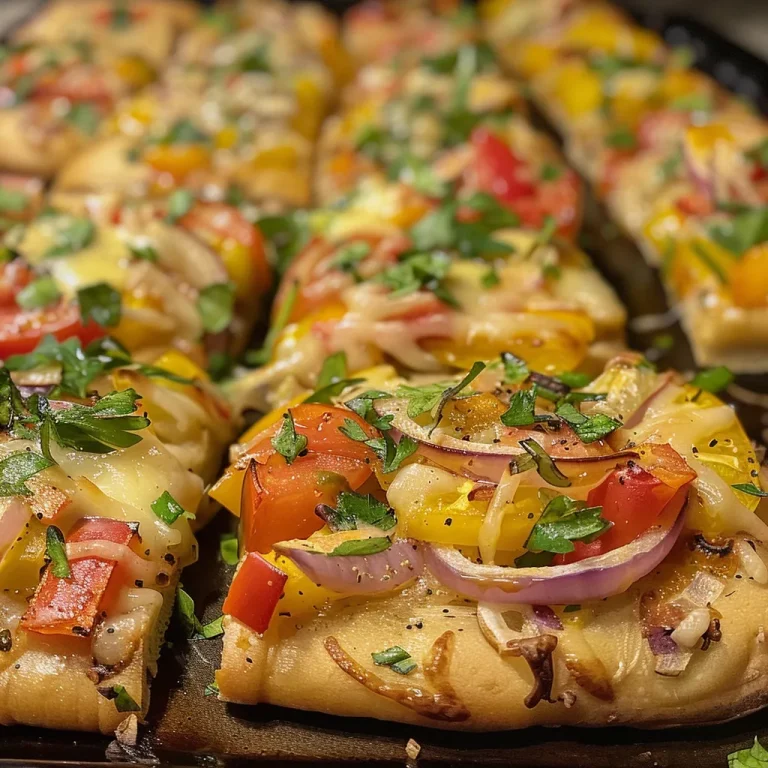
An appetizing mini veggie flatbread showcasing fresh ingredients in a side view shot.

Let’s get cooking! Follow these simple steps to create your mini veggie flatbreads:

  1. Preheat and Prepare Your Workspace: Begin by preheating your oven to 425°F (220°C). A hot oven is crucial for achieving a crispy crust. Line a large baking sheet with parchment paper for easy cleanup.
  2. Prepare the Flatbread Bases: Arrange your mini naan or halved pita breads on the prepared baking sheet. Brush the tops with extra virgin olive oil to create a barrier that prevents sogginess.
  3. Season the Vegetables: In a medium bowl, combine the sliced bell peppers, red onion, zucchini, and halved cherry tomatoes. Drizzle with olive oil, sprinkle with dried oregano, garlic powder, salt, and pepper. Toss to coat.
  4. Assemble the Flatbreads: Spread a thin layer of marinara or pizza sauce on each flatbread, leaving a half-inch border around the edges.
  5. Add the Cheese: Generously sprinkle shredded mozzarella over the sauce on each flatbread.
  6. Arrange the Toppings: Distribute the seasoned veggies evenly over the cheese, ensuring a balanced variety.
  7. Bake to Perfection: Bake in the preheated oven for 10-15 minutes, or until the cheese is melted and bubbly, and the edges are golden brown.
  8. Garnish and Serve: Remove from the oven, let cool slightly, and sprinkle with fresh basil or parsley. Slice into smaller pieces for sharing or serve whole.

Pro Tips for Perfect Flatbreads

Before you dive into making these mini veggie flatbreads, consider these expert insights that can elevate your dish:

  • Quality Matters: Use high-quality ingredients, especially for olive oil and cheese, to enhance the overall flavor.
  • Room Temperature Ingredients: Ensure your ingredients are at room temperature for even cooking.
  • Don’t Overload: Avoid piling on too many toppings to prevent sogginess.
  • Experiment with Flavors: Try different sauces and cheeses to customize your flatbreads to your taste.
  • Preheat the Baking Sheet: For an extra crispy crust, preheat the baking sheet before placing the flatbreads on it.
  • Use Parchment Paper: This prevents sticking and makes cleanup a breeze.
  • Keep an Eye on Them: Oven temperatures can vary; check your flatbreads a few minutes before the suggested baking time.
  • Allow to Rest: Let the flatbreads sit for a minute after baking to firm up before slicing.

Common Mistakes and Troubleshooting

Even the best chefs can face challenges in the kitchen! Here’s how to troubleshoot common issues:

  • Soggy Flatbreads: Ensure you coat the flatbread with olive oil before adding sauce to create a barrier.
  • Burnt Edges: If your flatbreads are browning too quickly, reduce the oven temperature slightly and keep an eye on them.
  • Uneven Cooking: Rotate the baking sheet halfway through cooking for even heat distribution.
  • Cheese Not Melting: Ensure you’re using low-moisture mozzarella for that gooey texture; fresh mozzarella can release too much liquid.

Variations to Try

Get creative with these variations to suit your taste or dietary preferences:

  • Gluten-Free Option: Substitute regular naan or pita with gluten-free flatbreads available in stores.
  • Spicy Flatbreads: Add jalapeños or red pepper flakes to the vegetable mix for a spicy kick.
  • Cheesy Delight: Mix in different cheeses like feta or goat cheese for a tangy flavor burst.
  • Herbed Crust: Mix dried herbs like thyme or rosemary into the olive oil for an aromatic crust.

Storage and Make-Ahead Instructions

These mini veggie flatbreads can be made ahead of time:

  • Storing Leftovers: Store any leftover flatbreads in an airtight container in the refrigerator for up to 3 days.
  • Reheating: Reheat in a preheated oven at 350°F (175°C) for about 5-7 minutes until warmed through.
  • Make-Ahead Tip: Assemble the flatbreads without baking, cover them with plastic wrap, and refrigerate for up to 24 hours. Bake just before serving.

Comprehensive FAQ

Have questions? Here are some common inquiries about mini veggie flatbreads:

  • Can I use different vegetables? Absolutely! Feel free to swap in your favorites or whatever you have on hand.
  • Is this recipe vegan? You can easily make it vegan by using a dairy-free cheese substitute.
  • What can I serve with these flatbreads? Serve with a side salad, hummus, or a yogurt dip for a complete meal.
  • How do I prevent the flatbreads from getting soggy? Brush the flatbreads with olive oil before adding sauce, and don’t overload with toppings.
  • Can I freeze the flatbreads? Yes, freeze baked flatbreads in an airtight container for up to 2 months. Reheat directly from frozen.
  • What’s the best cheese for these flatbreads? Low-moisture mozzarella is ideal, but feel free to experiment with other cheeses!
  • How spicy can I make these flatbreads? Adjust the heat to your preference by adding more spicy elements or using milder vegetables.
  • How long do they take to bake? Bake for 10-15 minutes, depending on your oven, until the cheese is bubbly and golden.

Nutritional Tips and Dietary Adaptations

Embrace healthy eating with these tips:

  • Load Up on Veggies: The more colorful your toppings, the more nutrients you’ll get!
  • Whole-Grain Option: Opt for whole-grain naan or pita for added fiber.
  • Low-Calorie Cheese: Choose a lower-fat cheese option to reduce calories without sacrificing flavor.

Equipment Recommendations

Here are some essential tools to make your cooking experience easier:

  • Baking Sheet: A sturdy, rimmed baking sheet is crucial for even cooking.
  • Parchment Paper: For easy cleanup and to prevent sticking.
  • Pastry Brush: Perfect for evenly applying olive oil on the flatbreads.

Serving Suggestions

These mini veggie flatbreads are incredibly versatile:

  • As Appetizers: Cut them into smaller pieces for bite-sized appetizers at parties.
  • As a Main Course: Serve with a fresh side salad and a dip.
  • Garnished: Top with a drizzle of balsamic glaze for an elegant touch.

In conclusion, these mini veggie flatbreads are more than just a meal – they are a joyful culinary experience that brings people together. With this guide, you’ll not only master the recipe but also discover the joy of cooking and sharing delicious food. So grab your apron, gather your loved ones, and let’s create something beautiful together in the kitchen!

Mini Veggie Flatbreads

Prep Time 10 minutes
Cook Time 15 minutes
Total Time 25 minutes
Servings 4 pieces
Calories 350
These colorful mini veggie flatbreads are quick to assemble and packed with fresh flavors, perfect for a casual lunch or appetizer.

Ingredients

Flatbread Base

  • 4 pieces Mini Naan Breads or Pita Breads (Store-bought, halved)
  • 2 tablespoons Extra Virgin Olive Oil (For brushing and tossing vegetables)

Sauce and Cheese

  • 0.5 cup Marinara or Pizza Sauce
  • 1.5 cups Shredded Low-Moisture Mozzarella Cheese

Vegetable Toppings

  • 0.5 red Red Bell Pepper (Thinly sliced)
  • 0.5 green Green Bell Pepper (Thinly sliced)
  • 0.25 cup Red Onion (Thinly sliced)
  • 0.5 cup Zucchini (Thinly sliced into half-moons)
  • 0.5 cup Cherry Tomatoes (Halved)

Seasoning and Garnish

  • 1 teaspoon Dried Oregano
  • 0.5 teaspoon Garlic Powder
  • to taste salt and black pepper Salt and Freshly Ground Black Pepper

Garnish

  • as needed fresh herbs Fresh Basil or Parsley (Chopped for garnish)

Instructions 

  • Preheat oven to 425°F (220°C) and line a baking sheet with parchment paper.
  • Arrange flatbreads, brush with olive oil, and prepare vegetables with seasonings.
  • Spread sauce on flatbreads, sprinkle with cheese, then top with seasoned vegetables.
  • Bake for 10-15 minutes until cheese is bubbly and edges are crisp. Garnish with fresh herbs before serving.

Notes

For extra flavor, add a drizzle of balsamic glaze or a sprinkle of red pepper flakes before serving.
Calories: 350kcal
Cost: $15
Course: Main Course
Cuisine: Italian
Keyword: Vegetables

Experience the Joy of Baking with Yogurt Dinner Rolls

Welcome to the delightful world of baking where every roll tells a story! Today, we’re diving into the magic of Yogurt Dinner Rolls. These rolls are not just soft and fluffy; they also carry a hint of tanginess from Greek yogurt that elevates any meal. Whether it’s a family dinner or a cozy gathering with friends, these rolls are bound to steal the show. Let’s embark on this culinary adventure together, where tradition meets modern flair, and every bite is a celebration!

Why You’ll Love This Recipe

Here are just a few reasons why these Yogurt Dinner Rolls will become a staple in your kitchen:

  • Quick and Easy: With minimal ingredients and straightforward steps, these rolls are perfect for both novice and experienced bakers.
  • Two-Ingredient Dough: The magic lies in using just Greek yogurt and self-rising flour, making it a simple and accessible recipe.
  • Soft and Fluffy: Baking these rolls results in a tender and airy texture that’s irresistible fresh from the oven.
  • Versatile Pairing: They pair wonderfully with soups, salads, or as a delightful snack on their own.
  • Perfect for Meal Prep: These rolls can be made ahead and stored, making them a convenient choice for busy days.

Ingredient Breakdown

Let’s take a closer look at the ingredients that make these Yogurt Dinner Rolls shine:

  • 1 Tablespoon Dry, Active Yeast: This is the magic ingredient that helps the rolls rise and become fluffy.
  • 1 Cup Warm Water: Activates the yeast to create a bubbly, airy dough.
  • 2 teaspoons Sugar: A little sweetness to feed the yeast and enhance the flavor.
  • 2 Eggs: Adds richness and moisture to the dough, resulting in a tender crumb.
  • 1/4 Cup Plain Yogurt: Greek yogurt gives these rolls their unique tang and keeps them moist.
  • 1 1/2 teaspoons Salt: Balances the sweetness and enhances the overall flavor.
  • 3 1/2 Cups Unbleached All-Purpose Flour: Creates the structure of the rolls, giving them that perfect chewy texture.

Pro Tips for Perfect Rolls

Juicy and fluffy yogurt dinner rolls shown from the side on a wooden table.

To ensure your Yogurt Dinner Rolls turn out perfectly every time, keep these expert tips in mind:

  • Warm Water: Make sure the water is warm (not hot!) to activate the yeast properly.
  • Let the Dough Rise: Be patient! Allow the dough to rise until it has doubled in size for the best texture.
  • Knead Well: Kneading the dough until it’s soft and elastic is key to achieving fluffy rolls.
  • Don’t Overbake: Keep an eye on the oven; rolls are done when golden brown and sound hollow when tapped.
  • Experiment with Flavors: Feel free to add herbs or spices for a unique twist on the classic flavor.
  • Use Fresh Yeast: Always check the expiration date on your yeast for optimal rising.
  • Cover While Rising: Keep the dough covered with a towel to prevent it from drying out during the rising process.
  • Cool Completely: Allow rolls to cool on a wire rack to maintain their soft texture.

Common Mistakes and Troubleshooting

If you encounter issues with your rolls, here are some common problems and how to fix them:

  • Too Sticky Dough: If your dough is overly sticky, sprinkle a little extra flour while kneading until manageable.
  • Bread Too Dense: This can happen if the dough hasn’t risen enough; ensure it doubles in size before baking.
  • Overly Dry Rolls: If your rolls come out dry, consider adding a bit more yogurt or ensuring you don’t overbake.
  • Flavors Not Strong Enough: If you want a bolder taste, experiment with adding garlic powder or herbs to the dough.

Delicious Variations to Try

Feeling adventurous? Here are some variations to spice up your Yogurt Dinner Rolls:

  • Herbed Rolls: Add dried herbs like rosemary or thyme into the dough for a fragrant twist.
  • Cheesy Rolls: Fold in shredded cheese for a rich, savory flavor that pairs well with soups.
  • Sweet Rolls: Incorporate cinnamon and sugar for a sweet treat that’s perfect for breakfast.
  • Whole Wheat Option: Substitute half of the all-purpose flour for whole wheat flour for a healthier version.

Storage and Make-Ahead Instructions

These Yogurt Dinner Rolls can be prepared in advance, making them a great choice for busy schedules:

  • Room Temperature: Store baked rolls in an airtight container for up to 2 days.
  • Refrigeration: For longer storage, keep them in the fridge for up to a week.
  • Freezing: Freeze unbaked rolls by wrapping in plastic wrap and placing in a freezer bag for up to 3 months. Bake directly from frozen, adding a few extra minutes to the baking time.

Frequently Asked Questions

Let’s address some common questions to help you master these Yogurt Dinner Rolls:

  • Can I use Greek yogurt? Yes! Greek yogurt works perfectly in this recipe, adding moisture and flavor.
  • What if I don’t have self-rising flour? You can use all-purpose flour and add 1 1/2 teaspoons of baking powder and 1/2 teaspoon of salt.
  • How do I know when the rolls are done? They should be golden brown and sound hollow when tapped on the bottom.
  • Can I add herbs or spices? Absolutely! Feel free to get creative with your favorite seasonings.
  • How do I make these rolls gluten-free? Substitute the all-purpose flour with a gluten-free flour blend.
  • Can I use other types of yogurt? Yes, any plain yogurt works, but Greek yogurt produces the best texture.
  • What’s the best way to reheat leftovers? Warm them in the oven at 350°F for a few minutes until heated through.
  • Can I double the recipe? Yes, simply double the ingredients and follow the same process!

Nutritional Tips and Dietary Adaptations

These Yogurt Dinner Rolls can be adapted to fit various dietary needs:

  • Low-Carb Option: Use almond flour or coconut flour for a low-carb alternative.
  • Dairy-Free Version: Substitute yogurt with a plant-based yogurt and use a dairy-free milk alternative.
  • Lower Sugar: Reduce the sugar to 1 teaspoon if you prefer less sweetness.

Essential Equipment Recommendations

To make the most out of this recipe, here are some kitchen tools you’ll need:

  • Mixing Bowls: A good set of mixing bowls for combining ingredients.
  • Measuring Cups and Spoons: Accurate measurements are key to successful baking.
  • Baking Sheet: Use a sturdy baking sheet for even baking of your rolls.
  • Wire Rack: Perfect for cooling your baked rolls without trapping moisture.

Serving Suggestions

Serve your Yogurt Dinner Rolls in style! Here are some delightful ideas:

  • With Dipping Sauces: Pair them with hummus or a tangy dipping oil.
  • As a Side Dish: Serve alongside soups, stews, or salads for a complete meal.
  • With Butter: A little spread of butter or a drizzle of olive oil enhances the flavor beautifully.

In conclusion, these Yogurt Dinner Rolls are more than just a recipe; they are an invitation to create memories around the table. With their delightful texture and comforting taste, they are sure to be a hit at any gathering. So roll up your sleeves, gather your ingredients, and let’s bake something wonderful together!

Yogurt Dinner Rolls

Prep Time 20 minutes
Cook Time 20 minutes
Total Time 40 minutes
Servings 12 pieces
Calories 150
Soft, fluffy dinner rolls made with yogurt and yeast, perfect for any meal.

Ingredients

Yeast

  • 1 Tablespoon Dry, Active Yeast

Liquid

  • 1 Cup Warm Water
  • 2 teaspoons Sugar

Eggs

  • 2 Eggs

Dairy

  • 1/4 Cup Plain Yogurt
  • 1 1/2 teaspoons Salt

Flour

  • 3 1/2 Cups Unbleached All-Purpose Flour

Instructions 

  • Mix warm water, yeast, and sugar; let sit until foamy (~5 min).
  • Whisk in eggs and yogurt; add 2 cups flour and salt, stir.
  • Gradually add remaining flour, knead until soft and elastic.
  • Let dough rise until doubled (~45 min), then punch down and divide into 12 pieces.
  • Shape into rolls, place on greased sheet, let rise 30-45 min, then bake at 375°F (190°C) for 15-20 min.

Notes

Ensure dough is kneaded well for soft rolls.
Calories: 150kcal
Cost: $12
Course: Side Dish
Cuisine: American
Keyword: bread

Welcome, dear friends! Today, we embark on a delightful culinary journey into the sweet world of Gourmet Black Chocolate Covered Strawberries. Imagine the vibrant red of fresh strawberries, their juicy sweetness enveloped in rich, dark chocolate—it’s an experience that tantalizes the senses and brings joy to any occasion. Whether you’re celebrating a special event, looking for a romantic gesture, or simply want to indulge in a luxurious treat, this recipe is sure to impress. Let’s dive into why you’ll love making these chocolate-covered delights!

Why You’ll Love This Recipe

This recipe is not just about creating a dessert; it’s about celebrating flavors, textures, and the joy of sharing. Here are five reasons why this recipe will become your go-to for any gathering:

  • Easy to make: The recipe is simple and requires minimal ingredients, making it accessible to cooks of all levels.
  • Impressive presentation: With just a touch of edible gold luster dust, these strawberries transform into a gourmet treat that dazzles on any table.
  • Customizable flavors: You can personalize your chocolate-covered strawberries by experimenting with toppings and flavor infusions.
  • Perfect for sharing: These treats are ideal for celebrations, gifting, or simply enjoying with loved ones.
  • Healthier indulgence: Strawberries are packed with vitamins and antioxidants, making them a guilt-free dessert choice.

Ingredient Breakdown

Let’s gather our ingredients! Here’s what you’ll need to create these luxurious chocolate-covered strawberries:

  • 12 fresh strawberries: Choose ripe strawberries that are firm and unblemished for the best flavor.
  • 8 ounces dark chocolate (70% cocoa or higher): The richness of dark chocolate enhances the strawberries’ sweetness.
  • 1 tablespoon coconut oil or vegetable shortening: This helps the chocolate melt smoothly and gives it a glossy finish.
  • Edible gold luster dust or gold glitter for decoration: Adds a touch of elegance and makes these treats visually stunning.

If you want to customize your ingredients, here are some substitutions:

  • Chocolate options: Use milk chocolate or white chocolate for a sweeter twist.
  • Fruit alternatives: Try this recipe with bananas, pretzels, or marshmallows for a variety of flavors.
  • Decorative toppings: Consider crushed nuts, sprinkles, or shredded coconut as alternative garnishes.

Preparation Process

Now that we have our ingredients, let’s get down to the delicious task of preparation. Follow these steps to create your gourmet black chocolate covered strawberries:

  1. Ensure the strawberries are completely dry after washing, as water can cause the chocolate to seize.
  2. In a microwave-safe bowl, combine the chopped dark chocolate and coconut oil. Heat in the microwave in 30-second intervals, stirring in between, until smooth and fully melted.
  3. Hold each strawberry by the stem and dip it into the melted chocolate, swirling to coat evenly. Allow excess chocolate to drip off.
  4. Using a small brush or a piping bag, apply the edible gold luster dust or glitter in swirls over the chocolate-covered strawberries while the chocolate is still wet.
  5. Place the dipped strawberries on a parchment-lined baking sheet and let them cool at room temperature until the chocolate hardens.
  6. Once set, arrange the strawberries on a serving platter or insert them onto sticks for easy handling. Enjoy immediately or refrigerate until ready to serve.

Pro Tips for Perfection

Fresh strawberries dipped in dark chocolate, with a shiny coating and gold dust.

To ensure your chocolate-covered strawberries are nothing short of spectacular, here are some expert insights:

  • Choose quality chocolate: The type of chocolate you use can make or break your strawberries. Opt for high-quality dark chocolate for a more intense flavor.
  • Temperature matters: Make sure your strawberries are at room temperature before dipping to avoid condensation that can ruin the chocolate coating.
  • Mind the dip: Dip strawberries quickly to maintain the chocolate’s melt; take your time for an even coat.
  • Experiment with flavors: Infuse your chocolate with flavors like orange zest or espresso for an extra layer of taste.
  • Chill before serving: If you prefer, refrigerate the dipped strawberries for a short while to firm up the chocolate further.
  • Decorate boldly: Don’t be shy with the gold luster dust; it elevates your dessert to a whole new level of luxury.
  • Alternative melting methods: If you don’t have a microwave, use a double boiler for melting chocolate.
  • Work in batches: If you’re making a large quantity, work in smaller batches to ensure each strawberry is perfectly dipped.

Common Mistakes and Troubleshooting

Even the best chefs can encounter hiccups along the way. Here are some common mistakes and how to avoid them:

  • Chocolate seizing: If your chocolate looks grainy, it might have come into contact with moisture. Always ensure that your bowl and utensils are completely dry.
  • Too thick a coating: Make sure to let excess chocolate drip off your strawberries; a thick layer can lead to a messy finish.
  • Gold dust clumping: Apply the luster dust quickly while the chocolate is still wet to avoid clumping.
  • Strawberries leaking juice: Use fresh, dry strawberries to prevent juices from seeping into the chocolate.

Variations to Try

Don’t be afraid to get creative! Here are some variations to consider:

  • White Chocolate Drizzle: Dip in dark chocolate and drizzle with melted white chocolate for a beautiful contrast.
  • Nutty Bliss: Roll your dipped strawberries in crushed nuts for added texture and flavor.
  • Spicy Kick: Add a sprinkle of cayenne pepper or chili powder to your melted chocolate for a spicy twist.
  • Fruit Fusion: Mix in some raspberry or orange zest into your chocolate for a fruity flavor boost.

Storage and Make-Ahead Instructions

Planning a special occasion? Here’s how to store your gourmet strawberries:

  • Refrigerate: Store chocolate-covered strawberries in an airtight container in the refrigerator for up to 48 hours.
  • Room temperature: If serving the same day, they can be kept at room temperature for a couple of hours before serving.
  • Make-ahead tip: Dip strawberries a day in advance and store them in the refrigerator until ready to serve.

Frequently Asked Questions

Let’s address some common queries about making gourmet black chocolate covered strawberries:

  • Can I use milk chocolate instead of dark chocolate? Yes! Feel free to use any chocolate you love.
  • How do I make sure the chocolate is glossy? Adding coconut oil or shortening to your chocolate will help achieve a shiny coating.
  • Can I freeze chocolate-covered strawberries? It’s not recommended, as the strawberries can become mushy when thawed.
  • What can I do if the chocolate hardens before dipping? Simply reheat it gently in the microwave or over a double boiler.
  • Are there other toppings I can use? Absolutely! Crushed cookies, sprinkles, or even sea salt make delightful toppings.
  • How do I avoid chocolate running off the strawberries? Ensure your strawberries are completely dry before dipping to keep the chocolate intact.
  • Can I use store-bought chocolate? Yes, but homemade melted chocolate often yields a better flavor and texture.
  • Is this recipe suitable for vegan diets? Use dark chocolate that is dairy-free and substitute coconut oil for any other shortening.

Nutritional Tips and Dietary Adaptations

While indulging in Gourmet Black Chocolate Covered Strawberries, it’s important to consider their nutritional profile:

  • Rich in antioxidants: Strawberries are high in vitamin C and antioxidants, promoting overall health.
  • Moderate indulgence: Enjoy these treats in moderation as part of a balanced diet.
  • Gluten-free option: This recipe is naturally gluten-free, making it a great dessert for those with dietary restrictions.

Equipment Recommendations

To make your chocolate-covered strawberries, you’ll need:

  • Microwave-safe bowl: For melting chocolate smoothly.
  • Parchment paper: To line your baking sheet for easy cleanup.
  • Small brush or piping bag: For applying the gold luster dust or glitter.
  • Double boiler (optional): If you prefer to melt chocolate using this method.

Serving Suggestions

These gourmet black chocolate covered strawberries can be served in various delightful ways:

  • On a platter: Arrange them artfully on a serving platter for a stunning presentation.
  • In a glass: Serve them in tall glasses for a unique display at parties.
  • With drinks: Pair them with sparkling wine or coffee for a luxurious treat.

In conclusion, preparing Gourmet Black Chocolate Covered Strawberries is not just about the end result; it’s an experience that brings joy, creativity, and connection. Whether it’s for a special occasion or simply to treat yourself, these strawberries are a testament to the beauty of cooking with love and passion. So gather your ingredients, invite some friends, and let’s celebrate life through food! Enjoy your culinary adventure!

Gourmet Black Chocolate Covered Strawberries

Prep Time 15 minutes
Cook Time 5 minutes
Total Time 20 minutes
Servings 12 pieces
Calories 150
Indulge in elegant, decadent strawberries dipped in rich dark chocolate and adorned with edible gold for a luxurious treat.

Ingredients

Fruits

  • 12 pieces fresh strawberries, washed and dried

Chocolate

  • 8 ounces dark chocolate (70% cocoa or higher), chopped
  • 1 tablespoon coconut oil or vegetable shortening

Decoration

  • 1 tablespoon edible gold luster dust or gold glitter

Instructions 

  • Ensure strawberries are completely dry.
  • Melt chocolate and coconut oil in 30-second microwave intervals, stirring until smooth.
  • Dip strawberries into melted chocolate, letting excess drip off.
  • Apply gold dust or glitter on wet chocolate with a brush or piping bag.
  • Place strawberries on parchment and let cool until chocolate hardens.
  • Serve immediately or refrigerate until ready.

Notes

Use high-quality chocolate for best flavor and appearance.
Calories: 150kcal
Cost: $15
Course: Dessert
Cuisine: International
Keyword: chocolate, Gold, Strawberries