Author

rafael

Browsing

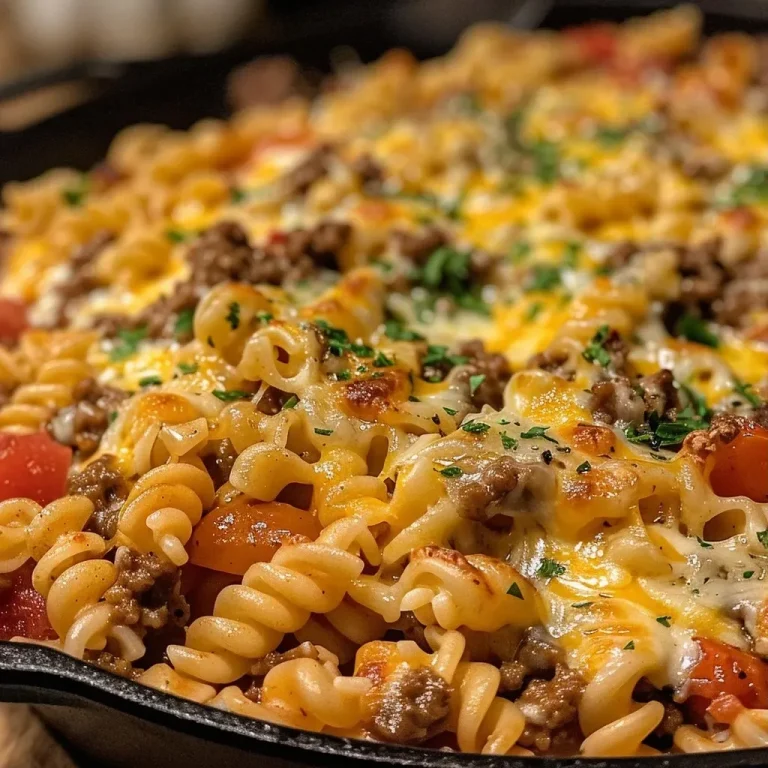
The Heart of the Mediterranean: Ground Beef Skillet Delight

Welcome to my kitchen, where the vibrant aromas of the Mediterranean dance with the sizzle of fresh ingredients! Today, we’re diving into a dish that’s not only a feast for the senses but also a quick and easy way to bring comfort to your dining table: the Ground Beef Skillet. This delightful recipe showcases the perfect blend of sautéed onions, bell peppers, and juicy tomatoes, transforming a simple meal into a vibrant celebration of flavors. Let’s savor every bite together!

Why You’ll Love This Recipe

This Ground Beef Skillet is more than just a meal. Here are five reasons why it will become a staple in your kitchen:

  • Quick and Easy: Perfect for busy weeknights, this dish comes together in under 30 minutes, allowing you to enjoy a homemade meal without the fuss.
  • Flavorful Comfort: The combination of savory beef, aromatic spices, and fresh vegetables creates a comforting dish that warms the soul.
  • Versatile Base: Use it as a base for tacos, serve it over rice, or enjoy it with crusty bread for a delightful twist.
  • Nutritious Ingredients: Packed with protein and vitamins, this skillet meal is not only satisfying but also nourishing.
  • Family-Friendly: With flavors that appeal to both adults and kids, it’s a dish that everyone will love!

Ingredient Breakdown

Now, let’s explore the ingredients that make this Ground Beef Skillet so irresistible:

  • 1 lb Ground Beef: Choose lean ground beef for a healthier option. You can also substitute with ground turkey or chicken if preferred.
  • 1 cup Chopped Onion: Adds sweetness and depth. Try using red onion for a slightly bolder flavor.
  • 0.5 cup Chopped Bell Pepper: Bell peppers bring a pop of color and a sweet crunch. Feel free to mix colors for visual appeal.
  • 1 tsp Garlic Powder: For an aromatic boost, fresh minced garlic can enhance the dish even further.
  • 1 can (14.5 oz) Diced Tomatoes: Juicy and tangy, these tomatoes help create a lovely sauce. Opt for fire-roasted tomatoes for a smoky flavor.
  • 1 cup Beef Broth: Enhances the savory elements of the dish. Use vegetable broth for a lighter version.

Pro Tips for Perfecting Your Skillet

Here are some expert insights to elevate your Ground Beef Skillet:

  • Brown the Beef Properly: For maximum flavor, let the beef brown thoroughly before adding other ingredients.
  • Season Gradually: Taste as you cook and adjust seasoning to your preference. A pinch of salt can enhance the flavors significantly.
  • Use Fresh Ingredients: Fresh vegetables not only taste better but also add vibrant colors and nutrients to your dish.
  • Experiment with Spices: Add a pinch of cumin or smoked paprika for an extra layer of flavor.
  • Don’t Overcrowd the Pan: Cook in batches if necessary to ensure even cooking and browning.
  • Simmer Gently: Allow the dish to simmer for a few minutes to meld the flavors together beautifully.
  • Garnish Generously: Fresh herbs like parsley or cilantro add a refreshing touch to your finished dish.
  • Keep it Warm: Serve immediately, but if you need to hold it, keep it on low heat covered to maintain warmth without overcooking.

Avoiding Common Mistakes

Even the best cooks can make mistakes! Here are some common pitfalls and how to troubleshoot them:

  • Too Greasy: If your skillet is too oily, opt for leaner ground beef or drain excess fat after browning.
  • Flavorless Dish: Ensure to season at every stage of cooking. A well-seasoned dish is key to great flavor.
  • Overcooked Vegetables: Add vegetables towards the end of cooking to retain their crunch and color.
  • Too Watery: If the dish is too soupy, let it simmer uncovered to allow excess liquid to evaporate.

Delicious Variations

Mix things up with these tasty variations of the Ground Beef Skillet:

  • Mexican Twist: Add black beans, corn, and taco seasoning for a hearty taco skillet.
  • Italian Style: Stir in cooked pasta and a sprinkle of Parmesan cheese for a comforting pasta bake.
  • Moroccan Influence: Incorporate dried fruits like raisins and spices such as cinnamon for a unique flavor profile.
  • Vegetarian Option: Swap the beef for lentils or quinoa and load up on more vegetables for a filling plant-based meal.

Storage and Make-Ahead Instructions

This Ground Beef Skillet is perfect for meal prep! Here’s how to store and reheat your dish:

  • Refrigerator: Store in an airtight container for up to 3 days. Reheat on the stovetop or microwave until warmed through.
  • Freezer: Freeze in portions for up to 3 months. Thaw overnight in the fridge before reheating.
  • Make Ahead: Prepare the ingredients in advance and store them separately. Cook when ready to enjoy a fresh meal!

Frequently Asked Questions

Here are some common questions and answers about the Ground Beef Skillet:

  • Can I use frozen ground beef? Yes, just thaw it completely before cooking for even results.
  • What can I serve with this dish? Pair it with rice, crusty bread, or a fresh salad for a complete meal.
  • Can I make this dish spicy? Absolutely! Add diced jalapeños or a sprinkle of red pepper flakes for a kick.
  • What’s a good substitute for beef broth? Vegetable broth or chicken broth works well if you want a lighter flavor.
  • How do I know when the beef is cooked? Ground beef should be browned throughout with no pink remaining.
  • Can I add cheese? Yes! A sprinkle of cheese right before serving adds a delightful richness.
  • How can I make this recipe gluten-free? Ensure all ingredients, especially broth and canned goods, are labeled gluten-free.
  • Can I use other meats? Yes, ground turkey, chicken, or even plant-based substitutes work great!

Nutritional Tips and Dietary Adaptations

Want to make this dish even healthier? Here are some tips:

  • Increase Vegetables: Add more veggies to boost fiber and nutrients. Spinach, zucchini, and carrots are great additions.
  • Opt for Whole Grains: Serve with brown rice or quinoa instead of white rice for added health benefits.
  • Limit Sodium: Use low-sodium broth and season to taste to control salt intake.

Essential Equipment Recommendations

To make your cooking experience seamless, here’s what you’ll need:

  • Cast Iron Skillet: Perfect for even heat distribution and browning.
  • Wooden Spoon: Ideal for stirring without damaging your cookware.
  • Measuring Cups and Spoons: Accurate measurements ensure consistent results.

Serving Suggestions

Finally, let’s talk about how to serve your Ground Beef Skillet:

  • Garnish: Fresh herbs like cilantro or parsley add a burst of color and flavor on top.
  • Accompaniments: Serve with warm tortillas for a taco night or a side of roasted vegetables.
  • Presentation: Use colorful bowls or plates to present your dish beautifully and make it Instagram-worthy!

Conclusion

Cooking is a celebration, and this Ground Beef Skillet embodies that spirit! With its vibrant flavors, quick preparation, and endless possibilities for customization, it’s a dish that invites everyone to gather around the table. So grab your ingredients, turn up the heat, and let’s create something delicious together that whispers comfort and joy!
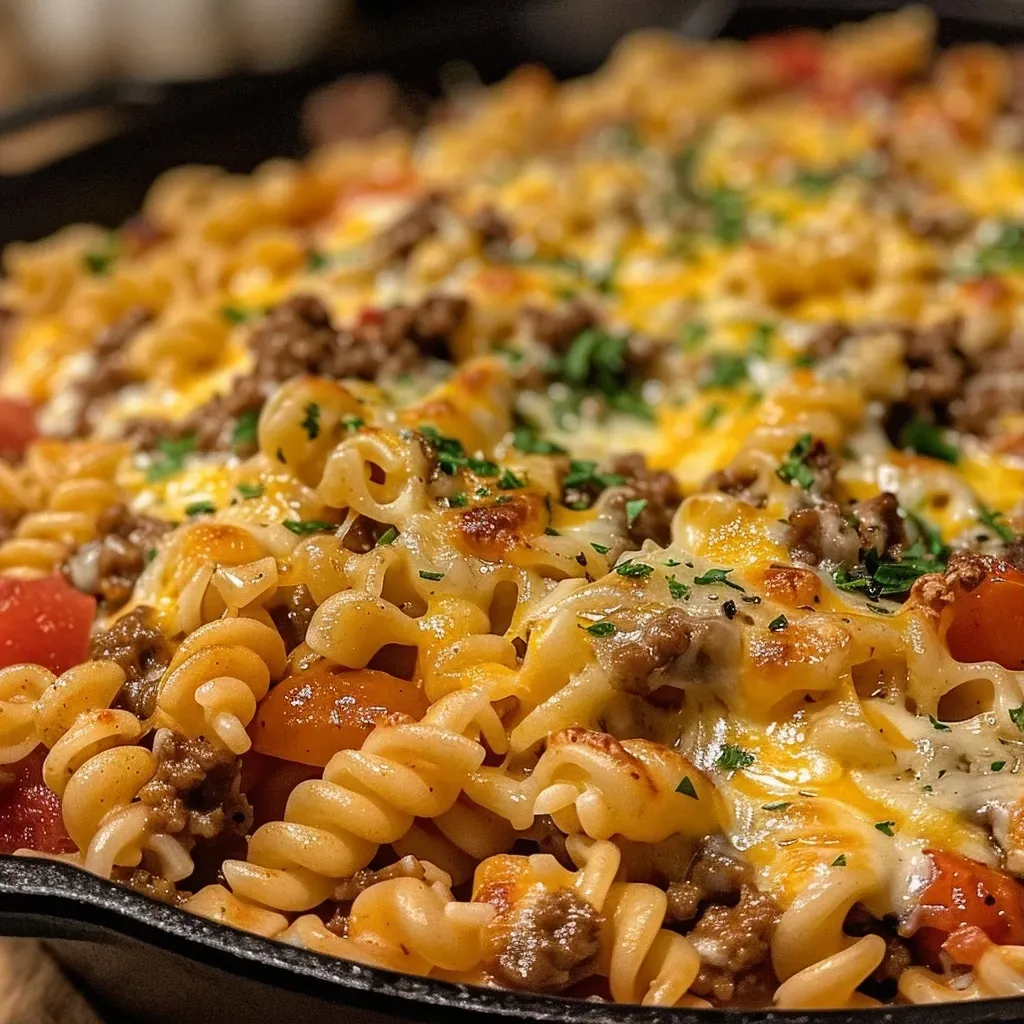
Ground Beef Skillet

Prep Time 10 minutes
Cook Time 20 minutes
Total Time 30 minutes
Servings 4 servings
Calories 350
A quick and hearty dish combining ground beef with vegetables and tomatoes for a satisfying meal.

Ingredients

Meat

  • 1 lb Ground Beef
  • 1 cup Chopped Onion
  • 0.5 cup Chopped Bell Pepper
  • 1 tsp Garlic Powder
  • 1 can (14.5 oz) Diced Tomatoes
  • 1 cup Beef Broth

Instructions 

  • Cook ground beef in a skillet until browned.
  • Add chopped onion and bell pepper; cook until softened.
  • Stir in garlic powder and diced tomatoes.
  • Pour in beef broth and simmer for 10 minutes.
  • Serve hot, garnished as desired.
Notes

You can add cheese or herbs for extra flavor.
Calories: 350kcal
Cost: $10
Course: Main Course
Cuisine: American
Keyword: Ground Beef

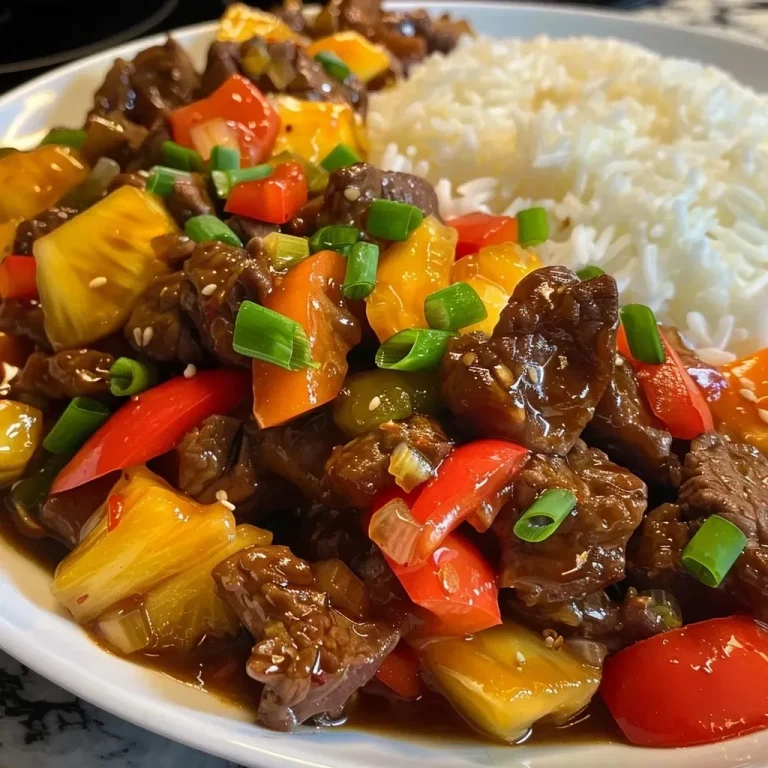
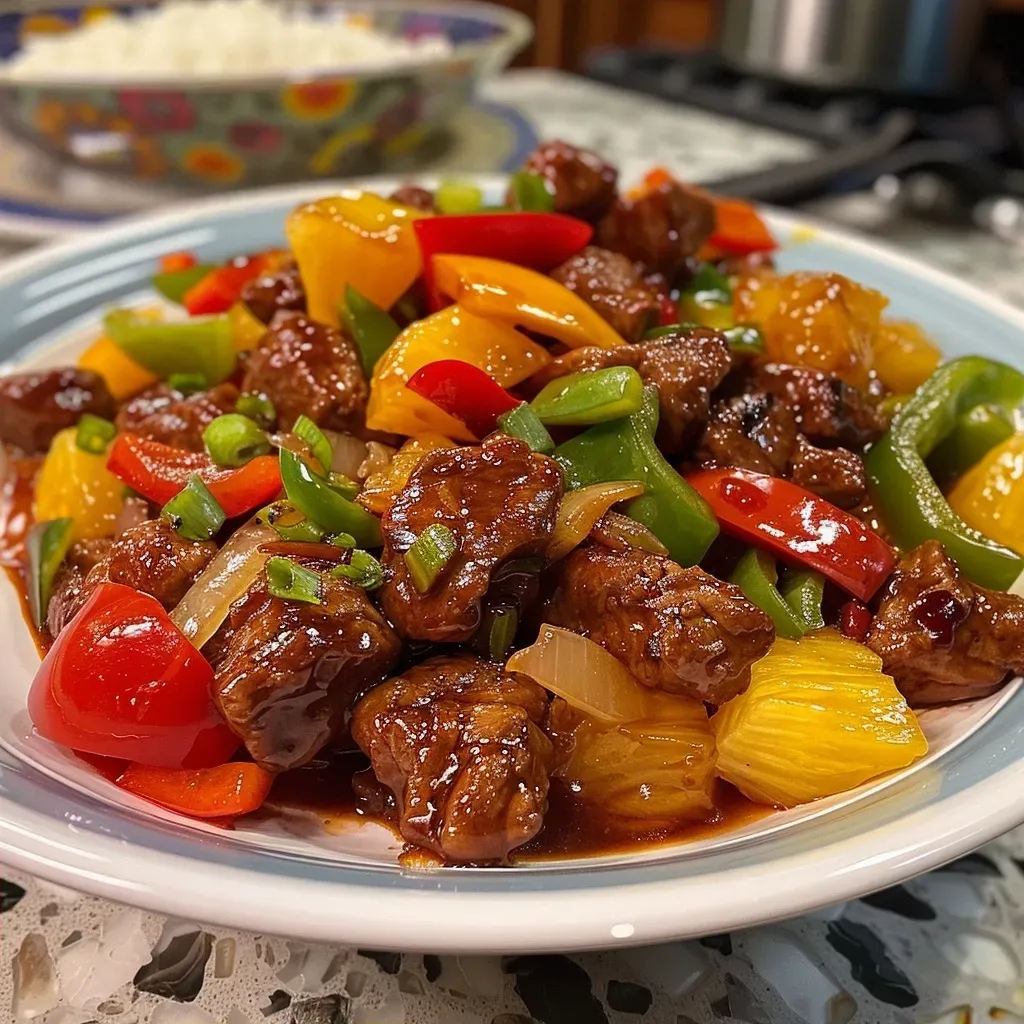
Welcome to a Flavorful Journey: Sweet and Sour Beef

Ah, sweet and sour beef! This dish is more than just a recipe; it’s a delightful celebration of flavors that will bring your family and friends together around the table. As a child growing up in Seville, I learned that cooking is about joy, culture, and experience. Today, I want to share my take on sweet and sour beef, where tender beef sirloin meets vibrant bell peppers and sweet pineapple, all enveloped in a tangy sauce that sings with flavor. This dish is perfect for family gatherings, quick weeknight dinners, or any occasion that calls for a bit of culinary magic!

Why You’ll Love This Recipe

  • Quick to prepare: Ready in about 30 minutes, making it a fantastic choice for weeknight meals.
  • Flavorful balance: The sweet and tangy sauce perfectly complements the savory beef, creating a symphony of taste.
  • Colorful presentation: The inclusion of vibrant bell peppers and pineapple adds a burst of color to your plate.
  • Customizable: Easily adapt the ingredients based on your preferences or what you have on hand.
  • Family favorite: With its delightful taste, this dish is sure to become a staple in your household!

Ingredients for Sweet and Sour Beef

Let’s gather our ingredients! Here’s what you’ll need:

  • 1 pound beef sirloin: Thinly sliced for tenderness and quick cooking.
  • 1/2 cup bell pepper: Chopped (any color works—green, red, or yellow for sweetness).
  • 1/2 cup onion: Chopped for deeper flavor.
  • 1 cup pineapple chunks: Fresh or canned, adding a lovely sweetness.
  • 1/4 cup soy sauce: For that savory umami flavor.
  • 1/4 cup ketchup: Adds sweetness and thickness to the sauce.
  • 1/4 cup apple cider vinegar: For a tangy kick!
  • 1/4 cup brown sugar: Balances the flavors perfectly.
  • 2 tablespoons cornstarch: Helps thicken the sauce.
  • 1 tablespoon vegetable oil: For frying.
  • 1 teaspoon garlic powder: A must for that aromatic touch.
  • 1 teaspoon ginger powder: Adds warmth and depth.
  • Salt and pepper to taste: Essential for seasoning.
  • Cooked rice for serving: To soak up all that delicious sauce.

How to Make Sweet and Sour Beef

Sweet and Sour Beef

Now that we have all our ingredients ready, let’s dive into the cooking process. Follow these step-by-step instructions for a dish that is sure to impress!

  • Step 1: Prepare the sauce – In a medium bowl, whisk together the soy sauce, ketchup, apple cider vinegar, brown sugar, garlic powder, ginger powder, and a pinch of salt and pepper until well blended.
  • Step 2: Cook the beef – In a large skillet or wok, heat the vegetable oil over medium-high heat. Add the sliced beef and cook until browned, about 3-4 minutes. Remove the beef from the skillet and set aside.
  • Step 3: Stir-fry the vegetables – In the same skillet, add the chopped onion and bell pepper. Stir-fry for about 2-3 minutes until they start to soften.
  • Step 4: Add the pineapple – Toss in the pineapple chunks and stir to combine, letting the flavors meld.
  • Step 5: Combine ingredients – Return the beef to the skillet, pour the sauce mixture over everything, and stir well to coat evenly.
  • Step 6: Thicken the sauce – In a small bowl, mix the cornstarch with 2 tablespoons of water to create a slurry. Add this to the skillet and stir until the sauce thickens, about 2-3 minutes.
  • Step 7: Serve – Serve the sweet and sour beef over cooked rice for a satisfying meal.

Pro Tips for Perfect Sweet and Sour Beef

  • Choose the right beef: Sirloin is tender and flavorful, but flank steak or even chicken can work beautifully.
  • Don’t skip the cornstarch: This is key for achieving that glossy sauce that clings to your ingredients.
  • Experiment with vegetables: Feel free to add broccoli, snap peas, or carrots for extra color and nutrition.
  • Let it simmer: If you have time, let the dish simmer for a few extra minutes to deepen the flavors.
  • Adjust sweetness: If you prefer less sweetness, reduce the brown sugar or ketchup.
  • Garnish for flair: A sprinkle of sesame seeds or chopped green onions adds a beautiful finishing touch.
  • Make it gluten-free: Substitute soy sauce with tamari or coconut aminos for a gluten-free option.
  • Serve with a side: Pair with a simple green salad to balance the meal.

Common Mistakes to Avoid

Let’s make sure your sweet and sour beef turns out perfectly! Here are some common pitfalls to watch out for:

  • Overcooking the beef: Sauté just until browned; it will continue to cook when combined with the sauce.
  • Skipping the marinade: Allowing the beef to marinate in the sauce for 10-15 minutes enhances flavor.
  • Using too much cornstarch: Too much can lead to a gummy sauce; start with less and adjust as needed.
  • Not tasting as you go: Always sample your dish while cooking to adjust seasoning to your liking.

Delicious Variations of Sweet and Sour Beef

Feeling adventurous? Here are some fun variations to try!

  • Sweet and Sour Chicken: Substitute beef with chicken breast for a lighter option.
  • Vegetable Delight: Go vegetarian by using tofu and a medley of your favorite vegetables.
  • Spicy Kick: Add red pepper flakes or a splash of sriracha to the sauce for heat.
  • Pineapple Fried Rice: Serve the beef on a bed of fried rice mixed with pineapple for a twist.

Storage and Make-Ahead Instructions

If you’re planning ahead, here’s how to store and reheat your sweet and sour beef:

  • Refrigeration: Store leftovers in an airtight container in the fridge for up to 3 days.
  • Freezing: This dish can be frozen for up to 3 months. Reheat thoroughly before serving.
  • Make-ahead: Prepare the sauce and chop your vegetables ahead of time for a quick cooking experience on busy nights.

Frequently Asked Questions

Here are some common questions about making sweet and sour beef:

  • Can I use frozen vegetables? Yes! Frozen stir-fry blends are a convenient option.
  • What can I serve with sweet and sour beef? Serve it with rice, noodles, or a fresh salad.
  • How do I make it less sweet? Reduce the amount of brown sugar or ketchup in the sauce.
  • Can I use other meats? Absolutely! Pork or shrimp can also be delicious in this recipe.
  • What’s the best way to cut beef for stir-fry? Always slice against the grain for tenderness.
  • How can I make this dish spicier? Add fresh chilies or a few dashes of hot sauce to the sauce.
  • Is this recipe suitable for meal prep? Yes! It stores and reheats well for easy meals throughout the week.
  • Can I use low-sodium soy sauce? Definitely! It’s a great way to reduce sodium intake.

Nutritional Tips and Dietary Adaptations

This sweet and sour beef can easily fit into various dietary preferences:

  • Low-carb option: Serve it over cauliflower rice instead of regular rice.
  • Gluten-free: Use gluten-free soy sauce or coconut aminos.
  • Low sugar alternative: Substitute brown sugar with a sugar alternative like stevia.
  • Paleo-friendly: Use honey instead of sugar and ditch the soy sauce for coconut aminos.

Essential Equipment for Cooking Sweet and Sour Beef

To prepare this dish, you’ll need:

  • Sharp knife: For slicing the beef and vegetables.
  • Cutting board: A sturdy surface for prep.
  • Large skillet or wok: To stir-fry the ingredients evenly.
  • Measuring cups and spoons: For accurate ingredient measurements.
  • Whisk: To combine the sauce ingredients smoothly.

Serving Suggestions

To elevate your dining experience, consider these serving ideas:

  • Garnish with fresh herbs: Cilantro or green onions add a fresh touch.
  • Serve with sesame seeds: A sprinkle of toasted sesame seeds enhances presentation and flavor.
  • Accompany with a side of spring rolls: A crispy side that complements the dish beautifully.
  • Pair with a refreshing drink: Serve with iced tea or lemonade to balance the meal.

Conclusion: A Dish to Celebrate!

Now that you have the ultimate guide to making sweet and sour beef, I invite you to create this dish in your kitchen. Cooking is not just about feeding the body but nourishing the soul, and this vibrant meal embodies that spirit. Gather your loved ones, share stories, and enjoy the delightful flavors of sweet and sour beef together. Happy cooking, and may your kitchen be filled with laughter and joy!

Sweet and Sour Beef

Prep Time 10 minutes
Cook Time 15 minutes
Total Time 25 minutes
Servings 4 servings
Calories 350
A flavorful dish combining tender beef with a tangy sweet and sour sauce, served over rice for a satisfying meal.

Ingredients

Meat

  • 1 pound beef sirloin, thinly sliced
  • 1/2 cup bell pepper, chopped (any color)
  • 1/2 cup onion, chopped
  • 1 cup pineapple chunks, fresh or canned
  • 1/4 cup soy sauce
  • 1/4 cup ketchup
  • 1/4 cup apple cider vinegar
  • 1/4 cup brown sugar
  • 2 tablespoons cornstarch
  • 1 tablespoon vegetable oil
  • 1 teaspoon garlic powder
  • 1 teaspoon ginger powder
  • to taste Salt and pepper
  • for serving Cooked rice

Instructions 

  • Whisk soy sauce, ketchup, vinegar, sugar, garlic, ginger, salt, and pepper.
  • Cook beef in oil until browned, then set aside.
  • Stir-fry onion and bell pepper until softened.
  • Add pineapple and beef back to skillet, then pour sauce over.
  • Mix cornstarch with water, add to skillet, and cook until thickened.
  • Serve over cooked rice.

Notes

Adjust sauce ingredients to taste for sweetness or tanginess.
Calories: 350kcal
Cost: $15
Course: Main Course
Cuisine: Asian
Keyword: Beef

Ah, the aroma of **creamy Tuscan chicken** wafting through the air! This delightful dish, often affectionately dubbed “**Marry Me Tuscan Chicken**,” is a celebration of rich flavors and comforting textures that can transform any meal into a festive gathering. Whether you’re cooking for family or hosting friends, this recipe promises to enchant every taste bud and warm every heart. Get ready to dive into a culinary adventure that combines the vibrant essence of Mediterranean cuisine with modern twists!

Why You’ll Love This Recipe

  • Quick and Easy: Perfect for weeknight dinners, this dish comes together in under 30 minutes without sacrificing flavor.
  • Deliciously Creamy: The rich **creamy sauce** made from heavy cream and Parmesan cheese creates a luscious coating for the chicken.
  • Nutritious Greens: Fresh baby spinach adds a pop of color and nutrition, making it a well-rounded meal.
  • Versatile Pairing: This chicken dish pairs beautifully with a variety of sides, from mashed potatoes to crusty bread.
  • Impressive Presentation: Garnished with fresh basil, it looks as stunning as it tastes, perfect for impressing guests!

Ingredients Overview

Gathering the right ingredients is key to creating a flavorful **Tuscan chicken**. Here’s a detailed breakdown of what you’ll need, along with some substitution ideas:

  • 4 boneless, skinless chicken breasts: These are lean and perfect for absorbing flavors. You can substitute with chicken thighs for a juicier option.
  • Salt and freshly ground black pepper: To taste, these are essential for seasoning the chicken properly.
  • 2 tablespoons olive oil: This adds richness and helps in browning the chicken. Feel free to use avocado oil if you prefer.
  • 3 cloves garlic, minced: Fresh garlic gives a fragrant kick to the dish.
  • 1 cup heavy cream: This is the star of the sauce! For a lighter version, you can use half-and-half or coconut cream.
  • 1/2 cup chicken broth: Adds depth to the sauce; vegetable broth works as a great vegetarian alternative.
  • 1/2 cup grated Parmesan cheese: For that cheesy, savory goodness. Nutritional yeast can be a vegan substitute.
  • 1/4 cup sun-dried tomatoes, chopped: These bring a sweet-tart flavor that’s quintessential in Tuscan cuisine.
  • 2 cups fresh baby spinach: A nutrient powerhouse that wilts beautifully into the sauce.
  • 1 teaspoon dried Italian herbs: A blend of oregano, basil, and thyme elevates the flavor profile.
  • Red pepper flakes: Optional, but they add a delightful kick!
  • Fresh basil, for garnish: This aromatic herb not only enhances the flavor but also adds a beautiful presentation.

Step-by-Step Instructions

Now that we’ve covered the ingredients, let’s dive into the cooking process!

  1. Season the chicken: Generously season both sides of the chicken breasts with salt and pepper.
  2. Cook the chicken: Heat olive oil in a large skillet over medium-high heat. Add the chicken and cook until golden brown and cooked through, about 5-7 minutes per side. Remove chicken and set aside.
  3. Sauté garlic: In the same skillet, add the minced garlic and sauté for 1 minute until fragrant.
  4. Create the sauce: Add heavy cream, chicken broth, and Parmesan cheese. Stir to combine and bring to a simmer.
  5. Add sun-dried tomatoes and herbs: Stir in chopped sun-dried tomatoes, dried Italian herbs, and red pepper flakes if using.
  6. Incorporate spinach: Add fresh spinach and cook until wilted, about 2 minutes.
  7. Return chicken to skillet: Place the cooked chicken breasts back in the skillet and spoon some sauce over the top. Simmer for 2-3 minutes until heated through.
  8. Garnish and serve: Top with freshly chopped basil and serve immediately.

Expert Tips for Success

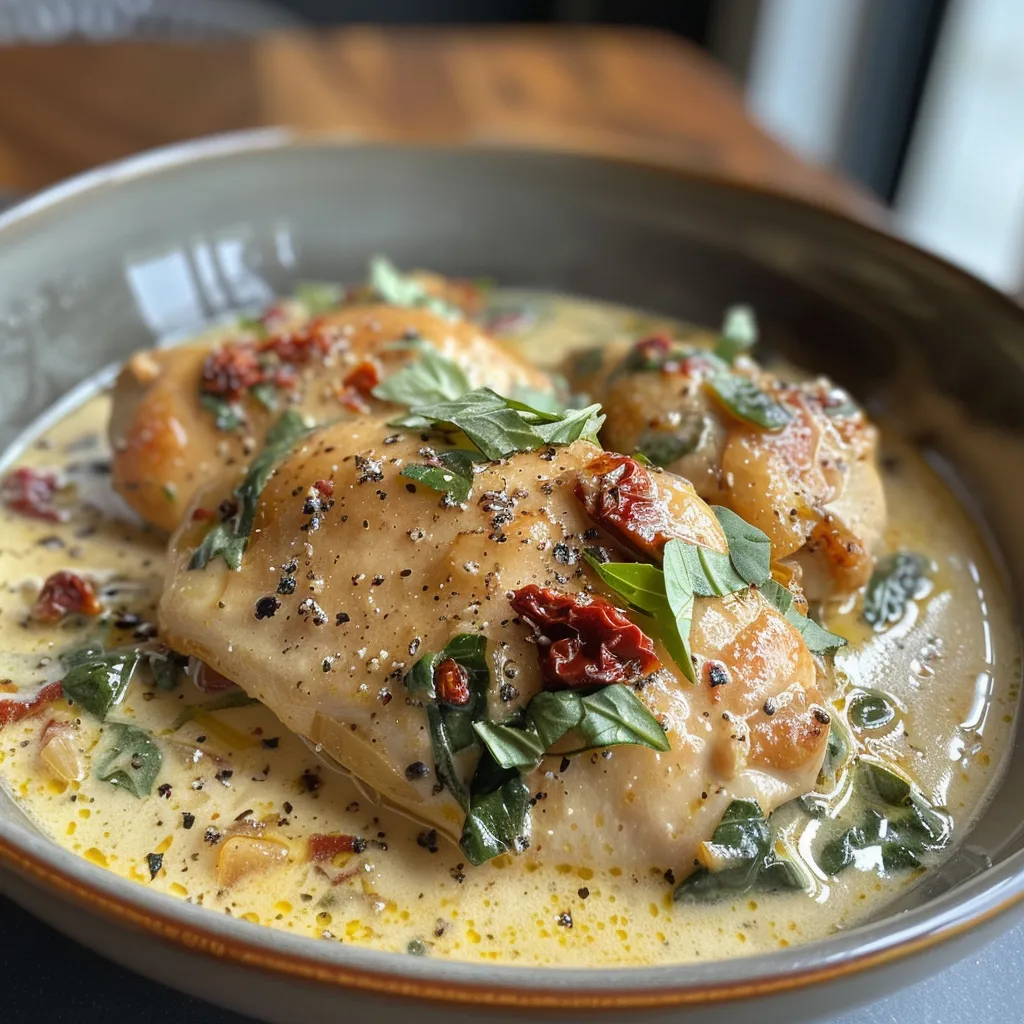
Close-up of Tuscan chicken garnished with fresh basil and sun-dried tomatoes.

To ensure your **creamy Tuscan chicken** turns out perfect every time, consider these pro tips:

  • Use a meat thermometer: Chicken is perfectly cooked at an internal temperature of 165°F (75°C).
  • Sear for flavor: Don’t overcrowd the pan; cook chicken in batches if necessary to achieve a nice golden crust.
  • Fresh ingredients matter: Always opt for fresh spinach and quality Parmesan for the best flavors.
  • Let it rest: Allow the chicken to rest for a few minutes after cooking to retain its juices.
  • Make it your own: Feel free to experiment with additional vegetables like mushrooms or bell peppers for added texture and flavor.
  • Adjust the creaminess: For a lighter sauce, reduce the amount of cream or substitute with Greek yogurt.
  • Save some sauce: Reserve a bit of sauce for drizzling over your sides for an extra flavor boost.
  • Reheat gently: If you have leftovers, reheat gently over low heat to prevent the sauce from separating.

Common Mistakes to Avoid

Avoid these pitfalls for a flawless dish:

  • Undercooking the chicken: Always ensure the chicken is fully cooked; it should not be pink in the center.
  • Not seasoning enough: Seasoning is key! Don’t be shy with salt and pepper.
  • Skipping the resting time: Letting the chicken rest allows the juices to redistribute for maximum tenderness.
  • Overcooking the spinach: Add spinach at the end to keep it vibrant and fresh.

Delicious Variations

Feel free to switch things up and personalize your **Marry Me Tuscan Chicken** with these exciting variations:

  • Mushroom Medley: Add sliced mushrooms for an earthy flavor and hearty texture.
  • Sun-Dried Tomato Pesto: Replace sun-dried tomatoes with a dollop of pesto for a herby twist.
  • Italian Sausage: Mix in cooked Italian sausage for a more robust and spicy flavor profile.
  • Veggie Delight: Incorporate bell peppers, zucchini, or asparagus for a colorful and nutritious boost.

Storage and Make-Ahead Instructions

This dish is as convenient as it is delicious! Here’s how to store and prepare ahead of time:

  • Refrigeration: Store leftovers in an airtight container for up to 3 days in the fridge.
  • Freezing: While best eaten fresh, you can freeze it for up to 2 months. Thaw in the refrigerator overnight before reheating.
  • Make-Ahead: You can prepare the sauce up to a day in advance. Store separately and combine with freshly cooked chicken when ready to serve.

Frequently Asked Questions

Here are some common queries about **creamy Tuscan chicken**:

  • Can I make Marry Me Tuscan Chicken ahead of time? Yes, you can prepare the sauce in advance and cook the chicken fresh when you’re ready to serve.
  • What if I don’t have sun-dried tomatoes? You can substitute with fresh tomatoes or omit them altogether for a simpler sauce.
  • How do I store leftover Tuscan chicken? Keep it in an airtight container in the fridge for up to 3 days.
  • Can I use chicken thighs instead of breasts? Absolutely! Chicken thighs will provide a richer flavor.
  • Is this recipe gluten-free? Yes, it is naturally gluten-free, but always check your ingredients to be sure.
  • How do I thicken the creamy sauce without cream? You can use a cornstarch slurry or reduce the sauce longer to achieve the desired thickness.
  • What sides pair well with Tuscan chicken? Creamy mashed potatoes, garlic bread, or a fresh garden salad complement this dish beautifully.
  • Can I add more vegetables? Yes, feel free to add your favorite vegetables for a delicious twist!

Nutritional Tips and Dietary Adaptations

This dish is not only delicious but can also fit various dietary needs:

  • Low-Carb Option: Serve over cauliflower rice instead of traditional carbs.
  • Dairy-Free: Use coconut milk or almond cream in place of heavy cream and omit cheese.
  • Whole 30 Compliant: Substitute with compliant broth and skip the cheese.

Essential Kitchen Equipment

To make your cooking experience smoother, here are some recommended kitchen tools:

  • Non-stick skillet: Crucial for easy cooking and cleanup.
  • Meat thermometer: Ensures perfectly cooked chicken every time.
  • Sharp knife: For easy chopping of garlic and sun-dried tomatoes.
  • Cutting board: A sturdy surface for all your chopping needs.

Serving Suggestions

The beauty of this dish is in its versatility! Here are some serving ideas:

  • With mashed potatoes: The creamy sauce drizzled over fluffy mashed potatoes makes for a comforting meal.
  • With crusty bread: Perfect for soaking up every bit of the luscious sauce.
  • Over pasta: Toss with your favorite pasta for a heartier version!
  • With a side salad: A fresh garden salad balances the richness beautifully.

Conclusion

Cooking should be a joyous celebration, and this **creamy Tuscan chicken** brings just that to your table. With its vibrant flavors, comforting textures, and the ability to bring family and friends together, it’s sure to become a favorite in your recipe rotation. So grab your ingredients, turn on some music, and let the kitchen become your playground. Buon appetito!

Marry Me Tuscan Chicken

Prep Time 10 minutes
Cook Time 20 minutes
Total Time 30 minutes
Servings 4 servings
Calories 550
A creamy, flavorful Tuscan chicken dish with sun-dried tomatoes and spinach, perfect for a quick and elegant meal.

Ingredients

Protein

  • 4 pieces boneless, skinless chicken breasts
  • 2 tablespoons olive oil
  • 3 cloves garlic, minced
  • 1 cup heavy cream
  • 1/2 cup chicken broth
  • 1/2 cup grated Parmesan cheese
  • 1/4 cup sun-dried tomatoes, chopped
  • 2 cups fresh baby spinach
  • 1 teaspoon dried Italian herbs
  • Red pepper flakes optional Red pepper flakes, optional
  • Fresh for garnish Fresh basil

Instructions 

  • Season chicken with salt and pepper. Cook in olive oil until golden, then set aside.
  • Sauté garlic in the same skillet for 1 minute. Add cream, broth, and Parmesan; simmer.
  • Stir in sun-dried tomatoes, Italian herbs, and spinach; cook until wilted.
  • Return chicken to skillet, spoon sauce over, and heat through. Garnish with basil.

Notes

Use fresh basil for the best flavor and adjust red pepper flakes to taste.
Calories: 550kcal
Cost: $15
Course: Main Course
Cuisine: Italian
Keyword: Chicken

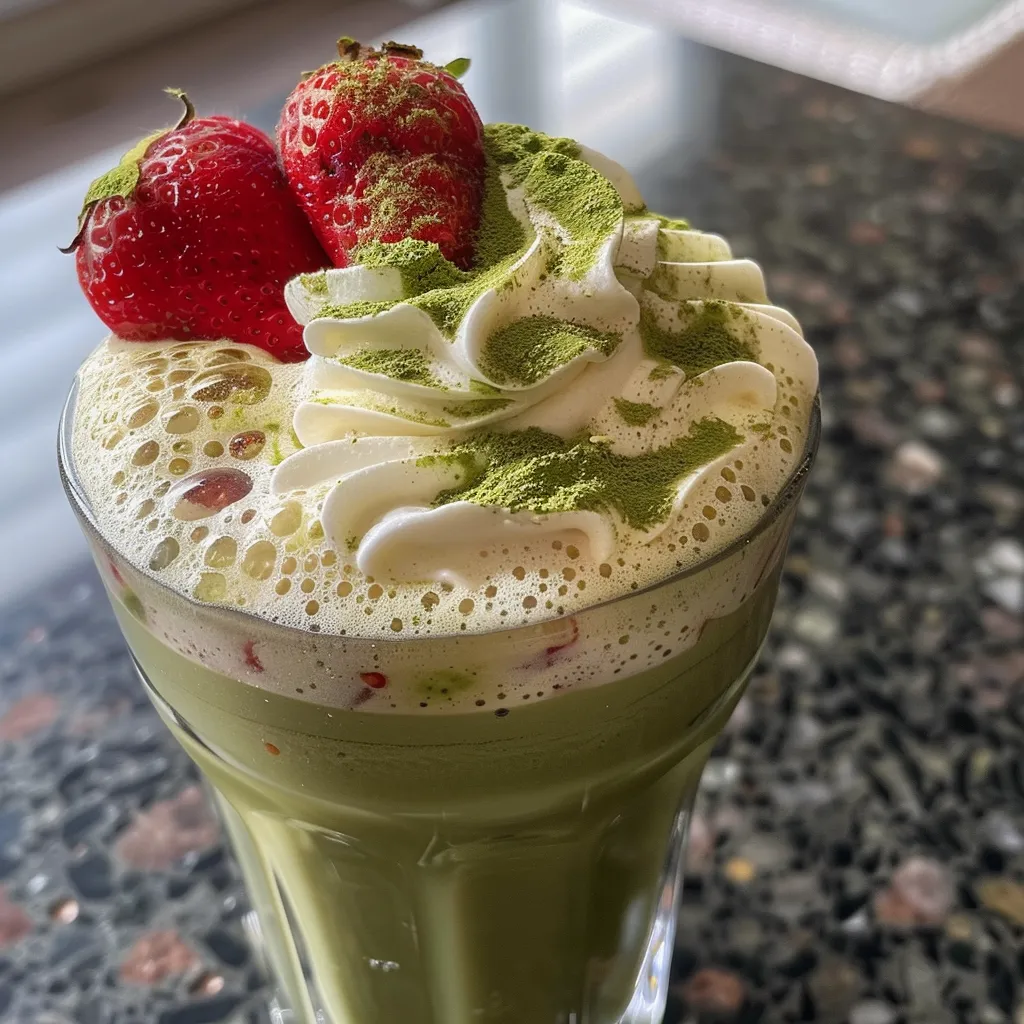
Brighten Your Day with a Strawberry Matcha Latte

Welcome to the vibrant world of Strawberry Matcha Latte! This delightful drink is not just a feast for the eyes; it’s a celebration of flavors that dance on the palate, bringing together the earthy notes of matcha green tea and the sweet, fruity essence of fresh strawberries. Perfect for any occasion, this strawberry matcha latte is a refreshing twist that elevates your coffee break into a joyful experience. Whether you’re looking for a morning pick-me-up or an afternoon treat, this drink will brighten your day!

Why You’ll Love This Recipe

Here are some reasons to fall in love with this strawberry matcha latte:

  • Delicious Harmony: The blend of fresh strawberries and matcha creates a delightful balance of sweet and earthy flavors.
  • Nutrient-Rich: Matcha is packed with antioxidants, vitamins, and minerals, making this drink not just tasty but also beneficial for your health.
  • Customizable: You can easily adjust the sweetness or creaminess to suit your personal taste, making it a versatile option for everyone.
  • Quick and Easy: With just a few simple steps, you can whip up this delightful drink in no time, perfect for busy mornings!
  • Instagram-Worthy: The vibrant colors of this latte make it a stunning addition to your social media feed, guaranteed to impress your friends!

Ingredients Breakdown

To create the perfect strawberry matcha latte, you’ll need the following ingredients:

  • 1 cup fresh strawberries: Use ripe strawberries for the best flavor. You can also use frozen strawberries if fresh ones are unavailable.
  • 1 teaspoon matcha green tea powder: Opt for high-quality ceremonial grade matcha for a rich flavor and vibrant color.
  • 1 tablespoon honey or maple syrup: Adjust the sweetness to your liking; both options provide a delicious flavor.
  • 1 cup milk of choice: Whether you prefer dairy or a plant-based alternative like oat or almond milk, the choice is yours.
  • 1/2 teaspoon vanilla extract (optional): This adds a lovely aroma and depth to your latte.
  • Ice cubes (optional): For a chilled version, ice cubes are a must!

Step-by-Step Instructions

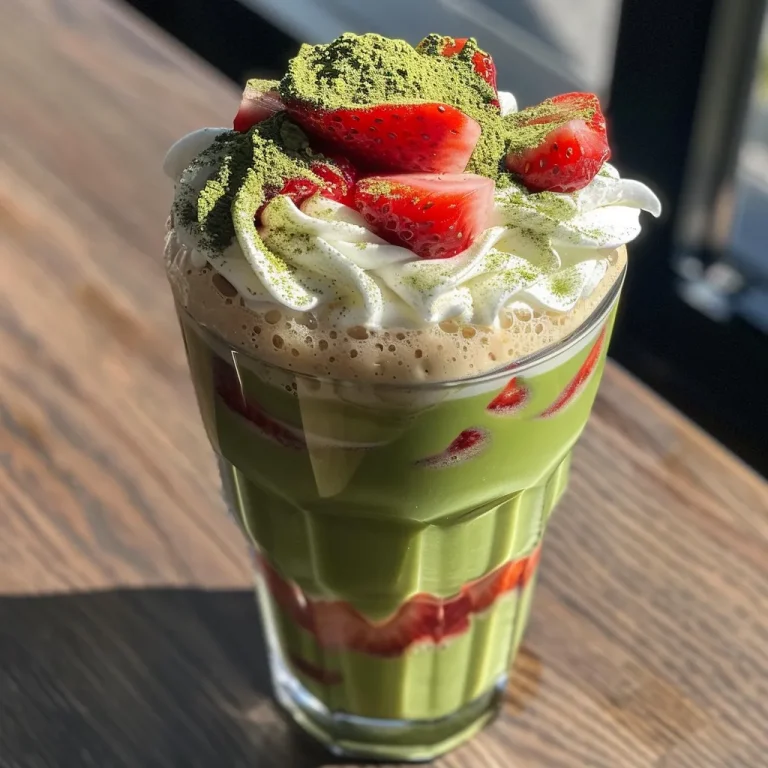
Side angle of a vibrant strawberry matcha latte topped with strawberries and ice.

Let’s dive into the process of making this delightful strawberry matcha latte:

  1. Place the strawberries in a blender and puree until smooth.
  2. Strain the strawberry puree through a fine mesh sieve to remove seeds, if desired.
  3. In a small bowl, whisk the matcha powder with 2 tablespoons of hot water until smooth and frothy.
  4. Heat the milk in a saucepan over medium heat until warm but not boiling. Alternatively, froth the milk if desired.
  5. Combine the matcha, strawberry puree, honey, and vanilla extract in a glass or mug.
  6. Pour in the warm milk and stir gently to combine.
  7. Add ice cubes for a chilled latte, if preferred.
  8. Serve immediately and enjoy the vibrant flavors!

Pro Tips for the Best Strawberry Matcha Latte

  • Use Fresh Ingredients: The quality of your strawberries and matcha will significantly impact the flavor of your latte.
  • Whisk Well: Make sure to whisk the matcha thoroughly to avoid clumps; a bamboo whisk works wonders!
  • Experiment with Sweetness: If you prefer a sweeter latte, feel free to add more honey or syrup to taste.
  • Chill Your Glass: For a refreshing drink, chill your glass before pouring in the latte.
  • Layer for Visual Appeal: Pour the strawberry puree first, followed by the matcha, and finally the milk for a stunning layered effect.
  • Try Different Milks: Almond, coconut, or oat milk each bring a unique flavor and texture to the drink.
  • Add Ice for a Frosty Treat: On hot days, serve it over ice for a refreshing twist!
  • Stir Gently: When combining the matcha and milk, stir gently to maintain the beautiful layers.

Common Mistakes and Troubleshooting

Even the best cooks can stumble! Here are some common mistakes to avoid:

  • Clumpy Matcha: If your matcha is clumpy, whisk with more hot water until fully dissolved before adding to your latte.
  • Too Sweet or Not Sweet Enough: Taste as you go and adjust the sweetness to your liking.
  • Overheating Milk: Avoid boiling the milk; it should only be warmed to enhance the flavor.
  • Not Straining the Puree: If you prefer a smoother texture, always strain the strawberry puree to remove seeds.

Variations to Try

Want to mix it up? Here are some fun variations:

  • Chocolate Strawberry Matcha: Add a tablespoon of cocoa powder for a chocolaty twist.
  • Minty Strawberry Matcha: Incorporate fresh mint leaves for a refreshing herbal note.
  • Spiced Strawberry Matcha: Sprinkle a pinch of cinnamon or nutmeg for added warmth.
  • Berry Blast: Mix in other berries like blueberries or raspberries for a berry explosion!

Storage and Make-Ahead Instructions

If you want to prepare in advance:

  • Strawberry Puree: Make the strawberry puree ahead of time and store it in an airtight container in the fridge for up to 3 days.
  • Matcha Mixture: You can whisk together the matcha and water and store it in the fridge for a quick assembly later.
  • Assemble Fresh: Always assemble the latte fresh to maintain the best flavor and texture.

Frequently Asked Questions (FAQs)

  • Can I use frozen strawberries? Yes, frozen strawberries can be used; simply thaw before blending.
  • Is this drink vegan? Yes, use plant-based milk and maple syrup for a vegan-friendly version.
  • Can I make it sugar-free? Use a sugar substitute like stevia or monk fruit sweetener for a sugar-free option.
  • How do I make it iced? Blend the strawberry puree with ice and then layer the other ingredients on top.
  • What’s the best type of matcha to use? Look for ceremonial grade matcha for the best flavor and color.
  • Can I add protein to this latte? Absolutely! Consider adding protein powder or collagen for an extra boost.
  • How long does matcha last? Matcha should be consumed within a few months for the best flavor.
  • Can I substitute the matcha? You can try green tea powder, but the flavor will differ.

Nutrition Tips and Dietary Adaptations

This strawberry matcha latte is not only delicious but can also be tailored to fit various dietary needs:

  • Low-Calorie Option: Use unsweetened almond milk and reduce or omit the sweetener.
  • Dairy-Free: Substitute with coconut or oat milk to enjoy this drink without dairy.
  • High-Protein Variation: Add a scoop of your favorite protein powder for a post-workout treat.

Equipment Recommendations

To make your strawberry matcha latte, you’ll need:

  • Blender: For achieving a smooth strawberry puree.
  • Fine Mesh Sieve: To strain out any seeds from the puree.
  • Whisk: A bamboo whisk is ideal for mixing matcha.
  • Small Saucepan: For warming your milk to the perfect temperature.

Serving Suggestions

This refreshing drink pairs beautifully with:

  • Scones or Muffins: Perfect for a mid-morning snack.
  • Fruit Salad: Complement the flavors with a fresh fruit medley.
  • Light Sandwiches: A refreshing drink that balances well with savory bites.

Conclusion

Now that you have the complete guide to creating your own Strawberry Matcha Latte, it’s time to embrace the joy of cooking and share this delightful drink with friends and family. The burst of flavors and colors will not only brighten your palate but also your day! So grab your ingredients, invite a friend, and enjoy this vibrant treat together. Cheers to flavorful adventures in your kitchen!

Strawberry Matcha Latte

Prep Time 10 minutes
Cook Time 5 minutes
Total Time 15 minutes
Servings 2 cups
Calories 150
A vibrant and refreshing latte combining the sweetness of strawberries with the earthy flavor of matcha, perfect for a healthy treat.

Ingredients

Fruits and liquids

  • 1 cup fresh strawberries, hulled
  • 1 teaspoon matcha green tea powder
  • 1 tablespoon honey or maple syrup
  • 1 cup milk of choice (dairy or plant-based)
  • 1/2 teaspoon vanilla extract (optional)
  • Ice cubes Ice cubes (optional)

Instructions 

  • Puree strawberries until smooth, then strain if desired.
  • Whisk matcha powder with hot water until frothy.
  • Heat milk until warm, then combine with matcha, strawberry puree, honey, and vanilla.
  • Pour mixture into glasses, add ice if desired, and serve immediately.

Notes

Use fresh strawberries for the best flavor and adjust sweetness to taste.
Calories: 150kcal
Cost: $10
Course: beverage
Cuisine: fusion
Keyword: Latte, matcha, strawberry

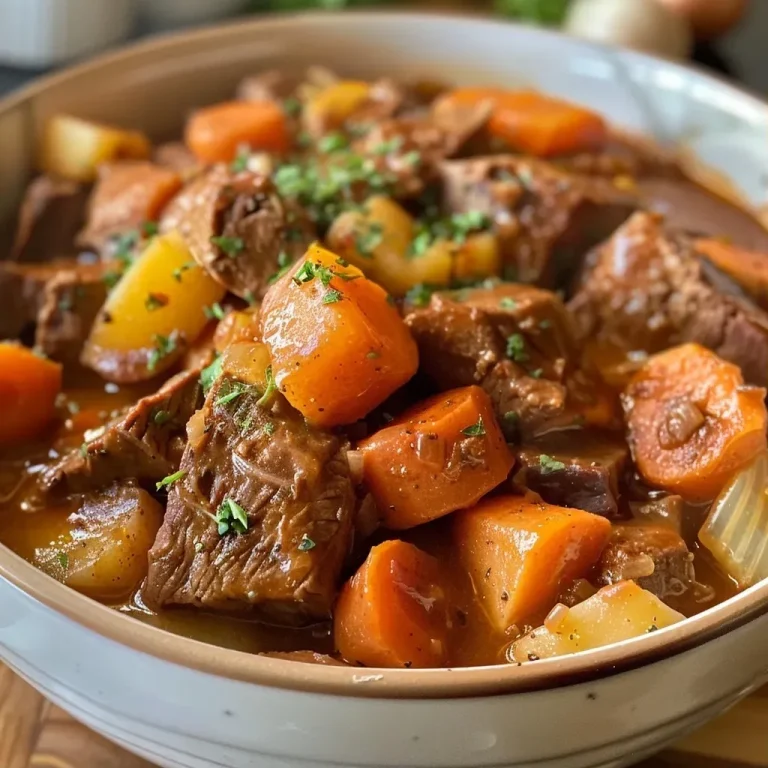
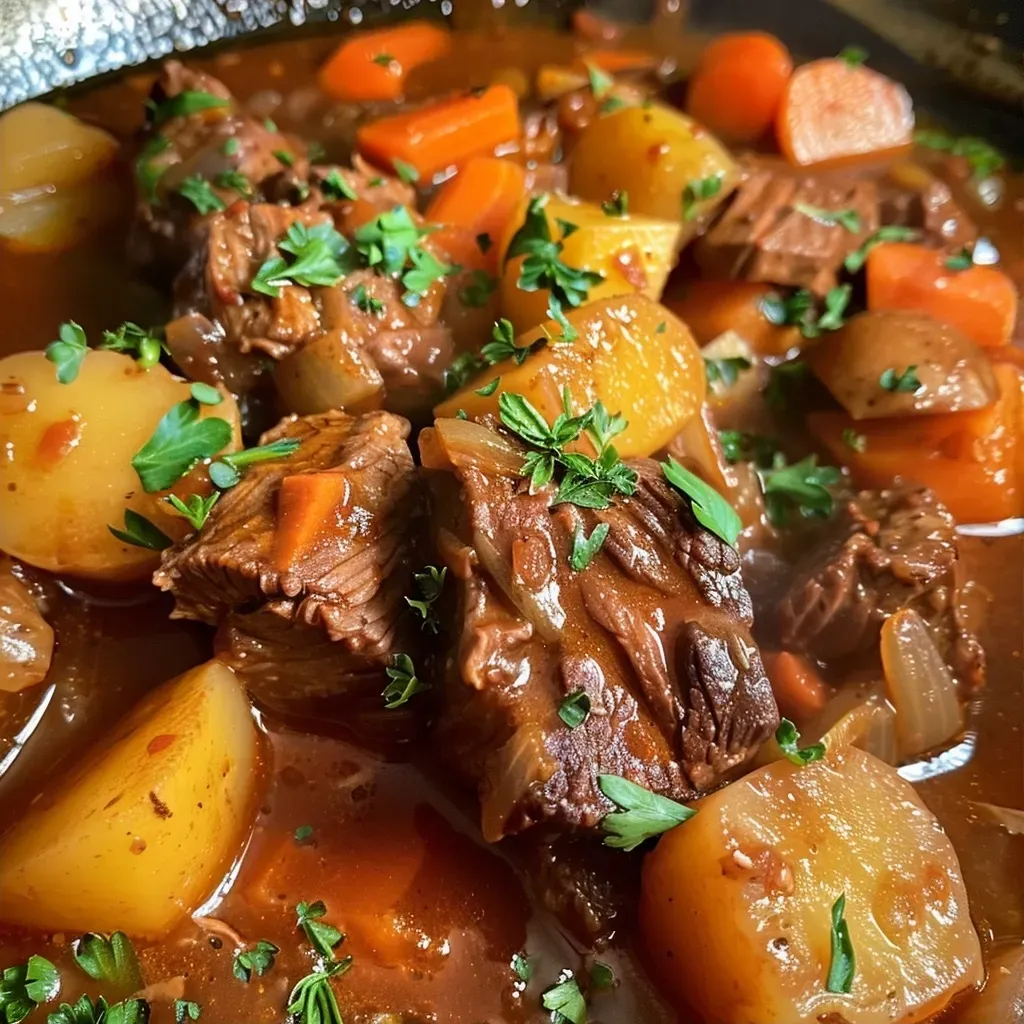
Discover the Heart of Culinary Tradition with This Hearty Classic Gluten Free Beef Stew

Welcome, dear friends! Today, I invite you to join me in the kitchen as we embark on a delightful culinary journey, crafting a dish that not only warms the belly but also nourishes the soul: a Classic Gluten Free Beef Stew. This dish is a celebration of flavors, a tapestry woven with tender beef, vibrant vegetables, and aromatic herbs, all simmered together to create a hearty embrace that invites family and friends around the table. Whether it’s a chilly evening or a cozy gathering, this stew is your go-to comfort food that effortlessly blends tradition with modern flair.

Why You’ll Love This Recipe

Here are some reasons why this gluten free beef stew will become a cherished staple in your home:

  • Rich Flavor Profile: The combination of seared beef, fresh vegetables, and aromatic herbs creates layers of flavor that dance on your palate.
  • Simple Preparation: With just a few steps, you can create a dish that tastes like it simmered for hours.
  • Nutritious Ingredients: Packed with wholesome ingredients, this stew is not only delicious but also nourishing, providing a balance of protein and veggies.
  • Versatile Dish: Customize the stew with your favorite vegetables or herbs to make it uniquely yours.
  • Perfect for Meal Prep: This stew stores beautifully, making it a fantastic option for leftovers or meal prepping for the week ahead.

Ingredient Breakdown

Let’s dive into the heart of our stew: the ingredients! Each component plays a vital role in creating the perfect classic gluten free beef stew.

  • Beef Chuck Roast: The star of this dish, tender and flavorful, it becomes melt-in-your-mouth delicious after slow cooking. Opt for grass-fed if possible for richer flavor.
  • Carrots: These add sweetness and color. Feel free to substitute with parsnips for a unique twist.
  • Yukon Gold Potatoes: Their creamy texture holds up beautifully during cooking. You can swap them with sweet potatoes for a touch of sweetness.
  • Onion: A must for building flavor; you can use yellow, white, or even shallots depending on your preference.
  • Garlic: Adds an aromatic depth; use fresh cloves for the best flavor.
  • Tomato Paste: This adds richness and a hint of acidity. If you’re out, crushed tomatoes can work in a pinch.
  • Beef Broth: Low-sodium is ideal, allowing you to control the salt level. Homemade broth is even better!
  • Worcestershire Sauce: A splash of umami goodness that enhances the overall flavor. For a gluten-free version, ensure you select a gluten-free brand.
  • Fresh Herbs: Thyme and bay leaves bring an aromatic touch; feel free to experiment with herbs like rosemary or parsley.

How to Prepare Classic Gluten Free Beef Stew

Classic Gluten Free Beef Stew

Now that we have our ingredients ready, let’s get cooking! Follow these simple steps to create your masterpiece:

  1. Sear the meat: Heat olive oil in a large pot over medium heat. Add the cubed beef and sear until browned on all sides. Remove the meat and set aside.
  2. Sauté the vegetables: In the same pot, add diced onion and sauté until translucent. Then, add minced garlic, sliced carrots, and cubed potatoes, stirring well to combine.
  3. Blend in the tomato paste: Stir in the tomato paste, then gradually add the beef broth while scraping the flavorful bits from the bottom of the pot.
  4. Return the beef: Add the seared beef back into the pot along with Worcestershire sauce and fresh herbs. Season to taste.
  5. Simmer away: Bring the mixture to a boil, then reduce the heat and let it simmer for at least an hour, or until the meat is tender and the flavors have melded beautifully.

Pro Tips for a Perfect Stew

Let’s elevate your stew game with these expert insights:

  • Let it rest: Allowing your stew to sit overnight in the fridge enhances the flavors even more. Just reheat gently before serving!
  • Adjust thickness: If you prefer a thicker stew, mix a tablespoon of cornstarch with cold water and stir it into the stew during the last few minutes of cooking.
  • Experiment with spices: Don’t hesitate to add spices like paprika or cumin for an extra flavor kick.
  • Fresh herbs at the end: Adding fresh herbs right before serving can brighten the dish significantly.
  • Use a slow cooker: For a hands-off approach, throw everything into a slow cooker and let it work its magic.
  • Choose the right pot: A heavy-bottomed pot is ideal for even cooking. Consider a Dutch oven for best results.
  • Don’t rush the process: Allow time for the flavors to meld and develop, especially during simmering.
  • Season gradually: Taste and adjust seasoning throughout the cooking process rather than all at once.

Common Mistakes and Troubleshooting

Even the best chefs can encounter bumps in the road. Here’s how to navigate common pitfalls:

  • Too salty: If your stew turns out too salty, add a sliced potato and simmer for 20-30 minutes to absorb the excess salt.
  • Meat tough: If the beef is tough, it likely needs more cooking time. Let it simmer longer until tender.
  • Watery stew: If your stew is too watery, let it simmer uncovered for a while to reduce the liquid.
  • Flavorless stew: Always taste and adjust seasoning as you cook. Sometimes a pinch of salt or a splash of vinegar can elevate the flavor significantly.

Variations to Try

Now, let’s get creative! Here are some delicious variations to inspire your culinary adventure:

  • Vegetable-Loaded Stew: Add extra veggies like bell peppers, peas, or green beans for more color and nutrition.
  • Herb-Infused Stew: Experiment with different herbs like rosemary or oregano for a unique twist on the flavor.
  • Spicy Kick: Add chopped jalapeños or a sprinkle of red pepper flakes for a bit of heat.
  • Moroccan Influence: Incorporate spices like cinnamon and cumin, along with some dried apricots for a sweet and savory delight.

Storing and Make-Ahead Instructions

This stew is perfect for meal prep! Here’s how to store and reheat:

  • Refrigeration: Allow the stew to cool completely before transferring it to an airtight container. It will keep in the fridge for up to 3 days.
  • Freezing: Freeze in portioned containers for up to 3 months. Thaw overnight in the fridge before reheating.
  • Reheating: Gently reheat on the stovetop or in the microwave until heated through. Add a splash of broth if it’s too thick.

Comprehensive FAQ

Here are some frequently asked questions to enhance your beef stew experience:

  • Can I use other cuts of beef? Yes! Cuts like brisket or round can work, but may require different cooking times.
  • Is this recipe suitable for freezing? Absolutely! This stew freezes well, making it perfect for meal prep.
  • How do I make this stew more flavorful? Season as you go, and consider adding a splash of red wine for depth.
  • Can I make this stew in a slow cooker? Yes! Just follow the same steps and cook on low for 6-8 hours.
  • What can I serve with this stew? Crusty bread, rice, or a fresh salad pairs wonderfully with this dish.
  • How do I make gluten-free substitutions? Ensure all sauces and broth are labeled gluten-free, and use gluten-free flour if thickening is needed.
  • Can I add beans for protein? Yes! White beans or kidney beans can be a great addition.
  • What herbs can I use? Thyme, rosemary, and bay leaves are traditional, but feel free to experiment with others!

Nutrition Tips and Dietary Adaptations

This classic gluten free beef stew is naturally rich in nutrients, but here are some tips to enhance its health benefits:

  • Lean cuts: Opt for leaner cuts of beef to reduce fat content while maintaining protein levels.
  • Fiber boost: Add more vegetables for extra fiber and nutrients.
  • Low-sodium options: Use low-sodium broth to keep the salt levels in check.
  • Gluten-free options: Ensure all ingredients are certified gluten-free to cater to dietary needs.

Equipment Recommendations

To make your cooking experience as smooth as possible, here are some recommended tools:

  • Heavy-bottomed pot: Essential for even cooking; a Dutch oven is ideal.
  • Wooden spoon: For stirring and scraping up delicious bits from the pot.
  • Meat thermometer: To ensure your beef is cooked perfectly.
  • Sharp knife: For easy chopping of vegetables and meat.

Serving Suggestions

Finally, let’s talk about how to present your stew:

  • Garnish: A sprinkle of fresh herbs such as parsley or thyme can brighten up the dish.
  • Serve with bread: Offer crusty bread for dipping, or a side of fluffy rice to soak up the flavors.
  • Pair with wine: A good red wine complements the rich flavors beautifully.

Conclusion

And there you have it, my friends! A Classic Gluten Free Beef Stew that not only warms your body but also fills your heart with joy and nostalgia. Remember, cooking is not just about feeding ourselves; it’s about creating memories and sharing experiences. So gather your loved ones, fill your kitchen with laughter, and enjoy the process of making this delightful stew. Until next time, happy cooking!

Classic Gluten Free Beef Stew

Prep Time 15 minutes
Cook Time 1 hour 15 minutes
Total Time 1 hour 30 minutes
Servings 4 servings
Calories 450
A hearty and comforting gluten-free beef stew perfect for cozy dinners. Made with tender beef and fresh vegetables, it's a wholesome meal everyone will enjoy.

Ingredients

Meat

  • 2-3 lbs beef chuck roast (cut into 1-inch cubes)

Vegetables

  • 3-4 medium carrots (sliced)
  • 2-3 medium Yukon Gold potatoes (cubed)
  • 1 large onion (diced)
  • 3-4 cloves garlic (minced)

Other ingredients

  • 2 tbsp tomato paste
  • 4 cups low-sodium beef broth
  • 1 tbsp Worcestershire sauce
  • Fresh thyme and bay leaves

Instructions 

  • Sear the beef in olive oil until browned. Remove from pot.
  • Sauté onion, then add garlic, carrots, and potatoes.
  • Stir in tomato paste, add broth, and scrape flavorful bits.
  • Return beef with Worcestershire sauce and herbs. Simmer for 1 hour until tender.

Notes

Use fresh herbs for best flavor. Adjust cooking time for tenderness.
Calories: 450kcal
Cost: $15
Course: Main Course
Cuisine: American
Keyword: Beef, gluten free, Stew

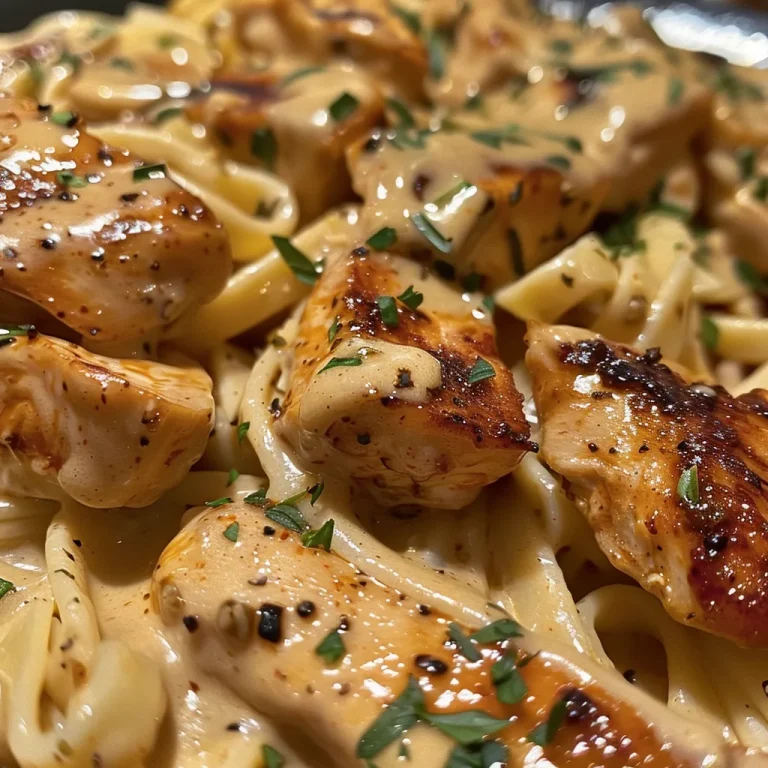
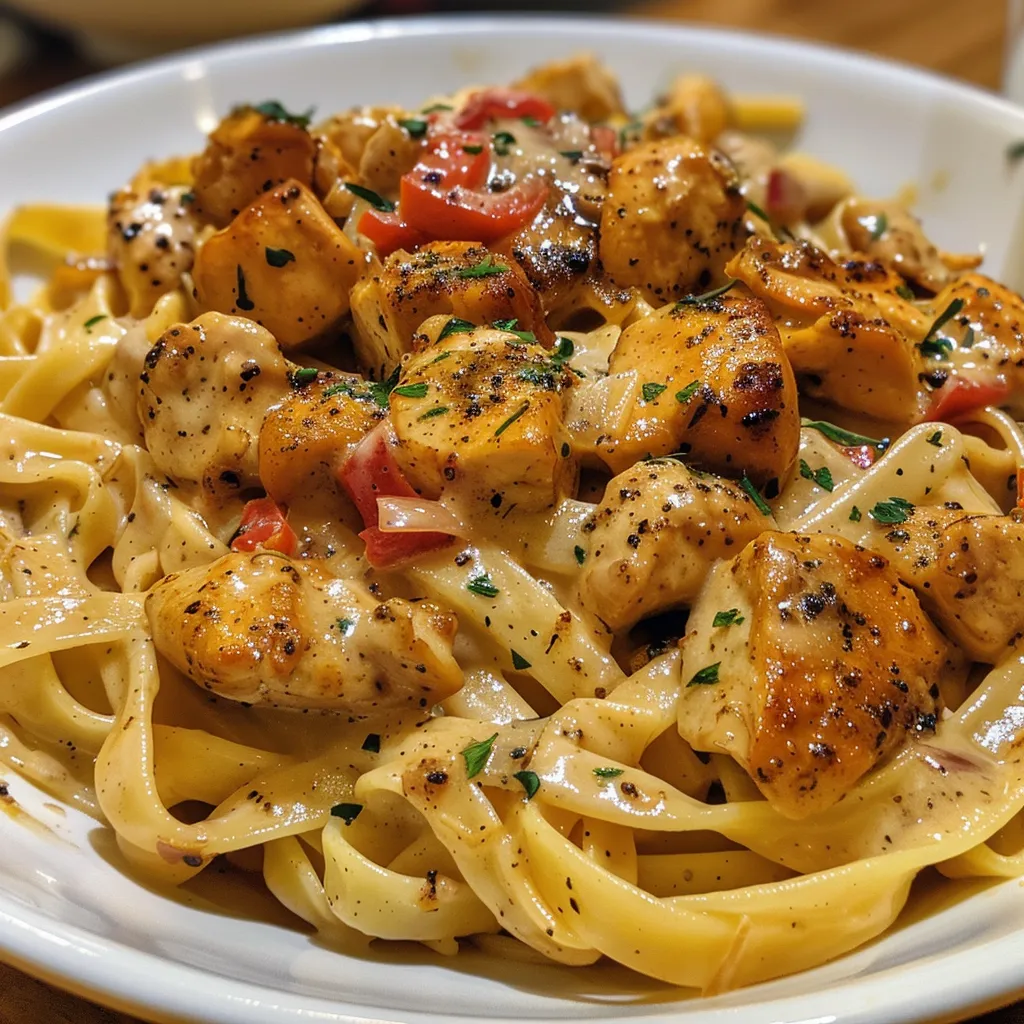
Discover the Joy of Cooking: Creamy Cajun Chicken Pasta

Welcome to a culinary adventure that takes you to the heart of Southern charm! This creamy Cajun chicken pasta recipe is all about vibrant flavors and comforting textures, bringing together the smoky warmth of Cajun spices and the richness of cream. Imagine sitting around a table filled with laughter, the aroma of garlic and spices wafting through the air, as this dish transforms a simple meal into a celebration. Let’s dive into this recipe that not only satisfies your taste buds but also warms your soul!

Why You’ll Love This Recipe

This creamy Cajun chicken pasta is more than just a meal; it’s an experience. Here’s why you should add it to your dinner repertoire:

  • Flavor Explosion: The combination of Cajun and Creole seasonings creates a dynamic flavor profile that dances on your palate.
  • Quick & Easy: Ready in just 30 minutes, this dish is perfect for busy weeknights yet impressive enough for guests.
  • Comfort Food: The creamy sauce and tender chicken make this pasta a warm hug in a bowl, perfect for lifting spirits.
  • Customizable: Easily swap ingredients to cater to dietary preferences or use whatever you have on hand.
  • Feeding a Crowd: Scalable recipe that can serve a small family or a full gathering, making it ideal for sharing.

Ingredient Breakdown: What You’ll Need

Let’s gather everything you need to create this delightful dish. Here’s a closer look at the ingredients:

  • Chicken: 2 large chicken breasts, sliced thin or pounded flat for even cooking.
  • Olive Oil or Butter: 2–3 tbsp for sautéing – enhances flavor and helps achieve a golden crust.
  • Cajun Seasoning: A mix of spices that adds depth; feel free to adjust the quantity based on your spice preference.
  • Pasta: Use 12 oz of your favorite pasta like fettuccine, linguine, or penne. Choose whole grain for a healthier twist!
  • Heavy Cream: 1½ cups for that luscious, creamy sauce. For a lighter version, you can use half-and-half.
  • Cheeses: ½ cup shredded mozzarella and ¼ cup grated Parmesan cheese for a cheesy finish.
  • Garlic: 3–4 cloves, minced, to add aromatic goodness.
  • Pasta Water: ½ cup reserved from boiling pasta to help create a silky sauce.

How to Make Creamy Cajun Chicken Pasta

Juicy slices of chicken mixed with pasta in a creamy Cajun sauce, with a side view perspective.

Now that you have your ingredients, let’s get cooking! Follow these straightforward steps for a delicious outcome:

  1. Boil the Pasta: Bring a large pot of salted water to a boil. Cook the pasta until just al dente, reserving about ½ cup of the pasta water. Drain and set aside.
  2. Sauté the Chicken: Pat the chicken dry and coat with olive oil. Season generously with Cajun seasoning, salt, and pepper. In a large skillet over medium-high heat, cook for 5–6 minutes per side until golden and fully cooked. Remove and let rest.
  3. Make the Sauce: In the same skillet, melt 2 tbsp of butter. Add minced garlic and sauté for about 30 seconds. Stir in cream cheese until melted, then add heavy cream and whisk until smooth. Season with salt and extra Cajun seasoning if desired.
  4. Combine: Stir in the reserved pasta water to adjust the sauce’s consistency. Mix in mozzarella and Parmesan until melted, then add the cooked pasta and sliced chicken, tossing to combine.
  5. Serve: Plate immediately, garnishing with additional cheese or crushed red pepper flakes for an extra kick. Enjoy the creamy goodness!

Pro Tips for Perfect Pasta

  • Don’t Overcook the Pasta: Aim for al dente to maintain the perfect texture.
  • Rest the Chicken: Letting the chicken rest before slicing keeps it juicy.
  • Reserve Pasta Water: This starchy water helps the sauce cling to the pasta beautifully.
  • Adjust Spices: Feel free to tweak the spice levels to suit your taste buds; add more heat if you love it spicy!
  • Extra Creaminess: For an even creamier sauce, consider adding a touch of mascarpone cheese.
  • Garnish Well: A sprinkle of fresh parsley or green onions can brighten up the dish!

Common Mistakes and Troubleshooting

Even the best chefs face challenges in the kitchen! Here are some common pitfalls and how to avoid them:

  • Over-seasoning: Start with less Cajun seasoning; you can always add more later.
  • Thick Sauce: If your sauce is too thick, gradually add reserved pasta water until you reach desired consistency.
  • Dry Chicken: Ensure your chicken is not overcooked; use a meat thermometer for best results (165°F is perfect!).

Delicious Variations to Try

While the classic creamy Cajun chicken pasta is unbeatable, here are some fun variations to inspire your culinary creativity:

  • Seafood Twist: Substitute chicken with shrimp or scallops for a delightful seafood version.
  • Vegetarian Delight: Replace chicken with roasted vegetables like bell peppers, zucchini, and mushrooms.
  • Spicy Cajun: Add jalapeños or crushed red pepper flakes to give your dish an extra kick.
  • Cheesy Spin: Incorporate different cheeses like Gouda or cheddar for a unique flavor twist.

Storage and Make-Ahead Instructions

This creamy Cajun chicken pasta can be prepared ahead of time and stored for later enjoyment:

  • Refrigerate: Store in an airtight container in the fridge for up to 3 days.
  • Freeze: While best enjoyed fresh, you can freeze leftovers for up to 2 months. Reheat gently on the stove.
  • Make-Ahead: Prepare the sauce and cook pasta ahead of time; combine before serving for a quick meal.

Frequently Asked Questions

Here are some questions commonly asked about creamy Cajun chicken pasta:

  • Can I use a different type of pasta? Absolutely! Feel free to use any pasta shape you prefer.
  • Is this recipe suitable for meal prep? Yes! It stores well and can be easily reheated.
  • What can I serve with Cajun chicken pasta? A fresh salad, garlic bread, or steamed vegetables make great sides.
  • Can I make this dish dairy-free? Yes, substitute cream cheese and heavy cream with plant-based alternatives.
  • How spicy is this dish? The spice level can be adjusted based on personal preference; start with less Cajun seasoning if you’re unsure.
  • Can I add more vegetables? Definitely! Bell peppers, spinach, and mushrooms work wonderfully in this pasta.
  • Is it possible to make this gluten-free? Use gluten-free pasta to adapt this recipe for a gluten-free diet.
  • What wine pairs well with Cajun chicken pasta? A crisp white wine like Sauvignon Blanc or a light red like Pinot Noir complements the flavors beautifully.

Nutritional Tips and Dietary Adaptations

Consider these tips to make this dish fit your dietary needs:

  • Calorie Conscious: Use reduced-fat cream cheese and heavy cream to cut calories without sacrificing flavor.
  • Whole Grains: Opt for whole grain or legume-based pasta for added fiber and protein.
  • Vegetarian Option: The dish can easily be made vegetarian by replacing chicken with beans or lentils.

Essential Kitchen Equipment

To create this creamy Cajun chicken pasta, having the right tools is crucial:

  • Large Pot: Essential for boiling pasta; look for one with a sturdy bottom for even cooking.
  • Skillet: A large non-stick or cast-iron skillet is perfect for sautéing chicken and making the sauce.
  • Meat Thermometer: Ensures your chicken is cooked perfectly without drying it out.
  • Whisk: Ideal for mixing the creamy sauce to a smooth consistency.

Serving Suggestions

Present your dish beautifully to impress your guests or family:

  • Garnish: Top with freshly chopped parsley or basil for a pop of color.
  • Cheese: Add extra grated Parmesan or mozzarella right before serving for a cheesy touch.
  • Accompany with Bread: Serve with crusty garlic bread or a warm baguette to soak up the sauce.
  • Pair with Salad: A light arugula salad dressed with lemon vinaigrette balances the richness of the pasta.

In conclusion, this creamy Cajun chicken pasta is not just a recipe; it’s an invitation to bring people together, celebrate flavors, and create lasting memories. Whether you’re cooking for family, friends, or simply treating yourself, this dish embodies the joy of Mediterranean cooking. So grab your ingredients, put on some music, and let the flavors of the South fill your kitchen!

Creamy Cajun Chicken Pasta

Prep Time 10 minutes
Cook Time 20 minutes
Total Time 30 minutes
Servings 4 servings
Calories 850
A rich and flavorful pasta dish featuring seasoned chicken in a creamy Cajun sauce, perfect for a satisfying meal.

Ingredients

Protein

  • 2 pieces large chicken breasts (sliced thin or pounded flat)
  • 2–3 tbsp olive oil or butter (for cooking)

Seasonings

  • 1 tbsp sazón seasoning
  • 1 tsp garlic powder
  • 1 tsp Creole seasoning
  • 1 tsp Cajun seasoning
  • ½ tsp paprika
  • ½ tsp adobo seasoning (optional) (for extra flavor)
  • to taste Salt and black pepper

Pasta and Dairy

  • 12 oz pasta (fettuccine, linguine, or penne)
  • 2 tbsp butter
  • 3–4 cloves garlic (minced)
  • 4 oz cream cheese (softened)
  • 1½ cups heavy cream
  • ½ cup pasta water (reserved)
  • ½ cup shredded mozzarella cheese
  • ¼ cup grated Parmesan cheese

Optional toppings

  • to taste crushed red pepper flakes or extra Cajun spice (for heat)

Instructions 

  • Cook pasta in salted boiling water until al dente; reserve ½ cup pasta water, then drain.
  • Season chicken with spices, cook until golden, then rest and slice.
  • Melt butter, sauté garlic, add cream cheese, then pour in heavy cream; season and stir until smooth. Mix in cheeses and reserved pasta water.
  • Toss cooked pasta and sliced chicken in the sauce until coated. Serve immediately with optional toppings.

Notes

For extra flavor, sprinkle with additional Cajun spice or Parmesan before serving.
Calories: 850kcal
Cost: $15
Course: Main Course
Cuisine: American
Keyword: Cajun, Chicken, Creamy, pasta

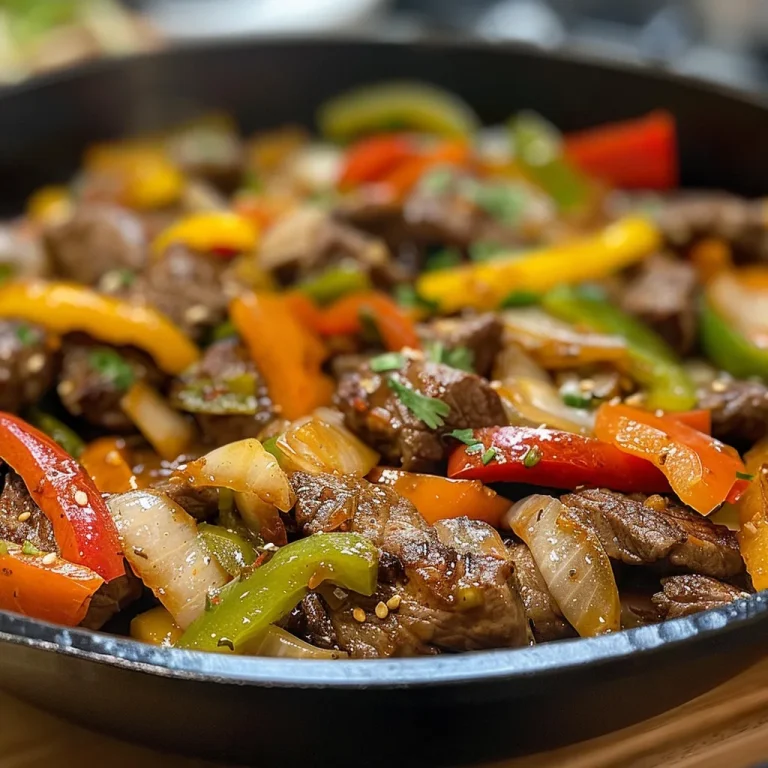
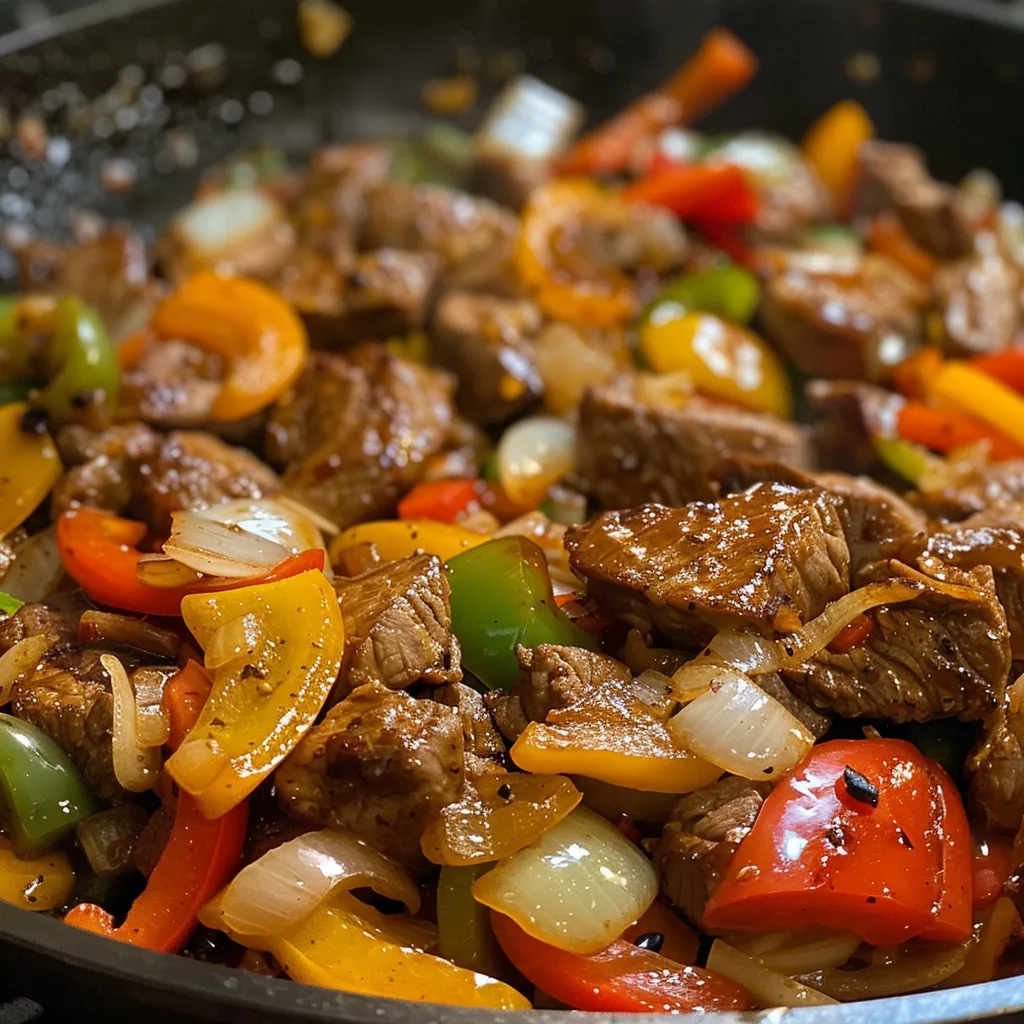
Embark on a Flavorful Journey with Pepper Steak

Welcome to a delightful culinary adventure that celebrates the vibrant flavors of Mediterranean cooking! Today, we’re diving into a dish that brings warmth to your kitchen and joy to your table: Pepper Steak with Bell Peppers and Onion. This recipe is a perfect blend of juicy beef sirloin, colorful bell peppers, and aromatic onions that promises to tantalize your taste buds and elevate your dinner experience. Whether you’re cooking for family or welcoming friends for a feast, this dish is sure to impress!

In this comprehensive guide, I’ll walk you through every step of preparing this mouthwatering dish, share tips from my kitchen in Barcelona, and sprinkle in a few stories from my childhood in Seville that shaped my love for cooking. So, grab your apron, and let’s get started!

Why You’ll Love This Recipe

  • Quick and Easy: With simple steps and minimal prep time, this recipe is perfect for busy weeknights or spontaneous gatherings.
  • Flavor Explosion: The combination of marinated beef, fresh bell peppers, and onions creates a symphony of flavors that will leave you craving more.
  • Versatile Dish: Feel free to customize with your favorite vegetables or spices, making it a personal favorite every time you cook it.
  • Perfect for Any Occasion: Whether it’s a casual family dinner or a festive celebration, this dish fits all moods and settings.
  • Healthy and Nutritious: Packed with protein and vitamins from the fresh produce, it’s a satisfying meal that you can feel good about.

Ingredients for Pepper Steak with Bell Peppers and Onion

To create this vibrant dish, you’ll need the following ingredients:

  • Beef Sirloin: Tender, juicy, and flavorful, this cut is perfect for quick cooking.
  • Bell Peppers: A mix of red, green, and yellow bell peppers adds color and sweetness.
  • Onion: Yellow or white onions work best, adding depth to the dish.
  • Garlic: Fresh minced garlic boosts the flavor profile.
  • Low-Sodium Soy Sauce: This adds umami and enhances the overall taste.
  • Cornstarch: For marinating the beef to lock in moisture and tenderness.

Feel free to substitute the beef with chicken or tofu for a different twist, and you can swap out bell peppers for other veggies like snap peas or zucchini!

How to Make Pepper Steak with Bell Peppers and Onion

Pepper Steak with Bell Peppers and Onion

Ready to bring this dish to life? Follow these simple steps:

  1. Slice the beef, bell peppers, and onion into thin strips, ensuring even cooking.
  2. Marinate the beef with soy sauce, cornstarch, minced garlic, salt, and pepper for 15 minutes to infuse flavor.
  3. Heat oil in a skillet over medium-high heat; cook the beef in batches until browned and cooked through (about 3-4 minutes per batch).
  4. Add the bell peppers and onions to the skillet and sauté until softened (approximately 5-7 minutes).
  5. Combine everything back in the skillet; heat through for an additional 2-3 minutes.
  6. Serve hot over rice or noodles, garnishing with green onions or sesame seeds if desired.

Pro Tips for Perfect Pepper Steak

  • Choose the Right Cut: Use tender cuts like sirloin or flank steak for the best texture. Thinly slice against the grain for maximum tenderness.
  • Don’t Overcrowd the Pan: Cook in batches if necessary. Overcrowding can lead to steaming rather than searing, affecting flavor.
  • Use Fresh Ingredients: Fresh bell peppers and onions will provide the best taste and texture, enhancing your dish.
  • Monitor Cooking Times: Keep an eye on the beef to avoid overcooking, which can lead to a tough texture.
  • Experiment with Marinades: For added depth, try marinating the beef overnight for richer flavors.
  • Adjust Spice Levels: Add chili flakes or fresh jalapeños if you like a spicy kick!
  • Serve it Right: Pair your pepper steak with a side of fluffy rice or soba noodles to soak up the delicious sauce.
  • Garnish for Impact: Fresh herbs like cilantro or parsley can elevate the visual appeal and flavor.

Common Mistakes and Troubleshooting

Even the best chefs make mistakes, so here are some common pitfalls and how to avoid them:

  • Overcooked Beef: If your beef turns out tough, it’s likely overcooked. Aim for medium-rare to keep it juicy.
  • Soggy Vegetables: If your bell peppers and onions are too soft, try cooking them separately from the beef and adding them back in at the end.
  • Too Salty: If the dish is too salty, balance it with a splash of vinegar or a bit of sugar to cut through the saltiness.

Delicious Variations of Pepper Steak

This dish is incredibly versatile! Here are some fun variations to try:

  • Spicy Pepper Steak: Add sliced jalapeños or a dash of hot sauce for a spicy kick!
  • Mediterranean Style: Incorporate olives and feta cheese for a Mediterranean twist.
  • Thai-Inspired: Use coconut milk and serve with jasmine rice for a tropical flair.
  • Vegetarian Option: Substitute beef with tofu or tempeh, and add more colorful vegetables like carrots and snap peas.

Storage and Make-Ahead Instructions

If you want to prepare in advance, here’s how to store your pepper steak:

  • Refrigerate: Store leftovers in an airtight container for up to 3 days. Reheat in a skillet over medium heat.
  • Freezing: You can freeze the cooked pepper steak for up to 2 months. Thaw in the fridge overnight before reheating.
  • Meal Prep: Prepare the beef and vegetables in advance, then cook them fresh for a quick weeknight meal.

Frequently Asked Questions

  • Can you freeze pepper steak? Yes, it freezes well. Just make sure to store it in an airtight container.
  • What’s the best cut of meat for pepper steak? Sirloin or flank steak works best due to their tenderness.
  • Can I use other vegetables? Absolutely! Feel free to mix in your favorite veggies, such as broccoli or mushrooms.
  • How do I make my pepper steak tender? Marinating the beef and cooking it quickly over high heat helps keep it tender.
  • What can I serve with pepper steak? It’s delicious over rice, noodles, or even in a sandwich!
  • How do I know when the beef is cooked? Use a meat thermometer; aim for 135°F for medium-rare.
  • Can I make this dish spicy? Yes! Add chili flakes or fresh jalapeños to the mix for extra heat.
  • What’s a good sauce to use? Soy sauce, oyster sauce, or a homemade stir-fry sauce works well.

Nutritional Tips and Dietary Adaptations

This pepper steak dish can easily fit into various dietary lifestyles:

  • Low-Carb: Serve it over cauliflower rice instead of traditional rice to cut down on carbs.
  • Gluten-Free: Use tamari instead of soy sauce to ensure the dish is gluten-free.
  • High-Protein: This dish is naturally high in protein thanks to the beef, making it great for muscle recovery.

Essential Equipment for Cooking Pepper Steak

To make your cooking experience smooth and enjoyable, here’s what you’ll need:

  • Skillet or Wok: A large skillet or wok will allow for quick cooking and even heat distribution.
  • Sharp Knife: A good chef’s knife is essential for slicing the beef and vegetables thinly.
  • Cutting Board: A sturdy cutting board will make prep work easier.
  • Measuring Cups and Spoons: For accurate ingredient measurements to ensure consistent results.

Serving Suggestions

To truly elevate your dining experience, consider these serving ideas:

  • Garnish: Sprinkle fresh herbs like cilantro or parsley on top just before serving.
  • Pair with Wine: A medium-bodied red wine complements the beef beautifully.
  • Side Dishes: Serve with a light salad, crusty bread, or roasted vegetables to create a balanced meal.

Conclusion

And there you have it! A complete guide to making the most delicious pepper steak with bell peppers and onion. With its vibrant colors, rich flavors, and heartwarming aromas, this dish is more than just a meal; it’s a celebration of life, culture, and togetherness. I hope you enjoy making this recipe as much as I enjoyed sharing it with you. Now, gather your loved ones, set the table, and savor the delightful flavors of Mediterranean cooking!

Pepper Steak with Bell Peppers and Onion

Prep Time 10 minutes
Cook Time 15 minutes
Total Time 25 minutes
Servings 4 people
Calories 350
A quick and flavorful stir-fry combining tender beef with colorful bell peppers and onions, perfect served over rice or noodles.

Ingredients

Meat

  • 1 pound Beef sirloin

Vegetables

  • 3 bell peppers Bell peppers (red, green, yellow) (sliced)
  • 1 onion Onion (yellow or white) (sliced)

Aromatics

  • 3 cloves Garlic (minced)

Sauces & Thickeners

  • 2 tablespoons Low-sodium soy sauce
  • 1 teaspoon Cornstarch

Instructions 

  • Slice beef, peppers, and onion.
  • Marinate beef with soy sauce, cornstarch, and garlic for 15 minutes.
  • Cook beef in a skillet until browned, then set aside.
  • Sauté peppers and onions until tender.
  • Combine beef with vegetables and heat through. Serve hot.

Notes

Use a hot skillet for best results and serve over rice or noodles.
Calories: 350kcal
Cost: $15
Course: Main Course
Cuisine: American
Keyword: Beef, Bell Peppers, Stir Fry

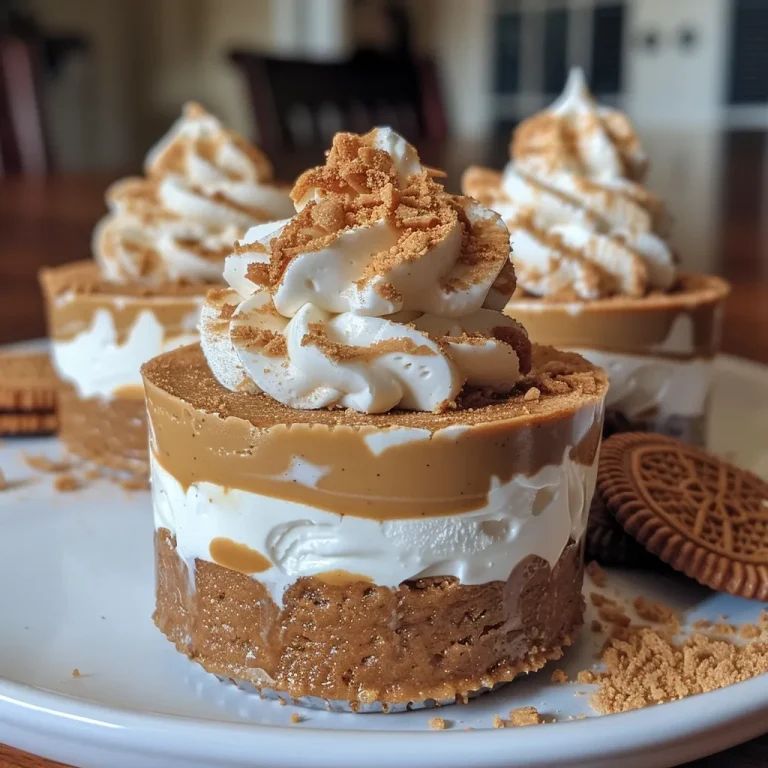
Indulge in a Sweet Escape: The Allure of No-Bake Biscoff Cheesecake Cups

Welcome to a delightful journey into the world of desserts with a Mediterranean twist! Today, we’re diving into the luscious realm of No-Bake Biscoff Cheesecake Cups. This dessert is not just a treat; it’s an experience that encapsulates the essence of creamy cheesecake, tantalizing Biscoff flavors, and the simplicity of no-bake preparation. Perfect for gatherings or a cozy night in, these cups promise to bring joy and satisfaction with every bite.

Imagine the scene: the sun is setting, casting a golden glow in your kitchen, and the enticing aroma of Biscoff biscuits fills the air. As you prepare these cheesecake cups, you’re not just cooking; you’re creating memories and sharing love through food. Let’s explore why this recipe is a must-try!

Why You’ll Love This Recipe

  • Effortless Preparation: With no baking required, these cheesecake cups are incredibly easy to whip up, making them perfect for last-minute gatherings or a sweet craving.
  • Irresistible Flavors: The combination of creamy cheesecake and the unique spiced notes of Biscoff biscuits creates a flavor profile that is both comforting and exciting.
  • Individual Servings: Serving them in cups means everyone gets their own delightful portion, making them visually appealing and perfect for sharing.
  • Customizable Toppings: You can easily personalize these cups with your favorite toppings, adding a fun twist to each serving.
  • Make-Ahead Convenience: These no-bake cheesecake cups can be made ahead of time, allowing you more time to enjoy the company of your guests.

Ingredient Breakdown

Let’s get into the details of what makes these Biscoff cheesecake cups so special. Below, you’ll find the ingredients needed along with some helpful substitutions for your convenience.

  • 30 pieces Lotus Biscoff biscuits: These form the crunchy, spiced base and add that signature flavor. You can substitute with any other spiced biscuit if necessary.
  • 2 tablespoons unsalted butter (melted): This helps to bind the biscuit crumbs firmly. For a dairy-free option, use coconut oil.
  • 16 oz heavy cream (2 cups): Whipped to fluffy peaks for a light and airy cheesecake texture. You can use coconut cream for a non-dairy alternative.
  • 8 oz cream cheese (at room temperature): Essential for that creamy consistency. If you need a vegan option, consider using a plant-based cream cheese.
  • 1/2 cup powdered sugar: Adds sweetness to the cheesecake filling. You can adjust this based on your preference or use a sugar substitute.
  • 1 cup Biscoff spread: The star of this recipe! It adds richness and flavor. Feel free to use other cookie spreads if desired.
  • 1 teaspoon vanilla extract: Enhances the overall flavor of the cheesecake. You can also use almond extract for a twist.
  • 1/2 cup Biscoff spread (for drizzling on top): For that extra indulgence. Make sure to warm it slightly for easy drizzling.
  • 8 pieces Biscoff cookies (cut in half for garnish): Adds a visual appeal and a delicious crunch on top.

The Method: How to Make No-Bake Biscoff Cheesecake Cups

Delicious No-Bake Biscoff Cheesecake Cups with a creamy texture and biscuit garnish.

Now that we have our ingredients ready, let’s dive into the step-by-step process of creating these delightful cheesecake cups.

Step 1: Create the Crunchy Base

In a food processor, pulse the Biscoff biscuits until they resemble fine crumbs. Combine the crumbs with melted butter in a bowl and mix well until the crumbs are fully coated. Spoon the mixture into the bottom of each serving cup, pressing down firmly to create a solid base.

Step 2: Whip Up the Fluffy Cheesecake Filling

In a large mixing bowl, beat the cream cheese until smooth and creamy. Gradually add the powdered sugar and continue to mix until well combined. Pour in the Biscoff spread and vanilla extract, mixing until fully incorporated.

Step 3: Fold in the Whipped Cream

In a separate bowl, whip the heavy cream until stiff peaks form. Gently fold the whipped cream into the cheesecake mixture, being careful not to deflate the airiness. This step is crucial for achieving that light and fluffy texture.

Step 4: Assemble and Decorate

Spoon the cheesecake filling over the prepared biscuit base in each cup, using a spatula to smooth the tops. For a finishing touch, drizzle some warmed Biscoff spread over the top and garnish with half a Biscoff cookie. Chill in the refrigerator for at least 4 hours, or overnight for the best results.

Pro Tips for Perfect No-Bake Biscoff Cheesecake Cups

  • Room Temperature Ingredients: Ensure your cream cheese is at room temperature to avoid lumps in your filling.
  • Chill Time is Key: Don’t skip the chilling step; it helps the cheesecake set perfectly.
  • Whipping Technique: When whipping your cream, start at a low speed and gradually increase to achieve the perfect peaks without over-whipping.
  • Personalize Your Toppings: Feel free to add fresh fruits, chocolate shavings, or nuts for added texture and flavor.
  • Flavor Variations: Experiment with flavored extracts like almond or lemon for a unique twist on the classic.
  • Serving Temperature: Serve them chilled from the fridge for the best texture and flavor.
  • Storage Tips: Keep leftovers covered in the fridge for up to 3 days.
  • Batch Preparation: This recipe can easily be doubled for larger gatherings.

Common Mistakes and Troubleshooting

Even the best cooks can run into issues. Here are some common challenges and their solutions:

  • Lumpy Cheesecake Filling: This often happens when the cream cheese is too cold. Always use room temperature cream cheese.
  • Too Soft or Runny Mixture: Ensure your cream is whipped to stiff peaks and that you’ve chilled the cups adequately.
  • Crust Falling Apart: Make sure the biscuit crumbs are well-coated in butter and pressed down firmly in the cups.
  • Biscoff Spread Hardening: If your Biscoff spread is too thick, gently warm it in the microwave for 10 seconds to make it easier to drizzle.

Variations to Explore

Feeling adventurous? Here are a few fun variations you can try with your Biscoff cheesecake cups:

  • Chocolate Drizzle: Top with melted chocolate for an indulgent twist.
  • Fruit Layer: Add a layer of fresh berries or banana slices between the cheesecake and the crust for a fruity burst.
  • Nutty Crunch: Mix in crushed nuts into the crust for added texture and flavor.
  • Spiced Up: Add a pinch of cinnamon or nutmeg to the cheesecake filling for an extra layer of warmth and spice.

Storage and Make-Ahead Instructions

These no-bake cheesecake cups can be prepared ahead of time, making them an excellent choice for busy schedules. Here are some storage tips:

  • Refrigeration: Store the cups in an airtight container in the fridge for up to 3 days.
  • Freezing: If you want to make them further in advance, you can freeze the cheesecake cups (without toppings) for up to a month. Thaw in the refrigerator overnight before serving.
  • Make-Ahead Assembly: You can prepare the crust and filling separately and assemble them a day before serving for optimal freshness.

Comprehensive FAQ

  • Can I use different types of cookies? Absolutely! Any spiced cookie can be used for the crust.
  • Is it necessary to use Biscoff spread? While it’s the star ingredient, you can substitute with other cookie spreads, but the flavor will differ.
  • How long do I need to chill these cups? For best results, chill for at least 4 hours or overnight.
  • Can I make these vegan? Yes! Use plant-based cream cheese and whipped coconut cream.
  • What if I don’t have heavy cream? You can substitute with a whipped topping or coconut cream for a dairy-free option.
  • Can I make these in advance? Yes, they are perfect for make-ahead desserts!
  • How do I know when they are set? They should be firm to the touch and hold their shape when removed from the cup.
  • Can I add more sugar? You can adjust the sweetness to your liking, just taste as you go!

Nutritional Tips and Dietary Adaptations

For those watching their dietary intake, here are some tips:

  • Lower Sugar Option: Use less powdered sugar or a sugar substitute to reduce calories.
  • Gluten-Free: Ensure the biscuits used are gluten-free for those with gluten sensitivities.
  • High-Protein Version: Consider adding Greek yogurt to the cheesecake filling for extra protein.

Essential Equipment for Preparation

To make your baking experience smooth and enjoyable, here are some essential tools you’ll need:

  • Food Processor: For easily crushing the biscuits.
  • Mixing Bowls: Having a few different sizes will help with mixing ingredients.
  • Measuring Cups and Spoons: Accurate measurements are key to a perfect recipe.
  • Whisk or Electric Mixer: For whipping the cream to perfect peaks.
  • Spoon or Spatula: For layering and smoothing the cheesecake filling in the cups.

Serving Suggestions

When it comes to serving your No-Bake Biscoff Cheesecake Cups, presentation is key! Here are some delightful suggestions:

  • Serve in Individual Cups: Use clear cups to showcase the beautiful layers.
  • Add Fresh Fruits: Serve with a side of fresh berries for a refreshing contrast.
  • Pair with Coffee or Tea: A warm beverage complements the creamy cheesecake flavors beautifully.
  • Garnish with Mint: A sprig of mint adds a pop of color and freshness.

In conclusion, making these No-Bake Biscoff Cheesecake Cups is an adventure that celebrates flavors, textures, and the joy of sharing sweet moments with loved ones. So gather your ingredients, roll up your sleeves, and join me in creating a delightful dessert that will transport you straight to flavor paradise. Happy cooking!

No-Bake Biscoff Cheesecake Cups

Prep Time 15 minutes
Total Time 15 minutes
Servings 8 cups
Calories 350
These creamy, no-bake cheesecake cups feature the irresistible flavor of Biscoff cookies, perfect for a quick and delicious dessert.

Ingredients

Crust

  • 30 pieces Lotus Biscoff biscuits
  • 2 tablespoons unsalted butter (melted)

Filling

  • 16 oz heavy cream
  • 8 oz cream cheese (at room temperature)
  • 1/2 cup powdered sugar
  • 1 cup Biscoff spread
  • 1 teaspoon vanilla extract

Topping & Garnish

  • 1/2 cup Biscoff spread (for drizzling on top)
  • 8 pieces Biscoff cookies (cut in half for garnish)

Instructions 

  • Crush Biscoff biscuits and mix with melted butter to form the crust. Press into the bottom of cups.
  • Beat heavy cream until stiff peaks form.
  • Mix cream cheese, powdered sugar, Biscoff spread, and vanilla until smooth. Fold in whipped cream.
  • Spoon filling into cups over the crust. Chill for at least 2 hours.
  • Drizzle Biscoff spread on top and garnish with halved Biscoff cookies before serving.

Notes

Keep refrigerated and enjoy within 2 days for best freshness.
Calories: 350kcal
Cost: $12
Course: Dessert
Cuisine: American
Keyword: Biscoff

Welcome to a Flavorful Fiesta!

Gather around, friends! Today, we’re diving into a dish that not only tantalizes the taste buds but also brings the warmth of Mediterranean culture to your kitchen. The Ground Beef Enchilada Skillet is a one-pan wonder that bursts with vibrant flavors of cumin, oregano, and creamy avocado. Perfect for sharing with family or friends, this dish is not just about eating; it’s about celebrating togetherness. Let’s embark on this culinary journey that can be made in under an hour!

Why You’ll Love This Recipe

There are countless reasons to adore this enchilada skillet, but here are just a few:

  • Quick and Easy: This recipe is so simple that you can whip it up in about 30 minutes, making it ideal for busy weeknights.
  • Flavor Explosion: The combination of spices and fresh ingredients creates a dish that’s bursting with flavor!
  • Healthy Option: Packed with nutritious ingredients like lean ground beef and vegetables, it’s a well-rounded meal.
  • Customizable: You can easily adapt this recipe to suit your dietary needs or personal preferences.
  • One-Pan Wonder: Minimal cleanup means more time to enjoy your meal and less time scrubbing dishes!

Ingredients: Your Flavorful Cast

Let’s gather our ingredients for this scrumptious skillet! Here’s what you’ll need:

  • 1 pound ground beef (85/15 blend recommended; can substitute with ground turkey)
  • 1/2 onion, diced
  • 3 cloves garlic, minced
  • 3/4 teaspoon salt
  • 1/4 teaspoon black pepper (omit for AIP)
  • 1 teaspoon oregano
  • 1 teaspoon cumin (omit for AIP)
  • 2 cups butternut squash (cubed into ½-inch pieces; frozen and thawed recommended)
  • 1 1/2 cups enchilada sauce (Siete brand for paleo)
  • 4 almond flour tortillas, sliced into strips
  • 1/4 cup dairy-free cheese, shredded (optional)
  • 2 tablespoons dairy-free sour cream
  • 2 tablespoons fresh cilantro, chopped
  • 1 tablespoon green onion, chopped
  • 1 avocado, sliced
  • Fresh lime wedges (to serve)

How to Make This Flavorful Skillet

Ground Beef Enchilada Skillet

Now that we have all our ingredients ready, let’s get cooking!

  1. Heat a large skillet over medium heat. Add the ground beef, diced onion, minced garlic, salt, black pepper, oregano, and cumin. Break up the beef with a wooden spoon as it cooks, crumbling it into small pieces. Cook for 6-8 minutes until the beef is browned and the onions have softened. Drain off most of the fat, leaving about 2 tablespoons in the pan, and set the beef mixture aside.
  2. In the same skillet, add the cubed butternut squash and sauté for 5-7 minutes (if using thawed frozen squash) or 12-15 minutes (if using fresh) until fork-tender and lightly golden. Return the beef mixture to the pan and stir to combine.
  3. Pour in the enchilada sauce and stir well to coat the beef and squash evenly. Bring the mixture to a low simmer, add the sliced tortilla strips, and gently fold them into the sauce, allowing them to soften for 2-3 minutes.
  4. If using cheese, sprinkle it on top and let it melt for about 1 minute over low heat. Remove from heat and top with fresh cilantro, chopped green onion, dairy-free sour cream, sliced avocado, and serve with lime wedges on the side.

Pro Tips for Perfect Enchiladas

To elevate your cooking experience, consider these expert tips:

  • Choose Quality Meat: Opt for lean ground beef for a healthier option. If you prefer a lighter meal, ground turkey is a fantastic substitute!
  • Customize Your Veggies: Feel free to add other vegetables like bell peppers or zucchini for added nutrition and flavor.
  • Make Ahead: Prepare the beef mixture in advance and store it in the fridge for up to 2 days. Just add the tortillas and toppings when you’re ready to serve!
  • Spice Level: Adjust the seasoning to your taste. Add a pinch of cayenne or chili powder for some heat!
  • Storage: Leftovers can be stored in an airtight container in the refrigerator for up to 3 days.

Common Mistakes and Troubleshooting

Even the best chefs make mistakes! Here are some common pitfalls and how to avoid them:

  • Overcooking the Beef: Cook just until browned to preserve moisture and flavor.
  • Too Much Liquid: If the mixture seems too soupy, let it simmer a bit longer to thicken.
  • Stale Tortillas: Ensure your tortillas are fresh for the best texture. If they break, consider warming them slightly before adding to the skillet.

Variations to Spice Things Up

Keep things exciting by trying these variations:

  • Vegetarian Delight: Substitute ground beef with black beans or lentils for a hearty vegetarian option.
  • Low Carb Twist: Replace tortillas with zucchini slices or cauliflower rice for a low-carb version.
  • Cheesy Goodness: Add different types of cheese or use a vegan cheese alternative for a cheesy topping.
  • Spicy Kick: Incorporate diced jalapeños into your beef mixture for a spicy twist!

Storage and Make-Ahead Instructions

Planning ahead? Here’s how to store and prepare for later:

  • Refrigerate: Store leftovers in an airtight container for up to 3 days.
  • Freeze: Prepare the beef mixture and freeze it for up to 3 months. Just thaw and reheat whenever you’re ready to enjoy!
  • Make Ahead: You can prepare the entire dish ahead of time, allow it to cool, and then refrigerate. Reheat before serving.

Frequently Asked Questions

Got questions? We’ve got answers!

  • Can I use a different type of meat? Absolutely! Ground turkey or chicken works wonderfully.
  • What if I can’t find butternut squash? You can substitute with sweet potatoes or any favorite vegetable.
  • Is this recipe gluten-free? Yes! Just ensure your tortillas and sauce are gluten-free.
  • Can I make this dish vegan? Yes! Use plant-based ground meat and dairy-free cheese.
  • How can I make this spicier? Add fresh jalapeños or a sprinkle of chili powder.
  • Can I prepare this in advance? Yes! You can make the beef mixture ahead of time and add tortillas and toppings before serving.
  • What can I serve with this dish? Pair it with a fresh salad, guacamole, or some tortilla chips!
  • How do I reheat leftovers? Reheat in the microwave or on the stovetop until warmed through.

Nutritional Tips and Dietary Adaptations

This dish is packed with nutrition! Here are some tips to enhance its health benefits:

  • Protein Power: Lean ground beef provides a hearty source of protein, essential for muscle growth and repair.
  • Fiber Boost: Adding beans or extra vegetables can increase fiber for better digestion.
  • Healthy Fats: Using avocado and healthy oils contributes to heart health and keeps you full longer.

Essential Equipment Recommendations

To make your cooking experience smooth, here’s what you’ll need:

  • Large Skillet: A sturdy, non-stick skillet is essential for even cooking.
  • Wooden Spoon: Perfect for breaking up ground meat and stirring ingredients.
  • Measuring Cups and Spoons: Ensure accuracy in your recipe for the best results.
  • Spatula: Useful for serving and mixing ingredients.

Serving Suggestions

Make your meal even more delightful with these serving ideas:

  • Add Freshness: Serve with a side of fresh salad or coleslaw to balance the richness of the dish.
  • Garnish: Top with extra cilantro, lime wedges, and sliced jalapeños for added flavor.
  • Accompaniments: Offer some tortilla chips or a side of guacamole for dipping!

Conclusion: Celebrate Togetherness

Cooking is a beautiful way to celebrate life, culture, and community. This Ground Beef Enchilada Skillet is more than just a meal; it’s an experience to share with those you cherish. So gather your loved ones around the table, savor the flavors, and create memories that will last a lifetime. Happy cooking, amigos!

Ground Beef Enchilada Skillet

Prep Time 10 minutes
Cook Time 20 minutes
Total Time 30 minutes
Servings 4 servings
Calories 550
A flavorful and easy-to-make skillet dish combining ground beef, butternut squash, and enchilada sauce, topped with fresh herbs and served with lime wedges.

Ingredients

Meat and Vegetables

  • 1 pound ground beef (85/15 blend recommended, can substitute ground turkey)
  • 1/2 diced onion
  • 3 cloves garlic (minced)
  • 3/4 teaspoon salt
  • 1/4 teaspoon black pepper (omit for AIP)
  • 1 teaspoon oregano
  • 1 teaspoon cumin (omit for AIP)
  • 2 cups butternut squash (cubed into ½-inch pieces, frozen and thawed recommended)
  • 1 1/2 cups enchilada sauce (use Siete brand for paleo)
  • 4 almond flour tortillas sliced into strips
  • 1/4 cup dairy-free cheese (shredded, optional)
  • 2 tablespoons dairy-free sour cream
  • 2 tablespoons fresh cilantro (chopped)
  • 1 tablespoon green onion (chopped)
  • 1 avocado sliced
  • fresh lime wedges (to serve)

Instructions 

  • Cook ground beef with onion, garlic, salt, pepper, oregano, and cumin until browned, then drain excess fat.
  • Sauté butternut squash in the same skillet until fork-tender, then return beef to pan and mix.
  • Pour in enchilada sauce, add tortilla strips, and simmer for 2-3 minutes until softened. Top with cheese, cilantro, green onion, sour cream, avocado, and lime wedges.

Notes

For a lower sodium version, reduce the salt and use homemade enchilada sauce.
Calories: 550kcal
Cost: $15
Course: Main Course
Cuisine: Mexican
Keyword: Beef, Enchilada, skillet

Dive into a Flavorful Adventure with Strawberry Crunch Cheesecake Tacos

Welcome, dear readers! Today, we’re embarking on a delightful culinary journey where tradition meets innovation. Get ready to savor the enchanting flavors of strawberry crunch cheesecake tacos—a dessert that combines creamy cheesecake filling with a crunchy shell and the bright freshness of strawberries. Perfect for gatherings, celebrations, or a sweet indulgence at home, these tacos are sure to impress your family and friends. Let’s dive in!

Why You’ll Love This Recipe

These strawberry crunch cheesecake tacos are not just another dessert—they’re a celebration of flavors and textures! Here’s why you’ll adore them:

  • Unique Presentation: Tacos aren’t just for savory meals! This sweet version captivates both the eyes and the palate.
  • Easy to Make: With simple steps and common ingredients, even novice bakers can create this stunning dessert.
  • Versatile Filling: The cheesecake filling can be customized with different fruits or flavors, making this recipe adaptable for any season.
  • Perfect for Sharing: Individual taco servings are great for parties, allowing guests to grab and enjoy at their leisure.
  • Light and Refreshing: The use of fresh strawberries and a light cheesecake filling ensures that this dessert feels indulgent yet not overly heavy.

Ingredients You’ll Need

Let’s gather our ingredients for these delightful tacos. Here’s what you’ll need:

  • 8 small flour tortillas (fajita size)
  • 4 tablespoons butter, melted (for shells)
  • 1 teaspoon cinnamon
  • 3 tablespoons granulated sugar
  • 16 oz cream cheese, softened
  • 0.75 to 1 cup powdered sugar
  • 2 teaspoons vanilla extract
  • 0.75 cup heavy cream, cold
  • 1.5 to 2 cups fresh strawberries, diced
  • 2 to 3 tablespoons optional strawberry glaze
  • 20 Golden Oreo cookies
  • 2 cups freeze dried strawberries
  • 0.5 cup butter, melted (for crunch)
  • 2 to 3 tablespoons white chocolate drizzle (optional)

Step-by-Step Instructions

Side view of colorful Strawberry Crunch Cheesecake Tacos with a crunchy topping and drizzled chocolate.

Ready to create these scrumptious tacos? Follow these easy steps:

  1. Preheat your oven to 350°F (175°C). Decide on how you want to shape the shells.
  2. In a small bowl, mix sugar and cinnamon together. Brush both sides of each tortilla with melted butter and coat with the sugar mixture.
  3. Drape tortillas over oven racks, baking them for 8 to 10 minutes until crisp. Allow them to cool completely.
  4. In a food processor, pulse Golden Oreos and freeze-dried strawberries into coarse crumbs. Stir in melted butter until you achieve sandy clusters.
  5. In a large bowl, beat softened cream cheese with powdered sugar and vanilla until smooth and fluffy.
  6. In another bowl, whip cold heavy cream to soft peaks, then gently fold it into the cream cheese mixture.
  7. Dice strawberries and toss them with a spoonful of sugar. Let them sit for 5 to 10 minutes to release their juice.
  8. Transfer the filling into a piping bag or a zip bag with the corner cut. Pipe the filling into the cooled taco shells.
  9. Top with strawberries, sprinkle on generous strawberry crunch topping, and chill for at least 30 minutes before serving.

Pro Tips for the Best Strawberry Crunch Cheesecake Tacos

To elevate your taco-making game, consider these expert tips:

  • Perfect Shells: For an even crispier texture, let the shells cool in a turned-off oven after baking.
  • Chill the Filling: Keeping the cheesecake filling chilled will make it easier to pipe and help it hold its shape.
  • Flavor Boost: Experiment with flavored extracts like almond or lemon to add a unique twist to your cheesecake filling!
  • Berry Selection: Use ripe, juicy strawberries for the best flavor. You can also mix in blueberries or raspberries for variety.
  • Make Ahead: The shells can be made a day in advance and stored in an airtight container to maintain their crunch.
  • Sweet Drizzle: A drizzle of white chocolate adds an elegant touch and enhances the dessert’s sweetness.
  • Substitution Ideas: Swap out cream cheese for mascarpone for a lighter flavor, or use Greek yogurt for a healthier option.
  • Crunch Factor: For added crunch, consider sprinkling some chopped nuts or granola on top before serving.

Common Mistakes and Troubleshooting

Here are some common pitfalls to avoid while making your strawberry crunch cheesecake tacos:

  • Overbaking the Shells: Keep an eye on the tortillas while baking. They can turn from crisp to burnt quickly!
  • Filling Too Runny: If your filling is too runny, ensure your cream cheese is at room temperature and well-beaten before folding in the whipped cream.
  • Uneven Distribution: When filling the shells, use a piping bag for even distribution and to avoid overfilling.
  • Soggy Tacos: Always chill the tacos before serving to help the filling set and maintain the crispness of the shells.

Variations for Your Strawberry Crunch Cheesecake Tacos

Get creative with these variations to make the recipe your own:

  • Chocolate Lovers: Incorporate cocoa powder into the cheesecake filling for a rich chocolate flavor.
  • Tropical Twist: Substitute strawberries for diced mango or pineapple and add a hint of coconut to the filling.
  • Nutty Delight: Add crushed nuts like almonds or walnuts to the strawberry crunch topping for an earthy flavor.
  • Cheesecake Bar: Instead of tacos, use a rectangular dish to create a cheesecake bar, layering the filling and toppings.

Storage and Make-Ahead Instructions

Planning to make these ahead of time? Here’s how to store them:

  • Make Ahead: You can prepare the taco shells and filling a day in advance. Store them separately until ready to serve.
  • Storing Leftovers: Keep any leftovers in an airtight container in the refrigerator for up to 2 days. However, the shells may soften over time.
  • Freezing Options: While it’s best to enjoy these fresh, you can freeze the filled tacos for up to a month. Just remember to re-crisp the shells in the oven before serving!

Frequently Asked Questions

Here are some common questions about making strawberry crunch cheesecake tacos:

  • Can I use other fruits? Absolutely! Feel free to experiment with different fruits like blueberries, raspberries, or even peaches.
  • Is this recipe gluten-free? You can make gluten-free versions by using gluten-free tortillas and cookies.
  • How do I make the crunch topping? Simply crush freeze-dried strawberries and Golden Oreos, then mix with melted butter until it resembles sand.
  • Can I use whipped cream instead of heavy cream? Yes! Whipped cream can be substituted, but be careful not to overmix.
  • What can I serve with these tacos? Pair with a scoop of vanilla ice cream or a drizzle of chocolate sauce for extra indulgence.
  • How long does it take to prepare? The total time is approximately 30-40 minutes, plus chilling time.
  • Can I make these vegan? Yes! Substitute cream cheese with vegan cream cheese and use plant-based butter.
  • Do I have to chill the tacos? Chilling helps set the filling, so it’s recommended for the best texture!

Nutrition Tips and Dietary Adaptations

For those mindful of nutrition, here are some tips:

  • Lower Sugar Option: Use a sugar substitute in the filling for a lower-calorie dessert.
  • Rich in Vitamins: Strawberries are high in vitamin C and antioxidants, making this dessert a healthier choice.
  • Portion Control: Enjoy one taco at a time to savor the flavors without overindulging.

Equipment Recommendations

Here’s what you’ll need to make this delicious treat:

  • Oven for baking the taco shells
  • Food processor for crushing cookies and strawberries
  • Mixing bowls for preparing your filling
  • Piping bag or zip bag for easy filling

Serving Suggestions

Make your serving even more delightful with these ideas:

  • Garnish with Mint: A sprinkle of fresh mint adds a pop of color and flavor.
  • Drizzle of Sauce: Consider drizzling caramel or chocolate sauce for added sweetness.
  • Accompany with Drinks: Serve with a refreshing lemonade or iced tea for a perfect dessert pairing.

In conclusion, these strawberry crunch cheesecake tacos are not just a dessert; they’re an experience filled with love, joy, and creativity. So grab your ingredients, gather your loved ones, and let’s create some sweet memories together at the dinner table. Bon appétit!

Delicious Strawberry Crunch Cheesecake Tacos

Prep Time 20 minutes
Cook Time 10 minutes
Total Time 30 minutes
Servings 8 pieces
Calories 450
These crispy taco shells filled with creamy cheesecake and fresh strawberries are a delightful treat perfect for any occasion.

Ingredients

Tortilla Shells

  • 8 small flour tortillas, fajita size
  • 4 tablespoons butter, melted (for shells)
  • 1 teaspoon cinnamon
  • 3 tablespoons granulated sugar

Cheesecake Filling

  • 16 oz cream cheese, softened
  • 0.75 to 1 cup powdered sugar
  • 2 teaspoons vanilla extract

Strawberry Crunch

  • 20 cookies Golden Oreo cookies
  • 2 cups freeze dried strawberries
  • 0.5 cup butter, melted (for crunch)

Toppings

  • 2 to 3 tablespoons optional strawberry glaze
  • 2 to 3 tablespoons white chocolate drizzle, optional

Instructions 

  • Preheat oven to 350°F. Mix sugar and cinnamon, brush tortillas with melted butter, coat with mixture, then bake 8-10 minutes until crisp. Cool completely.
  • Pulse cookies and dried strawberries into coarse crumbs, stir in melted butter to form sandy clusters.
  • Beat cream cheese with powdered sugar and vanilla until smooth, whip heavy cream to soft peaks, then fold into mixture.
  • Dice strawberries, toss with a small spoon of sugar, and let sit for 5-10 minutes. Pipe filling into cooled shells, top with strawberries, sprinkle crunch, and chill for 30 minutes.

Notes

For best results, chill the assembled tacos before serving.
Calories: 450kcal
Cost: $15
Course: Dessert
Keyword: cheesecake, strawberry, tacos