Author

rafael

Browsing

Welcome to the World of Matilda’s Chocolate Cake!

Ah, the allure of chocolate cake! It’s more than just a dessert; it’s an experience, a celebration of flavors that dance on our taste buds. Today, we’re diving into the rich, velvety goodness of Matilda’s Chocolate Cake, a treat so delightful it can turn any gathering into a festive occasion. With its moist layers and luscious fudge frosting, this cake is not just any chocolate cake; it’s a slice of heaven that beckons you to indulge.

In this comprehensive guide, we’ll explore why this recipe stands out, the secrets behind its irresistible flavor, and how you can bring it to life in your kitchen. So, roll up your sleeves, and let’s get started!

Why You’ll Love This Recipe

  • Decadent flavor: This cake is rich and chocolatey, perfect for true chocolate lovers.
  • Moist and tender: Thanks to the buttermilk and hot coffee, each bite is soft and luscious.
  • Easy to prepare: With straightforward steps, making this cake is a breeze, even for beginners.
  • Versatile for occasions: Whether it’s a birthday, anniversary, or just a Tuesday, this cake fits every occasion.
  • Impressive presentation: The glossy fudge frosting makes it a stunning centerpiece for any table.

Gathering Your Ingredients

To create the best Matilda’s chocolate cake, you’ll need a selection of high-quality ingredients. Here’s what you’ll need:

  • 2 1/2 cups Flour: All-purpose flour gives the cake structure. For a lighter texture, you can substitute with cake flour.
  • 1 3/4 cups Granulated sugar: This adds sweetness and helps create that tender crumb.
  • 2 tsp Baking powder: Essential for leavening and achieving that perfect rise.
  • 1 tsp Baking soda: Works in tandem with baking powder for fluffy layers.
  • 1/2 tsp Kosher salt: Balances the sweetness and enhances the chocolate flavor.
  • 1/2 cup Cocoa powder: Unsweetened cocoa powder is key to that deep chocolate taste.
  • 2/3 cup Vegetable oil: Keeps the cake moist and rich.
  • 1 tsp Vanilla extract: Adds depth of flavor; use pure vanilla for the best results.
  • 3 Eggs: Provide structure and moisture.
  • 2/3 cup Buttermilk: Contributes to the cake’s tenderness and adds a slight tang.
  • 1 cup Coffee (hot): Enhances the chocolate flavor without making the cake taste like coffee.
  • 11.11 oz Butter (unsalted): Used in frosting for a rich, creamy texture.
  • 14.1 oz Dark chocolate (about 60%-70%): The star of the frosting, delivering that deep chocolate richness.
  • 1/3 cup Cocoa powder: For the frosting, to intensify the chocolate flavor.
  • 1 1/3 cups Heavy cream: Creates a luscious ganache for frosting.
  • 1 1/3 cups Powdered sugar: Sweetens the frosting while keeping it smooth.
  • 1/2 tsp Kosher salt: Enhances flavors in the frosting.
  • 1 tsp Vanilla extract: Adds warmth to the frosting.

How to Make Matilda’s Chocolate Cake

Richly layered chocolate cake with a shiny ganache, highlighting its moist interior and buttery finish.

Step-by-Step Instructions

Let’s break down the cake-making process into simple steps:

  • Preheat the oven: Set your oven to 180°C (350°F) and prepare two 8-inch baking pans by lining them with parchment paper.
  • Mix the dry ingredients: In a large mixing bowl, whisk together the flour, sugar, baking powder, baking soda, salt, and sifted cocoa powder.
  • Add wet ingredients: Pour in the buttermilk, vegetable oil, vanilla extract, and eggs. Mix until just combined.
  • Incorporate hot coffee: Gradually add the hot coffee to the mixture, stirring until smooth. The batter will be runny but that’s perfect!
  • Divide and bake: Split the batter evenly between the prepared pans. Bake for 25-30 minutes, or until a toothpick inserted comes out clean.
  • Cool the cakes: Allow the cakes to cool completely in the pans before frosting.

Making the Chocolate Fudge Frosting

Now, let’s whip up the decadent fudge frosting:

  • Melt ingredients: In a saucepan, combine the unsalted butter, heavy cream, dark chocolate, sifted cocoa powder, powdered sugar, and salt.
  • Heat and stir: Over medium heat, stir continuously until the mixture is smooth and fully melted.
  • Cool the frosting: Strain the mixture into a bowl to remove any lumps. Cover with plastic wrap, ensuring it touches the surface to prevent a skin from forming.
  • Chill: Let the frosting cool at room temperature for 30 minutes, then refrigerate for 1-2 hours until it reaches your desired thickness.

Assembling Your Cake

Once your cakes are cool and your frosting is ready, it’s time to assemble:

  • Layer the cake: Place a dollop of frosting on your cake stand as glue, followed by the first layer of cake.
  • Frost the layers: Spread about ⅓ of the frosting on top of the first layer, then place the second layer on top.
  • Final frosting: Frost the top and sides of the cake with the remaining frosting, creating a wave pattern for a beautiful finish.
  • Optional: If you have leftover frosting, save it for your next chocolate creation!

Expert Tips for Best Results

To ensure your Matilda’s chocolate cake turns out perfectly, keep these expert tips in mind:

  • Room temperature ingredients: For best results, ensure your eggs and buttermilk are at room temperature before mixing.
  • Use high-quality chocolate: Opt for a good quality dark chocolate; it makes a significant difference in flavor.
  • Don’t overmix the batter: Mix until just combined to maintain a light texture.
  • Check oven temperature: Oven temperatures can vary; use an oven thermometer to ensure accuracy.
  • Use cake strips: To achieve even layers, use cake strips around your pans to help them bake evenly.
  • Let the cakes cool completely: This prevents the frosting from melting off when you assemble.
  • Chill the frosting: A thicker frosting is easier to work with and holds its shape better.
  • Experiment with flavors: You can add espresso powder to the batter for an even richer chocolate flavor.

Common Mistakes and Troubleshooting

If you encounter issues while making your cake, here are some common mistakes and how to fix them:

  • Dense cake: This usually happens from overmixing. Mix just until combined, especially after adding dry ingredients.
  • Dry cake: Ensure you’re measuring flour accurately. Use the spoon-and-level method to avoid packing it.
  • Crumbly frosting: If your frosting is crumbly, it may be too cold. Let it sit at room temperature to soften before spreading.
  • Frosting sliding off: Make sure your cake layers are cool before frosting. If necessary, chill them for a short time.

Variations to Try

Feeling adventurous? Here are some delicious variations to personalize your Matilda’s chocolate cake:

  • Chocolate Orange Cake: Add orange zest to the batter for a citrusy zing.
  • Nutty Delight: Fold in chopped nuts like walnuts or hazelnuts for added texture.
  • Mint Chocolate Cake: Incorporate mint extract into the frosting for a refreshing twist.
  • Layered with Fruit: Add layers of fresh raspberries or strawberries between the cake layers for a fruity contrast.

Storage and Make-Ahead Instructions

To keep your cake fresh and delicious, follow these storage tips:

  • Room temperature: Store the cake in an airtight container at room temperature for up to 3 days.
  • Refrigerate: If you need to keep it longer, refrigerate for up to a week. Ensure it’s well covered to prevent drying out.
  • Freezing: You can freeze the unfrosted cake layers for up to 3 months. Thaw in the refrigerator before frosting.
  • Make ahead: You can bake the cake layers a day in advance. Just wrap them in plastic wrap after cooling.

Nutrition Tips and Dietary Adaptations

To cater to different dietary needs, consider these substitutions:

  • Gluten-free: Use a 1:1 gluten-free flour blend for a gluten-free version.
  • Lower sugar: Reduce the sugar by 1/4 cup for a less sweet cake.
  • Dairy-free: Substitute buttermilk with almond milk mixed with vinegar, and use dairy-free butter and chocolate.
  • Vegan: Replace eggs with flax eggs (1 tbsp flaxseed meal + 2.5 tbsp water per egg) and use plant-based butter and milk.

Equipment Recommendations

Here’s what you’ll need to successfully create your cake:

  • Mixing bowls: A set of various sizes for mixing ingredients.
  • Measuring cups and spoons: Accurate measurements are crucial for baking.
  • Whisk: For mixing dry and wet ingredients smoothly.
  • Rubber spatula: Helps in folding ingredients gently and scraping bowls.
  • Cake pans: Two 8-inch round pans preferably with a non-stick finish.
  • Cooling rack: Essential for cooling your cake layers evenly.
  • Offset spatula: Perfect for frosting and smoothing the surface of your cake.

Serving Suggestions

To elevate your chocolate cake experience, consider these delightful serving ideas:

  • Serve with whipped cream: A dollop of freshly whipped cream adds a light contrast to the rich cake.
  • Pair with ice cream: Vanilla or mint chocolate chip ice cream makes for a delightful pairing.
  • Garnish with fruits: Fresh berries or a sprinkle of shaved chocolate on top adds a lovely finish.
  • Drizzle with caramel sauce: For an extra indulgent touch, drizzle warm caramel over a slice.

Frequently Asked Questions (FAQs)

Got questions? Here are some common queries about Matilda’s chocolate cake:

  • Can I make this cake ahead of time?: Yes! Bake the layers a day in advance and frost just before serving.
  • How do I store leftovers?: Keep in an airtight container at room temperature for up to 3 days, or refrigerate for up to a week.
  • Can I freeze this cake?: Absolutely! Freeze unfrosted layers for up to 3 months.
  • What can I substitute for buttermilk?: Mix 2/3 cup of milk with 1 tablespoon of vinegar or lemon juice.
  • Is this cake suitable for special diets?: Yes! There are gluten-free, dairy-free, and vegan adaptations available.
  • What type of chocolate should I use?: Use high-quality dark chocolate for the best flavor.
  • Can I make this cake in a different pan size?: Yes! Just adjust the baking time based on the pan size.
  • Why is my cake dry?: Ensure accurate measurements and don’t overbake for best results.

With this guide, you are now equipped to create the best Matilda’s chocolate cake that will impress everyone at the table. Gather your ingredients, follow the steps, and let the aroma fill your kitchen as you create a masterpiece. Remember, cooking is not just about following recipes; it’s about making memories, sharing love, and celebrating life. So, grab a plate and join the feast!

Best Matilda's Chocolate Cake

Prep Time 30 minutes
Cook Time 30 minutes
Total Time 1 hour
Servings 12 pieces
Calories 550
A rich and moist chocolate cake with a luscious fudge frosting, perfect for special occasions or indulgent treats.

Ingredients

Dry ingredients

  • 2 1/2 cups Flour
  • 1 3/4 cups Granulated sugar
  • 2 tsp Baking powder
  • 1 tsp Baking soda
  • 1/2 tsp Kosher salt
  • 1/2 cup Cocoa powder
  • 2/3 cup Vegetable oil
  • 1 tsp Vanilla extract

Wet ingredients

  • 3 eggs Eggs
  • 2/3 cup Buttermilk
  • 1 cup Hot coffee
  • 11.11 oz Butter (unsalted)
  • 14.1 oz Dark chocolate (about 60%-70%)
  • 1/3 cup Cocoa powder
  • 1 1/3 cups Heavy cream
  • 1 1/3 cups Powdered sugar
Instructions

Notes

Use cake strips for even baking and ensure the cake is fully cooled before frosting.
Calories: 550kcal
Cost: $15
Course: Dessert
Keyword: cake, chocolate

The Sweet Art of Heart-Shaped Sugar Cookies

Welcome, dear friends! Today, we embark on a delightful journey into the world of baking with a recipe that captures the essence of love and celebration: Heart-Shaped Sugar Cookies. These charming treats are not only a feast for the eyes but also a delight for the taste buds, perfect for any occasion that calls for a touch of sweetness. Whether it’s Valentine’s Day, an anniversary, or just a cozy afternoon with family, these cookies are sure to warm hearts and create cherished memories.

Why You’ll Love This Recipe

Here are five compelling reasons to dive into this heart-shaped cookie adventure:

  • Easy to Make: This recipe requires simple ingredients and straightforward steps, making it perfect for bakers of all levels.
  • Customizable: Feel free to get creative with decorations — from colorful icing to sprinkles, the possibilities are endless!
  • Perfect for Gifting: These cookies make wonderful gifts, beautifully packaged in a box or a jar, spreading love to friends and family.
  • Deliciously Buttery: The rich flavor of butter combined with a hint of vanilla creates a cookie that’s melt-in-your-mouth good.
  • Great for Any Occasion: Whether it’s a holiday, birthday, or simply a gathering of friends, these cookies fit right in.

Ingredients Breakdown

Let’s gather our ingredients for these delightful heart-shaped sugar cookies:

  • 2 1/2 cups all-purpose flour: The foundation of our cookies. You can substitute with gluten-free flour if desired.
  • 1 cup unsalted butter, softened: For a rich and creamy texture. Make sure it’s at room temperature for easy mixing!
  • 1 cup granulated sugar: This adds just the right amount of sweetness. You can substitute with brown sugar for a deeper flavor.
  • 1 egg: Acts as a binding agent. For a vegan version, substitute with a flax egg (1 tablespoon ground flaxseed mixed with 2.5 tablespoons water).
  • 1 tsp vanilla extract: Adds a warm, sweet aroma. You can also use almond extract for a unique twist.
  • 1/2 tsp salt: Balances the sweetness and enhances flavors.

Pro Tips for Perfect Cookies

Heart-shaped sugar cookies with a golden edge, arranged on a table.

To ensure your cookies turn out beautifully every time, here are some pro tips:

  • Chill the Dough: After mixing, chill the dough for at least 30 minutes. This helps the cookies maintain their shape while baking.
  • Even Thickness: Roll out the dough to an even thickness (about 1/4 inch) for uniform baking.
  • Watch the Oven: Keep an eye on the cookies while they bake — they should be golden around the edges but still soft in the center.
  • Perfect Cut-Outs: Use a sharp cookie cutter for clean edges and fun shapes.
  • Decorate While Fresh: Decorate the cookies as soon as they come out of the oven for the best adherence of icing and sprinkles.
  • Experiment: Don’t be afraid to try different flavors or add-ins, like citrus zest or chocolate chips!
  • Use Parchment Paper: Line your baking sheet with parchment paper to prevent sticking.
  • Let Cool Completely: Allow cookies to cool completely before decorating to prevent the icing from melting.

Common Mistakes and Troubleshooting

Even seasoned bakers can run into a few hiccups. Here are some common mistakes and how to avoid them:

  • Too Sticky Dough: If your dough is too sticky, try adding a bit more flour until it’s workable.
  • Overbaking: Keep track of the baking time; cookies can go from perfect to overdone quickly.
  • Too Soft Cookies: Ensure your butter isn’t too warm when mixing, as this can lead to overly soft cookies.
  • Uneven Shapes: Use a rolling pin and a consistent pressure to ensure even shapes when cutting out the cookies.

Variations to Try

Feeling adventurous? Here are some fun variations you can try:

  • Citrus Zest Cookies: Add zest from a lemon or orange for a refreshing twist.
  • Chocolate-Dipped Hearts: Dip the cooled cookies in melted chocolate for an indulgent treat.
  • Sprinkles Galore: Roll the edges of the cookies in colorful sprinkles before baking for a festive look.
  • Spiced Cookies: Incorporate a teaspoon of cinnamon or nutmeg into the dough for a warm, spicy flavor.

Storage and Make-Ahead Instructions

Want to prepare your cookies in advance? Here’s how:

  • Storage: Store baked cookies in an airtight container at room temperature for up to a week. They can also be frozen for up to 3 months.
  • Make-Ahead Dough: You can prepare the cookie dough up to 3 days in advance. Just wrap it tightly in plastic wrap and refrigerate until ready to use.

Frequently Asked Questions

Here are some common questions about making heart-shaped sugar cookies:

  • Can I use whole wheat flour? Yes, but the cookies may have a denser texture.
  • What can I use instead of eggs? A flax egg or applesauce can be a great substitute.
  • How do I get my cookies to hold their shape? Chilling the dough and rolling it to an even thickness are key.
  • Can I freeze the dough? Absolutely! You can freeze the dough for later use. Just thaw in the fridge before baking.
  • How can I decorate my cookies? Use royal icing, buttercream, or melted chocolate for delicious decorations.
  • What’s the baking time? Bake for 8-10 minutes at 350°F, or until the edges are lightly golden.
  • Can I add flavors? Yes! Almond extract or different spices can add unique flavors to your cookies.
  • What’s the best way to store decorated cookies? Store in a single layer in an airtight container to prevent smudging the decorations.

Nutritional Tips and Dietary Adaptations

For those who are health-conscious or have dietary restrictions, here are some tips:

  • Reduced Sugar: Substitute half of the sugar with a natural sweetener like honey or agave nectar.
  • Gluten-Free Option: Use a 1:1 gluten-free flour blend for a gluten-free version.
  • Dairy-Free Option: Substitute butter with coconut oil or a vegan butter alternative.

Equipment Recommendations

Before you start baking, gather these essential tools:

  • Baking Sheet: A sturdy baking sheet is essential for even baking.
  • Rolling Pin: To roll out your dough evenly.
  • Cookie Cutters: A heart-shaped cookie cutter is a must-have for this recipe.
  • Mixing Bowls: Use a large bowl for mixing ingredients and a smaller one for whisking eggs.
  • Cooling Rack: To let your cookies cool evenly after baking.

Serving Suggestions

Once your cookies are baked and decorated, here are some delightful serving ideas:

  • With Tea or Coffee: Pair these cookies with a warm cup of tea or coffee for a cozy afternoon.
  • At Parties: Arrange on a platter for a beautiful centerpiece at celebrations.
  • Gift Packaging: Place in a decorative box or jar with a ribbon for a heartfelt gift.

Conclusion

Now that you have all the secrets to crafting the perfect heart-shaped sugar cookies, it’s time to roll up your sleeves and get baking! Remember, this isn’t just about making cookies; it’s about creating moments of joy, sharing love, and celebrating life’s sweet occasions. So gather your loved ones, grab those cookie cutters, and let’s fill the world with sweetness, one heart-shaped cookie at a time. Bon appétit!

Heart-Shaped Sugar Cookies

Prep Time 20 minutes
Cook Time 10 minutes
Total Time 30 minutes
Servings 24 cookies
Calories 150
Delight in these festive, buttery sugar cookies shaped like hearts, perfect for special occasions or just because.

Ingredients

Dough

  • 2 1/2 cups all-purpose flour
  • 1 cup unsalted butter, softened
  • 1 cup granulated sugar
  • 1 egg egg
  • 1 tsp vanilla extract
  • 1/2 tsp salt

Instructions 

  • Cream butter and sugar until smooth.
  • Mix in egg and vanilla.
  • Add flour and salt; form dough.
  • Roll out and cut into hearts.
  • Bake at 350°F for 8-10 minutes.
  • Cool and decorate as desired.

Notes

Chill dough before rolling for easier handling.
Calories: 150kcal
Cost: $10
Course: Dessert
Cuisine: American
Keyword: sugar cookies

Indulge in Decadence with Chocolate Lava Cakes

Welcome to a delightful journey of flavors that will ignite romance and create unforgettable moments! If you’re craving a dessert that combines rich, molten chocolate with the warmth of togetherness, you’ve found the perfect recipe. These Chocolate Lava Cakes are not only simple to prepare but also perfectly portioned for two, making them ideal for a romantic dinner or a cozy night in. Let’s dive into the enchanting world of chocolate and discover how to create these decadent treats that melt in your mouth and warm your heart.

Why You’ll Love This Recipe

  • Elegant Presentation: These individual lava cakes look stunning when served, perfect for impressing your partner or guests.
  • Quick and Easy: With just a few ingredients and minimal prep time, you can whip up this indulgent dessert in under 30 minutes.
  • Molten Chocolate Center: The secret to their charm lies in the gooey, rich chocolate center that flows out when you cut into them.
  • Customizable Flavors: Feel free to experiment with different flavors, such as adding orange zest or a dash of espresso for a unique twist.
  • Perfect for Sharing: These cakes are meant for two, encouraging you to savor each bite together, making every moment special.

Ingredients Breakdown

Let’s talk about the ingredients that will bring these chocolate lava cakes to life. Quality matters, so choose wisely!

  • 2 oz high-quality dark chocolate: Aim for chocolate with at least 60% cocoa for a rich flavor.
  • 2 oz unsalted butter: Adds creaminess and a silky texture to the batter.
  • 1 large egg: Provides structure and richness.
  • 1 large egg yolk: Enhances the cake’s richness and creates that divine molten center.
  • 1/4 cup granulated sugar: Sweetens the mixture while contributing to the cake’s texture.
  • 2 tablespoons all-purpose flour: Just enough to hold the cake together without compromising the molten center.
  • Cooking spray or butter: For greasing ramekins to ensure easy release.
  • Pinch of salt: Balances the sweetness and enhances the chocolate flavor.

How to Make Chocolate Lava Cakes

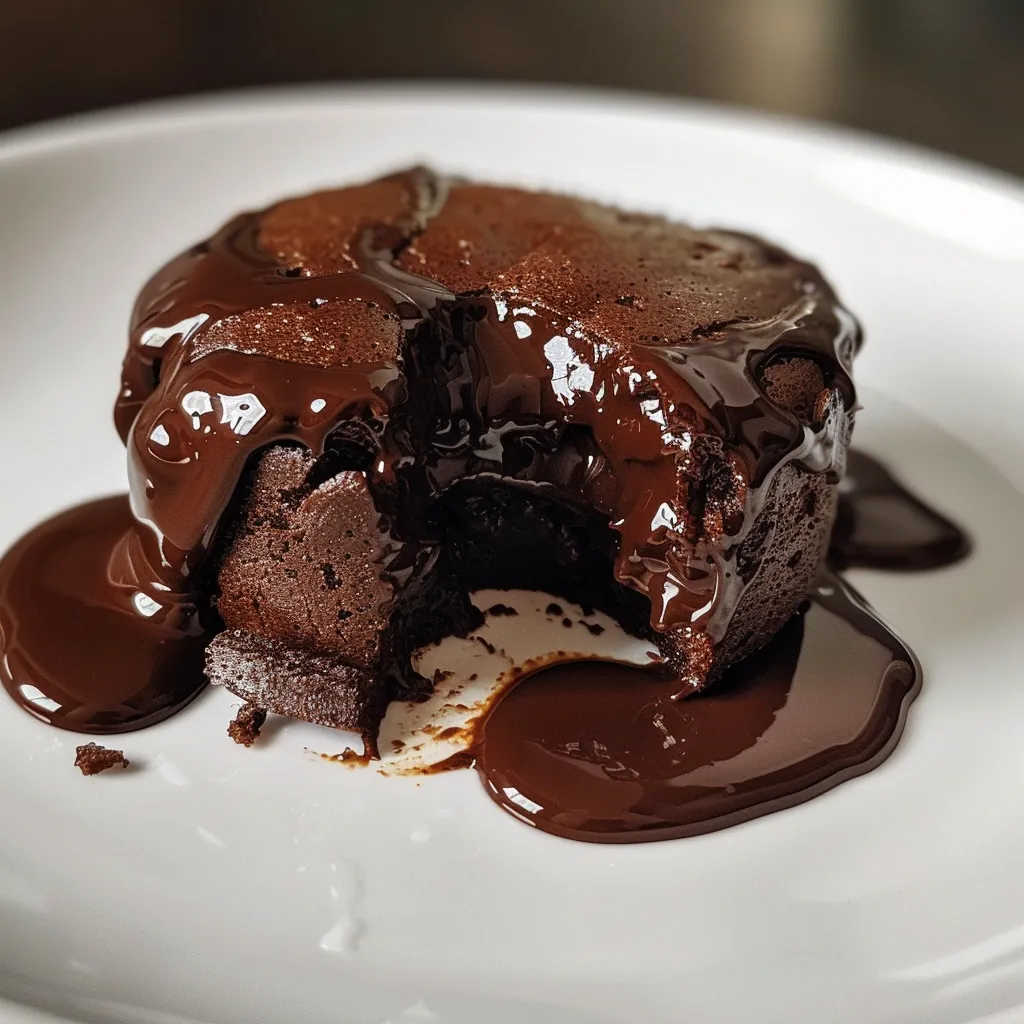
Side view of two decadent chocolate lava cakes, showcasing their rich, flowing chocolate filling.

Creating these heavenly desserts is easier than you might think! Follow these simple steps to achieve chocolate perfection.

  • Step 1: Preheat your oven to 425°F (220°C).
  • Step 2: Melt the dark chocolate and butter together in the microwave in 30-second intervals, stirring until smooth.
  • Step 3: Whisk the egg, egg yolk, and granulated sugar together until light and slightly thickened.
  • Step 4: Fold the melted chocolate mixture into the egg mixture until fully combined.
  • Step 5: Sift in the flour and salt, and fold gently until no flour streaks remain.
  • Step 6: Grease two 6-oz ramekins (you can optionally dust them with cocoa powder for an extra touch).
  • Step 7: Divide the batter evenly between the ramekins and place them on a baking sheet for easy handling.
  • Step 8: Bake for 12–14 minutes, until the edges are set and the centers jiggle slightly.
  • Step 9: Cool for 1 minute, then run a knife around the edges and invert onto plates.
  • Step 10: Serve immediately, topped with whipped cream, ice cream, berries, or a dusting of powdered sugar if desired.

Pro Tips for the Perfect Lava Cake

Crafting the perfect chocolate lava cake requires attention to detail. Here are some expert insights:

  • Use Quality Ingredients: Opt for premium chocolate and fresh eggs to enhance flavor.
  • Don’t Overbake: The key to the molten center is underbaking slightly. Keep an eye on them!
  • Experiment with Flavors: Add a splash of vanilla extract or a hint of espresso for depth.
  • Chill the Batter: For a firmer texture, chill the batter for 30 minutes before baking.
  • Test Ramekin Size: Ensure your ramekins are the right size; 6 oz is perfect for a gooey center.
  • Use a Baking Sheet: Always place ramekins on a baking sheet for easy transfer to the oven.
  • Let Them Rest: Allowing the cakes to rest for a minute helps achieve the perfect release.
  • Garnish Wisely: Enhance presentation with fresh berries or a drizzle of chocolate sauce.
  • Serve Immediately: These cakes are best enjoyed right out of the oven for that gooey experience.

Troubleshooting Common Mistakes

Even the best bakers encounter hiccups. Here’s how to avoid common pitfalls:

  • Too Runny: If the center is too runny, try increasing baking time by a minute or two.
  • Too Dry: If your cakes turn out dry, reduce baking time, or check your oven’s temperature accuracy.
  • Sticking to Ramekins: Ensure proper greasing and run a knife around the edges before inverting.
  • Flat Cakes: Overmixing the batter can lead to flat cakes; mix gently to maintain airiness.
  • Not Melting: If the center doesn’t melt, it may need more baking time; adjust accordingly next time.

Delicious Variations to Delight Your Taste Buds

Don’t hesitate to get creative! Here are some irresistible variations:

  • Nutty Chocolate Lava Cake: Fold in chopped nuts like hazelnuts or almonds for a crunchy texture.
  • Berry-Infused Lava Cake: Add a spoonful of raspberry or cherry jam in the center for a fruity surprise.
  • Spiced Lava Cake: Incorporate a sprinkle of cayenne pepper or cinnamon for a warm, spicy kick.
  • Vegan Chocolate Lava Cake: Substitute eggs with flaxseed meal and butter with coconut oil for a plant-based treat.

Storage and Make-Ahead Instructions

Want to prepare these in advance? Here’s how:

  • Make-Ahead: Prepare the batter and pour it into the greased ramekins. Cover and refrigerate for up to 24 hours. Bake when ready!
  • Storage: Store baked lava cakes in an airtight container in the fridge for up to 2 days. Reheat in the microwave for a few seconds to restore the molten center.

Comprehensive FAQ

Here are some common questions about making chocolate lava cakes:

  • Can I use milk chocolate instead of dark chocolate? Yes, but it will result in a sweeter flavor and less intense chocolate taste.
  • What if I don’t have ramekins? You can use muffin tins, but adjust the baking time accordingly.
  • Can I freeze the batter? Yes, the batter can be frozen for up to 3 months. Thaw in the fridge before baking.
  • How do I know when they are done? The edges should be set, while the center remains slightly jiggly for that perfect molten center.
  • What toppings pair well with these cakes? Whipped cream, fresh fruit, or a scoop of ice cream are all excellent choices!
  • Can I add coffee flavor? Absolutely! Adding a tablespoon of brewed coffee enhances the chocolate flavor beautifully.
  • Is this recipe gluten-free? To make it gluten-free, substitute all-purpose flour with almond flour or a gluten-free blend.
  • How long can I keep leftovers? Baked lava cakes can be kept in the fridge for up to 2 days but are best enjoyed fresh.

Nutrition Tips and Dietary Adaptations

For those mindful of their dietary choices, here are a few tips:

  • Healthier Substitutions: Use coconut oil instead of butter for a dairy-free option.
  • Lower Sugar: Reduce the sugar to 2 tablespoons for a less sweet dessert.
  • Portion Control: Share a cake or serve with fresh fruit to balance indulgence with health.

Essential Equipment Recommendations

To make these delightful chocolate lava cakes, you’ll need a few key pieces of equipment:

  • Ramekins: 6 oz ramekins are perfect for individual servings.
  • Mixing Bowls: Use medium-sized mixing bowls for easy combining of ingredients.
  • Whisk: A whisk is essential for achieving the perfect texture in your batter.
  • Microwave Safe Bowl: For melting chocolate and butter seamlessly.

Serving Suggestions

Elevate your dessert experience with these serving ideas:

  • Garnish with Fresh Berries: A sprinkle of raspberries or strawberries adds a pop of color and freshness.
  • Drizzle with Chocolate Sauce: Add a rich chocolate sauce on top for extra indulgence.
  • Pair with Ice Cream: A scoop of vanilla ice cream alongside brings a delightful contrast to the warm cake.
  • Dust with Powdered Sugar: A light dusting adds a touch of elegance.

Conclusion: A Celebration of Love and Flavor

Chocolate Lava Cakes for Two are more than just a dessert; they are an experience meant to be shared. The rich, molten center, combined with the joy of creating something special, makes every bite a celebration of love and flavor. So gather your ingredients, preheat that oven, and indulge in this decadent treat that promises to melt hearts and bring smiles. Happy baking!

Chocolate Lava Cakes for Two

Prep Time 10 minutes
Cook Time 14 minutes
Total Time 24 minutes
Servings 2 servings
Calories 350
Indulge in rich, gooey chocolate lava cakes perfect for a romantic dessert for two.

Ingredients

Main

  • 2 oz high-quality dark chocolate (at least 60% cocoa)
  • 2 oz unsalted butter
  • 1 large egg large egg
  • 1 large egg yolk large egg yolk
  • 1/4 cup granulated sugar
  • 2 tablespoons all-purpose flour
  • as needed Cooking spray or butter, for greasing
  • pinch salt

Instructions 

  • Preheat oven to 425°F (220°C). Grease ramekins.
  • Microwave chocolate and butter until smooth, then whisk with eggs and sugar.
  • Fold in flour and salt, then divide batter into ramekins.
  • Bake for 12–14 minutes, then invert onto plates and serve immediately.

Notes

For an extra touch, serve with whipped cream or berries.
Calories: 350kcal
Cost: $15
Course: Dessert
Keyword: chocolate

Indulge in the Richness of Red Velvet Cupcakes

Welcome, fellow food enthusiasts! Today, we’re diving into the delightful world of red velvet cupcakes, a classic dessert that embodies joy and celebration. These striking red treats, adorned with luscious cream cheese frosting, not only tantalize your taste buds but also create unforgettable moments around the table. With their velvety soft texture and subtle cocoa flavor, these cupcakes are perfect for birthdays, anniversaries, or just because! Let’s whisk up some joy together!

Why You’ll Love This Recipe

  • A Perfect Balance of Flavors: The combination of cocoa powder and buttermilk gives these cupcakes a unique flavor profile that is both rich and refreshing.
  • Moist and Tender Crumb: Thanks to the careful mixing of ingredients, every bite melts in your mouth with a soft crumb that’s simply irresistible.
  • Visually Stunning: The vibrant red color makes these cupcakes a showstopper at any gathering, ensuring they’re the centerpiece of your dessert table.
  • Easy to Follow: With straightforward steps and common ingredients, this recipe is perfect for bakers of all skill levels.
  • Customizable Options: Feel free to experiment with flavors and toppings to make these cupcakes uniquely yours!

Ingredients You’ll Need

Before we get started, let’s gather our ingredients. Here’s what you’ll need to create these delightful red velvet cupcakes:

  • 2 1/2 cups Cake Flour (285g): For a light and airy texture.
  • 2 cups Granulated Sugar (400g): Sweetness that complements the cocoa.
  • 1 tbsp Cocoa Powder (natural unsweetened): Just a hint of chocolate flavor.
  • 1 tsp Salt: Enhances the flavors.
  • 1 tsp Baking Soda: Helps the cupcakes rise.
  • 2 Large Eggs (room temperature): Binds the ingredients together.
  • 1 1/2 cups Vegetable Oil (360ml): Keeps the cupcakes moist.
  • 1 cup Buttermilk (240ml, room temperature): Adds a subtle tang and moisture.
  • 1 tbsp White Vinegar: Reacts with baking soda for extra lift.
  • 1 tsp Vanilla Extract: Adds depth to the flavor.
  • 1 tsp Gel Red Food Coloring: The signature hue of red velvet.
  • 8 oz Cream Cheese (227g): For the luscious frosting.
  • 1 stick Unsalted Butter (114g): Adds richness to the frosting.
  • 4-6 cups Powdered Sugar (480g – 720g): Sweetens and thickens the frosting.
  • 1 tsp Vanilla Extract: For flavoring the frosting.
  • 1/4 tsp Salt: Balances the sweetness.

Step-by-Step Instructions to Make Red Velvet Cupcakes

Juicy red velvet cupcake topped with a swirl of white cream cheese icing.

Now that we have our ingredients ready, let’s get baking!

  1. Preheat your oven to 350°F (180°C) and line a muffin pan with cupcake liners.
  2. In a large bowl, sift together the sugar, flour, cocoa powder, baking soda, and salt. Mix well to combine.
  3. In a separate bowl, crack the eggs and add the buttermilk, vegetable oil, vinegar, and vanilla extract. Whisk together until smooth.
  4. Add the red food coloring to the wet ingredients and stir until fully incorporated.
  5. Pour the wet mixture into the dry ingredients and mix gently with a wooden spoon or rubber spatula until just combined; avoid overmixing.
  6. Using an ice cream scoop, divide the batter evenly into the lined cupcake tin.
  7. Bake for 20-22 minutes or until a skewer comes out clean.
  8. Let the cupcakes cool in the pan for a few minutes before transferring them to a wire rack to cool completely before frosting.

Crafting the Cream Cheese Frosting

Now, let’s create that dreamy cream cheese frosting!

  1. In a large bowl, beat together the cream cheese and unsalted butter until creamy.
  2. Gradually add the powdered sugar, mixing until smooth and fluffy.
  3. Add the vanilla extract and salt, mixing until combined.
  4. If the frosting is too thick, you can add a splash of milk to reach your desired consistency.
  5. Once the cupcakes are completely cool, generously frost each cupcake with a beautiful swirl of cream cheese frosting.

Pro Tips for Baking Success

  • Room Temperature Ingredients: Ensuring your eggs and buttermilk are at room temperature helps create a smoother batter and better rise.
  • Don’t Overmix: Overmixing can lead to dense cupcakes. Mix just until the ingredients are combined!
  • Check for Doneness: Use a toothpick to check for doneness; it should come out clean or with a few crumbs.
  • Cool Completely: Always allow cupcakes to cool completely before frosting to prevent melting.
  • Experiment with Colors: Feel free to use different food colorings for a fun twist on the classic red.
  • Make Ahead: Bake the cupcakes a day in advance and store them in an airtight container until you’re ready to frost.
  • Frosting Variations: Try adding different extracts like almond or lemon for a unique flavor twist!

Common Mistakes and Troubleshooting

  • Dry Cupcakes: This can happen if you overbake them. Keep an eye on them in the oven!
  • Dense Texture: Overmixing can lead to a dense cupcake. Mix just until combined.
  • Frosting Too Runny: If your frosting is too runny, add more powdered sugar until you achieve the right consistency.

Variations of Red Velvet Cupcakes

  • Red Velvet Cake: Use the same recipe but bake it in a round cake pan for a stunning layered cake.
  • Red Velvet Brownies: Incorporate the recipe into a brownie format for a fudgy twist.
  • Red Velvet Whoopie Pies: Use the same batter to create delightful whoopie pies filled with cream cheese frosting.
  • Chocolate Chip Red Velvet Cupcakes: Fold in chocolate chips for an extra chocolatey surprise!

Storage and Make-Ahead Instructions

These red velvet cupcakes can be stored in an airtight container at room temperature for up to 3 days. For longer storage, freeze the un-frosted cupcakes in a single layer in an airtight container for up to 3 months. Thaw and frost when ready to enjoy!

Frequently Asked Questions

  • Can I make these cupcakes gluten-free? Yes! Substitute the cake flour with a gluten-free flour blend.
  • What can I replace buttermilk with? You can use regular milk with a splash of vinegar or lemon juice as a substitute.
  • How do I know when my cupcakes are done? Insert a toothpick in the center; if it comes out clean, they’re ready!
  • Can I use a different frosting? Absolutely! Cream cheese frosting is traditional, but chocolate or vanilla buttercream works well too.
  • Why are my cupcakes not red enough? Ensure you’re using gel food coloring, and add more if necessary until you achieve the desired hue.
  • How do I make these cupcakes vegan? Substitute eggs with flax eggs and use plant-based milk and butter.
  • Can I add nuts to the batter? Yes! Chopped walnuts or pecans add a delightful crunch.
  • What’s the best way to frost cupcakes? Use a piping bag for beautiful swirls, or simply spread with a spatula for a rustic look!

Nutritional Tips and Dietary Adaptations

For a healthier twist, consider using whole wheat flour, reducing sugar, or substituting applesauce for some of the oil. You can also explore vegan options for a plant-based version of these delightful treats.

Essential Equipment Recommendations

  • Muffin Pan: A quality muffin pan ensures even baking.
  • Mixing Bowls: A set of various sizes for mixing and whisking.
  • Whisk: Ideal for combining wet ingredients smoothly.
  • Ice Cream Scoop: Perfect for evenly portioning batter into the cupcake liners.
  • Cooling Rack: Helps cool the cupcakes completely before frosting.

Serving Suggestions

Serve your red velvet cupcakes with a side of fresh berries or a scoop of vanilla ice cream for an indulgent treat. Pair them with a cup of coffee or a glass of milk for the ultimate dessert experience.

As we wrap up this delightful journey into the world of red velvet cupcakes, I encourage you to gather your loved ones, whip up a batch, and celebrate the joy of cooking and sharing. Bon appétit!

Red Velvet Cupcakes Recipe

Prep Time 15 minutes
Cook Time 20 minutes
Total Time 35 minutes
Servings 12 cupcakes
Calories 250
Delight in these moist, vibrant red velvet cupcakes topped with creamy frosting, perfect for any celebration.

Ingredients

Dry Ingredients

  • 2 1/2 cups Cake Flour ((285g))
  • 2 cups Granulated Sugar ((400g))
  • 1 tbsp Cocoa Powder (natural unsweetened)
  • 1 tsp Salt
  • 1 tsp Baking Soda

Wet Ingredients

  • 2 large Eggs ((room temperature))
  • 1 1/2 cups Vegetable Oil ((360ml))
  • 1 cup Buttermilk ((240ml, room temperature))
  • 1 tbsp White Vinegar
  • 1 tsp Vanilla Extract
  • 1 tsp Gel Red Food Colouring

Frosting

  • 8 oz Cream Cheese ((227g))
  • 1 stick Unsalted Butter ((114g))
  • 4-6 cups Powdered Sugar ((480g - 720g))
  • 1 tsp Vanilla Extract
  • 1/4 tsp Salt

Instructions 

  • Preheat oven to 350°F / 180°C and line a muffin pan with cupcake liners.
  • Mix dry ingredients in a bowl. Whisk wet ingredients separately, add red food coloring, then combine with dry ingredients until just mixed.
  • Divide batter into cupcake liners and bake for 20-22 minutes. Cool completely before frosting.

Notes

Use an ice cream scoop for even cupcake sizes.
Calories: 250kcal
Cost: $15
Course: Dessert
Cuisine: American
Keyword: red velvet

Welcome to a world of flavor where classic meets contemporary! Today, I’m thrilled to share with you my Brown Butter Brownies, a delightful dessert that transforms the ordinary into the extraordinary. Imagine biting into a brownie that is rich, fudgy, and kissed with the nutty aroma of brown butter—it’s a culinary love story waiting to be told! With every morsel, these brownies will transport you to sun-drenched Mediterranean kitchens, filled with laughter and the enticing scent of baked treats. Ready to embark on this delicious journey?

Why You’ll Love This Recipe

  • Rich Flavor: The addition of brown butter elevates these brownies, providing a deep, nutty flavor that traditional brownies simply can’t match.
  • Fudgy Texture: With a perfect balance of ingredients, these brownies achieve a fudgy texture that melts in your mouth, ensuring every bite is a treat.
  • Simplicity: Made in just one bowl, this recipe is easy to follow, making it perfect for both novice bakers and seasoned pros.
  • Customizable: Feel free to add your favorite mix-ins, like nuts or chocolate chips, to personalize your brownies to your taste.
  • Perfect for Sharing: Whether it’s a family gathering or a casual get-together with friends, these brownies are sure to impress and satisfy a crowd.

Ingredients Breakdown

Let’s dive into the stars of our show! Here’s what you’ll need to create these mouthwatering brownies:

  • 3/4 cup unsalted butter: This is where the magic begins! Use unsalted butter for better control over the sweetness.
  • 3/4 cup Dutch-process cocoa powder: This gives our brownies a rich chocolate flavor. You can substitute with natural cocoa powder if needed.
  • 1 teaspoon vanilla extract: A splash of vanilla enhances the overall taste and aroma.
  • 1 3/4 cup packed light brown sugar: This ingredient adds depth and moisture to the brownies.
  • 3 large eggs: Eggs are essential for binding and creating that fudgy texture.
  • 3/4 cup all-purpose flour: This is the base of our brownie batter, giving structure while keeping them soft.
  • 1/2 teaspoon salt: A little salt enhances the sweetness and balances flavors.
  • 1/2 cup semisweet or bittersweet chocolate chips: Optional, but they add an extra layer of chocolatey goodness!

How to Make Brown Butter Brownies

Now that we have our ingredients ready, let’s get baking! Follow these simple steps to create your divine brownies:

  1. Preheat the Oven: Begin by preheating your oven to 350°F (175°C). Grease and line an 8 x 8-inch pan with parchment paper on all sides and set aside.
  2. Brown the Butter: In a small saucepan, melt the butter over medium-low heat. Stir and scrape the bottom every 10 to 15 seconds. Watch closely as it turns golden brown and develops a nutty aroma, about 10 to 15 minutes.
  3. Mix Cocoa and Vanilla: Once browned, remove the butter from heat and whisk in the cocoa powder and vanilla until smooth.
  4. Prepare the Egg Mixture: In a stand mixer fitted with the whisk attachment, beat the eggs and brown sugar together until light, fluffy, and pale in color.
  5. Combine the Mixtures: Gently fold the brown butter mixture into the egg mixture using a rubber spatula until just combined.
  6. Add Flour and Salt: Fold in the flour and salt until no streaks remain. If using, fold in the chocolate chips last.
  7. Bake: Pour the batter into the prepared pan and smooth the top. Bake for approximately 25 minutes, checking for doneness with a knife. It should come out with a bit of brownie batter on it.

Pro Tips for the Perfect Brownies

A tempting slice of brown butter brownie showcasing a slightly cracked top and melted chocolate chips.
  • Monitor the Browning: Keep an eye on the butter as it browns. Too dark, and it can turn bitter; too light, and you may miss out on that nutty flavor.
  • Don’t Overmix: When combining the flour, mix until just combined to avoid tough brownies.
  • Use Quality Ingredients: High-quality chocolate and cocoa powder will enhance the flavor significantly.
  • Let Them Cool: Allow the brownies to cool in the pan before cutting to achieve clean edges.
  • Experiment with Add-ins: Consider adding nuts, caramel swirls, or even a sprinkle of sea salt on top for extra flavor.

Common Mistakes and Troubleshooting

Even the best bakers make mistakes! Here are some common pitfalls and how to avoid them:

  • Brownies are too dry: Ensure you’re not overbaking! Check them a few minutes early.
  • Brownies are too gooey: If they’re too undercooked, pop them back in for a few more minutes.
  • Cracked tops: Cracks can occur if the batter is overmixed. Mix until just combined.

Delicious Variations

Ready to switch things up? Here are some scrumptious variations of your Brown Butter Brownies:

  • Nutty Brownies: Add chopped walnuts or pecans for a crunchy texture.
  • Fudgy Swirl: Swirl in some peanut butter or Nutella before baking for a creamy twist.
  • Mint Chocolate: Add peppermint extract and chocolate chips for a refreshing flavor.
  • Spiced Brownies: Incorporate a dash of cinnamon or espresso powder for added depth.

Storage and Make-Ahead Instructions

These brownies can be made ahead and stored to enjoy later!

  • Room Temperature: Store in an airtight container for up to 3 days.
  • Refrigerator: Keep them in the fridge for up to a week for an even fudgier texture.
  • Freezer: Freeze brownies wrapped in plastic wrap for up to 3 months. Thaw at room temperature before serving.

Frequently Asked Questions

  • Can I use salted butter? Yes, just omit the additional salt in the recipe.
  • What’s the best way to cut brownies? Use a sharp knife and clean it between cuts for neat squares.
  • Can I double the recipe? Absolutely! Just bake in a larger pan and adjust the baking time as needed.
  • What if I don’t have cocoa powder? You can substitute with melted chocolate, using a 1:1 ratio.
  • How do I know when they are done baking? The edges should be set, but the center should still look slightly underbaked.
  • Can I use gluten-free flour? Yes, a gluten-free 1:1 baking flour works well in this recipe.
  • What’s the best way to serve these brownies? Serve warm with a scoop of vanilla ice cream or a drizzle of caramel sauce.
  • Can I make this recipe vegan? Substitute eggs with flax eggs and use vegan butter and chocolate.

Nutritional Tips and Dietary Adaptations

Enjoying brownies doesn’t have to derail your dietary goals! Here are some tips to make them healthier:

  • Reduce Sugar: You can cut down on the brown sugar by 1/4 cup without compromising texture.
  • Whole Wheat Flour: Swap all-purpose flour with whole wheat flour for added fiber.
  • Add Protein: Consider mixing in protein powder for a post-workout treat!

Essential Equipment Recommendations

Here’s a quick list of tools that will make your brownie-making experience seamless:

  • 8 x 8-inch Baking Pan: Essential for achieving that perfect brownie size.
  • Silicone Spatula: Great for scraping down the sides of bowls and mixing ingredients.
  • Whisk: A good whisk is crucial for ensuring your egg and sugar mixture is airy and fluffy.
  • Measuring Cups and Spoons: Precision is key in baking—don’t skimp on accurate measurements!

Serving Suggestions

Serve your Brown Butter Brownies warm, perhaps with a scoop of vanilla ice cream or a drizzle of caramel sauce. Pair them with a cup of coffee or a glass of milk for a delightful treat. They also make a fantastic gift when packaged in a decorative box!

So there you have it, my friends! A recipe that not only delivers on flavor but also invites you into the joyful world of baking. I hope you’re as excited to make these brownies as I am to share them with you. Remember, cooking is not just about feeding the body; it’s about nourishing the soul with love and tradition. Now, grab your apron and let’s bake some magic!

Brown Butter Brownies

Prep Time 15 minutes
Cook Time 25 minutes
Total Time 40 minutes
Servings 16 pieces
Calories 250
Rich, fudgy brownies with a deep nutty flavor from browned butter, perfect for chocolate lovers.

Ingredients

Dried ingredients

  • 3/4 cup unsalted butter
  • 3/4 cup Dutch-process cocoa powder
  • 1 teaspoon vanilla extract
  • 1 3/4 cup packed light brown sugar
  • 3 large eggs
  • 3/4 cup all-purpose flour
  • 1/2 teaspoon salt
  • 1/2 cup semisweet or bittersweet chocolate chips (or chopped chocolate) (optional)

Instructions 

  • Preheat oven to 350°F (175°C). Grease and line an 8x8-inch pan with parchment paper.
  • Cook butter over medium-low heat until golden brown, stirring frequently, about 10-15 minutes. Remove from heat.
  • Whisk cocoa powder and vanilla into the browned butter until smooth. Beat eggs and brown sugar until pale, then fold in the butter mixture.
  • Fold in flour, salt, and chocolate chips until just combined. Pour batter into prepared pan.
  • Bake for 25 minutes, testing for doneness with a toothpick. Cool before slicing.

Notes

For extra flavor, sprinkle sea salt on top before baking.
Calories: 250kcal
Cost: $15
Course: Dessert
Cuisine: American
Keyword: brown butter, brownies, chocolate

Welcome to the Heart of Baked Cinnamon Apples

Ah, the allure of freshly baked cinnamon apples! There’s something genuinely enchanting about this dessert that welcomes you home with its warm aroma and inviting sweetness. In this delightful recipe, we’re not just creating a dish; we’re crafting a memory. Imagine the comforting scents of cinnamon and nutmeg swirling through your kitchen, taking you back to cozy family gatherings where laughter echoed and joy was shared. This recipe is not only easy to make but also a celebration of the simple pleasures of life. Let’s embark on this culinary journey together!

Why You’ll Love This Recipe

  • Easy to Prepare: With just a handful of ingredients, you can whip up this delightful dessert in no time. Perfect for busy weeknights or last-minute gatherings!
  • Healthy Indulgence: Using fresh apples packed with nutrients means you’re treating yourself to a delicious yet nutritious dessert. Apples are a great source of dietary fiber and vitamin C.
  • Versatile Serving Options: Enjoy these baked cinnamon apples on their own, or elevate them with a scoop of vanilla ice cream or a dollop of whipped cream for an indulgent treat.
  • Customizable Flavors: This recipe is a blank canvas! Feel free to experiment with different spices and toppings to make it your own.
  • Perfect for Any Occasion: Whether it’s a cozy family dinner, a holiday feast, or just a sweet afternoon snack, these baked apples fit the bill beautifully!

Ingredients Breakdown

Let’s dive into the ingredients you’ll need for our baked cinnamon apples, along with some helpful substitutions to consider.

  • 3 large apples (peeled, cored, and sliced, about 4-5 cups): Choose firm varieties like Honeycrisp or Granny Smith for the best results. If you’re looking for sweetness, Fuji apples are fantastic too!
  • ¼ cup brown sugar: This adds a rich caramel flavor. For a healthier option, consider using coconut sugar or a sugar substitute like stevia.
  • 1 teaspoon cornstarch: Helps thicken the juices for a lovely syrupy consistency. If you’re avoiding cornstarch, you can use arrowroot powder instead.
  • 1 ½ tablespoons cinnamon: The star spice of this dish! Adjust to your preference; if you love it, feel free to add more!
  • ½ teaspoon nutmeg (optional): Adds a warm, earthy flavor that complements the cinnamon. You can also experiment with cardamom for a unique twist.
  • 1 ½ tablespoons lemon juice: Brightens the flavors and prevents the apples from browning. Lime juice can be used as a substitute.
  • 3 tablespoons butter (cut into small cubes): For a richer flavor, use unsalted butter. Vegan? Substitute with coconut oil or a dairy-free butter alternative.

Pro Tips for Perfect Baked Cinnamon Apples

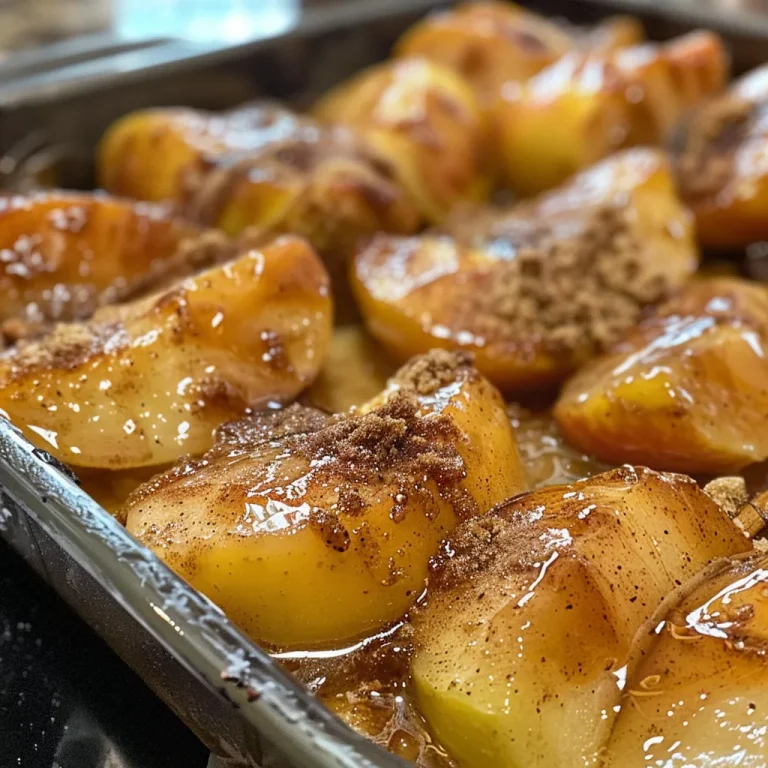
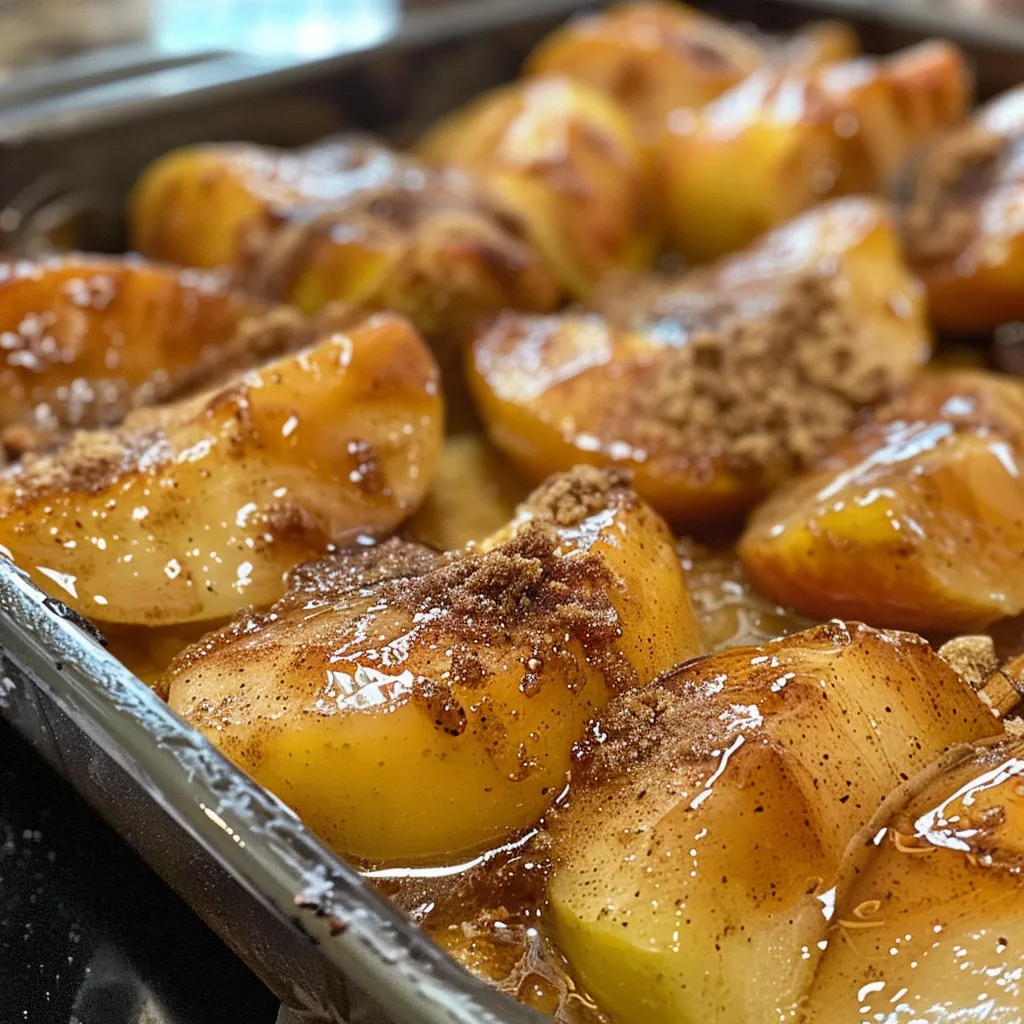
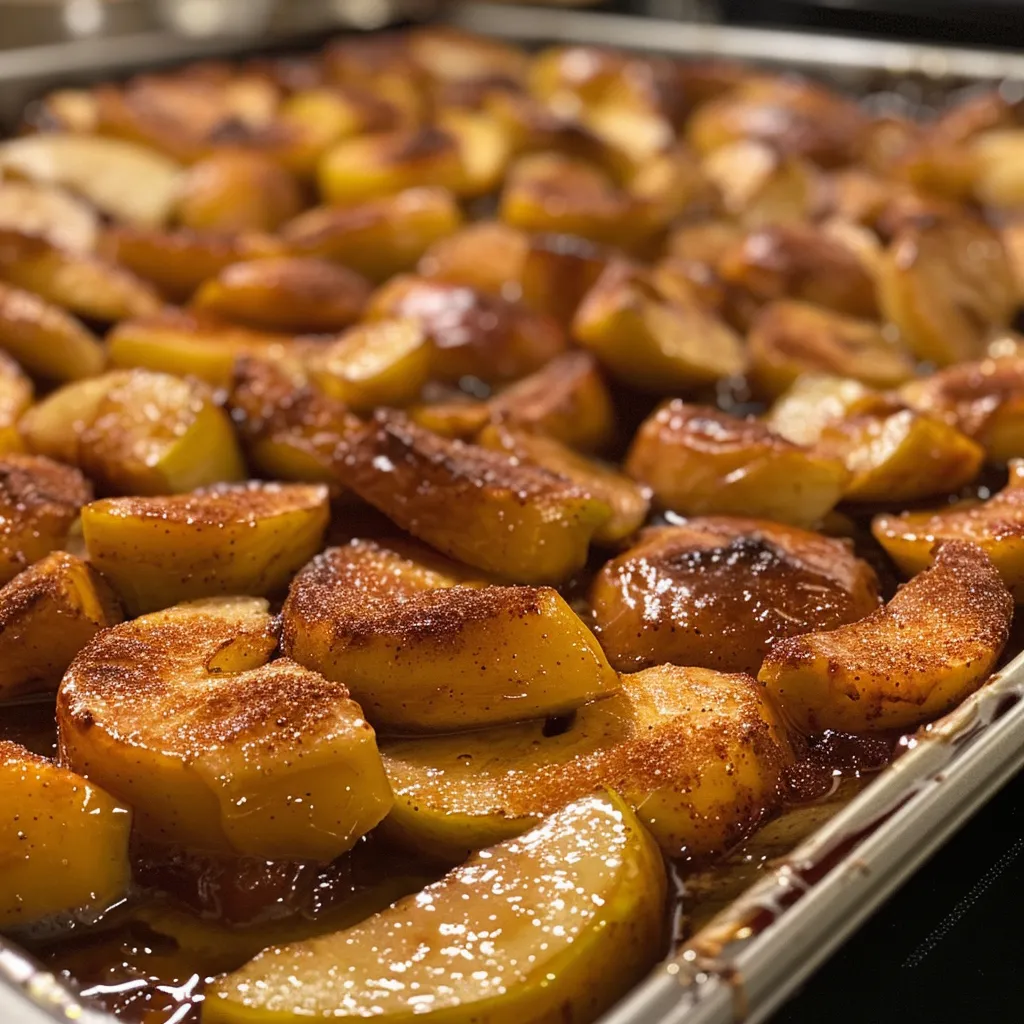
Sliced apples baked with cinnamon, brown sugar, and butter, showing a side view.

Here are some expert insights to ensure your baked cinnamon apples turn out perfect every time.

  • Choose the Right Apples: A mix of sweet and tart apples creates a balanced flavor. Honeycrisp and Granny Smith are a classic pairing!
  • Don’t Overcrowd the Baking Dish: Arrange the apple slices in a single layer to ensure even cooking and caramelization.
  • Cover with Foil: This helps trap steam, softening the apples and making them tender. Remove the foil in the last few minutes for a lovely golden top!
  • Adjust Sweetness: If you prefer a less sweet dessert, reduce the brown sugar or use unsweetened applesauce for added moisture.
  • Experiment with Spices: Try adding ginger or allspice for a different flavor profile that still complements the cinnamon.
  • Use Fresh Ingredients: Fresh apples and spices make all the difference in flavor. Avoid stale spices for the best results!
  • Serve Warm: The magic of baked cinnamon apples is in the warmth. Enjoy them fresh out of the oven for the best experience!
  • Make Ahead: You can prepare the apple mixture ahead of time and store it in the fridge until you’re ready to bake!

Common Mistakes and Troubleshooting

Even the best chefs make mistakes! Here are some common pitfalls and how to avoid them.

  • Apples are Mushy: This happens when the apples are overcooked. Keep an eye on them and check for doneness around the 30-minute mark.
  • Too Sweet: If you find your apples too sweet, add a splash of lemon juice to balance the flavors or serve with unsweetened yogurt.
  • Not Enough Flavor: Ensure you’re using fresh spices. If your cinnamon has been sitting in the pantry for months, it might need a refresh!

Delicious Variations

Feel free to get creative with your baked cinnamon apples! Here are some fun variations to try:

  • Nutty Delight: Add chopped walnuts or pecans to the apple mixture before baking for a crunchy texture.
  • Caramel Drizzle: Drizzle caramel sauce over the apples before serving for an indulgent treat.
  • Spiced Rum: Add a splash of dark rum or bourbon to the apple mixture for an adult twist.
  • Fruit Medley: Mix in other fruits like pears or peaches for a delightful combination of flavors.

Storage and Make-Ahead Instructions

Planning ahead? Here’s how to store your baked cinnamon apples and enjoy them later.

  • Storing Leftovers: Keep any leftover baked apples in an airtight container in the refrigerator for up to 5 days.
  • Reheating: To reheat, place in the oven at a low temperature or microwave until warmed through. A quick zap in the microwave for 30 seconds works wonders!
  • Make-Ahead Option: Prepare the apple mixture the day before, cover it, and store it in the fridge. Bake when you’re ready to enjoy!

Frequently Asked Questions

Here are some common questions about baking cinnamon apples that might help guide you in your culinary adventure!

  • Can I use frozen apples? Yes, but thaw them first and drain excess liquid to avoid a soggy dish.
  • How can I make this recipe gluten-free? This recipe is naturally gluten-free! Just ensure your butter or margarine is gluten-free.
  • What type of apples work best? Firm apples like Honeycrisp, Granny Smith, or Fuji are ideal.
  • Can I add raisins or cranberries? Absolutely! Dried fruits add a lovely tartness and chewy texture.
  • How do I know when the apples are done? They should be tender but still hold their shape. Use a fork to check for doneness.
  • Can I make this recipe vegan? Yes! Substitute the butter with coconut oil or a vegan butter alternative.
  • What should I serve with baked cinnamon apples? They pair beautifully with ice cream, yogurt, or a sprinkle of granola for added crunch.
  • How can I enhance the flavor? Consider adding a splash of vanilla extract or a bit of orange zest for a citrusy twist.

Nutritional Tips and Dietary Adaptations

For those watching their diet, here are some tips:

  • Reduce Sugar: You can cut down on the brown sugar or use a sugar substitute to lower calories while still enjoying this delightful dessert.
  • Increase Fiber: Leave the skins on the apples for added fiber and nutrients.
  • Low-Fat Option: Swap butter for a light margarine or coconut oil to reduce fat content.

Equipment Recommendations

Here’s what you’ll need to get started:

  • Baking Dish: A 2-quart baking dish is perfect for this recipe. Ensure it’s greased well to prevent sticking.
  • Mixing Bowl: A large bowl for tossing the apples with spices and sugar.
  • Measuring Cups and Spoons: Precise measurements make for the best results, so don’t skip these!

Serving Suggestions

Now that your baked cinnamon apples are ready, here are some delightful ways to serve them:

  • With Ice Cream: A scoop of vanilla ice cream on warm apples creates a heavenly combination.
  • Over Pancakes or Waffles: Use the baked apples as a topping for your breakfast favorites for a sweet start to the day.
  • On a Cheese Board: Pair slices with cheese for a sophisticated appetizer at your next gathering.

Conclusion: A Celebration of Flavor and Tradition

In every bite of these baked cinnamon apples, you’ll find the warmth of home and the joy of togetherness. This recipe is more than just a dessert; it’s an invitation to gather around the table, share stories, and create lasting memories. Whether you’re savoring them solo or sharing with loved ones, every scoop is a reminder of the beauty in simple pleasures. So, preheat your oven, grab your apples, and let’s make some magic happen in the kitchen!

Baked Cinnamon Apples

Prep Time 10 minutes
Cook Time 35 minutes
Total Time 45 minutes
Servings 4 servings
Calories 180
A warm and comforting dessert featuring tender baked apples infused with cinnamon and nutmeg, topped with buttery cubes.

Ingredients

Main

  • 3 large apples (peeled, cored, and sliced) (about 4-5 cups)
  • 0.25 cup brown sugar
  • 1 teaspoon cornstarch
  • 1.5 tablespoons cinnamon
  • 0.5 teaspoon nutmeg (optional, but recommended)
  • 1.5 tablespoons lemon juice
  • 3 tablespoons butter (cut into small cubes) (vegan, as desired)

Instructions 

  • Preheat oven to 400°F (200°C). Grease a baking dish.
  • Mix apple slices with sugar, cornstarch, cinnamon, nutmeg, and lemon juice.
  • Transfer apples to dish, top with butter cubes, cover with foil, and bake for 30-40 minutes.
  • Stir to coat apples in juices and serve warm.

Notes

Serve with a scoop of vanilla ice cream or a dollop of whipped cream for extra indulgence.
Calories: 180kcal
Cost: $10
Course: Dessert
Cuisine: American
Keyword: Apples

Welcome to the Cozy Delight of Baked Cinnamon Apples

Imagine the aroma of sweet cinnamon wafting through your kitchen, mingling with the warm, comforting scent of baked apples. This recipe for baked cinnamon apples is not just a dessert; it’s an experience that captures the essence of cozy autumn gatherings and family celebrations. Perfectly tender apples filled with a crumbly topping create a dish that you’ll want to savor and share. Whether you’re serving it at a family dinner or enjoying a quiet evening at home, these baked apples are bound to bring joy and warmth to your table.

Why You’ll Love This Recipe

  • Quick and Easy: This recipe comes together in under an hour, making it perfect for last-minute gatherings or a cozy night in.
  • Healthier Indulgence: With wholesome ingredients like oats and nuts, this dessert offers a delightful balance of sweetness and nutrition.
  • Customizable: You can easily tweak the ingredients to match your taste preferences or dietary needs.
  • Perfect for Sharing: A dish that’s both visually appealing and delicious, it’s an excellent choice for entertaining friends and family.
  • Adapts to Any Season: While they shine in the fall, baked cinnamon apples are a treat you can enjoy year-round, especially when fresh apples are in season.

Ingredients You’ll Need

For this recipe, gather the following ingredients to create your delicious baked cinnamon apples:

  • 4 large apples: Honeycrisp or Granny Smith work best for their sweetness and tartness.
  • 1/2 cup rolled oats: Avoid instant oats unless you enjoy mushy texture.
  • 1/4 cup brown sugar: A touch of brown sugar adds depth; feel free to substitute with coconut sugar for a healthier alternative.
  • 1/4 cup chopped nuts: Walnuts or pecans add a delightful crunch—nut-free? Consider sunflower seeds or pumpkin seeds.
  • 2 tbsp butter: Melted for richness; coconut oil is a great vegan substitute.
  • 1 tsp cinnamon: The star spice that brings warmth; adjust to your taste.
  • 1/2 tsp vanilla extract: Optional but recommended for a hint of sweetness.
  • Pinch of salt: Enhances sweetness and balances flavors.

Step-by-Step Instructions

Juicy baked apples filled with a crumbly mixture of oats and nuts.

Let’s get cooking! Follow these simple steps to create your baked cinnamon apples:

  • Preheat your oven: Set it to 375°F (190°C) to ensure proper baking.
  • Core the apples: Use a spoon or an apple corer, leaving the bottom intact to keep the filling inside.
  • Mix the crumble: In a bowl, combine oats, brown sugar, chopped nuts, cinnamon, melted butter, vanilla, and salt. Stir until it resembles delicious gravel.
  • Stuff the apples: Pack the crumble mixture tightly into each apple, as if preparing them for a cozy hibernation.
  • Bake: Place the stuffed apples in a baking dish and bake for 25–30 minutes. The apples should be tender and the topping golden brown.
  • Serve warm: Top your baked apples with a scoop of ice cream or a dollop of whipped cream for extra indulgence.

Pro Tips for Perfect Baked Apples

To elevate your baking game, consider these expert insights:

  • Choose the right apples: Opt for a mix of sweet and tart varieties for a more complex flavor profile.
  • Experiment with spices: Add nutmeg, ginger, or even a hint of clove for a unique twist.
  • Make them ahead: Prep the apples and crumble filling in advance, then assemble and bake just before serving.
  • Watch the baking time: Cooking times may vary based on apple variety and size; keep an eye on them!
  • Don’t skip the butter: If you want a richer flavor, increase the butter slightly.
  • Consider toppings: Try drizzling with caramel sauce or a sprinkle of sea salt for an extra touch.
  • Use a variety of nuts: Try pecans, almonds, or hazelnuts for different flavors and textures.
  • Pair with beverages: Enjoy with a hot cup of spiced cider or a warm mug of tea.

Common Mistakes and Troubleshooting

Even seasoned bakers can run into issues. Here’s how to avoid common pitfalls:

  • Overcooking: Keep an eye on your apples; they should be tender but not falling apart.
  • Too much sugar: If your crumble is overly sweet, reduce the sugar slightly next time.
  • Using the wrong apple type: Avoid apples that become mushy when cooked, like Red Delicious.
  • Neglecting to core properly: Ensure you leave the bottom intact, or your crumble will leak out.
  • Skipping the salt: A pinch of salt is essential for balancing the sweetness!

Variations to Try

Want to mix things up? Here are some variations to consider:

  • Maple Pecan: Substitute brown sugar with maple syrup and use pecans for a rich flavor.
  • Berry Burst: Add fresh or frozen berries to the crumble mix for a fruity explosion.
  • Chocolate Delight: Stir in dark chocolate chips into the crumble for a decadent touch.
  • Savory Twist: Add cheese like goat or feta for a sweet and salty combination that’s unexpected yet delightful.

Storage and Make-Ahead Instructions

Want to prepare in advance? Here’s how to store your baked cinnamon apples:

  • Make-ahead: Prep the apples and filling up to a day in advance. Store them separately until ready to bake.
  • Storing leftovers: Keep any uneaten apples in an airtight container in the refrigerator for up to 5 days.
  • Reheating: Warm them in the oven at 350°F (175°C) or in the microwave until heated through.

FAQ: All Your Questions Answered

Here are some frequently asked questions about baked cinnamon apples:

  • Can I use other fruits? Absolutely! Pears or peaches can be delicious substitutes.
  • What if I don’t have rolled oats? You can use granola or breadcrumbs as a substitute.
  • Can I make these vegan? Yes, use coconut oil instead of butter and omit the vanilla.
  • How can I adjust the sweetness? Reduce the brown sugar or use a sugar substitute like stevia.
  • What’s the best way to serve them? Serve warm with vanilla ice cream or whipped cream for a comforting treat.
  • How do I know when the apples are done? They should be tender and slightly wrinkled but not mushy.
  • Can I freeze baked apples? Yes, freeze them in an airtight container for up to 3 months. Reheat before serving.
  • What should I do if I have extra crumble? Bake it separately on a baking sheet for a crunchy snack!

Nutritional Tips and Dietary Adaptations

This recipe can be easily adapted for various dietary needs:

  • Gluten-free: Use certified gluten-free oats and ensure all other ingredients are gluten-free.
  • Low-carb: Substitute brown sugar with a low-carb sweetener like erythritol.
  • Nut-free: Omit nuts or replace them with seeds or additional oats.
  • Dairy-free: Use coconut oil instead of butter and serve with dairy-free ice cream.

Equipment Recommendations

Here’s what you’ll need to make this recipe:

  • Apple corer: This tool makes coring apples a breeze and ensures they stay intact.
  • Mixing bowls: Use different sizes for mixing ingredients easily.
  • Baking dish: A glass or ceramic dish works best for even baking.
  • Measuring cups and spoons: Precision is key for baking success.

Serving Suggestions

To elevate your baked cinnamon apples, consider these delightful pairings:

  • Pair with vanilla ice cream: The warm apples and cold ice cream create a heavenly contrast.
  • Serve with whipped cream: A dollop of whipped cream adds a light, creamy touch.
  • Add a sprinkle of nuts: Chopped nuts on top provide additional crunch and flavor.
  • Drizzle with caramel sauce: For those with a sweet tooth, a drizzle of caramel elevates the dessert further.

Conclusion

Baking cinnamon apples is more than just a recipe; it’s a celebration of flavors, aromas, and nostalgia. With every bite, you’re not just tasting the sweetness of apples, but also the warmth of home and the joy of togetherness. So, gather your loved ones, embrace the spirit of cooking, and create this cozy delight that will surely become a favorite in your household. Happy baking!

Baked Cinnamon Apples with Crumble Filling

Prep Time 10 minutes
Cook Time 30 minutes
Total Time 40 minutes
Servings 4 servings
Calories 250
Enjoy warm, tender apples topped with a crunchy cinnamon crumble for a cozy dessert or snack.

Ingredients

Apples

  • 4 large apples (Honeycrisp or Granny Smith) (core the apples, leave bottom intact)

Crumble mixture

  • 1/2 cup rolled oats (not instant)
  • 1/4 cup brown sugar
  • 1/4 cup chopped nuts (walnuts or pecans)
  • 2 tbsp butter (melted)
  • 1 tsp cinnamon (the hero of this story)
  • 1/2 tsp vanilla extract (optional)
  • Pinch salt (to balance sweetness)

Instructions 

  • Preheat oven to 375°F (190°C).
  • Core apples, leaving bottoms intact.
  • Mix oats, sugar, nuts, cinnamon, butter, vanilla, and salt into crumble.
  • Stuff crumble into apples.
  • Bake for 25–30 minutes until tender and golden.
  • Serve warm, optionally with ice cream or whipped cream.

Notes

Use firm apples for best results and enjoy!
Calories: 250kcal
Cost: $10
Course: Dessert
Cuisine: American
Keyword: Apples

Start Your Day with a Smile: The Ultimate Buttermilk Pancakes Recipe

Welcome to a delightful culinary adventure in your kitchen! Today, we’re diving into the world of **buttermilk pancakes**, a breakfast classic that promises to bring joy to your mornings. Fluffy, golden, and irresistibly delicious, these pancakes are perfect for cozy family breakfasts or a leisurely weekend brunch. With a few simple ingredients and some expert tips, you’ll be whipping up a stack of these heavenly treats in no time. Let’s get started!

Why You’ll Love This Recipe

  • Fluffiness guaranteed: The secret lies in letting the batter rest, creating a light and airy texture that melts in your mouth.
  • Quick and easy: With just a handful of ingredients, you can whip up a batch in under 30 minutes!
  • Versatile toppings: Serve them with maple syrup, fresh berries, or a dollop of whipped cream for a treat that suits any palate.
  • Healthy variations available: Easily substitute ingredients for a gluten-free or dairy-free option.
  • Perfect for meal prep: Make a large batch and freeze leftovers for busy mornings—just pop them in the toaster when you’re ready to enjoy!

Ingredients Breakdown

Here’s what you’ll need to create these scrumptious pancakes, along with some substitutions to cater to your dietary needs:

  • 2 cups of all-purpose flour: This forms the base of your pancakes. For a gluten-free option, try almond flour or a gluten-free all-purpose blend.
  • 2 cups of buttermilk: For that signature tang and moisture. If you don’t have buttermilk, you can make your own by adding a tablespoon of vinegar or lemon juice to regular milk and letting it sit for 5 minutes.
  • 2 large eggs, beaten: Eggs help bind the ingredients together and add richness to the batter.
  • 2 tablespoons of sugar: Sweetness is key! You can reduce this if you’re topping with syrup or fruits.
  • 1 tablespoon of baking powder: This will give your pancakes that lovely rise.
  • 1/2 teaspoon of baking soda: For extra fluffiness; it reacts with the buttermilk to create bubbles.
  • 1/2 teaspoon of salt: Enhances all the flavors.
  • 2 tablespoons of melted butter: Adds richness and flavor. You can substitute with coconut oil for a dairy-free option.

Steps to Create Fluffy Buttermilk Pancakes

Juicy classic buttermilk pancakes shown from the side, topped with sticky maple syrup, photographed with an iPhone.

Follow these simple steps for pancake perfection:

  1. Whisk together the dry ingredients (flour, sugar, baking powder, baking soda, and salt) in a large mixing bowl.
  2. In another bowl, mix the wet ingredients (buttermilk, eggs, and melted butter) until well combined.
  3. Gently combine the wet and dry ingredients, stirring until just mixed. **Remember**: It’s okay if the batter is a little lumpy—this helps keep your pancakes fluffy!
  4. Let the batter rest for about 10 minutes. This resting period is crucial as it allows the leavening agents to activate.
  5. While your batter is resting, preheat a greased griddle or cast iron skillet to 350°F (175°C).
  6. Pour about ¼ cup of batter onto the hot surface for each pancake. Watch for small bubbles to form on the surface before flipping—this usually takes about 2-3 minutes.
  7. Flip the pancakes gently, avoiding the urge to press them down. Cook for an additional 1-2 minutes or until both sides are golden brown.
  8. Serve warm with a generous drizzle of maple syrup, a pat of butter, or fresh fruit!

Pro Tips for Pancake Mastery

  • Don’t overmix: Mix until just combined to avoid tough pancakes. Lumps are okay!
  • Temperature matters: Ensure your skillet is preheated; too cool and your pancakes will absorb oil and become greasy.
  • Keep pancakes warm: If making a large batch, keep them warm in an oven set to 200°F (93°C) until all are cooked.
  • Experiment with flavors: Add vanilla extract or a sprinkle of cinnamon to the batter for a flavor twist.
  • Try different toppings: From yogurt and honey to chocolate chips, the possibilities are endless!
  • Make them mini: For fun, pour smaller amounts of batter for mini pancakes that are perfect for kids or for a pancake platter.
  • Use a ladle: This helps control the portion size and keeps your pancakes uniform in shape.
  • Store properly: Leftover pancakes can be stored in an airtight container in the fridge for up to 3 days or frozen for up to a month.

Common Mistakes and Troubleshooting

Even the best can have off days! Here are some common pitfalls and how to avoid them:

  • Flat pancakes: Ensure your baking powder and soda are fresh. If they’re old, your pancakes won’t rise.
  • Dense texture: This usually happens from overmixing the batter. Remember, lumps are your friends!
  • Burnt bottoms: If your griddle is too hot, the outside will burn before the inside cooks through. Adjust the heat as necessary.

Delicious Variations to Try

Looking to mix things up? Here are some fun variations to explore:

  • Banana Pancakes: Mash 1 ripe banana into the batter for sweet, fruity pancakes.
  • Blueberry Pancakes: Fold in fresh or frozen blueberries for a burst of flavor in every bite.
  • Chocolate Chip Pancakes: Add semi-sweet chocolate chips to the batter for a decadent twist!
  • Savory Pancakes: Incorporate herbs like chives or spinach and serve with a poached egg on top.

Storage and Make-Ahead Instructions

Want to make your mornings easier? Here’s how to store and prepare your pancakes in advance:

  • Storing leftovers: Place cooked pancakes in an airtight container in the fridge for up to 3 days.
  • Freezing pancakes: Layer parchment paper between pancakes in a freezer-safe bag to prevent sticking. They can be frozen for up to a month.
  • Reheating tips: Reheat pancakes in a toaster or microwave, or warm them in the oven at 350°F (175°C) for a few minutes.

Frequently Asked Questions

  • Can I use whole wheat flour? Yes! Whole wheat flour adds a nutty flavor and is a healthier option.
  • What can I substitute for buttermilk? You can use regular milk with a bit of vinegar or lemon juice added.
  • How can I make these pancakes dairy-free? Substitute buttermilk with a non-dairy milk like almond milk and use coconut oil instead of butter.
  • Can I double the recipe? Absolutely! Just scale up the ingredients as needed.
  • Why are my pancakes sticking to the pan? Ensure your skillet is well-greased and preheated before pouring the batter.
  • How do I store leftover batter? It’s best to cook the batter right away; however, you can refrigerate it for up to 24 hours if needed.
  • Is it necessary to let the batter rest? Yes, resting the batter allows the gluten to relax, resulting in fluffier pancakes.
  • Can I make these pancakes vegan? Yes! Use flax eggs and a plant-based milk for a vegan-friendly version.

Nutritional Tips and Dietary Adaptations

Looking for a healthier pancake option? Here are some ideas:

  • Reduce sugar: Cut down on sugar or use natural sweeteners like honey or maple syrup.
  • Increase fiber: Add oats or chia seeds to the batter for an extra nutritional boost.
  • Portion control: Use smaller amounts of batter to create mini pancakes, perfect for controlling portions.

Essential Equipment for Pancake Perfection

Here’s what you need to ensure your pancake-making is a success:

  • Non-stick skillet or griddle: Essential for even cooking and easy flipping.
  • Mixing bowls: Having separate bowls for wet and dry ingredients is key.
  • Whisk: A good whisk helps combine ingredients thoroughly.
  • Measuring cups and spoons: Accurate measurements are crucial for consistent results.
  • Spatula: A flexible spatula makes flipping pancakes a breeze.

Serving Suggestions

Ready to serve those fluffy beauties? Here are some delightful ideas:

  • Classic toppings: Maple syrup, butter, and a sprinkle of powdered sugar.
  • Fruit toppings: Fresh berries, sliced bananas, or caramelized apples add a refreshing twist.
  • Yogurt or cream: A dollop of Greek yogurt or whipped cream can elevate your pancakes.
  • Nut butters: Spread almond or peanut butter for a protein-packed breakfast.

Conclusion: Celebrate the Joy of Cooking

And there you have it—your guide to creating the fluffiest, most delicious **buttermilk pancakes** that will brighten your mornings and bring smiles to your family’s faces. Cooking is about more than just food; it’s a celebration of culture, tradition, and togetherness. So gather your loved ones, whip up a batch of these delightful pancakes, and enjoy the laughter and memories that come with each bite. Happy cooking!

Classic Buttermilk Pancakes With Maple Syrup

Prep Time 10 minutes
Cook Time 15 minutes
Total Time 25 minutes
Servings 4 servings
Calories 350
Fluffy and delicious pancakes made with buttermilk, perfect for a cozy breakfast topped with maple syrup.

Ingredients

Dry ingredients

  • 2 cups all-purpose flour
  • 2 cups buttermilk
  • 2 large eggs, beaten

Instructions 

  • Mix dry ingredients in one bowl.
  • Whisk wet ingredients separately.
  • Combine wet and dry gently, leaving lumps.
  • Let batter rest for 10 minutes.
  • Preheat skillet and pour ¼ cup batter for each pancake.
  • Cook until bubbles form, then flip and serve with syrup.

Notes

For extra fluffiness, do not overmix the batter.
Calories: 350kcal
Cost: $15
Course: Breakfast
Cuisine: American
Keyword: Pancakes

Indulging in the Richness of Dark Chocolate Cake

Welcome to a culinary adventure that brings the heart of Mediterranean baking right into your home! This dark chocolate cake recipe is not just a dessert; it’s a celebration of flavors, textures, and memories. As you embark on this delightful journey, prepare to indulge in an experience that tantalizes your taste buds and warms your heart, reminiscent of family gatherings filled with laughter and love.

In this article, we will explore why this cake is a must-try, break down the essential ingredients, share expert tips, and much more. So, gather your loved ones, don your apron, and let’s create something magical together!

Why You’ll Love This Recipe

  • Decadent Flavor: The rich notes of dark chocolate combined with the depth of espresso create an unforgettable flavor that elevates any occasion.
  • Moist and Tender: This cake has a luscious texture, thanks to ingredients like buttermilk and sour cream, ensuring every bite melts in your mouth.
  • Versatile for Any Occasion: Whether it’s a birthday celebration, a dinner party, or a casual gathering, this cake fits right in and impresses everyone.
  • Easy to Make: With straightforward steps and accessible ingredients, you’ll find this cake a breeze to whip up, even for novice bakers.
  • Customizable: This recipe allows for variations, so you can put your unique twist on it, making it truly your own.

Ingredient Breakdown

Let’s dive into the components that make this dark chocolate cake a standout. Each ingredient plays a vital role in creating the perfect balance of flavor and texture.

  • Dark Chocolate (170 g, 60–70% cocoa): The star of the show! Use high-quality chocolate for a deep, rich flavor.
  • Dutch-process Cocoa Powder (60 g): Bloomed in coffee for enhanced chocolate flavor, this cocoa powder adds depth to the cake.
  • Fresh Brewed Coffee (240 ml, hot): A secret ingredient that intensifies the chocolate flavor. Choose a robust brew to elevate the taste.
  • Vanilla Extract (2 tsp): Pure vanilla extract enhances the overall flavor profile, balancing the richness of the chocolate.
  • Brown Sugar (200 g, packed): Adds moisture and a subtle caramel-like sweetness that complements the chocolate.
  • All-purpose Flour (200 g): This forms the structure of the cake. Be sure to spoon and level it for accuracy.
  • Baking Soda & Baking Powder (1 tsp each): These leavening agents ensure that the cake rises beautifully.
  • Fine Sea Salt (½ tsp): A pinch of salt enhances the sweetness and deepens the chocolate flavor.
  • Eggs (2 large, room temperature): Essential for binding the ingredients and adding richness.
  • Buttermilk (240 ml, room temperature): Contributes to the cake’s moisture and tenderness.
  • Unsalted Butter (115 g, softened): Creamed with sugar, it adds richness to the batter.
  • Vegetable Oil (60 ml): A neutral oil that ensures the cake stays moist.
  • Sour Cream (120 g, full-fat, room temperature): This ingredient also adds moisture and tanginess.
  • Instant Espresso Powder (1 tbsp): Intensifies the chocolate flavor without adding a coffee taste.

How to Make Dark Chocolate Cake

Side view of a moist dark chocolate cake topped with decadent chocolate ganache.

Now that we have our ingredients ready, let’s get to the exciting part—baking! Follow these steps for a flawless dark chocolate cake.

  • Preheat the Oven: Preheat your oven to 350°F (175°C). Grease and line two 9-inch round cake pans with parchment paper to prevent sticking.
  • Melt the Chocolate: Gently melt the dark chocolate in a heatproof bowl over simmering water or in the microwave. Allow it to cool slightly.
  • Bloom the Cocoa: Stir the cocoa powder into the hot coffee and let it sit to bloom, enhancing its flavor.
  • Cream the Butter and Sugar: In a large bowl, cream the softened butter and half of the brown sugar until light and fluffy (about 3 minutes).
  • Whisk the Eggs: In a separate bowl, whisk the eggs with the remaining brown sugar until thickened and pale.
  • Combine Mixtures: Add the egg mixture to the creamed butter, then stir in the melted chocolate and vanilla extract.
  • Mix Dry Ingredients: In another bowl, mix the flour, baking soda, baking powder, and salt. Gradually add this to the wet ingredients alternately with the buttermilk.
  • Fold in Cream: Gently fold in the sour cream and vegetable oil until just combined, being careful not to overmix.
  • Divide and Bake: Divide the batter evenly between the prepared pans, tap to release any air bubbles, and bake for 30-35 minutes or until a toothpick inserted into the center comes out with moist crumbs.
  • Cool Down: Allow the cakes to cool in the pans for 10 minutes before transferring them to a wire rack. For the best flavor, wrap and rest overnight.

Pro Tips for Perfecting Your Cake

  • Room Temperature Ingredients: Ensure all your ingredients, especially eggs and buttermilk, are at room temperature for better emulsification.
  • Quality Chocolate Matters: Use high-quality dark chocolate for the best flavor and texture.
  • Don’t Overmix: When combining dry and wet ingredients, mix until just combined to keep the cake tender.
  • Check for Doneness: Start checking your cake a few minutes before the recommended time to prevent overbaking.
  • Let It Rest: Allowing the cake to rest overnight enhances the flavors and makes it easier to slice.
  • Layering Techniques: If making a layered cake, trim the tops of the cakes for even stacking.
  • Frosting Tips: Use a ganache or cream cheese frosting for a delightful pairing with the rich chocolate flavor.
  • Serving Temperature: Serve the cake at room temperature for the best taste and texture.

Common Mistakes and Troubleshooting

Even the best bakers encounter hiccups. Here are some common issues and how to solve them:

  • Cake Sinks in the Middle: This often happens due to underbaking. Always check for doneness with a toothpick.
  • Dry Cake: Overbaking or not measuring ingredients accurately can lead to a dry cake. Use an oven thermometer to ensure your oven is accurate.
  • Chocolate Flavor Is Weak: Ensure you use high-quality chocolate and espresso powder to enhance the chocolate flavor.
  • Cake Sticks to the Pan: Properly grease and line your cake pans to prevent sticking.

Variations to Try

Feeling adventurous? Here are some exciting variations to put your spin on this classic recipe:

  • Chocolate Orange Cake: Add orange zest and a splash of orange juice for a refreshing twist.
  • Nutty Chocolate Cake: Fold in chopped nuts like walnuts or hazelnuts for added texture and flavor.
  • Mint Chocolate Cake: Incorporate mint extract into the batter for a delightful minty surprise.
  • Layered Chocolate Mousse Cake: Add a layer of chocolate mousse between the cake layers for extra indulgence.

Storage and Make-Ahead Instructions

This dark chocolate cake can be made ahead of time and stored properly for later enjoyment:

  • Storing Leftovers: Keep leftover cake in an airtight container at room temperature for up to 3 days, or refrigerate for up to a week.
  • Freezing: Wrap the cooled cake tightly in plastic wrap and foil, then freeze for up to 3 months. Thaw in the refrigerator before serving.
  • Make-Ahead Batter: You can prepare the batter and refrigerate it for up to 24 hours before baking. Just allow it to come to room temperature before pouring it into the pans.

Frequently Asked Questions

  • Can I use different types of chocolate? Yes! You can mix dark and milk chocolate for a milder taste.
  • Is there a gluten-free version? Absolutely! Substitute all-purpose flour with a gluten-free blend.
  • Can I make cupcakes instead? Yes! This recipe is perfect for cupcakes; just adjust the baking time to 18-20 minutes.
  • What frosting pairs well with this cake? A rich chocolate ganache or a light cream cheese frosting complements the cake beautifully.
  • How can I make it less sweet? Reduce the amount of brown sugar or use a darker chocolate to balance the sweetness.
  • Can I add fruit? Yes! Fresh berries or a fruit compote can add a lovely contrast to the rich chocolate.
  • What’s the best way to serve this cake? Serve it with a dollop of whipped cream or a scoop of vanilla ice cream.
  • How do I know when the cake is done? Insert a toothpick in the center; it should come out with a few moist crumbs, not wet batter.

Nutrition Tips and Dietary Adaptations

For those mindful of dietary choices, here are some adaptations:

  • Lower Sugar Option: Use coconut sugar or a sugar substitute for a healthier alternative.
  • Vegan Version: Substitute eggs with flax eggs and use plant-based buttermilk and butter.
  • Lower Fat Option: Use applesauce in place of oil and sour cream for a lighter cake.

Equipment Recommendations

To ensure your baking experience is seamless, here’s a list of essential equipment:

  • Mixing Bowls: A set of various sizes for mixing ingredients efficiently.
  • Measuring Cups and Spoons: Accurate measurements are crucial for baking success.
  • Electric Mixer: A stand or hand mixer will save you time and effort when creaming butter and sugar.
  • Cake Pans: Two 9-inch round pans are ideal for this recipe.
  • Spatula: A rubber spatula is perfect for folding in ingredients gently.
  • Cooling Rack: Essential for cooling your cakes evenly.
  • Oven Thermometer: Ensures your oven temperature is accurate for perfect baking.

Serving Suggestions

Now that your cake is baked to perfection, here are some delightful ways to serve it:

  • With Fresh Berries: Top your cake with fresh raspberries or strawberries for a burst of color and flavor.
  • Whipped Cream: A dollop of freshly whipped cream adds a light and airy touch.
  • Iced Coffee: Pair your cake with a glass of iced coffee or a cappuccino for a delightful dessert experience.
  • Chocolate Ganache: Drizzle warm chocolate ganache over the top for an elegant finish.

Conclusion

In conclusion, this dark chocolate cake is more than just a dessert; it’s a celebration of flavors, traditions, and gatherings. With every bite, you’re not just tasting chocolate—you’re savoring memories, love, and joy. So, whether it’s a special occasion or a simple family dinner, this cake is sure to bring people together. Now, roll up your sleeves, gather your ingredients, and let the baking begin! Enjoy the journey, and may your home be filled with the sweet aroma of chocolate and happiness!

dark chocolate cake

Prep Time 20 minutes
Cook Time 35 minutes
Total Time 55 minutes
Servings 8 pieces
Calories 420
A rich and moist dark chocolate cake with deep cocoa flavor, perfect for special occasions or indulgent treats.

Ingredients

Dried ingredients

  • 170 g Dark chocolate (60–70% cocoa, melted)
  • 60 g Dutch-process cocoa powder (bloomed in coffee)
  • 240 ml Fresh brewed coffee (hot)
  • 2 tsp Vanilla extract (pure)
  • 200 g Brown sugar (packed)
  • 200 g All-purpose flour (spoon & leveled)
  • 1 tsp Baking soda
  • 1 tsp Baking powder
  • 0.5 tsp Fine sea salt
  • 2 large Eggs (room temperature)
  • 240 ml Buttermilk (room temperature)
  • 115 g Unsalted butter (softened)
  • 60 ml Vegetable oil (neutral-flavored)
  • 120 g Sour cream (full-fat, room temperature)
  • 1 tbsp Instant espresso powder (intensifies chocolate)

Instructions 

  • Preheat oven to 350°F (175°C). Grease and line two 9-inch pans.
  • Melt chocolate and stir cocoa into hot coffee; cool.
  • Cream butter and half sugar; whisk eggs and remaining sugar until pale.
  • Combine wet and dry ingredients alternately with buttermilk; fold in sour cream and oil.
  • Divide batter into pans, tap to release air, and bake 30–35 min. Cool and serve.

Notes

For best results, wrap and rest overnight before serving.
Calories: 420kcal
Cost: $15
Course: Dessert
Cuisine: American
Keyword: chocolate

Introducing the Soft Embrace of Whole Wheat: A Bread Journey Worth Sharing

Ah, the warm, inviting aroma of freshly baked bread wafting through your kitchen! There’s something truly magical about the experience of baking your own bread, especially when it comes to this Whole Wheat Sandwich Bread recipe. If you’re ready to embark on a culinary adventure, gather your ingredients, and prepare to embrace the soft, wholesome goodness that awaits you. This isn’t just any bread; it’s a celebration of flavor, texture, and tradition!

In this guide, we’ll explore the intricacies of making the perfect soft whole wheat sandwich bread, ensuring that every slice is a delight. From ingredient breakdowns to expert tips and troubleshooting, I’ve got you covered. Let’s dive in!

Why You’ll Love This Recipe

This Whole Wheat Sandwich Bread is not only delicious but also packed with nutritional benefits. Here are some reasons to get excited about this recipe:

  • Healthier Choice: Made with whole wheat flour, this bread is rich in fiber and essential nutrients, making it a great option for a wholesome diet.
  • Customizable: You can easily adjust the ingredients to suit your dietary needs or preferences, including gluten-free options!
  • Versatile: Perfect for sandwiches, toast, or even as a side for your favorite soups and salads.
  • Easy to Make: With straightforward steps, anyone can master this recipe, even if you’re a first-time baker.
  • Family Tradition: Share the joy of homemade bread with your loved ones, creating lasting memories around the dinner table.

Ingredient Breakdown

Let’s gather our ingredients and understand their roles. Here’s what you’ll need:

  • Whole Wheat Flour (3 cups): The backbone of our bread, providing the rich, nutty flavor and essential nutrients.
  • All-Purpose Flour (1 cup): Helps to lighten the density of the bread and gives it a wonderful texture.
  • Warm Water (1 1/2 cups): Activates the yeast; make sure it’s warm to the touch but not too hot!
  • Active Dry Yeast (2 1/4 teaspoons): The magic ingredient that helps the dough rise and gives it that light, airy quality.
  • Honey (2 tablespoons): Adds a touch of sweetness and helps to nourish the yeast.
  • Salt (1 1/2 teaspoons): Enhances flavor and strengthens the dough structure.
  • Olive Oil (2 tablespoons): Adds moisture and richness to the bread.

Substitutions

Close-up of golden brown whole wheat sandwich bread with a soft texture.

If you’re looking to make adjustments, here are some great substitutions:

  • Flour: You can use bread flour instead of all-purpose flour for a chewier texture, or a gluten-free blend if necessary.
  • Sweetener: Instead of honey, maple syrup or agave can be used for a vegan option.
  • Oil: Avocado oil or melted coconut oil works well if you prefer a different flavor profile.

Step-by-Step Instructions to Bake Your Bread

Now, let’s get our hands doughy! Follow these steps for a perfectly soft whole wheat sandwich bread:

  1. In a large mixing bowl, combine warm water, yeast, and honey. Let it stand for about 5 minutes until it becomes frothy.
  2. Add the whole wheat flour, all-purpose flour, salt, and olive oil to the bowl.
  3. Knead the dough by hand or with a stand mixer for about 8-10 minutes until it’s smooth and elastic.
  4. Transfer the dough to a greased bowl, cover it with a damp cloth, and let it rise in a warm place for about 1 hour, or until it doubles in size.
  5. Once risen, punch down the dough to release air. Shape it into a loaf and place it in a greased loaf pan.
  6. Let it rise again for about 30 minutes, covered with a cloth. This second rise is crucial for a fluffy texture.
  7. Preheat your oven to 350°F (175°C). Bake the bread for 30-35 minutes, or until it’s golden brown and sounds hollow when tapped.
  8. Let cool on a wire rack before slicing and enjoying!

Pro Tips for Perfect Whole Wheat Sandwich Bread

To ensure your bread turns out perfectly, consider these expert insights:

  • Temperature Matters: Ensure your water is warm, around 110°F (43°C), to properly activate the yeast without killing it.
  • Kneading Technique: If you’re kneading by hand, use the push-fold-turn method for even gluten development.
  • Humidity Awareness: In humid climates, you may need to reduce the water slightly to prevent a sticky dough.
  • Flavor Boost: Add seeds like flax or sunflower for added texture and nutrition.
  • Check for Doneness: The internal temperature should be around 190°F (88°C) when fully baked.
  • Experiment with Add-Ins: Consider adding herbs, garlic, or cheese for a unique flavor twist!
  • Storage Tips: Store your bread in a bread box or wrapped in a cloth to keep it fresh.

Common Mistakes and Troubleshooting

Baking bread is a journey of trial and error! Here are some common pitfalls and how to avoid them:

  • Dense Bread: This can occur if the dough wasn’t kneaded enough or if too much flour was added. Always measure flour correctly!
  • Not Rising: If your yeast is old or the water was too hot, the dough won’t rise. Always check the expiration date of your yeast.
  • Dry Texture: If you overbake, you’ll end up with a dry loaf. Keep an eye on it during the last few minutes of baking.
  • Sticky Dough: If the dough is too sticky, incorporate a little extra flour gradually while kneading; avoid adding too much at once.

Delicious Variations to Try

Once you’ve mastered the classic whole wheat sandwich bread, here are some delicious variations to explore:

  • Honey Oat Bread: Add 1 cup of rolled oats to the dough for a hearty texture and flavor.
  • Herb-Infused Bread: Mix in dried herbs like rosemary or thyme for a fragrant twist.
  • Cheddar and Chive Bread: Fold in shredded cheddar cheese and chopped chives for a savory treat.
  • Spiced Bread: Sprinkle in cinnamon and nutmeg for a warm, spiced flavor, perfect for breakfast.

Storage and Make-Ahead Instructions

Your whole wheat sandwich bread can be stored and enjoyed over several days:

  • Room Temperature: Keep the bread wrapped in a cloth or in a bread box for up to 3-4 days.
  • Freezing: Slice the bread and wrap it tightly in plastic wrap, then place it in a freezer bag. It can last for up to 3 months. Simply thaw at room temperature when you’re ready to enjoy.
  • Make-Ahead Option: You can prepare the dough up to the first rise, then refrigerate it overnight. Shape and let it rise in the morning before baking.

Frequently Asked Questions

Here are some common questions I’ve encountered about baking whole wheat sandwich bread:

  • Can I use only whole wheat flour? Yes, but the texture may be denser. Consider adding a bit of all-purpose flour for a lighter loaf.
  • What if my dough doesn’t rise? Ensure your yeast is active. If not, try again with fresh yeast and the right water temperature.
  • Can I substitute the honey? Absolutely! Maple syrup or agave nectar are great alternatives.
  • How do I know when my bread is done? The bread should be golden brown and sound hollow when tapped on the bottom.
  • What’s the best way to slice my bread? Use a serrated knife for clean slices without squishing the loaf.
  • Can I add seeds or nuts? Yes! Just fold them into the dough during the kneading process.
  • Is this bread suitable for sandwiches? Definitely! This soft bread is perfect for any sandwich creation.
  • How can I enhance the flavor of my bread? Try adding spices, herbs, or cheese during the mixing process for a unique twist.

Nutrition Tips and Dietary Adaptations

This whole wheat sandwich bread is not only delicious but also nutritious. Here are some tips to enhance its health benefits:

  • Fiber Boost: Whole wheat flour contains more fiber than white flour, helping with digestion and keeping you full longer.
  • Protein Power: Add seeds like chia or flax to increase protein content.
  • Low Sugar: By controlling the amount of honey, you can reduce the sugar content while still enjoying the sweet flavor.

Equipment Recommendations

For the best baking experience, consider having the following tools handy:

  • Mixing Bowls: A set of different sized bowls for mixing ingredients.
  • Dough Scraper: Helps in kneading and shaping the dough without mess.
  • Loaf Pans: A good quality loaf pan ensures even baking.
  • Thermometer: A kitchen thermometer is great for checking water temperature and bread doneness.

Serving Suggestions

Once your bread is baked and cooled, it’s time to enjoy! Here are some delightful serving ideas:

  • Classic Sandwiches: Layer your favorite meats, cheeses, and veggies for a hearty lunch.
  • Toast with Toppings: Spread with butter, jam, or avocado for a delicious breakfast or snack.
  • Soup Companion: Serve alongside a warm bowl of soup for a comforting meal.

With this comprehensive guide to making the perfect Whole Wheat Sandwich Bread, you’re set to bake your way to culinary success! Remember, the joy of cooking lies not just in the final product, but in the process of creating something beautiful and delicious. So roll up your sleeves, gather your loved ones, and embark on this delicious journey together. Bon appétit!

Unleash Softness: 1 Recipe for Whole Wheat Sandwich Bread (Soft)!

Prep Time 15 minutes
Cook Time 35 minutes
Total Time 50 minutes
Servings 12 slices
Calories 150
Enjoy soft, wholesome bread perfect for sandwiches, made with whole wheat and a touch of honey.

Ingredients

Dough

  • 3 cups Whole wheat flour
  • 1 cup All-purpose flour
  • 1.5 cups Warm water
  • 2.25 teaspoons Active dry yeast
  • 2 tablespoons Honey
  • 1.5 teaspoons Salt
  • 2 tablespoons Olive oil

Instructions 

  • Mix warm water, yeast, and honey; let sit 5 min.
  • Add flours, salt, and olive oil; knead 8-10 min.
  • Let dough rise 1 hour in a greased bowl.
  • Shape dough, place in loaf pan, and rise 30 min.
  • Bake at 350°F (175°C) for 30-35 min; cool before slicing.

Notes

Use fresh yeast for best rise.
Calories: 150kcal
Cost: $12
Course: Bread
Cuisine: American
Keyword: Whole Wheat