Author

rafael

Browsing

Unleash the Flavor: Discover the Secrets of Gluten Free Pumpkin Bread

As the leaves turn golden and the air becomes crisp, there’s nothing quite like the aroma of freshly baked Gluten Free Pumpkin Bread filling your kitchen. This delightful recipe not only celebrates the essence of autumn but also caters to those seeking gluten-free options without compromising on taste or texture. Join me, Rafael, as we embark on a culinary adventure that promises to warm your heart and tantalize your taste buds!

Why You’ll Love This Recipe

  • Rich Flavor: The combination of pumpkin puree and warm spices creates a loaf that’s bursting with flavor, making it a perfect treat for cozy gatherings.
  • Gluten Free Delight: Enjoy a delicious bread that caters to gluten intolerances, letting everyone at your table partake in the joy of baking.
  • Easy to Make: With simple ingredients and straightforward steps, this recipe is perfect for bakers of all levels, from novices to pros.
  • Versatile Enjoyment: Whether enjoyed as breakfast, a snack, or a dessert, this pumpkin bread fits seamlessly into any meal.
  • Customizable: Add your personal touch with mix-ins like chocolate chips or nuts, creating a unique loaf every time!

Ingredient Breakdown

Understanding the ingredients is crucial for crafting the perfect Gluten Free Pumpkin Bread. Here’s a detailed breakdown:

  • Pumpkin Puree: The star of the show! Use homemade or canned, just ensure it’s pure pumpkin without additives.
  • Eggs: Three large eggs provide moisture and act as a binder, giving the bread structure.
  • White Sugar & Brown Sugar: A blend of both sugars creates depth of flavor—white sugar for sweetness and brown sugar for a hint of caramel-like richness.
  • Melted Butter or Coconut Oil: Adds moisture and richness; coconut oil is a great dairy-free alternative.
  • Vanilla Extract: A splash enhances the overall flavor profile, balancing the spices.
  • Gluten Free All Purpose Baking Flour: A key player! Make sure to choose a blend that includes xanthan gum for the best texture.
  • Spices: Cinnamon, ginger, nutmeg, and cloves bring warmth and complexity to each bite.
  • Baking Soda & Baking Powder: These leavening agents help your bread rise perfectly.
  • Salt: Just a pinch enhances all the flavors.

Pro Tips for Perfection

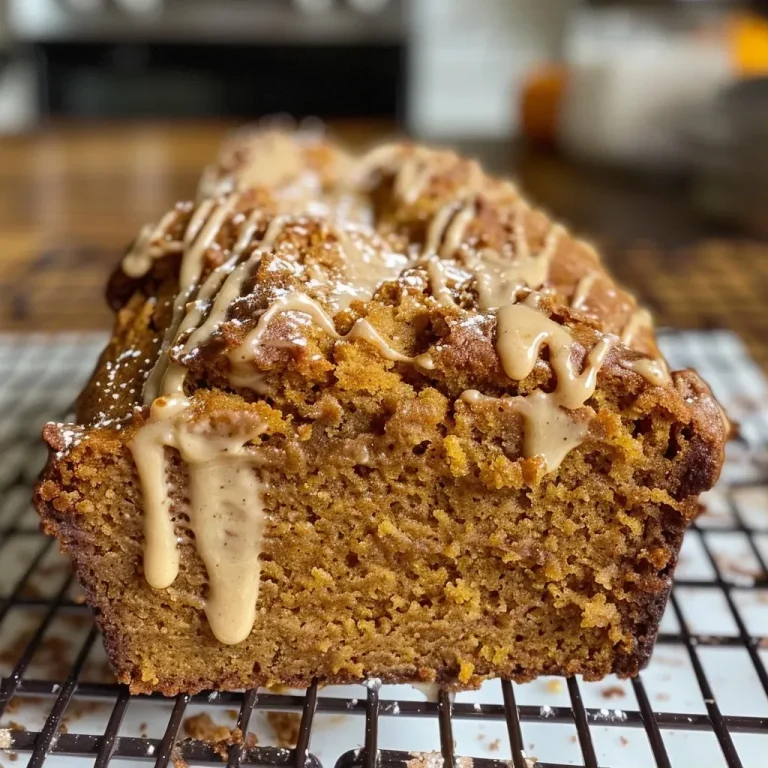
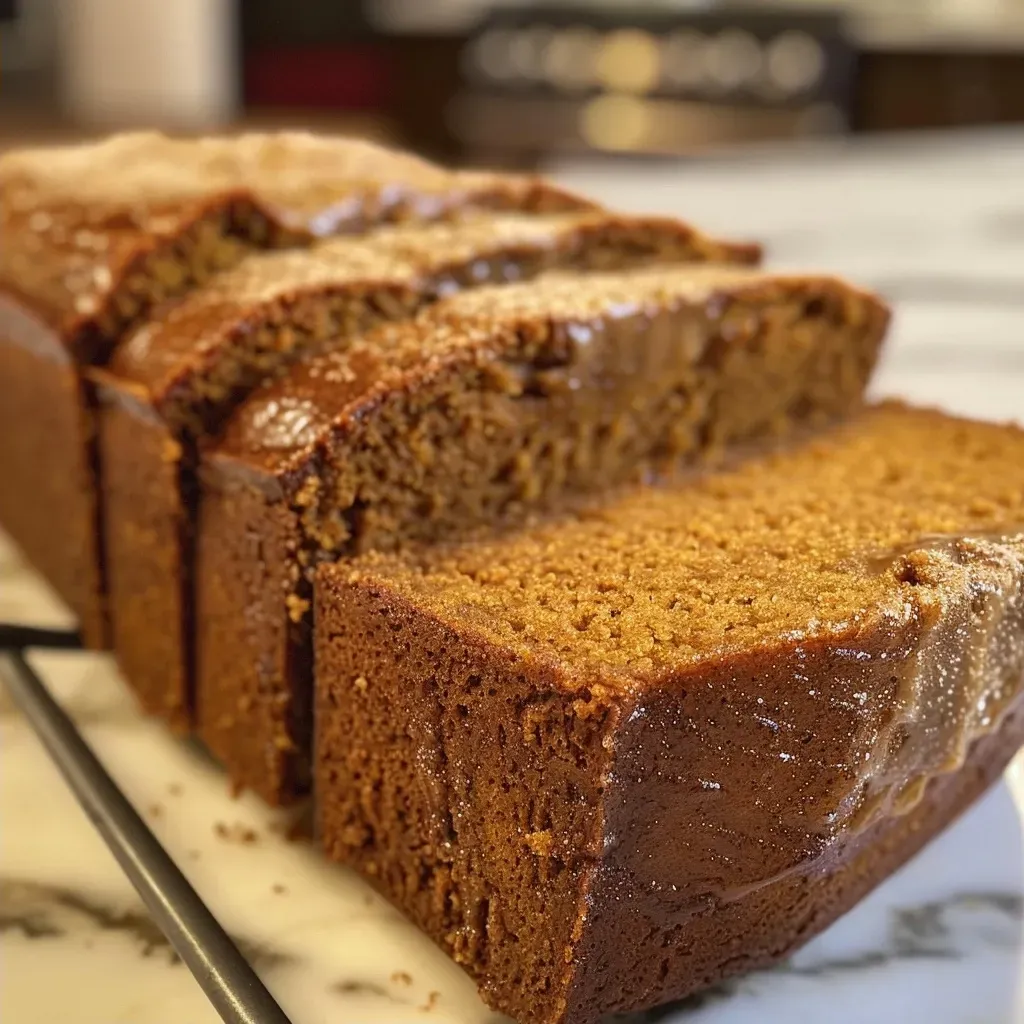
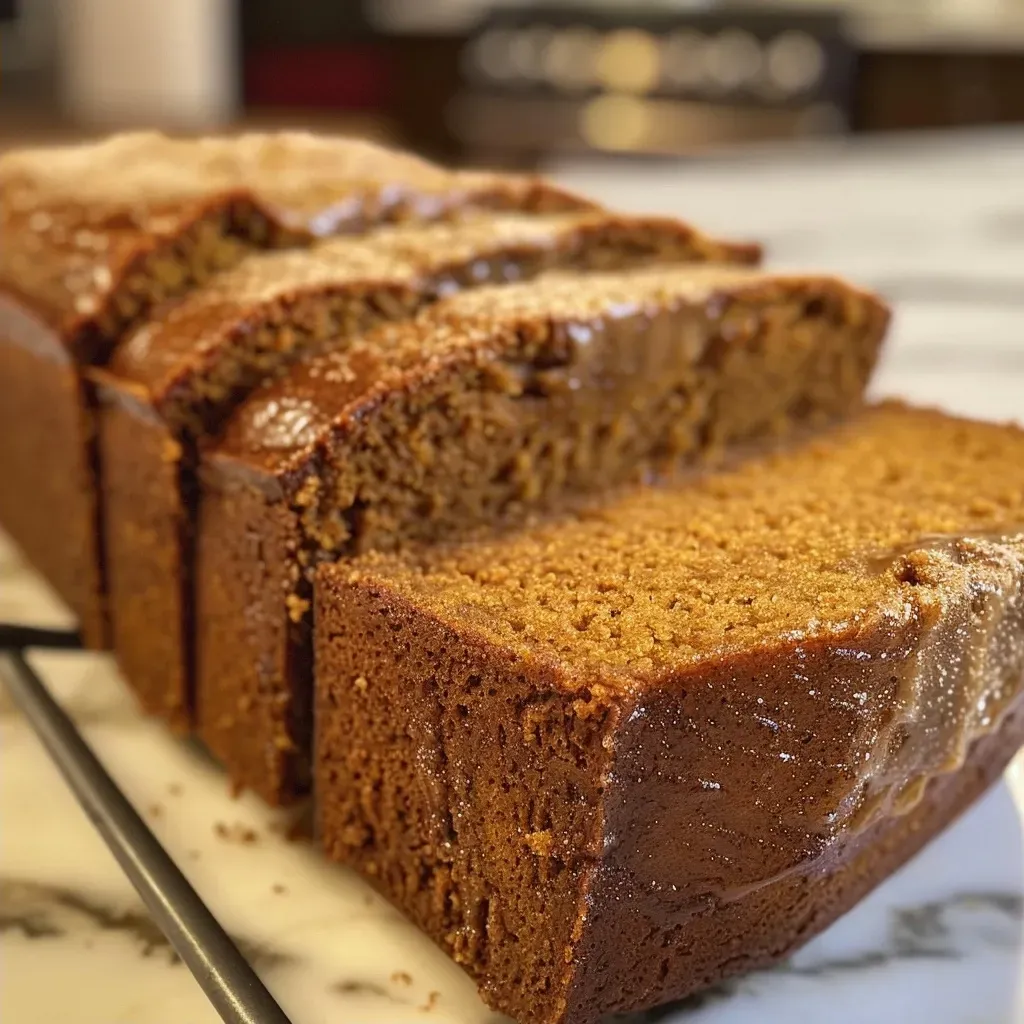
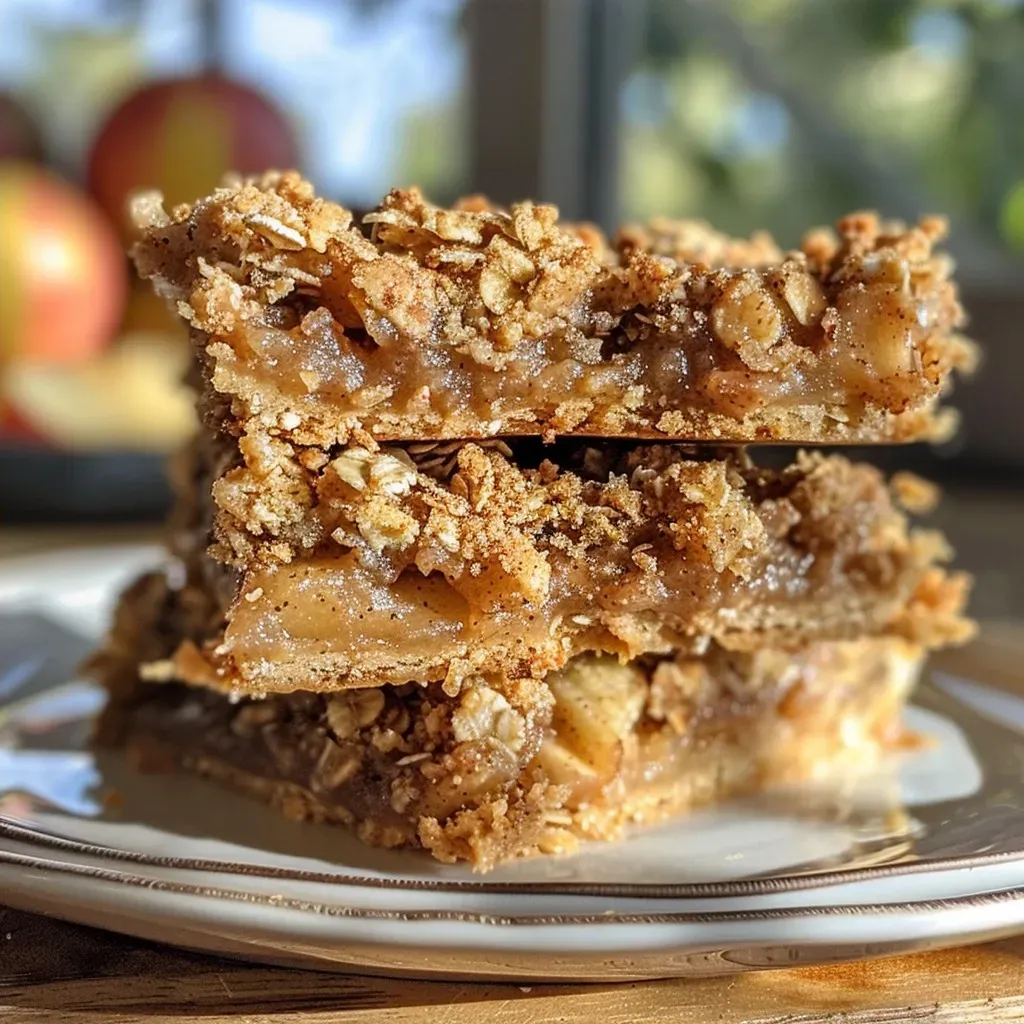
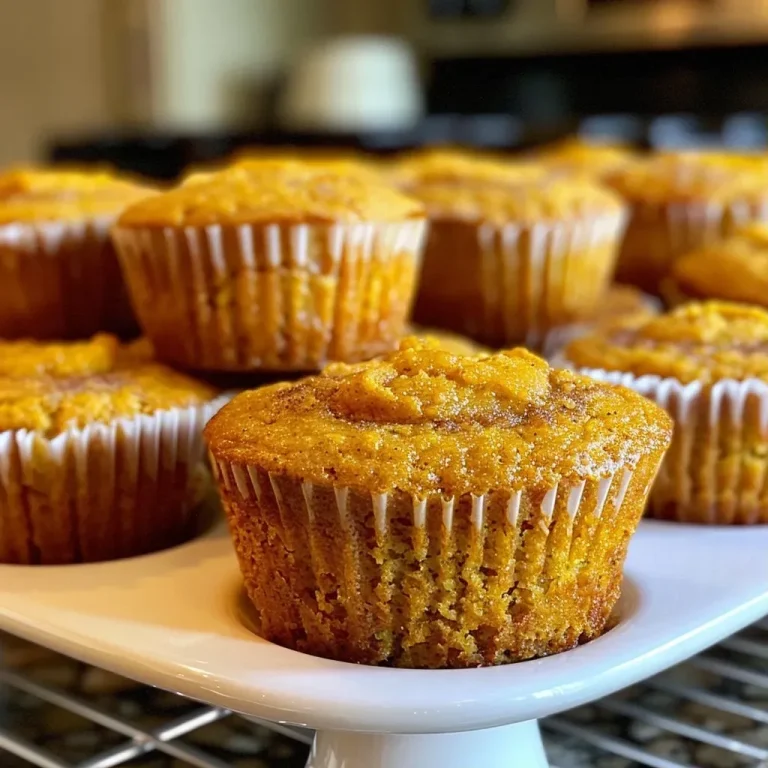
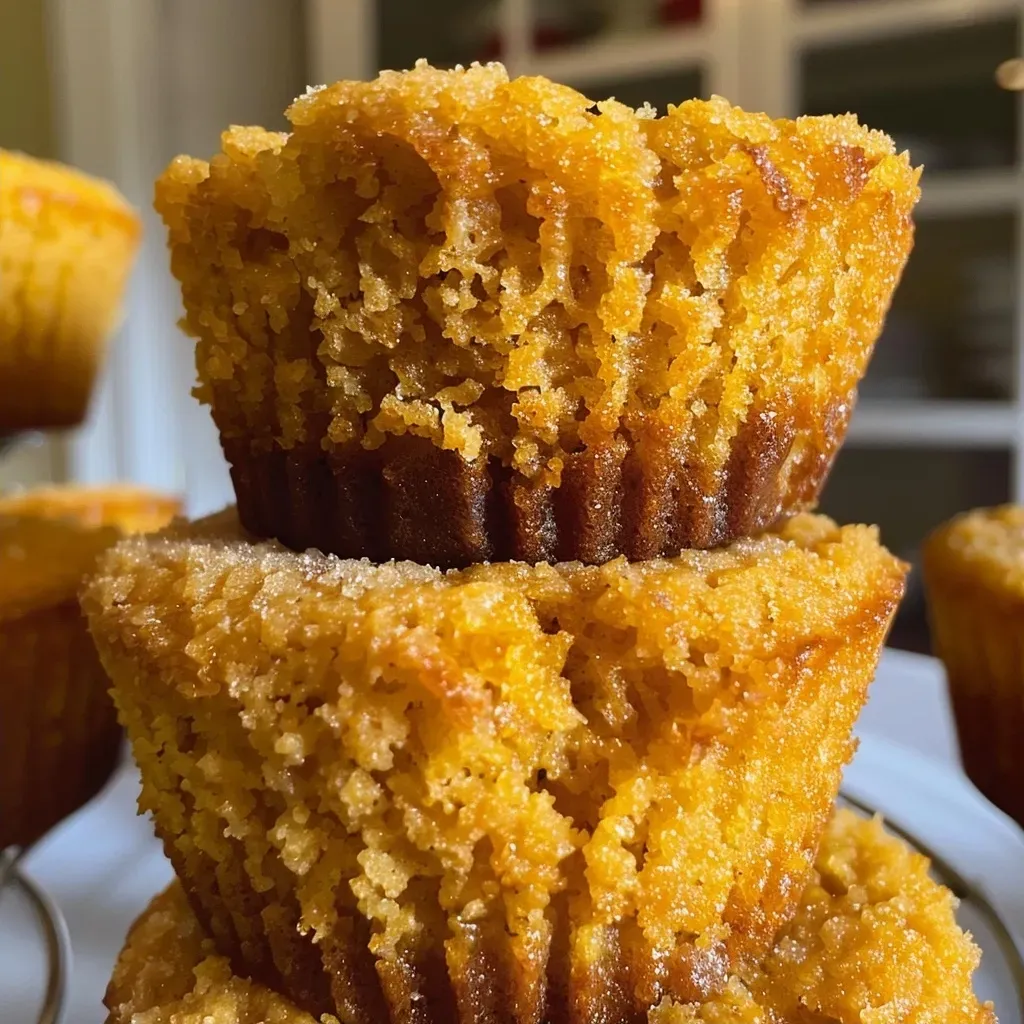
['Close-up view of a slice of gluten-free pumpkin bread with a moist texture.', 'Side view of gluten-free pumpkin bread displaying its dense, soft interior.', 'Juicy and rich gluten-free pumpkin bread cut into thick slices, highlighting its spices.', 'A delicious portion of gluten-free pumpkin bread showcasing its vibrant pumpkin color.']
  • Room Temperature Ingredients: Ensure your eggs and butter are at room temperature for a smoother batter.
  • Don’t Overmix: Mix until just combined to prevent a dense loaf.
  • Check Doneness: Insert a toothpick into the center; it should come out clean or with a few moist crumbs.
  • Chill Before Slicing: Let the bread cool for at least 1 hour to set the flavors and texture.
  • Enhance Flavor with Add-ins: Consider adding chocolate chips, walnuts, or dried cranberries for extra texture and taste.
  • Adjust Spice Levels: Feel free to increase or decrease spices based on your preference.
  • Use Fresh Spices: For the best flavor, ensure your spices are fresh; they lose potency over time.
  • Store Properly: Keep the bread in an airtight container to maintain freshness.
  • Make it Vegan: Substitute eggs with flax eggs (1 tablespoon of flaxseed meal + 2.5 tablespoons of water per egg).
  • Freeze for Later: Slice and freeze individual pieces for a quick treat anytime!

Avoid Common Mistakes

Even the most seasoned bakers can run into issues. Here are some common pitfalls and how to avoid them:


Professional Chef Knife Set

★ Recommended Kitchen Tool

Professional Chef Knife Set

Make this recipe even easier with a quality Professional Chef Knife Set — a must-have kitchen staple!


🛒 See Deals on Amazon →

As an Amazon Associate, we earn from qualifying purchases.
  • Dry Bread: Overbaking can lead to dryness. Always check for doneness a few minutes before the timer goes off.
  • Dense Texture: This can occur from overmixing or using the wrong flour blend. Be gentle with your batter!
  • Flavorless Bread: If your bread lacks flavor, ensure you’re using fresh spices and the right balance of sugars.
  • Too Sweet: Adjust sugar levels to your taste; you can reduce the sugar without sacrificing moisture.

Delicious Variations to Try

Get creative in the kitchen! Here are some fun variations to this classic pumpkin bread recipe:

  • Chocolate Chip Pumpkin Bread: Fold in 1 cup of semi-sweet chocolate chips for a dessert-like treat.
  • Nutty Pumpkin Bread: Add 1 cup of chopped walnuts or pecans for a delightful crunch.
  • Spiced Pumpkin Bread: Experiment with spices like cardamom or allspice for a unique twist.
  • Maple Pumpkin Bread: Substitute half of the white sugar with maple syrup for a richer flavor.

Storage & Make-Ahead Instructions

To keep your Gluten Free Pumpkin Bread fresh and delicious:

  • Room Temperature: Store in an airtight container for up to 3 days.
  • Refrigerator: To extend freshness, store in the fridge for up to a week.
  • Freezing: Wrap slices tightly in plastic wrap and foil, then freeze for up to 3 months. Thaw at room temperature when ready!

Frequently Asked Questions

Let’s tackle some common inquiries to ensure your baking experience is a success:

  • Can I use fresh pumpkin instead of canned? Absolutely! Just make sure to puree it until smooth and adjust for moisture content.
  • What gluten free flour is best? Look for a blend that includes xanthan gum for optimal texture.
  • Can I make this bread dairy free? Yes! Use coconut oil or a dairy-free butter substitute.
  • How can I make this recipe vegan? Substitute the eggs with flax eggs or applesauce.
  • What can I do if my bread is too dense? Check your mixing technique and ensure your flour blend is suitable for baking.
  • How long does this bread last? It can last up to a week in the fridge or 3 months in the freezer.
  • Can I add other flavors? Yes! Feel free to experiment with different spices or extracts.
  • What’s the best way to serve this bread? Enjoy warm, toasted with a spread of butter, or as is with a cup of tea!

Nutritional Considerations

This gluten-free pumpkin bread is not only a treat but also offers some nutritional benefits:

  • Rich in Fiber: Thanks to pumpkin puree, which is also packed with vitamins A and C.
  • Lower in Fat: Using alternatives like coconut oil can help reduce saturated fat content.
  • Customizable for Health Needs: Easily adapt ingredients to suit dietary restrictions, such as dairy-free or vegan.

Essential Equipment for Success

To create your masterpiece, here’s a quick list of kitchen essentials:

  • Loaf Pan: A standard 9×5 inch loaf pan works best for this recipe.
  • Mixing Bowls: Use a large bowl for mixing wet ingredients and a smaller one for dry.
  • Whisk: A sturdy whisk is essential for combining ingredients smoothly.
  • Spatula: Perfect for folding in ingredients without overmixing.
  • Cooling Rack: Ensure your bread cools evenly and prevents sogginess.

Serving Suggestions

Now that your Gluten Free Pumpkin Bread is ready, here are some delightful ways to serve it:

  • With Butter: Spread a layer of butter or dairy-free margarine for a simple yet delicious treat.
  • With Cream Cheese: A tangy cream cheese spread complements the sweetness of the bread perfectly.
  • As French Toast: Slice the bread and dip it in an egg mixture to create a unique breakfast dish.
  • Pair with Coffee: Enjoy your slice with a warm cup of coffee or chai for a cozy afternoon.

Conclusion

With this Gluten Free Pumpkin Bread recipe, you’re not just baking; you’re creating a heartwarming experience filled with flavor and tradition. Whether you’re celebrating with loved ones or enjoying a quiet morning, this bread is sure to bring joy to your table. So preheat your oven, gather your ingredients, and let’s make some memories together!

Gluten Free Pumpkin Bread

Prep Time 15 minutes
Cook Time 1 hour
Total Time 1 hour 15 minutes
Servings 8 slices
Calories 210
A moist and flavorful gluten-free pumpkin bread perfect for fall, combining warm spices and natural sweetness.

Ingredients

Wet ingredients

  • 1 cup pumpkin puree
  • 3 large eggs eggs
  • 2/3 cup white sugar
  • 2/3 cup light brown sugar
  • 1/2 cup melted butter or coconut oil
  • 2 teaspoons vanilla extract

Dry ingredients

  • 1 1/2 cups gluten free all purpose baking flour
  • 3 teaspoons cinnamon
  • 1 teaspoon ginger
  • 3/4 teaspoon nutmeg
  • 1/4 teaspoon cloves
  • 1 teaspoon baking soda
  • 1/2 teaspoon baking powder
  • 1/4 teaspoon salt

Instructions 

  • Preheat oven to 350°F (175°C). Line a loaf pan with parchment.
  • Mix wet ingredients until smooth, then fold in dry ingredients.
  • Pour batter into pan, sprinkle with cinnamon or nuts if desired.
  • Bake for 55-65 minutes until a toothpick comes out clean.
  • Cool for 15 minutes in pan, then transfer to rack and cool completely.

Notes

Store in an airtight container for best freshness.
Calories: 210kcal
Cost: $12
Course: Dessert
Cuisine: American
Keyword: bread, gluten free, pumpkin

Welcome, dear friends! As the golden leaves begin to fall and the air turns crisp, there’s a delightful aroma that fills the kitchens across the Mediterranean. Today, I invite you to join me in creating a treat that captures the essence of fall: **Pumpkin Protein Balls**. These little bites of joy are not just a snack; they embody the warmth of family gatherings and the festive spirit of the harvest season. Get ready to indulge in a recipe that’s not only wholesome but bursting with flavor, perfect for any occasion!

Why You’ll Love This Recipe

These Pumpkin Protein Balls are a celebration of health and taste! Here are just a few reasons why you will adore them:

  • Nutritious Boost: Packed with protein and fiber, these bites will keep your energy levels high, making them an ideal post-workout snack or a quick pick-me-up during busy days.
  • Easy to Make: With just a handful of ingredients and a simple mixing process, you can whip up a batch in under 15 minutes!
  • Customizable: Tailor the flavors to suit your palate! Whether you prefer a hint of chocolate or a sprinkle of nuts, the possibilities are endless.
  • Perfect for Fall: Embrace the season with the warm spices of pumpkin pie and the comforting scent of cinnamon and nutmeg.
  • Vegan-Friendly Option: Easily adapt the recipe to suit dietary preferences by substituting honey with maple syrup!

Ingredient Breakdown: What You’ll Need

Let’s dive into the ingredients that make these Pumpkin Protein Balls so special. Here’s what you need:


Digital Kitchen Scale

★ Recommended Kitchen Tool

Digital Kitchen Scale

Make this recipe even easier with a quality Digital Kitchen Scale — a must-have kitchen staple!


🛒 View on Amazon →

As an Amazon Associate, we earn from qualifying purchases.
  • 1 cup rolled oats: Use gluten-free oats if you prefer. They provide a hearty base and a chewy texture.
  • 2 scoops vanilla protein powder: This recipe is flexible! You can use your favorite brand or flavor of protein powder.
  • 1 tsp pumpkin pie spice: A blend of cinnamon, nutmeg, and clove, it brings that cozy fall flavor.
  • 1/2 cup almond butter: This adds creaminess and healthy fats. Feel free to swap for any nut or seed butter you love.
  • 1/3 cup pumpkin puree: The star of the show! Fresh or canned, it’s essential for that rich pumpkin flavor.
  • 1/4 cup raw honey: For sweetness, or substitute with maple syrup for a vegan-friendly option!

How to Make Pumpkin Protein Balls

Ready to bring these delightful bites to life? Follow these simple steps:

  1. In a large mixing bowl, combine all the ingredients. If you’re feeling adventurous, add chocolate chips or chopped nuts for extra crunch!
  2. Using a small cookie scoop, portion out approximately 24 small balls. Use your hands to roll them into perfect little spheres.
  3. Arrange the protein balls on a plate and freeze for about 10 minutes. This helps them firm up and makes them easier to handle.

Pro Tips for Perfect Pumpkin Protein Balls

['Close-up view of golden-brown pumpkin protein balls on a wooden surface.', 'Side view of pumpkin protein balls with a soft texture and pumpkin seeds sprinkled on top.', 'Array of round, orange-hued protein balls displayed on a rustic table.', 'Juicy pumpkin protein balls arranged neatly, highlighting their chewy consistency.']

Here are some expert insights to elevate your protein ball game:

  • Mix Thoroughly: Ensure all ingredients are well combined for even flavor distribution. A stand mixer can make this easier!
  • Adjust Texture: If the mixture feels too wet, add a bit more oats or protein powder. If too dry, incorporate a splash of almond milk.
  • Chill Before Serving: Chilling the protein balls not only helps them set but enhances the flavors!
  • Experiment with Add-Ins: Try adding dried fruit, seeds, or even a sprinkle of sea salt for a unique twist.
  • Storage Tips: Keep the energy balls in an airtight container in the fridge for up to a week. They are perfect for on-the-go snacking!

Common Mistakes and Troubleshooting

Even the best chefs can make a misstep. Here are some common pitfalls and how to avoid them:

  • Too Crumbly?: If your balls aren’t holding together, increase the nut butter or pumpkin puree slightly.
  • Overly Sweet?: Reduce the amount of honey or maple syrup next time to suit your taste preferences.
  • Flavor Lacking?: Feel free to add more spices or vanilla extract to enhance the overall flavor profile.

Variations for Making Protein Pumpkin Balls

Why stick to just one flavor? Here are some fun variations to try:

  • Chocolate Chip Delight: Mix in dark chocolate chips for a rich, indulgent treat.
  • Nutty Banana Bliss: Add mashed banana to the mix for added sweetness and moisture.
  • Coconut Crunch: Incorporate shredded coconut for a tropical twist!
  • Spiced Cranberry: Fold in dried cranberries for a tart contrast to the sweet pumpkin.

Storage and Make-Ahead Instructions

These Pumpkin Protein Balls are perfect for meal prep! Here are some storage tips:

  • Refrigerate: Store in an airtight container in the fridge for up to a week.
  • Freeze: For longer storage, place them in a freezer-safe bag or container. They can last up to 3 months!
  • Thawing: To enjoy, simply take them out of the freezer and let them sit at room temperature for a few minutes.

Comprehensive FAQ

Let’s address some commonly asked questions about this delightful recipe:

  • Can I substitute other nut butters? Yes! Peanut butter or sunflower seed butter works wonderfully.
  • What protein powder do you recommend? I prefer vanilla, but chocolate can add a delicious twist!
  • Are these gluten-free? Absolutely! Just be sure to choose gluten-free oats.
  • Can I make these vegan? Yes! Substitute honey with maple syrup to make them fully vegan.
  • How do I know when they’re done? They should feel firm to the touch and hold their shape after freezing.
  • Can I add fresh pumpkin? Yes, be sure to cook and puree it first for the best consistency.
  • How many calories are in each ball? Each ball contains approximately 80 calories, depending on the ingredients used.
  • What’s the best way to serve them? They can be enjoyed as a quick snack, breakfast on the go, or even dessert!

Nutrition Tips and Dietary Adaptations

For those mindful of their nutrition, here are some tips:

  • Protein Boost: Add an extra scoop of protein powder for more muscle-repairing goodness.
  • Lower Sugar: Reduce the honey or maple syrup for a lower-sugar version.
  • Fiber Rich: Mix in chia seeds or flaxseeds to increase fiber content and aid digestion.

Essential Equipment Recommendations

Having the right tools can make your cooking experience seamless:

  • Mixing Bowl: A large, sturdy bowl is essential for mixing your ingredients thoroughly.
  • Cookie Scoop: This helps in portioning out uniform balls with ease.
  • Spatula: A good spatula will help you scrape all the delicious mixture from the bowl!

Serving Suggestions

Enjoy these delightful Pumpkin Protein Balls in various ways:

  • With Coffee: Pair them with your morning coffee for a delightful breakfast!
  • Post-Workout: They serve as a perfect recovery snack after a workout session.
  • On-the-Go: Pack them in your bag for a nutritious snack throughout your busy day.

Conclusion

And there you have it, my friends! A simple yet delicious way to celebrate the flavors of fall with these **Pumpkin Protein Balls**. I hope you feel inspired to try this recipe and make it your own. Remember, cooking is about joy, creativity, and sharing with loved ones. So, gather your ingredients, crank up the music, and let’s celebrate the season together! Happy cooking!

Pumpkin Protein Balls

Prep Time 10 minutes
Total Time 10 minutes
Servings 24 pieces
Calories 150
These delicious and healthy pumpkin protein balls are perfect for a quick snack or post-workout treat, combining cozy fall flavors with a boost of protein.

Ingredients

Dry ingredients

  • 1 cup rolled oats (gluten free if desired)
  • 2 scoops vanilla protein powder
  • 1 tsp pumpkin pie spice

Wet ingredients

  • 1/2 cup almond butter
  • 1/3 cup pumpkin puree
  • 1/4 cup raw honey (sub maple syrup for vegan)

Instructions 

  • Combine all ingredients in a large bowl.
  • Use a small cookie scoop to form approximately 24 balls, then roll with your hands and place on a plate.
  • Freeze for 10 minutes before serving.

Notes

Store in the freezer for best texture and freshness.
Calories: 150kcal
Cost: $10
Course: Snack
Cuisine: American
Keyword: Protein, pumpkin

Discover the Joy of Caprese Skewers

Welcome to the vibrant world of Caprese Skewers, where every bite is a celebration of Mediterranean flavors! These delightful little bites are more than just a snack; they encapsulate the essence of summer with their bright colors and fresh ingredients. Imagine juicy cherry tomatoes, creamy mozzarella balls, and aromatic fresh basil all drizzled with a luscious balsamic glaze. Perfect for any occasion, whether it’s a casual gathering or a festive party, these skewers are sure to impress your guests and bring smiles all around.

Why You’ll Love This Recipe

  • Easy to make: With just a few simple ingredients and minimal prep time, you can whip up these gorgeous skewers in no time.
  • Fresh and flavorful: The combination of sweet tomatoes, creamy cheese, and fragrant basil creates a taste explosion that will leave you craving more.
  • Perfect for any occasion: Whether it’s a family barbecue, a fancy dinner party, or a picnic in the park, these skewers fit right in.
  • Healthy and nutritious: Packed with fresh produce and healthy fats, these skewers are a wonderful guilt-free treat.
  • Visually stunning: The colorful layers make these skewers not just delicious but also a feast for the eyes.

Ingredients You Will Need

Gather these fresh ingredients for your Caprese Skewers:

  • 2 tablespoons Extra Virgin Olive Oil: This high-quality oil adds rich flavor and helps season the mozzarella.
  • 1 teaspoon Italian Seasoning: A blend of herbs that enhances the overall taste.
  • Salt and Freshly Ground Pepper: Essential for bringing out the flavors of the ingredients.
  • 24 Cherry Tomatoes: Look for the ripest, juiciest tomatoes for the best results.
  • 24 Mini Mozzarella Cheese Balls: These bite-sized pieces create a perfect pairing with the tomatoes.
  • 24 Fresh Basil Leaves: Choose vibrant green leaves for a burst of freshness.
  • 2 tablespoons Balsamic Glaze: Adds sweetness and a tangy finish to your skewers.

How to Make Caprese Skewers

['Close-up view of vibrant Caprese skewers featuring cherry tomatoes, mozzarella balls, and basil leaves.', 'Side profile of colorful Caprese skewers arranged on a wooden board, showcasing fresh ingredients.', 'Juicy Caprese skewers with cherry tomatoes, mozzarella, and basil, drizzled with balsamic glaze.', 'Delicious Caprese skewers displayed against a neutral background, highlighting their textures and colors.']

Follow these simple steps to create your Caprese Skewers:


Meal Prep Container Set

★ Recommended Kitchen Tool

Meal Prep Container Set

Make this recipe even easier with a quality Meal Prep Container Set — a must-have kitchen staple!


🛒 View on Amazon →

As an Amazon Associate, we earn from qualifying purchases.
  1. In a bowl, combine the extra virgin olive oil, Italian seasoning, salt, and pepper. Stir well.
  2. Add the mini mozzarella balls to the bowl and gently toss to coat. For the best flavor, let it marinate for at least 30 minutes, or overnight in the fridge!
  3. To assemble, take a mini skewer and thread on a cherry tomato, a folded basil leaf, and a marinated mozzarella ball. Repeat until all ingredients are used.
  4. Arrange the skewers on a serving platter and drizzle with balsamic reduction or seasoned olive oil before serving.

Expert Tips for Perfect Skewers

  • Use fresh ingredients: The quality of your tomatoes, basil, and mozzarella makes all the difference in flavor.
  • Marinate overnight: For an even richer taste, marinate your mozzarella balls overnight in the seasoned olive oil.
  • Choose uniform sizes: Select cherry tomatoes and mozzarella balls that are similar in size for easy assembly and a balanced bite.
  • Alternate colors: Mix different colored tomatoes for a more visually appealing presentation.
  • Make it a meal: Serve these skewers on a bed of arugula with a drizzle of olive oil for a light salad option.
  • Adjust the seasoning: Feel free to experiment with different herbs or spices based on your taste preference.
  • Use bamboo skewers: If using wooden skewers, soak them in water for 30 minutes before assembly to prevent burning.
  • Keep it cool: If making ahead of time, store in the refrigerator until serving to keep everything fresh.

Common Mistakes and Troubleshooting

Even the best cooks can make mistakes! Here are some common pitfalls and how to avoid them:

  • Using stale ingredients: Always check for freshness, especially with tomatoes and basil. Stale ingredients can ruin the dish.
  • Overcrowding skewers: Too many ingredients can make them difficult to eat. Stick to one of each item per skewer for a cleaner presentation.
  • Skipping the marination: Don’t underestimate the importance of marinating your cheese; it enhances flavor significantly.
  • Not using a good quality olive oil: A mediocre olive oil can diminish the overall taste. Invest in a quality brand for the best results.

Variations to Try

Feel free to get creative! Here are some delicious variations:

  • Caprese Skewers with Pesto: Drizzle with homemade or store-bought pesto instead of balsamic glaze for a different flavor profile.
  • Grilled Caprese Skewers: Grill the skewers for a smoky flavor. Just be sure to use metal skewers or soak wooden ones first.
  • Caprese Skewers with Prosciutto: Add slices of prosciutto for a savory contrast to the sweet tomatoes and creamy mozzarella.
  • Fruit Twist: Substitute the cherry tomatoes with fresh strawberries or peaches for a sweet summer treat.

Storage and Make-Ahead Instructions

You can make these skewers ahead of time for convenience:

  • Refrigerate: Store assembled skewers in an airtight container in the fridge for up to 3 days.
  • Prep ingredients separately: You can marinate the mozzarella and prep the tomatoes and basil a day in advance. Assemble just before serving for optimal freshness.
  • Freeze: While not ideal, you can freeze the individual ingredients. However, it’s best to enjoy these fresh for the best texture and flavor.

Frequently Asked Questions

Here are some common questions and answers about Caprese Skewers:

  • Can I use store-bought balsamic glaze? Yes! Store-bought options work perfectly and save time.
  • What’s the best way to serve these skewers? Arrange them on a platter and drizzle with balsamic glaze right before serving for the best presentation.
  • Can I use different types of cheese? Absolutely! Try burrata or feta for a twist on the classic flavor.
  • What if I can’t find mini mozzarella balls? You can cut regular mozzarella into bite-sized pieces if needed.
  • How do I keep the basil fresh? Store basil in a glass of water at room temperature, covering the leaves with a plastic bag for longer freshness.
  • Are Caprese Skewers gluten-free? Yes, this recipe is naturally gluten-free!
  • How long do they take to prepare? They take about 15-20 minutes to prepare, plus marination time.
  • Can I make these skewers vegetarian-friendly? Yes, all the ingredients are suitable for vegetarians!

Nutritional Tips and Dietary Adaptations

These skewers not only taste great, but they are also nutritious. Here’s how you can adapt them:

  • Low-Calorie Option: Use less olive oil or skip the balsamic glaze for fewer calories.
  • Dairy-Free Version: Substitute mozzarella with a vegan cheese alternative for a dairy-free option.
  • Low-Carb Skewers: Skip the glaze and stick to the basics for a keto-friendly snack.
  • Nut-Free Version: This recipe is nut-free, making it safe for those with nut allergies.

Equipment Recommendations

To make your Caprese Skewers, you’ll need:

  • Skewers: Either bamboo or metal skewers work well.
  • Cutting Board: For chopping and preparing your ingredients.
  • Mixing Bowl: To marinate your mozzarella and season your olive oil.
  • Serving Platter: To beautifully display your finished skewers.

Serving Suggestions

Here are some ideas for serving your Caprese Skewers:

  • Appetizer Platter: Serve alongside other appetizers like bruschetta and stuffed peppers.
  • Picnic Treat: Include them in a picnic basket with crusty bread and cheese for a delightful meal outdoors.
  • Party Favorite: Offer them as a finger food at your next gathering, paired with a refreshing drink.
  • Salad Alternative: Serve over a bed of mixed greens for a light lunch option.

In conclusion, these Caprese Skewers are a delightful way to bring the flavors of the Mediterranean to your table. Whether you’re enjoying them as a quick snack, an appetizer for a gathering, or a beautiful addition to your meal, each skewer is a celebration of quality ingredients and joyful cooking. So grab your ingredients and let’s celebrate life, one skewer at a time!

Caprese Skewers Recipe

Prep Time 15 minutes
Total Time 15 minutes
Servings 24 skewers
Calories 150
Enjoy these easy and elegant Caprese skewers, perfect for appetizers or entertaining guests.

Ingredients

Seasoning

  • 2 tablespoons Extra Virgin Olive Oil
  • 1 teaspoon Italian Seasoning
  • Salt to taste Salt
  • Freshly Ground Pepper to taste Pepper

Main Ingredients

  • 24 pieces Cherry Tomatoes
  • 24 pieces Mini Mozzarella Cheese Balls
  • 24 leaves Fresh Basil Leaves
  • 2 tablespoons Balsamic Glaze

Instructions 

  • Mix olive oil, Italian seasoning, salt, and pepper in a bowl.
  • Add mozzarella balls to the seasoned oil and marinate for 30 minutes or overnight.
  • Thread a tomato, basil leaf, and mozzarella onto skewers.
  • Arrange skewers on a platter and drizzle with balsamic glaze before serving.

Notes

For extra flavor, let the mozzarella marinate overnight.
Calories: 150kcal
Cost: $15
Course: Appetizer
Cuisine: Italian
Keyword: basil, Mozzarella, Tomato

Embrace the Flavors of Fall with Pumpkin Cinnamon Rolls

As the leaves turn golden and the air becomes crisp, nothing warms the heart quite like the aroma of freshly baked pumpkin cinnamon rolls. These rolls are not just a treat; they are a celebration of autumn, rich with the comforting flavors of pumpkin, warm spices, and sweet maple. Join me, Rafael, as we dive into the delightful process of creating these soft, fluffy rolls topped with a luscious salted maple cream cheese frosting. This recipe is perfect for cozy family gatherings or a simple indulgent breakfast.

Why You’ll Love This Recipe

  • Unmatched Flavor: The combination of pumpkin and spices creates a warm, inviting taste that embodies autumn.
  • Easy to Make: With straightforward steps, even novice bakers will find joy in making these rolls.
  • Vegan Delight: This recipe uses plant-based ingredients, making it suitable for those following a vegan lifestyle without sacrificing taste.
  • Perfect for Sharing: These rolls are ideal for gatherings, bringing family and friends together over a shared love for good food.
  • Make Ahead Option: Prepare the dough in advance, allowing for an easy bake on busy mornings.

Ingredients You’ll Need

Gather these ingredients to bring your pumpkin cinnamon rolls to life:

  • 1/2 cup almond milk: A dairy-free alternative that adds moisture.
  • 1/4 cup maple syrup: For natural sweetness and a hint of flavor.
  • 1 packet (14 oz) instant yeast: Essential for fluffy rolls.
  • 1/2 cup pumpkin puree: Use real pumpkin for the best flavor and texture.
  • 1/4 cup coconut cream or coconut oil: Adds richness and moisture to the dough.
  • 1 tsp pumpkin spice: A blend of cinnamon, nutmeg, and ginger that captures fall’s essence.
  • 3 1/2 cups all-purpose flour: Spoon into measuring cup and level for accuracy.
  • 1/2 tsp salt: Enhances the flavors of the ingredients.
  • 2/3 cup dark brown sugar: For deep sweetness and caramel notes in the filling.
  • 1 tsp pumpkin pie spice: Extra flavor boost for the filling.
  • 1/2 tsp cinnamon: Classic warm spice that pairs beautifully with pumpkin.
  • 1 tbsp coconut cream (or butter): For spreading on the dough before filling.
  • 4 oz plain vegan cream cheese: At room temperature for easy mixing into the frosting.
  • 3 tbsp maple syrup: To sweeten the cream cheese frosting.
  • 1/4 tsp cinnamon: Just a hint for the frosting’s flavor.
  • 1/4 tsp salt: Balances the sweetness of the frosting.

Step-by-Step Instructions

['A close-up side view of warm Pumpkin Cinnamon Rolls topped with a glossy salted maple cream cheese.', 'Side view of freshly baked Pumpkin Cinnamon Rolls drizzled with cream cheese frosting, showcasing layers and texture.', 'Delicious Pumpkin Cinnamon Rolls with a smooth cream cheese topping, capturing the rich colors and moist texture.', 'Close-up image featuring pumpkin-spiced cinnamon rolls with a creamy salted maple frosting, emphasizing their decadent appearance.']

Let’s get started on creating these delightful rolls!


Professional Chef Knife Set

★ Recommended Kitchen Tool

Professional Chef Knife Set

Make this recipe even easier with a quality Professional Chef Knife Set — a must-have kitchen staple!


🛒 View on Amazon →

As an Amazon Associate, we earn from qualifying purchases.
  1. Warm the Milk: In a microwave-safe mug, combine almond milk and maple syrup. Heat for 45-50 seconds until slightly warm. Mix well.
  2. Activate the Yeast: Add the packet of yeast to the warm milk mixture. Stir gently and let sit for 5 minutes until frothy.
  3. Mix the Dough: In a large bowl, combine pumpkin puree, coconut cream, and the activated yeast mixture. Stir until well combined.
  4. Add Dry Ingredients: Mix in pumpkin spice, salt, and flour gradually using a spatula until a dough begins to form.
  5. Knead the Dough: On a floured surface or in the bowl, knead the dough for 5-8 minutes until smooth and slightly sticky.
  6. Let it Rise: Place the dough in a lightly greased bowl, cover with a cloth, and let it rise in a warm spot (like an oven with the light on) for about 1 hour or until doubled in size.
  7. Prepare the Filling: While the dough rises, mix together brown sugar, cinnamon, and pumpkin pie spice in a small bowl.
  8. Roll Out the Dough: Once risen, turn the dough onto a floured surface and roll it out into a rectangle, about 1/4 inch thick.
  9. Spread the Cream: Brush coconut cream over the surface of the dough. Evenly sprinkle the cinnamon sugar mixture on top.
  10. Shape the Rolls: Starting from the short end, tightly roll the dough into a log. Pinch the seam to seal.
  11. Cut the Rolls: Using a serrated knife, slice the log into 12 equal rolls. Place them in a greased 9×13 inch pan with some space between each roll.
  12. Second Rise: Cover the pan and let the rolls rise again for about 30 minutes while preheating the oven to 350°F.
  13. Bake the Rolls: Bake for 17-20 minutes, until golden brown.
  14. Prepare the Frosting: While baking, whisk together the cream cheese, maple syrup, cinnamon, and salt until smooth.
  15. Frost and Serve: Allow the rolls to cool for 10 minutes before spreading the frosting generously on top. Enjoy!

Pro Tips for Perfect Pumpkin Cinnamon Rolls

  • Check Your Yeast: Ensure your yeast is fresh for optimal rising.
  • Room Temperature Ingredients: Allow your cream cheese and coconut cream to come to room temperature for easier mixing.
  • Don’t Overwork the Dough: Knead just until smooth; over-kneading can lead to tough rolls.
  • Use Real Pumpkin: Fresh pumpkin puree yields the best flavor and texture compared to canned.
  • Temperature Matters: A warm environment encourages yeast activation; avoid cold drafts.
  • Customize Your Fillings: Add nuts or dried fruit for extra texture and flavor.
  • Frosting Variations: Experiment with flavored extracts like vanilla or maple in your cream cheese frosting.
  • Keep an Eye on Baking Time: Oven temperatures can vary; check for a golden brown color to avoid overbaking.

Common Mistakes and Troubleshooting

  • Dense Rolls: This can happen if the dough was not kneaded enough or if the yeast was expired.
  • Overly Sweet Rolls: Adjust the sugar in the filling to suit your taste if you prefer a less sweet roll.
  • Frosting Too Runny: If your frosting is too thin, add more cream cheese or reduce the liquid ingredients.
  • Uneven Baking: Ensure your oven is preheated and use the middle rack for even heat distribution.

Delicious Variations to Try

  • Chocolate Chip Pumpkin Cinnamon Rolls: Add dairy-free chocolate chips to the filling for a sweet twist.
  • Maple Pecan Cinnamon Rolls: Fold in chopped pecans for added crunch and flavor.
  • Spiced Apple Cinnamon Rolls: Incorporate diced apples and a touch of nutmeg for an autumn-inspired variant.
  • Nut-Free Option: Simply omit nuts and use sunflower seeds for added crunch without allergens.

Storage and Make-Ahead Instructions

These pumpkin cinnamon rolls can be made ahead of time for convenience:

  • Make-Ahead Dough: Prepare the dough and let it rise, then refrigerate overnight. Bring to room temperature before rolling out.
  • Storage: Store leftover rolls in an airtight container at room temperature for up to 2 days or in the refrigerator for up to a week.
  • Freezing: Freeze unbaked rolls in a single layer on a baking sheet. Once frozen, transfer to a freezer bag. Bake from frozen, adding a few extra minutes to the baking time.

Frequently Asked Questions

  • Can I use gluten-free flour? Yes, substitute with a 1:1 gluten-free blend, but expect a different texture.
  • How can I make these rolls more flavorful? Increase the spices slightly or add vanilla extract to the dough.
  • Can I use canned pumpkin? Absolutely! Just ensure it’s pure pumpkin puree, not pie filling.
  • What if my dough doesn’t rise? Check that your yeast is active and that the environment is warm enough for rising.
  • How do I store leftover frosting? Keep in the refrigerator for up to a week; rewhip before using.
  • Can I make these rolls without yeast? For a quicker option, consider making pumpkin scones instead!
  • How do I know when the rolls are done? They should be golden brown on top and spring back when lightly pressed.
  • Can I add other spices? Feel free to experiment with additional spices like allspice or cardamom for unique flavors.

Nutrition Tips and Dietary Adaptations

This recipe is naturally vegan and can be tailored to fit various dietary needs:

  • Low Sugar Option: Substitute maple syrup with a lower-calorie sweetener.
  • Nut-Free: Use non-dairy milk that is nut-free if allergies are a concern.
  • Protein Boost: Add protein powder to the dough for added nutrition.

Equipment Recommendations

  • Mixing Bowls: Use a large bowl for mixing and a smaller one for the filling.
  • Rolling Pin: Essential for rolling out the dough evenly.
  • Baking Pan: A 9×13 inch pan works perfectly for baking the rolls.
  • Whisk: Handy for mixing the frosting to achieve a smooth consistency.

Serving Suggestions

These pumpkin cinnamon rolls are delightful on their own, but here are some serving ideas:

  • With Coffee: Pair them with a warm cup of coffee or chai for a cozy breakfast.
  • Festive Brunch: Serve them alongside other autumn-themed dishes like spiced apple cider or a fruit salad.
  • As a Gift: Wrap them in a decorative box for a thoughtful homemade gift during the fall season.

Conclusion

These Pumpkin Cinnamon Rolls with Salted Maple Cream Cheese are more than just a recipe; they are a warm hug in pastry form. Whether you’re celebrating with friends or enjoying a quiet morning at home, these rolls will surely become a beloved addition to your fall traditions. So preheat your oven, gather your ingredients, and let’s create something delicious together!

Pumpkin Cinnamon Rolls with Salted Maple Cream Cheese

Prep Time 20 minutes
Cook Time 20 minutes
Total Time 40 minutes
Servings 12 rolls
Calories 350
Delight in these warm, spiced pumpkin cinnamon rolls topped with a luscious salted maple cream cheese glaze, perfect for cozy mornings or special occasions.

Ingredients

Dough ingredients

  • 1/2 cup almond milk
  • 1/4 cup maple syrup
  • 1 packet instant yeast (14 oz packet)
  • 1/2 cup pumpkin puree
  • 1/4 cup coconut cream or coconut oil
  • 1 tsp pumpkin spice
  • 3 1/2 cups all purpose flour or bread flour (spooned and leveled)
  • 1/2 tsp salt
  • 2/3 cup dark brown sugar
  • 1 tsp pumpkin pie spice
  • 1/2 tsp cinnamon
  • 1 tbsp coconut cream (or butter or coconut oil)

Filling and glaze

  • 4 oz plain vegan cream cheese (at room temperature)
  • 3 tbsp maple syrup
  • 1/4 tsp cinnamon
  • 1/4 tsp salt

Instructions 

  • Warm almond milk and maple syrup, then add yeast and let sit for 5 minutes.
  • Mix pumpkin, coconut cream, and yeast mixture; then add spices, salt, and flour to form a dough.
  • Knead dough until smooth, let rise covered in a warm place for 1 hour.
  • Roll out dough, spread coconut cream, sprinkle cinnamon sugar, then roll into a log and cut into 12 rolls.
  • Place rolls in a greased pan, let rise for 30 minutes, then bake at 350°F (175°C) for 17-20 minutes. Prepare glaze while baking.
  • Cool slightly, then spread with salted maple cream cheese glaze and serve.

Notes

Ensure dough is kneaded well for a soft texture and allow enough rising time for fluffy rolls.
Calories: 350kcal
Cost: $15
Course: Breakfast
Cuisine: American
Keyword: pumpkin

Welcome to the vibrant world of Mediterranean cooking! Today, we’re diving into the delightful depths of Carrot Ginger Soup, a dish that not only warms your soul but also tantalizes your taste buds. Imagine the earthy sweetness of fresh carrots mingling with the zesty kick of ginger, all enveloped in a creamy blanket of coconut milk. This easy soup is perfect for cozy gatherings or a simple weeknight dinner, inviting you to celebrate the joy of cooking and sharing delicious meals with loved ones.

Why You’ll Love This Recipe

  • Quick and easy: This carrot ginger soup comes together in under an hour, making it a fantastic choice for busy weeknights.
  • Nourishing ingredients: Packed with vitamins and antioxidants, this soup is not just tasty, but also highly nutritious.
  • Versatile flavors: Adjust the spices and toppings to suit your palate, creating a unique dish every time.
  • Creamy texture: The addition of coconut milk provides a rich creaminess that complements the bright flavors beautifully.
  • Perfect for meal prep: Make a big batch to enjoy throughout the week or freeze for later!

Ingredients Breakdown

Here’s what you’ll need to create your delicious carrot ginger soup:

  • 2 pounds carrots: Roughly chopped for a rich, sweet flavor. You can substitute with parsnips for a twist.
  • 2 tablespoons olive oil: Extra virgin is best for that robust flavor.
  • Salt and pepper: To taste, enhancing the natural flavors.
  • 1 medium onion: Diced, provides a wonderful aromatic base.
  • 3 garlic cloves: Minced, adding depth and warmth.
  • 1 tablespoon fresh ginger: Grated for a punchy kick. Ground ginger can work in a pinch but fresh is best!
  • 1 teaspoon ground coriander: A lovely spice that complements the carrots.
  • ½ teaspoon turmeric: For its vibrant color and health benefits.
  • 4 cups low sodium vegetable broth: Keeps it healthy and flavorful.
  • 1 can unsweetened coconut milk: Adds creaminess without overpowering the flavor.
  • Cilantro: For a fresh garnish.
  • Crusty bread: To serve alongside, perfect for dipping.

Pro Tips for a Perfect Soup

Here are some expert insights to elevate your cooking:


Digital Kitchen Scale

★ Recommended Kitchen Tool

Digital Kitchen Scale

Make this recipe even easier with a quality Digital Kitchen Scale — a must-have kitchen staple!


🛒 See Deals on Amazon →

As an Amazon Associate, we earn from qualifying purchases.
  • Roast the carrots: Roasting enhances their sweetness and adds depth to the soup.
  • Use an immersion blender: For a smooth consistency without transferring to a blender.
  • Adjust the spices: Don’t be afraid to play with the ginger and spices; add more if you like a punch!
  • Garnish creatively: Try adding toasted pumpkin seeds or a swirl of coconut cream for added flair.
  • Store leftovers: Refrigerate for up to 5 days or freeze for up to 3 months.
  • Make it a meal: Pair this soup with a light salad or a hearty sandwich for a complete dinner.
  • Try different toppings: Consider adding croutons, yogurt, or even a drizzle of chili oil!
  • Experiment with flavors: Add a squeeze of lime or a dash of soy sauce for a unique twist.

Common Mistakes and Troubleshooting

['Close-up of a vibrant orange carrot ginger soup in a bowl, topped with fresh cilantro.', 'A side view of creamy carrot ginger soup garnished with herbs, showcasing its smooth texture.', 'A bowl of steaming carrot ginger soup with a rustic crusty bread on the side.', 'Bright carrot ginger soup with an inviting appearance, highlighting the ingredients in the background.']

Even the best chefs encounter hiccups! Here are some troubleshooting tips:

  • Too thick? Add more vegetable broth or coconut milk to reach your desired consistency.
  • Too spicy? Balance it out with a touch of honey or sugar.
  • Flavorless soup? Always season throughout the cooking process; taste and adjust as you go!
  • Not smooth enough? Blend longer or in smaller batches if needed.

Delicious Variations

Mix it up with these creative twists:

  • Add apples: For a sweet and tangy variation, include chopped apples while cooking.
  • Spicy kick: Incorporate a dash of cayenne pepper or red pepper flakes for heat.
  • Coconut curry: Stir in some red curry paste for an exotic flavor.
  • Herbed delight: Add herbs like thyme or basil for an aromatic touch.

Storage and Make-Ahead Instructions

This carrot ginger soup is perfect for meal prep! Here’s how to store it:

  • Refrigeration: Store in an airtight container for up to 5 days.
  • Freezing: Pour into freezer-safe containers, leaving space for expansion. It can last up to 3 months.
  • Thawing: To enjoy, thaw overnight in the refrigerator and reheat on the stove.

Frequently Asked Questions

Here are some common questions about this comforting soup:

  • Can I use frozen carrots? Yes, but fresh will enhance the flavor and texture.
  • Is this soup vegan? Absolutely! All ingredients are plant-based.
  • Can I make this soup spicy? Definitely! Adjust the ginger and add chili for heat.
  • What can I serve with this soup? It pairs wonderfully with crusty bread or a fresh salad.
  • Can I use vegetable scraps? Yes, using scraps can add depth to your broth!
  • How can I thicken the soup? Blend longer or add more coconut milk for creaminess.
  • Is this soup gluten-free? Yes! All ingredients are naturally gluten-free.
  • Can I use other types of milk? You can substitute with almond or oat milk, but the flavor will vary.

Nutrition Tips and Dietary Adaptations

For a healthy twist, consider these adaptations:

  • Low-fat option: Use light coconut milk or reduce the amount.
  • High-protein addition: Stir in cooked lentils or chickpeas for a protein boost.
  • Low-carb version: Substitute some carrots with zucchini or cauliflower.

Equipment Recommendations

Here’s what you’ll need:

  • Immersion blender: For easy blending right in the pot.
  • Sharp knife: For chopping vegetables with ease.
  • Large pot: To hold all those delicious ingredients!

Serving Suggestions

Finally, let’s talk about serving your masterpiece:

  • Garnish generously: Top with fresh cilantro or a drizzle of coconut milk.
  • Accompany with bread: A slice of crusty bread or a warm baguette complements the soup perfectly.
  • Pair with a salad: A light arugula salad dressed with lemon vinaigrette would balance the meal beautifully.

So there you have it! Your journey to creating the perfect Carrot Ginger Soup that dances with flavor awaits. This recipe is not just a meal; it’s a celebration of flavors and traditions. Gather your loved ones, pour a bowl, and let the warmth of this soup wrap around you like a cozy blanket. Happy cooking!

Carrot Ginger Soup Recipe

Prep Time 10 minutes
Cook Time 40 minutes
Total Time 50 minutes
Servings 4 servings
Calories 180
A warm and flavorful carrot ginger soup perfect for a cozy meal. Made with fresh ingredients and a creamy coconut milk finish.

Ingredients

Vegetables

  • 2 pounds carrots (rough chopped)
  • 2 tablespoons olive oil (divided)
  • Salt and pepper Salt and pepper (to taste)
  • 1 medium onion (diced)
  • 3 garlic cloves garlic (minced)
  • 1 tablespoon fresh ginger (grated)
  • 1 teaspoon ground coriander
  • ½ teaspoon turmeric
  • 4 cups low sodium vegetable broth (low sodium)
  • 1 can unsweetened coconut milk (light fat)

Garnishes

  • Cilantro Cilantro (for serving)
  • Crusty bread Crusty bread (for serving)

Instructions 

  • Preheat oven to 425°F. Roast carrots on a lined baking sheet with 1 tbsp olive oil until caramelized, 25-30 mins.
  • Cook diced onion in 1 tbsp olive oil until soft, 5-7 mins. Add garlic, ginger, coriander, turmeric; cook 30 sec.
  • Add vegetable broth and roasted carrots to the pot. Puree until smooth, reserving some carrots for topping.
  • Stir in coconut milk, heat through, then serve topped with cilantro and crusty bread if desired.

Notes

For extra flavor, add a squeeze of lime or a dash of chili flakes.
Calories: 180kcal
Cost: $12
Course: Soup
Cuisine: International
Keyword: Carrots

Embrace the Season: The Allure of Pumpkin Scones

As the crispness of autumn fills the air, it’s time to savor the flavors that define this beautiful season. One of the best ways to celebrate is with homemade pumpkin scones, a delightful treat that combines the warmth of spices with the rich, comforting taste of pumpkin. Perfect for cozy gatherings or as a sweet morning indulgence, these scones are a culinary hug on a plate. Whether you’re a seasoned baker or a novice in the kitchen, this recipe is designed to be easy to follow and full of joy. Let’s dive into this pumpkin scone adventure together!

Why You’ll Love This Recipe

These pumpkin scones are more than just a seasonal treat; they’re a celebration of flavor and texture. Here are five reasons you will adore this recipe:

  • Quick and Easy: With just a handful of ingredients and simple steps, you can whip up these scones in no time.
  • Perfectly Flaky: The combination of cold butter and just the right technique ensures a light and flaky texture.
  • Spice Infusion: Infused with cinnamon and pumpkin pie spice, these scones deliver that quintessential autumn flavor.
  • Customizable: You can easily adapt this recipe to suit your taste preferences with different add-ins or toppings.
  • Make-Ahead Friendly: These scones can be prepared in advance and stored, making them a convenient option for busy mornings.

Ingredient Breakdown

Let’s take a closer look at what you’ll need to make these delightful pumpkin scones, along with some handy substitutions.


Professional Chef Knife Set

★ Recommended Kitchen Tool

Professional Chef Knife Set

Make this recipe even easier with a quality Professional Chef Knife Set — a must-have kitchen staple!


🛒 See Deals on Amazon →

As an Amazon Associate, we earn from qualifying purchases.
  • All-Purpose Flour: The base of the scone. If you’re looking for a gluten-free option, try using a cup-for-cup gluten-free flour blend.
  • Brown Sugar: This adds moisture and a rich molasses flavor. You can substitute with coconut sugar for a healthier option.
  • Baking Powder: This helps the scones rise. Make sure it’s fresh for the best results.
  • Ground Cinnamon: A must for that warm spice flavor. Feel free to add more if you love cinnamon!
  • Pumpkin Pie Spice: A blend of spices that enhances the pumpkin flavor. You can also make your own mix with cinnamon, nutmeg, and ginger.
  • Fine Sea Salt: Enhances all the flavors. Always use high-quality salt for the best taste.
  • Very Cold Salted Butter: Cut into small pieces. Cold butter is key for the flakiness of your scones.
  • Pumpkin Purée: Use canned for convenience, but you can also roast and purée fresh pumpkin for a more vibrant flavor.
  • Buttermilk: This adds moisture and richness. If you don’t have buttermilk, you can use regular milk with a splash of vinegar.
  • Vanilla Extract: Adds depth to the flavor profile.

How to Make Pumpkin Scones

['Close-up view of golden-brown pumpkin scones with a flaky texture.', 'Side angle of delicious pumpkin scones, showcasing their moist interior.', 'Freshly baked pumpkin scones with a dusting of powdered sugar on top.', 'A plate of pumpkin scones highlighting their warm, inviting color.']

Follow these steps to create your own batch of pumpkin scones that will fill your kitchen with the aroma of autumn.

  • Combine Dry Ingredients: In a large mixing bowl, whisk together flour, brown sugar, baking powder, cinnamon, pumpkin pie spice, and salt until evenly mixed.
  • Cut in the Butter: Add the cold butter and use a pastry cutter or two forks to work it into the dry ingredients until crumbly with pea-sized pieces.
  • Add Wet Ingredients: Stir in the pumpkin purée, buttermilk, and vanilla extract until just combined. Be careful not to over-mix!
  • Shape the Scones: Turn the dough onto a floured surface, folding it over a few times to bring it together. Pat it into an 8-inch circle, then cut into 8 wedges.
  • Chill: Transfer the scones to a parchment-lined baking sheet, spacing them apart. Chill in the fridge for at least 15 minutes.
  • Bake: Preheat your oven to 425°F. Brush the tops with buttermilk, then bake for 13-15 minutes until golden.
  • Glaze: Mix powdered sugar with a bit of buttermilk and vanilla to create a glaze, then drizzle over the cooled scones.

Pro Tips for Perfect Scones

Perfecting the art of scone-making can be a delightful challenge. Here are some expert insights to ensure your pumpkin scones are a hit:

  • Use Cold Ingredients: Always use cold butter and buttermilk; this helps create a flaky texture.
  • Avoid Over-Mixing: Mix just until the dry ingredients are moistened to keep the scones tender.
  • Chill the Dough: Chilling the scones before baking helps them maintain their shape and rise better.
  • Experiment with Flavors: Add chocolate chips, nuts, or dried fruits to customize your scones.
  • Check for Doneness: They should be lightly golden and a toothpick inserted should come out clean.
  • Cool Completely: Allow scones to cool on a wire rack before glazing to prevent the glaze from melting.
  • Store Properly: Keep in an airtight container at room temperature for up to 3 days.
  • Make Ahead: Freeze unbaked scones for up to 2 months; just bake straight from the freezer, adding a few extra minutes to the baking time.

Common Mistakes and Troubleshooting

Even the best bakers encounter issues from time to time. Here are some common pitfalls to avoid:

  • Too Dry or Crumbly: This can happen if you over-measure the flour. Use the spoon-and-level method for accuracy.
  • Dense Scones: This usually results from over-mixing. Gently fold the ingredients together.
  • Uneven Baking: Make sure to space the scones evenly on the baking sheet to ensure they bake uniformly.
  • Flavorless Scones: Always taste your dough before baking to ensure you have the right balance of spices and sweetness.

Exciting Variations to Try

Why stick to the classic when you can explore different flavors? Here are some fun variations to consider:

  • Chocolate Chip Pumpkin Scones: Fold in some chocolate chips for a sweet twist.
  • Maple Pecan Scones: Add chopped pecans and replace some sugar with maple syrup for a nutty flavor.
  • Cheddar and Chive Scones: For a savory option, omit the sugar and add sharp cheddar and fresh chives.
  • Spiced Cranberry Scones: Toss in dried cranberries and increase the spices for a festive touch.

Storage and Make-Ahead Instructions

To ensure your pumpkin scones stay fresh and delicious:

  • Room Temperature: Store cooled scones in an airtight container for up to 3 days.
  • Refrigerator: They can be kept in the fridge for up to a week but will lose some of their flakiness.
  • Freezer: Freeze unbaked scones on a baking sheet, then transfer to a freezer bag. They can be baked directly from frozen.

Frequently Asked Questions

Got questions? We’ve got answers! Here are some common queries about pumpkin scones:

  • Can I use fresh pumpkin instead of canned? Absolutely! Just make sure to roast and purée it until smooth.
  • What can I serve with pumpkin scones? They pair wonderfully with coffee, tea, or a dollop of whipped cream.
  • Can I make these scones gluten-free? Yes, use a gluten-free flour blend for a delicious alternative.
  • How can I make my scones sweeter? Adjust the amount of brown sugar or add a bit of honey to the dough.
  • Are these scones suitable for freezing? Yes, both baked and unbaked scones freeze well!
  • What’s the best way to reheat scones? Warm them in the oven at a low temperature for a few minutes to restore their texture.
  • Can I add nuts or seeds? Definitely! Chopped walnuts or pumpkin seeds make great additions.
  • How do I know when my scones are done? Look for a golden top and a toothpick inserted into the center should come out clean.

Nutritional Tips and Dietary Adaptations

For those mindful of dietary needs, here are some tips:

  • Lower Sugar: Reduce the brown sugar for a less sweet option, or use a sugar substitute.
  • Vegan Option: Substitute butter with coconut oil and buttermilk with a plant-based milk mixed with vinegar.
  • High-Fiber Version: Replace half of the all-purpose flour with whole wheat flour for added nutrients.

Equipment Recommendations

Here’s what you’ll need to make these pumpkin scones:

  • Mixing Bowls: A set of various sizes will help you combine ingredients smoothly.
  • Pastry Cutter: Essential for cutting in the butter to achieve that perfect texture.
  • Baking Sheet: A sturdy, non-stick baking sheet is ideal for even baking.
  • Parchment Paper: Lining your baking sheet ensures easy clean-up and prevents sticking.
  • Wire Rack: Use this for cooling your scones after baking to maintain their texture.

Serving Suggestions

To elevate your pumpkin scone experience, consider these serving ideas:

  • Drizzle with Glaze: A simple glaze made of powdered sugar and milk adds a delightful sweetness.
  • Pair with Cream: Serve with clotted cream or whipped cream for a rich indulgence.
  • Add Fresh Fruit: Fresh apple slices or berries complement the scone’s flavors beautifully.
  • Enjoy with Beverages: These scones are perfect with coffee, tea, or spiced cider.

As you embark on this culinary journey, remember that cooking is not just about the food, but about the experiences and memories we create. These pumpkin scones are a perfect example of how a simple recipe can bring joy and warmth to your table. So gather your loved ones, enjoy the process, and celebrate the rich flavors of autumn with every bite. Happy baking!

Pumpkin Scones

Prep Time 15 minutes
Cook Time 15 minutes
Total Time 30 minutes
Servings 8 pieces
Calories 250
Delight in these warm, spiced pumpkin scones perfect for fall mornings or cozy afternoons.

Ingredients

Dry ingredients

  • 2 1/2 cups all-purpose flour
  • 1/2 cup packed brown sugar
  • 1 tablespoon baking powder
  • 2 teaspoons ground cinnamon
  • 2 teaspoons pumpkin pie spice
  • 1/2 teaspoon fine sea salt

Wet ingredients

  • 3/4 cup pumpkin purée
  • 1/3 cup buttermilk (or milk) (plus extra for brushing)
  • 1 teaspoon vanilla extract

Glaze ingredients

  • 1/2 cup powdered sugar
  • 2 to 3 teaspoons buttermilk (or milk)
  • 1/2 teaspoon vanilla extract

Instructions 

  • Whisk dry ingredients together in a large bowl.
  • Cut in cold butter until mixture is crumbly.
  • Add pumpkin purée, milk, and vanilla; stir gently until combined.
  • Shape dough into an 8-inch circle, cut into 8 wedges, and freeze for 15 minutes.
  • Brush tops with buttermilk, bake at 425°F (220°C) for 13-15 minutes until golden.
  • Mix glaze ingredients, then brush on cooled scones before serving.

Notes

For a richer flavor, chill the dough before baking.
Calories: 250kcal
Cost: $12
Course: Breakfast
Cuisine: American
Keyword: pumpkin

Welcome, dear friend! Today, we are diving into the heart of a dish that embodies the spirit of togetherness and celebration: gluten-free corn muffins. These delightful morsels are not just food; they are an experience that brings joy and warmth into any gathering. Imagine the aroma of freshly baked muffins filling your kitchen, inviting everyone to the table. This recipe is perfect for family gatherings, picnics, or simply a cozy night in. Let’s roll up our sleeves and create something magical!

Why You’ll Love This Recipe

  • Fluffy Texture: These gluten-free corn muffins are light and airy, thanks to the perfect balance of baking powder and the right mixing technique.
  • Easy to Make: With simple ingredients and straightforward steps, this recipe is perfect for both novice and experienced bakers.
  • Customizable: You can easily adapt this recipe to suit your dietary needs, whether you’re looking for dairy-free options or wish to add your favorite mix-ins.
  • Perfect for Any Occasion: Whether it’s a holiday feast or a casual brunch, these muffins are sure to impress your guests.
  • Make-Ahead Friendly: Bake a batch ahead of time and enjoy them warm from the oven or reheat them later for a delightful treat.

Ingredients You’ll Need

Before we jump into the cooking, let’s gather our ingredients. Here’s what you’ll need to create these delicious gluten-free corn muffins:

  • 1 cup (152g) gluten-free cornmeal
  • 3/4 cup (113g) gluten-free measure-for-measure flour
  • 1/4 cup (50g) granulated sugar
  • 4 teaspoons baking powder
  • 1/2 teaspoon kosher salt
  • 2 large eggs
  • 1 cup (240ml) milk (or dairy-free alternative)
  • 1/4 cup (57g) butter (melted)

Step-by-Step Instructions

Now, let’s get cooking! Follow these steps to create your golden muffins:


Silicone Baking Cups Set

★ Recommended Kitchen Tool

Silicone Baking Cups Set

Make this recipe even easier with a quality Silicone Baking Cups Set — a must-have kitchen staple!


🛒 Shop This Tool →

As an Amazon Associate, we earn from qualifying purchases.
  1. Preheat the oven to 400°F (200°C). Line a muffin pan with baking cups.
  2. In a large bowl, combine the cornmeal, gluten-free flour, sugar, baking powder, and salt.
  3. In another bowl, whisk together the eggs, milk, and melted butter.
  4. Pour the wet ingredients into the dry ingredients and stir until just combined. The batter should look fluffy and pillowy, thanks to the baking powder!
  5. Scoop the batter into the prepared muffin pan, filling each cup about 2/3 full.
  6. Bake for 15-20 minutes or until a toothpick inserted into the center comes out clean.
  7. Serve warm and enjoy every delicious bite!

Pro Tips for Perfect Muffins

['A close-up view of golden-brown gluten-free corn muffins with a fluffy texture.', 'Side view of freshly baked gluten-free corn muffins, showcasing their moist interior.', 'Juicy gluten-free corn muffins arranged on a plate, highlighting their enticing color.', 'Detailed side angle of gluten-free corn muffins, emphasizing their crumbly top and moisture.']
  • Don’t Overmix: Mix until just combined to keep the muffins light and fluffy.
  • Let the Batter Rest: Allowing the batter to sit for about 10 minutes before baking can enhance the texture.
  • Check for Doneness: Always do the toothpick test to ensure your muffins are perfectly baked.
  • Experiment with Mix-ins: Add corn kernels, jalapeños, or cheese for delicious variations!
  • Store Properly: Once cooled, store in an airtight container for up to two days or freeze for longer storage.
  • Use Quality Ingredients: Opt for high-quality gluten-free flour for the best results.
  • Adjust Sweetness: Feel free to reduce the sugar for a more savory muffin.
  • Try Alternative Milks: Almond or oat milk can be great dairy-free substitutes!

Common Mistakes and Troubleshooting

Even the best of us encounter a few bumps in the road while baking. Here are some common mistakes and how to avoid them:

  • Dense Muffins: This could be due to overmixing the batter or using too much flour. Always measure flour properly and mix gently.
  • Dry Muffins: Ensure you don’t overbake. Keep a close eye on them in the oven.
  • Sticking to the Pan: Make sure to line your muffin pan with liners or grease it well to prevent sticking.

Variations to Try

Feel free to get creative! Here are some delightful variations you can try:

  • Sweet Corn Muffins: Add a handful of blueberries or cranberries for a fruity twist.
  • Savory Muffins: Incorporate cheese and herbs like rosemary or thyme for a gourmet touch.
  • Spicy Muffins: Mix in diced jalapeños or chili flakes for a kick.
  • Herbed Corn Muffins: Add fresh herbs like cilantro or chives to elevate the flavor.

Storage and Make-Ahead Instructions

Planning ahead? Here’s how to store and prepare your muffins for later:

  • Once cooled, store muffins in an airtight container at room temperature for up to 2 days.
  • For longer storage, freeze the muffins in a single layer, then transfer to a freezer bag for up to 3 months.
  • To reheat, simply pop them in the oven at 350°F (175°C) for about 10 minutes, or microwave for a quick warm-up.

Comprehensive FAQ

Here are some frequently asked questions to help you along your baking journey:

  • Can I make these muffins dairy-free? Yes! Substitute the milk with any dairy-free alternative and use dairy-free butter.
  • What gluten-free flour should I use? A measure-for-measure blend works best. Brands like Cup4Cup or Bob’s Red Mill are great options.
  • How do I know when my muffins are done? A toothpick inserted into the center should come out clean or with a few crumbs.
  • Can I use frozen corn in this recipe? Absolutely! Just make sure to thaw and drain it before adding it to the batter.
  • How can I add sweetness without sugar? Try using honey or maple syrup in place of granulated sugar.
  • Can I double the recipe? Yes! Just ensure you have a large enough mixing bowl and muffin pan.
  • What’s the best way to store leftovers? Keep them in an airtight container at room temperature for 2 days or freeze for longer storage.
  • What can I serve with corn muffins? They pair beautifully with soups, stews, or even as a side for breakfast with eggs!

Nutritional Tips and Dietary Adaptations

Cooking is not just about taste; it’s also about nourishing our bodies. Here are some tips to keep in mind:

  • Boost the Nutrients: Add chia seeds or flaxseeds for extra fiber and omega-3 fatty acids.
  • Watch the Sugar: If you’re watching your sugar intake, consider reducing the amount or using a natural sweetener.
  • Gluten-Free Doesn’t Mean Less Flavor: Make sure to use fresh herbs and spices to enhance the overall taste of your muffins.

Equipment Recommendations

To ensure your baking experience is smooth and enjoyable, here are some tools you’ll want to have:

  • Muffin Pan: A good-quality non-stick muffin pan is essential for easy removal.
  • Mixing Bowls: Use at least two mixing bowls—one for dry ingredients and one for wet.
  • Whisk: A sturdy whisk makes mixing easy and efficient.
  • Measuring Cups and Spoons: Accurate measurements are key to successful baking.

Serving Suggestions

Now that you’ve baked these delightful corn muffins, here are some serving ideas:

  • With Butter: Spread a pat of butter while they are still warm for a melt-in-your-mouth experience.
  • With Honey: Drizzle with honey for a sweet touch, perfect for breakfast!
  • As a Side: Serve alongside chili, soup, or salads for a well-rounded meal.

In conclusion, these golden gluten-free corn muffins are not just a recipe; they are a celebration of flavor, texture, and joy. With their fluffy bite and delightful sweetness, they will surely bring smiles to your table. So gather your ingredients, invite your loved ones, and let’s create some beautiful memories together. Happy baking!

Gluten-Free Corn Muffins

Prep Time 10 minutes
Cook Time 15 minutes
Total Time 25 minutes
Servings 12 muffins
Calories 180
Enjoy these light and fluffy gluten-free corn muffins, perfect for breakfast or a snack.

Ingredients

dry ingredients

  • 1 cup gluten-free cornmeal
  • 3/4 cup gluten-free measure-for-measure flour
  • 1/4 cup granulated sugar
  • 4 teaspoons baking powder
  • 1/2 teaspoon kosher salt

wet ingredients

  • 2 large eggs
  • 1 cup milk (milk of choice)
  • 1/4 cup butter (melted)

Instructions 

  • Preheat oven to 400F and line a muffin pan with cups.
  • Mix dry ingredients in a bowl.
  • Whisk eggs, milk, and melted butter in another bowl.
  • Combine wet and dry ingredients until just mixed.
  • Scoop batter into muffin pan and bake for 15-20 minutes.

Notes

Do not overmix the batter to keep muffins fluffy.
Calories: 180kcal
Cost: $8
Course: Breakfast
Cuisine: American
Keyword: cornmeal

Welcome to the World of Trail Mix Granola Bars

Ah, the delightful trail mix granola bars—a perfect blend of energy, nutrition, and flavor that fuels our daily adventures! Whether you’re hiking through the stunning landscapes of the Sierra Nevada or simply navigating your busy workday, these bars provide a nourishing boost that’s both satisfying and delicious. In this comprehensive guide, I’ll take you through each step of creating these tasty morsels, sharing my personal tips, variations, and insights to ensure your experience is as joyful as the flavors themselves.

Join me, Rafael, as we dive into this recipe that celebrates the Mediterranean spirit of wholesome ingredients, vibrant flavors, and the joy of homemade snacks. So grab your apron and let’s get started!

Why You’ll Love This Recipe

Here are just a few reasons to get excited about making your own trail mix granola bars:


Glass Mason Jars for Oats

★ Recommended Kitchen Tool

Glass Mason Jars for Oats

Make this recipe even easier with a quality Glass Mason Jars for Oats — a must-have kitchen staple!


🛒 Shop This Tool →

As an Amazon Associate, we earn from qualifying purchases.
  • Customizable Ingredients: You can mix and match your favorite nuts, seeds, and dried fruits to create a flavor profile that excites your taste buds.
  • Healthy & Nutritious: Packed with wholesome ingredients, these bars offer a great source of energy and nutrition, perfect for a quick snack on the go.
  • Simple to Make: With just a few steps, you can whip up a batch of these delightful bars without the hassle of complicated techniques.
  • No Refined Sugars: Using natural sweeteners like honey or maple syrup allows you to keep the sweetness without the guilt.
  • Great for Meal Prep: These bars store well, making them an excellent option for meal prep or quick grab-and-go snacks during the week.

Ingredient Breakdown

Let’s explore the ingredients that make these trail mix granola bars both tasty and nourishing. Each component plays a crucial role, and I’ll include some substitutions for flexibility!

  • Seeds: Use 1/2 cup of seeds of your choice. I typically go for 1/4 cup sunflower seeds and 1/4 cup pepitas for a lovely crunch. Substitution: Chia seeds or sesame seeds work well too!
  • Nuts: I love a mix of chopped walnuts, pecans, and almonds. Each adds a unique flavor and texture. Substitution: Any nuts you have on hand will do—just ensure they’re chopped!
  • Gluten-Free Oats: A must for the base! They add fiber and help bind the bars together. Substitution: If you don’t need gluten-free, regular oats are perfect.
  • Chia Seeds: These tiny powerhouses add fiber and omega-3 fatty acids. Substitution: Flaxseeds are a great alternative!
  • Coconut Flakes: Unsweetened is best to avoid extra sugars. They add a chewy texture. Substitution: You can skip these if you’re not a fan.
  • Dried Fruits: I use cranberries and dried pineapple to enhance sweetness and flavor. Substitution: Get creative with raisins, apricots, or even figs!
  • Chocolate Chunks: Just a touch for indulgence! Substitution: You can use cacao nibs for a healthier option.
  • Nut Butter: I typically use almond or peanut butter for richness. Substitution: Sunflower seed butter is great for nut-free options.
  • Raw Honey: This natural sweetener is my go-to. Substitution: Maple syrup or agave can be used for a vegan alternative.
  • Vanilla Extract: A splash brings everything together beautifully.

How to Make Trail Mix Granola Bars

['Close-up of colorful Trail Mix Granola Bars with nuts and dried fruits.', 'Side view of healthy Trail Mix Granola Bars featuring seeds and chocolate chunks.', 'Juicy Trail Mix Granola Bars showcasing a mix of oats, nuts, and cranberries.', 'Delicious homemade Trail Mix Granola Bars with a variety of textures and ingredients.']

Now, let’s get down to the fun part—making these delicious bars! Follow these simple steps:

  1. Toast the Seeds and Nuts: Preheat your oven to 350°F (175°C). Spread the seeds and nuts on a sheet pan and toast for about 5 minutes. This step is optional but enhances the flavor.
  2. Mix the Dry Ingredients: In a large bowl, combine the toasted seeds, nuts, oats, chia seeds, coconut flakes, sea salt, dried fruit, and chocolate chunks.
  3. Prepare the Binder: In a saucepan over medium heat, warm the honey, nut butter, and vanilla extract for about 1 minute until smooth.
  4. Combine: Pour the warm mixture over the dry ingredients and mix until everything is well coated.
  5. Press into a Pan: Line a loaf pan or small sheet pan with parchment paper. Transfer the mixture into the pan and press down firmly with a greased spatula to ensure the bars hold their shape.
  6. Chill: Refrigerate or freeze the mixture until it hardens, making it easier to cut into bars. This usually takes about 1 hour.
  7. Slice and Store: Once set, cut the bars into your desired shape and size. Store them in an airtight container in the fridge for up to a week.

Pro Tips for the Best Bars

Here are some expert tips to make your trail mix granola bars even better:

  • Pack It Tight: Ensure you press the mixture down firmly in the pan for dense, non-crumbly bars.
  • Experiment with Flavors: Don’t be afraid to add spices like cinnamon or pumpkin spice for a seasonal twist!
  • Adjust Sweetness: If you prefer less sweetness, reduce the honey by 2 teaspoons without sacrificing flavor.
  • Use Fresh Ingredients: Make sure your nuts and dried fruits are fresh to enhance flavor and texture.
  • Mix It Up: Change the ratios of nuts and seeds based on what you have available.
  • Cut with Care: Use a sharp knife and wipe it clean between cuts for neat bars.
  • Store Properly: Keep them in an airtight container to maintain freshness.
  • Go Wild with Toppings: Feel free to add toppings like additional chocolate chunks or a sprinkle of sea salt before chilling.

Common Mistakes and Troubleshooting

Even the best chefs encounter hiccups. Here’s how to troubleshoot common issues:

  • Bars Crumbling: If they fall apart, it might be due to insufficient binding. Ensure you pack the mixture tightly and let it chill long enough.
  • Too Sweet: If you find the bars overly sweet, consider reducing the honey or using unsweetened dried fruits next time.
  • Too Hard: If the bars are too hard, they may have been overcooked or chilled too long. Try a shorter chilling time.
  • Flavor Balance: If the flavor is off, adjust the salt or spices in future batches to enhance taste.

Delicious Variations to Try

Spice things up with these exciting variations:

  • Chocolate Chip Delight: Add more chocolate chunks and a drizzle of melted chocolate on top for a decadent treat.
  • Fruit & Nut Medley: Swap the cranberries and pineapple for dried apricots and cashews for a tropical twist.
  • Spicy & Savory: Add a pinch of cayenne pepper or chili powder for a unique flavor contrast.
  • Nut-Free Version: Replace nuts with additional seeds like sunflower and pumpkin for a nut-free alternative.

Storage and Make-Ahead Instructions

These granola bars are fantastic make-ahead snacks. Here’s how to store them:

  • Refrigeration: Store in an airtight container in the refrigerator for up to 1 week.
  • Freezing: For longer storage, wrap individual bars in parchment paper and freeze for up to 3 months. Thaw in the fridge before enjoying.

Frequently Asked Questions

Curious minds want to know! Here are some common questions about trail mix granola bars:

  • Can I use quick oats instead of rolled oats? Yes, but rolled oats provide better texture and structure.
  • What can I use instead of honey? Maple syrup or agave nectar work well as vegan alternatives.
  • Are these bars gluten-free? Yes, as long as you use gluten-free oats!
  • Can I make these nut-free? Absolutely! Just replace nuts with extra seeds.
  • How can I make these bars higher in protein? Add protein powder or more nut butter to the mixture.
  • What’s the best way to cut the bars? Use a sharp knife and wipe it clean between cuts for neat slices.
  • Can I add protein powder? Yes, fold it into the dry ingredients for an extra boost!
  • How long do they last? In the fridge, they keep for about a week; in the freezer, up to 3 months.

Nourishing Nutrition Tips and Dietary Adaptations

These bars are not only delicious but can also be tailored to fit various dietary needs:

  • For Vegan Diets: Use maple syrup instead of honey, and opt for plant-based butter alternatives.
  • For Keto Diets: Replace oats with nuts and seeds, and use sugar-free sweeteners.
  • For Nut-Free Options: Focus on seeds and avoid all nuts—sunflower and pumpkin seeds are excellent choices.
  • For Higher Fiber: Incorporate flaxseeds or chia seeds into the mix for added fiber!

Essential Equipment Recommendations

To make your granola bars successfully, you’ll need a few key items:

  • Mixing Bowl: A large bowl for combining ingredients.
  • Sheet Pan: For toasting seeds and nuts.
  • Parchment Paper: To line your pan for easy removal.
  • Spatula: A greased spatula helps to press the mixture firmly into the pan.
  • Sharp Knife: For cutting the bars into perfect squares or rectangles.

Serving Suggestions

These granola bars are versatile and can be enjoyed in various ways:

  • As a Snack: Perfect for munching on between meals or during hikes.
  • Breakfast Boost: Pair them with yogurt and fresh fruit for a hearty breakfast.
  • Lunchbox Treat: An ideal addition to kids’ lunchboxes for a healthy treat.
  • Post-Workout Fuel: Great for replenishing energy after a workout or outdoor adventure.

You’re Ready to Create!

Now that you have all the secrets to crafting your very own trail mix granola bars, it’s time to get cooking! I’m so glad you’re here sharing this culinary journey with me. Remember, every batch is an opportunity for creativity—so don’t hesitate to experiment with flavors and ingredients. Let’s celebrate the joy of cooking together, one delicious bite at a time!

So, what are you waiting for? Grab those ingredients and let’s make some magic in the kitchen!

Trail Mix Granola Bars

Prep Time 10 minutes
Cook Time 5 minutes
Total Time 15 minutes
Servings 12 bars
Calories 250
Enjoy these homemade trail mix granola bars, packed with nuts, seeds, dried fruit, and chocolate for a delicious and energizing snack.

Ingredients

Seeds and Nuts

  • 0.5 cup seeds of choice (sunflower seeds and pepitas)
  • 0.5 cup chopped nuts (walnuts, pecans, almonds)
  • 0.5 cup gluten-free oats
  • 1 teaspoon chia seeds
  • 3 tablespoons unsweetened coconut flakes
  • Pinch sea salt
  • 0.25 teaspoon cinnamon or apple/pumpkin pie spice
  • 0.25 cup cranberries
  • 0.25 cup dried pineapple (cut into smaller chunks)
  • 2 tablespoons chocolate chunks
  • 1/3 cup raw honey (reduce by 2 teaspoons if less sweetness desired)
  • 1/4 cup nut butter
  • 0.5 teaspoon vanilla extract

Instructions 

  • Toast seeds and nuts on a sheet pan at 350°F (175°C) for 5 minutes (optional).
  • In a large bowl, combine seeds, nuts, oats, chia seeds, coconut, salt, dried fruit, and chocolate.
  • Heat honey, nut butter, and vanilla in a saucepan over medium heat for 1 minute. Pour over mixture and stir.
  • Transfer to a lined loaf or sheet pan, flatten with a greased spatula.
  • Refrigerate or freeze until firm, then cut into bars. Store in the refrigerator.

Notes

Press mixture firmly into the pan for best results and store in an airtight container.
Calories: 250kcal
Cost: $15
Course: Snack
Keyword: bars, granola, trail mix

As autumn approaches and the air becomes crisp, the aroma of pumpkin spice fills our kitchens, evoking memories of cozy gatherings and warm family meals. Today, I’m thrilled to share a delightful recipe for No Bake Pumpkin Spice Energy Bites that perfectly capture the essence of the season. These little bites of joy are not only delicious but also packed with nutrition, making them a fantastic snack for any time of day. Let’s dive into this festive treat that’s bound to become a favorite in your home!

Why You’ll Love This Recipe

  • Quick and Easy: With just a handful of ingredients and minimal prep time, you can whip up these energy bites in no time, allowing you to enjoy the flavors of fall without the fuss.
  • No Baking Required: These bites are perfect for those warm days when the last thing you want to do is turn on the oven!
  • Nutritious Ingredients: Made with wholesome ingredients like peanut butter, pumpkin, and oats, these bites are a guilt-free snack that will keep you energized throughout the day.
  • Customizable: Feel free to tailor the recipe with your favorite mix-ins, making these bites uniquely yours!
  • Perfect for Gatherings: Whether you’re hosting a fall gathering or looking for a tasty treat to share with friends, these energy bites are sure to impress.

Ingredients Breakdown

Let’s take a closer look at the star ingredients in our No Bake Pumpkin Spice Energy Bites. Here’s what you’ll need:

  • 1 cup peanut butter: A creamy base that provides healthy fats and protein.
  • 1/2 cup pumpkin puree: Adds moisture and that delicious pumpkin flavor while being rich in vitamins A and C.
  • 1 teaspoon vanilla extract: Enhances sweetness and brings a warm, aromatic flavor.
  • 1/2 cup maple syrup: A natural sweetener that pairs beautifully with pumpkin spice.
  • 1 1/2 cups gluten-free rolled oats: These oats give structure and chewiness. Feel free to add more if your mixture is too sticky!
  • 1/4 cup chia seeds: Packed with omega-3s and fiber, they help bind the mixture together.
  • 1 tbsp pumpkin pie spice: This blend of cinnamon, nutmeg, and ginger is what makes these bites a true autumn delight!
  • 1/2 cup dark chocolate chips: For a sweet finish that complements the spices beautifully.

Instructions: How to Make Pumpkin Spice Energy Bites

Now that we have our ingredients ready, let’s jump into the step-by-step process:


Professional Chef Knife Set

★ Recommended Kitchen Tool

Professional Chef Knife Set

Make this recipe even easier with a quality Professional Chef Knife Set — a must-have kitchen staple!


🛒 Check Price on Amazon →

As an Amazon Associate, we earn from qualifying purchases.
  1. Add the peanut butter, pumpkin purée, maple syrup, and vanilla extract to a mixing bowl. Use a wooden spoon to stir until well combined.
  2. Next, add the gluten-free rolled oats, chia seeds, chocolate chips, and pumpkin pie spice to the bowl. Stir until everything is thoroughly mixed and you have a cohesive “dough”.
  3. Place the mixture in the freezer for 15 to 20 minutes to firm up a bit.
  4. Once chilled, remove the dough from the freezer. Use a cookie dough scoop to scoop the mixture, then roll it into bite-sized balls with your hands.
  5. Store the energy bites in an airtight container in the fridge or freezer to keep them fresh and tasty.

Pro Tips for Perfect Energy Bites

['Close-up view of No Bake Pumpkin Spice Energy Bites on a plate.', 'Side view of delicious No Bake Pumpkin Spice Energy Bites with chocolate chips.', 'A cluster of No Bake Pumpkin Spice Energy Bites showcasing their texture.', 'Freshly made No Bake Pumpkin Spice Energy Bites arranged neatly on a wooden surface.']
  • Temperature Matters: If your peanut butter is too hard, warm it slightly in the microwave to make it easier to mix.
  • Adjust Sweetness: If you prefer a sweeter bite, feel free to add a bit more maple syrup to the mix.
  • Chill Time: Don’t skip the chilling step! It helps the bites hold their shape better.
  • Mix and Match: Try adding nuts, seeds, or dried fruit for added texture and flavor.
  • Storage: Keep these bites in the fridge for up to a week, or freeze them for up to three months!
  • Perfect for On-the-Go: These bites are fantastic for busy mornings or a quick afternoon snack.
  • Mind the Mix: If your mixture feels too dry, add a splash of milk or more pumpkin puree.
  • For a Crunch: Fold in some crushed graham crackers for an extra crunch and a hint of nostalgia!

Common Mistakes and Troubleshooting

Even the most seasoned cooks can face a few hiccups in the kitchen. Here are some common mistakes and how to troubleshoot them:

  • Too Sticky: If your dough is too sticky to handle, simply add more oats a tablespoon at a time until you reach the desired consistency.
  • Too Dry: If your mixture is crumbling, add a little more peanut butter or maple syrup to bind it together.
  • Flavor Lacking: If the flavor isn’t as bold as you’d like, consider adding extra spices or a pinch of salt to enhance the taste.

Delicious Variations

Want to switch things up? Here are some delightful variations to consider:

  • Chocolate Lovers: Substitute half the peanut butter with chocolate hazelnut spread for a rich, chocolatey flavor.
  • Nutty Delight: Add chopped nuts such as almonds or walnuts for a crunchy texture.
  • Fruit Fusion: Incorporate dried cranberries or raisins for a touch of sweetness and chewiness.
  • Protein Boost: Mix in a scoop of your favorite protein powder to make these bites even more satisfying!

Storage and Make-Ahead Instructions

These No Bake Pumpkin Spice Energy Bites are perfect for meal prep! Here’s how to store and make them ahead of time:

  • Refrigerate: Store the bites in an airtight container in the fridge for about one week.
  • Freeze: For longer storage, freeze the energy bites in a single layer on a baking sheet, then transfer them to a freezer-safe bag or container. They’ll stay fresh for up to three months!
  • Make Ahead: Prepare a double batch on the weekend and enjoy them throughout the week as a quick snack or energy boost.

Frequently Asked Questions (FAQs)

  • Can I use almond butter instead of peanut butter? Absolutely! Almond butter will give a different flavor, but it works just as well.
  • Are these energy bites gluten-free? Yes, as long as you use gluten-free oats, these bites are safe for those with gluten sensitivities.
  • How long do these energy bites last? They can last up to one week in the fridge and up to three months in the freezer.
  • Can I omit the chocolate chips? Yes! If you prefer a healthier option, feel free to leave them out.
  • What can I use instead of maple syrup? Honey or agave syrup can be great substitutes if you’re looking for alternatives.
  • Can I make these vegan? Yes! Use a vegan-friendly peanut butter and maple syrup, and ensure your chocolate chips are dairy-free.
  • What’s the best way to serve these energy bites? They make a fantastic snack on their own but can also be served alongside fresh fruit or yogurt for a complete treat.
  • Can I flavor these bites differently? Certainly! Feel free to experiment with different spices or flavored nut butters to create your unique version.

Nutrition Tips and Dietary Adaptations

These pumpkin spice energy bites are not only delicious but also nutritious! Here are some tips to enhance their health benefits:

  • High Fiber: With oats and chia seeds, these bites offer a good source of dietary fiber to keep you full longer.
  • Protein Power: The peanut butter and chia seeds provide a protein boost, making them a great post-workout snack.
  • Low Sugar Options: To reduce sugar content, use unsweetened peanut butter and adjust the maple syrup to your taste.

Equipment Recommendations

For best results, here’s what I recommend having on hand:

  • Mixing Bowl: A large mixing bowl to combine all your ingredients easily.
  • Wooden Spoon: Perfect for mixing and ensures you don’t damage your bowl.
  • Cookie Dough Scoop: This tool helps create perfectly sized energy bites every time.
  • Airtight Container: Essential for storing your bites and keeping them fresh.

Serving Suggestions

These bites can be enjoyed in numerous ways:

  • Snack Time: Perfect for a quick snack between meals.
  • On-the-Go: Great for busy mornings when you need a nutritious pick-me-up.
  • Party Treat: Serve them at gatherings for a festive, healthy option.

In conclusion, these No Bake Pumpkin Spice Energy Bites are more than just a snack; they are a celebration of fall’s bounty and a testament to the joy of cooking. I hope you try this recipe and share it with your loved ones, creating wonderful memories around the table. So grab a plate, gather your ingredients, and let’s make the season of pumpkin spice a little sweeter together!

No Bake Pumpkin Spice Energy Bites

Prep Time 10 minutes
Total Time 10 minutes
Servings 12 pieces
Calories 180
These delicious no-bake energy bites combine pumpkin, peanut butter, and warm spices for a perfect fall snack.

Ingredients

Dough

  • 1 cup peanut butter
  • 1/2 cup pumpkin puree
  • 1 teaspoon vanilla extract
  • 1/2 cup maple syrup
  • 1 1/2 cups gluten free rolled oats (add more if batter is too sticky)
  • 1/4 cup chia seeds
  • 1 tablespoon pumpkin pie spice
  • 1/2 cup dark chocolate chips

Instructions 

  • Add peanut butter, pumpkin purée, maple syrup, and vanilla to a bowl and stir until combined.
  • Mix in oats, chia seeds, chocolate chips, and pumpkin pie spice until a dough forms.
  • Chill in the freezer for 15-20 minutes.
  • Roll the dough into balls and store in an airtight container in the fridge or freezer.

Notes

Store in the fridge for best freshness.
Calories: 180kcal
Cost: $10
Course: Snack
Cuisine: American
Keyword: pumpkin

Welcome to the heart of my kitchen, where every dish tells a story and every bite is a celebration! Today, we’re diving into the world of sweet potato pancakes—a delightful twist on a classic breakfast favorite that brings the warmth of Mediterranean flavors right to your table. These pancakes are not only delicious but also packed with nutrients, making them a perfect start to your day. Infused with the comforting aroma of cinnamon and topped with creamy coconut whip, they’re sure to turn your breakfast into a feast!

Let’s embark on this journey together, exploring the joy of cooking with wholesome ingredients that nourish both body and soul. So grab your apron, and let’s make some magic happen!

Why You’ll Love This Recipe

This isn’t just any pancake recipe; it’s a joyful embrace of flavors and health benefits that you can’t resist. Here are five reasons why these healthy sweet potato pancakes will become a staple in your kitchen:


5-Speed Electric Hand Mixer

★ Recommended Kitchen Tool

5-Speed Electric Hand Mixer

Make this recipe even easier with a quality 5-Speed Electric Hand Mixer — a must-have kitchen staple!


🛒 See Deals on Amazon →

As an Amazon Associate, we earn from qualifying purchases.
  • Nutrient-Rich Ingredients: Packed with vitamins and minerals, sweet potatoes are loaded with antioxidants that promote good health.
  • Versatile and Customizable: Whether you prefer them sweet or savory, these pancakes can be tailored to your taste with different toppings and mix-ins.
  • Easy to Make: With simple steps and minimal prep, you’ll have a delicious breakfast ready in no time!
  • Freezer-Friendly: Make a big batch and freeze for busy mornings—just pop them in the toaster for a quick, satisfying meal!
  • Family-Friendly: Kids love these pancakes! They’re a sneaky way to get them to eat their veggies while enjoying a delicious breakfast.

Ingredients and Substitutions

Let’s take a closer look at what you’ll need to create these sweet potato pancakes:

  • 1 cup oat flour (about 1.25 cups rolled blended into oat flour) – gluten-free option
  • 2 tsp baking powderfor fluffiness
  • 2 tsp cinnamonadds warmth and flavor
  • 2 large eggsfor binding
  • 1 tbsp maple syrupfor natural sweetness
  • 1 tbsp coconut oil (or any other oil) – for a hint of tropical flavor
  • 1/2 cup unsweetened vanilla almond milkadds creaminess
  • 2 tsp apple cider vinegarhelps with leavening
  • 3/4 cup sweet potato (mashed) – the star of the show!
  • 1/4 cup coconut whip creamfor topping
  • 1-2 tbsp crushed pecansfor a crunchy finish

**Substitutions**: If you don’t have oat flour, you can use whole wheat flour or almond flour. For a vegan version, replace eggs with a flaxseed mixture (1 tbsp flaxseed meal + 3 tbsp water per egg) and use plant-based milk and sweeteners.

How to Make Sweet Potato Pancakes

Now that we have our ingredients ready, let’s dive into the step-by-step process of making these delightful pancakes:

  • Step 1: Add oat flour, baking powder, and cinnamon to the food processor. Pulse to combine.
  • Step 2: In a separate bowl, mix almond milk with apple cider vinegar and set aside. Add the eggs, maple syrup, coconut oil, and then the milk/vinegar mixture to the food processor. Finally, add the mashed sweet potato and process until smooth.
  • Step 3: On a preheated skillet over medium-low heat, form each pancake with two tablespoons of batter (for larger pancakes, use 1/4 cup of batter).
  • Step 4: After about one minute, once the surface bubbles, flip the pancakes over and cook for another 30 seconds to a minute until golden brown.
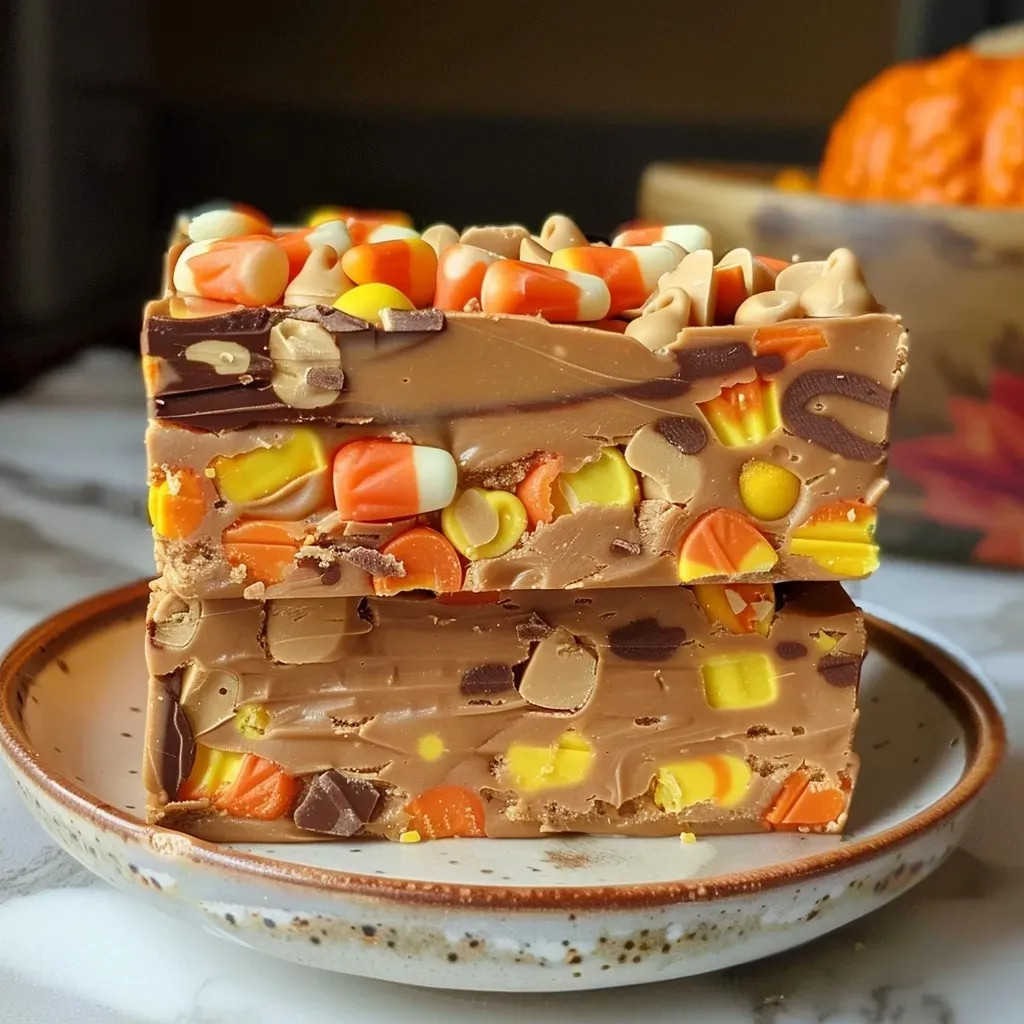
  • Step 5: Serve warm with coconut whip cream and crushed pecans for a delightful treat!

Pro Tips for Perfect Pancakes

['Close-up of fluffy sweet potato pancakes topped with coconut whip and crushed pecans.', 'Side view of healthy sweet potato pancakes with a drizzle of maple syrup and a dollop of cream.', 'Vibrant stack of sweet potato pancakes garnished with pecans, showcasing their rich texture.', 'Juicy sweet potato pancakes arranged on a plate, highlighting their golden-brown color and toppings.']

To ensure your sweet potato pancakes turn out perfectly every time, check out these expert insights:

  • Use fresh sweet potatoes: Opt for sweet potatoes that are firm and free from blemishes for the best flavor and texture.
  • Make a smooth batter: Ensure that all ingredients are well-combined to avoid lumps, which can affect the texture of your pancakes.
  • Preheat your skillet: A well-heated skillet ensures even cooking and prevents the pancakes from sticking.
  • Don’t overcrowd the pan: Cook in batches to maintain temperature and achieve that coveted golden-brown color.
  • Experiment with toppings: Try adding fresh fruit, yogurt, or a drizzle of honey for added flavor and nutrition.
  • Keep them warm: If making a large batch, keep finished pancakes warm in an oven set to low heat (around 200°F).
  • Use a non-stick skillet: To avoid sticking, consider using a well-seasoned cast-iron skillet or a non-stick pan.
  • Adjust thickness to preference: If you prefer thicker pancakes, add a bit more flour; for thinner pancakes, add more milk.

Common Mistakes and Troubleshooting

Even the best chefs have mishaps! Here’s how to avoid common pitfalls:

  • Too thick or too thin batter: Adjust with flour or liquid as needed for desired consistency.
  • Pancakes falling apart: Ensure you’re using enough binding agents like eggs, and don’t overmix the batter.
  • Uneven cooking: Watch your heat; too high can burn the outside while leaving the inside raw.
  • Not flipping at the right time: Wait until bubbles form on the surface before flipping to ensure they’re ready.

Variations to Try

Want to mix things up? Here are some fun variations you can try with your sweet potato pancakes:

  • Savory Sweet Potato Pancakes: Add herbs like rosemary or thyme for a savory twist.
  • Chocolate Chip Sweet Potato Pancakes: Fold in dark chocolate chips for a decadent treat.
  • Banana Sweet Potato Pancakes: Mash in a ripe banana for added sweetness and moisture.
  • Spiced Sweet Potato Pancakes: Add nutmeg or ginger to the batter for a warm, spicy flavor.

Storage and Make-Ahead Instructions

These pancakes can easily be made ahead of time. Here’s how to store and reheat them:

  • Refrigerator: Store leftovers in an airtight container for up to 3 days.
  • Freezer: Freeze cooked pancakes between layers of parchment paper for up to 2 months.
  • Reheating: To reheat, pop them in the toaster or microwave until heated through.

Frequently Asked Questions (FAQs)

Got questions? I’ve got answers! Here are some common queries about sweet potato pancakes:

  • Can I use a different type of flour? Yes, whole wheat or almond flour can be great substitutes for oat flour.
  • Are these pancakes gluten-free? If you use certified gluten-free oat flour, absolutely!
  • Can I make these pancakes vegan? Yes, substitute eggs with flaxseed meal and use plant-based milk and syrup.
  • How do I know when the pancakes are done? Look for bubbles forming on the surface and a golden-brown color on the edges.
  • How can I enhance the flavor? Consider adding spices like nutmeg or vanilla extract for an extra flavor boost.
  • What toppings go well with sweet potato pancakes? Try maple syrup, fresh fruits, yogurt, or nut butter!
  • Can I add protein to the pancakes? Yes! You can mix in protein powder or Greek yogurt for an extra protein boost.
  • What should I serve with sweet potato pancakes? They pair beautifully with a side of scrambled eggs or fresh fruit for a balanced meal.

Nutritional Tips and Dietary Adaptations

For those conscious about nutrition, here are some tips to enhance the health benefits of your sweet potato pancakes:

  • Increase fiber: Add chia seeds or flaxseeds to the batter for added fiber and omega-3 fatty acids.
  • Lower sugar: Reduce the maple syrup if you prefer a less sweet pancake.
  • Boost protein: Incorporate Greek yogurt as a topping or in the batter for a protein boost.
  • Add veggies: Mix in grated zucchini or carrots for added nutrients and moisture.

Essential Equipment

To ensure your cooking experience is seamless, here’s a list of recommended equipment:

  • Non-stick skillet or griddle: For easy flipping and even cooking.
  • Food processor or blender: To create a smooth batter.
  • Measuring cups and spoons: For accurate ingredient measurements.
  • Spatula: For flipping and serving your pancakes with ease.

Serving Suggestions

Elevate your pancake experience with these serving ideas:

  • Top with fresh fruit: Sliced bananas, berries, or apples add a refreshing touch.
  • Drizzle with honey or maple syrup: A sweet finish that complements the pancakes perfectly!
  • Add a dollop of yogurt: Greek yogurt or coconut yogurt adds creaminess and protein.
  • Sprinkle with nuts: Chopped walnuts or pecans enhance texture and flavor.

In conclusion, these sweet potato pancakes are not just a breakfast choice; they are a celebration of flavor, health, and the joy of cooking. I invite you to share this experience with your loved ones, creating memories and traditions over a plate of warm, fluffy pancakes. Thank you for joining me on this culinary adventure—now let’s get cooking and savor the delightful flavors of the Mediterranean!

Healthy Sweet Potato Pancakes

Prep Time 10 minutes
Cook Time 10 minutes
Total Time 20 minutes
Servings 4 pancakes
Calories 250
Enjoy these nutritious and fluffy sweet potato pancakes, perfect for a wholesome breakfast or brunch.

Ingredients

Dry Ingredients

  • 1 cup oat flour (about 1.25 cups rolled blended into oat flour)
  • 2 tsp baking powder
  • 2 tsp cinnamon

Wet Ingredients

  • 2 large eggs
  • 1 tbsp maple syrup
  • 1 tbsp coconut oil (or any other oil)
  • 1/2 cup unsweetened vanilla almond milk
  • 2 tsp apple cider vinegar
  • 3/4 cup sweet potato (mashed)

Toppings

  • 1/4 cup coconut whip cream
  • 1-2 tbsp crushed pecans

Instructions 

  • Add oat flour, baking powder, and cinnamon to a food processor and pulse to combine.
  • Mix almond milk with apple cider vinegar; in a bowl, whisk eggs, maple syrup, coconut oil, and the milk mixture. Add sweet potato and blend until smooth.
  • Pour batter onto a well-oiled skillet over medium-low heat, forming pancakes with 2 tablespoons of batter each.
  • Cook until bubbles form, then flip and cook for another 30 seconds to 1 minute.
  • Serve topped with coconut whip cream and crushed pecans.

Notes

For extra flavor, add a dash of vanilla extract or nutmeg.
Calories: 250kcal
Cost: $12
Course: Breakfast
Cuisine: American
Keyword: Sweet Potato