Author

rafael

Browsing

Celebrate Love with Soft Valentine’s Sugar Cookies

As Valentine’s Day approaches, the air fills with a sweet sense of anticipation and love. What better way to express your affection than with homemade Valentine’s sugar cookies? These delightful treats are not just visually appealing with their vibrant icing and heart shapes, but they also carry the warmth of home-cooked goodness. In this article, we’ll dive into crafting the perfect soft cut-out sugar cookies, ensuring your treats are the highlight of any celebration.

Why You’ll Love This Recipe

  • Soft and Buttery: These cookies are tender and melt-in-your-mouth delicious, making them irresistible.
  • Customizable Icing: The icing is versatile—add your favorite colors and sprinkles to create unique designs.
  • Easy to Make: With simple ingredients and straightforward steps, these cookies are perfect for bakers of all skill levels.
  • Perfect for Gifting: Decorate them beautifully; they make the ideal gift for friends, family, or that special someone.
  • Great for Any Occasion: While perfect for Valentine’s Day, these cookies are delightful for birthdays, anniversaries, or any celebration!

Ingredients: What You’ll Need

Here’s what you’ll need to create these scrumptious Valentine’s sugar cookies:

  • 2¾ cups (345 g) all-purpose flour – Essential for structure.
  • ½ tsp baking powder – Helps cookies rise and maintain their shape.
  • ½ tsp fine sea salt – Enhances flavor.
  • 1 cup (225 g) unsalted butter, softened – For that rich, buttery flavor.
  • 1 cup (200 g) granulated sugar – Sweetness and texture.
  • 1 large egg, room temperature – Binds the ingredients.
  • 2 tsp vanilla extract – Adds aromatic sweetness.
  • ½ tsp almond extract (optional) – A delightful twist for flavor.

For the icing:

  • 3 cups (360 g) powdered sugar, sifted – The base for your icing.
  • 3–4 tbsp milk (or water) – Adjust for desired consistency.
  • 1½–2 tbsp light corn syrup – Adds shine.
  • 1½ tsp vanilla extract – For flavor.
  • Pinch fine sea salt – Balances sweetness.
  • Gel food coloring (red, pink) – To create festive hues.
  • Valentine’s sprinkles – For that extra flair!

Steps to Make Your Cookies

Vibrant heart-shaped cookies with smooth icing and sprinkles, arranged artfully on a plate.
  1. In a bowl, whisk together all-purpose flour, baking powder, and salt. Set aside.
  2. In a large mixing bowl, beat the softened butter and granulated sugar together for 2–3 minutes until light and fluffy.
  3. Add the large egg, vanilla, and almond extract (if using) to the mixture and beat until combined.
  4. Gradually add the dry ingredients in two additions, mixing on low speed until the dough just comes together.
  5. Divide the dough into two disks, wrap them in plastic wrap, and chill in the refrigerator for 1–2 hours.
  6. Preheat your oven to 175°C (350°F). Line baking sheets with parchment paper.
  7. Once chilled, roll the dough on a lightly floured surface to ¼ inch (6 mm) thickness. Use heart-shaped cutters to cut out cookies and place them on the prepared baking sheets.
  8. Bake for 8–11 minutes, or until edges are barely golden. Allow to cool on the pan for 5 minutes before transferring to a wire rack to cool completely.

Making the Icing

While your cookies cool, prepare the icing:

  1. In a medium bowl, whisk the powdered sugar, 3 tablespoons of milk, corn syrup, vanilla extract, and salt until smooth. Adjust with more milk or sugar to reach your desired consistency.
  2. Divide the icing into bowls and tint each with gel food coloring.
  3. Once the cookies are completely cooled, pipe outlines on the cookies with a thicker consistency icing, then flood the centers with a slightly thinner icing.
  4. Decorate with additional icing designs and sprinkles as desired.
  5. Let the cookies dry completely for several hours or overnight before stacking or packaging.

Pro Tips for Perfect Cookies

  • Chill Your Dough: Chilling the dough is crucial for achieving clean shapes and preventing spreading during baking.
  • Room Temperature Ingredients: Ensure your butter and egg are at room temperature for a smoother batter.
  • Don’t Overmix: Mix the dough just until combined to keep your cookies tender.
  • Test for Doneness: Keep an eye on the cookies while baking; they should be just set and lightly golden at the edges.
  • Use Quality Ingredients: High-quality butter and fresh extracts make a significant difference in flavor.
  • Store Properly: Store cookies in an airtight container to maintain freshness.
  • Experiment with Flavors: Feel free to add spices like nutmeg or cinnamon for a unique twist.
  • Adjust Icing Consistency: For piping, icing should be thick; for flooding, a thinner consistency is ideal.

Common Mistakes and Troubleshooting

Even the most experienced bakers face challenges. Here are some common pitfalls and how to avoid them:

  • Dough is Too Sticky: Add a bit more flour, but be cautious not to overdo it.
  • Cookies Spread Too Much: Ensure the dough is adequately chilled before baking.
  • Overbaking: Watch the cookies closely; they can go from perfect to overdone quickly!
  • Curdled Icing: If your icing looks curdled, mix it more vigorously to smooth it out.

Variations to Try

Feeling adventurous? Here are some fun variations to add your personal touch:

  • Chocolate Sugar Cookies: Substitute part of the flour with cocoa powder for a chocolatey twist.
  • Spiced Sugar Cookies: Add cinnamon or nutmeg to the dough for a warm flavor.
  • Gluten-Free Version: Use a gluten-free flour blend for a delightful alternative.
  • Decorative Royal Icing: For a more intricate design, use royal icing instead of the simple glaze.

Storage and Make-Ahead Instructions

These cookies can be made in advance, making them perfect for busy schedules:

  • Storage: Keep cookies in an airtight container at room temperature for up to 1 week.
  • Make-Ahead: The dough can be prepared and chilled in advance, then baked when you’re ready.
  • Freezing Cookies: Baked cookies can be frozen for up to 3 months. Thaw at room temperature before decorating.
  • Freezing the Dough: Roll the chilled dough into logs, wrap tightly, and freeze for up to 3 months. Slice and bake directly from the freezer!

Frequently Asked Questions

Here are some common questions about making Valentine’s sugar cookies:

  • Can I use margarine instead of butter? Yes, but the flavor and texture may vary.
  • How can I make my cookies more colorful? Use gel food coloring for vibrant hues that won’t thin your icing.
  • What if my dough is too crumbly? Add a teaspoon of milk at a time until it comes together.
  • How do I get my icing to dry properly? Let the cookies sit out in a cool, dry place until the icing hardens.
  • Can I add other flavors to the icing? Absolutely! Extracts like lemon or orange can add a lovely touch.
  • What are some great decorations for the cookies? Use sprinkles, edible glitter, or colored sugar for finishing touches.
  • Can I use cookie cutters of different shapes? Yes! You can create a variety of shapes for different occasions.
  • How should I package these cookies for gifting? Place them in a decorative box or bag, with parchment paper to keep them fresh.

Nutritional Tips and Dietary Adaptations

Making treats that cater to various dietary needs can be simple:

  • Lower Sugar: Reduce the sugar in the dough by 25% without compromising on taste.
  • Vegan Option: Substitute butter with coconut oil and use flaxseed meal as an egg replacement.
  • Healthier Icing: Use Greek yogurt mixed with powdered sugar for a protein boost.
  • Portion Control: Consider making mini cookies to help manage serving sizes.

Equipment Recommendations

Having the right tools can simplify your baking experience:

  • Mixing Bowls: A set of various sizes for mixing and holding ingredients is essential.
  • Stand Mixer or Hand Mixer: For effortlessly beating butter and sugar.
  • Cookie Cutters: Heart shapes are great, but consider other fun shapes for different occasions.
  • Baking Sheets: Use heavy-duty, non-stick sheets for even baking.
  • Parchment Paper: To line your baking sheets and prevent sticking.

Serving Suggestions

These cookies shine in various settings:

  • With Coffee or Tea: Enjoy them alongside your favorite warm beverages.
  • At Parties: Serve on a colorful platter to impress your guests.
  • Gift Giving: Wrap them in cellophane bags tied with a ribbon for a charming gift.
  • As Party Favors: Use them as unique favors for weddings or baby showers.

Wrap Up Your Valentine’s Day with Love

As you embark on your journey to bake these delightful Valentine’s sugar cookies, remember that the essence of this recipe lies not just in the ingredients but in the love and joy you share while making them. So grab your apron, invite a friend or family member into the kitchen, and celebrate the spirit of togetherness. Happy baking!

Valentine’s Sugar Cookies (Soft Cut-Out Hearts with Icing)

Prep Time 30 minutes
Cook Time 10 minutes
Total Time 40 minutes
Servings 24 cookies
Calories 150
Celebrate love with these soft, buttery sugar cookies decorated with colorful icing and sprinkles, perfect for Valentine’s Day.

Ingredients

Cookies

  • 2¾ cups all-purpose flour
  • ½ tsp baking powder
  • ½ tsp fine sea salt
  • 1 cup unsalted butter, softened
  • 1 cup granulated sugar
  • 1 large egg, room temperature
  • 2 tsp vanilla extract
  • ½ tsp almond extract (optional)

Icing

  • 3 cups powdered sugar, sifted
  • 3–4 tbsp milk (or water), plus more as needed
  • 1½–2 tbsp light corn syrup
  • 1½ tsp vanilla extract (or 1 tsp vanilla + ½ tsp almond extract)

Decorations

Instructions 

  • Whisk flour, baking powder, and salt. Beat butter and sugar until light. Mix in egg and extracts. Add dry ingredients in parts, then chill dough 1–2 hours.
  • Preheat oven to 175°C / 350°F. Roll out dough, cut into hearts, and place on baking sheets.
  • Bake 8–11 minutes until edges are golden. Cool completely.
  • Mix powdered sugar, milk, corn syrup, vanilla, and salt for icing. Tint with gel colors. Pipe outlines and flood centers. Decorate with sprinkles.
  • Let cookies dry several hours or overnight before stacking.

Notes

Chill dough well for easier cutting and shaping.
Calories: 150kcal
Cost: $15
Course: Dessert
Cuisine: American
Keyword: sugar cookies

Whisking Up Joy: The Ultimate Cheese and Herb Muffins Recipe

Welcome to a delightful culinary adventure where we transform simple ingredients into irresistible Cheese and Herb Muffins! These fluffy, cheesy bites are not just a snack; they’re a celebration of flavor and togetherness, perfect for brunch or cozy evenings. As we whisk together ingredients, the aroma of fresh herbs and sharp cheddar fills the air, invoking memories of family gatherings in sunny Spain. Join me as we dive into the magic of these muffins and discover why they should be a staple in your kitchen!

Why You’ll Love This Recipe

These Cheese and Herb Muffins are more than just a treat; they’re a culinary hug that brings people together. Here are five reasons to fall in love with them:

  • Quick and Easy: With just a few simple steps, you can whip up a batch in under 30 minutes, perfect for those busy mornings.
  • Versatile Delight: Serve them warm as a side dish, or enjoy them as a standalone snack. They pair beautifully with soups, salads, or simply a cup of coffee.
  • Flavor-Packed: The combination of sharp cheddar and fresh herbs creates a savory explosion that tantalizes your taste buds with every bite.
  • Customizable: Feel free to experiment with different cheeses or herbs, making it easy to adapt this recipe to your personal preferences.
  • Freezer-Friendly: Make a large batch and store them in the freezer for a quick breakfast option or emergency snack!

Essential Ingredients

Let’s gather the stars of our show! Here’s what you’ll need:

  • 2 cups all-purpose flour: The base for fluffy muffins. Substitute with whole wheat flour for a healthier option.
  • 1 tbsp baking powder: This is essential for that perfect rise. Ensure it’s fresh for the best results.
  • 1 tsp salt: Enhances the flavors of the other ingredients.
  • 1 cup shredded sharp cheddar cheese: The star of the show! Feel free to use your favorite cheese or a blend for varied flavor.
  • 2 tbsp fresh thyme, chopped: Adds a delightful aromatic touch. You can also use dried thyme as a substitute.
  • 2 tbsp fresh parsley, chopped: Brightens up the flavor palette. Swap it for chives or basil for a different twist.
  • 1 cup whole milk: Keeps the muffins moist. Plant-based milk alternatives work wonderfully too!
  • 2 large eggs: Binds the ingredients together. For a vegan option, use flax eggs.
  • 1/2 cup unsalted butter, melted: Adds richness. You can replace it with olive oil for a Mediterranean flair.

Let’s Make it Together!

Side view of freshly baked Cheese and Herb Muffins with melted cheese and herbs peeking out.

Now that we have our ingredients ready, it’s time to bring them together!

  • Step 1: Preheat your oven to 375°F (190°C) and prepare a muffin tin with liners or grease it well.
  • Step 2: In a large mixing bowl, whisk together the flour, baking powder, salt, cheese, thyme, and parsley until well combined.
  • Step 3: In another bowl, mix the melted butter, milk, and eggs until smooth and creamy.
  • Step 4: Gently combine the wet ingredients with the dry ingredients using a spatula. Mix until just incorporated; avoid over-mixing!
  • Step 5: Spoon the batter into the muffin tin, filling each cup about three-quarters full.
  • Step 6: Bake for 20-25 minutes, or until golden brown and a toothpick inserted in the center comes out clean.
  • Step 7: Let the muffins cool in the tin for about 5 minutes before transferring them to a wire rack to cool completely.

Perfecting the Cooking Process

To ensure your muffins are nothing short of perfection, here are some pro tips:

  • Measure Flour Correctly: Spoon and level your flour for accurate measurements. Too much flour can lead to dense muffins.
  • Room Temperature Ingredients: Using eggs and milk at room temperature helps them combine better and ensures even baking.
  • Mix Gently: Over-mixing can lead to tough muffins. Stir until just combined for a lighter texture.
  • Check for Doneness: The muffins should be golden brown. A toothpick should come out clean from the center when they’re done.
  • Cool Properly: Letting them cool in the tin for a few minutes helps them set before transferring to a wire rack.
  • Flavor Boost: Consider adding a pinch of garlic powder or crushed red pepper flakes for an extra kick.
  • Cheese Variations: Experiment with different cheeses like feta, mozzarella, or even a spicy pepper jack!
  • Herb Alternatives: Try using fresh rosemary, dill, or even a mix of Mediterranean herbs for unique flavors.

Common Mistakes and Troubleshooting

If your muffins don’t turn out as expected, here’s what you can troubleshoot:

  • Dense Muffins: Over-mixing or using too much flour can lead to dense results. Always measure accurately and mix gently.
  • Too Dry: Ensure you’re not baking for too long. An oven thermometer can help ensure your oven’s temperature is accurate.
  • Sticking to the Tin: If your muffins stick, ensure your tin is well-greased or lined with paper liners.
  • Not Rising: Check that your baking powder is fresh. Old leavening agents can lead to flat muffins.

Variations on Cheese and Herb Muffins

Feeling adventurous? Here are some delightful variations to try:

  • Spinach and Feta: Add a cup of chopped spinach and swap cheddar for crumbled feta for a Mediterranean twist.
  • Bacon and Cheddar: Mix in crispy, crumbled bacon along with the cheddar for a savory kick.
  • Sun-Dried Tomato and Basil: Incorporate chopped sun-dried tomatoes and fresh basil for a vibrant flavor profile.
  • Sweet Corn and Jalapeño: Add fresh corn kernels and diced jalapeños for a sweet-spicy combination.

Storing & Reheating

To keep your muffins fresh and delicious:

  • Room Temperature: Store in an airtight container at room temperature for up to 3 days.
  • Refrigerator: For longer storage, keep in the fridge for up to a week.
  • Freezer: Freeze muffins in a zip-top bag for up to 3 months. Thaw at room temperature or microwave for a quick snack.
  • Reheating: Warm in the oven at 350°F (175°C) for about 5-10 minutes or microwave for 15-20 seconds.

Comprehensive FAQ

Here are some common questions about Cheese and Herb Muffins:

  • Can I use gluten-free flour? Yes, substitute with a gluten-free all-purpose flour blend, adjusting liquid as necessary.
  • What if I don’t have fresh herbs? You can use dried herbs; just remember to use less since dried herbs are more concentrated.
  • Can I make these muffins vegan? Absolutely! Use flax eggs and plant-based milk and butter alternatives.
  • How do I know when the muffins are done? A toothpick inserted in the center should come out clean; they should be golden brown on top.
  • Can I add other ingredients? Yes! Feel free to incorporate vegetables like zucchini or bell peppers for added nutrition.
  • How many muffins does this recipe make? This recipe typically yields about 12 standard-sized muffins.
  • Can I double the recipe? Yes, simply double the ingredients and use multiple muffin tins if needed.
  • How should I serve these muffins? They are delicious warm, served with butter, or alongside soups and salads.

Nutritional Tips and Dietary Adaptations

To make your Cheese and Herb Muffins even healthier:

  • Whole Wheat Flour: Substitute half or all of the all-purpose flour with whole wheat for added fiber.
  • Low-Fat Dairy: Use low-fat milk and cheese to reduce calories without sacrificing flavor.
  • Add Vegetables: Incorporating finely chopped vegetables increases the nutritional value.
  • Portion Control: Consider making mini muffins for smaller portion sizes, great for appetizers!

Equipment Recommendations

For the best baking experience, I recommend having the following tools:

  • Muffin Tin: Opt for a non-stick or silicone muffin tin for easy removal.
  • Mixing Bowls: A set of various sizes for mixing wet and dry ingredients efficiently.
  • Whisk: Essential for combining ingredients smoothly without lumps.
  • Spatula: Great for folding in ingredients gently without over-mixing.
  • Cooling Rack: Helps to cool muffins evenly and prevents sogginess.

Serving Suggestions

Serve your Cheese and Herb Muffins with:

  • Olive Oil and Balsamic Vinegar: A simple dip that complements the muffins beautifully.
  • Soup or Salad: Pair with a hearty soup or fresh salad for a complete meal.
  • Cheese Platter: Include these muffins on a cheese board with assorted cheeses and olives for a delightful spread.
  • Jam or Honey: For a sweet twist, try serving them with honey or fig jam for an unexpected pairing.

With these Cheese and Herb Muffins, you’re not just baking; you’re creating memories and connections at the table. So grab your apron and let the joy of cooking fill your kitchen. Happy baking!

Cheese and Herb Muffins

Prep Time 10 minutes
Cook Time 20 minutes
Total Time 30 minutes
Servings 12 muffins
Calories 180
Delight in these savory muffins packed with cheese and fresh herbs, perfect for breakfast or snacks.

Ingredients

Dry ingredients

  • 2 cups all-purpose flour
  • 1 tbsp baking powder
  • 1 tsp salt

Wet ingredients

  • 1 cup whole milk ((or plant-based milk))
  • 2 large eggs
  • 1/2 cup unsalted butter (melted)

Additional ingredients

  • 1 cup shredded sharp cheddar cheese
  • 2 tbsp fresh thyme, chopped
  • 2 tbsp fresh parsley, chopped

Instructions 

  • Preheat oven to 375°F (190°C) and prepare a muffin tin.
  • Mix dry ingredients with cheese and herbs in a large bowl.
  • Whisk wet ingredients in another bowl until smooth.
  • Combine wet and dry mixtures gently until just combined.
  • Spoon batter into muffin tin and bake for 20-25 minutes.
  • Cool for 5 minutes before serving.

Notes

Use fresh herbs for best flavor and avoid over-mixing the batter.
Calories: 180kcal
Cost: $12
Course: Breakfast
Cuisine: American
Keyword: Cheese, herbs

Welcome, dear friends! Today, I invite you to join me in creating an exquisite no bake chocolate cheesecake that is sure to tantalize your taste buds and bring smiles to your loved ones. This dessert boasts a rich, velvety texture and an irresistible chocolate flavor that makes it perfect for any occasion, from family gatherings to romantic dinners. Get ready to dive into a recipe that not only celebrates the joy of cooking but also embodies the warmth of Mediterranean hospitality.

Why You’ll Love This Recipe

Let me share with you why this no bake chocolate cheesecake will become your go-to dessert:

  • Easier than baking: With no oven required, this recipe is perfect for those hot summer days when you want something sweet without heating up your kitchen.
  • Decadent chocolate flavor: Each bite is a harmonious blend of rich chocolate and creamy cheesecake that melts in your mouth.
  • Customizable: You can easily adapt the recipe to suit your tastes—add nuts, fruits, or even a splash of liqueur for a personal touch.
  • Perfect for any event: Whether it’s a birthday party or a simple family dinner, this cheesecake is a showstopper that will impress everyone.
  • Make-ahead convenience: This cheesecake can be prepared a day in advance, making it a stress-free option for entertaining.

Ingredients Breakdown

Let’s gather our ingredients and explore some substitutions to cater to your preferences:

  • 25 Oreos or chocolate creme cookies: These will form the base of your cheesecake. You can substitute with any chocolate cookie of your choice.
  • 5 tbsp unsalted butter, melted: This helps bind the crust together. If you prefer, coconut oil can be used as a dairy-free alternative.
  • 250g dark chocolate: Opt for at least 70% cocoa for a rich flavor. If dark chocolate isn’t your favorite, feel free to use semi-sweet or milk chocolate.
  • 1 1/2 cup heavy cream: This is divided for both the filling and the chocolate ganache. For a lighter option, you can use whipped coconut cream.
  • 24 oz cream cheese, room temperature: This gives the cheesecake its creamy texture. Neufchâtel cheese can be a lower-fat alternative.
  • 1 cup granulated sugar: You can use coconut sugar or a sugar substitute for a healthier option.
  • 1/2 tsp salt: Enhances the flavors of the cheesecake.
  • Optional: 1 tsp instant coffee: This intensifies the chocolate flavor. Skip it if you prefer a pure chocolate taste.
  • 100g chocolate (for ganache): Use the same type as in the filling to maintain consistency.
  • 1/4 cup granulated sugar (for whipped cream): This adds sweetness to your whipped cream topping.
  • 3 tbsp cocoa powder, sifted: For a deeper chocolate flavor in the whipped cream.

Pro Tips for the Best No Bake Chocolate Cheesecake

Follow these expert insights to ensure your cheesecake turns out perfectly:

  • Use room temperature cream cheese: This will help achieve a smooth, lump-free filling.
  • Chill your mixing bowl: For whipped cream, chilling your bowl and beaters beforehand will help achieve stiff peaks faster.
  • Don’t overmix the whipped cream: Gently fold in the whipped cream to keep it light and airy.
  • Let it set overnight: While 6 hours will suffice, allowing the cheesecake to set overnight will enhance its flavor and texture.
  • Use a springform pan: This makes it easy to remove the cheesecake without damaging its beautiful presentation.
  • Experiment with flavors: Try adding a splash of vanilla extract or almond extract to the filling for an exciting twist.
  • Serve chilled: Make sure to serve the cheesecake straight from the fridge for the best texture.
  • Decorate with fresh fruits: Berries or sliced bananas on top add a refreshing contrast to the rich chocolate.
  • Keep it covered: Store leftover cheesecake in an airtight container to maintain its freshness.
  • Make it a day ahead: The flavors meld beautifully when given time to rest.

Common Mistakes and Troubleshooting

Side view of a decadent no-bake chocolate cheesecake showcasing its creamy layers and rich chocolate crust.

Here are some common pitfalls and how to avoid them:

  • Lumpy filling: Make sure your cream cheese is at room temperature before mixing to prevent lumps.
  • Crust falling apart: Ensure the cookie crumbs are finely ground and mixed well with melted butter.
  • Cheesecake not setting: If it’s too soft, it may need more chilling time. Make sure to give it a full 6-8 hours.
  • Ganache too thick: If it cools too much, reheat gently to achieve a pourable consistency.
  • Whipped cream deflating: Overmixing can cause the whipped cream to lose its structure. Fold gently!

Delicious Variations to Try

Feeling adventurous? Here are some fun variations to spice up your cheesecake:

  • Nutty chocolate cheesecake: Add 1 cup of finely chopped nuts (like walnuts or pecans) to your crust for extra crunch.
  • Mint chocolate cheesecake: Incorporate peppermint extract into the filling for a refreshing twist.
  • Fruit-topped cheesecake: Top your cheesecake with fresh raspberries or strawberries for a pop of color and flavor.
  • Caramel drizzle: Drizzle homemade or store-bought caramel sauce over the cheesecake before serving for an indulgent touch.

Storage and Make-Ahead Instructions

This cheesecake is perfect for making ahead of time. Here’s how to store it:

  • Refrigerate: Cover the cheesecake tightly with plastic wrap or aluminum foil, and it will keep well in the fridge for up to 5 days.
  • Freeze: You can freeze individual slices for up to 3 months. Just wrap them tightly in plastic wrap and place them in a freezer-safe container.
  • Thawing: To enjoy frozen slices, simply transfer them to the fridge to thaw overnight before serving.

Frequently Asked Questions

Let’s answer some common questions about this delightful dessert:

  • Can I use a different type of cookie for the crust? Absolutely! Any chocolate cookie will work beautifully, including gluten-free options.
  • What can I use instead of cream cheese? You can try mascarpone or silken tofu for a dairy-free alternative.
  • How do I know when the cheesecake is set? It should be firm to the touch and hold its shape when cut.
  • Can I make this cheesecake without chocolate? Yes, you can replace the chocolate with fruit puree for a lighter flavor.
  • How long does it take to set? Ideally, let it chill for at least 6 hours, but overnight is best.
  • Can I add a layer of fruit on top? Yes! Fresh fruit complements the rich chocolate flavor beautifully.
  • Is this recipe suitable for vegans? You can adapt it using vegan cream cheese and coconut cream.
  • What’s the best way to serve it? Slice it cold, and consider adding a dollop of whipped cream or a drizzle of chocolate sauce for extra indulgence.

Nutritional Tips and Dietary Adaptations

For those mindful of dietary restrictions, here are a few tips:

  • Lower sugar options: Substitute granulated sugar with a sugar alternative or reduce the amount to your desired sweetness.
  • Dairy-free adaptation: Use vegan cream cheese and coconut cream for a rich, dairy-free version.
  • Gluten-free crust: Opt for gluten-free chocolate cookies to make this dessert suitable for those with gluten sensitivities.
  • Portion control: Slice your cheesecake into smaller pieces for a satisfying, guilt-free treat.

Essential Equipment Recommendations

To create this masterpiece, here’s a list of helpful tools:

  • 9″ springform pan: Essential for easy removal and presentation of your cheesecake.
  • Food processor: Makes creating the crust a breeze by finely grinding the cookies.
  • Mixing bowls: Have a few of varying sizes for mixing ingredients and whipping cream.
  • Electric mixer: A hand mixer or stand mixer will help you achieve perfectly whipped cream.
  • Rubber spatula: Perfect for folding in ingredients gently without deflating your whipped cream.

Serving Suggestions

When it’s time to serve your cheesecake, consider these delightful ideas:

  • Garnish with fresh berries: A mix of strawberries, raspberries, or blueberries adds a vibrant touch.
  • Chocolate shavings: Sprinkle some dark chocolate shavings on top for an elegant finish.
  • Whipped cream clouds: Serve alongside a dollop of whipped cream for a creamy contrast to the rich chocolate.
  • Mint leaves: A few fresh mint leaves can brighten the presentation and palate.

Conclusion

As we wrap up this culinary journey, I hope you feel inspired to gather your ingredients and create this heavenly no bake chocolate cheesecake. Remember, cooking is not just about feeding the body; it’s about nurturing the soul and creating memories with loved ones. So grab a plate, share a slice, and celebrate the joy of togetherness. Happy cooking, amigos!

BEST NO BAKE CHOCOLATE CHEESECAKE RECIPE

Prep Time 30 minutes
Total Time 30 minutes
Servings 12 pieces
Calories 550
A rich and creamy no-bake chocolate cheesecake that combines a chocolate cookie crust with a luscious chocolate filling, topped with ganache and whipped cream.

Ingredients

Crust

  • 285 g Oreos or chocolate creme cookies
  • 70 g unsalted butter, melted

Chocolate Filling

  • 250 g dark chocolate (see notes)
  • 360 g heavy cream, divided (3/4 cup + 3/4 cup)
  • 680 g cream cheese (room temperature)
  • 200 g granulated sugar
  • 0.5 tsp salt
  • 1 tsp instant coffee (optional)

Topping & Ganache

  • 120 g heavy cream (½ cup)
  • 100 g chocolate (dark, semi-sweet or milk)
  • 240 g heavy cream (chilled)
  • 50 g granulated sugar (¼ cup)
  • 25 g cocoa powder, sifted

Instructions 

  • Line a 9" springform pan with parchment paper or lightly butter the bottom and sides.
  • Process cookies with melted butter until fine crumbs, press into pan to form crust, then chill.
  • Heat chocolate and ¾ cup heavy cream, melt over double boiler, then cool for 5 minutes.
  • Whisk cream cheese, sugar, and salt until smooth, then fold in cooled ganache.
  • Whip remaining heavy cream until stiff peaks, fold into filling, then pour into crust and chill for at least 6 hours.
  • Top with ganache and chocolate whipped cream, then serve.

Notes

Ensure the cheesecake is well chilled before serving for best texture.
Calories: 550kcal
Cost: $15
Course: Dessert
Cuisine: American
Keyword: cheesecake, chocolate, no-bake

Welcome to a Mediterranean Culinary Adventure!

Let’s dive into a delightful breakfast experience that transforms the classic avocado toast into a Mediterranean masterpiece. This dish, featuring a perfectly poached egg atop creamy mashed avocado, is not just a meal; it’s a celebration of flavors, textures, and the joy of cooking. The combination of ripe avocados, zesty lemon, and a hint of olive oil will awaken your taste buds and bring a taste of sunny Mediterranean mornings to your table. Join me, Rafael, in creating a dish that is as beautiful as it is delicious, perfect for sharing with family and friends!

Why You’ll Love This Recipe

  • Flavor Explosion: The rich creaminess of avocado meets the soft, runny yolk of the poached egg, creating a delightful burst of flavor in every bite.
  • Simple & Quick: With just a few fresh ingredients and minimal cooking time, you can whip up this delicious breakfast in under 15 minutes!
  • Health Benefits: Packed with healthy fats from avocados and protein from eggs, this dish supports heart health and keeps you energized throughout the morning.
  • Customizable: Whether you prefer it spicy, savory, or topped with your favorite herbs, this recipe can easily be adapted to suit your taste.
  • Perfect for All Occasions: Great for a casual brunch, a quick weekday breakfast, or an elegant dinner appetizer, this dish fits any meal!

Ingredient Breakdown

Let’s look at the ingredients that come together to make this Mediterranean avocado toast with poached egg:

  • Avocados: 2 ripe avocados are essential for that creamy base. Choose avocados that yield slightly when pressed for the best results.
  • Eggs: 2 large eggs are needed for poaching. Fresh eggs work best for achieving that delicate poached texture.
  • Bread Slices: 2 thick-cut slices of sourdough or whole grain bread give a hearty foundation for your toppings.
  • Lemon Juice: 1 teaspoon of fresh lemon juice not only adds brightness but also helps prevent the avocado from browning.
  • Salt: ½ teaspoon of salt enhances all the flavors and is critical for seasoning the avocado mash.
  • Black Pepper: ¼ teaspoon of freshly cracked black pepper for a touch of spice.
  • White Vinegar: 1 tablespoon added to the poaching water to help keep the egg whites together.
  • Olive Oil: 1 teaspoon (optional) for drizzling, adding richness and a touch of Mediterranean flair.

Ingredient Substitutions

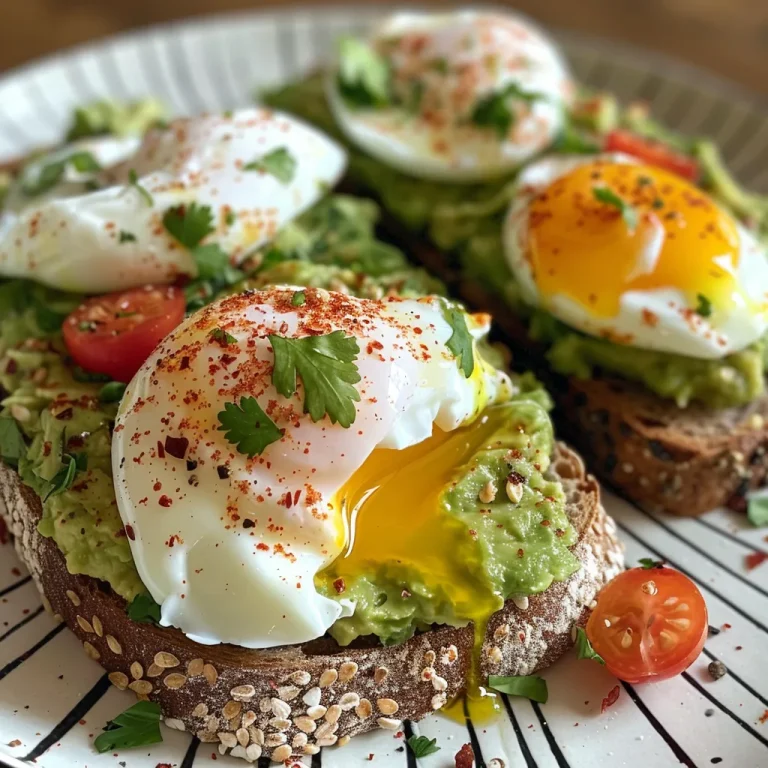
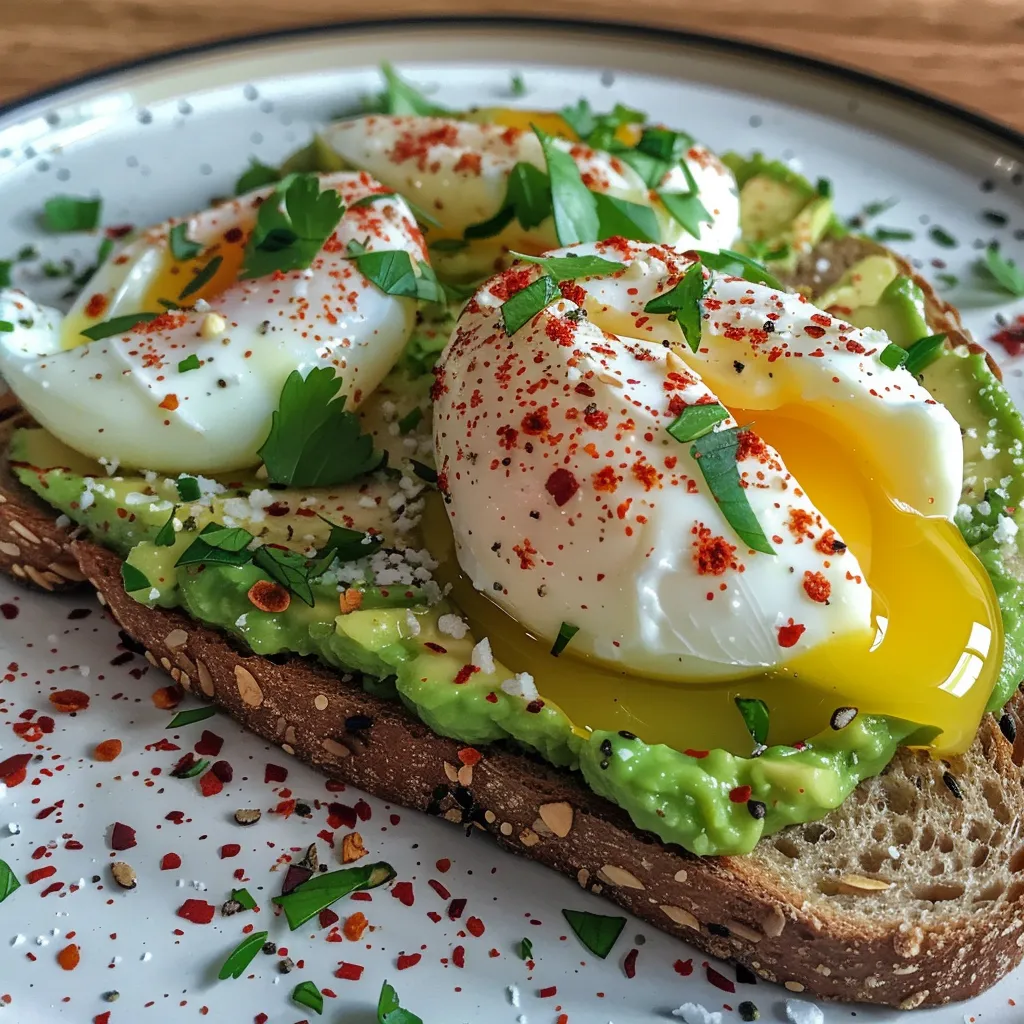
Side view of thick sourdough avocado toast garnished with a runny poached egg.

Don’t have all the ingredients? No worries! Here are some substitutions you can consider:

  • Avocados: If avocados are unavailable, try using hummus or a bean spread for a different yet creamy base.
  • Eggs: For a vegan alternative, consider using tofu scramble or chickpea flour to create a similar texture.
  • Bread: Gluten-free bread or even crispbread can be used for a gluten-free version.
  • Lemon Juice: Lime juice can work as a substitute, offering a slightly different but refreshing flavor.

Chef’s Pro Tips for Perfect Results

Let’s make sure your avocado toast with poached egg turns out perfectly every time:

  • Choose the Right Avocado: Select avocados that are ripe but not overly soft; they should yield gently to pressure.
  • Poach with Care: Swirl the water gently before adding the eggs to create a whirlpool effect that helps the whites wrap around the yolk.
  • Don’t Overcook: Aim for 3-4 minutes of poaching for a runny yolk; adjust timing for firmer yolks if preferred.
  • Toast it Right: Toast your bread until it’s golden and crispy, ensuring it can support the weight of the toppings.
  • Mix Avocado Well: Mash the avocado thoroughly with lemon juice and seasonings for a smooth and flavorful spread.
  • Experiment with Toppings: Add crumbled feta, chili flakes, or fresh herbs like basil or parsley for an extra layer of flavor.
  • Use Quality Olive Oil: A drizzle of high-quality extra virgin olive oil enhances the dish’s richness and adds depth.
  • Serve Fresh: Enjoy your toast immediately after preparing to savor the flavors at their best.

Common Mistakes and Troubleshooting

Even the best chefs can make mistakes! Here are some common pitfalls and how to avoid them:

  • Overcooked Eggs: If your eggs are too firm, reduce the poaching time by a minute and keep an eye on them.
  • Browning Avocado: To prevent browning, use lemon juice immediately after mashing and cover tightly if not serving right away.
  • Too Much Salt: Always start with less salt; you can add more later but it’s hard to fix if you overdo it.

Delicious Variations

Make this dish your own with these delightful variations:

  • Spicy Avocado Toast: Add a pinch of cayenne pepper or a drizzle of sriracha for a kick!
  • Guacamole Twist: Mix in diced tomatoes, onions, and cilantro for a guacamole-inspired spread.
  • Herbed Delight: Blend in fresh herbs like dill or chives into the avocado for a fresh twist.
  • Sweet & Savory: Top with sliced strawberries and a sprinkle of balsamic glaze for a unique flavor combination.

Storage and Make-Ahead Instructions

This dish is best enjoyed fresh, but here are some tips for storage and preparation:

  • Avocado Prep: If you need to prepare in advance, mash the avocados but add lemon juice to prevent browning. Store in an airtight container.
  • Egg Preparation: Poached eggs can be made ahead of time; cool them in a bowl of cold water and reheat in hot water when ready to serve.

Frequently Asked Questions

Here are some common questions about preparing this delightful dish:

  • Can I use frozen avocados? Yes, frozen avocado can be thawed and used, but it may be less creamy.
  • Can I poach more than two eggs at once? Yes, just ensure your pot is large enough and the water remains at a gentle simmer.
  • What if I don’t have vinegar? You can poach without vinegar; just be cautious of the egg whites spreading.
  • How do I know when the egg is done? For a perfectly poached egg, the white should be set while the yolk remains soft.
  • Can I use an egg cooker? Yes, an egg cooker can help achieve consistent results for poached eggs.
  • What bread works best? Sourdough or whole grain bread enhances the dish’s texture and flavor.
  • Can I make this vegan? Yes, substitute eggs with a tofu scramble or chickpea flour mix for a similar experience.
  • How do I serve this dish? Pair with fresh fruit, a side salad, or even a glass of freshly squeezed juice for a complete meal.

Nutrition Tips and Dietary Adaptations

This avocado toast is not only delicious but also packed with nutrients. Here’s how you can make it even healthier:

  • Add Greens: Top your toast with spinach or arugula for an extra boost of vitamins and minerals.
  • Use Whole Grains: Opt for whole grain or sprouted bread for added fiber and nutrients.
  • Mind Your Portions: If watching calories, adjust the quantity of avocado and eggs as needed.

Equipment Recommendations

To make your cooking experience smoother, here are some equipment suggestions:

  • Non-stick saucepan: Ideal for poaching eggs without sticking.
  • Slotted spoon: Perfect for gently removing poached eggs from the water.
  • Mixing bowl: Use for mashing avocados and mixing with seasonings.
  • Toaster or oven: For perfectly crispy toast.

Serving Suggestions

When it comes to serving, presentation can elevate your dish. Consider these ideas:

  • Garnish: Sprinkle fresh herbs, chili flakes, or even a drizzle of balsamic glaze on top for an appealing finish.
  • Accompaniments: Serve alongside grilled tomatoes, olives, or a side of mixed greens for a balanced meal.
  • Drinks: Pair with a refreshing mint tea or a frothy cappuccino for a delightful breakfast experience.

Conclusion: Celebrate Every Bite!

Avocado toast with poached egg is more than just a trendy breakfast; it’s a wonderful way to embrace the Mediterranean way of life—simple, fresh, and bursting with flavor. Whether you’re enjoying it alone or sharing it with loved ones, each bite is a reminder of the joy of cooking and the beauty of good food. So grab your ingredients, let your kitchen come alive, and celebrate the flavors of the Mediterranean in your own home. Bon appétit!

Avocado Toast with Poached Egg

Prep Time 5 minutes
Cook Time 10 minutes
Total Time 15 minutes
Servings 2 servings
Calories 350
A quick and nutritious breakfast featuring creamy avocado, perfectly poached eggs, and toasted bread.

Ingredients

Main Ingredients

  • 2 pieces ripe avocados
  • 2 pieces eggs
  • 2 slices thick-cut bread (such as sourdough or whole grain)
  • 1 teaspoon lemon juice
  • 0.5 teaspoon salt
  • 0.25 teaspoon black pepper
  • 1 tablespoon white vinegar
  • 1 teaspoon olive oil (optional)

Instructions 

  • Simmer water with vinegar in a saucepan.
  • Mash avocados with lemon juice, salt, and pepper.
  • Poach eggs in simmering water for 3–4 minutes.
  • Toast bread and spread mashed avocado on each slice.
  • Remove eggs with a slotted spoon and place on toast.
  • Season with pepper and serve warm.

Notes

For extra flavor, add toppings like herbs or hot sauce.
Calories: 350kcal
Cost: $10
Course: Breakfast
Cuisine: American
Keyword: Avocado, Egg, Toast

Welcome to the Heartwarming World of Homemade Pita Bread

Join me, Rafael, on a delightful culinary adventure as we explore the art of making homemade pita bread. With just a handful of ingredients, you can create warm, fluffy pockets that are perfect for sharing and celebrating with loved ones. Let’s bring the Mediterranean spirit into our kitchens!

Why You’ll Love This Recipe

  • Simple Ingredients: This recipe uses just five basic ingredients, making it accessible for everyone, even beginners.
  • Fast and Fun: In less than an hour, you can have fresh pita bread ready to enjoy, perfect for a spontaneous meal.
  • Versatile Uses: From sandwiches to dipping, these pitas can elevate any dish or be enjoyed on their own.
  • Healthier Option: Homemade pita is healthier than store-bought, allowing you to control the ingredients and avoid preservatives.
  • Family Activity: Making pita bread can be a fun activity for the whole family, fostering togetherness and creativity in the kitchen.

Ingredients for Perfect Pita Bread

Let’s break down the ingredients you’ll need to make this delightful pita bread:

  • 1 cup warm water (237g): This activates the yeast, ensuring a lovely rise.
  • 2 1/4 teaspoons instant yeast (1 packet): The star of our show, providing that perfect puff.
  • 1 teaspoon granulated sugar: A touch of sweetness that helps the yeast thrive.
  • 1 teaspoon fine sea salt: Balances the flavors and enhances the bread.
  • 1 Tablespoon olive oil: Adds richness and moisture to the dough.
  • 2 ¼ cups all-purpose flour (281g): The base for our dough, creating that lovely texture.

If you’re looking for substitutions, you can use whole wheat flour for a healthier twist or gluten-free flour for a gluten-free option. Just ensure to adjust the water content accordingly.

How to Make Pita Bread: A Step-by-Step Guide

Side view of pita bread revealing its soft texture and fluffy interior.

Now, let’s dive into the steps to create your own fluffy pita bread:

  • Make Dough: In a large bowl, mix the warm water, yeast, sugar, salt, olive oil, and 1 cup of flour. Gradually add more flour until the dough comes together but remains slightly sticky. Knead in the bowl for about a minute until smooth.
  • Rest: Transfer the dough to a well-greased bowl, cover it with a clean kitchen towel, and let it rest for 40 minutes. You can also refrigerate it until you’re ready to use it.
  • Divide Dough: Once rested, divide the dough into 8 equal pieces. Roll each piece into a thin circle, about 1/4 inch thick.
  • Cook: Heat a griddle or large skillet over medium-high heat. Lightly grease the pan, then lay the pitas flat. Cook for about 2 minutes until lightly golden, then flip and cook for another minute. Remove and keep warm under a kitchen towel.
  • Store: Leftover cooked pitas can be stored in an airtight container at room temperature for 2-3 days, in the fridge for up to 5 days, or frozen for later use.

Pro Tips for Fluffy Pita Bread

Here are some expert insights to ensure your pita bread is nothing short of perfection:

  • Stickiness is Good: Don’t be afraid of a slightly sticky dough; this ensures a tender pita.
  • High Heat: Ensure your cooking surface is hot enough to get that perfect puff.
  • Roll Thin: The thinner you roll your dough, the puffier the pita will be.
  • Cover to Keep Warm: Always keep your cooked pitas wrapped in a towel to maintain their warmth and softness.
  • Experiment with Flavors: Try adding herbs or spices to the dough for a unique twist!
  • Don’t Overcrowd the Pan: Cook in batches to avoid steaming instead of baking.
  • Use a Pizza Stone: If you have one, a pizza stone can help achieve an even higher heat.
  • Check Your Yeast: Ensure your yeast is fresh for the best rise.

Common Mistakes and Troubleshooting

Even the best of us may encounter a hiccup or two. Here are some common mistakes and how to fix them:

  • Dough Not Rising: If your dough doesn’t rise, your yeast may be dead. Always check the expiration date.
  • Pitas Not Puffing: Ensure your cooking surface is hot enough. If not, the moisture in the dough will escape instead of creating steam.
  • Dry Pitas: If your pitas turn out dry, try adding a touch more olive oil to your dough next time.
  • Uneven Cooking: Rotate your pitas halfway through cooking to ensure even browning.

Delicious Variations of Pita Bread

Why not get adventurous? Here are some variations to try:

  • Whole Wheat Pitas: Substitute half or all the all-purpose flour with whole wheat flour for a nuttier flavor.
  • Herbed Pitas: Add dried herbs like oregano or rosemary into the dough for added flavor.
  • Spiced Pitas: Incorporate spices like cumin or coriander for a Middle Eastern twist.
  • Stuffed Pitas: Fill your pitas with cheese or cooked vegetables before cooking for a delightful surprise!

Storage and Make-Ahead Instructions

Planning ahead? Here’s how to store and prepare your pitas:

  • Make Ahead: You can prepare the dough a day in advance; just refrigerate it and let it come to room temperature before rolling out.
  • Freezing: Freeze cooked pitas separated by parchment paper in an airtight container. Reheat in the oven or skillet when ready to enjoy.
  • Room Temperature Storage: Keep cooked pitas wrapped in a clean towel or in a bread box for up to 2-3 days.

Nutritional Tips and Dietary Adaptations

This recipe can cater to various dietary needs:

  • Gluten-Free Option: Use a gluten-free all-purpose flour blend to make this recipe gluten-free.
  • Low-Carb Variation: Try using almond flour or coconut flour for a low-carb alternative.
  • Vegan Friendly: This recipe is naturally vegan; just ensure your other ingredients align with your dietary preferences.

Essential Equipment for Making Pita Bread

To make the process smooth and enjoyable, consider having the following equipment handy:

  • Mixing Bowls: A large bowl for mixing the dough.
  • Rolling Pin: To roll out your dough into thin circles.
  • Griddle or Skillet: A heavy-bottomed skillet or griddle for even cooking.
  • Kitchen Towel: To keep your pitas warm post-cooking.

Serving Suggestions for Your Delicious Pita Bread

Now that you’ve made your pita bread, here are some delightful ways to serve it:

  • Classic Gyros: Fill with sliced meats, tzatziki sauce, and fresh veggies for a hearty meal.
  • Hummus and Veggies: Pair with homemade hummus and a platter of fresh vegetables for a healthy snack.
  • Wraps: Use as a wrap for grilled chicken, falafel, or any of your favorite fillings.
  • Chips: Cut leftover pitas into triangles, brush with olive oil, and bake them for delicious pita chips.

Frequently Asked Questions

Here are some common questions about making pita bread:

  • Can I use active dry yeast instead of instant yeast? Yes, just activate it in warm water with sugar before mixing it into the dough.
  • Why didn’t my pitas puff? This can happen if the pan isn’t hot enough or if the dough was rolled too thick.
  • How can I tell if my pitas are done? They should be lightly golden on both sides and puffed up.
  • What’s the best way to reheat pita bread? Warm in a dry skillet or oven until just heated through.
  • Can I add ingredients to the dough? Absolutely! Herbs and spices can enhance the flavor significantly.
  • How long can I store homemade pita bread? Store at room temperature for 2-3 days or in the fridge for up to 5 days.
  • Can I freeze pita bread? Yes, just ensure you separate them with parchment paper and store in an airtight container.
  • Is this recipe suitable for children? Yes! Kids can join in rolling and shaping the dough for a fun family activity.

Conclusion: Bring Mediterranean Joy to Your Table

Making homemade pita bread is more than just a recipe; it’s a celebration of flavors and cultures. The warmth of freshly baked bread, the joy of sharing it with loved ones, and the satisfaction of creating something from scratch are what it’s all about. So roll up your sleeves, gather your ingredients, and let’s create some kitchen magic together!

Pita Bread

Prep Time 15 minutes
Cook Time 10 minutes
Total Time 25 minutes
Servings 8 pieces
Calories 150
Enjoy homemade pita bread with soft, fluffy texture perfect for sandwiches or snacks.

Ingredients

Dough

  • 1 cup warm water
  • 2 1/4 teaspoons instant yeast (1 packet)
  • 1 teaspoon granulated sugar
  • 1 teaspoon fine sea salt
  • 1 Tablespoon olive oil
  • 2 ¼ cups all-purpose flour

Instructions 

  • Mix water, yeast, sugar, salt, olive oil, and 1 cup of flour. Add more flour until dough is soft and slightly sticky. Knead until smooth.
  • Place dough in a greased bowl, cover, and rest for 40 minutes or refrigerate.
  • Divide dough into 8 pieces and roll into thin circles.
  • Heat a skillet over medium-high heat, lightly oil, and cook pitas 2 minutes per side until golden.
  • Keep cooked pitas warm in a towel. Store leftovers in an airtight container.

Notes

Leftover pitas can be stored at room temperature for 2-3 days or frozen for longer storage.
Calories: 150kcal
Cost: $3
Course: Bread
Cuisine: Mediterranean
Keyword: Pita

Welcome to the World of Rich Chocolate Cake

Ah, the aroma of a freshly baked chocolate cake wafting through the air, the warm, inviting scent that pulls you into the kitchen and wraps you in a cozy embrace. Today, I’m excited to share with you my beloved recipe for a decadent chocolate cake that not only tantalizes your taste buds but also brings the joy of cooking and sharing together. This is not just any dessert; it’s a celebration of life’s sweetest moments, crafted with love and a sprinkle of Mediterranean charm.

In this guide, you’ll discover how to create a rich chocolate cake that’s moist and bursting with flavor, thanks to the delightful addition of brewed coffee. Whether you’re celebrating a birthday, an anniversary, or simply indulging yourself on a cozy Sunday afternoon, this cake is sure to be a showstopper that brings smiles and satisfaction.

Why You’ll Love This Recipe

  • Unforgettable Flavor: The combination of rich cocoa and brewed coffee elevates the chocolate flavor to new heights, making every slice a heavenly experience.
  • Moist and Tender: Thanks to the careful balance of ingredients, this cake stays moist for days, ensuring you can savor it long after baking.
  • Simple Preparation: With straightforward steps, even novice bakers can achieve a perfect result without stress!
  • Versatile Use: This cake serves beautifully on its own or can be dressed up with frosting, fresh fruit, or a scoop of ice cream.
  • Make-Ahead Friendly: You can prepare the cake in advance, making it perfect for parties or gatherings.

Ingredient Breakdown

Let’s dive into the heart of this recipe: the ingredients! Each one plays a vital role in creating the perfect rich chocolate cake.

  • All-Purpose Flour: Provides the structure for the cake. If you want a gluten-free option, almond flour can be a great substitute.
  • Granulated Sugar: Sweetens the cake and helps with moisture retention. Brown sugar can be used for a deeper flavor.
  • Unsweetened Cocoa Powder: The star of the show! Look for high-quality cocoa for the best chocolate flavor.
  • Baking Powder and Baking Soda: These leavening agents help the cake rise to perfection, giving it that light, fluffy texture.
  • Salt: Enhances the flavors of the other ingredients.
  • Whole Milk: Adds moisture. You can substitute with buttermilk for a tangy twist.
  • Vegetable Oil: Keeps the cake moist. Olive oil can add a unique taste that pairs beautifully with chocolate.
  • Eggs: Bind the ingredients together and add richness. Flax eggs can be used for a vegan version.
  • Pure Vanilla Extract: A must for depth of flavor.
  • Hot Brewed Coffee: Enhances the chocolate flavor without making the cake taste like coffee. Brew it strong for the best results.
  • Bittersweet Chocolate: Used for the ganache, elevating the cake from simple to sublime.
  • Heavy Cream and Unsalted Butter: Essential for a luscious ganache that coats the cake beautifully.

Step-by-Step Instructions

Juicy chocolate cake slice showcasing layers and a glossy chocolate topping.

Now, let’s put these ingredients to work to create a masterpiece!

  1. Preheat the oven: Set it to 350°F (175°C). Grease and line two 9-inch round cake pans with parchment paper to prevent sticking.
  2. Sift the dry ingredients: In a large bowl, sift together the flour, sugar, cocoa powder, baking powder, baking soda, and salt. This step ensures even distribution and removes any lumps.
  3. Mix the wet ingredients: In another bowl, whisk together the milk, vegetable oil, eggs, and vanilla extract until fully combined.
  4. Combine the mixtures: Gently add the wet ingredients into the dry mixture, stirring until just combined. Be careful not to overmix!
  5. Incorporate the coffee: Pour in the hot brewed coffee and mix until the batter is smooth and slightly runny.
  6. Divide the batter: Evenly pour the batter into your prepared cake pans.
  7. Bake to perfection: Place in the oven and bake for 30 to 35 minutes, or until a toothpick inserted in the center comes out clean.
  8. Cool down: Let the cakes cool in the pans for 10 minutes, then remove and transfer them to a wire rack to cool completely.
  9. Prepare the ganache: Place the chopped bittersweet chocolate in a heatproof bowl. Heat the heavy cream until it simmers, then pour it over the chocolate. Let it sit for 2 minutes, add butter, and stir until smooth.
  10. Assemble the cake: Spread ganache on top of one cake layer, place the second layer on top, and coat the entire cake with the remaining ganache. Allow it to set before slicing.

Pro Tips for the Perfect Cake

  • Room Temperature Ingredients: Ensure your eggs and milk are at room temperature for a smoother batter.
  • Don’t Overmix: Mix just until combined to keep the cake tender.
  • Use Quality Chocolate: High-quality bittersweet chocolate makes a significant difference in the ganache.
  • Cool Completely: Allow the cakes to cool completely before frosting to prevent melting the ganache.
  • Test for Doneness: Use a toothpick to check; it should come out clean or with a few moist crumbs.
  • Flavor Variations: Consider adding orange zest or espresso powder for a different flavor profile.
  • Layering Technique: For a more dramatic presentation, slice each cake in half horizontally and add ganache in between layers.
  • Decorate with Fresh Fruit: Add berries or edible flowers on top for a beautiful finish.

Common Mistakes and Troubleshooting

Even the best bakers can run into issues. Here’s how to avoid common pitfalls:

  • Dry Cake: This can happen if you overbake. Keep an eye on the timer and check a few minutes early.
  • Dense Texture: Caused by overmixing the batter. Mix just until combined for a lighter cake.
  • Frosting Sliding Off: Make sure the cake is cool before frosting and use a thicker ganache if necessary.
  • Uneven Baking: Rotate the cakes halfway through baking for even heat distribution.

Variations to Explore

Feeling adventurous? Here are some delightful variations you can try:

  • Chocolate Chip Cake: Fold in a cup of chocolate chips into the batter for added texture and sweetness.
  • Mocha Cake: Add a teaspoon of instant espresso powder to the batter for a rich mocha flavor.
  • Mint Chocolate Cake: Incorporate mint extract into the ganache for a refreshing twist.
  • Nutty Delight: Add chopped nuts such as walnuts or hazelnuts to the batter for a delightful crunch.

Storage and Make-Ahead Instructions

This chocolate cake can be made ahead of time and stored properly for later enjoyment:

  • Room Temperature: Store the cake at room temperature in an airtight container for up to 3 days.
  • Refrigeration: If you need to store it longer, keep it in the fridge for up to a week. Allow it to come to room temperature before serving.
  • Freezing: Wrap the cooled cakes tightly in plastic wrap and freeze for up to 3 months. Thaw in the fridge overnight before frosting.

Frequently Asked Questions

Here are some common questions about this delightful recipe:

  • Can I use dark cocoa powder? Yes! Dark cocoa will give a richer flavor but may alter the color slightly.
  • What if I don’t have brewed coffee? You can substitute with hot water, but the coffee enhances the chocolate flavor.
  • Can I make this cake gluten-free? Absolutely! Substitute all-purpose flour with a gluten-free blend.
  • How can I make it dairy-free? Use almond milk and a dairy-free butter alternative.
  • What’s the best way to serve this cake? Serve it plain, or add a dollop of whipped cream and fresh berries for an extra touch.
  • Can I turn this into cupcakes? Yes! Bake for about 18-20 minutes instead of 30-35 minutes.
  • How do I achieve a glossy ganache? Make sure to stir gently and allow it to set properly after coating the cake.
  • What if my ganache is too thick? You can reheat it slightly and add a bit more cream to reach your desired consistency.

Nutrition Tips and Dietary Adaptations

For those mindful of dietary choices, here are some tips:

  • Reduce Sugar: You can cut the sugar by half without compromising taste too much.
  • Low-Calorie Option: Use applesauce as a partial substitute for oil to lower the calorie count.
  • High-Protein Version: Add protein powder to the batter for a nutritional boost.
  • Vegan Adaptation: Use flax eggs and non-dairy milk to make this cake entirely plant-based.

Equipment Recommendations

Here’s what you’ll need to create this masterpiece:

  • Mixing Bowls: A set of diverse sizes makes mixing easier.
  • Measuring Cups and Spoons: Accurate measurements are crucial for baking success.
  • Electric Mixer: While a whisk works, an electric mixer saves time and effort.
  • Baking Pans: Quality non-stick or lined pans ensure easy removal.
  • Cooling Rack: Essential for cooling the cakes evenly.

Serving Suggestions

Now that your cake is ready, how can you serve it to impress your guests?

  • Classic Slice: Serve a slice with a dusting of powdered sugar for a simple yet elegant presentation.
  • With Ice Cream: A scoop of vanilla ice cream on the side complements the rich flavors beautifully.
  • Fresh Berries: Decorate with strawberries or raspberries for a pop of color and acidity.
  • Chocolate Sauce: Drizzle some extra melted chocolate over the top for indulgence.

Conclusion

And there you have it, dear friends! A rich chocolate cake that is not just a dessert but a celebration of life’s sweetest moments. I hope this recipe brings as much joy to your kitchen as it does to mine. Gather your loved ones, share a slice, and create memories that will linger long after the last bite. Bon appétit! 🎉

Rich Chocolate Cake Indulgence

Prep Time 20 minutes
Cook Time 35 minutes
Total Time 55 minutes
Servings 12 pieces
Calories 550
A decadent chocolate cake featuring rich ganache and moist layers, perfect for special occasions.

Ingredients

Dry ingredients

  • 2 cups all-purpose flour
  • 1 3/4 cups granulated sugar
  • 3/4 cup unsweetened cocoa powder
  • 2 teaspoons baking powder
  • 1/2 teaspoon baking soda
  • 1/2 teaspoon salt

Wet ingredients

  • 1 cup whole milk, room temperature
  • 1/2 cup vegetable oil
  • 2 large eggs, room temperature
  • 2 teaspoons pure vanilla extract

Additional liquids

  • 1 cup hot brewed coffee
  • 8 ounces bittersweet chocolate, finely chopped
  • 1 cup heavy cream
  • 2 tablespoons unsalted butter

Instructions 

  • Preheat oven to 350°F. Prepare two 9-inch pans.
  • Mix dry ingredients in a bowl. Whisk wet ingredients separately.
  • Combine wet and dry, then add coffee and mix until smooth.
  • Divide batter into pans and bake for 30-35 minutes. Cool completely.
  • Heat cream, pour over chocolate, add butter, stir until smooth to make ganache.
  • Spread ganache between layers and over the cake. Let set before serving.

Notes

Ensure cakes are fully cooled before applying ganache for best results.
Calories: 550kcal
Cost: $15
Course: Dessert
Cuisine: International
Keyword: chocolate

Experience the Vibrant Flavors of Our Green Goddess Whipped Feta Dip

Welcome to a world of flavor where every bite of our Green Goddess Whipped Feta Dip transports you to the sun-drenched Mediterranean! This creamy, herbaceous delight is not just an appetizer; it’s a celebration of culinary tradition and modern zest. In this recipe, you’ll discover all the secrets to crafting the perfect whipped feta that will make your gatherings unforgettable. So, gather your ingredients, and let’s dive into the vibrant flavors of Mediterranean cuisine!

Why You’ll Love This Recipe

Our goddess whipped feta dip is packed with flavor and goodness, making it a must-have for any occasion. Here are just a few reasons to love it:

  • Quick to Prepare: Ready in just 15 minutes, this dip is perfect for last-minute gatherings.
  • Nutritious Ingredients: Made with fresh herbs and wholesome feta, this dip is a healthy choice.
  • Versatile Use: Great as a dip, spread, or dressing, it adapts to any meal or snack.
  • Impressive Presentation: Its vibrant color and creamy texture make it a showstopper on any table.
  • Customizable Flavor: Easily adapt the recipe to suit your taste preferences and dietary needs.

Ingredient Breakdown

To create the perfect whipped feta dip, you’ll need the following ingredients:

  • Feta Cheese (8 ounces): The star of the show! Use good quality block feta packed in brine for the best flavor and creamy texture. Drain the brine before using.
  • Olive Oil (1/4 cup): Extra virgin olive oil is recommended for its rich flavor, contributing to a creamy texture and fruity note.
  • Fresh Parsley (1 cup, packed): Flat-leaf parsley is preferred for its robust flavor, providing a fresh, herbaceous base.
  • Fresh Basil (1/2 cup, packed): Adds a sweet, slightly peppery dimension to the dip.
  • Fresh Mint (1/4 cup, packed): Brings refreshing coolness and balances the saltiness of the feta.
  • Green Onions (2-3): Offers a mild oniony flavor, contributing to the “green” element.
  • Garlic Cloves (2): Provides savory depth; adjust to your taste.
  • Lemon Juice (2 tablespoons, fresh): Essential for bright acidity, cutting through the richness of the feta.
  • Lemon Zest (1 teaspoon): Adds an extra layer of citrusy aroma and flavor.
  • Salt and Black Pepper (to taste): Adjust after blending for the perfect seasoning.

Expert Pro Tips for Success

Side view of a vibrant green dip with feta cheese and vegetables, presented in a stylish dish.

To ensure your green goddess whipped feta dip turns out perfectly, keep these expert tips in mind:

  • Use Room Temperature Ingredients: Bringing your ingredients to room temperature helps achieve a smoother dip.
  • Pulse, Don’t Over-Process: Blend just until combined to retain some texture; you want it creamy, not soupy.
  • Adjust Consistency: If the dip is too thick, add a splash of water or more olive oil to loosen it up.
  • Taste as You Go: Always sample your dip before serving to adjust seasonings and flavors.
  • Chill for Flavor: Allowing the dip to chill enhances the flavors, so make it ahead of time if possible.
  • Experiment with Herbs: Swap in your favorite herbs or add a pinch of chili flakes for a spicy kick.
  • Serving Options: Serve with fresh veggies, pita chips, or as a spread on sandwiches for added flavor.
  • Storage Tips: Keep leftovers in an airtight container in the fridge for up to a week.

Avoid These Common Mistakes

Even seasoned cooks can make mistakes! Here are some pitfalls to avoid:

  • Using Pre-Crumbled Feta: For the best texture, always opt for block feta; it blends more smoothly.
  • Skipping the Lemon Juice: The acid is crucial for balancing the flavors; don’t leave it out!
  • Over-Blending: You want a whipped texture, not a puree; stop when it’s creamy but still has some body.
  • Ignoring Fresh Herbs: Dried herbs can’t replicate the bright flavor of fresh herbs in this recipe.

Delicious Variations to Try

Want to mix things up? Here are some creative variations to customize your dip:

  • Spicy Goddess Dip: Add minced jalapeños or a dash of hot sauce for a spicy twist.
  • Roasted Garlic Feta Dip: Roast the garlic cloves before adding them for a sweeter, mellow flavor.
  • Smoky Feta Dip: Incorporate smoked paprika for a deep, smoky flavor profile.
  • Dairy-Free Version: Substitute the feta with a plant-based cheese and use coconut yogurt for creaminess.

Storage and Make-Ahead Instructions

This dip can be made ahead of time, making it perfect for parties:

  • Make Ahead: Prepare the dip up to 2 days in advance and store it in the refrigerator. The flavors will develop beautifully!
  • Storage: Keep it in an airtight container. It will stay fresh for up to a week in the fridge.
  • Freezing: While not ideal due to the texture change, you can freeze it for up to a month. Thaw in the refrigerator before serving.

Frequently Asked Questions

Here are answers to common questions about our Green Goddess Whipped Feta Dip:

  • Can I use dried herbs instead of fresh? While fresh herbs are recommended for the best flavor, you can use dried herbs in a pinch—just remember they are more potent, so reduce the amount.
  • How do I make this dip dairy-free? Substitute the feta with a dairy-free feta and use coconut yogurt or cashew cream for a rich texture.
  • What can I dip in this? Serve alongside fresh vegetables, pita chips, or use it as a spread on crusty bread or sandwiches.
  • Can I add more ingredients? Absolutely! Feel free to experiment with additions like roasted red peppers or olives for a twist.
  • How long will this dip last? It can last up to a week in the fridge when stored properly in an airtight container.
  • Is this suitable for kids? Yes! It’s a healthy option and can be adjusted to reduce garlic or spice if needed.
  • Can I use crumbled feta? While you can, it’s best to use block feta for smoother blending and better flavor.
  • What’s the best way to serve it? Garnish with olive oil and fresh herbs, and serve with a colorful platter of dippers for an appealing presentation.

Nutritional Tips and Dietary Adaptations

This dip not only tastes divine, but it can also fit into various dietary needs:

  • Low-Carb Option: Pair it with sliced vegetables for a low-carb snack.
  • Gluten-Free: Serve with gluten-free crackers or veggies.
  • Protein Boost: Add a handful of chickpeas blended into the dip for extra protein.

Essential Equipment Recommendations

To create your whipped feta dip, you’ll need:

  • Food Processor: Essential for achieving that creamy texture.
  • Measuring Cups and Spoons: Accurate measurements ensure the best flavor.
  • Spatula: For scraping down the sides of the food processor and ensuring all ingredients are blended.

Serving Suggestions

When it comes to serving your green goddess whipped feta dip, the possibilities are endless:

  • Vegetable Platter: Pair with crunchy carrots, cucumbers, and bell peppers for a fresh accompaniment.
  • Pita Chips: Their crunchy texture contrasts beautifully with the creamy dip.
  • Sandwich Spread: Use it as a flavorful spread for wraps or sandwiches.
  • Crackers: Serve with a variety of crackers for a delightful snacking experience.

Conclusion: Celebrate with Flavor!

Now that you have the complete guide to making the ultimate Green Goddess Whipped Feta Dip, it’s time to celebrate! Share this dip with friends and family, and let the conversation flow as freely as the flavors. Cooking is not just about feeding your body; it’s about nourishing your soul and creating lasting memories. So, grab your ingredients, invite your loved ones, and let’s make some magic happen in the kitchen!

Green Goddess Whipped Feta Dip

Prep Time 10 minutes
Total Time 10 minutes
Servings 4 servings
Calories 180
A vibrant, herbaceous dip combining creamy feta with fresh herbs and citrus for a perfect appetizer or spread.

Ingredients

Dairy

  • 8 ounces Feta Cheese (Use good quality feta packed in brine, drain before using.)
  • 0.25 cup Olive Oil (Extra virgin recommended.)
  • 1 cup Fresh Parsley (Packed, flat-leaf preferred.)
  • 0.5 cup Fresh Basil (Packed.)
  • 0.25 cup Fresh Mint (Packed.)
  • 2-3 pieces Green Onions (White and light green parts.)
  • 2 cloves Garlic Cloves (Adjust to taste.)
  • 2 tablespoons Lemon Juice (Freshly squeezed.)
  • 1 teaspoon Lemon Zest (Use a microplane or fine grater.)
  • to taste Salt (Start small, adjust after blending.)
  • to taste Black Pepper (Freshly ground.)

Instructions 

  • Drain and crumble the feta cheese.
  • In a food processor, blend feta and olive oil until smooth and creamy.
  • Add herbs, green onions, and garlic; pulse briefly to combine.
  • Mix in lemon juice and zest, then season with salt and pepper to taste. Blend until well combined.
  • Chill for at least 30 minutes before serving, or serve immediately garnished as desired.

Notes

For a thinner dip, add a drizzle of olive oil or a splash of water before serving.
Calories: 180kcal
Cost: $15
Course: Appetizer
Cuisine: American
Keyword: Dip, Feta, herbs

Unleashing the Joy of Vegan Spring Rolls: A Culinary Adventure

Welcome, fellow food enthusiasts! Today, we embark on a vibrant culinary journey that celebrates the spirit of togetherness and the art of fresh ingredients. Vegan spring rolls, bursting with colorful vegetables and paired with a creamy peanut sauce, are not just a dish; they are an experience. With their delightful crunch and invigorating flavors, these rolls are perfect for gatherings, picnics, or a cozy evening at home. Join me as we explore the essentials of crafting these beauties from the heart of Mediterranean cuisine!

Why You’ll Love This Recipe

Here are just a few reasons why this vegan spring rolls recipe will become a staple in your cooking repertoire:

  • Bright Flavors: Each bite offers a fresh burst of flavors from crisp vegetables, making them a delightful snack or appetizer.
  • Versatile Ingredients: You can customize your rolls with your favorite veggies, making them a canvas for your culinary creativity.
  • Easy to Prepare: With minimal cooking involved, these rolls are quick to assemble, allowing you to spend more time enjoying your meal.
  • Healthy Eating: Packed with nutrients from fresh produce, these vegan spring rolls are a guilt-free indulgence.
  • Fun for Everyone: Perfect for gatherings, these rolls are enjoyable to make and eat together, bringing friends and family closer.

Gather Your Ingredients

Creating the perfect vegan spring rolls starts with selecting the right ingredients. Here’s what you’ll need:

  • 8 rice paper spring roll wrappers: The delicate outer layer that holds everything together.
  • 4 green leaf lettuce leaves: Cut in half, they add a crisp texture and freshness.
  • 1 cup chopped red cabbage: For crunch and color, enhancing the visual appeal of your rolls.
  • 1/3 English cucumber: Julienne this into 1 ½-inch pieces for a refreshing bite.
  • 1 large carrot: Grated for a sweet crunch that complements the other ingredients.
  • 3/4 avocado: Thinly sliced, it adds creaminess and richness to the rolls.
  • ¾ red bell pepper: Thinly sliced to bring a touch of sweetness and a pop of color.

Crafting the Irresistible Peanut Sauce

Colorful vegan spring rolls filled with fresh vegetables and peanut sauce.

No spring roll is complete without a delectable dipping sauce! Here’s how to whip up a quick peanut sauce:

  • 1/4 cup natural peanut butter: The star ingredient for a creamy base.
  • 2 tablespoons fresh lime juice: For a zesty kick that brightens the sauce.
  • 2 tablespoons soy sauce: Adds depth and umami flavor.
  • 1 tablespoon agave nectar: A touch of sweetness to balance the flavors.
  • 1 teaspoon rice vinegar: For a hint of acidity.
  • 1/2 teaspoon chili garlic sauce: Optional, but it adds a delightful heat!

Step-by-Step Guide: How to Make Vegan Spring Rolls

Now that we have our ingredients ready, let’s dive into the assembly process:

  • Soften the wrappers: Fill a large bowl with warm water. Dip one rice paper wrapper into the water for about 10 seconds until softened. Be careful not to soak too long, as it can become gummy.
  • Layer your fillings: Place the softened wrapper on a clean cutting board. Lay half a lettuce leaf, followed by a small handful of red cabbage, julienned cucumber, grated carrot, sliced avocado, and red bell pepper in the center of the wrapper.
  • Roll it up: Fold the sides of the wrapper over the fillings, then roll from the bottom to the top, creating a tight roll. Repeat with the remaining wrappers and fillings.
  • Prepare the peanut sauce: In a bowl, whisk together the peanut butter, lime juice, soy sauce, agave nectar, rice vinegar, and chili garlic sauce. Adjust the consistency with a splash of water if needed.

Pro Tips for Perfect Vegan Spring Rolls

Want to elevate your spring roll game? Here are some expert tips:

  • Fresh is Best: Choose the freshest vegetables you can find. Local farmers’ markets are a treasure trove of colorful produce!
  • Prep Ahead: Slice your vegetables in advance and keep them in an airtight container in the fridge for quick assembly.
  • Experiment with Flavors: Try adding herbs like basil or mint for extra freshness.
  • Don’t Overfill: Less is more! Overstuffing can make rolling difficult and lead to messy results.
  • Serve with Style: Arrange your spring rolls on a platter with the peanut sauce in the center for a stunning presentation.
  • Use a Damp Cloth: Keep a damp cloth over the assembled rolls to prevent them from drying out.
  • Mind the Temperature: Serve your rolls chilled or at room temperature for the best flavor experience.
  • Practice Makes Perfect: Don’t worry if your first rolls aren’t perfect. The more you practice, the better you’ll become!

Troubleshooting Common Mistakes

Even the best chefs encounter challenges! Here are some common issues and solutions:

  • Wrapper Breaking: If your rice paper tears, it may be too dry. Ensure you soak it just long enough to soften.
  • Filling Falling Out: This can happen if you overfill. Try reducing the amount of filling you use.
  • Too Gummy: If your rolls are gummy, you may have soaked the wrappers for too long. Aim for a slight elasticity.

Delicious Variations to Try

Feeling adventurous? Here are some variations to customize your vegan spring rolls:

  • Thai Peanut Sauce: Add a hint of coconut milk to your peanut sauce for a tropical twist.
  • Sushi Rolls: Substitute sushi rice for the vegetables and wrap with rice paper for a fusion experience.
  • Spicy Avocado Rolls: Incorporate sliced jalapeños or sriracha for a spicy kick.
  • Fruit Spring Rolls: Replace vegetables with mango, strawberries, and banana for a sweet treat!

Storage and Make-Ahead Instructions

Want to prepare these rolls in advance? Here’s how to store them:

  • Refrigerate: Store the assembled rolls in an airtight container with damp paper towels to maintain moisture.
  • Make-Ahead: You can prepare the filling a day ahead to save time on assembly day.

Frequently Asked Questions

Got questions? Here are some common queries about vegan spring rolls:

  • Can I make these rolls gluten-free? Absolutely! Use gluten-free soy sauce or tamari in the peanut sauce.
  • How long do spring rolls last in the fridge? They can last up to 2-3 days when stored properly.
  • Can I freeze vegan spring rolls? Yes, but it’s best to freeze them before rolling. Wrap them tightly in plastic wrap and then foil.
  • What can I serve with spring rolls? They pair beautifully with a side of edamame, a fresh salad, or even as part of a larger platter of appetizers.
  • Can I use different types of vegetables? Definitely! Feel free to experiment with your favorite vegetables, such as bell peppers, zucchini, or even cooked quinoa.
  • Are these rolls suitable for meal prep? Yes! They are perfect for meal prep as they stay fresh and crisp when stored correctly.
  • What if I’m not a fan of peanut butter? You can substitute with almond butter or tahini for a different flavor.
  • How do I prevent the rolls from sticking together? Use parchment paper between layers if storing multiple rolls in one container.

Nutritional Benefits and Dietary Adaptations

These vegan spring rolls are not only delicious but also come with a host of nutritional benefits:

  • Low in Calories: A great option for a light meal or snack, helping you maintain a balanced diet.
  • Rich in Fiber: The vegetables provide essential fiber, promoting good digestion.
  • Healthy Fats: Avocado and peanut butter offer heart-healthy fats that keep you satiated.

Essential Equipment for Your Kitchen

To make your spring roll-making experience seamless, here’s a list of essential tools:

  • Large Bowl: For soaking the rice paper wrappers.
  • Cutting Board: A clean surface for assembling your rolls.
  • Sharp Knife: For precise vegetable cutting.
  • Whisk: For mixing the peanut sauce until smooth.
  • Serving Platter: To beautifully present your delectable rolls.

Serving Suggestions

Finally, let’s talk about how to serve these delightful vegan spring rolls:

  • Garnish: Sprinkle with sesame seeds or chopped peanuts for added texture.
  • Pair with Drinks: They pair wonderfully with a refreshing iced tea or a zesty lemonade.
  • Make it a Meal: Serve alongside a hearty soup or a grain salad for a complete dining experience.

Conclusion: Celebrate with Every Bite

There you have it, a comprehensive guide to crafting the most vibrant vegan spring rolls! With their fresh ingredients, delightful textures, and the irresistible peanut sauce, these rolls are sure to become a favorite in your home. So gather your loved ones, roll up your sleeves, and create unforgettable memories around the table. Happy cooking, and may your kitchen always be filled with joy and laughter!

Vegan Spring Rolls with Peanut Sauce

Prep Time 20 minutes
Total Time 20 minutes
Servings 4 pieces
Calories 250
Fresh and healthy vegan spring rolls filled with colorful vegetables, served with a creamy peanut sauce for dipping.

Ingredients

spring roll wrappers

  • 8 pieces rice paper spring roll wrappers

lettuce leaves

  • 4 leaves green leaf lettuce leaves (cut in half)

vegetables

  • 1 cup chopped red cabbage
  • 1/3 cup English cucumber (julienned into 1 ½-inch pieces)
  • 1 large carrot (grated)

avocado

  • 3/4 avocado avocado (thinly sliced)

red bell pepper

  • ¾ red bell pepper red bell pepper (thinly sliced)

peanut sauce

  • ¼ cup natural peanut butter
  • 2 tablespoons fresh lime juice
  • 2 tablespoons soy sauce
  • 1 tablespoon agave nectar
  • 1 teaspoon rice vinegar
  • ½ teaspoon chili garlic garlic sauce

Instructions 

  • Soak rice paper wrappers in warm water until pliable.
  • Place ingredients on each wrapper and roll tightly.
  • Mix peanut butter, lime juice, soy sauce, agave, rice vinegar, and chili garlic sauce to make the dipping sauce.
  • Serve spring rolls with peanut sauce for dipping.

Notes

Keep the rolls moist by covering with a damp cloth until serving.
Calories: 250kcal
Cost: $12
Course: Appetizer
Cuisine: vegan
Keyword: Spring Rolls

Welcome to Autumn Bliss: Your Guide to a Decadent Baked Apple Crumble

As the leaves turn golden and the air fills with the sweet scent of harvest, it’s the perfect time to indulge in a classic dessert that captures the essence of fall: the baked apple crumble. This delightful dish combines tart apples with a crispy, buttery streusel topping, all beautifully layered with a velvety cinnamon cream. Not only is this dessert a feast for the eyes, but it also invites you to savor each bite, celebrating the warm flavors and cozy moments of the season.

Why You’ll Love This Recipe

Here are just a few reasons to fall in love with this scrumptious baked apple crumble:

  • Versatile dessert: Perfect for any occasion, whether it’s a family gathering or a cozy night in.
  • Seasonal flavors: The combination of fresh apples, cinnamon, and orange juice brings the spirit of autumn to your table.
  • Easy to make: With straightforward instructions, even novice bakers will shine in the kitchen.
  • Make ahead: Prepare the components in advance to save time on busy days.
  • Customizable: You can easily adjust the ingredients to suit your taste or dietary needs.

Ingredients Breakdown

Let’s dive into the rich tapestry of flavors that make up this baked apple crumble. Here’s what you’ll need:

  • 80 g soft butter: Essential for achieving that rich, crumbly texture in the streusel.
  • 125 g flour: The base of your streusel, contributing to the delightful crunch.
  • 40 g sugar: Sweeten your crumble—adjust based on the tartness of your apples.
  • 1 packet of Bourbon vanilla sugar: For a fragrant, warm flavor; substitute with regular vanilla sugar if needed.
  • Optional: pinch of cinnamon: Adds an extra layer of warmth and spice.
  • 3 firm apples (e.g., Granny Smith or Braeburn): Their tartness balances the sweetness of the dish.
  • Juice of one lemon: Prevents the apples from browning and adds a zesty kick.
  • 1 cinnamon stick: Infuses a deep, aromatic flavor into the apple compote.
  • 1 star anise: Provides a unique, sweet spice note; optional for those who prefer a milder flavor.
  • 100 ml orange juice: Brightens the compote and enhances the apples’ natural sweetness.
  • 1 drop of bitter almond oil: Adds depth; skip if unavailable.
  • 2-3 tablespoons brown sugar: Adjust to taste based on apple sweetness.
  • 250 g quark (or Greek yogurt): Offers a creamy texture to the cinnamon cream.
  • 200 ml cream (whipped): The base for a luscious topping.
  • 50 g powdered sugar: Sweetens the cream to perfection.
  • 1 teaspoon cinnamon: Ties the flavors together in the cream.
  • 1 teaspoon vanilla extract: Enhances the overall flavor of the cream.

Step-by-Step Instructions

Side view of a delicious baked apple crumble topped with whipped cream and cinnamon.

Ready to create your masterpiece? Follow these easy steps:

  • Prepare the streusel: In a bowl, combine the butter, sugar, vanilla sugar, and flour. Rub the ingredients together until crumbly. For added flavor, mix in a pinch of cinnamon. Bake at 175°C (150°C fan) for about 15 minutes until golden. Let cool.
  • Make the apple compote: Peel and core the apples, cutting them into small pieces. Toss with lemon juice. In a baking dish, combine apples, cinnamon stick, star anise, and orange juice. Drizzle with almond oil and sprinkle with brown sugar. Roast at 180°C for 20-25 minutes, stirring occasionally until tender.
  • Whip up the cinnamon cream: Whip the cream until stiff peaks form. In another bowl, mix quark with powdered sugar, cinnamon, and vanilla extract. Gently fold the whipped cream into the quark mixture until smooth. Chill until ready to serve.
  • Assemble the dessert: In individual glasses, layer the cinnamon cream, followed by apple compote, and top with streusel. Garnish with toasted almond flakes or a dusting of cinnamon for extra flair.

Pro Tips for Perfecting Your Baked Apple Crumble

Elevate your dessert game with these expert insights:

  • Choose the right apples: Opt for a mix of tart and sweet apples for a more complex flavor profile.
  • Don’t overbake: Keep an eye on the streusel to prevent burning; it should be golden brown.
  • Layer flavors: Consider adding a splash of bourbon or rum to the apple compote for a sophisticated twist.
  • Chill the cream: Ensure your cream is cold before whipping for the best volume and texture.
  • Experiment with spices: Feel free to add nutmeg or ginger for a unique flavor kick.
  • Serve warm: This dessert is best enjoyed warm, allowing the flavors to meld beautifully.
  • Make it gluten-free: Substitute all-purpose flour with gluten-free flour for a delicious alternative.
  • Double the recipe: Make extra to share with friends and family; it’s a crowd-pleaser!

Common Mistakes and Troubleshooting

Avoid these pitfalls to ensure your baked apple crumble shines:

  • Too soggy: Ensure your apples are not overcooked during roasting; they should maintain a slight bite.
  • Overly sweet: Taste your apple compote before adding all the sugar; adjust according to the apple’s natural sweetness.
  • Streusel not crispy: If the streusel is soft, it may need more time in the oven. Watch carefully to prevent burning.
  • Cream too stiff: If your whipped cream is too stiff, gently fold in a bit more cream until you achieve the desired texture.

Variations to Delight Your Taste Buds

Explore these fun twists on the classic baked apple crumble:

  • Nutty delight: Add chopped walnuts or pecans to the streusel for added crunch.
  • Berry mix: Incorporate fresh berries like blueberries or raspberries into the apple compote for a vibrant color.
  • Chocolate addition: Sprinkle dark chocolate chips into the apple mixture for a decadent twist.
  • Vegan option: Substitute butter with coconut oil and use a plant-based cream alternative for a vegan-friendly dessert.

Storage and Make-Ahead Instructions

Want to prepare ahead of time? Here’s how to store your creations:

  • Refrigerate: Store covered in the fridge for up to 3 days; the streusel may lose some crunch but will still taste delicious.
  • Freeze: Assemble the baked apple crumble without the cream and freeze for up to 3 months. Thaw and reheat before serving.
  • Make-ahead: Prepare the apple compote and streusel in advance. Assemble just before serving for the freshest taste.

Comprehensive FAQ

Here are some common questions answered:

  • Can I use frozen apples? Yes, but fresh apples yield the best texture and flavor.
  • What can I substitute for quark? Greek yogurt or mascarpone works well in the cinnamon cream.
  • How do I know when the apples are done? They should be tender but not mushy, retaining a slight bite.
  • Can I use a different sweetener? Absolutely! Maple syrup or honey can be great alternatives.
  • How should I serve this dessert? It’s delightful on its own or paired with a scoop of vanilla ice cream.
  • Is this recipe kid-friendly? Definitely! Kids will love the sweet flavors and fun textures.
  • Can I make this gluten-free? Yes, just substitute the all-purpose flour with a gluten-free blend.
  • What other spices can I add? Nutmeg, ginger, or cardamom can add exciting new flavors!

Nutrition Tips and Dietary Adaptations

Looking to make this dessert healthier? Here are a few tips:

  • Reduce sugar: Cut down on sugar in the apple compote if your apples are naturally sweet.
  • Use low-fat cream: Choose a lighter cream option for the cinnamon cream without sacrificing flavor.
  • Boost fiber: Add oats to your streusel for added texture and health benefits.

Equipment Recommendations

Here’s what you’ll need to whip up this delicious dessert:

  • Mixing bowls: For combining your ingredients easily.
  • Baking dish: A medium-sized dish to cook your apple compote.
  • Whisk or electric mixer: For whipping cream to fluffy perfection.
  • Spatula: To fold ingredients gently and assemble your dessert.

Serving Suggestions

Here are some delightful ways to serve your baked apple crumble:

  • With vanilla ice cream: The warm crumble contrasts beautifully with cold ice cream.
  • Drizzled with caramel sauce: A rich caramel drizzle enhances the dessert’s sweetness.
  • Garnished with fresh mint: A sprinkle of mint adds a refreshing touch.
  • In a parfait: Layer the components in a glass for an elegant presentation.

Conclusion: A Celebration of Flavor and Togetherness

Creating this baked apple crumble is not just about preparing a dish; it’s about embracing the flavors of autumn and the joy of sharing. Whether enjoyed warm from the oven or chilled in the fridge, every bite is a reminder of the beauty found in simple ingredients and cherished moments. So, gather your loved ones, serve up a slice, and celebrate the warmth of the season together. Enjoy your culinary adventure, and remember—the kitchen is where memories are made!

Autumn Bliss in a Glass: Baked Apple Crumble with Cinnamon Cream

Prep Time 20 minutes
Cook Time 40 minutes
Total Time 1 hour
Servings 4 servings
Calories 450
A delightful dessert combining baked tart apples, crunchy streusel, and creamy cinnamon topping, perfect for cozy autumn evenings.

Ingredients

Streusel topping

  • 80 g soft butter
  • 125 g flour
  • 40 g sugar
  • 1 packet Bourbon vanilla sugar (or regular vanilla sugar)

Apple compote

  • 3 pieces apples (firm, tart apples like Granny Smith or Braeburn)
  • 1 pcs lemon (juice of one lemon)
  • 1 stick cinnamon (cinnamon stick)
  • 1 star anise (star anise)
  • 100 ml orange juice
  • 1 drop bitter almond oil (optional)
  • 2-3 tbsp brown sugar (adjust depending on apple sweetness)

Cinnamon cream

  • 250 g quark (or Greek yogurt)
  • 200 ml cream (whipped)
  • 50 g powdered sugar
  • 1 tsp cinnamon
  • 1 tsp vanilla extract (or Bourbon vanilla sugar)

Instructions 

  • Mix butter, sugar, vanilla sugar, and flour; bake at 175°C for 15 minutes until golden. Cool.
  • Peel, core, and chop apples; toss with lemon juice. Roast with cinnamon, star anise, orange juice, almond oil, and brown sugar for 20–25 minutes. Cool and refrigerate.
  • Whip cream; mix quark with powdered sugar, cinnamon, and vanilla. Fold in whipped cream. Chill.
  • Assemble by layering cinnamon cream, baked apples, and streusel in glasses. Garnish with toasted almonds or cinnamon. Serve immediately or chill.

Notes

For extra flavor, sprinkle with toasted almond flakes or additional cinnamon before serving.
Calories: 450kcal
Cost: $15
Course: Dessert
Cuisine: American
Keyword: apple, cinnamon, crumble

A Flavor-Packed Journey Awaits

Welcome, dear friend! Today, we dive into the vibrant and delicious world of Spinach and Cheese Stuffed Portobello Mushrooms. This dish is more than just a recipe; it’s a celebration of fresh ingredients, Mediterranean flavors, and the joy of cooking together. These stuffed mushrooms are perfect for any occasion—be it a cozy family dinner or a lively gathering with friends. With a rich filling of spinach and cheese, these mushrooms are a delight that will transform your dining table into a feast of flavors!

Why You’ll Love This Recipe

Let me share why this dish is a must-try:

  • Quick and Easy Preparation: With just a handful of ingredients and simple steps, you can whip up this dish in under 30 minutes!
  • Vegetarian Delight: Packed with nutrients, these mushrooms are a satisfying option for vegetarians and meat lovers alike.
  • Versatile Serving Options: Serve them as an elegant appetizer, a vibrant side dish, or a hearty vegetarian main course.
  • Flavor Explosion: The combination of spinach, ricotta, mozzarella, and Parmesan creates a creamy, cheesy filling that is simply irresistible.
  • Healthy and Nutritious: Loaded with vitamins and minerals from the spinach and the goodness of mushrooms, this dish is a wholesome choice.

Ingredient Breakdown

Before we jump into cooking, let’s explore the essential ingredients for our stuffed portobello mushrooms and some delightful substitutions:

  • Portobello Mushrooms: Use 2 large, firm caps for the best results. You can also substitute with large button mushrooms if needed.
  • Olive Oil: A tablespoon for drizzling enhances the flavor. Feel free to use avocado oil for a different taste.
  • Garlic Powder: This adds a gentle aroma. If you prefer fresh, use 1-2 cloves of minced garlic.
  • Salt and Pepper: Season to taste. Sea salt and freshly ground black pepper work wonders!
  • Butter: For sautéing the spinach, you can use margarine or olive oil for a dairy-free option.
  • Fresh Spinach: 2 cups, washed and chopped. Substitute with kale or Swiss chard for a new twist.
  • Ricotta Cheese: ½ cup for creaminess. Cottage cheese can be a lighter alternative.
  • Shredded Mozzarella: ½ cup for that melty goodness. Replace with vegan cheese if desired.
  • Grated Parmesan: ¼ cup adds depth of flavor. Nutritional yeast can be used for a vegan option.
  • Crushed Red Pepper Flakes: A pinch for a kick! Adjust to your spice preference.

Step-by-Step Instructions

Juicy Portobello mushroom filled with spinach and cheese, garnished and ready to serve.

Let’s get cooking! Follow these simple steps to create your Spinach and Cheese Stuffed Portobello Mushrooms:

  1. Preheat the Oven: Set your oven to 375°F (190°C) so it’s ready for the mushrooms.
  2. Clean the Mushrooms: Gently wipe the portobello caps with a damp paper towel to remove any dirt.
  3. Remove the Stems and Gills: Carefully twist off the stems and scrape out the gills with a spoon. This will create space for your delicious filling.
  4. Prepare the Filling: In a skillet, melt the butter over medium heat. Add the chopped spinach and sauté until wilted. Season with garlic powder, salt, and pepper.
  5. Mix the Cheese: In a bowl, combine the sautéed spinach, ricotta cheese, mozzarella, Parmesan, and crushed red pepper flakes. Stir until well combined.
  6. Stuff the Mushrooms: Generously fill each portobello cap with the cheese mixture, pressing down slightly to ensure it’s packed in.
  7. Drizzle with Olive Oil: Lightly drizzle the tops of the stuffed mushrooms with olive oil for added flavor.
  8. Bake: Place the stuffed mushrooms on a baking sheet and bake in the preheated oven for 20-25 minutes, or until the cheese is bubbly and golden.
  9. Serve Hot: Remove from the oven and let them cool for a minute before serving. Enjoy!

Pro Tips for Perfect Stuffed Mushrooms

Here are some expert insights to elevate your mushroom game:

  • Choose Fresh Mushrooms: Opt for firm, fresh portobello caps for the best texture and flavor.
  • Don’t Overcook: Keep an eye on the mushrooms while baking to prevent them from becoming too soft.
  • Experiment with Flavors: Add sun-dried tomatoes, olives, or herbs like basil and thyme to the filling for added depth.
  • Make Ahead: Prepare the filling in advance and stuff the mushrooms just before baking for a quick meal.
  • Garnish Creatively: Top with fresh herbs like parsley or a drizzle of balsamic reduction for an elegant finish.
  • Serve with Dips: Pair with a yogurt dip or a tangy marinara sauce for a delightful contrast.
  • Portion Control: These mushrooms can be filling, so consider serving half caps for smaller appetites.
  • Use a Meat Option: For non-vegetarians, add crumbled sausage or ground turkey to the filling for a heartier dish.

Common Mistakes and Troubleshooting

Even the best chefs have their off days! Here are some common pitfalls and how to avoid them:

  • Watery Filling: If your filling is too wet, it might make the mushrooms soggy. Sauté the spinach until all moisture evaporates before mixing.
  • Overstuffed Caps: Avoid overfilling; otherwise, the filling may spill out during baking. Aim for a generous, but level amount.
  • Insufficient Seasoning: Taste your filling before baking. Adjust seasoning as needed to ensure each bite is packed with flavor.
  • Burnt Cheese: Cover with aluminum foil if the cheese starts to brown too quickly, allowing the mushrooms to cook through without burning.

Delicious Variations

Feeling adventurous? Here are some creative variations to try:

  • Italian Twist: Add Italian sausage and a sprinkle of Italian herbs to the cheese mixture for a hearty Italian-inspired dish.
  • Asian Fusion: Incorporate sesame oil, green onions, and chopped water chestnuts for an Asian flair.
  • Mexican Style: Mix in black beans, corn, and taco seasoning for a zesty twist.
  • Cheesy Truffle Delight: Drizzle with truffle oil before serving for an indulgent gourmet touch.

Storage and Make-Ahead Instructions

If you have leftovers (although unlikely!), here’s how to store them:

  • Refrigerate: Store cooked mushrooms in an airtight container in the fridge for up to 3 days.
  • Freeze for Later: You can freeze the uncooked stuffed mushrooms for up to 2 months. Thaw in the fridge overnight before baking.
  • Reheat: Warm them in the oven at 350°F (175°C) for 10-15 minutes or until heated through.

Frequently Asked Questions

Here are answers to some common questions about this delightful dish:

  • Can I use other types of mushrooms? Absolutely! Button mushrooms or shiitake mushrooms can be used as alternatives.
  • Is this recipe gluten-free? Yes, as long as you choose gluten-free cheese and confirm your seasonings are gluten-free.
  • Can I prepare the filling in advance? Yes! The filling can be made a day ahead and stored in the fridge.
  • What can I serve with these mushrooms? Pair with a light salad, crusty bread, or a side of roasted vegetables for a complete meal.
  • How can I make this dish spicier? Add more crushed red pepper flakes or some diced jalapeños to the filling.
  • Can I make these stuffed mushrooms vegan? Yes! Use vegan cheese and omit the butter or substitute with olive oil.
  • What if I can’t find portobello mushrooms? Use large button mushrooms as a substitute; just adjust cooking time as needed.
  • How do I know when they are done? The mushrooms should be tender, and the cheese should be melted and bubbling.

Nutrition Tips and Dietary Adaptations

This dish not only tantalizes your taste buds but also provides a nutritious profile:

  • Protein Power: The combination of cheese and spinach offers a good amount of protein and calcium.
  • Fiber Rich: Mushrooms and spinach are excellent sources of dietary fiber, promoting digestive health.
  • Low-Carb Option: Perfect for low-carb diets, this dish is naturally low in carbohydrates while being filling.

Equipment Recommendations

To create your stuffed portobello mushrooms, you’ll need:

  • Baking Sheet: A sturdy baking sheet is essential for even cooking.
  • Skillet: A non-stick skillet is ideal for sautéing the spinach and mixing the filling.
  • Mixing Bowl: Use a medium bowl to combine your filling ingredients effortlessly.
  • Spoon: A tablespoon works great for stuffing the mushrooms with your cheesy mixture.

Serving Suggestions

Present your stuffed mushrooms beautifully:

  • Garnish: Sprinkle with fresh parsley or basil for a pop of color.
  • Pair with a Sauce: Serve with a side of marinara or a creamy dip for extra flavor.
  • Plate with Sides: Accompany with a fresh garden salad or roasted seasonal vegetables to round out the meal.

Conclusion: A Dish to Remember

And there you have it, my friend! The journey of creating Spinach and Cheese Stuffed Portobello Mushrooms is not just about the food; it’s about bringing people together, sharing stories, and enjoying the process of cooking. I invite you to step into your kitchen, embrace the flavors, and celebrate the joy of cooking. Gather your loved ones, serve these delightful mushrooms, and watch as smiles light up the room! Bon appétit!

Spinach and Cheese Stuffed Portobello Mushroom

Prep Time 10 minutes
Cook Time 15 minutes
Total Time 25 minutes
Servings 2 servings
Calories 250
A delicious and easy-to-make stuffed mushroom recipe featuring fresh spinach and a blend of cheeses, perfect as an appetizer or main dish.

Ingredients

Main

  • 2 large Portobello mushrooms (Fresh and firm)
  • 1 tablespoon olive oil (For drizzling)
  • 1/2 teaspoon garlic powder (Seasoning)
  • 1/4 teaspoon salt (To taste)
  • 1/4 teaspoon black pepper (To taste)
  • 1 tablespoon butter (For sautéing)
  • 2 cups fresh spinach (Washed and chopped)
  • 1/2 cup ricotta cheese (For creaminess)
  • 1/2 cup shredded mozzarella cheese (For melting)
  • 1/4 cup grated Parmesan cheese (For flavor)
  • 1/4 teaspoon crushed red pepper flakes (For a slight kick)

Instructions 

  • Preheat oven to 375°F (190°C). Remove stems from mushrooms and brush with olive oil.
  • Sauté spinach in butter until wilted, then mix with ricotta, mozzarella, Parmesan, garlic powder, salt, pepper, and red pepper flakes.
  • Stuff the mushroom caps with the spinach and cheese mixture, then place on a baking sheet.
  • Bake for 15 minutes until cheese is bubbly and golden.

Notes

For extra flavor, sprinkle with additional Parmesan before serving.
Calories: 250kcal
Cost: $12
Course: Appetizer
Cuisine: American
Keyword: Cheese, Portobello, Spinach